This fire station project will be a full stand-alone quiet book, just like the dollhouse book, but using full size 9″ x 12″ sheets of felt for each page. The fire fighters are made from the same pattern as the dollhouse dolls, so they will be interchangeable. To see the first section of the project, go here: Felt Fire Station – Fire Truck & Dalmatian and Felt Fire Station – Garage & Locker Room.
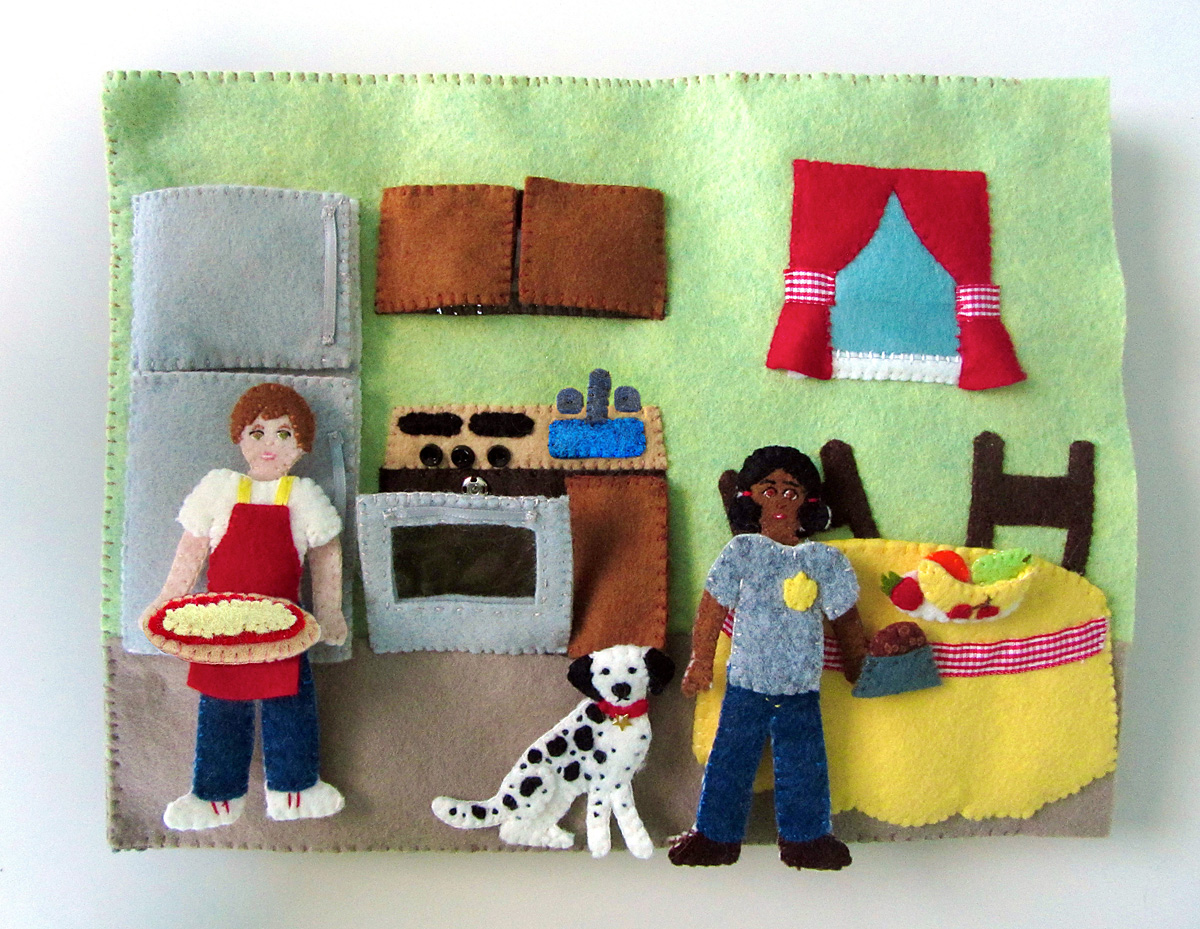
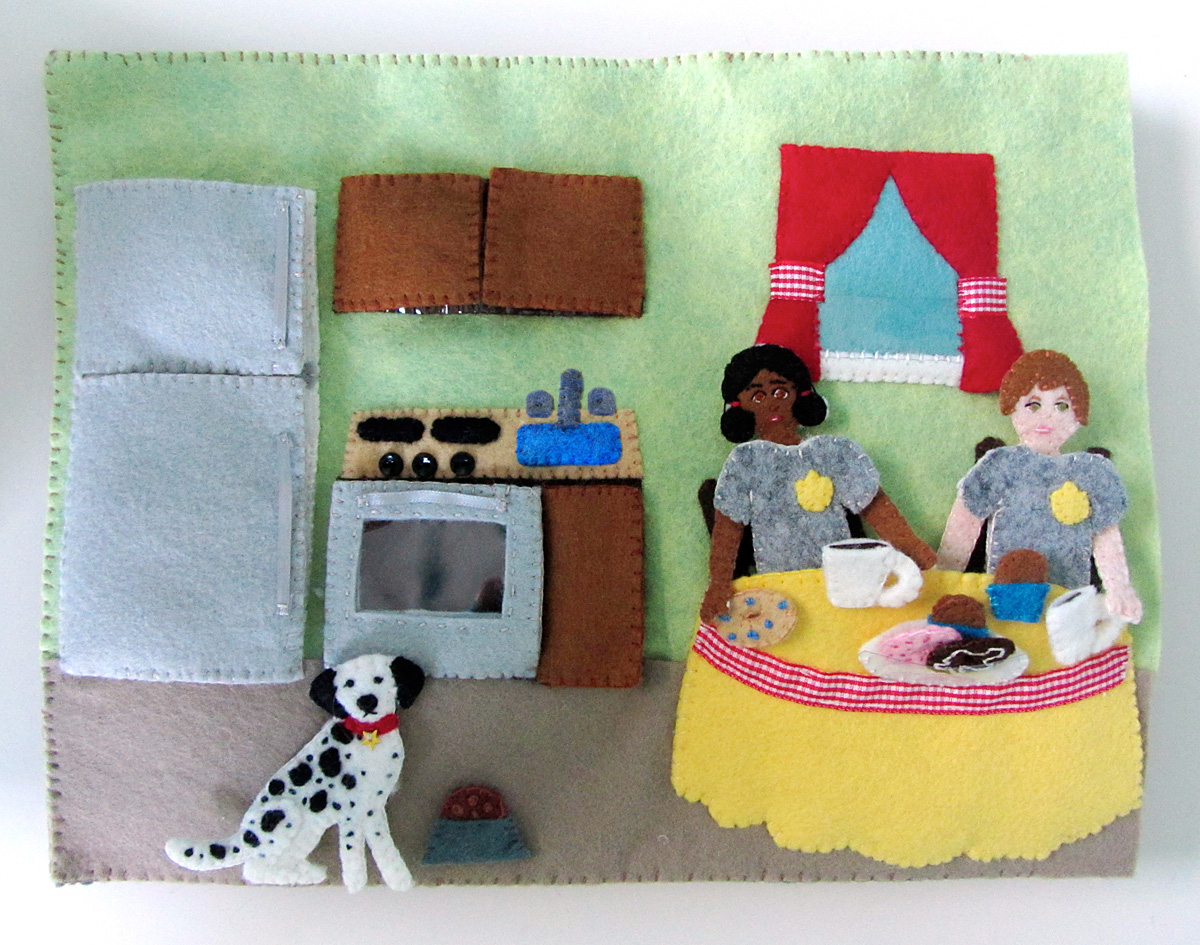
This tutorial is for the third interior page of the fire station – the kitchen!
- The Pattern
- Felt from American Felt & Craft (in white, honeydew, chai, banana cream pie, doe, chocolate, gray, gray flannel, favorite jeans, ice, big apple and pastry)
- Additional Felt Scraps (in key lime pie, cilantro, black, pool party, pink tutu, orange juice, monarch butterfly, elephant, butter cream and hot pink.)
- Clear Vinyl
- Snag-Free Velcro (in white)
- Sew-on Snaps
- 1/8″ Wide Ribbon (in silver
and yellow)
- 3/8″ Red Gingham Ribbon
- Tiny buttons (in black)
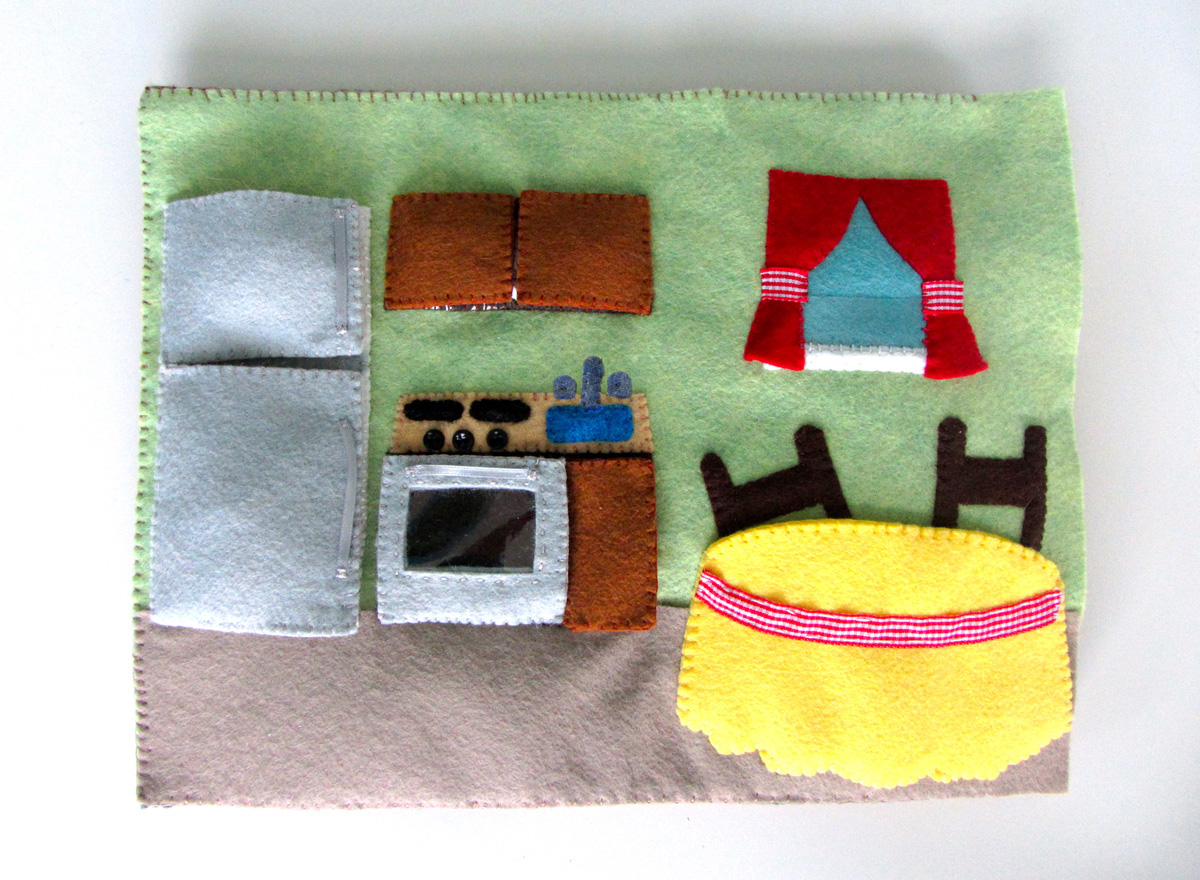
Background: I started with a background sheet of honeydew green felt. I pinned down a 12″ x 2.5″ strip of chai felt for the ground. Don’t sew anything important about 1/4″ from the center edges of the two-page spread to allow for sewing the binding. But having the floor go to the edge is fine!
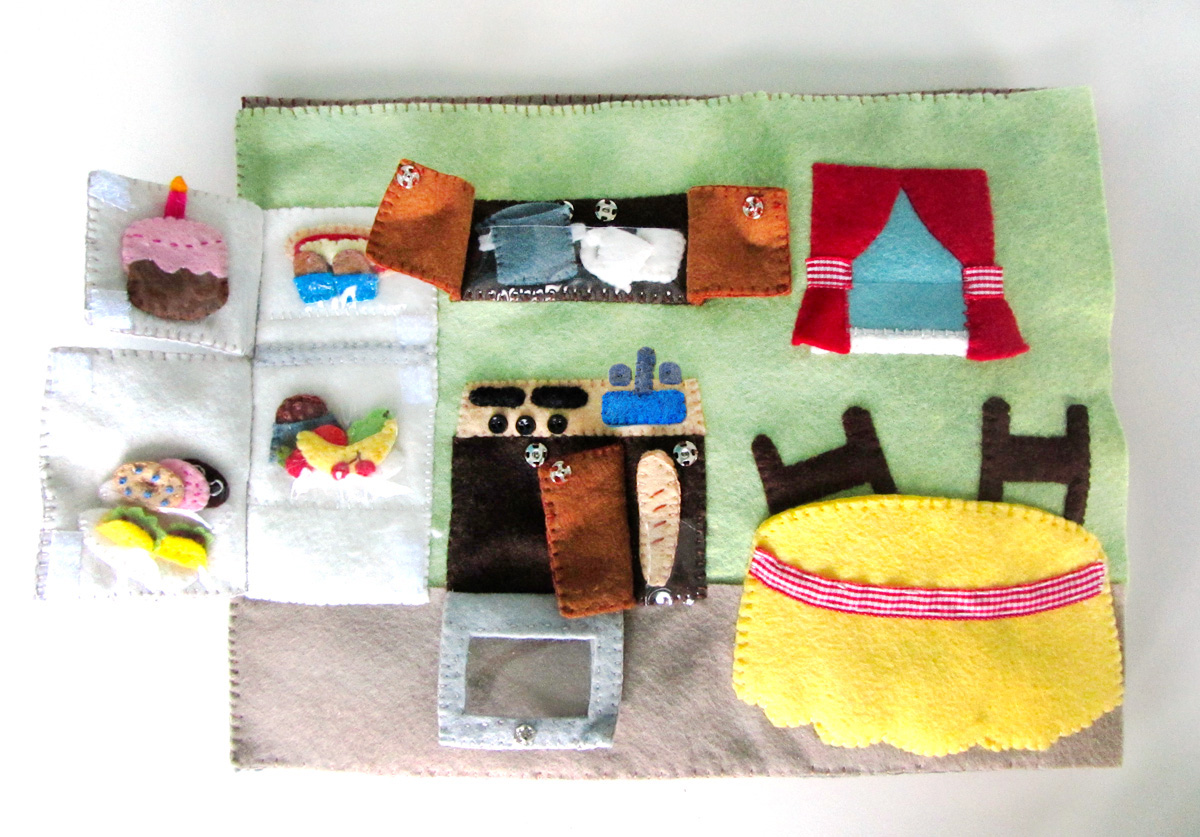
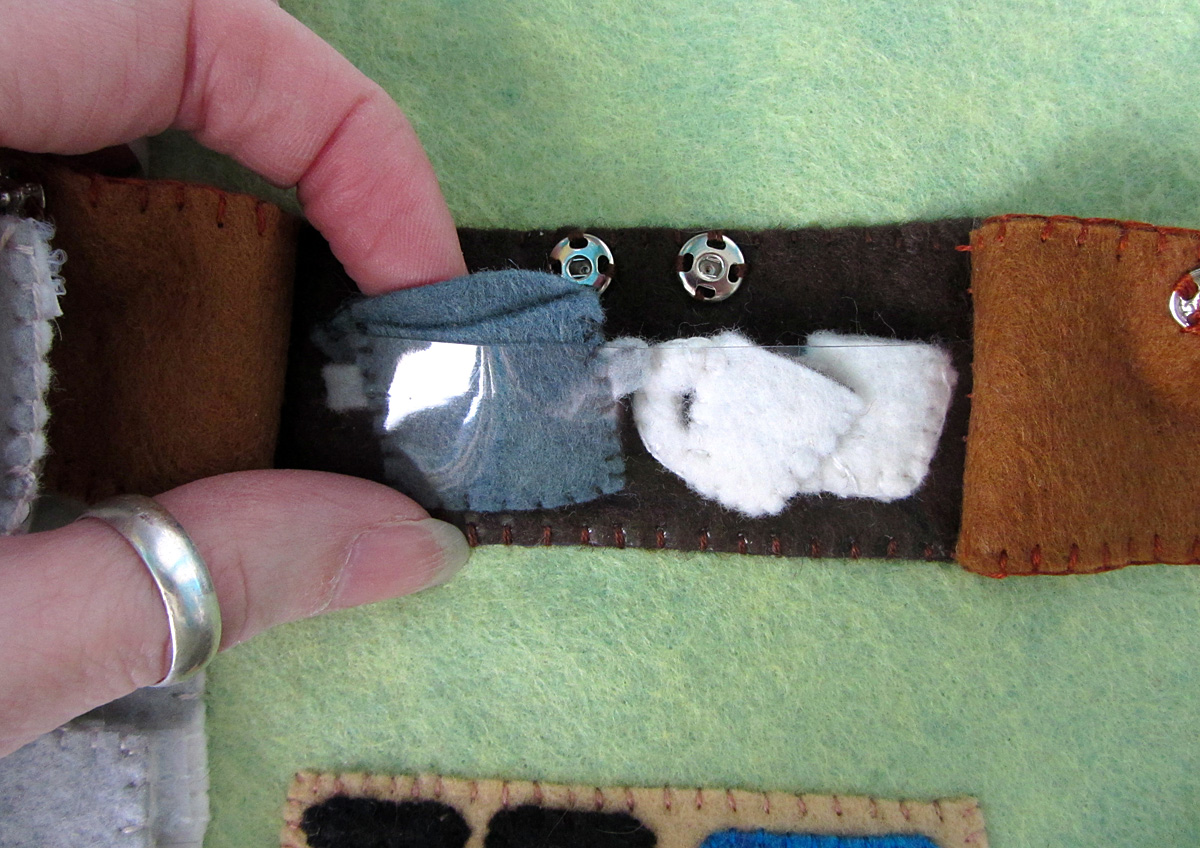
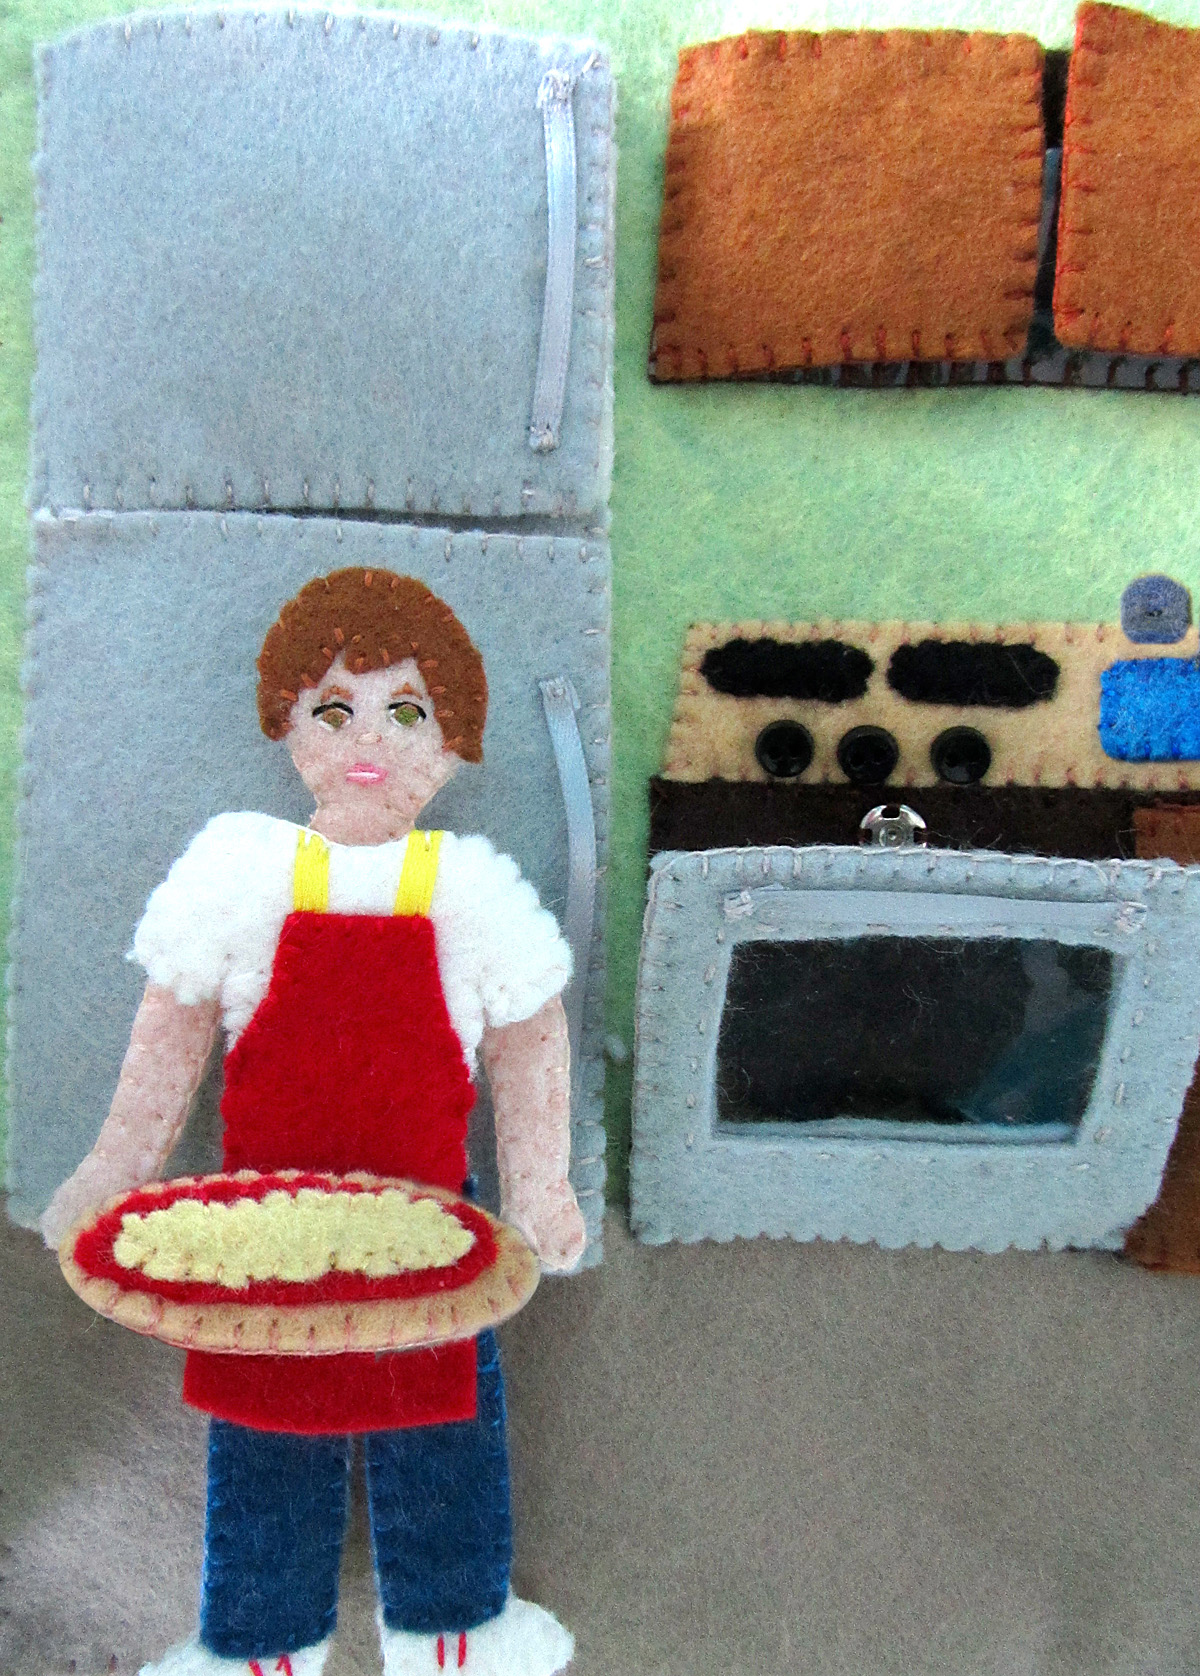
Fridge: I sewed the white background down, catching clear vinyl pockets in my stitches as I went around. I sewed the bottoms of the pockets closed. (You can add more pockets, but I staggered mine between the doors and interior so that the fridge didn’t get too bulky. I then sewed the gray line down between the freezer and the fridge. This hide the white when the doors are closed. I sewed four small squares of snag-free Velcro on the right edge (as shown above.)
I sewed the doors around the top, right and bottom edges with the gray outside, white inside, and clear pockets layered together, then added matching Velcro squares to the corners. I positioned the doors in place on the fridge and sewed the fourth side while attaching them to the page.
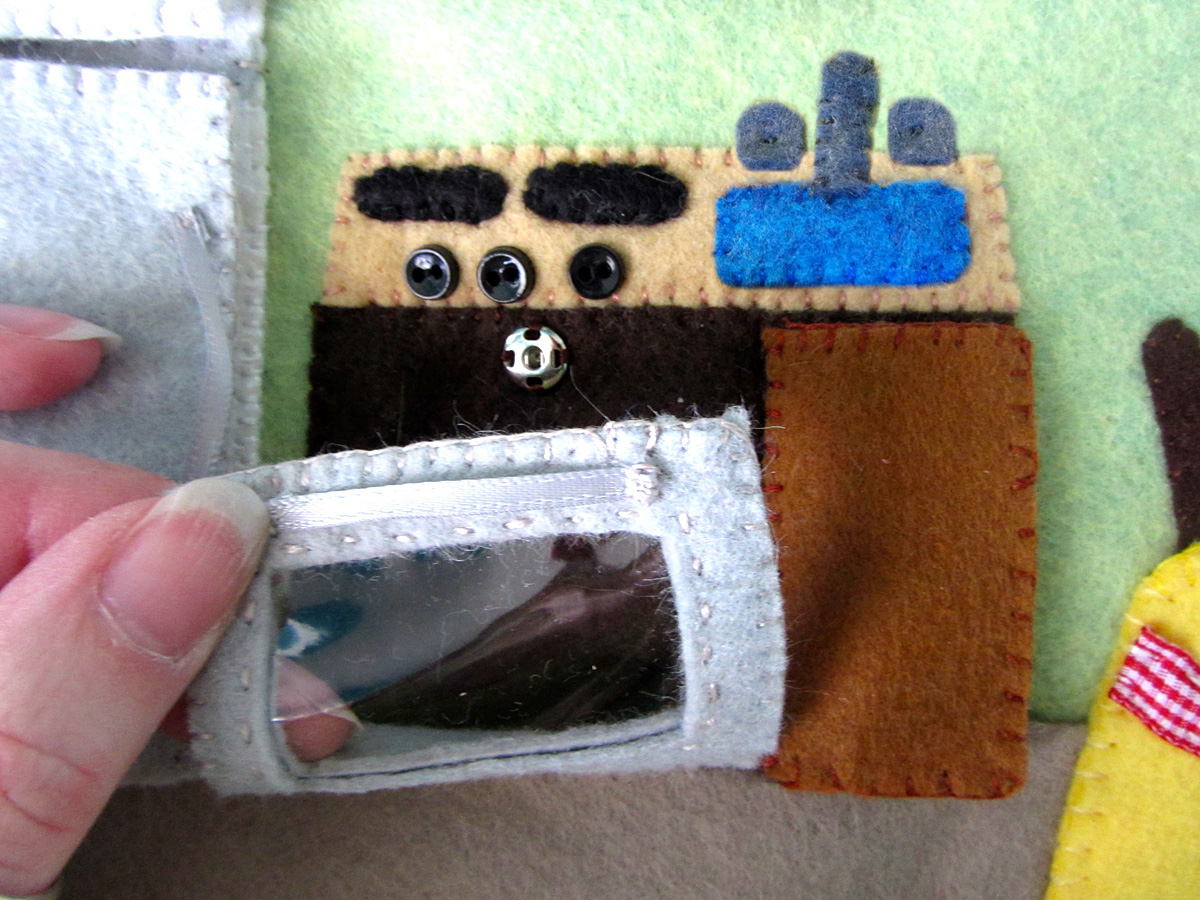
Lower Cabinet/Oven: I started by sewing the dark brown cabinet interior down, followed by the counter. On the counter, I sewed the sink, taps, faucet and burners. I added 3 tiny buttons left over from my Snowman page. I sewed a clear pocket down where the cabinet would be, and added snaps for the cabinet and oven door.
I sewed a silver ribbon handle on to one of the gray oven door pieces and a matching snap half on the other, then sewed the two sides together with clear vinyl sandwiched between. I did a running stitch (dashed line) around the window to keep it from stretching. I sewed it down to the cabinet along the bottom.
For the cabinet door, I sewed the matching snap half to the corner of the inside felt piece, then sewed the two sides together along the top, right and bottom. I sewed the last side while attaching it to the page.
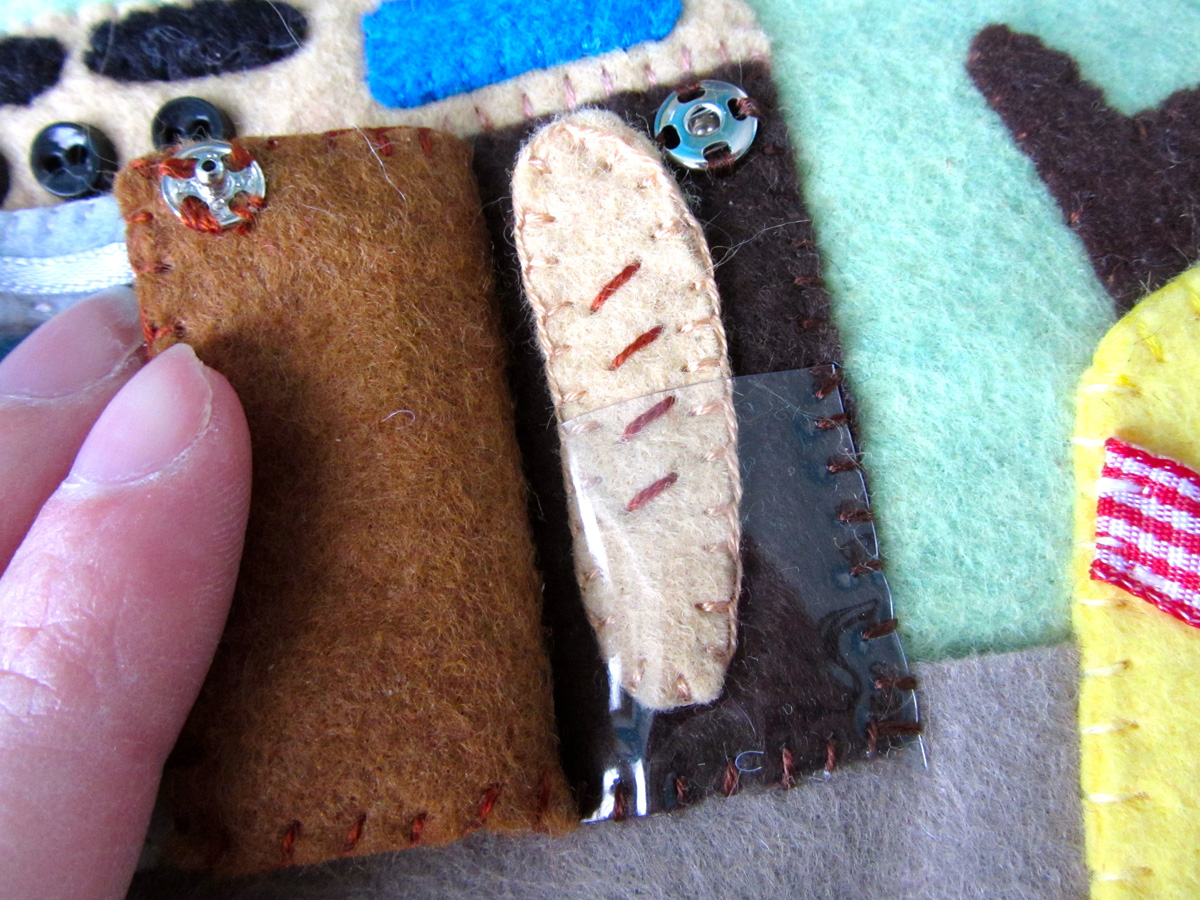
Upper Cabinet: I sewed the cabinet interior down tot he page along with the clear vinyl pocket. I added snaps, then did the cabinet doors the same way as with the lower cabinet.
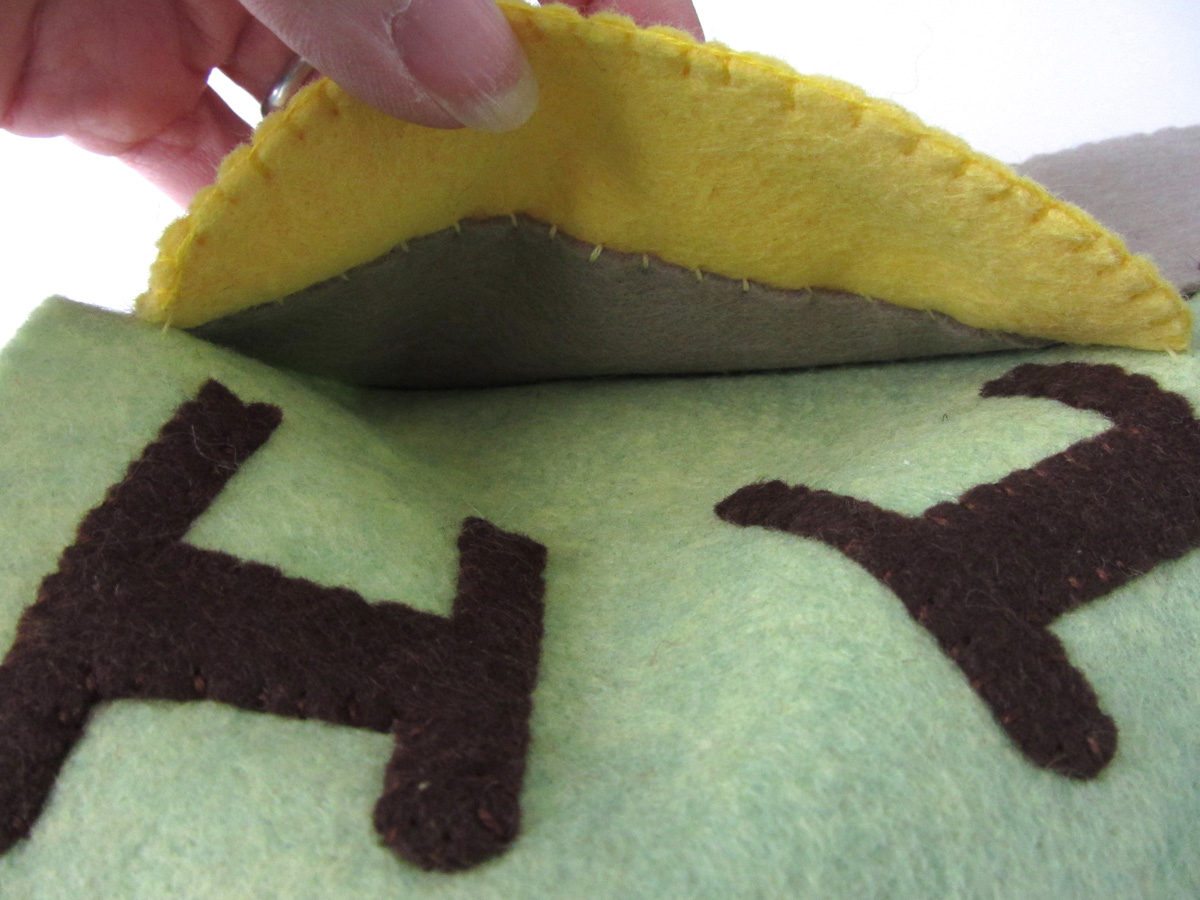
Table & Chairs: I sewed the chairs in place on the page. Only the tops show from behind the table, so that is all I used. I unpinned the floor and basted the interior of the table in place along the floor. (See above photo showing the inside of the finished table pocket.)

I decorated the table front felt piece with some red gingham ribbon. I pinned the table front to the page, lined up with the table bottom, and sewed it to the page around the sides and the bottom. Sewing only through the two table felt pieces, I sewed along the top.
Window: I sewed the blue glass felt piece down, catching some clear vinyl in the bottom to make a pocket (for potted plants included with the next page.) I sewed the white window sill down over the bottom. I sewed the red curtains in place, leaving the bottoms open, then added some more of the gingham ribbon as tiebacks.
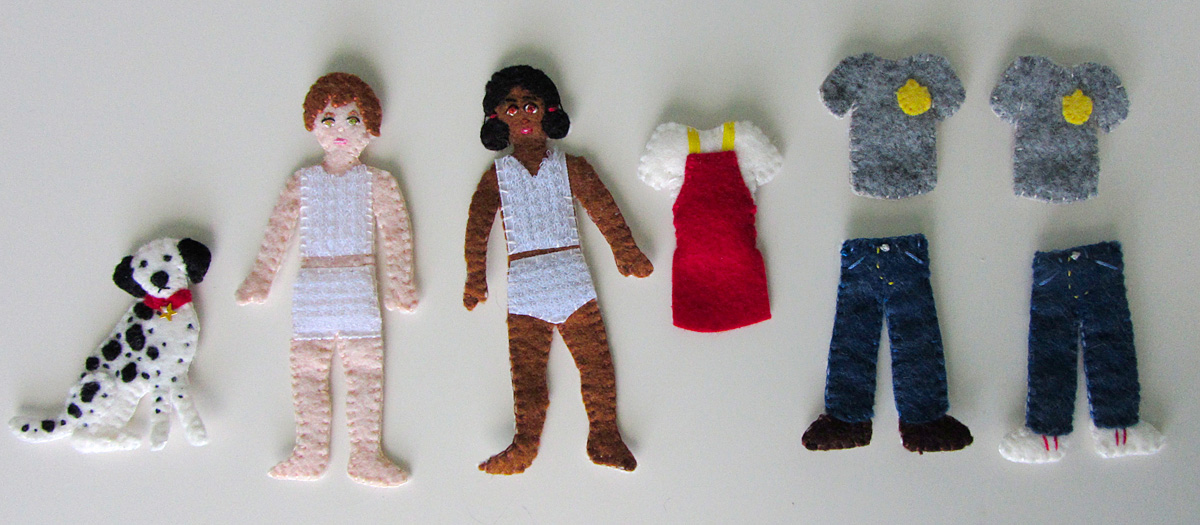
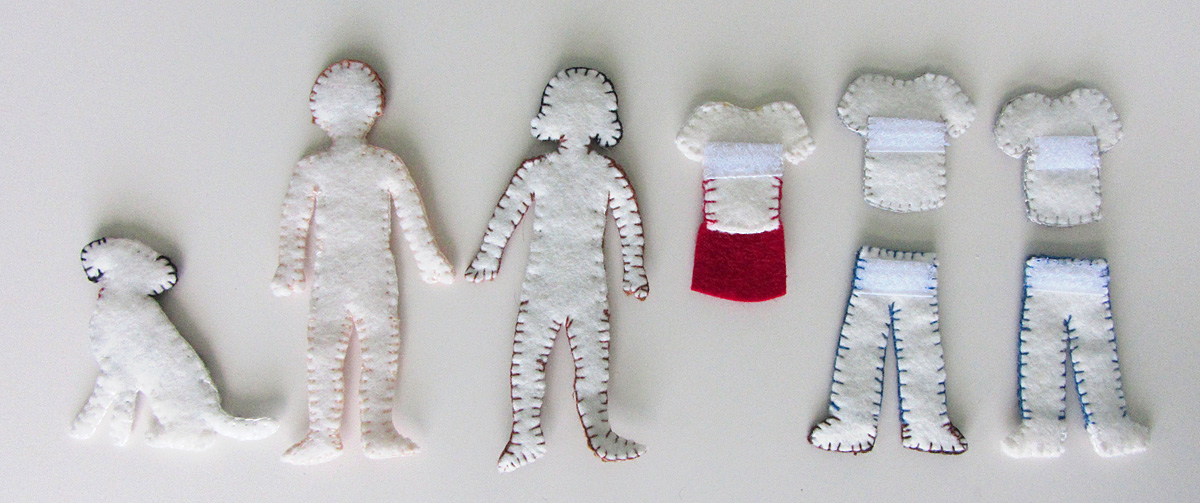
Clothes: This page includes casual clothes for the fire fighters. The dolls are sewn like the one included in the Dollhouse.
Logo T-shirts: I sewed the yellow emblem to the pocket area of the heather gray tees, then sewed them to a white felt backing with a bit of snag-free Velcro sewn to it.
Tee with Apron: I sewed the top of a red apron (only one thickness of felt) down to the white t-shirt, catching two yellow ribbons in my stitching. I sewed only the t-shirt part to a white backing with Velcro, catching the other ends of the straps between the two layers.
Jeans: I decorated the jeans with a yellow dashed line of stitching at the crotch, a gray French knot button, four light indigo stitches as belt loops and 2 slanted long stitches as pockets. I stitched shoes to the bottom cuffs (decorating the white ones with red stripes) and sewed the whole thing to white backing felt with Velcro at the top.
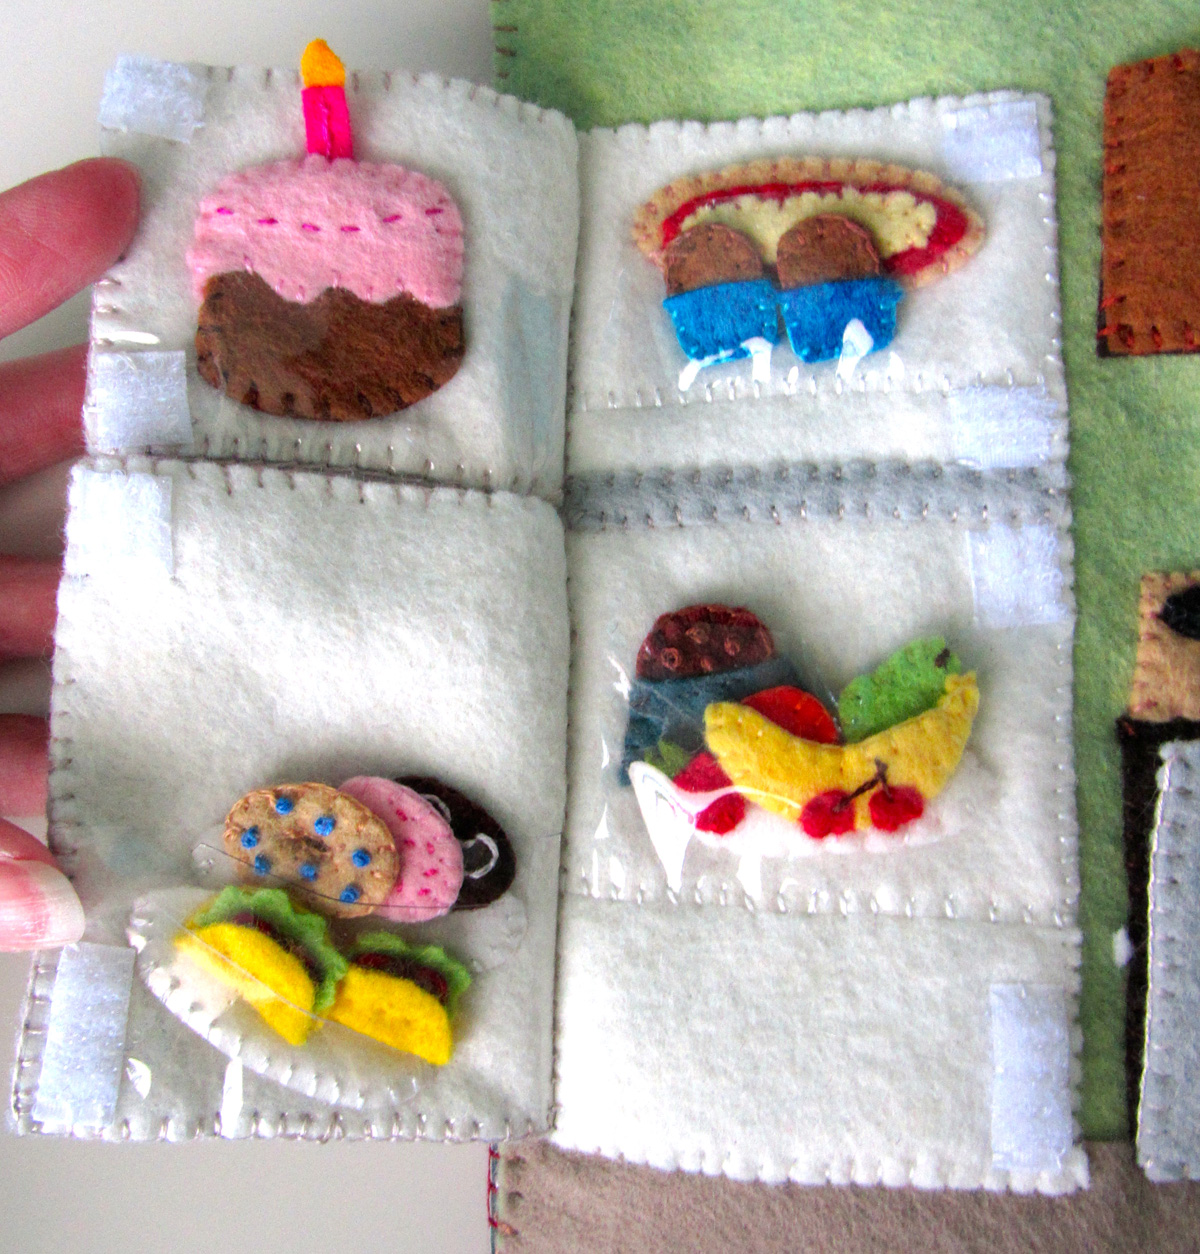
 Food: I’ve included a lot of food in this pattern, and will be adding a bit more when I do the back cover with a grill. You can also use food from the Dollhouse Kitchen.
Coffee Mugs: I sewed the two handle pieces together, then layered it and the coffee felt between the two sides of the mug. I sewed it together along the sides and bottom, then trimmed the extra handle inside the mug so it was less visible.
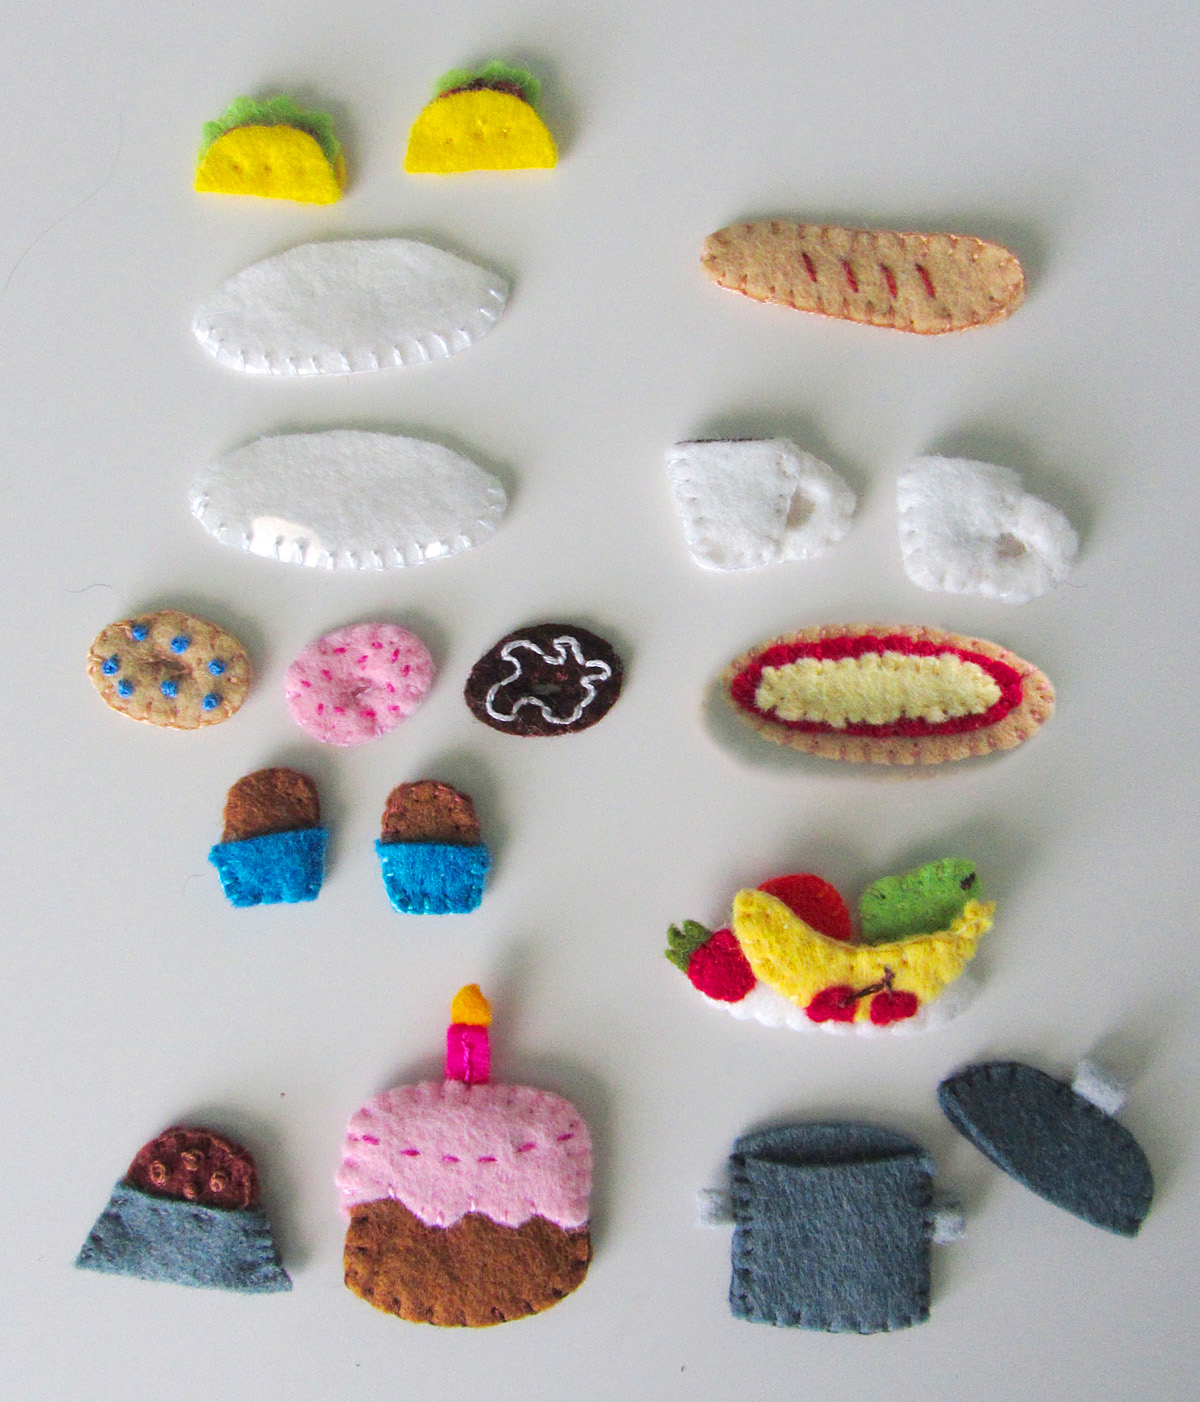
Muffins: I sewed the muffin tops (hah) together, then sandwiched them in place between the muffin liner pieces. I sewed along the sides and bottom of the liners, then made a couple tiny stitches at the top to hold the muffins in.
Fruit Plate: Each little piece of fruit is sewn separately, but stitched to the top of the plate at their bottoms. The exception is the cherries, which are appliqued to the banana. I added stitched brown stems to the cherries and pear, and caught a bit of green felt in the top of the strawberry to make the green leafy top. I sewed the back of the plate on once I finished the fruit.
Pizza: I sewed the cheese to the sauce and the sauce to the top of the crust, then sewed the back of the crust on. Note that I didn’t center the sauce on the crust – I had it closer to the back to created a foreshortened look.
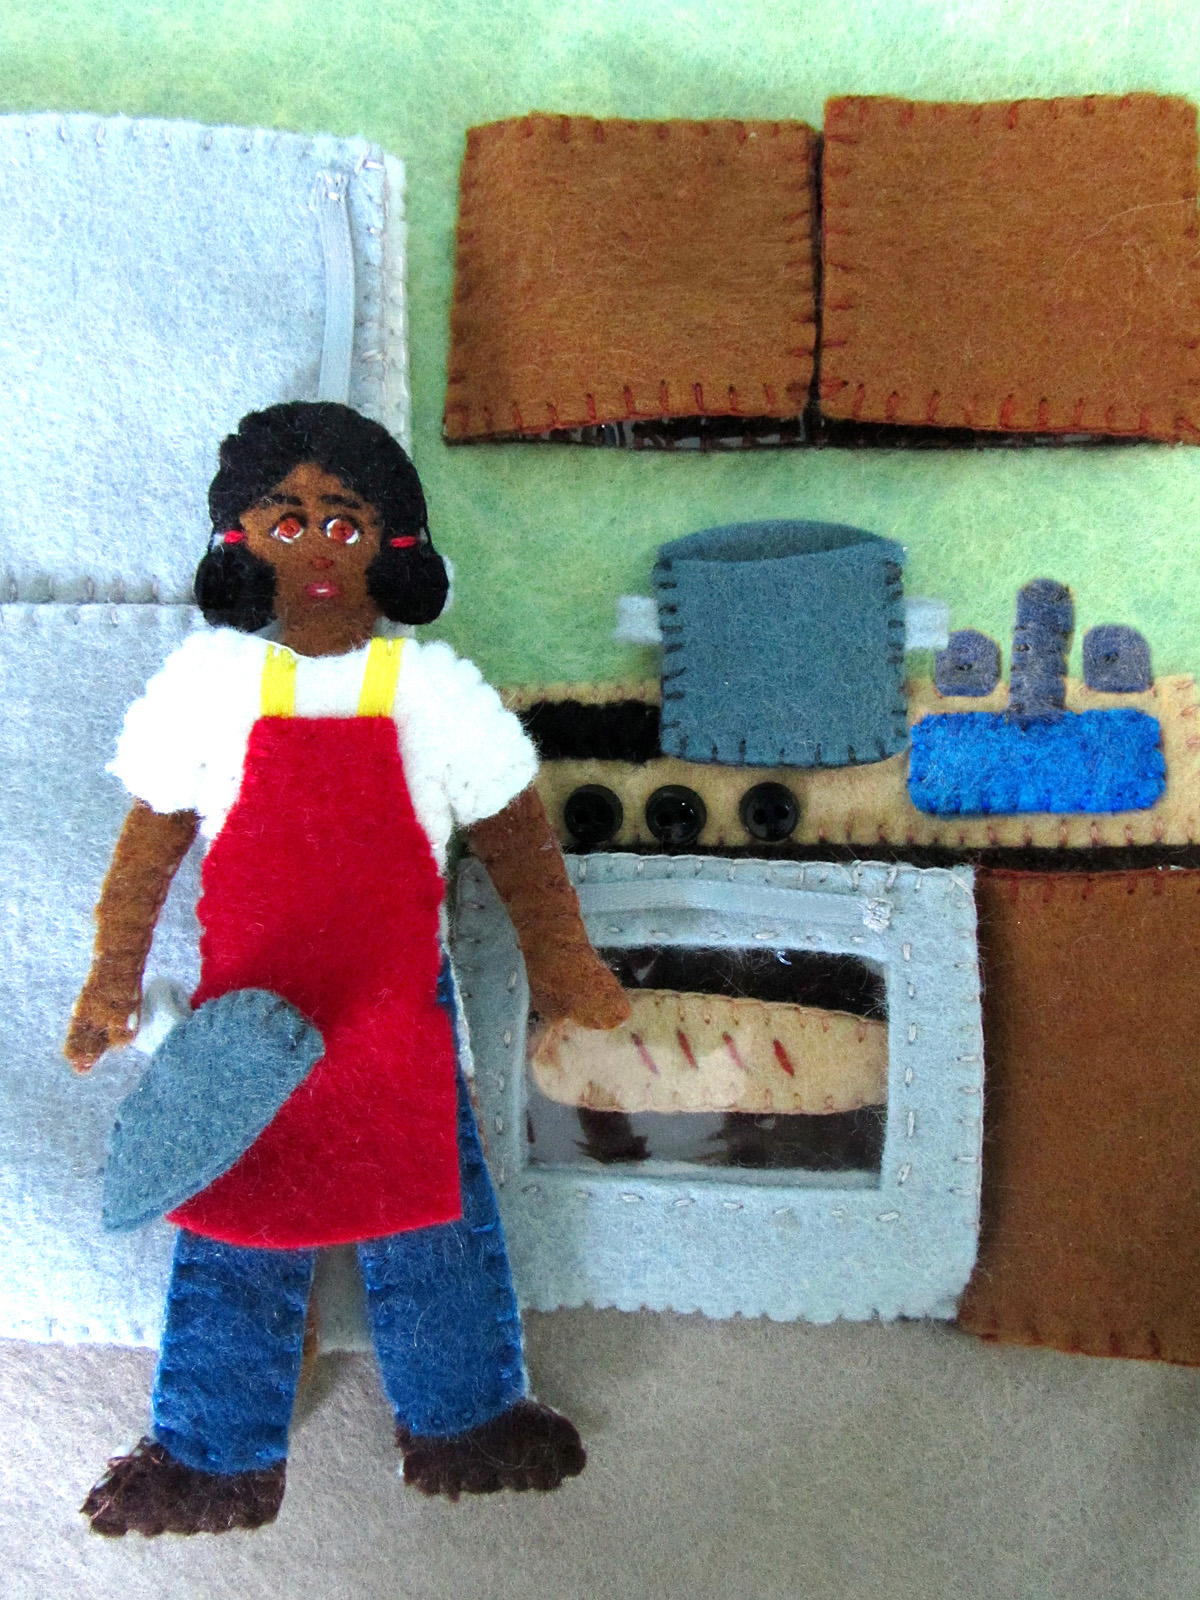
French Bread Loaf: I sewed slanted long stitches in brown to make the slashes in the crust on both sides, then sewed the sides together.
Stock Pot: I sewed the sides and bottom of the pot together, catching folded scraps of gray felt in the sides to make handles. I sewed along the curved top of the lid, catching a folded bit of gray felt in the top center ans a handle.
Donuts: I decorated both sides of the tan “blueberry” donut with periwinkle French knots and sewed the sides together. I decorated both sides of the “strawberry” donut with stitched sprinkles, then sewed the two sides together. I decorated the top of the “chocolate” donut with a curvy white line of stitching, then sewed both sides together.
You could sew the donuts to the platter as with the fruit, but I decided to let Jax have some loose food to “feed” to the dolls. So I sewed the platter separate, added a clear vinyl pocket to hold the food.
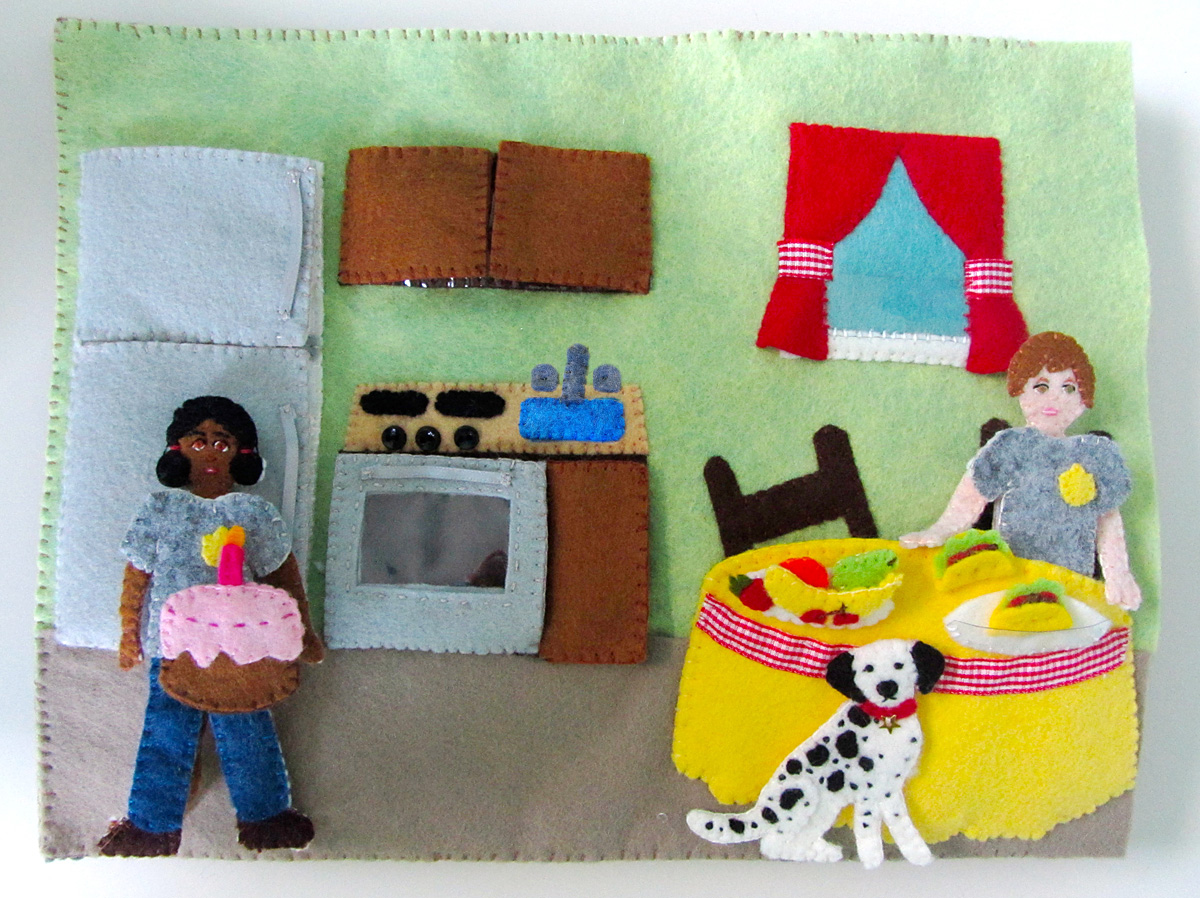
Tacos: I sewed scraps of red felt to the lettuce felt, then added brown French knot “taco meat”. I placed the toppings inside the folded taco shell felt and made tiny stitches to hold it closed. Note that the taco shell is folded so the front is a bit shorter than the back.
I did the platter with a pocket the same way as for the donuts.
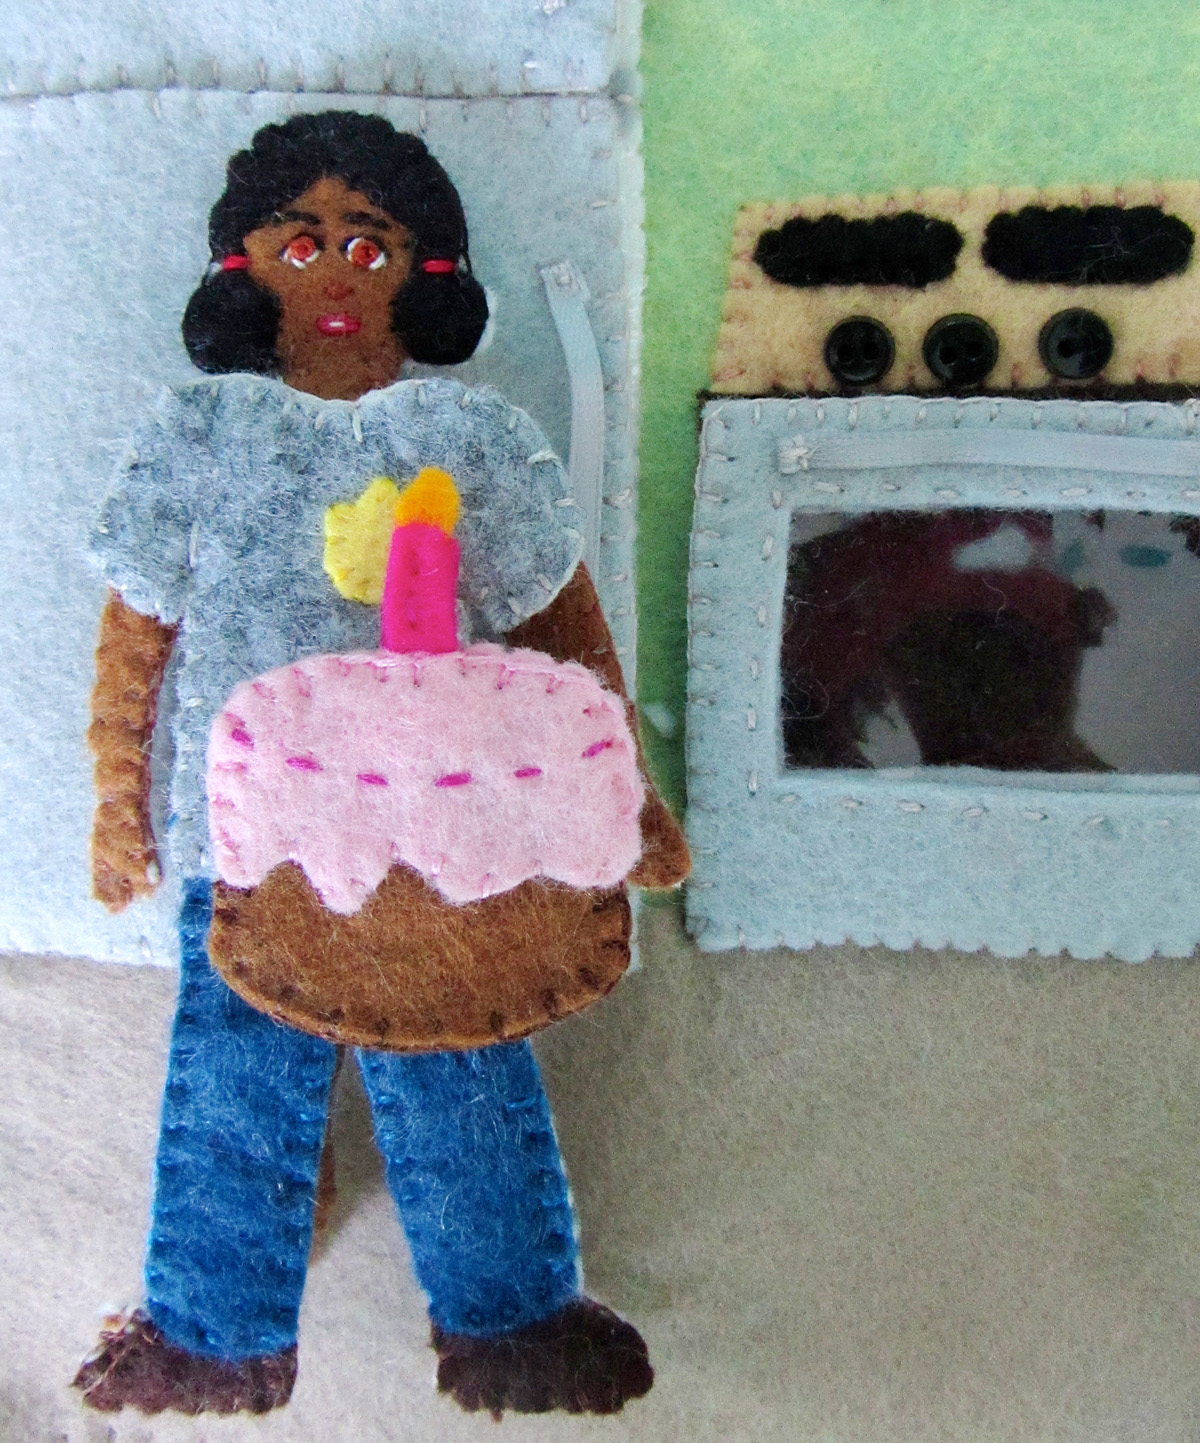
Cake: I first stitched a curving running stitch (dashed line) on the frosting pieces, then stitched them each to a cake piece. I stitched together the candle pieces with the flame caught in the top. I placed the candle between the two sides of the cake and sewed around the edges.
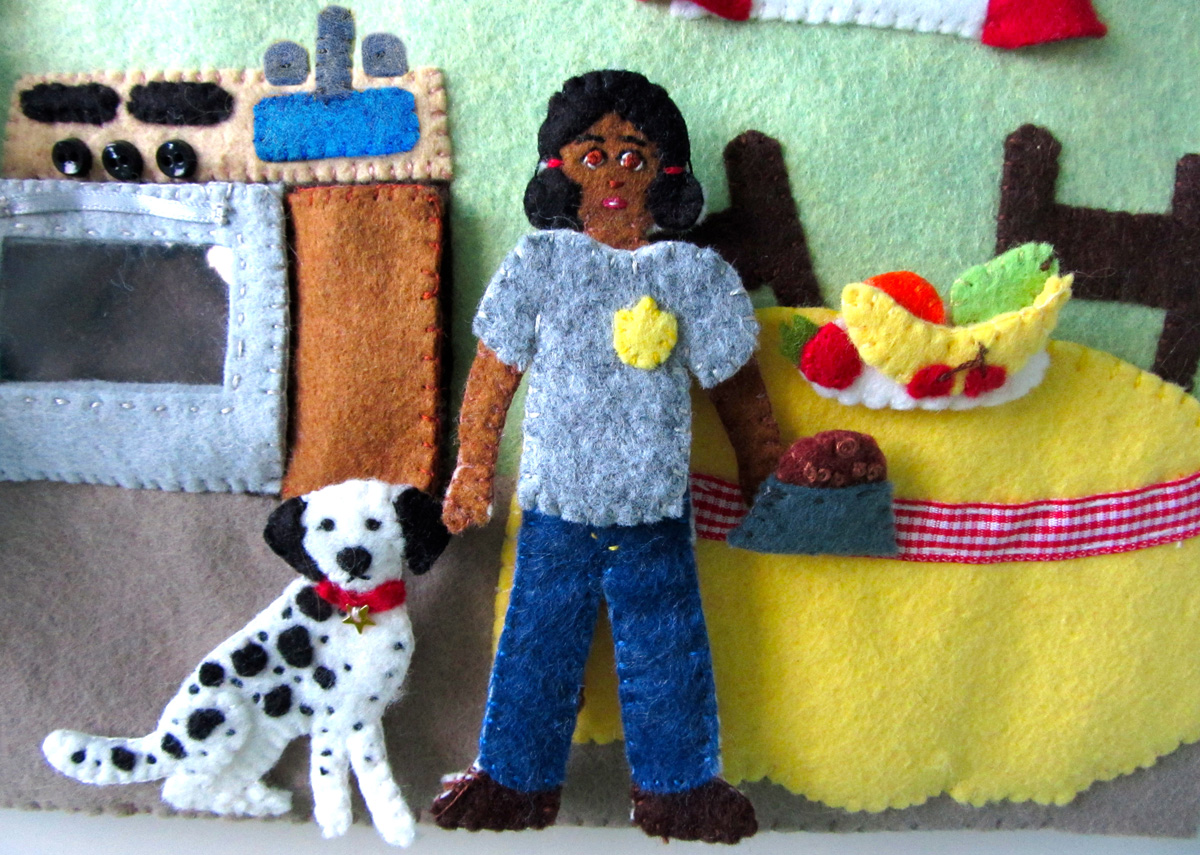
Dog Kibble: Puppy needs to eat too! I sewed brown French knots on both sides of the kibble felt,, then sewed the sides together along the top. I layered it between the bowl pieces and sewed along the sides and bottom. I added a couple small stitches along the top to hold the kibble in the bowl.
I’d almost say this is Jax’s favorite in the fire house so far – he’s always been a fan of play food. But, He’s been so excited about the whole thing that it is too close to call. I’ll be hiding this book away once it is done so it is new and fun during out California trip in May.
Have you been sewing along with me on this Fire Station book? I’d love to see your progress! Stop by the Facebook page and post a photo!
The next two pages in this series will be the office and bunk room. So close to finishing! Happy sewing!
Thank you so much for sharing all of your great creations! Thank you for all the patterns and tutorials. I am so inspired I am actually going to buy a sewing machine.
I’ve just posted about a book I made for my grandson using a few of your patterns. Thank you so much for providing free patterns, that is very generous of you. As I state in my blog post, if I had started earlier and was certain of my grandson’s interest in the book, I would have gone into more detail. I’m not ruling out future felt projects if he shows interest. My current blog post is http://lazydayandsundays.blogspot.com/2013/03/a-busy-book-for-my-grandson.html
I love all your ideas for quiet books and you have really inspired me to make one for my son. We’ve a family holiday in September and I might just get it completed by then!
I love your work! I recently began the camping scene for my Grandson and can’t find the directions….I have the pattern, thanks so much for sharing!
Hi! The camping tutorial can be found here: http://www.imagineourlife.com/2012/07/17/camping-quiet-book-page/