DIY Rainbow Dash Plush with Goggles

DIY Rainbow Dash Plush

For much of this project, I did things the same as with the Pinkie Pie I made my niece for Christmas. You can read that post for many details I will be leaving out here!

DIY Rainbow Dash Plush with Goggles

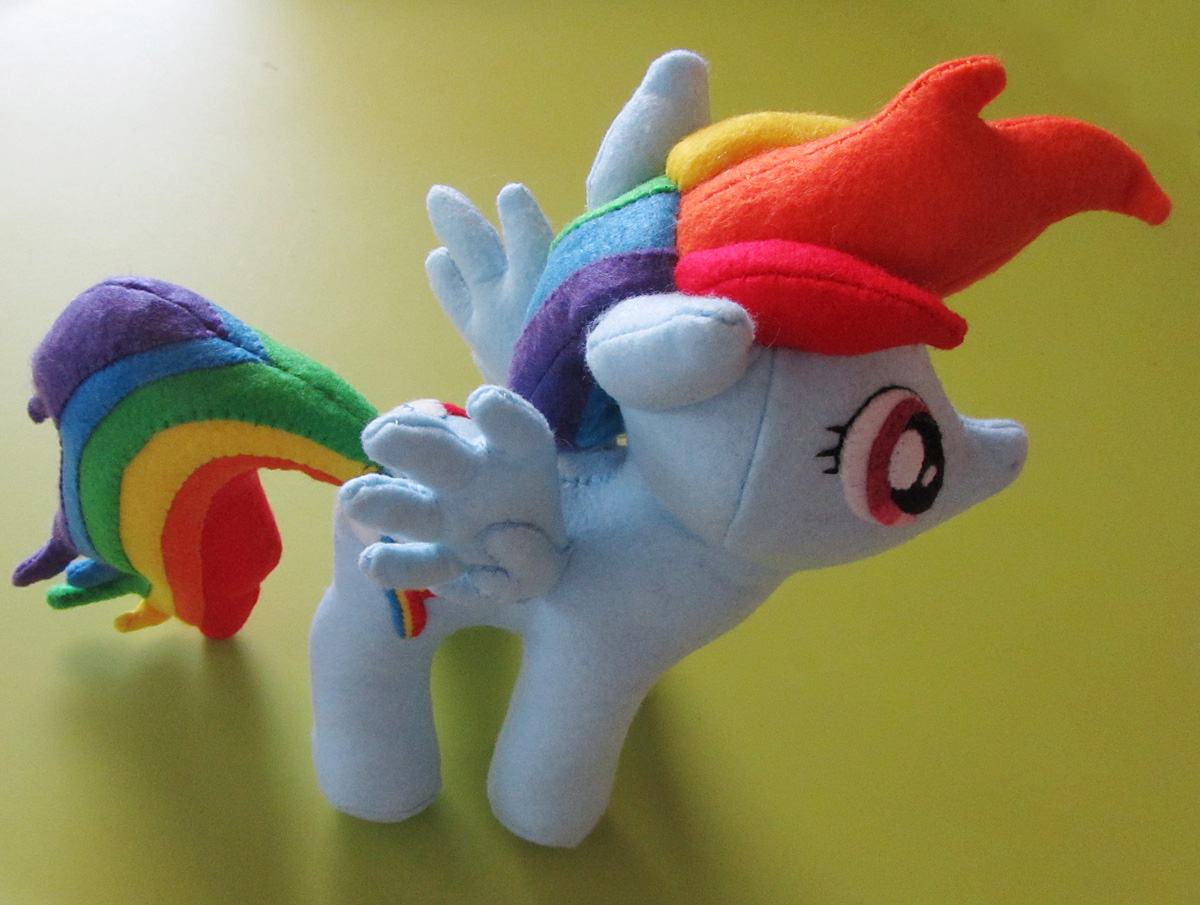
I scaled the pony body pattern up for a larger, huggable plush. This also made it easier to sew with felt. Felt is thick, and sewing inside out with seams can be tough. There were many places (wings, tips of hair) where it was really hard to flip the sewn felt right-side out, even at the larger size! My pattern ended up being 9.4″ wide from foot to foot (E2 to E2) on the “Underbody” piece. I had to break up the “Body Side” piece to print, then tape it together.

DIY Rainbow Dash Plush with Goggles

I did all of the details (everything but the body and eyes) freehand – cutting paper, then felt to whatever looked right. I did my best to photograph each piece to scale so I could draw it into a pattern for you later. Please keep that in mind when using the pattern! Things might be a little off since it was created after the fact and not tested. Grab my pattern here. (The pattern for the body is linked into the Pinkie Pie post.

IDIY Rainbow Dash Plush with Goggles  DIY Rainbow Dash Plush with Goggles

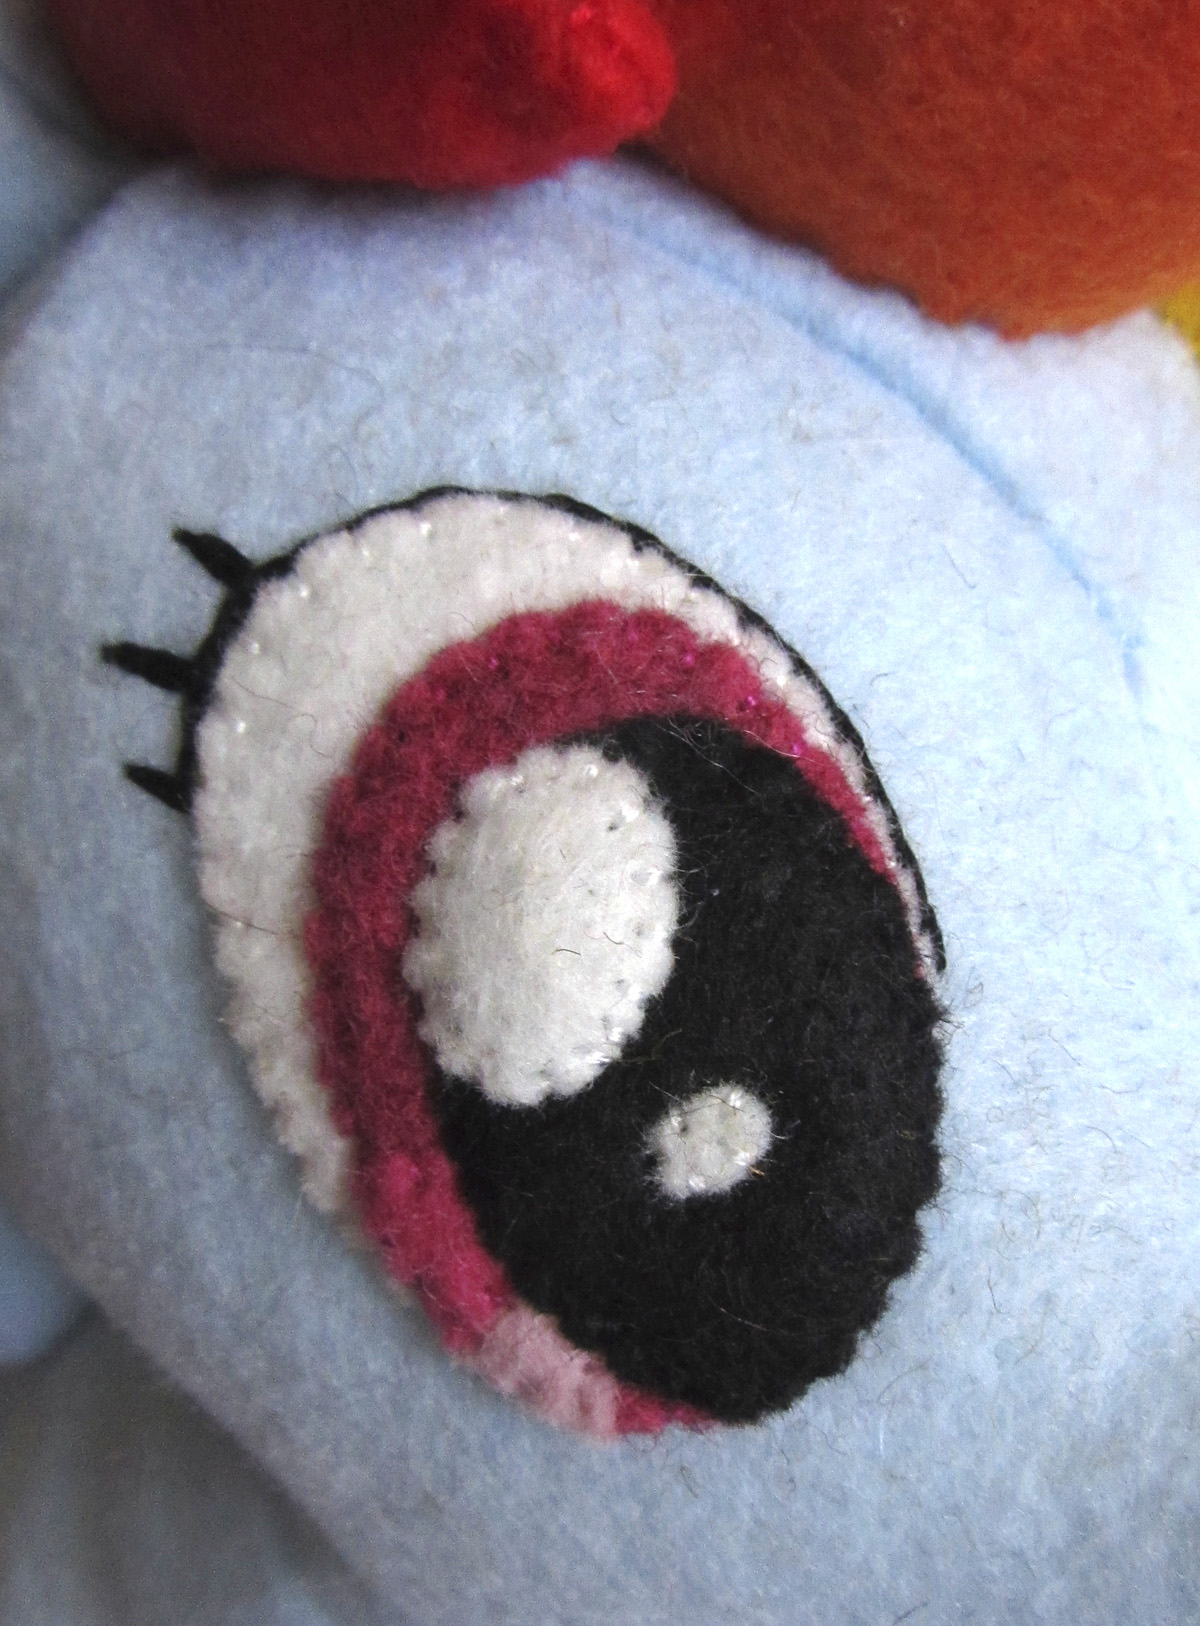
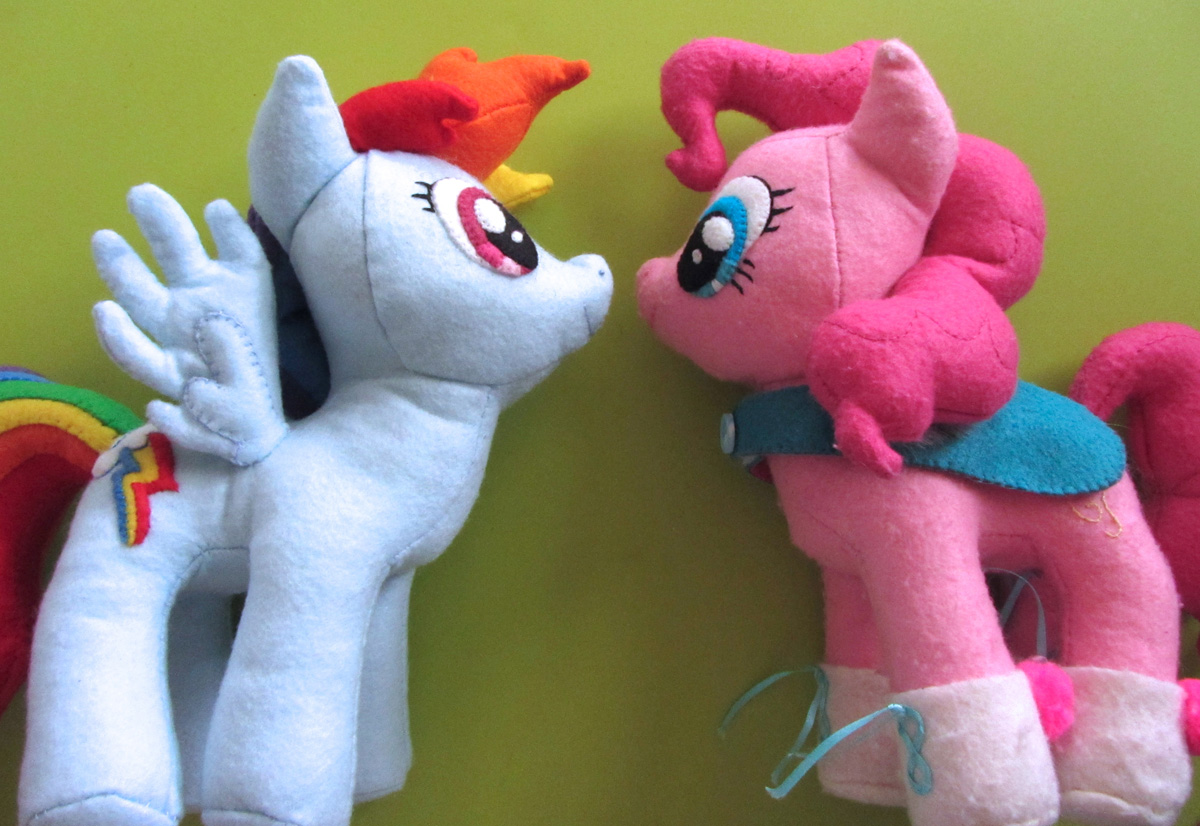
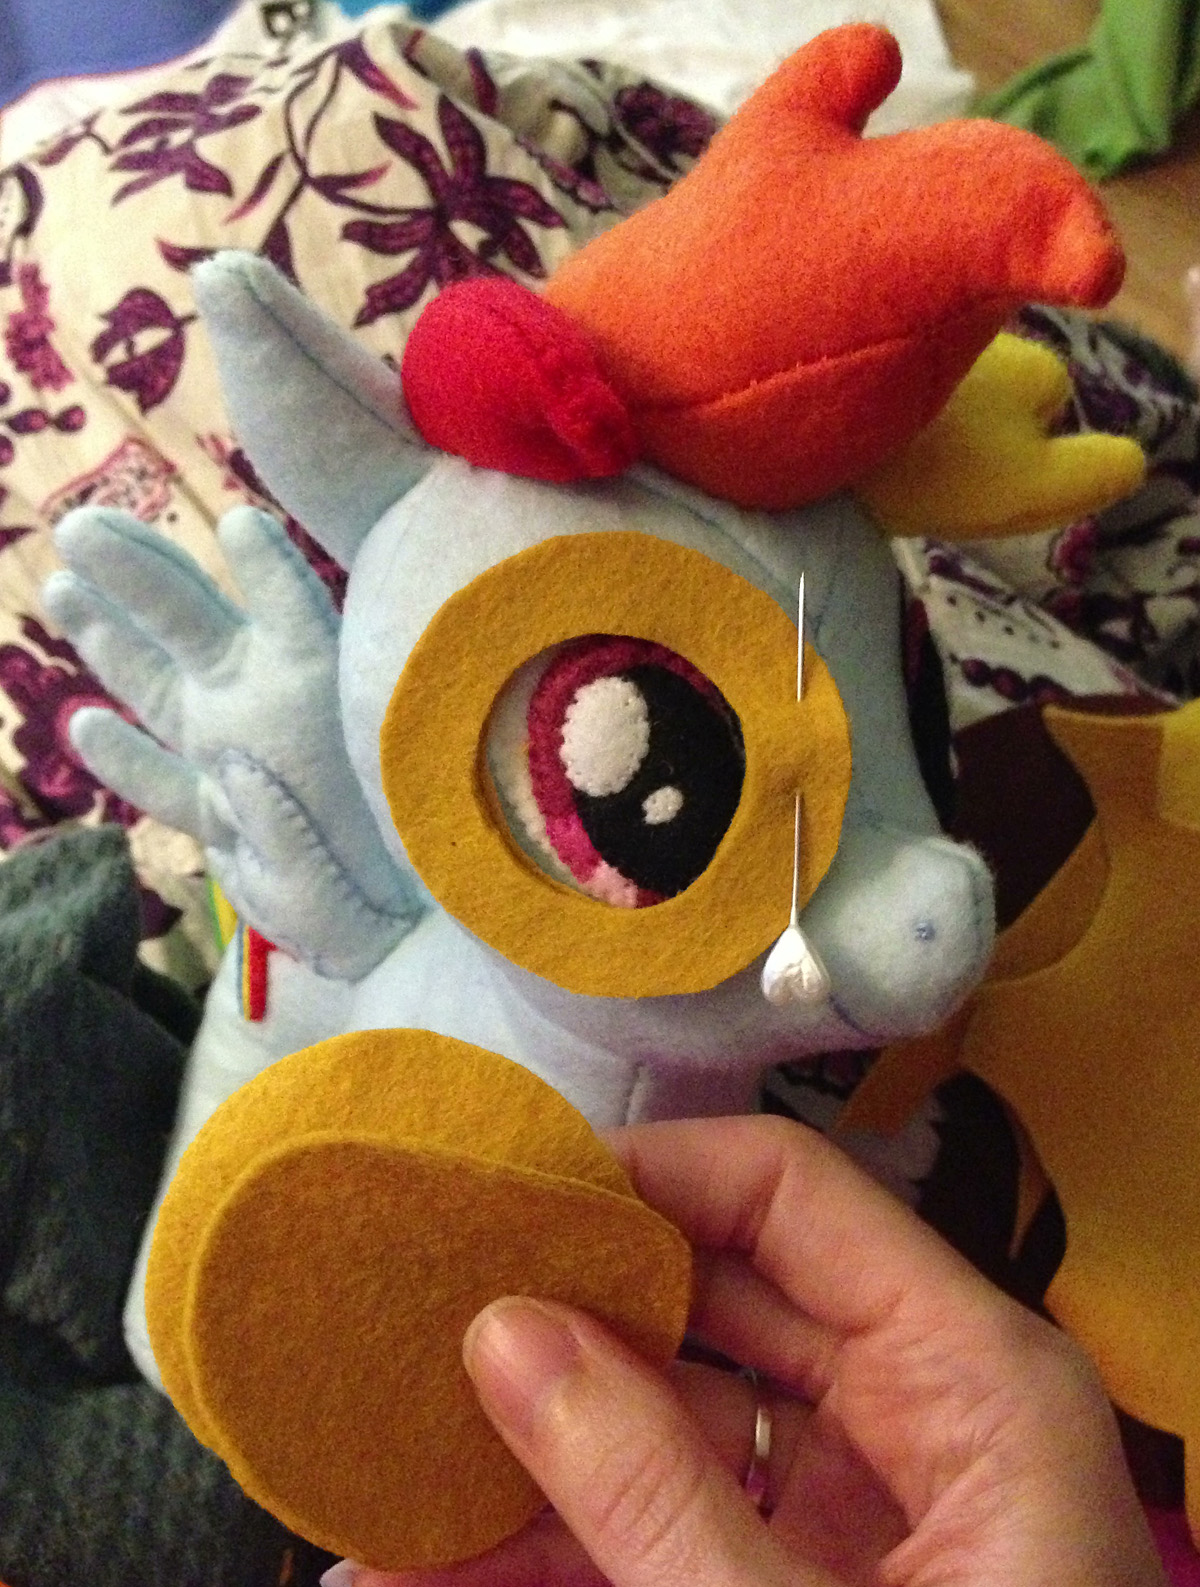
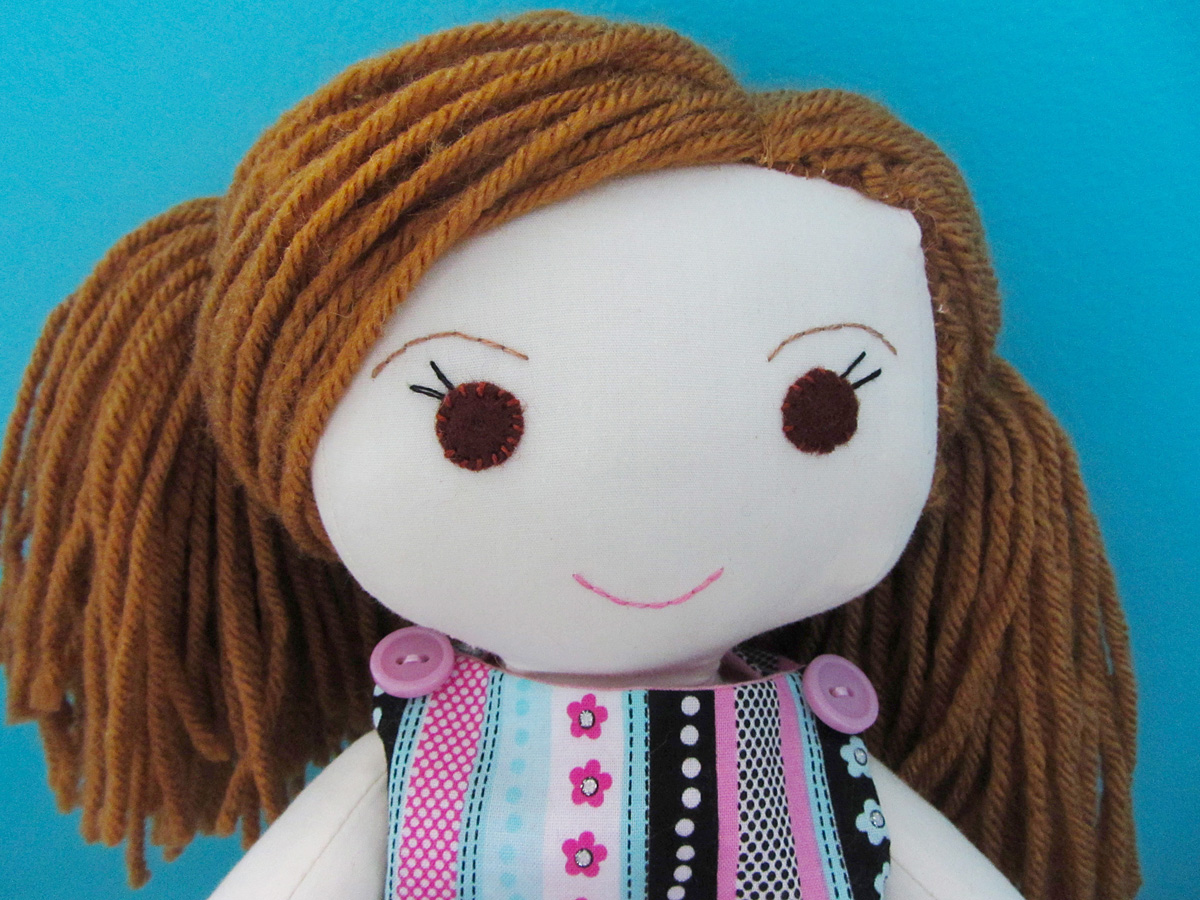
Body: Rainbow Dash’s body is sewn the same way as Pinkie Pie’s was. I also used the same kind of felt, so that the two ponies will age the same. It is from Felt for Less. I got a rainbow pack as well as some light blue. Her eyes, nostrils and mouth were sewed on the same as well. (Note that she has different eyelashes than Pinkie.)

DIY Rainbow Dash Plush with Goggles

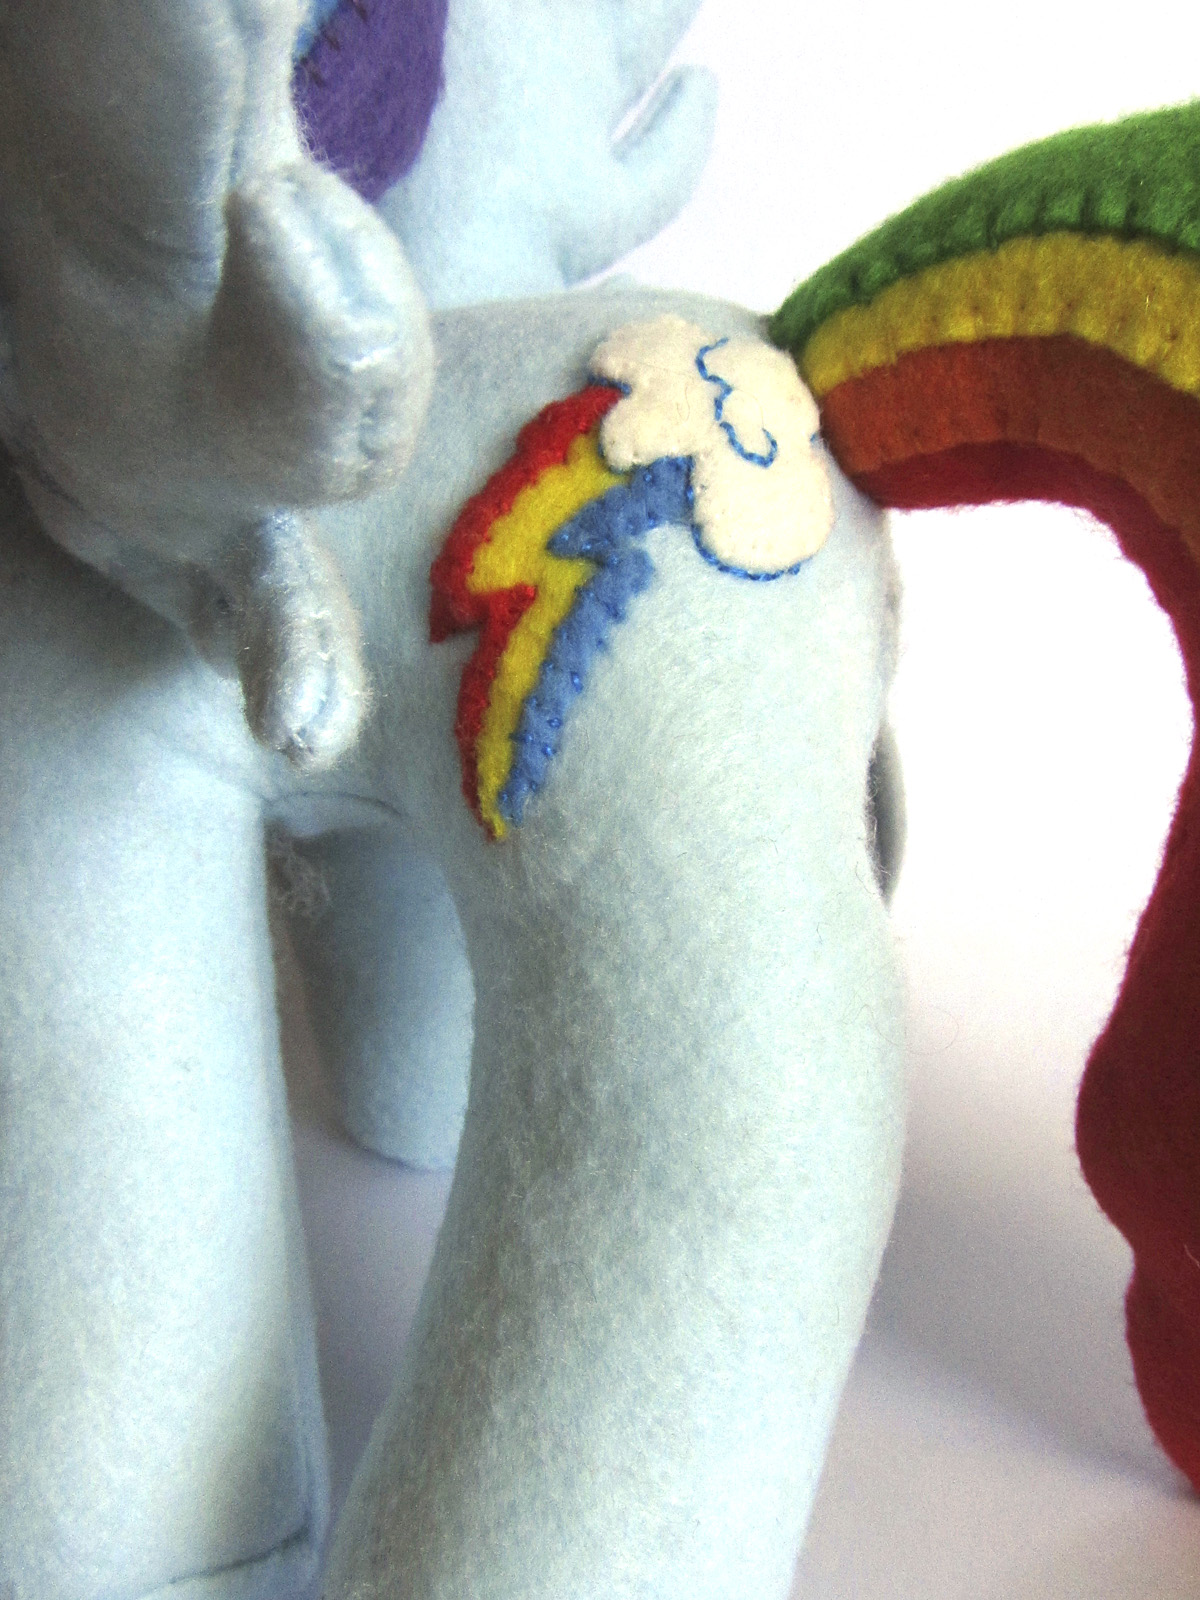
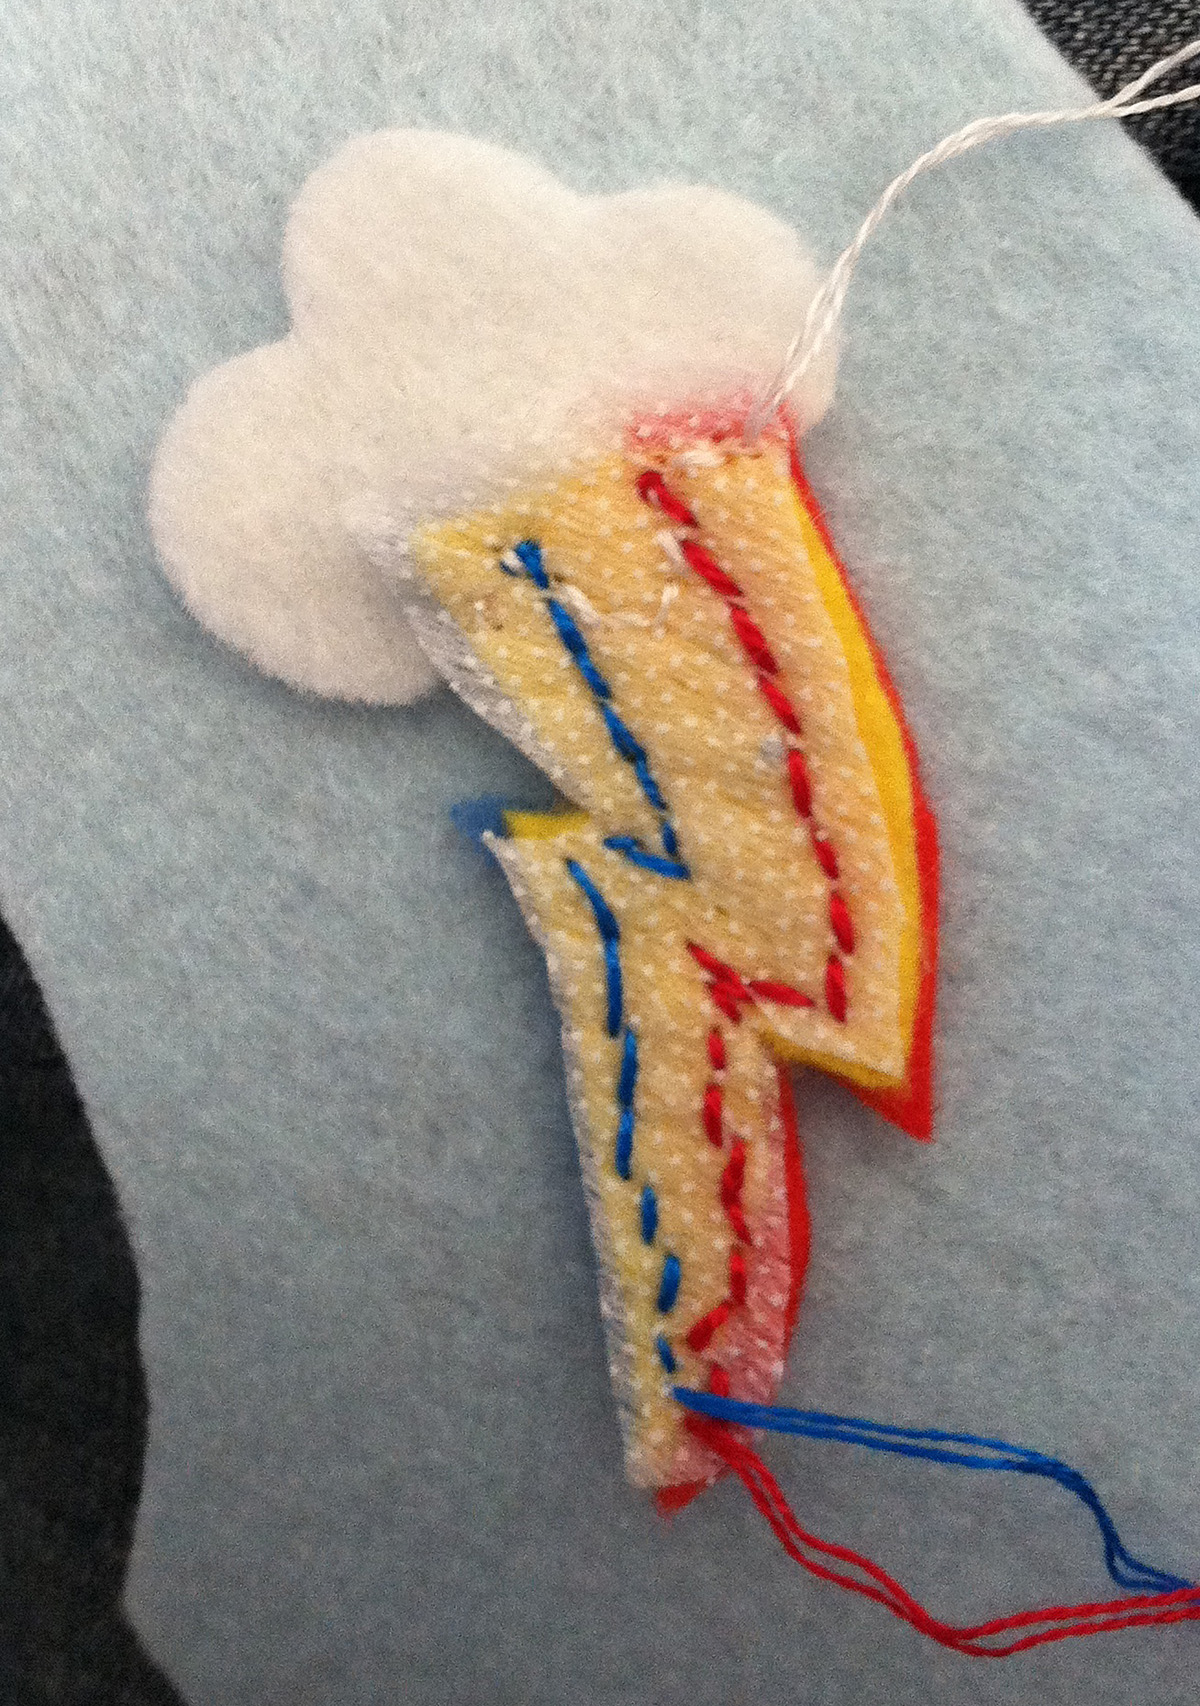
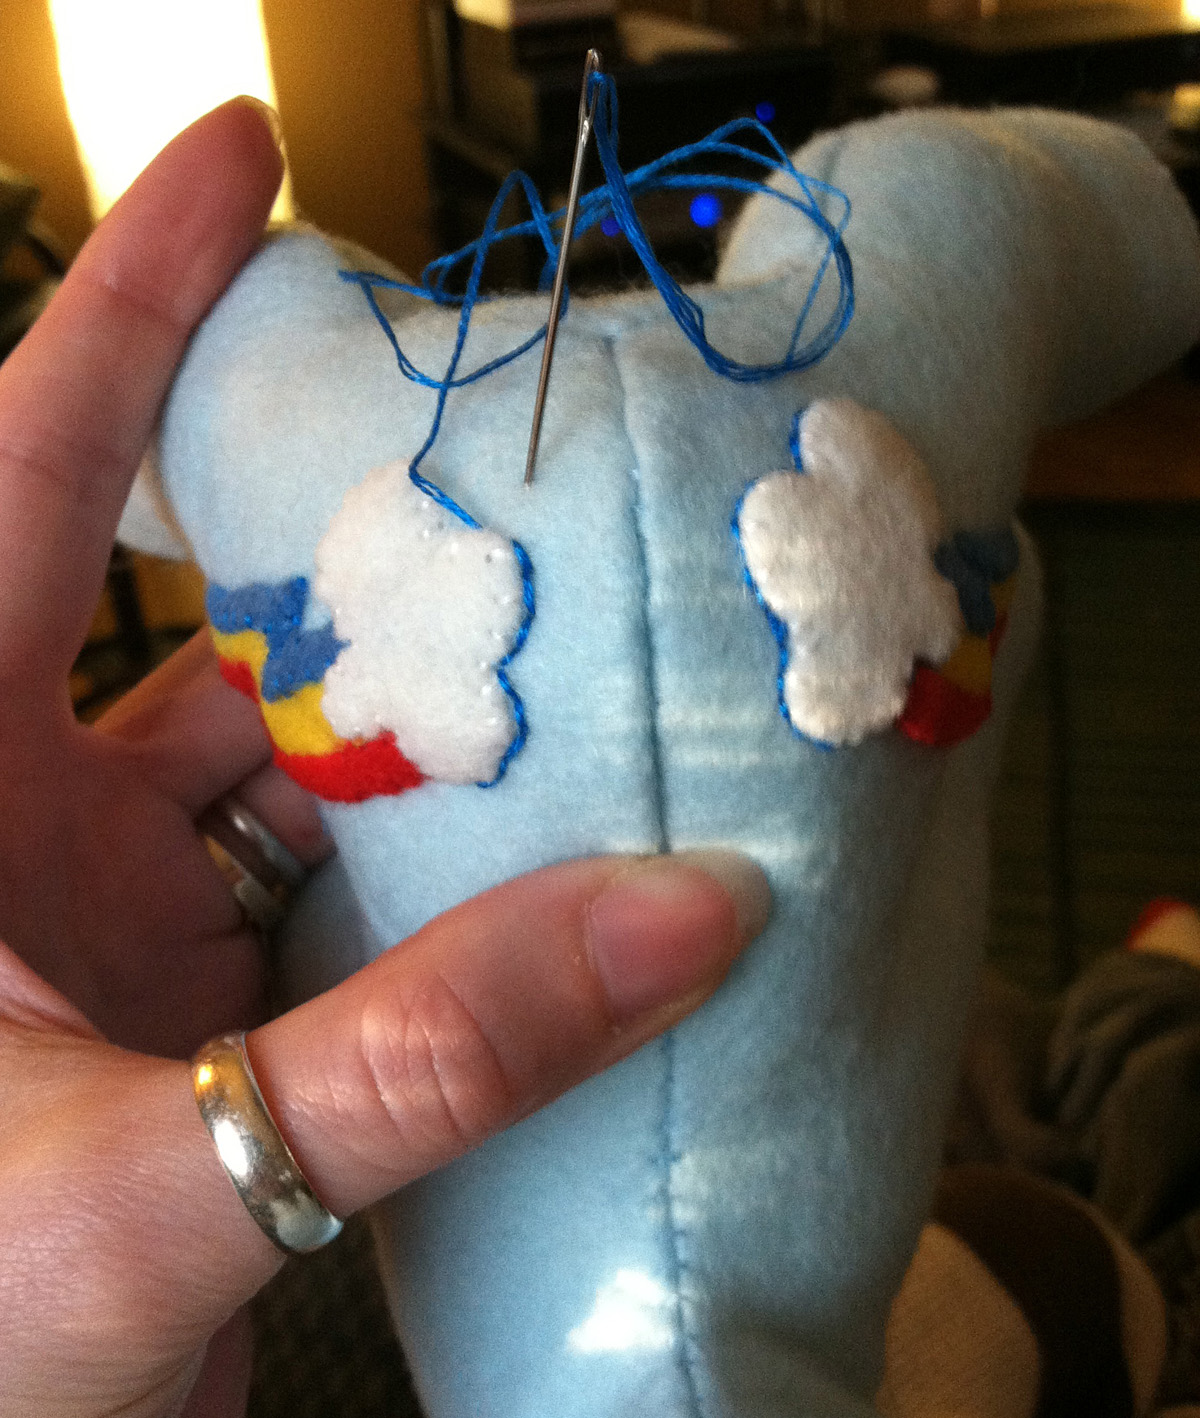
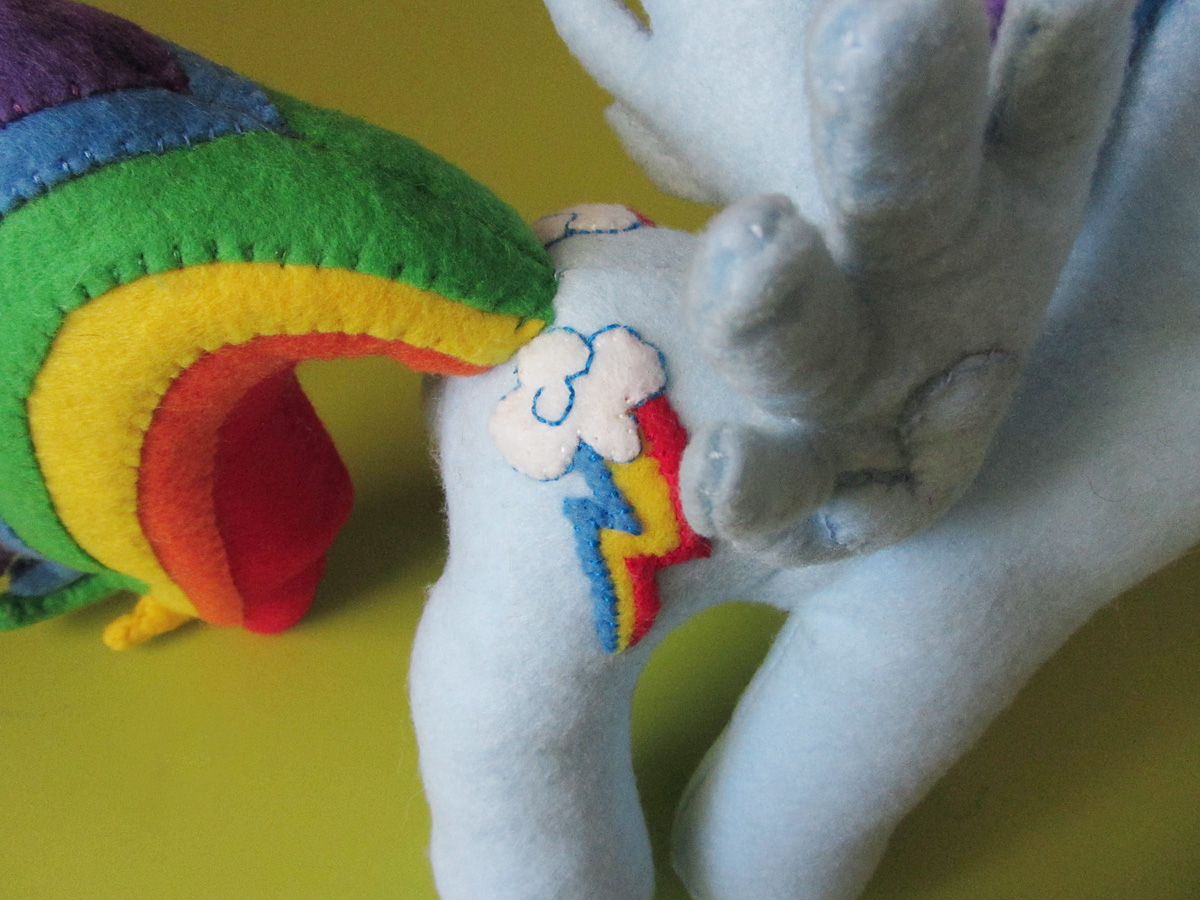
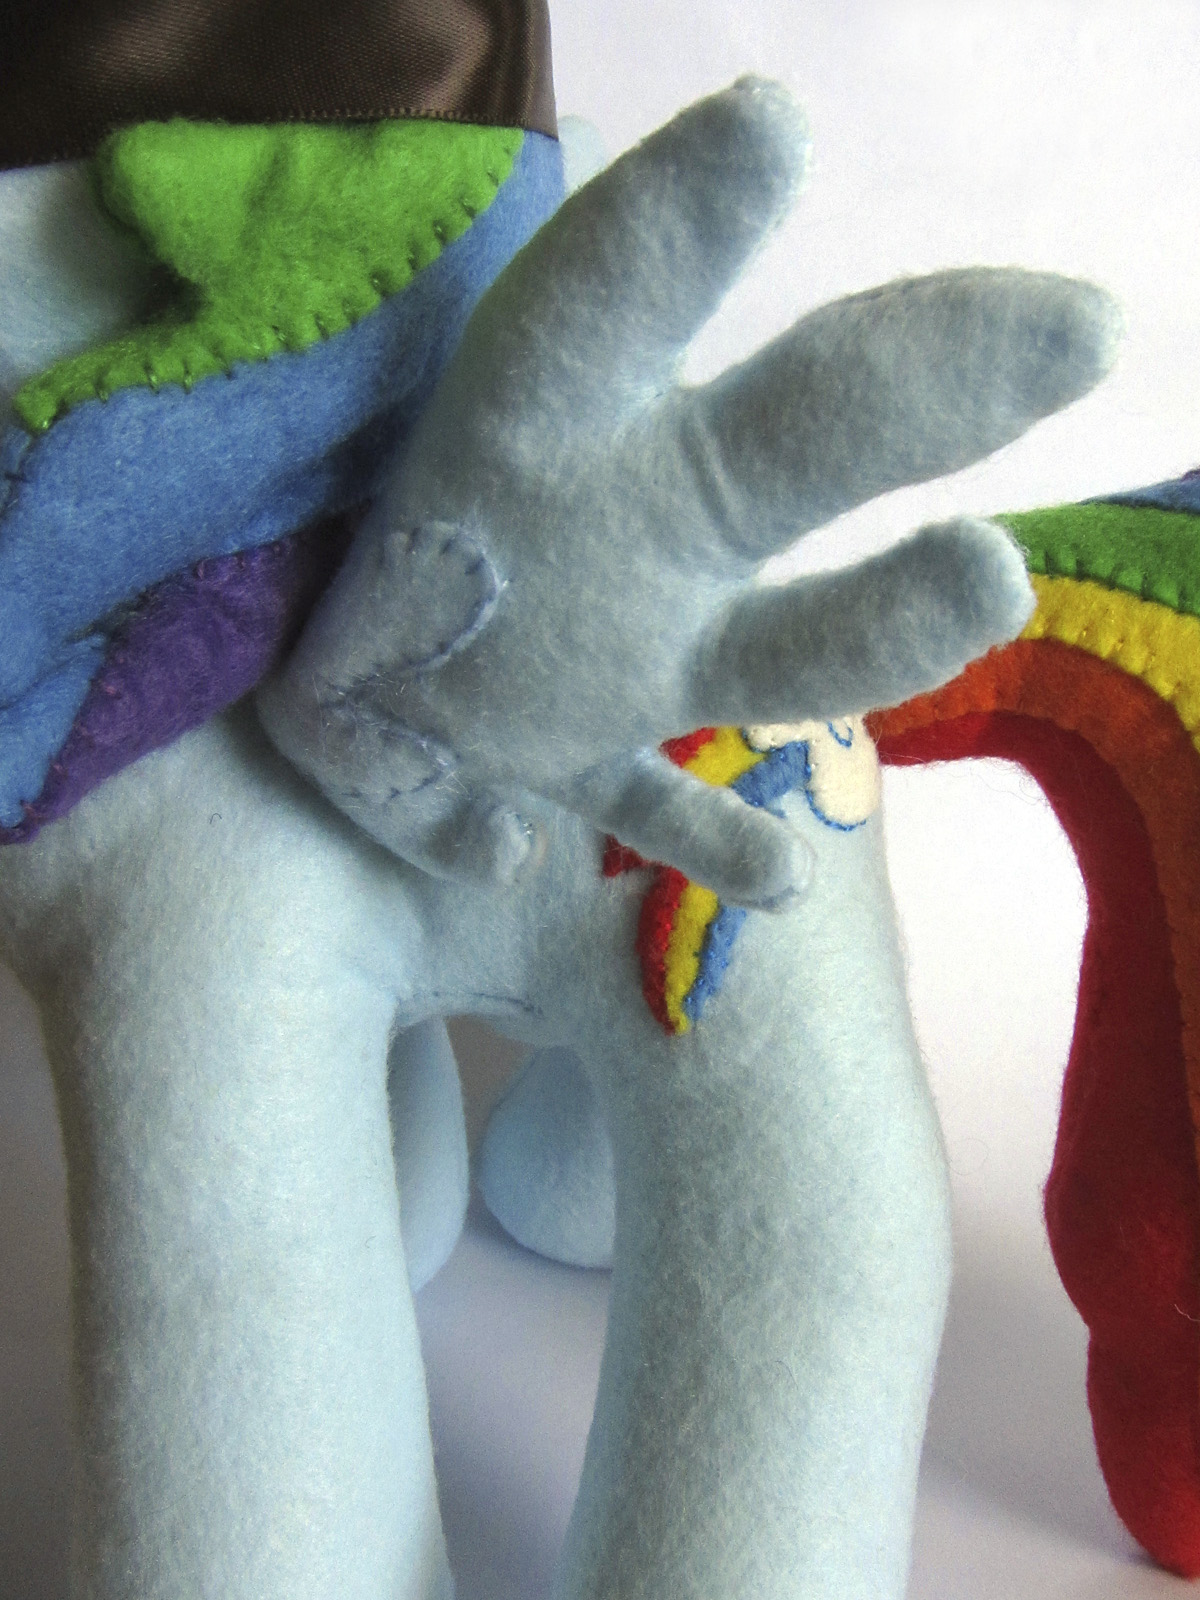
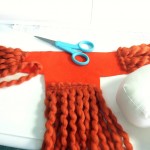
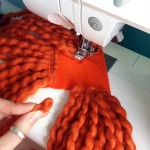
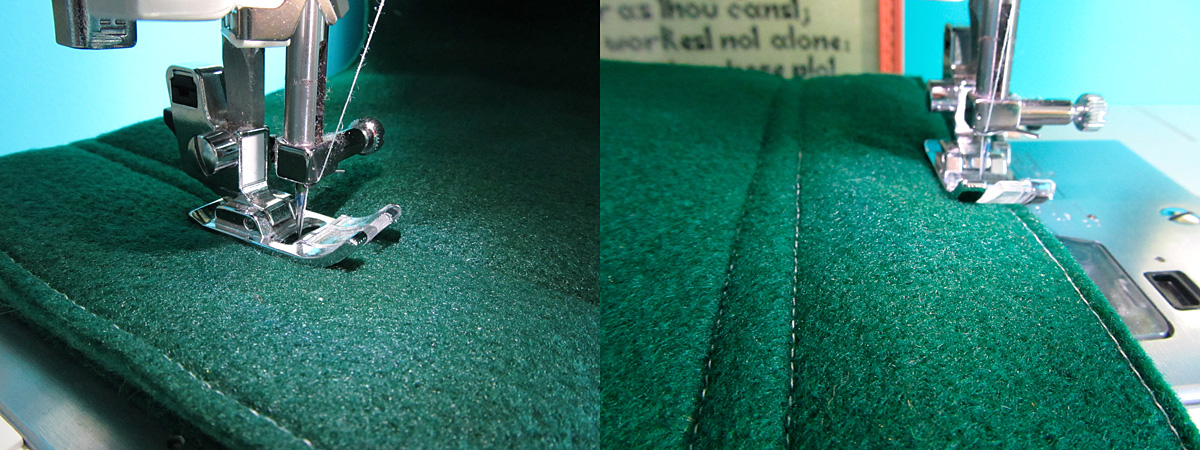
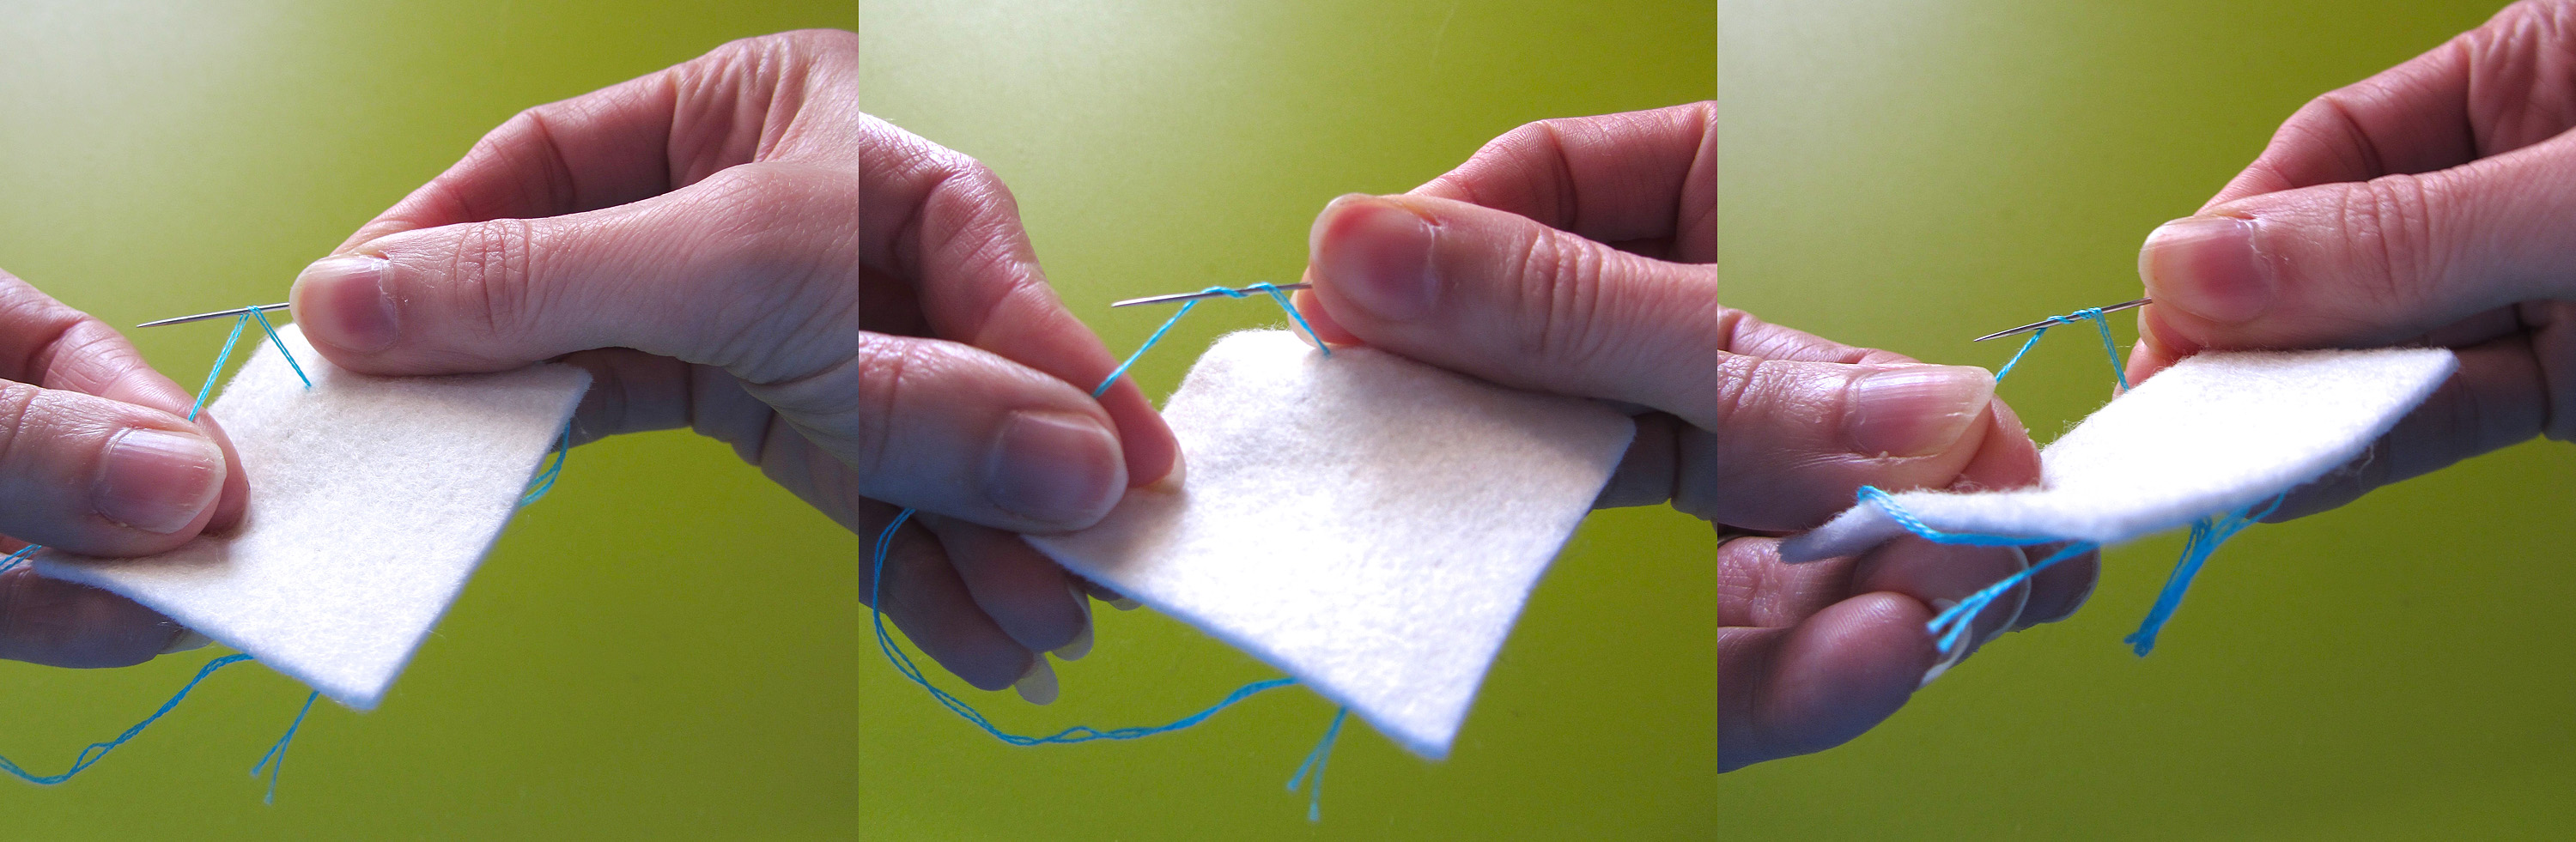
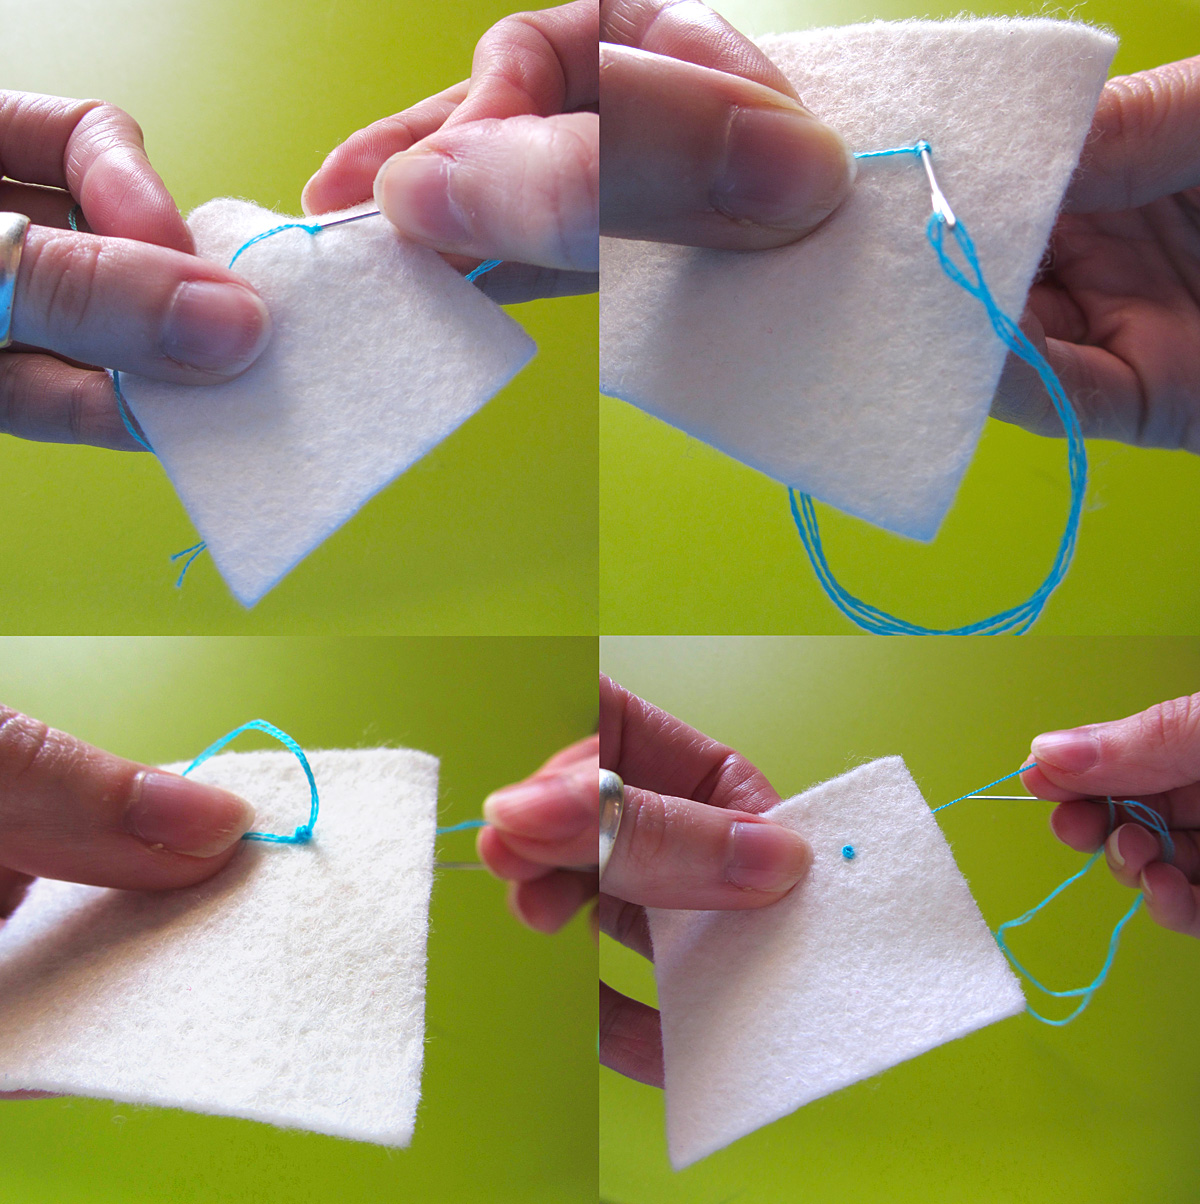
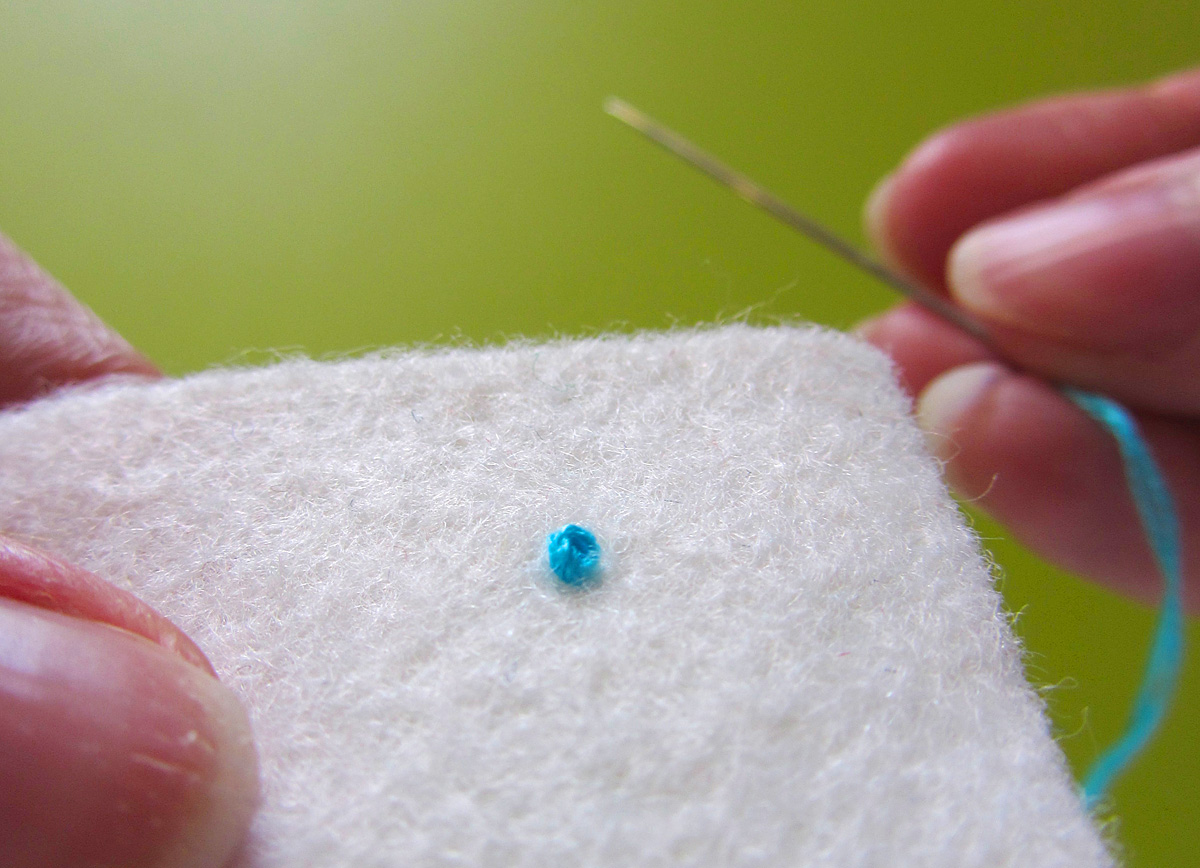
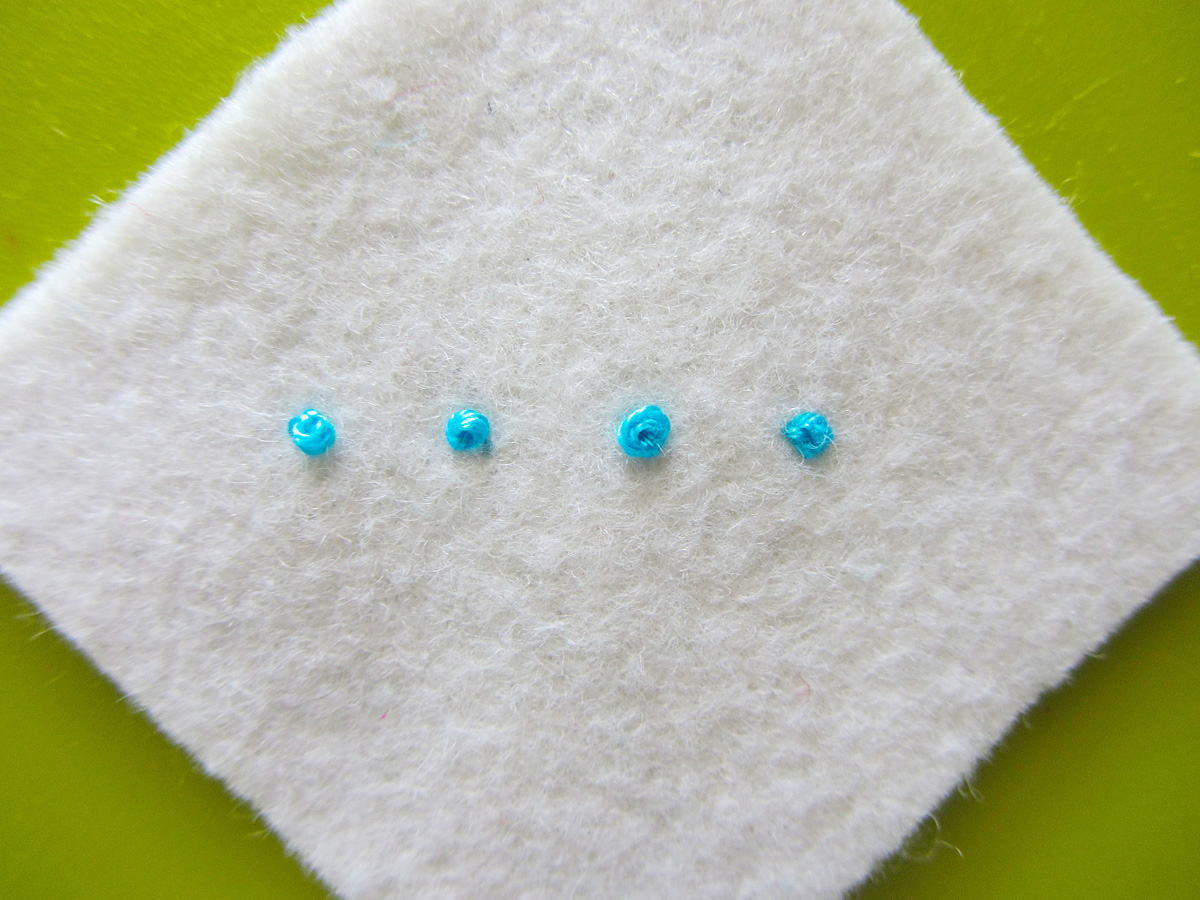
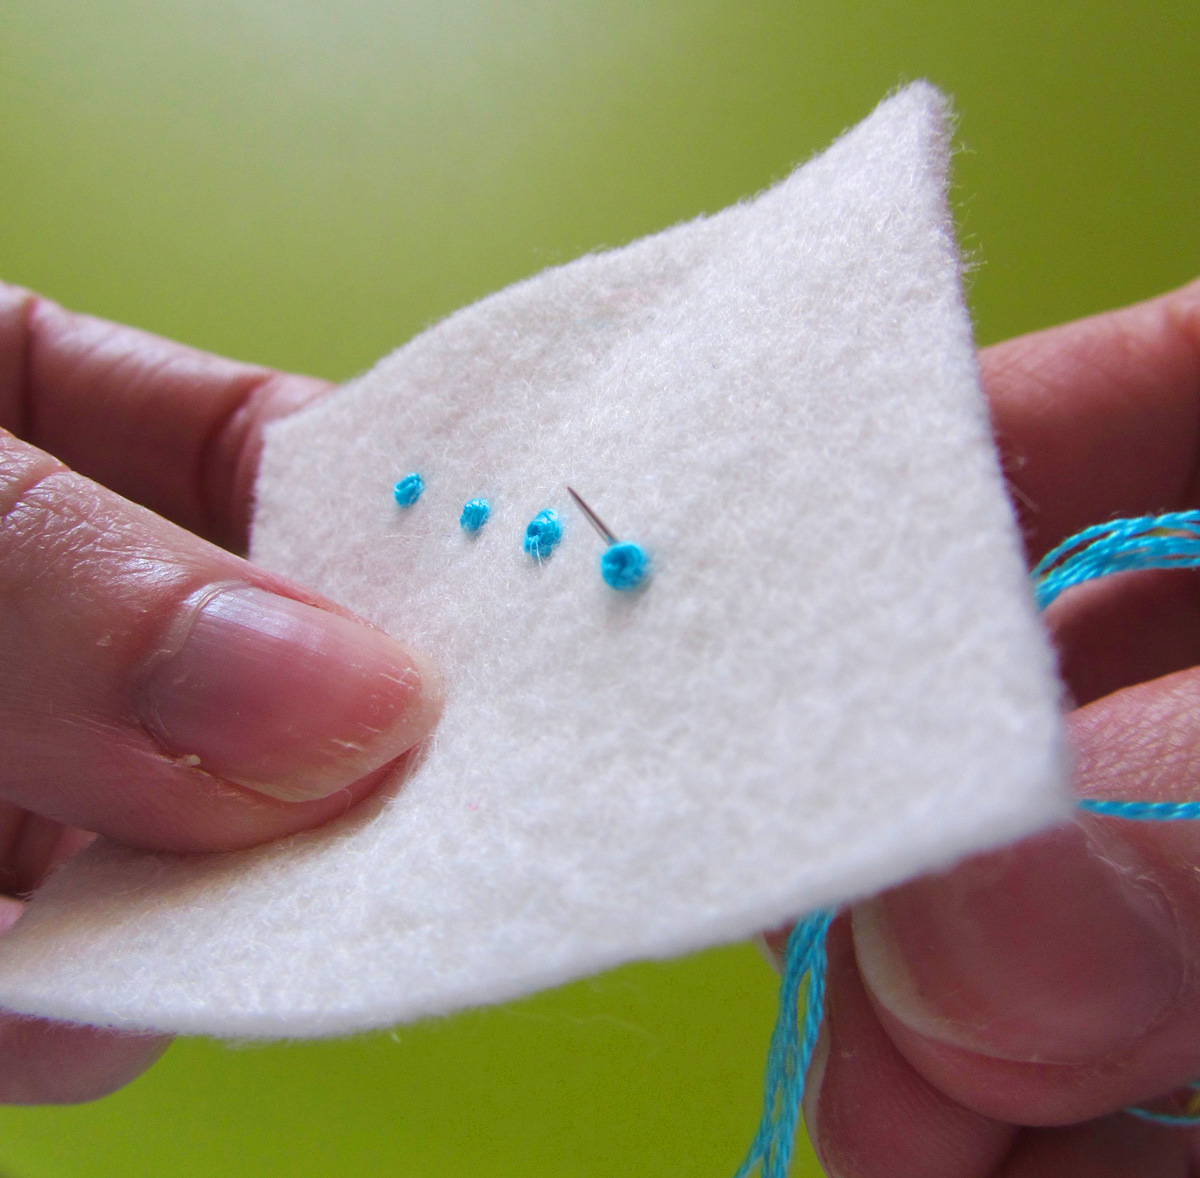
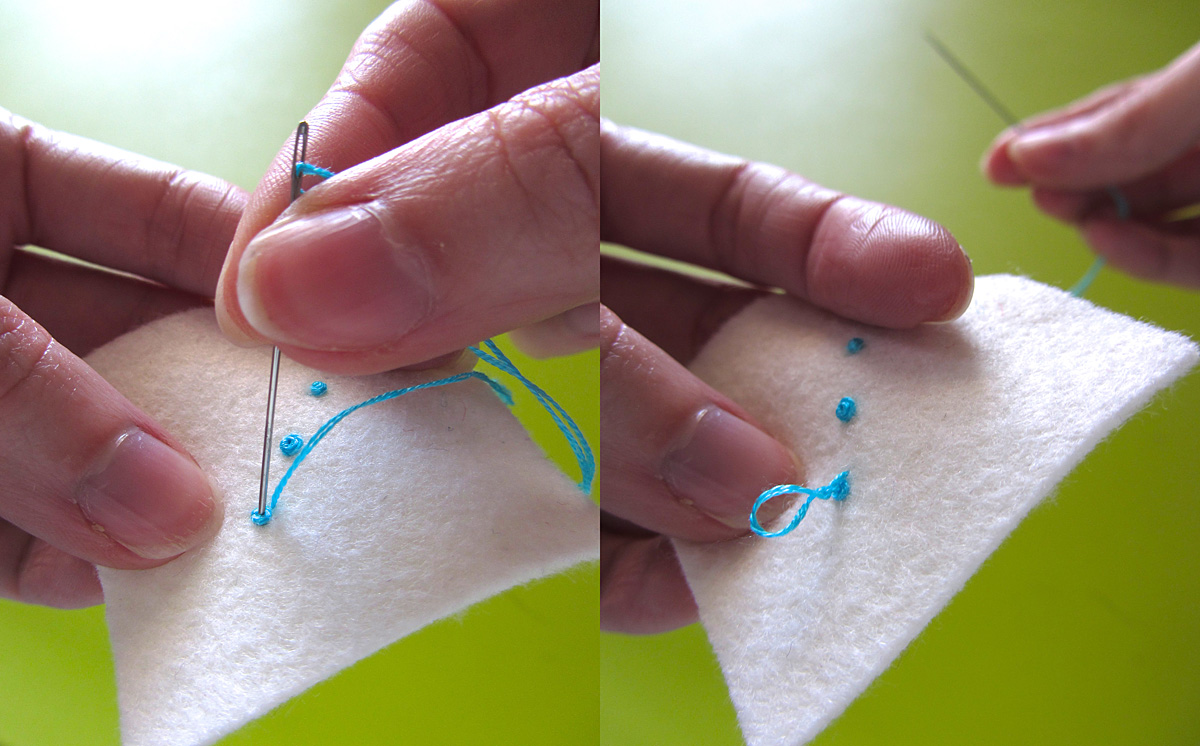
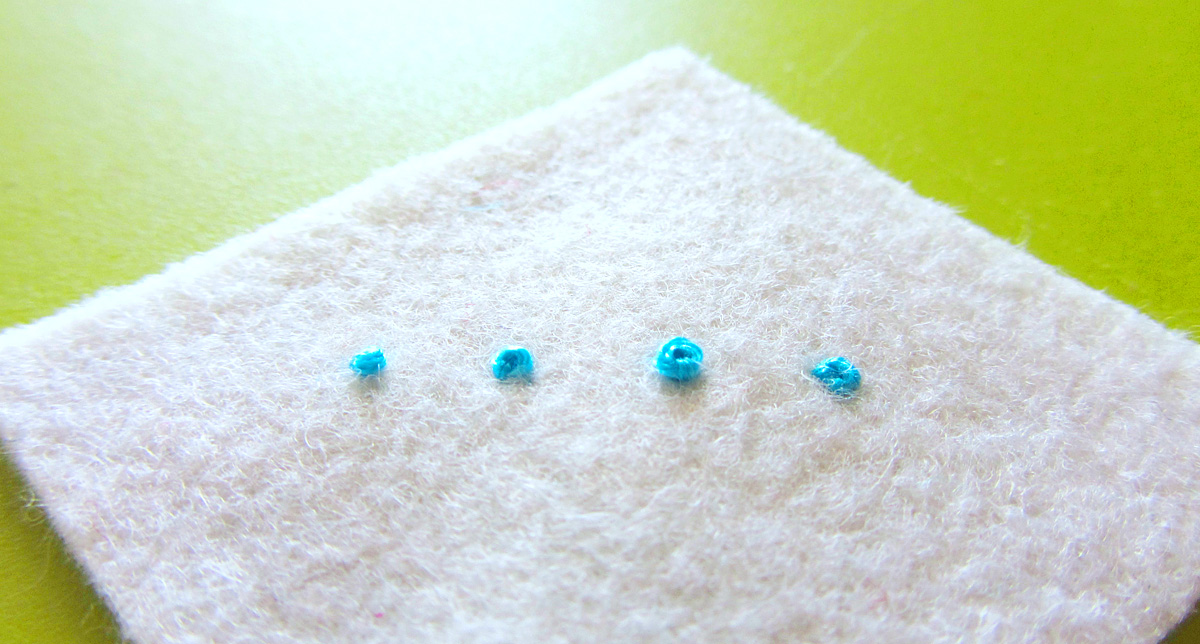
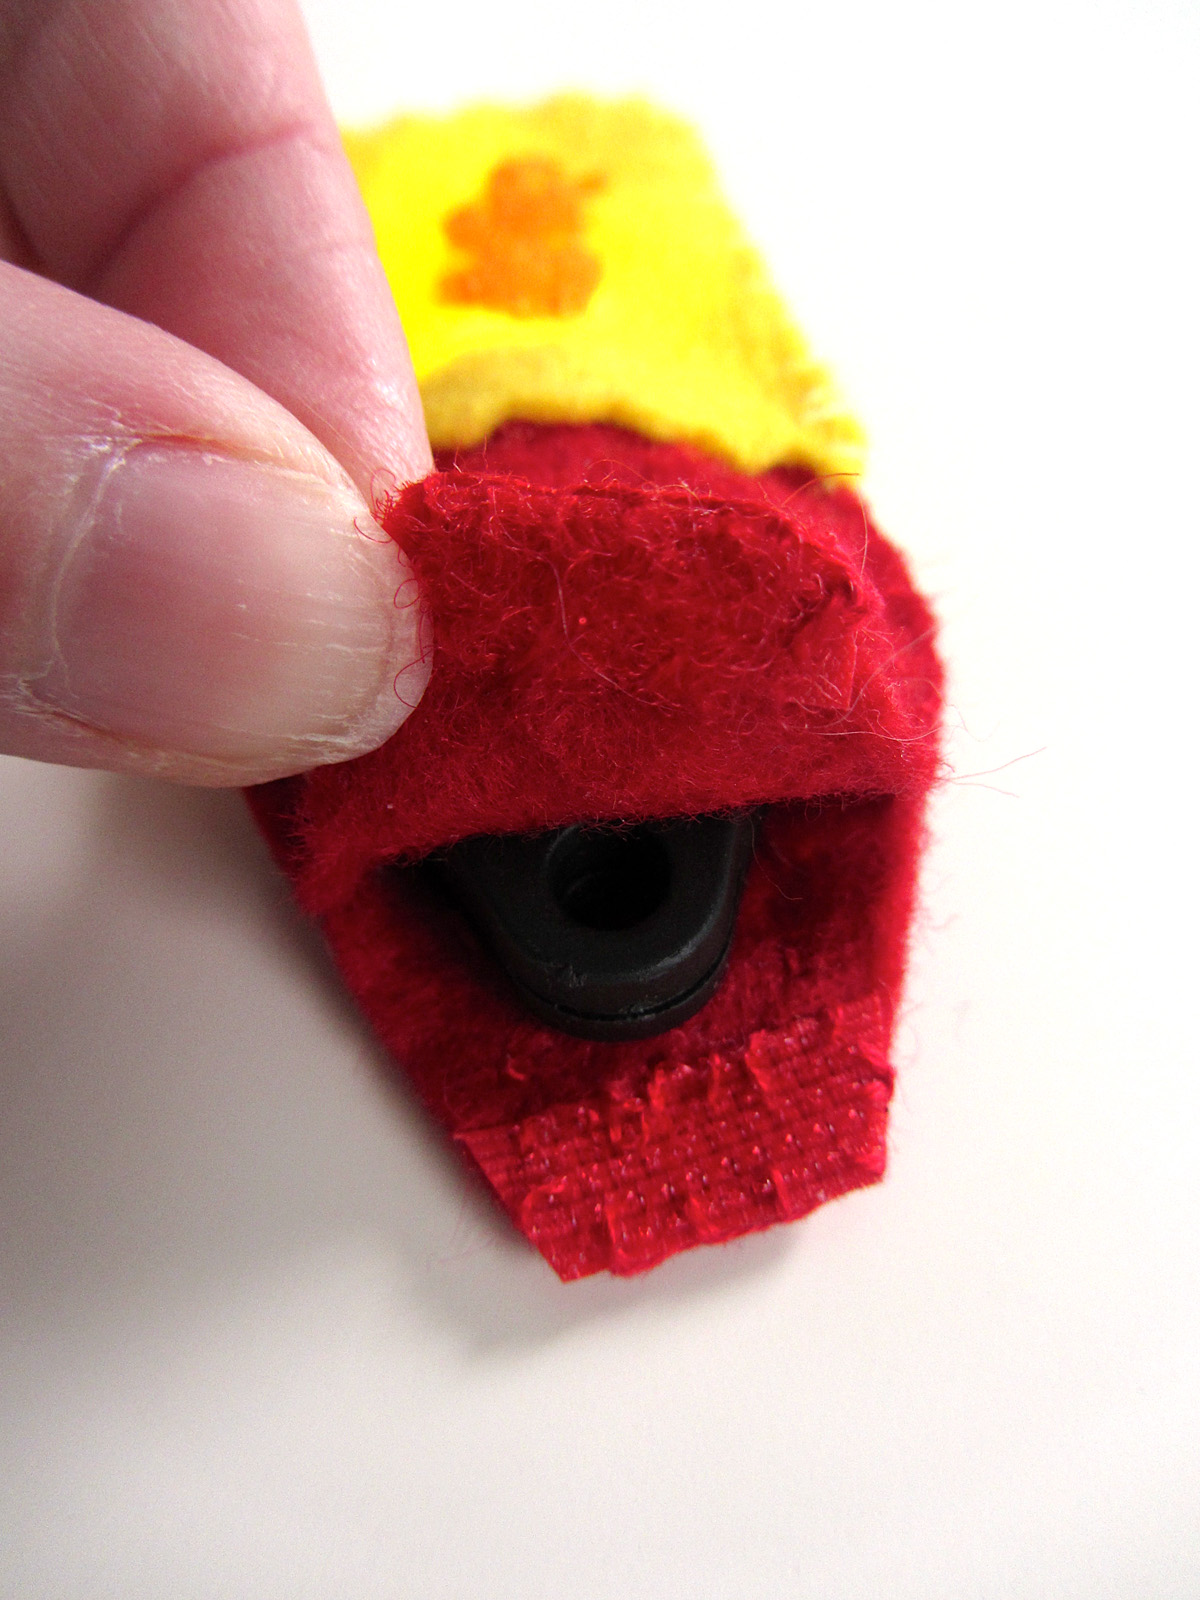
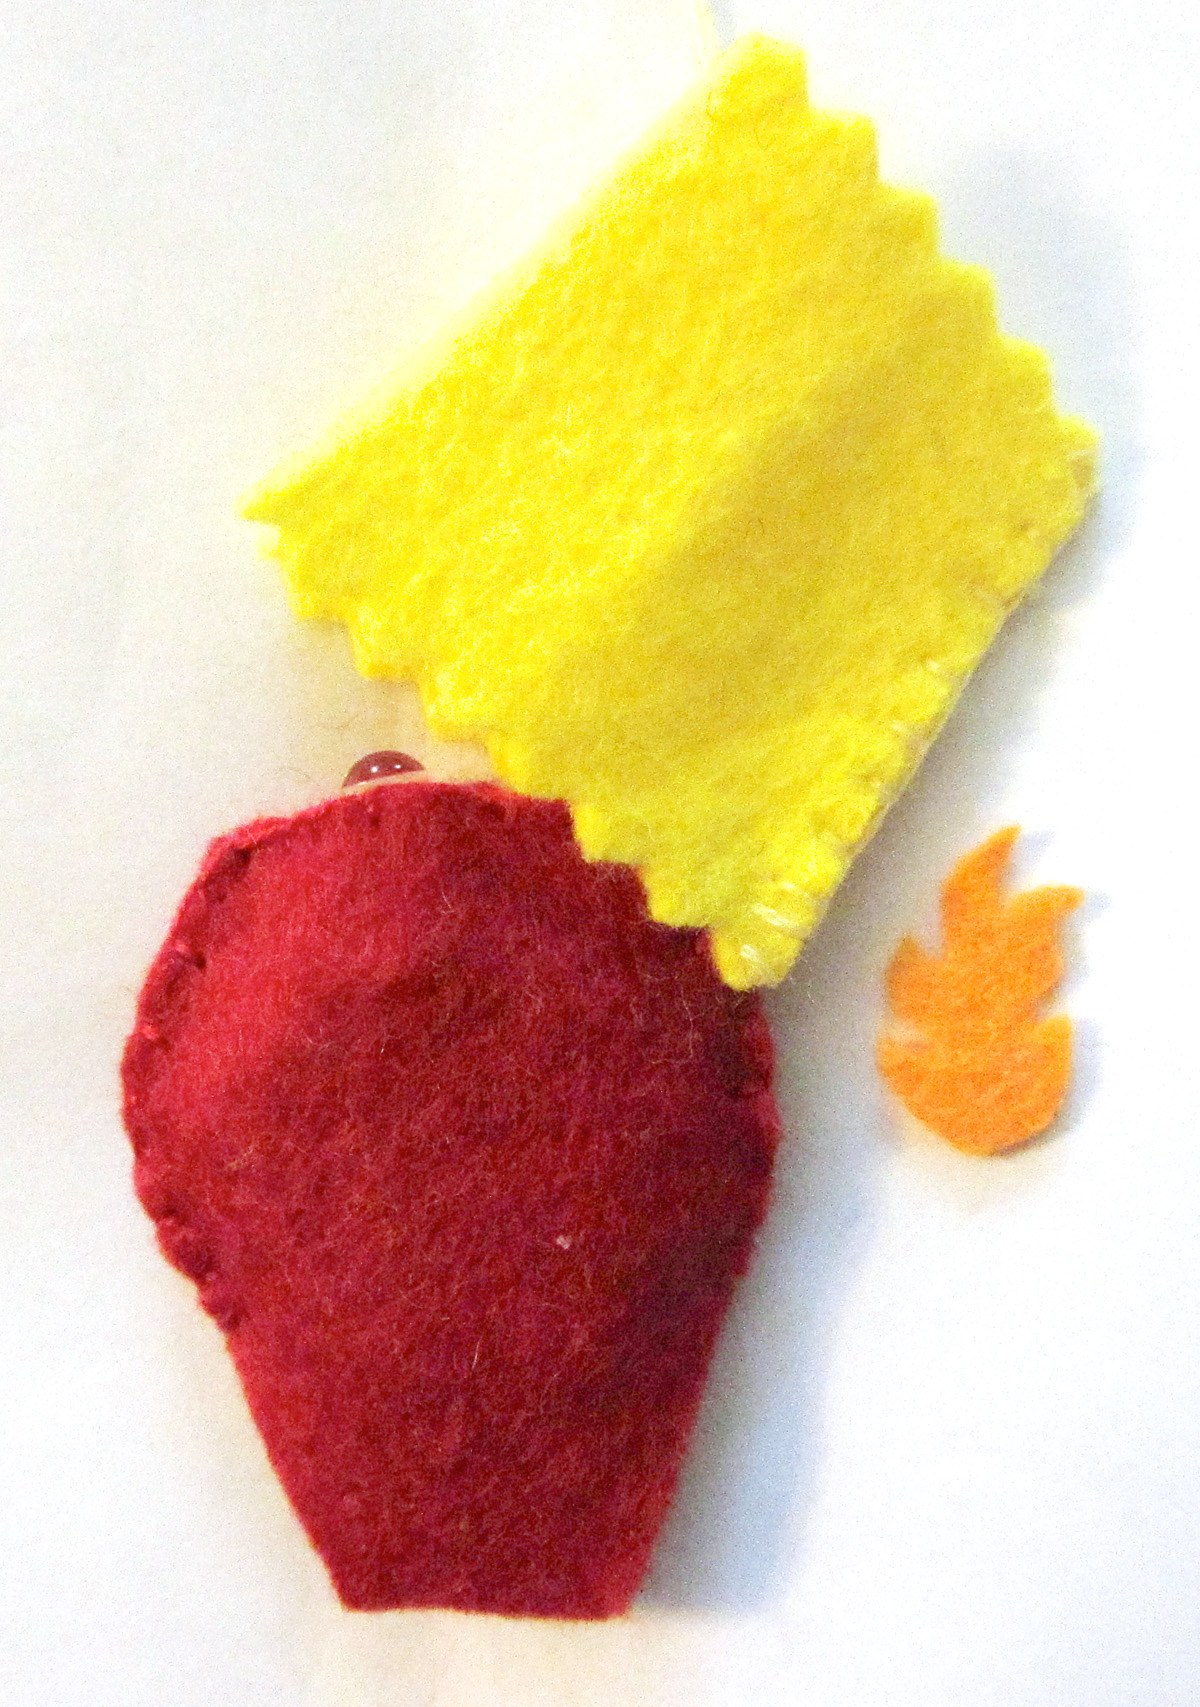
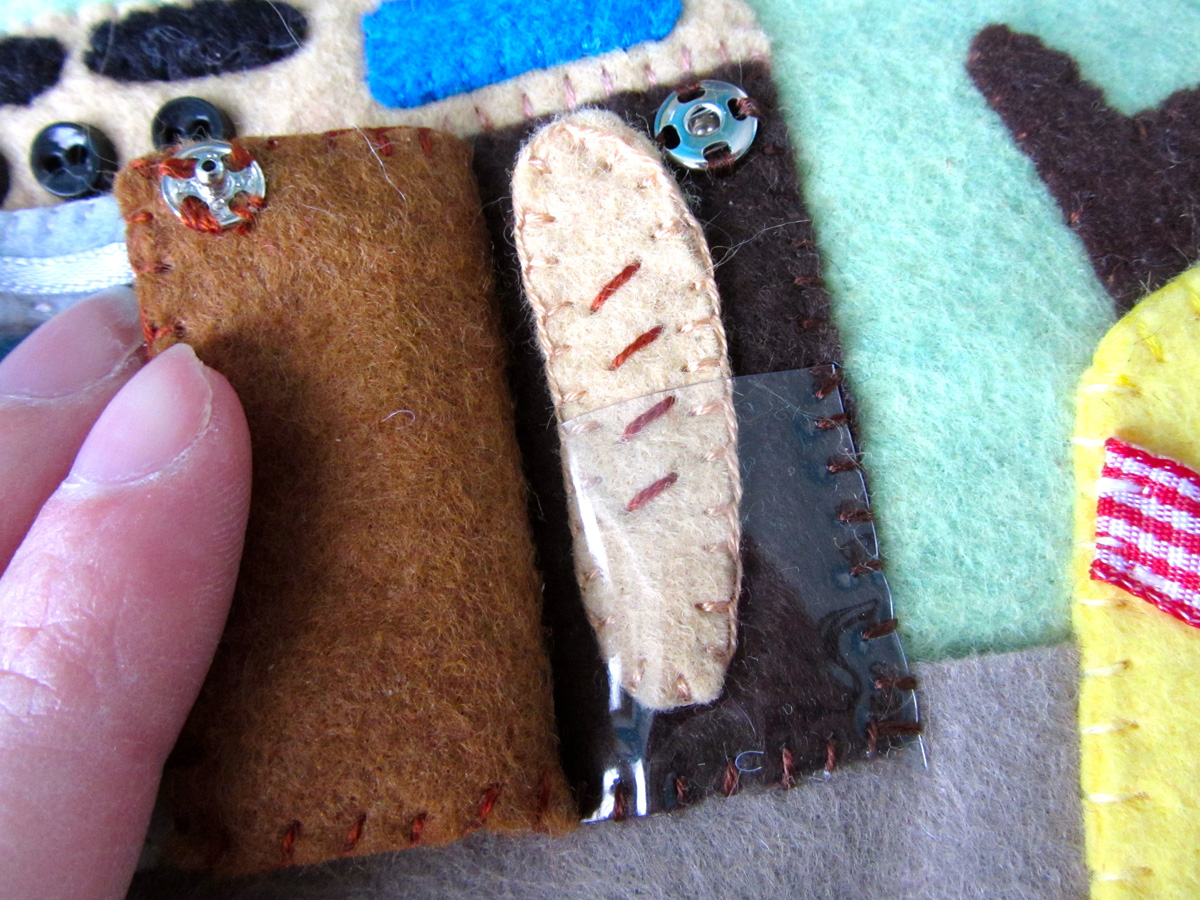
Cutie Marks: I cut the entire shape of the rainbow bolt out of yellow as my base ,extending it under the cloud a bit. I then cut the red and blue stripes to sew on top. They are tiny! Use sharp micro-tip scissors and be patient. I had to try twice on one of them. Sew the red and blue onto the yellow (my photo shows webbing, but I ended up not using it.) Overlap the white cloud, then sew it to the pony. A curved needle may help if you’ve already sewn and stuffed her. I used a plain one and jumped around a bit when stitches were too close to maneuver to. I added blue back stitched outlines to the cloud and to make the extra swirls.

DIY Rainbow Dash Plush with Goggles  DIY Rainbow Dash Plush with Goggles

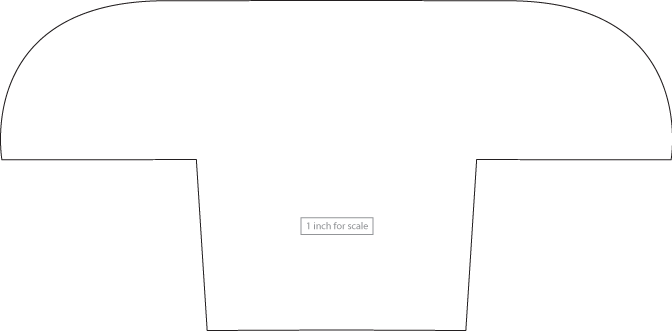
Tail: My pattern for the tail already has  1/4″ seam allowance added, because I photographed it at that stage. Cut the base out of scrap felt (I used extra body felt) then layer the stripes on top to match, starting from red and working out to purple. Sew down the overlaps with matching thread.

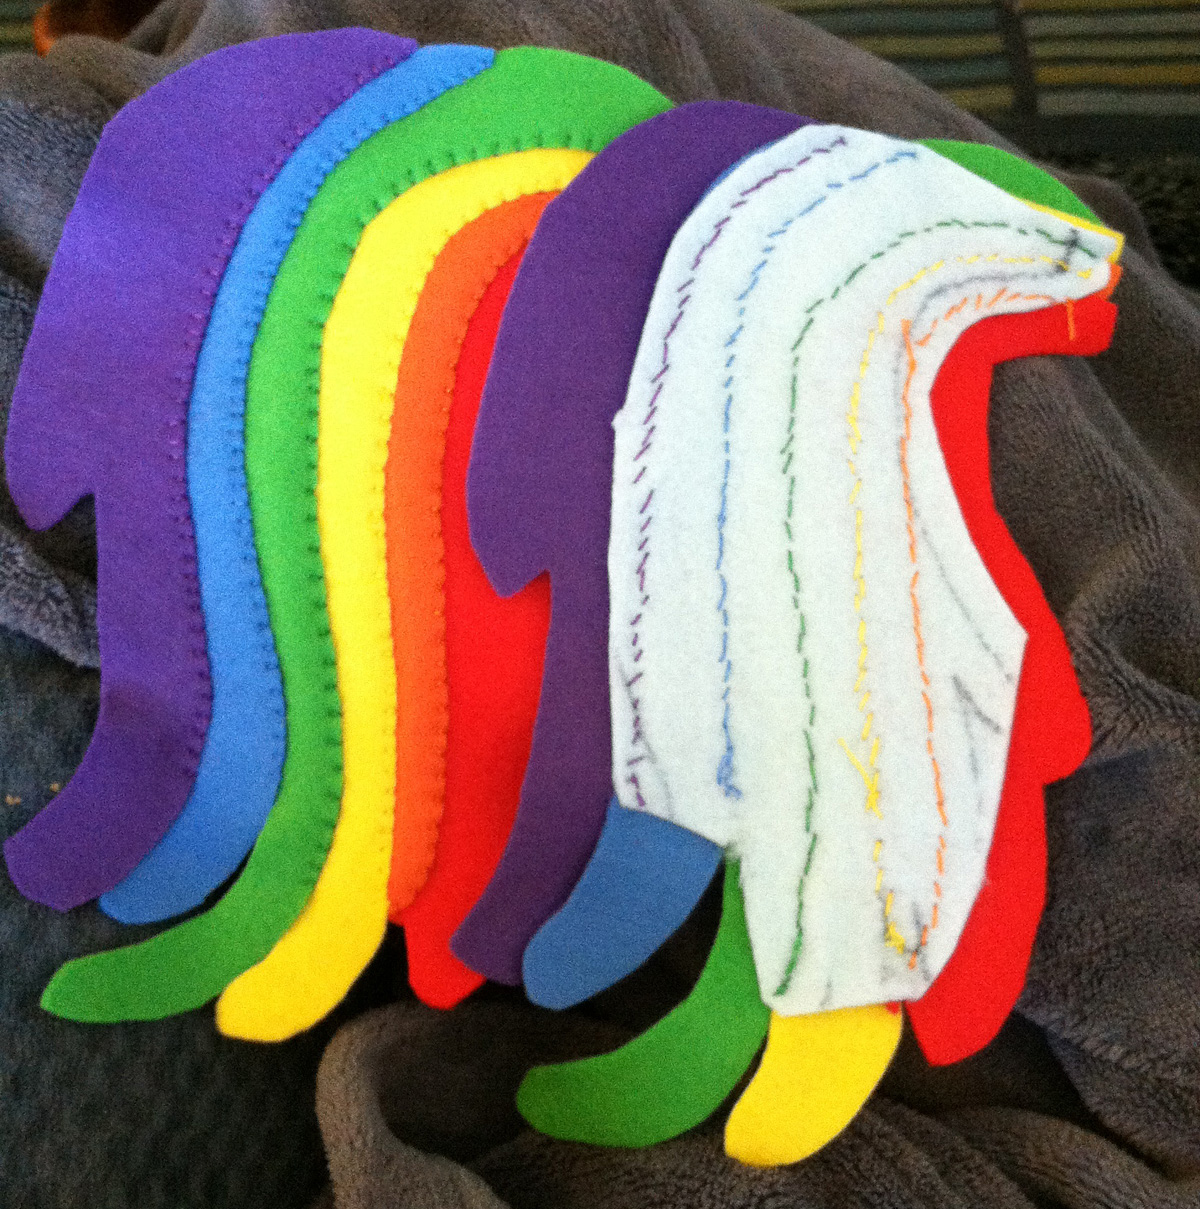
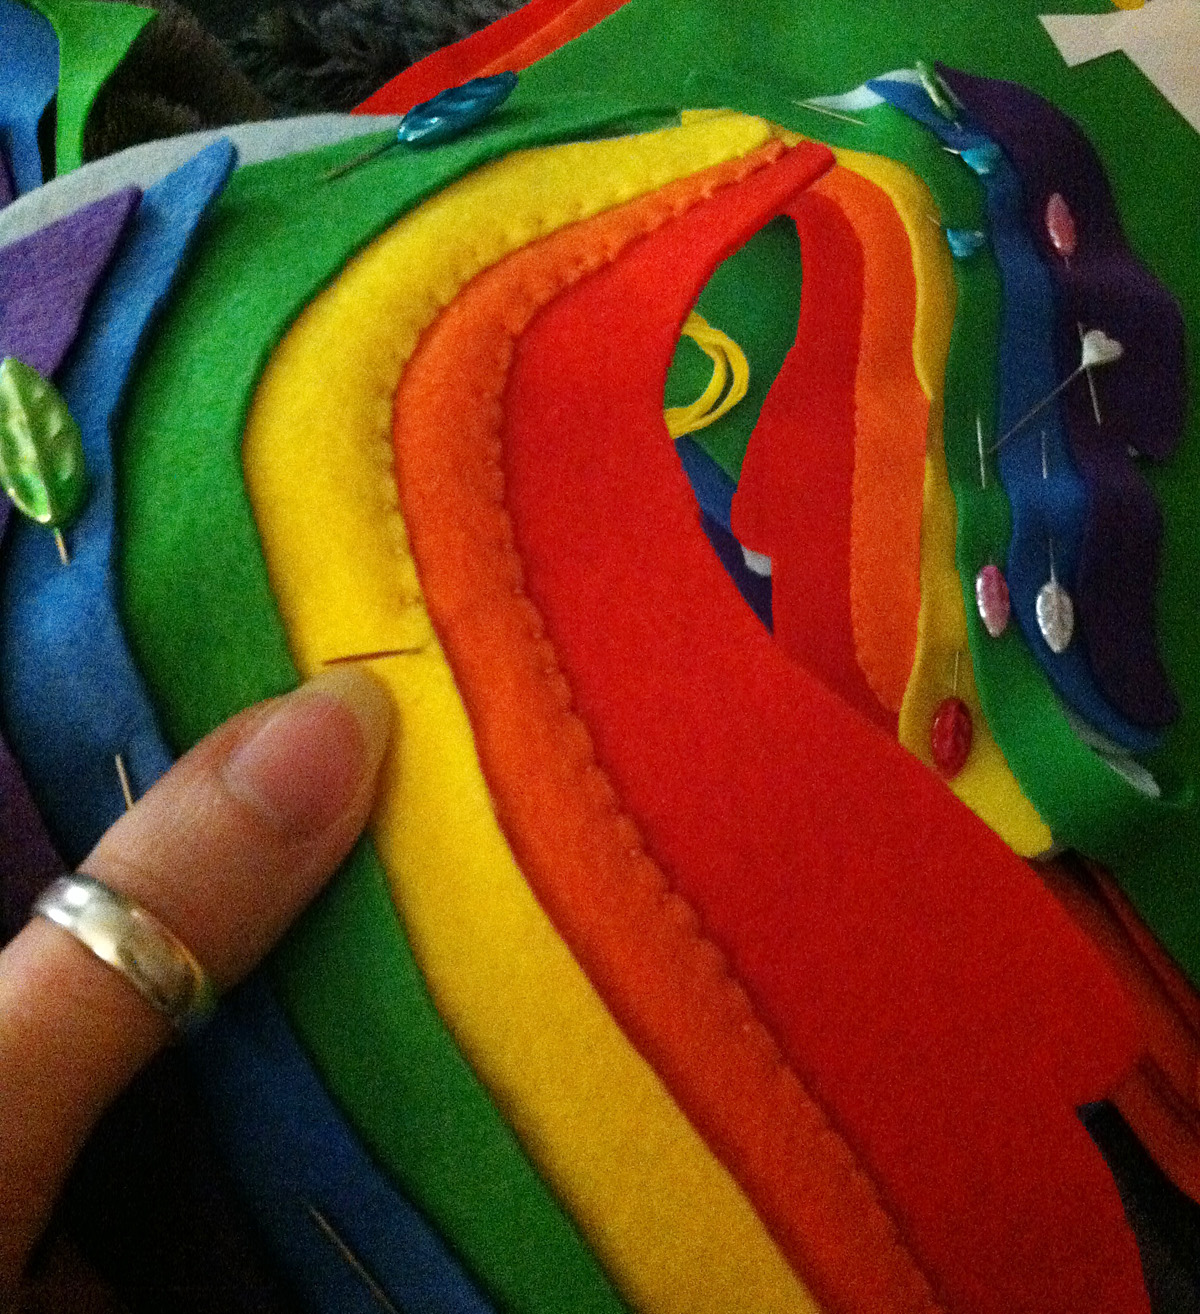
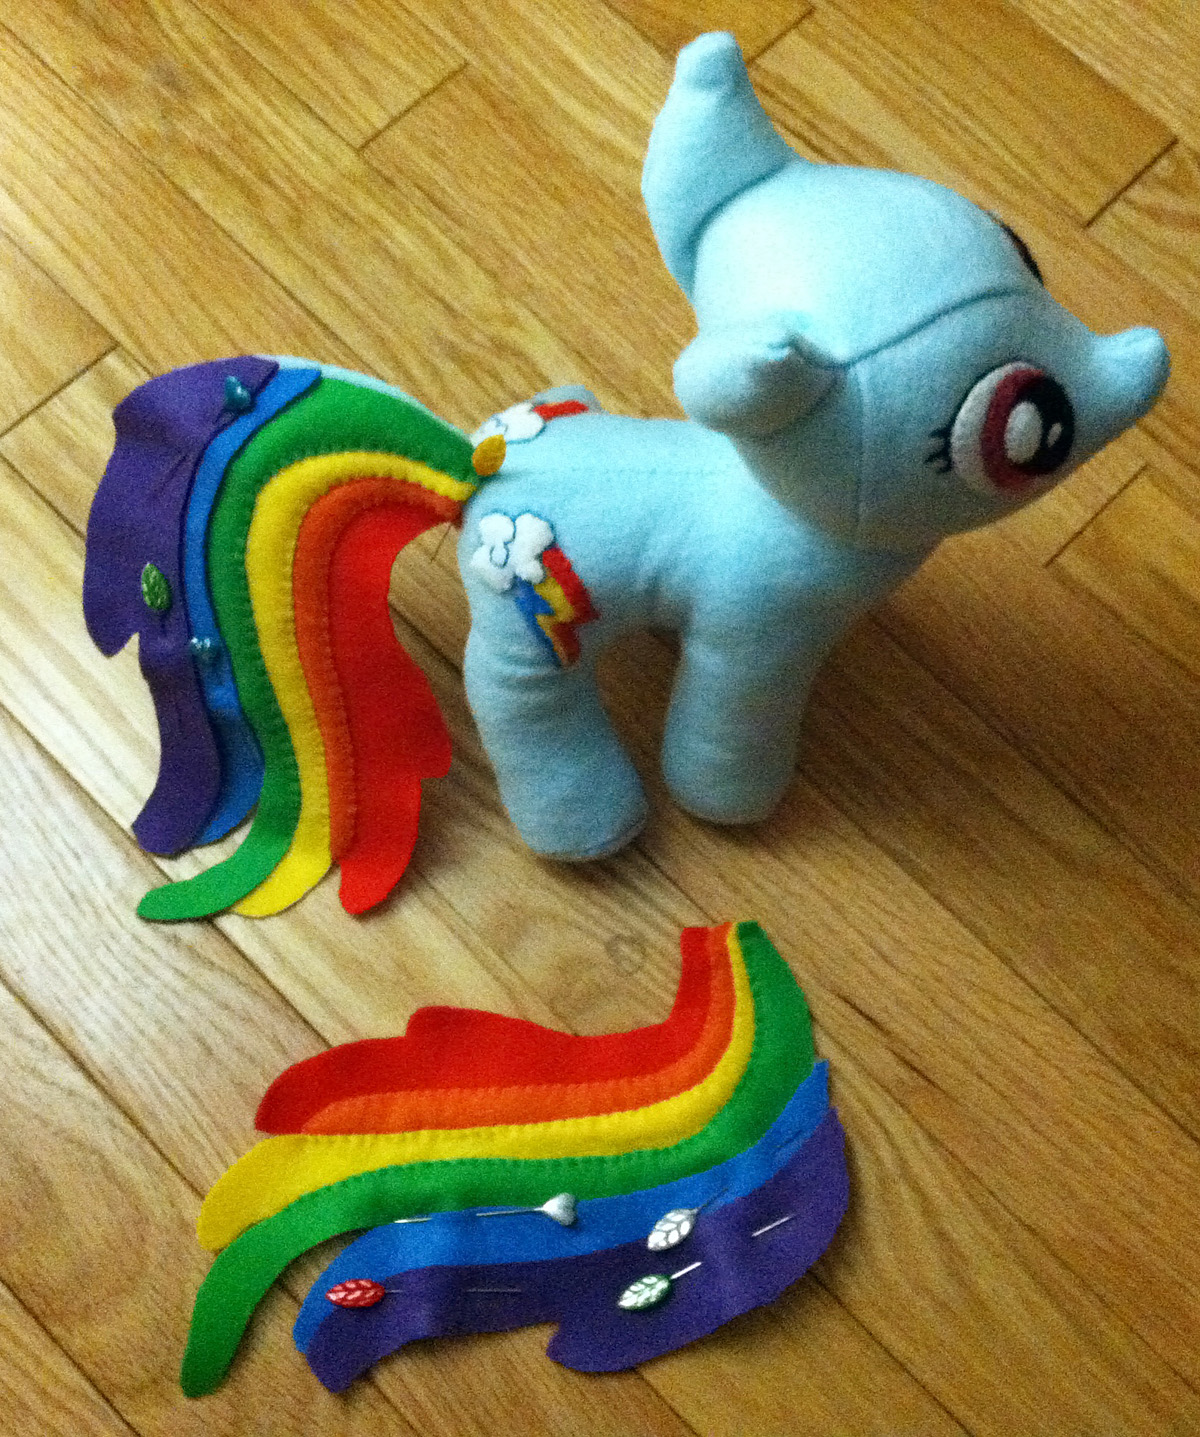
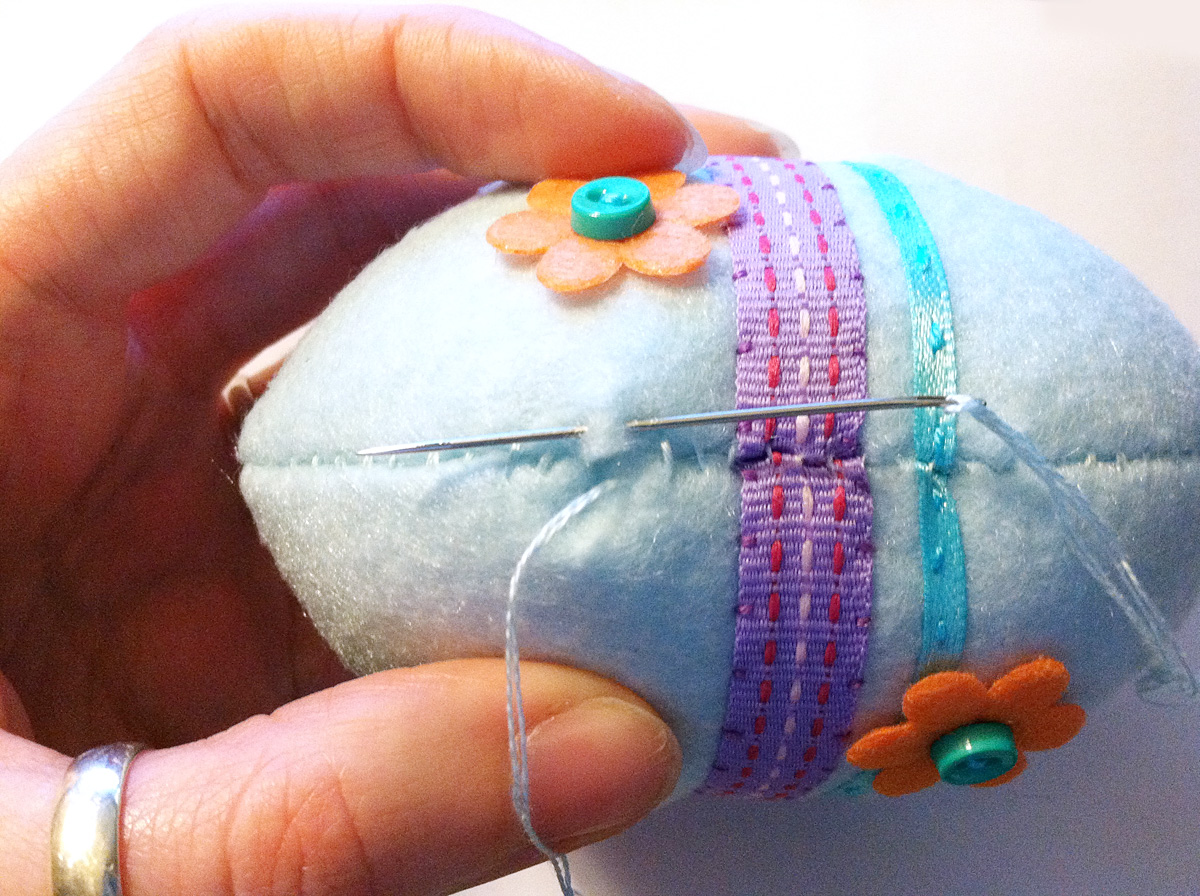
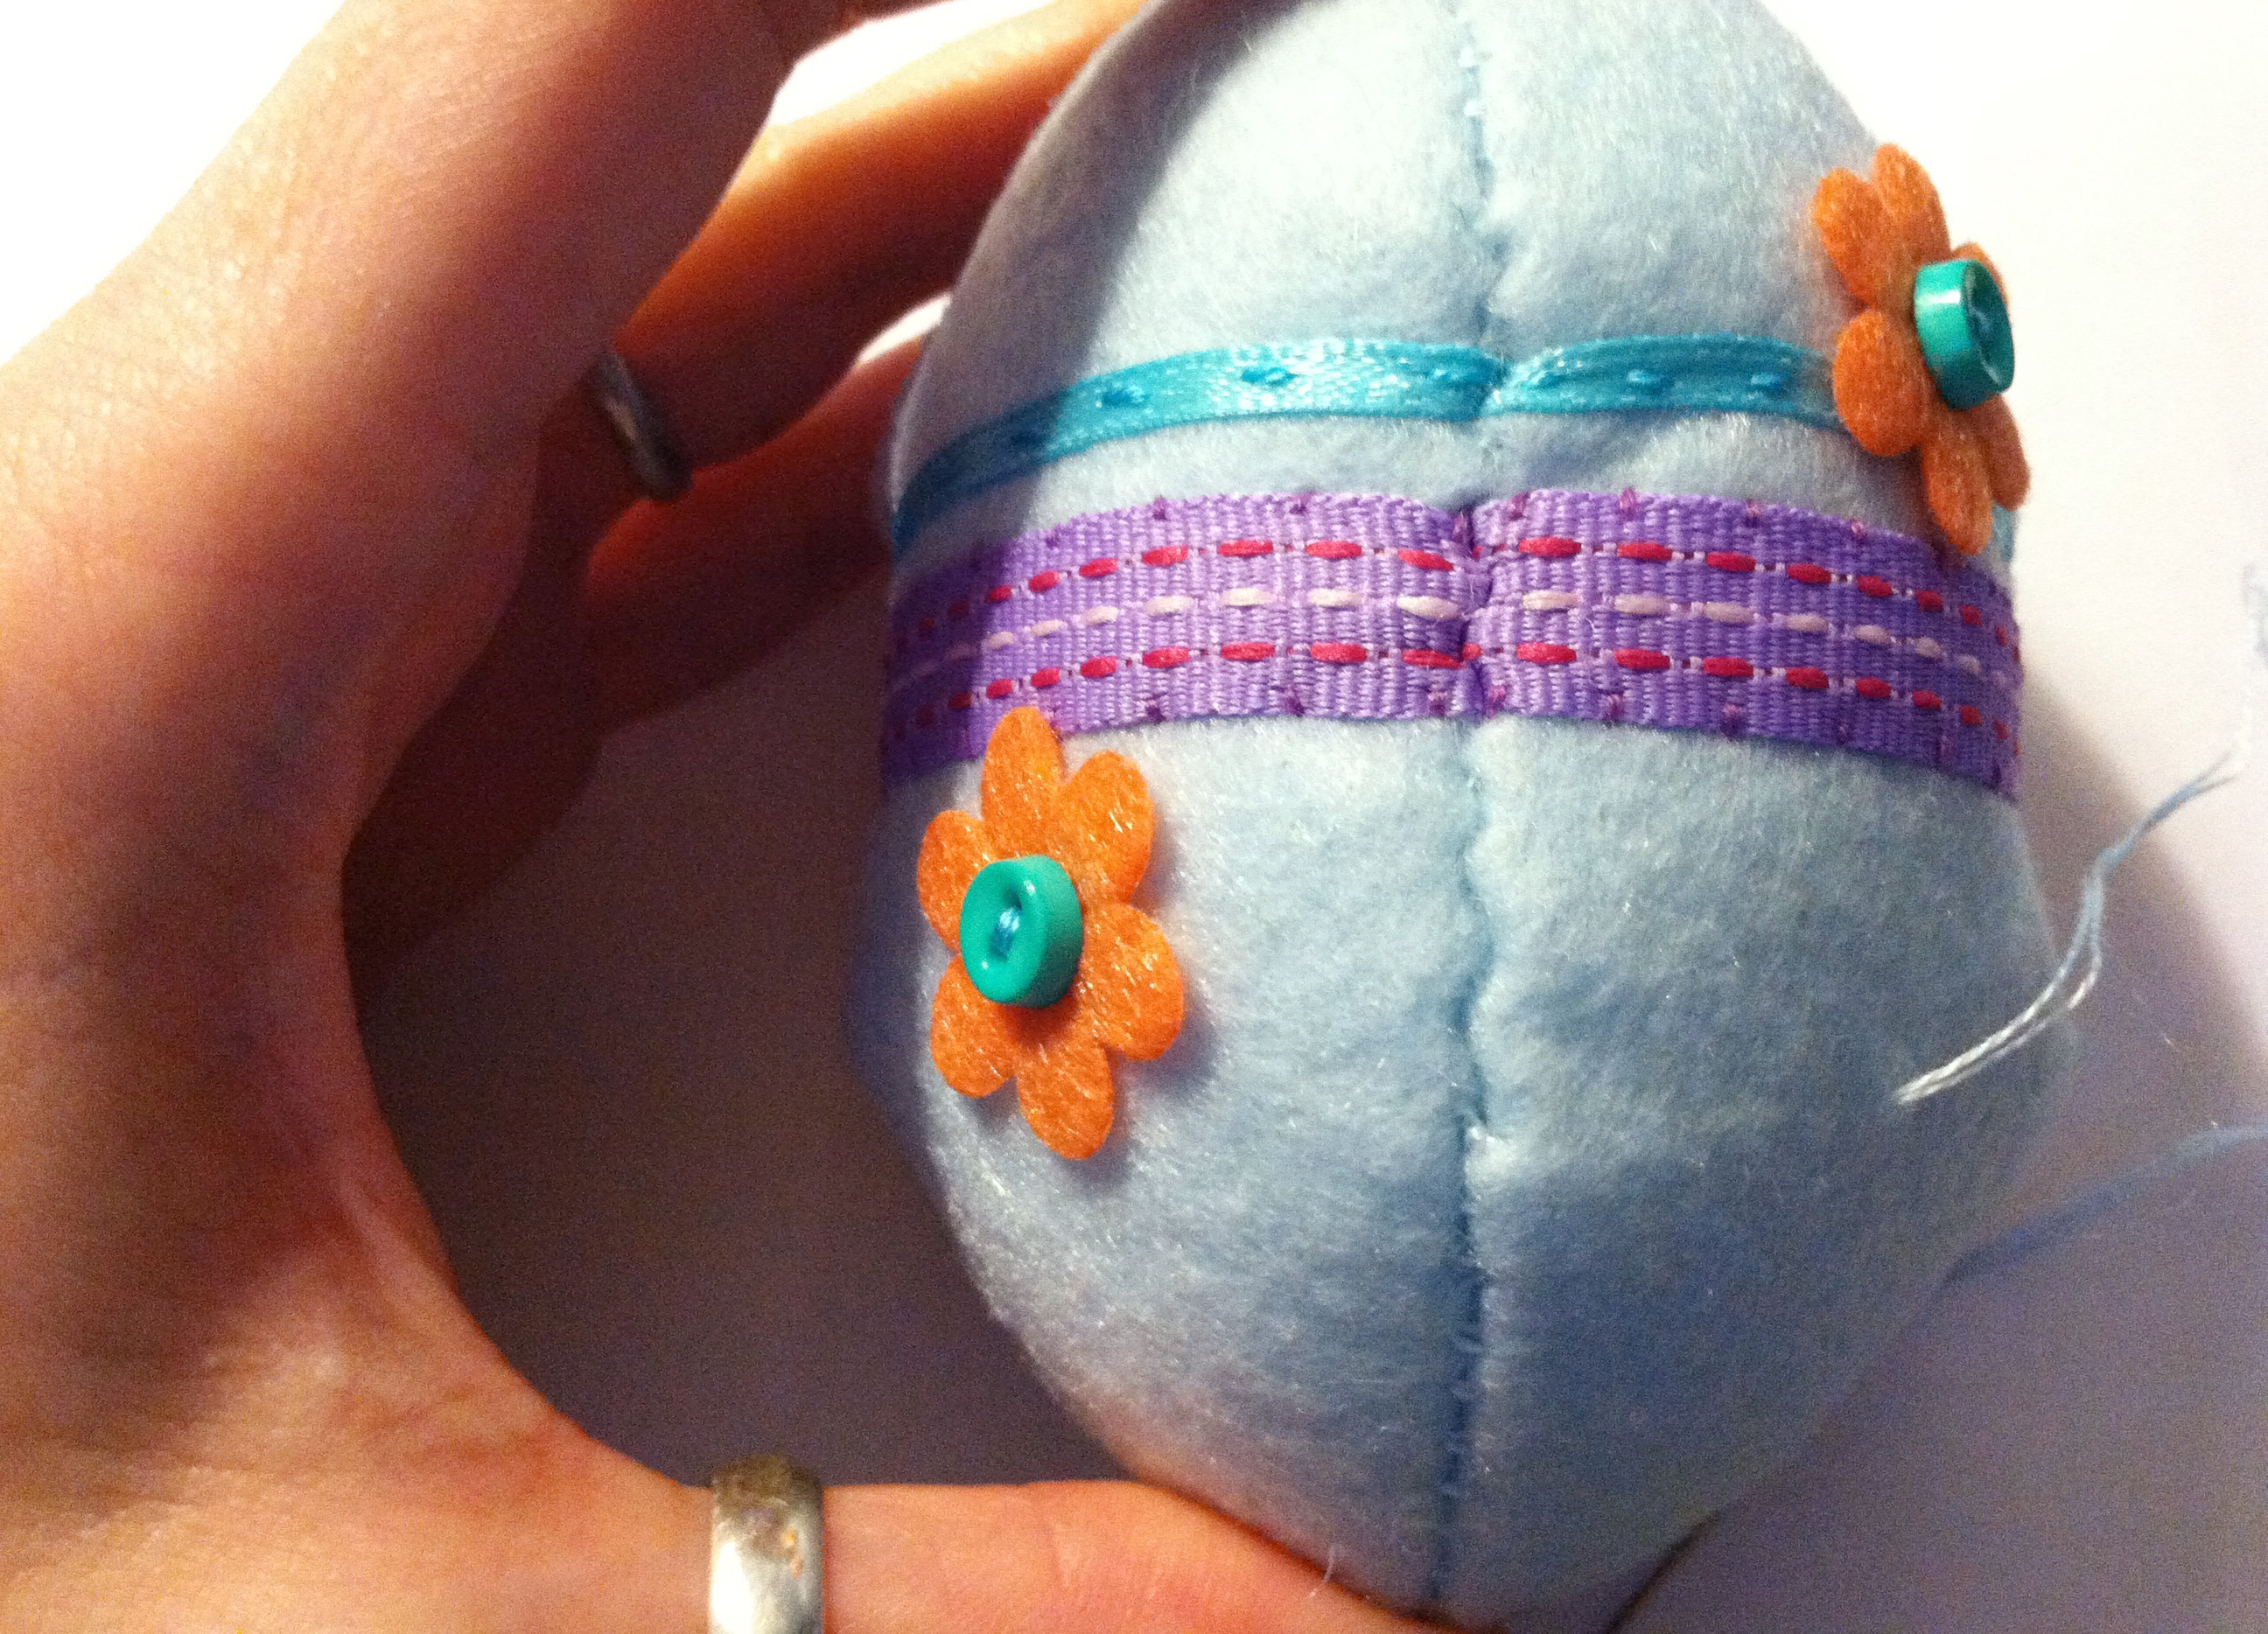
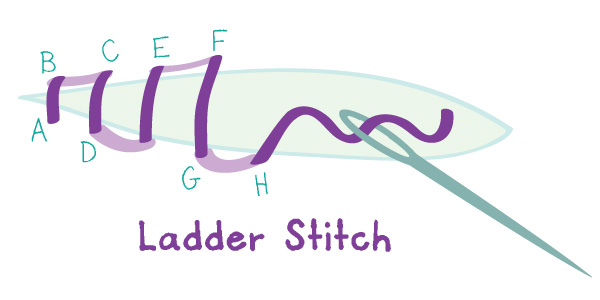
Put right sides facing and sew around the large, straight areas, leaving any small flippy hair ends open, as well as a couple inches at the base of the tail. urn it right side out and sew the little flippy end bit by hand with a ladder stitch. (I talk about this in the Pinkie Pie post – It was just too hard to turn the tiny hair ends right-side out using felt.) Stuff the tail through the base, then fold in the remaining seam allowance and ladder stitch it closed. Attach the tail the same way mentioned int he other post. I kept going back and reinforcing it. Her tail is heavy!

DIY Rainbow Dash Plush with Goggles

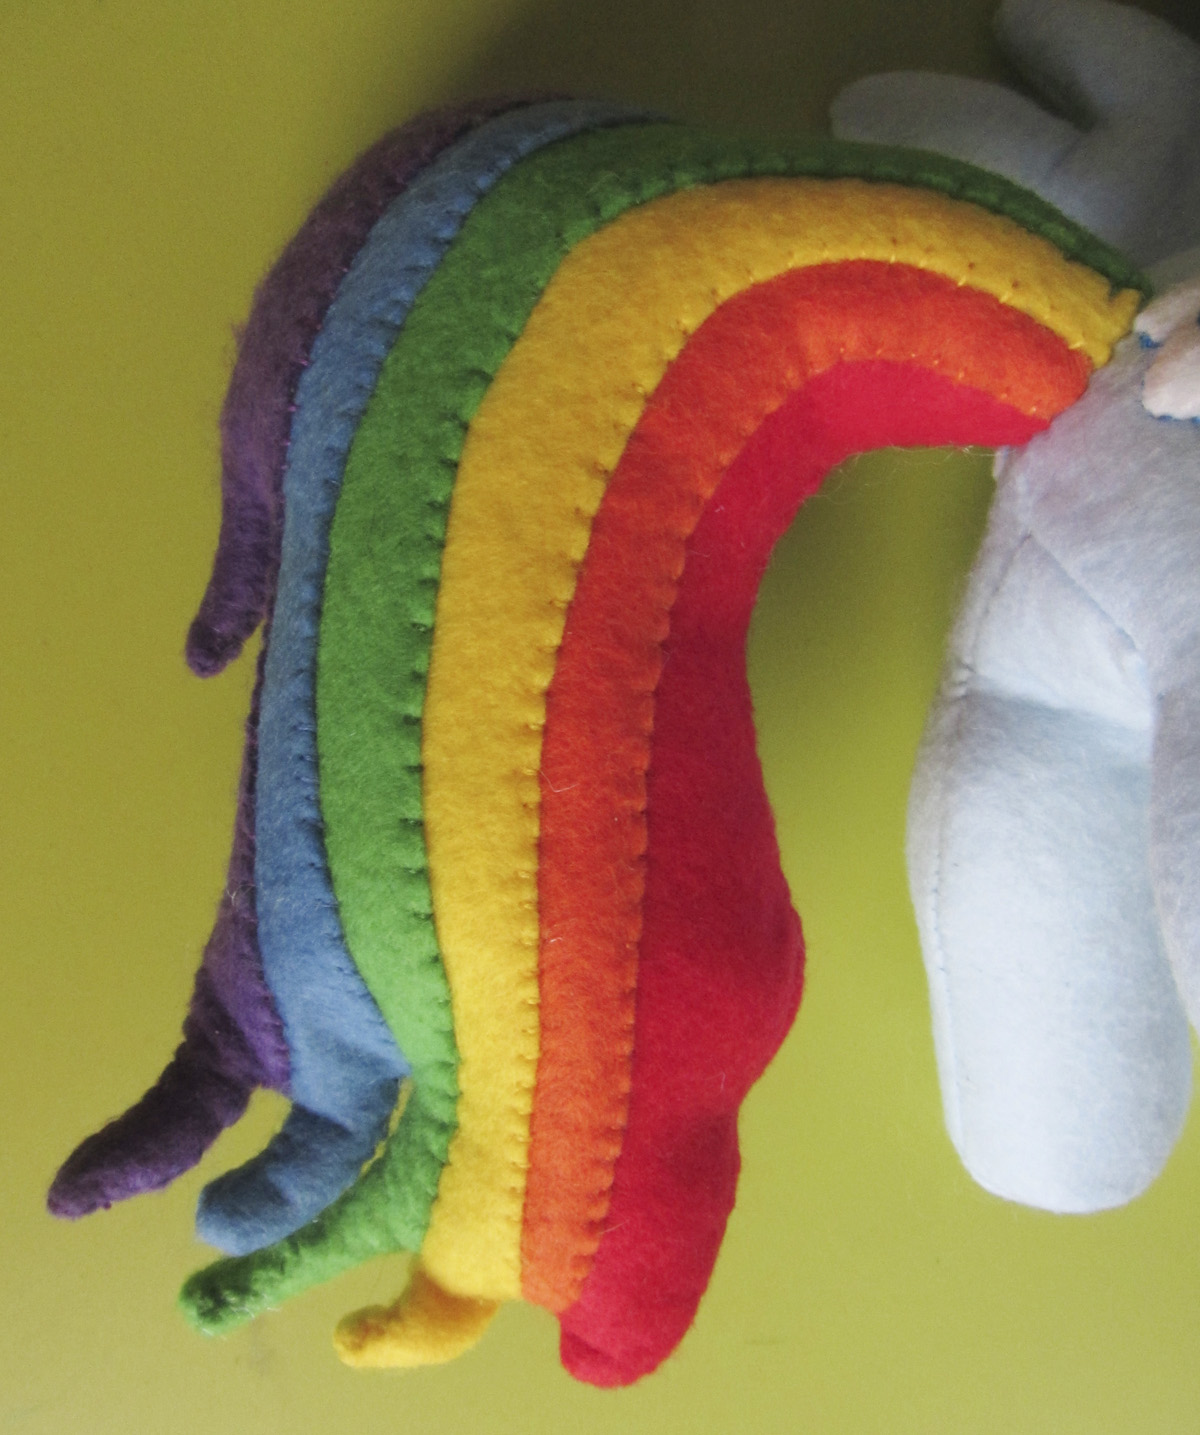
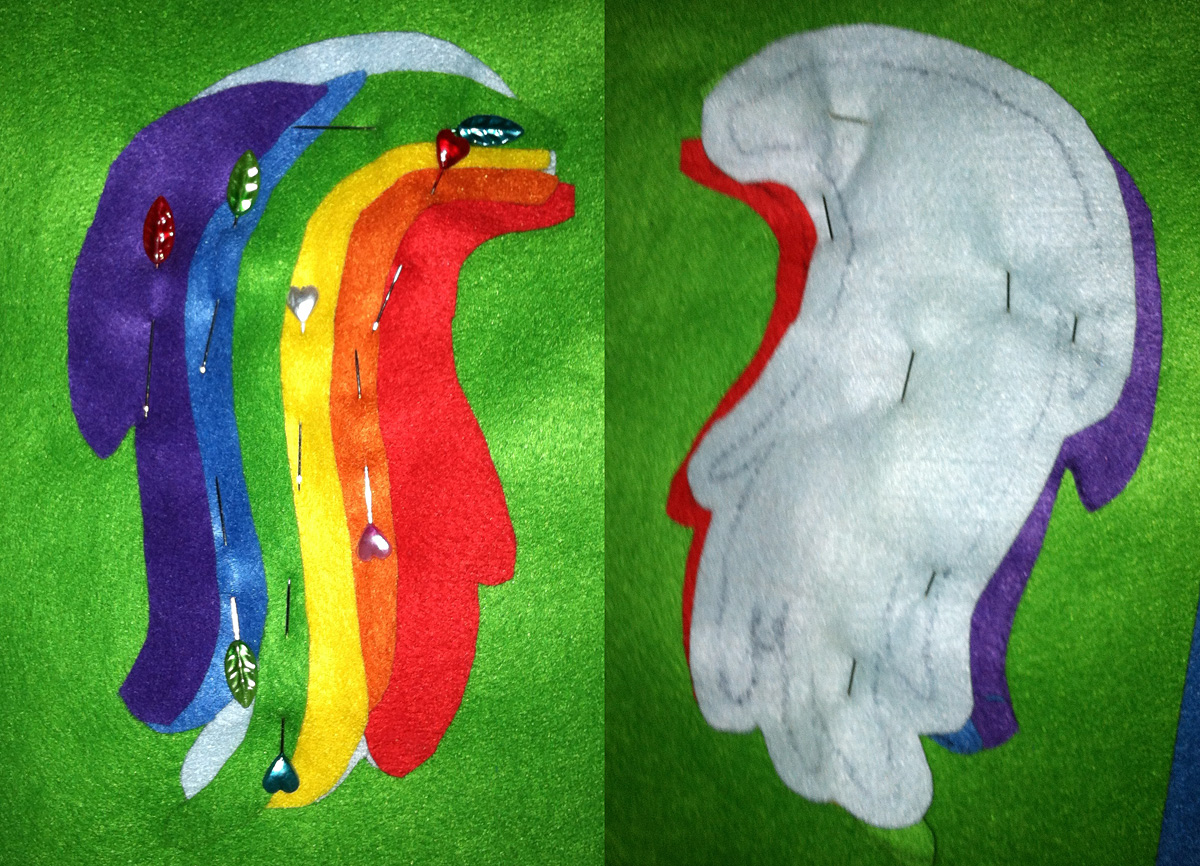
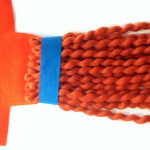
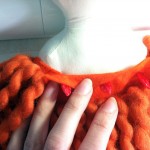
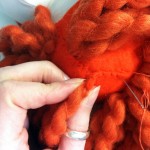
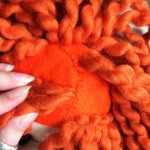
Mane: Used the same technique of overlapping the stripes to make the tail, but start with the blue stripe as the base and layer on the green and purple on the sides. Sew and lightly stuff. Sew closed and attach to her neck so it can curl around to her left side.

DIY Rainbow Dash Plush with Goggles

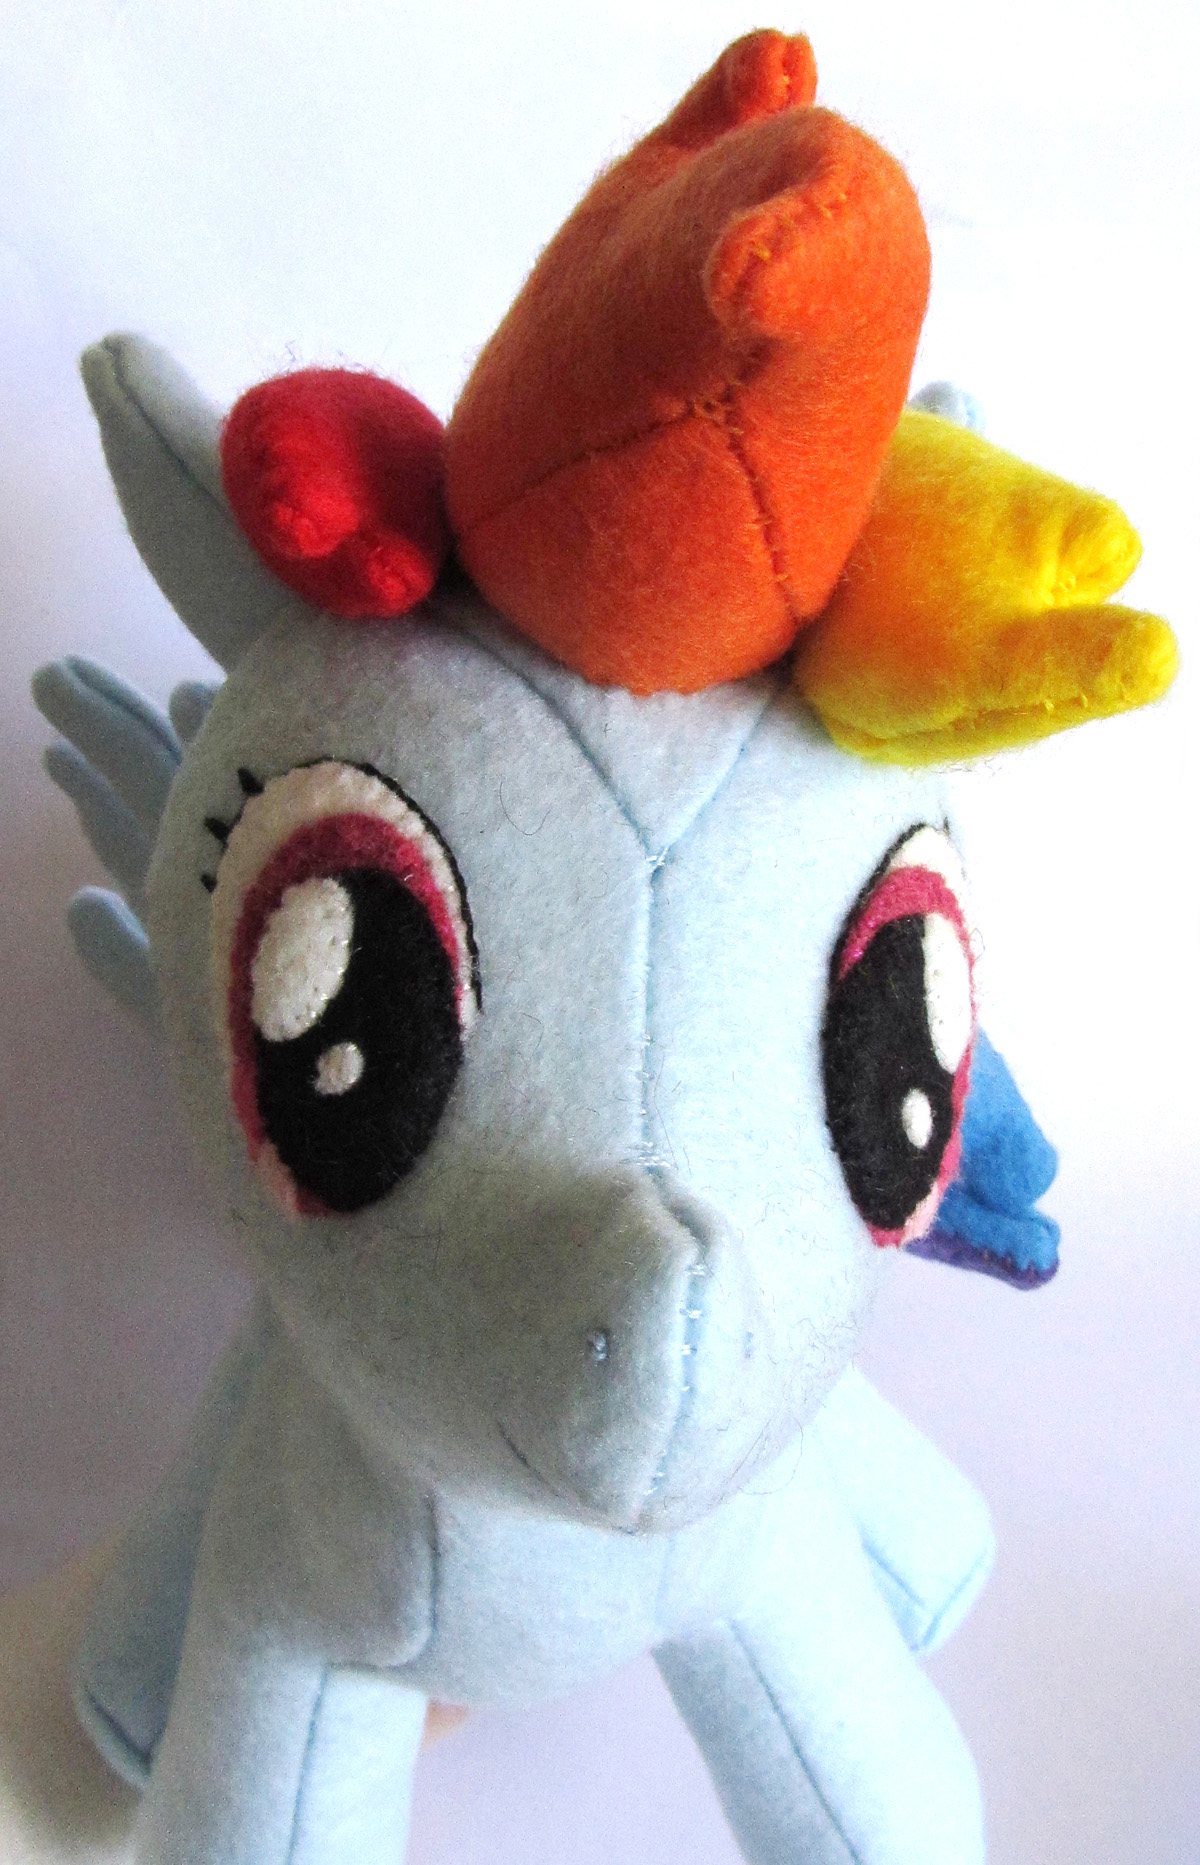
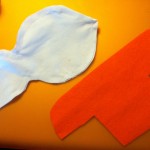
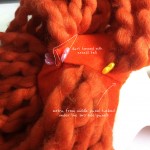
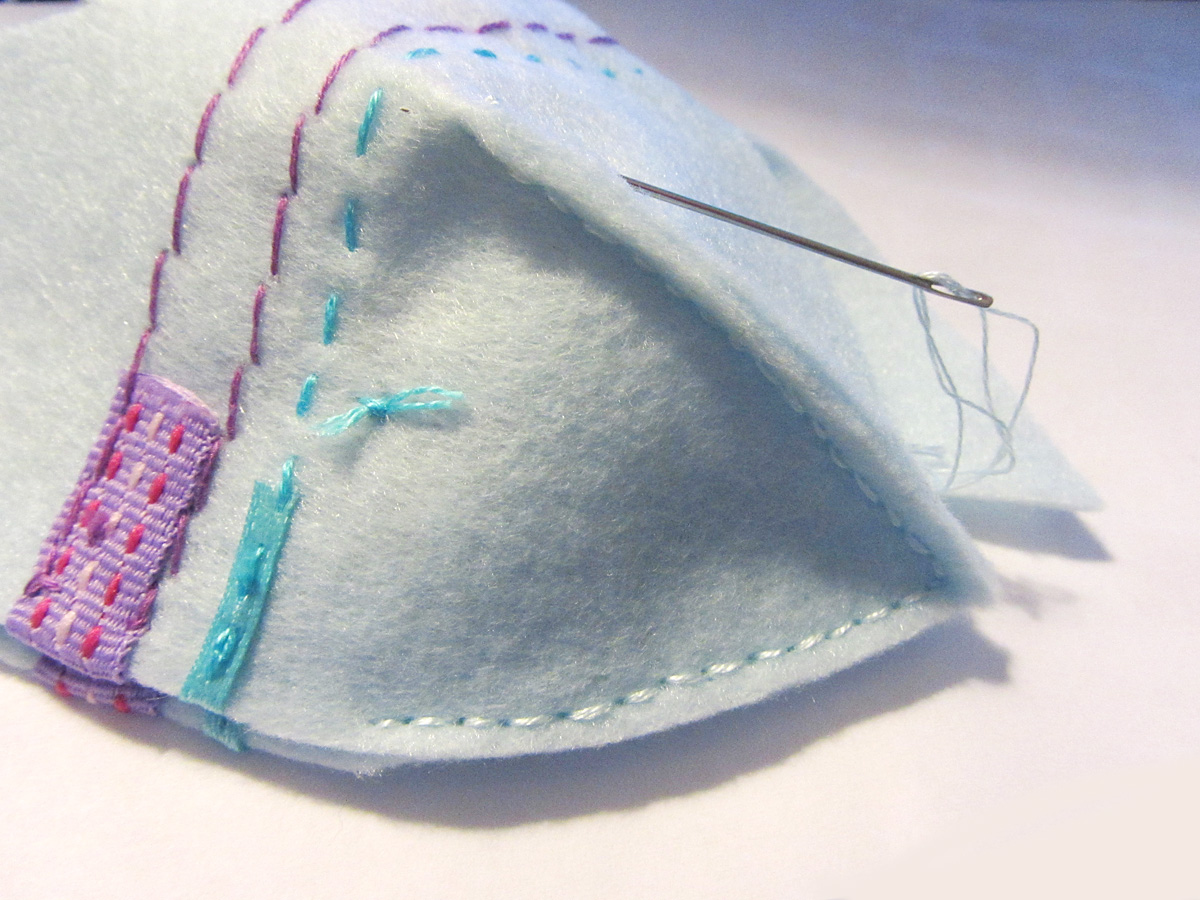
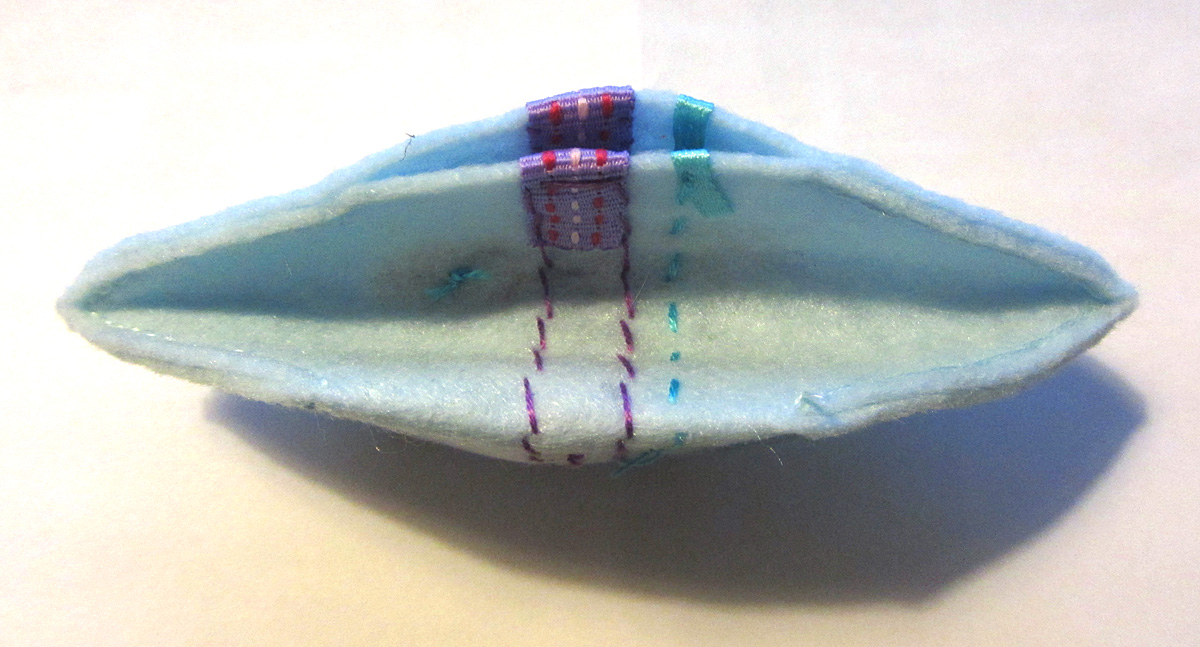
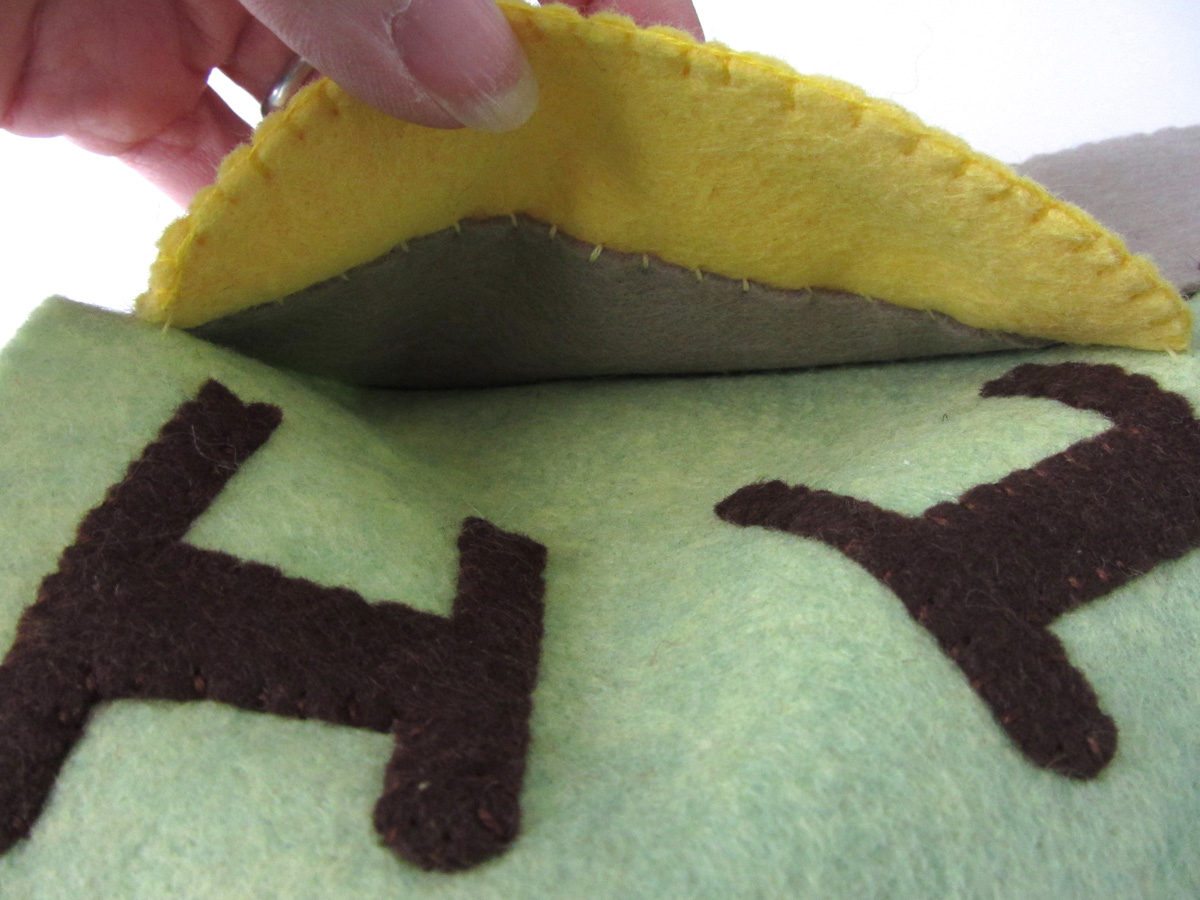
Bangs/Fringe: For each segment, sew the two main pieces together along the top and front, leaving the bottom and end open (see dots). Open like the triangular roof of a tent and sew the base to it, leaving the end open for stuffing. (See the letters on the pattern and the photos for help understanding where things go.)

DIY Rainbow Dash Plush with Goggles

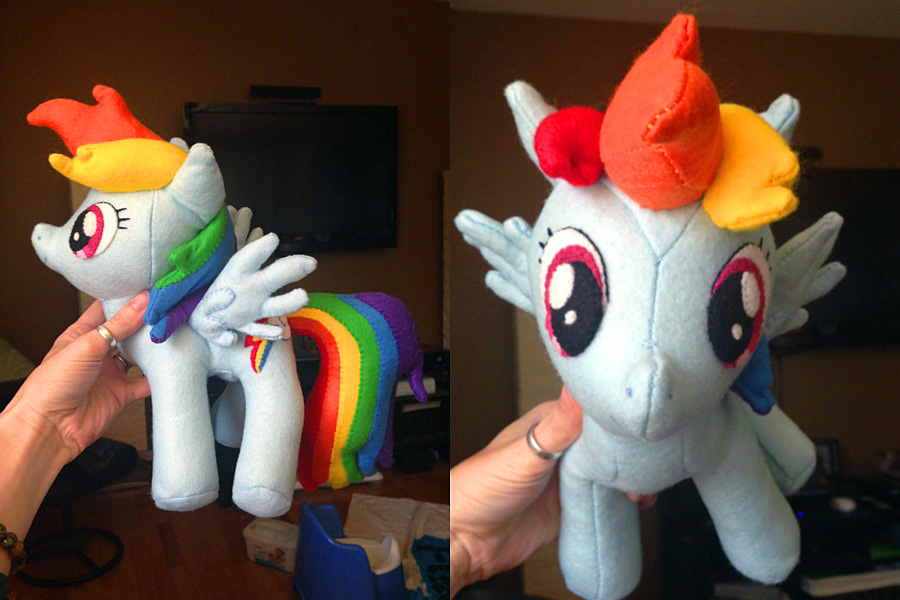
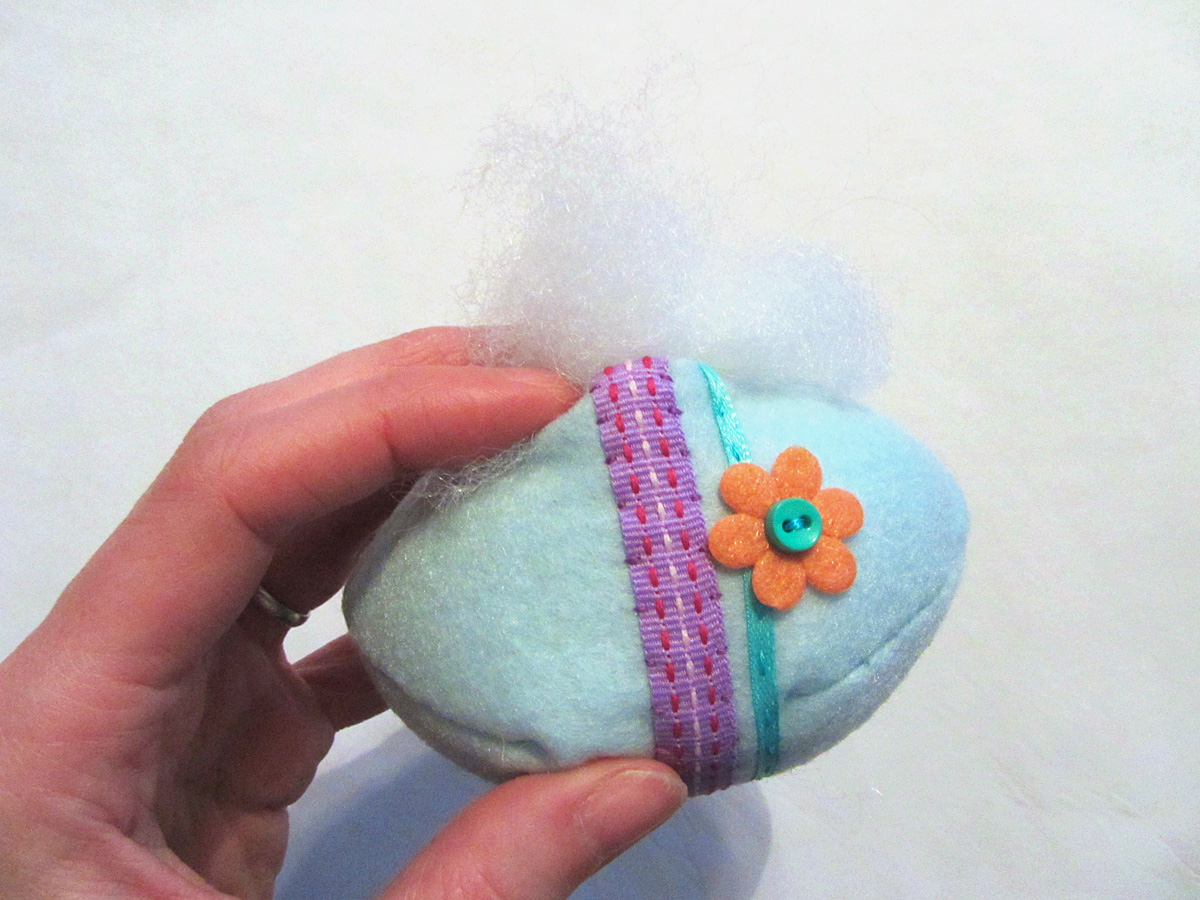
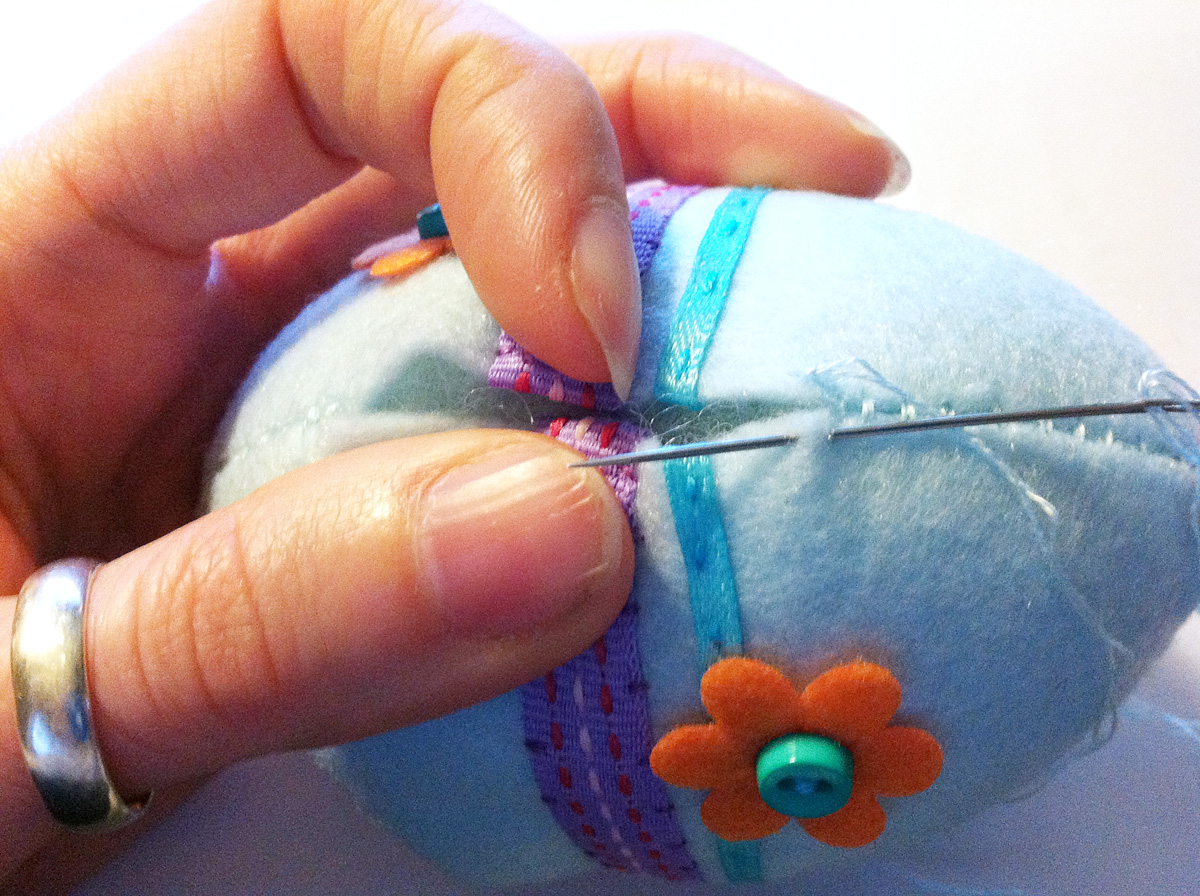
Sew the end shut with a ladder stitch and attach them to her head between the ears. Make sure the are right up against the lower mane, and squish them in a bit to fit. I sewed them to each other and to her head near the base.

DIY Rainbow Dash Plush with Goggles  DIY Rainbow Dash Plush with Goggles

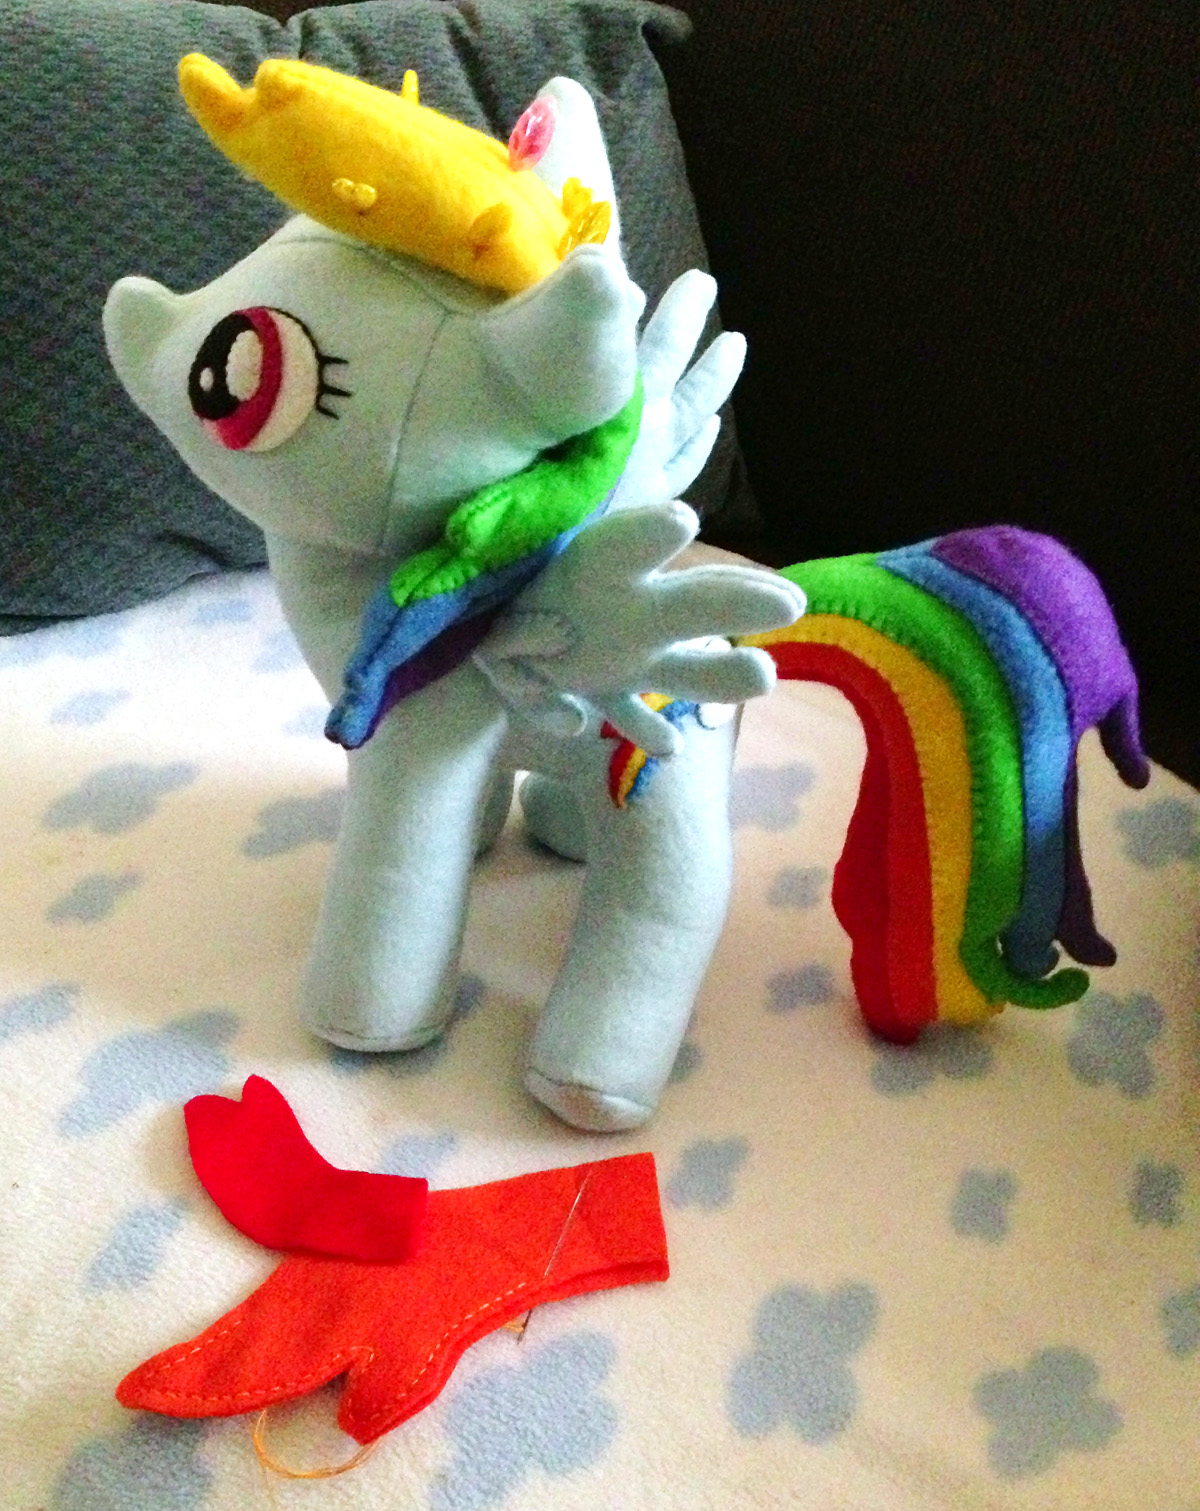
Wings: These are similar to the mane, in that they are lightly stuffed, with the feather detail appliqued on. I actually sewed all the way around each wing, minus a couple inches for an opening) and turned each feather right-side out in a very slow process involving pointy objects and long pins used to grab bits of felt and pull it up. It took longer to flip the right way out then it did to sew them, but they came out neat. Something to keep in mind if you want to sew all the way around the tail. I attached them to her body with ladder stitch.

DIY Rainbow Dash Plush with Goggles

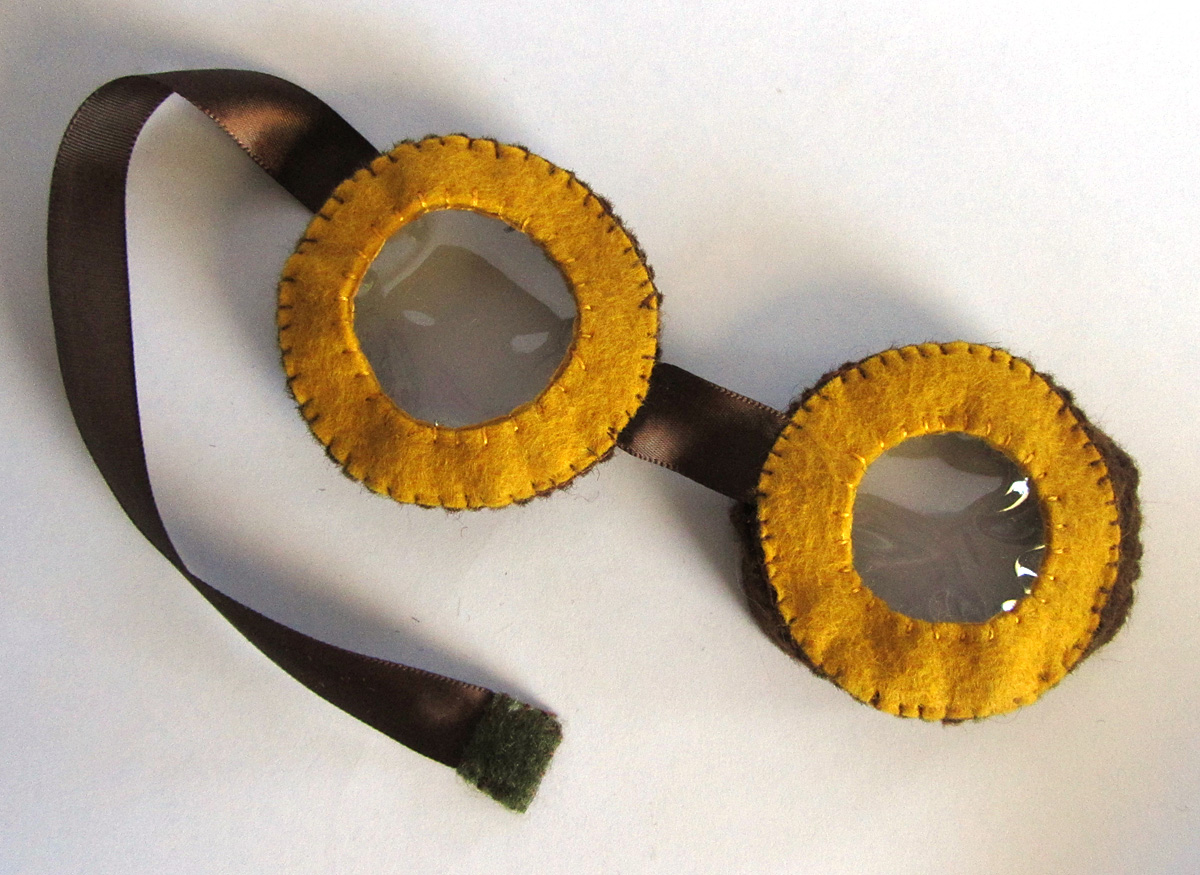
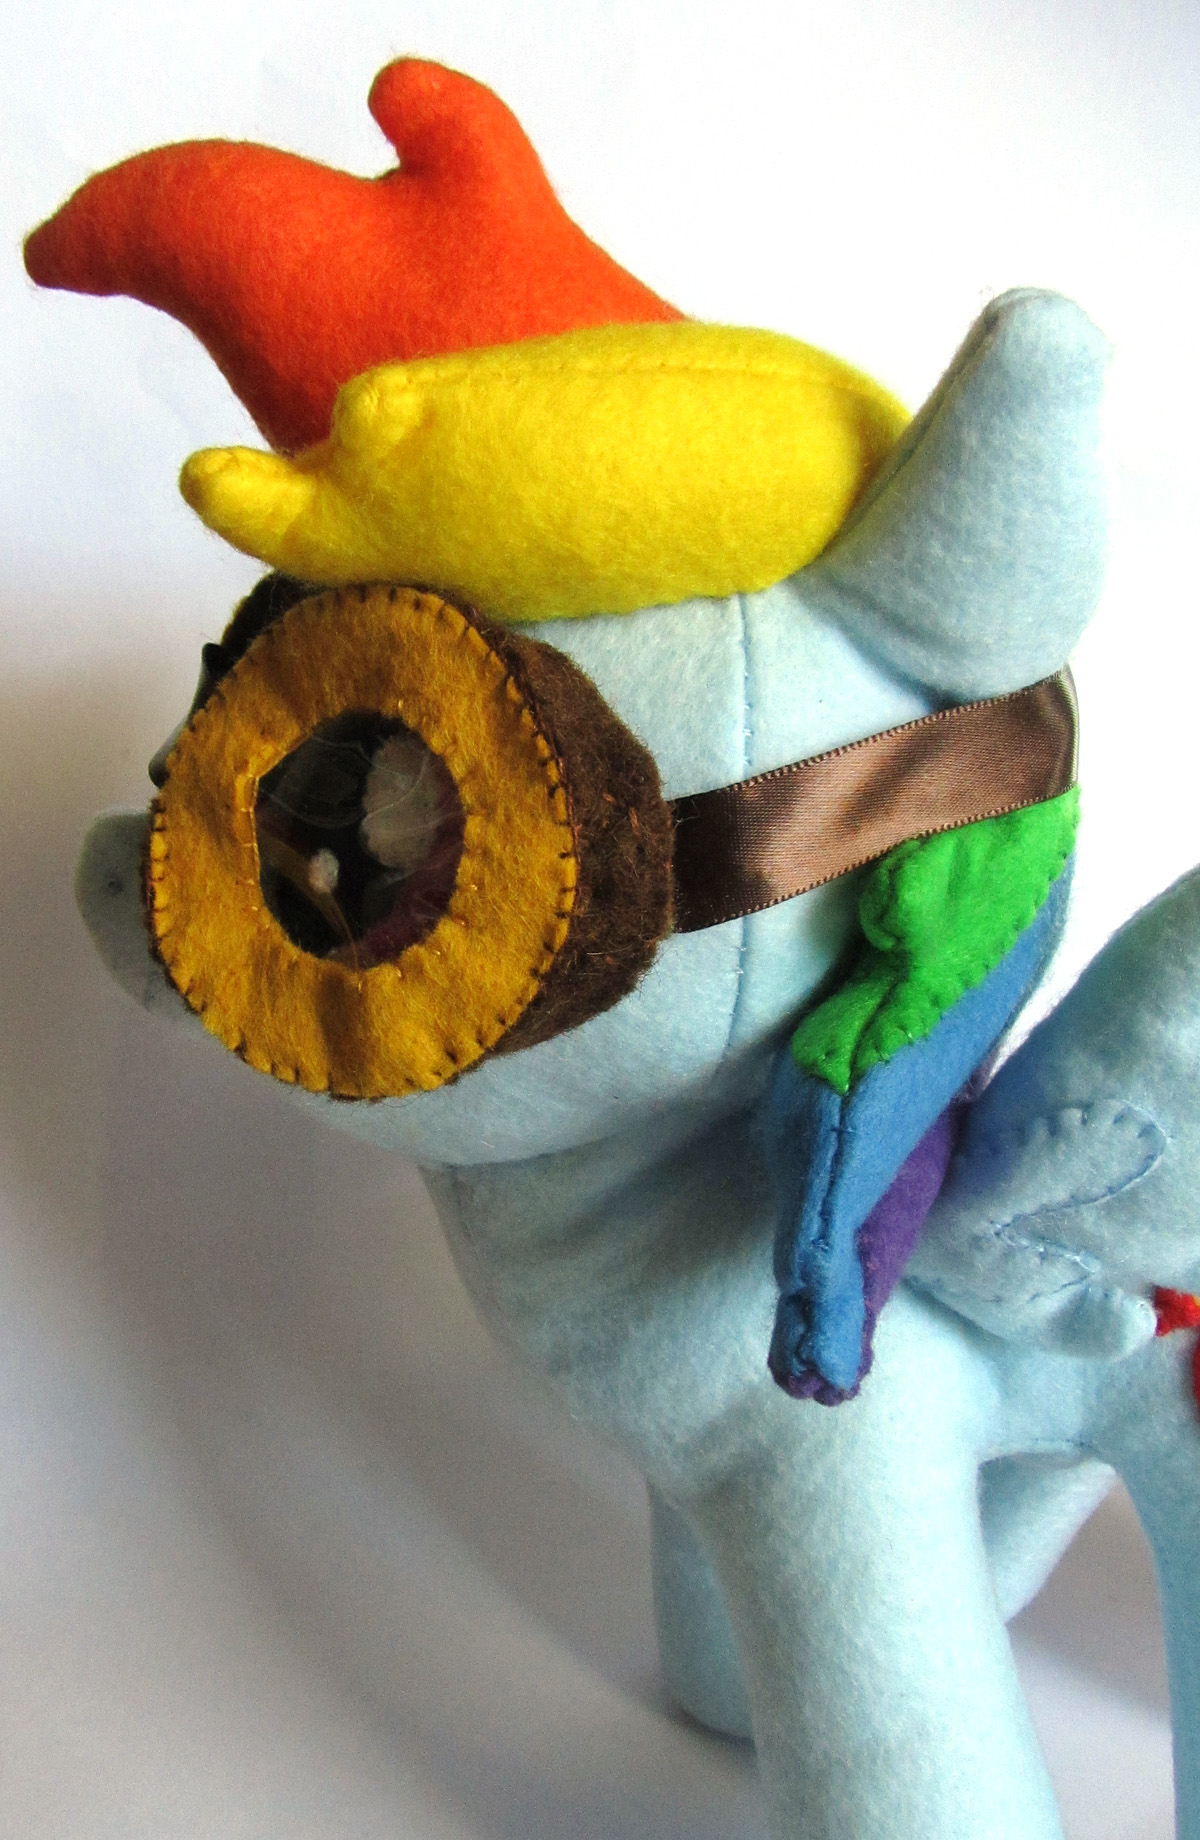
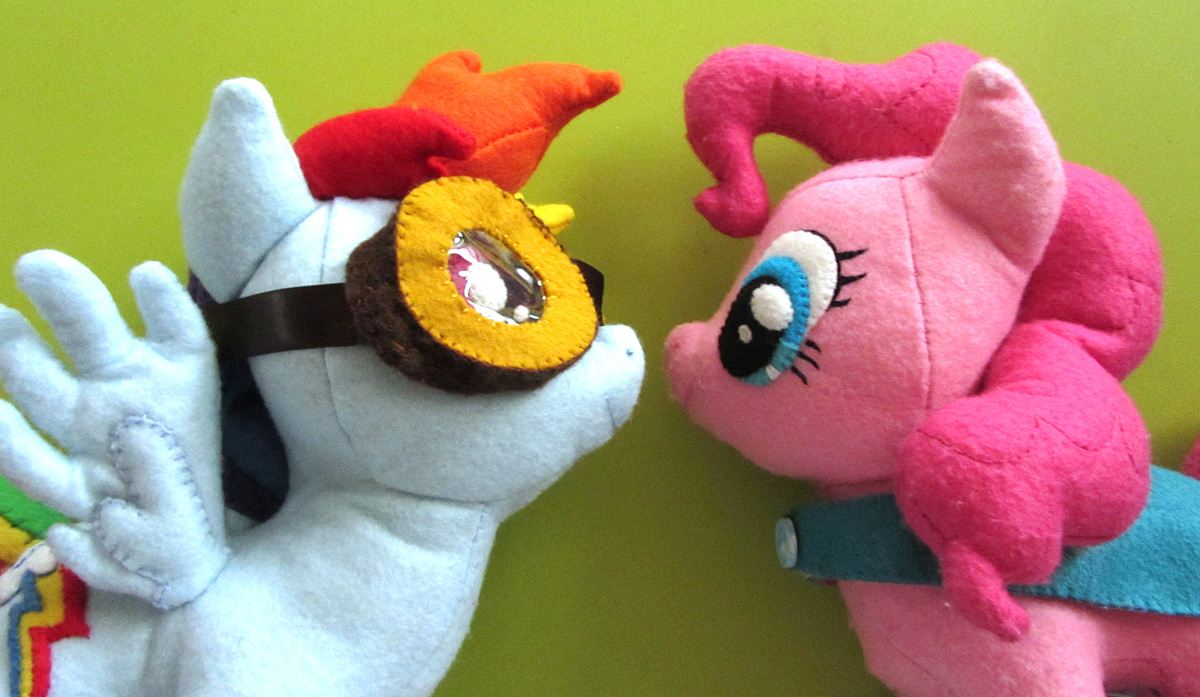
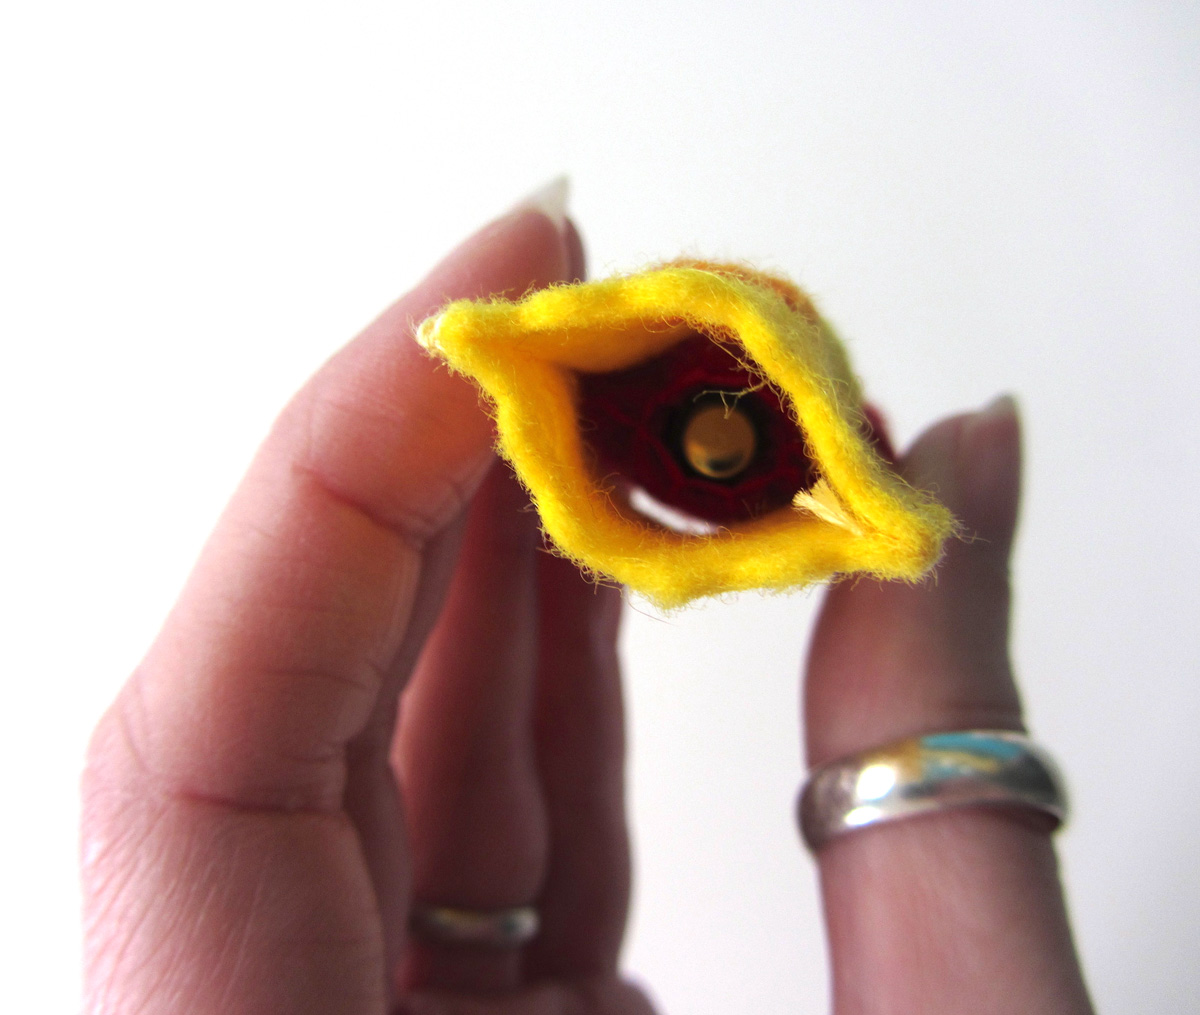
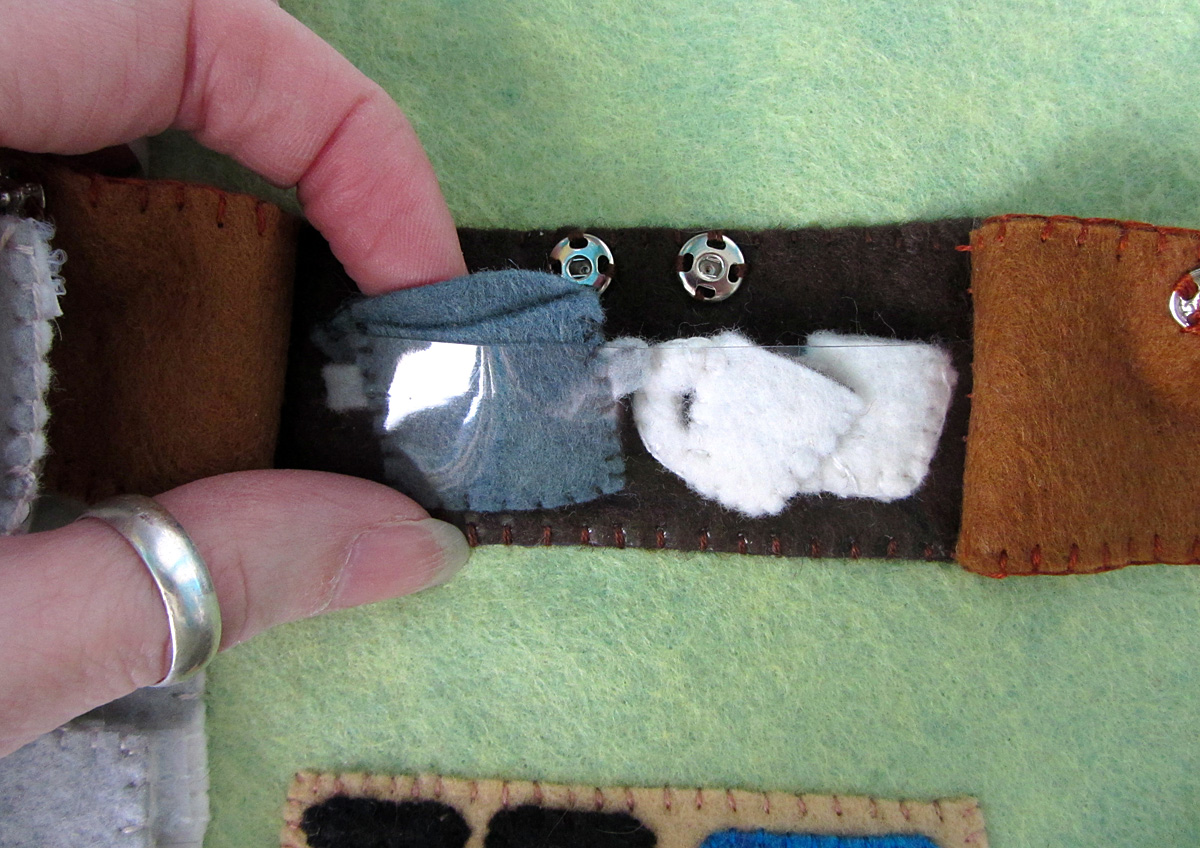
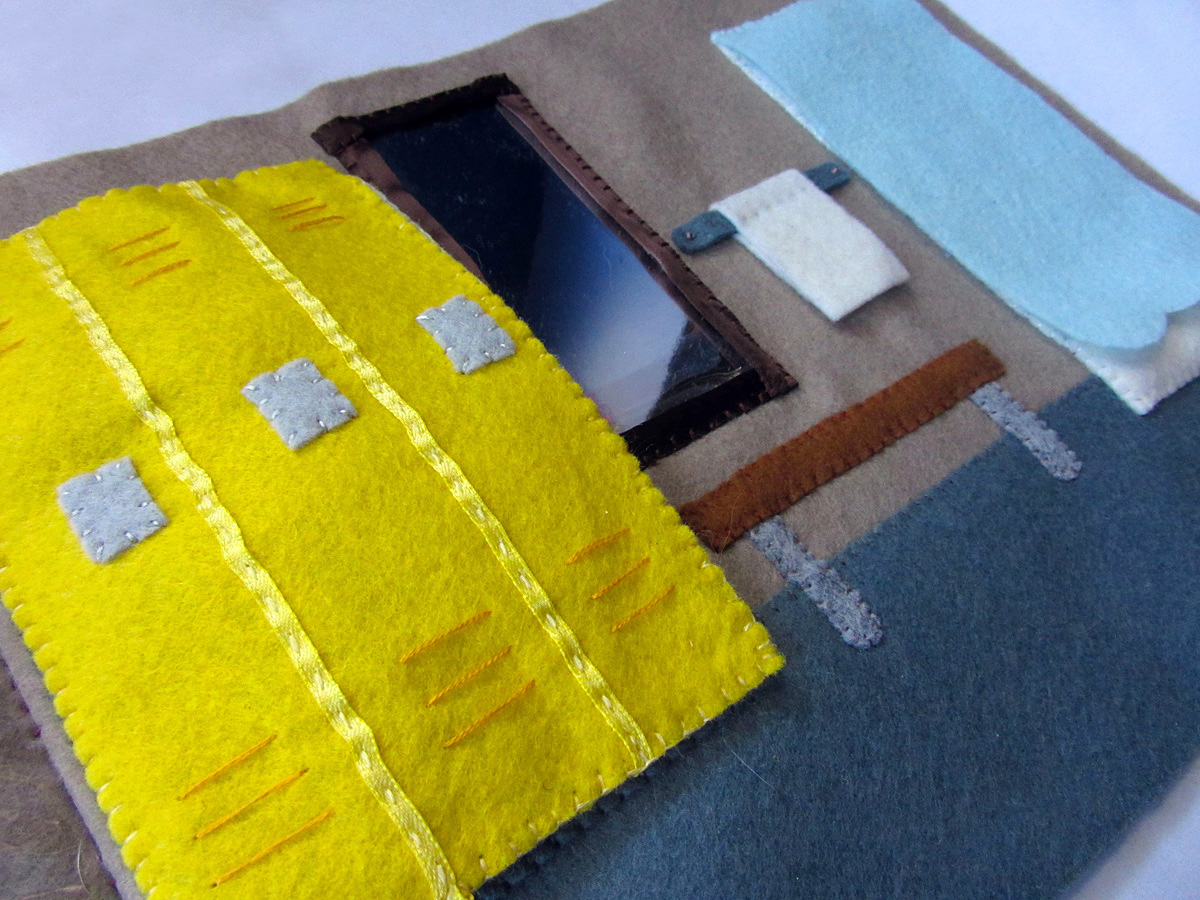
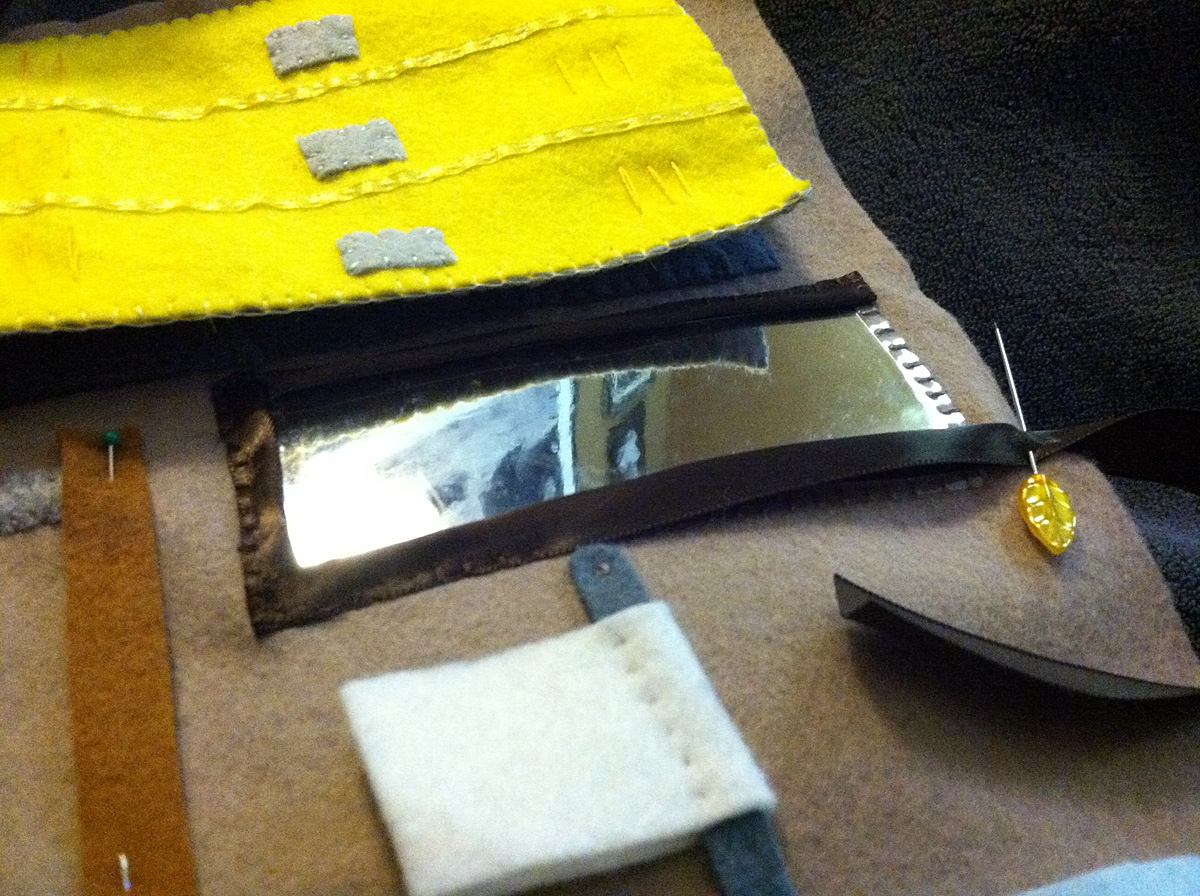
Goggles: I had very little time to make accessories, and apparently Rainbow Dash doesn’t wear a lot of easy to sew clothing. I saw an image of her in goggles, and knew I wanted to do those! I freehanded these as well – including the circles. I cut out two rings of gold felt (from American Felt & Craft) for each eyepiece and sewed them together with clear vinyl layered inside. I cut strips of thick 100% wool felt in brown and sewed it in a ring to each eyepiece, layering in a long ribbon on one outer edge and a short piece for the nose bridge between the two. I cut the long ribbon to fit around her head and added colored Velcro to the end (and the inside of one brown ring.

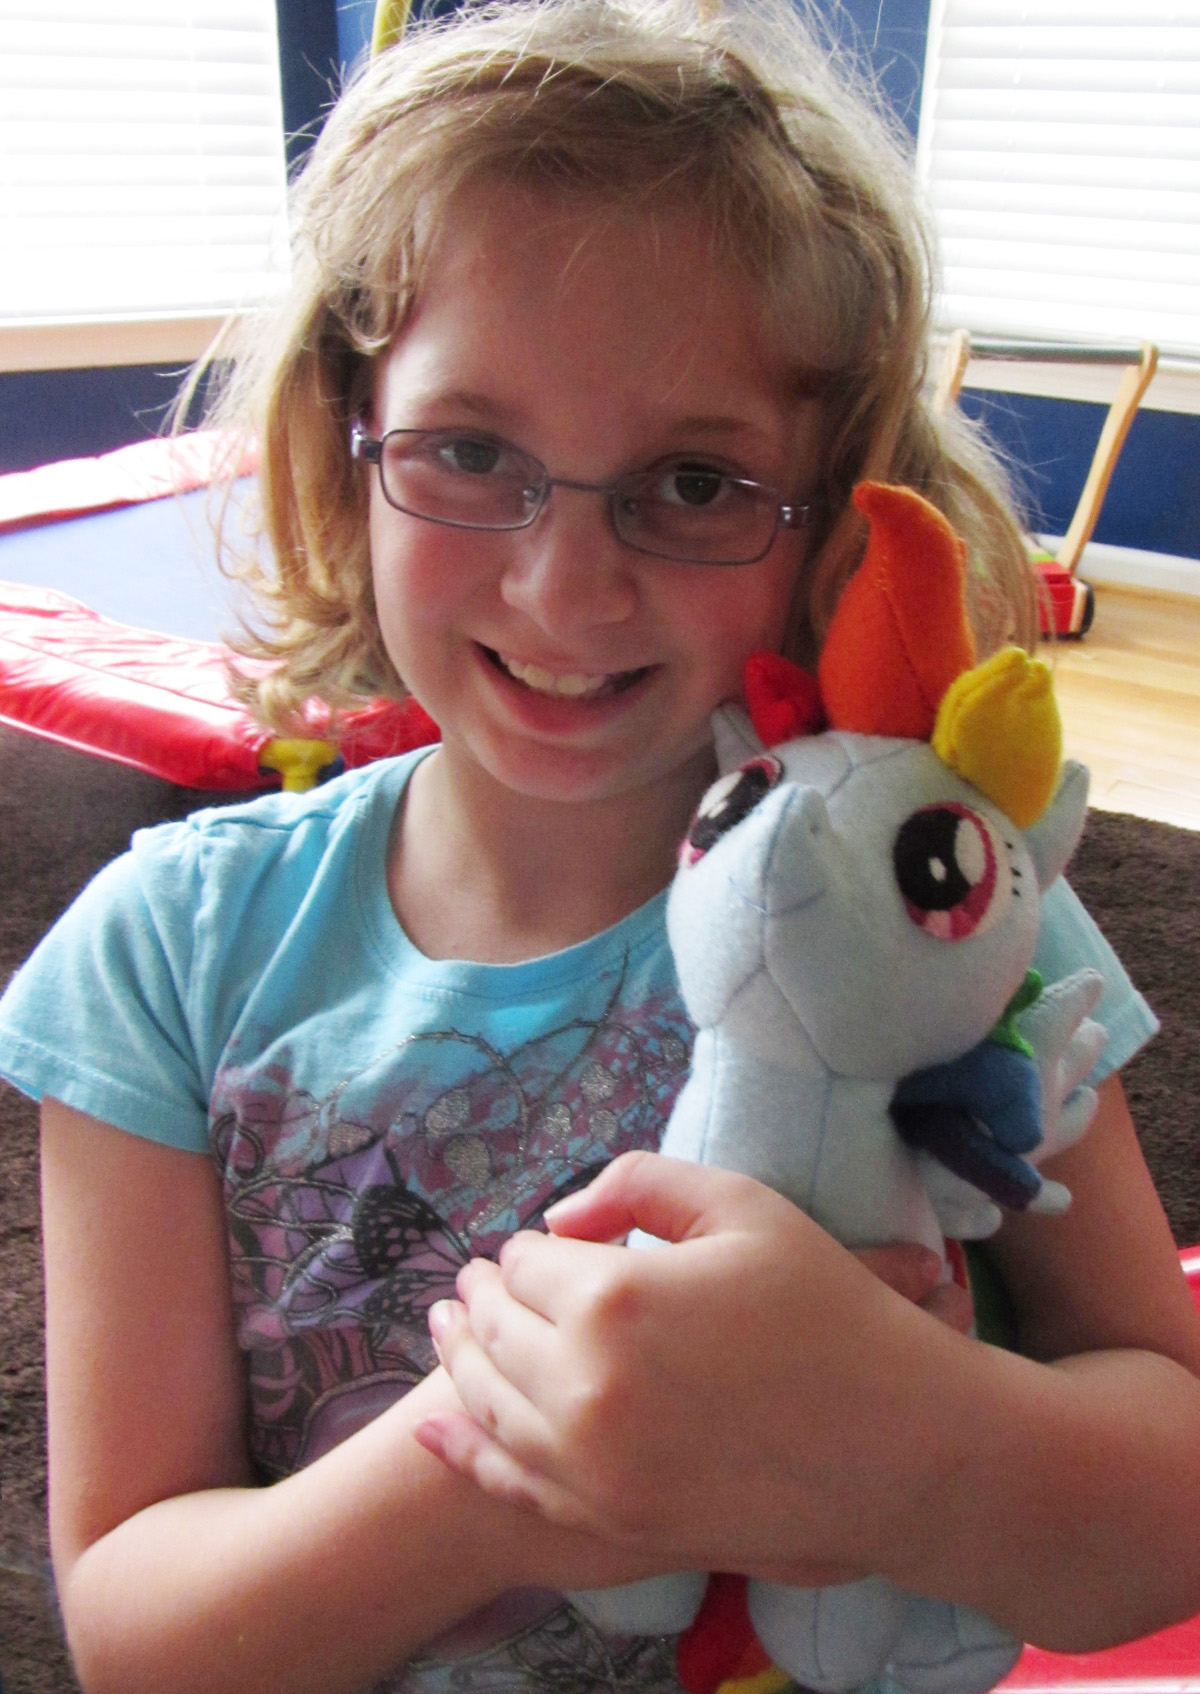
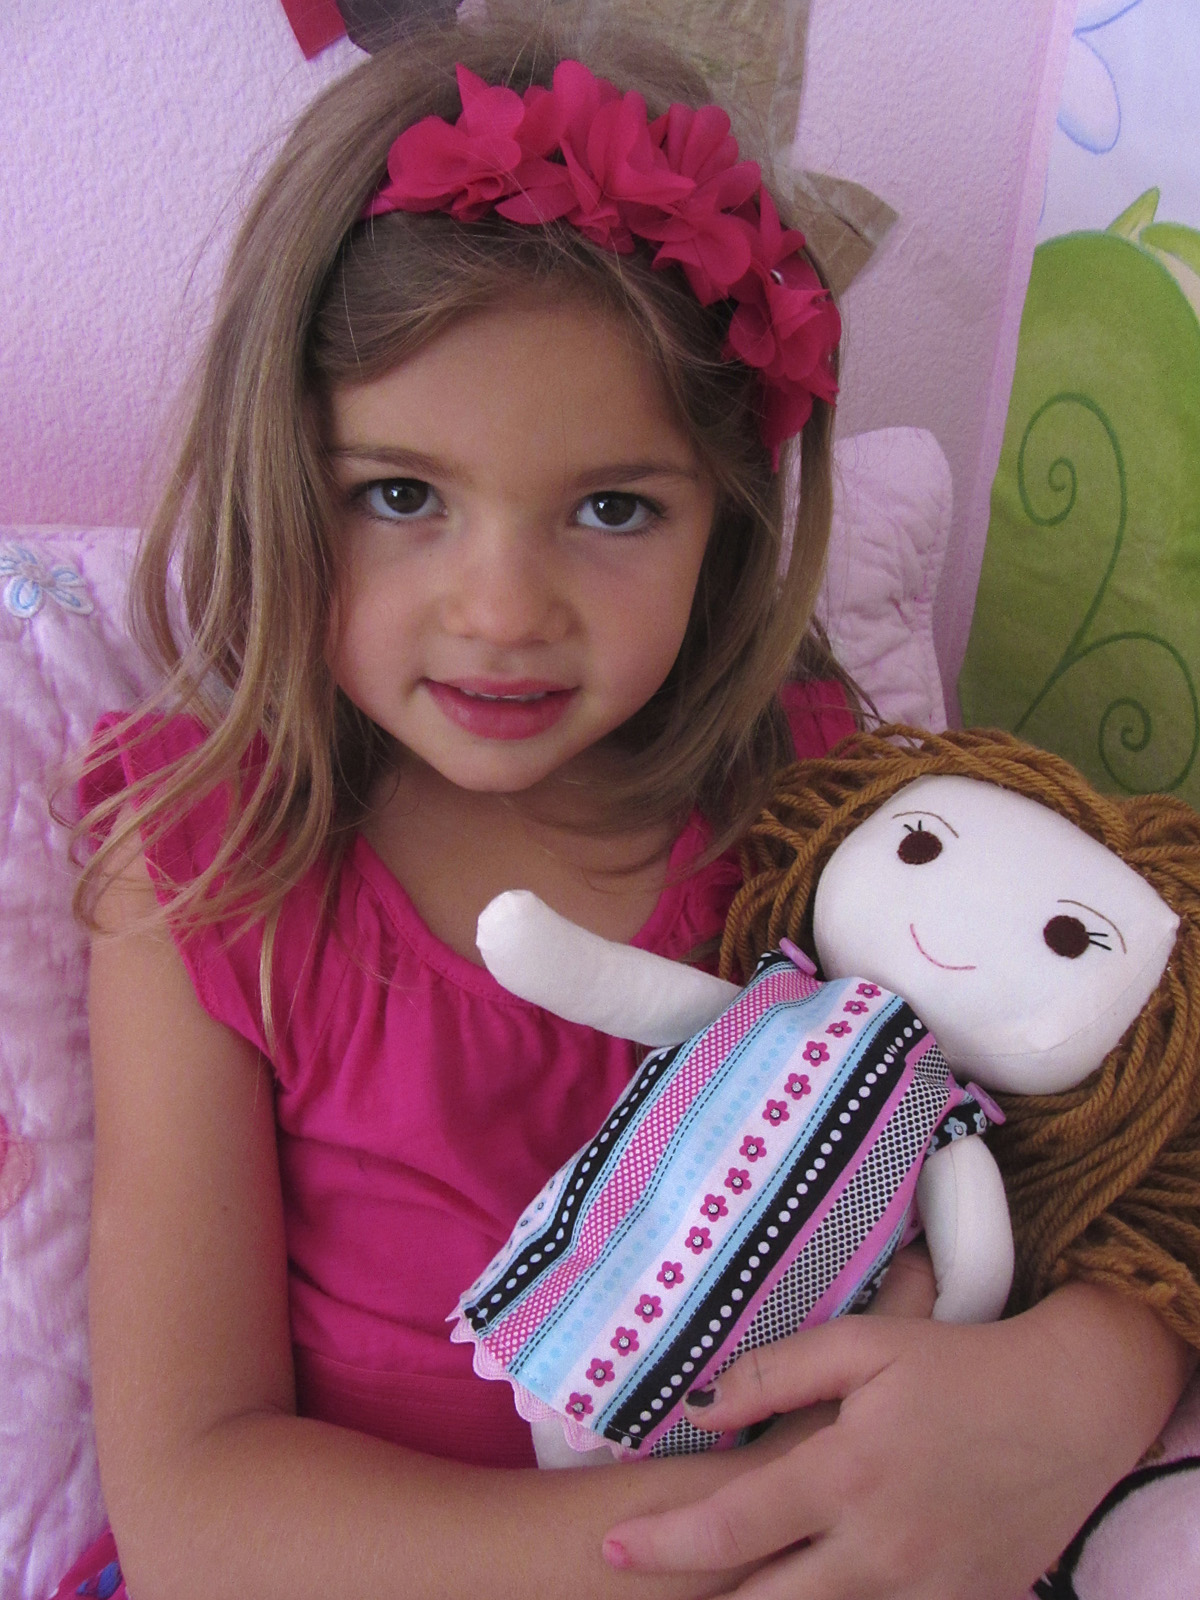
My niece received her new pony Memorial Day weekend when she came to stay with us. She loved her and carried her and Pinkie Pie around the house her whole stay! Next up will likely be Apple Jack for Christmas. Stay tuned!

DIY Rainbow Dash Plush with Goggles

Happy sewing! If you sew your own My Little Pony, I’d love to see it! Email me or stop by our Facebook page.

DIY Rainbow Dash Plush with Goggles

Toddler App Review – Gappy’s First Words

Toddler App Review - Gappy's First Words

It was perfect timing when we received a copy of Spinlight’s new phonics app Gappy’s First Words. I had just decided to start using Montessori methods full time for Jax’s homeschooling, and was switching from memorizing the alphabet to teaching letter sounds and empowering him to read and spell on his own. (Should I start blogging about homeschooling again? Stop by our Facebook page and let me know!)

Toddler App Review - Gappy's First Words

I handed this app over to Jax without any presentation to him, and he dove right in. He loves letters, so he first clicked on the “ABC” button. There you’ll find an alphabet page where you can listen to either the letter names or their sounds. Perfect, as I’m now using letter sounds. This is just a free play area of the app.

Toddler App Review - Gappy's First Words

Next, Jax clicked on Gappy’s silhouette and entered the game. I let him choose his level, and of course he wanted to do the highest level – 4. In level four, you aren’t given any letters in the three-letter CVC (consonant-vowel-consonant) words. We’ve actually been working on our Montessori pink level CVC words for the past two weeks, but hadn’t started when we first tried Gappy. It was a nice way for Jax to get a feel for sounding out a word and writing it based on each letter sound he hears. I played with him, and separated the sounds out for him.

Two weeks later, Jax can reliably get starting and ending sounds himself with our encouragement, but still needs us to slow down the words for that middle vowel. Gappy’s First Words ties in great with our Montessori language lessons,. I’m happy to let my son “play a game” that is actually helping him learn to read and write at age three!

Toddler App Review - Gappy's First Words

There is a reward system built into the game. You earn house parts so you can design Gappy’s house. Every 10 words you complete, you unlock another house item. This hasn’t been a huge motivator for Jax. But he loves letters and finds the spelling to be fun in itself.

We have an original iPad 1 and have had no technical problems with Gappy. A good thing, as our iPad isn’t always able to handle new apps. Thank you Spinlight for introducing us to Gappy’s First Words!

Wee Wonderfuls – Sewing Rag Dolls

Follow my blog with Bloglovin

When we let our family know we’d be visiting them for a day while we took our California vacation, my husband’s aunt reached out to me to see if I’d like to do a sewing craft with her adorable twin girls. They are 5, and S loves fashion design. I was very excited at the idea, but once it was mentioned we’d likely do a trip to Legoland with them, I needed to think of something I could leave with them.

Wee Wonderfuls - Sewing Rag Dolls

I decided to try sewing two Wee Wonderfuls rag dolls, making a lookalike dolly for each girl. That way, I could also pack up a little box of sewing goodies – felt buttons (in pink and purple – their favorite colors), floss, ribbon scraps and some needles. I threw in some barrettes and headbands from the dollar store, thinking I could sew the buttons into pretty hair clips for the girls and their dolls if we had time. If not, the felt buttons would be simple for their mom to help them with.

Legoland

We ended up at Legoland. Jax LOVED it! (Despite the rain.)

I used the Kit, Chloe and Louise pattern for the dolls. It included a lot of clothing options, so I was able to make two outfits per doll. (Sewing tiny doll clothes was NOT fun for me! Some I made did not make the cut. The pajama top I attempted looked like that Cosby shirt.) I actually made three dolls – my first a test doll for Jax. I was glad I did – I learned a lot!

Wee Wonderfuls - Sewing Rag Dolls

I think the girls liked them! They were still in that shy phase after not seeing us for a year and a half when I gave them to them. It was very sweet seeing them with their lookalikes.

The Redhead – A’s Doll

Wee Wonderfuls - Sewing Rag Dolls

Curly red hair! Swoon! Beautiful, but how do you make it translate to yarn? I actually found the perfect yarn for A’s doll, and purchased it when it was 50% off (I used 1.5 skeins.) It’s Martha Stewart’s Lofty Wool Blend. I sewed my hair on differently than the pattern called for. More on that below.

Wee Wonderfuls - Sewing Rag Dolls

Both dolls got a lined jumper with trim and vintage button’s from my mom’s collection as their main dress. A’s doll had a purple and lime pattern on the outside and lavender solid on the inside. I added vintage lace trim, a little ribbon belt and some mini ric rac around the neck.

Wee Wonderfuls - Sewing Rag Dolls

Both dolls got shoes, but I used the shoe pattern in two different ways. For A, I did brown 100% wool felt, with a white wool blend felt crescent sewn in to look like a sock. I added a ring of lace and a sew-on jewel to each.

Wee Wonderfuls - Sewing Rag Dolls

I really liked this jumper pattern because the lining made it so finished looking.

Wee Wonderfuls - Sewing Rag Dolls IMG_2009

For A’s second dress, I made a standard pillowcase dress with a purple floral pattern and lavender satin ribbon.

Wee Wonderfuls - Sewing Rag Dolls

Quick and pretty!

The Blond – S’s Doll

Wee Wonderfuls - Sewing Rag Dolls

Honey blond hair! For S’s doll, I used Vanna’s Choice yarn in Honey. S often styles her hair with a side part or ponytails, and loves hair clips. I made her hair thick, focusing on both a side part that hangs well when loose, and divides all the way down (to allow for ponytails.)Wee Wonderfuls - Sewing Rag Dolls

S’s main dress is a pink/black/blue striped pattern on the outside and pink on the inside. I added large pink ric rac to the bottom and vintage buttons at the shoulders.

Wee Wonderfuls - Sewing Rag Dolls

For her shoes, I used a magenta 100% wool felt, ribbon and vintage buttons.

Wee Wonderfuls - Sewing Rag Dolls Wee Wonderfuls - Sewing Rag Dolls

For her second dress, I followed one of the dress patterns included with the doll pattern. I used a cute pink flower fabric.

Wee Wonderfuls - Sewing Rag Dolls

The Doll’s Wigs

I knew I wanted to do the doll’s hair differently than how the pattern instructed. I really didn’t want their scalps to show through – especially on A’s doll where I couldn’t sew too many rows of hair or else it would be too thick. Being a felt lover, I decided to sew the yarn directly to some felt to make a wig, then sew it on to the doll.

Hopefully this gallery helps explain how I made my doll wigs. Here is the shape I cut in the felt, and what I did for the blond doll.

Wee Wonderfuls - Sewing Rag Dolls Wee Wonderfuls - Sewing Rag Dolls Wee Wonderfuls - Sewing Rag Dolls

This (double) project was a lot of work, but so much fun!

Wee Wonderfuls - Sewing Rag Dolls

Pillow Quiet Book Cover

I have a lot of quiet book pages for Jax, as you can guess! When we go on trips, sometimes I just put a few pages into Jax’s bag. Other times I pack some pages into the simple cover I made. But if we are going on a long car trip and I want to bring a lot of pages with loose pieces, I bring the double-wide pillow cover I made.

Pillow Quiet Book Cover

What I used:

Handles: I used 2 strips of fleece for each handle – 2″ x 12″ (estimated). I sewed each handle together (0.5″ seam allowance), right sides facing, leaving one small end open. I turned and pressed it, folding the open end in, then top stitched all around (0.25″ seam allowance).

Pillow Quiet Book Cover

Main Body: For the body of the case, I took two pieces of fleece that were 29″ x 29″. I sewed them together (0.5″ seam allowance), right sides facing, leaving a 4″ hole open. I turned and pressed it, folding the opening in, then top stitched all around (0.25″ seam allowance). I sewed the handles in place, stitching squares with x’s inside to attach them.

I sewed strips of snag-free Velcro around the edges, making sure the strips matched up when the case is folded closed. The sang-free Velcro is great because it sticks together without snagging and damaging your felt.

Pillow Quiet Book Cover
Binder Ring Strap: (This works for my method of binding my pages. You may need to modify it.)

Pillow Quiet Book Cover

To make the strap to hold the binder rings, I took two 11″ x  3″ strips of fleece and sewed them together (0.5″ seam allowance), right sides facing, leaving one small end open. I turned and pressed it, folding the open end in, then top stitched all around (0.25″ seam allowance).

Pillow Quiet Book Cover

I laid the strap in the center of the top half of the case (on the inside) and stitched the short ends down with double rows of stitching. I then made two lines of stitching that divided the strap into thirds, and attached a 3″ binder rings to the top and bottom thirds.

Pillow Quiet Book Cover

Put half of your pages on one side of the rings, and the other half on the other side.

Pillow Quiet Book Cover

When the case is open, you can sit on it like a blanket and play. When it is closed, you can use it as a pillow!

Pillow Quiet Book Cover

Bumble Bee Lacing Maze Quiet Book Page

Want to sell items sewn from this pattern? A commercial license is available!

Bumble Bee Lacing Maze Quiet Book Page

I’ve been a busy bee, so it’s taken a while to get this latest free pattern up for you! Seems fitting that it is a page about a very busy bee!

This page came about because I wanted to do a page about spring flowers and bees, but I also wanted to do something to help Jax with his manual dexterity. A lacing activity was the perfect combination! Since Jax is in to dot-to-dots and mazes, I numbered the flowers so the bee needs to follow the correct path to collect pollen and bring it back to the hive.

This two-page spread is a scrap-buster. All the flowers are made from my scrap felt from American Felt and Craft. Their felt is way to pretty to throw away even the smallest scraps. But my scrap bucket is overflowing! This was a perfect way to use up a bit of it.

Bumble Bee Lacing Maze Quiet Book Page

What I used:

closeup01

Starting Leaf: Back stitch a vein on the top leaf piece then sew both layers together. Stitch one end of your cord to the page, then sew the leaf to the page one each end, leaving the center open to hold the extra cord. My cord is sewn to the page under where the leaf is sewn down.

Bumble Bee Lacing Maze Quiet Book Page

Hive: Stitch the ground piece to the page on the ends. The rest will get sewn down under the hive. Sew the leaves down one at a time by back stitching a center vein.

Bumble Bee Lacing Maze Quiet Book Page

Cut the center slit in both hive pieces, then sew a running stitches (dashed lines)  to show the layers of the hive. Pin the two layers of the hive together and sew both sides of the slit using a blanket stitch. Pin the hive onto the page and sew it down around the outside edge.

Bumble Bee Lacing Maze Quiet Book Page

Leaves and D-rings: For each flower, cut about 3.5″ of ribbon and fold it in half through a D-ring. Stitch through the ribbon just below the D-ring to hold the ring in place at the end of the folded ribbon. (Zoom in to the above photo to see!) Place each ribbon and D-ring where it will be on the page, and pin a leaf over the end. Stitch the center vein of the leaf, making sure your stitching goes across the end of the ribbon to secure it to the page.

Flowers: You can definitely get creative with your flowers. I’ll tell you what I did for each, but go for it and make this page your own!

For each flower, I used a stem stitch to embroider the number on (using a thread that matches the petals.) I also made French knots in floss that matched the centers – the number of knots corresponding to the flower number.

Flower 1: I layered the petals evenly under the center and stitched the center on. Then I back stitched the center line of each petal.

Flower 2: The petals on this flower were evenly spaced around the center.

Flower 3: I centered the center on the flower petal piece and stitched it down. I made some straight stitches around the center.

Flower 4: I overlapped the petals under the center so they were evenly spaced.

Flower 5: The center is just sewn down over the middle of the petal piece on this flower.

Flower 6: The two petal pieces are layered with the top one rotated. The center was sewn down on top.

Flower 7: I sewed the center down onto the evenly spaced petals. Then I made long stitches in the center of each petal (but not the page) and pulled tight to ruche the petals up.

Flower 8: The petals on this flower are evenly spaced under the center.

Flower 9: The petals are spaced evenly, each one overlapping the petal to the right.

Bumble Bee Lacing Maze Quiet Book Page

Flower 10: The four petals on the past flower were evenly spaced.

Bee: I melted the loose end of the cord in a candle flame so it couldn’t unravel. I threaded on a black pony bead, yellow pony bead, the wings (with a tiny hole cut in the center of the base) and a black pony bead. Using black thread, I made stitched through the cord and around the black beads to hold them in place. (Look closely at the above picture to see the black thread.)

Here is a quick overview of how I sewed the two pages together.

Jax is thrilled with this page and started playing with it before it was even finished! He begged me every time I finished a flower to let him lace the bee through. I think this page with be a big hit right now.

Stop by my Instagram or the Facebook page to see updates of my current project. It’s a fun one!

Felt Fire Station – Cover

IMG_1900

This fire station project is a full stand-alone quiet book, just like the dollhouse book, but using full size 9″ x 12″ sheets of felt for each page. The fire fighters are made from the same pattern as the dollhouse dolls, so they will be interchangeable. To see the other sections of the project, go here: Felt Fire Station – Fire Truck & Dalmatian, Felt Fire Station – Garage & Locker Room, Felt Fire Station – Kitchen and Felt Fire Station – Office & Bedroom.

This tutorial is for the cover and assembly. I had to sew my book together as I went in order to have better pictures for the blog. I’ll do my best to explain!

Felt Fire Station - Cover

What I Used:

IMG_17011 Felt Fire Station - Office & Bedroom

To prep your interior pages, sew each set of facing pages together at the middle seam. I just put right sides together and used a blanket stitch. You will have these sets: garage/locker room and the kitchen/office (with the bedroom already sewn to the top of the office.) You then pin the locker room and kitchen together, wrong sides faceing, and sew around 3 sides (leaving the binding edge open for later.) It will look like an accordion of pages at this point.

Felt Fire Station - Cover

I started by sewing everything that goes on the front an back cover to the beet (burgundy) felt sheets and the leather (brown) roof.

Front Exterior: I pinned the garage door in place with strips of ribbon tucked under the sides. I sewed the ribbons down, then sewed around the sides and top of the garage. I sewed the door down beside the garage, leaving space to the right for a piece of snag-free Velcro. I sewed the door emblem onto the upper window, then sewed both windows down. I finished the door by sewing down the handle.

Felt Fire Station - Cover

I added 4 pieces of snag-free Velcro to the front, as shown in the above picture. Line it up with 3 matching pieces of Velcro on the top of the bedroom (add those now if you didn’t already.) At this point, you can sew the front exterior to the garage (wrong sides facing). Sewed 3 sides, leaving the spine open for later. (I sewed all 4 sides then had to sew on top of my stitches when sewing the binding closed.)

Felt Fire Station - Cover

Back Exterior:

Hydrant: I sewed the fire hydrant down on the far right and sewed a black Velcro dot (loop side so the hook on the hose can attach) to it.

Sunflower: For the sunflower, I made a zigzag stitch that went across the ric rac stem, then added some leaves by stitching a line up the centers. I pinned the flower and flower center in place and sewed around the center, leaving the petals loose.

Felt Fire Station - Cover

Dog House: I pinned the two layers of the red dog house together and sewed around the door. I pinned the roof in place and sewed them together along the bottom of the roof. I pinned the doghouse in place on the page, and sewed around the sides and top. This makes a nice pocket for the puppy to go into.

Felt Fire Station - Cover IMG_1902

Grill: For the grill, I pinned the grilling surface to the grill body then made long stitches for the grill bars. I made tiny stitches at the end of each long stitch to hold everything tight. I pinned the grill to the page, sewed the top down, and laid the clear vinyl pocket in place. I sewed along the bottom of the pocket, then added a sew-on snap just under it. I sewed around the sides of the grill, making sure to catch the sides of the pocket in my stitches.

Felt Fire Station - Cover

For the lid, I sewed a matching snap to one side, then sewed the front and back together with a ribbon handle stretched across and tucked between the layers at each end. I pinned the lid to the page with it already open, and sewed it to the page. Sewing it down while it is open helps it stay open on its own while you are playing.

Felt Fire Station - Cover

Hotdogs & Hamburgers: (Veggie dogs and Gardenburgers for us!) Fold each hotdog lengthwise and sew around the edges. Place each one in the center of a bun. Wrap the bun up around the hotdogs and make small stitched through all layers along the length of the hotdog to hold them together. For the hamburgers, stitch tiny sesame seeds to the outside of the top of the bun. Place each patty on the inside of the bottom of each bun, fold over the tops, then make a few tiny stitches to hold them closed.

Side Strap: Sew some snag-free Velcro on to one side that matches the Velcro by the front door, then sew the two sides together.

Felt Fire Station - Cover

Roof: Sew the roof emblem to the center bottom of the roof, as shown above.

Felt Fire Station - Cover

Pin the back exterior to the office (wrong sides facing) with the side strap caught in the side (Velcro on the interior side). Briefly pin the roof to the bedroom, aligning it to the top (wrong sides facing) to find where it needs to be sewn to the back exterior. Unpin the roof from the bedroom and sew the bottom edge down to the back exterior. Pin the roof back in place and sew the back exterior and roof to the office/bedroom, taking care not to sew the bedroom floor flap when you go past it on each side.

Felt Fire Station - Cover

At this point, the book is all sewn together except the side binding is open. With the roof flap open, Sew through all the layers of the book to close the binding. I used a blanket stitch, and used floss that matched the roof to start with, then switched to floss to match the walls.

Felt Fire Station - Cover Felt Fire Station - Cover

I didn’t pin mine, as it was so thick. I just went slowly and pinched the layers close and all lined up as I went. Excuse the phone photos here. Jax was napping on my lap and I used his lap as my sewing table. Shh, don’t tell him!

Felt Fire Station - Cover

As you can see, the edges came together nicely. This quiet book actually isn’t as thick as I expected it would be all finished.

Felt Fire Station - Cover

This is a view of the bottom edge of the book.

Felt Fire Station - Cover

Here is a view of the right side. I matched my threads to the exterior (roof and brick colors) when sewing the pages together. But that is just personal preference. I like the clean look on the outside. Since the interior rooms are already busy, the contrasting floss around the edges isn’t really noticeable.

Felt Fire Station - Cover

Stay tuned for an fun add-on pattern to be released soon, because firefighters need to have fires to put out! I hope you had fun visiting our little fire station quiet book! Jax will be bringing this along on our week-long vacation in California. We are renting part of a Spanish bungalow so he won’t have any toys but what I bring him.

Are you making the fire station from my pattern? I’d love to see! Email me photos, or stop by the Facebook page to share!

Felt Fire Station - Cover

Come back soon!

Sewing Basics – French Knots

IMG_1886

I will be featuring some hand sewing basics here for those of you who are new to it. If you have a special request, please let me know!

Sewing Basics - French Knots

Getting Started

I generally stitch with 2 strands of embroidery floss when sewing on felt. I like to take one strand, double my desired length, and fold it in half. I then thread the two loose ends through my needle. To attach the thread to the page, I make a stitch and pass my needle through the loop at the end of my thread before pulling it tight on the back of my work. To see this in detail, go to my embroidery floss tips. For my French knot, I attached my thread with a tiny stitch where the French knot will go.

Sewing Basics - French Knots

French Knots

Bring your needle up along side of the tiny stitch you made.

Sewing Basics - French Knots

I am right-handed and hold my needle in my right hand. Mirror these directions as needed. With your left hand, take hole of your thread an inch or so above where it comes out of the fabric.

Sewing Basics - French Knots

Holding your needle parallel to the fabric, run the thread over the needle and hold it firmly. This makes your first “twist” of the thread. Carefully dipping the tip of needle under the thread, bring up another twist. Repeat until you have your desired number of thread twists. I usually wind my thread around the needle 3 to 4 times when using two strands of floss. I find 5 twists makes a sloppier knot. For larger knots, it’s better to just use more strands of floss.

Make sure you are keeping firm and even pressure with the hand holding the thread. How tight you pull the thread is the key to successful French knots. Too tight and you can’t pull your needle eye through it. Too loose and your knot will unravel. Practice makes perfect here!

Carefully place the tip of your needle down in the same spot you came up through the fabric, without letting the twists of thread slide off. While starting to pass the needle through, slide the twists down to the fabric and gently pull the thread with your left hand so all the twists form a ball around your needle.

Sewing Basics - French Knots

I find that if I have to wiggle the eye of the needle a tiny bit to pull it all the way through the twists, then I get a neat French knot. If it feels like my needle is not going to make it through without a fight, I ease up on the thread with my left hand. If it is going through too easy, the knot will be a hot mess.

Sewing Basics - French Knots

All done!

Tip – When I am doing multiple French knots, I don’t like to tie off my thread and start over with every knot. I just go to the next spot and make another tiny stitch to anchor the thread before making the knot on top. If the knots are more than an inch apart, I do tie off and start a new thread. I don’t want to risk the threads getting loose on the back side of my work.

Sewing Basics - French Knots

Here is an example of a few different French knots. All were done with 2 strands of embroidery floss. From left to right: 3 twists, 4 twists, 5 twists and 4 twists “locked”.

Locking a French Knot

While you could add a drop of Fray Check to your knots it you are sewing something that will be handled and played with a lot, I like to “lock” my knots.

Sewing Basics - French Knots

To lock a French knot, I bring my needle up through the fabric just underneath the edge of the knot.

Sewing Basics - French Knots

Pass the needle back down through the knot, either through the center hole or just beside it. I usually go just beside it, as it can be tough to fit through the center and it makes the center more noticeable. I repeat on the opposite side of the knot so the knot doesn’t lean.

Sewing Basics - French Knots

In this example (far right), I went through the center for the first stitch, then went just beside it for the second. It only slightly changes the look of the knot, but you won’t have trouble with our knots getting loose and wiggly.

Here is a little video of me sewing a French knot to help you see how smooth and quick the process goes after some practice!

Felt Fire Station – Office & Bedroom

Felt Fire Station - Office & Bedroom

This fire station project will be a full stand-alone quiet book, just like the dollhouse book, but using full size 9″ x 12″ sheets of felt for each page. The fire fighters are made from the same pattern as the dollhouse dolls, so they will be interchangeable. To see the other sections of the project, go here: Felt Fire Station – Fire Truck & Dalmatian, Felt Fire Station – Garage & Locker Room and Felt Fire Station – Kitchen.

Felt Fire Station - Office & Bedroom

This tutorial is for the fourth interior page of the fire station – the office – plus the inside of the roof flap – the bedroom! Fire stations simply have to have a fire pole to slide down, so I knew I needed a second level. I realized the inside of the roof flap that closes the book would be perfect!

What I Used:

Felt Fire Station - Office & Bedroom

Upper Floor/Hole for Fire Pole: To make the floor of the bedroom, I sewed two 12″ x 2.25″ rectangles together along their sides and bottom. I cut out an oval hole through both layers and sewed around the hole edge. I took the wall felt for each room and placed the bedroom wall above the office wall (as it will be in the book) but overlapping them about .25″. I laid the floor on top of the overlap (so the top of the floor lines up with the top of the office wall) and sewed through all the layers along the top of the floor. I also sewed the top .25″ of the sides of the floor down for strength.

Felt Fire Station - Office & Bedroom

Desk: I pinned the floor of the office in place, then sewed the two desk pieces together along the top. I sewed the desk chair piece to the page so it would stick out from behind the desk. I pinned the desk to the page and placed the clear pocket piece at the top. (Don’t pin vinyl! It leaves holes!) I sewed the sides and bottom of the desk to the page, making a pocket for the dolls to sit in.

Felt Fire Station - Office & BedroomFire Pole: I cut some paracord, left over from the fire truck, long enough to stretch the height of both pages. I ran it through the hole in the bedroom floor, then sewed it to the page with the pole bases over top of each end.

Felt Fire Station - Office & BedroomDog Bed: I sewed the two sides together along the top, then pinned it to the page and sewed around the remaining edges. Where it overlaps the desk, I made sure to only go through the top layer of the desk so I didn’t sew through the pocket.

TV & Plaque: My tv screen is printed on photo fabric, as I had some extra space when I was printing out my Valentines. Because it is fabric instead of paper, I can easily spot-wash the quiet book without worrying about wet paper. If you print yours on paper, You will need to make the tv into a pocket like the picture from in the dollhouse kitchen. To sew mine, I basted the screen image to the page, laid the clear vinyl over it, then sewed the black felt frame on the top. The place was sewn together off of the page, then I sewed it down to the wall.

Felt Fire Station - Office & Bedroom

Beds: I started by sewing the sheets to the gray bunk bed piece. I only sewed the top and left sides of the sheets. I pinned the blankets in place and sewed a diagonal line where I wanted the top corner of each blanket to fold over. This also keeps you from seeing that the sheets don’t go all the way down. I made a stitch in the corner of each blanket to hold the folds down, then I sewed the blankets to the bed along their tops. I sewed the pillows to the page. I pinned the bunks to the page then sewed the bottom of each “mattress” to the page. This makes the bottoms of the two bed pockets. I sewed the two vertical bed posts to the page, then sewed the sides of the blankets down. I left the bottoms of the blankets loose.

Felt Fire Station - Office & Bedroom

Felt Fire Station - Office & BedroomNightstand & Lamp: The nightstand is sewn to the page. (I sewed through the floor flap a bit with both the nightstand and the bed legs, as I sewed the sides of the flap down a bit anyway. You could sew carefully and only sew them to the top layer of the floor.) I added French knots for drawer pulls. I sewed the red lamp base to the page, and added some red hook (soft side) Velcro. The Velcro is optional – I added it so I could have the optional working LED light that detaches from the page. I cut the top and bottom of the lampshade with my pinking shears, and sewed just the sides to the page. If you are not doing the optional LED lamp, you can sew the little flame emblem to the shade before attaching it.

LED Lamp: I sewed a little strip of red Velcro to the bottom insides of the two red felt pieces that make the LED case, and a large piece of hook (hard) Velcro to the outside of one piece. I sewed the sides together, then sewed around the opening at the top – just for added strength.

Felt Fire Station - Office & Bedroom Felt Fire Station - Office & Bedroom Felt Fire Station - Office & Bedroom

I sewed the flame emblem to one of the lampshade pieces, then sewed them together along the sides, catching the top-sides of the red LED case in the bottom stitches to attach it. I put my LED keychain light in without the jump ring, making sure the side with the button was on top. My LEDs have a tiny switch you can slide to have the light always on. It is hard to slide through the felt, but gives you another option for having it on when playing with your little one. I don’t plan to keep the LED light in the book when Jax has solo access to it. It is something I will bring out when we play together.

Felt Fire Station - Office & Bedroom

Uniform: I sewed the little shields to the front chest area, then placed the collar on the shirt. I made a stitch across the center of the collar to attach it, then sewn a line of French knot buttons down the front. I sewed a strip of white snag-free Velcro to a matching white backing, the sewed the two sides together. I sewed each pant cuff to a shoe, then cut out a matching white felt backing, added some white snag-free Velcro to to the top of it, then sewed both sides together around the edges.

Smoothies: Jax requested smoothies while I was working on these pages, so I whipped some up. I cut a little bit of blue ribbon and coated the ends with Fray Check to keep it from unraveling. I layered colored felt and the ribbon (on an angle so one end gets caught in the edge seam) between two pieces of clear vinyl and sewed around the sides and bottom. Jax asked for strawberry and mango, in case you’re curious!

Cacti: I sewed the cactus with arms by sewed all around the edges. For the flowering cactus, I layered the hot pink petal between the two link pink ones and placed that between the tops of the green felt before sewing around the edges. For both pots, I layered the pots and pot edges on either side of each cactus, then sewed around the edges, going through the cacti at the tops.

Felt Fire Station - Office & Bedroom

Laptop: I sewed the screen to the front felt piece, then sewed the two sides together along the sides and top. I made a couple rows of dashed stitches on the front keyboard piece, then sewed the two sides together along the sides and bottom. I laid the screen and keyboard together, and sewed the edges together. This lets the laptop fold open.

Clipboard: I sewed zigzag lines of gray stitching on the white paper piece, then placed it on the top red clipboard piece. I didn’t worry about it laying totally straight. I sewed the gray clip to the top then sewed the red back on all around the edges.

Felt Fire Station - Office & Bedroom

All done! Jax is dying to place with this book, so I’ve let him have a few sessions with it already. He loves helping the fire fighters down the pole and cooking feasts.

My pages are partially sewed together into book form, simply so I have better photos in between. I’ll go over constructing the book in the next post. The next post will also cover everything sewn to the cover. As you can see in these photos, snag-free Velcro will be sewn to the top of the bedroom, as it is the inside of the cover flap.

Stop by the Facebook page if you are sewing along with this project. I’d love to see photos of your progress!

Felt Easter Eggs

IMG_1789

Felt Easter Eggs

Easter is almost here!

I wanted to do a quick and easy project for Easter that I could share with you all. The hardest part is already done – figuring out the pattern to sew a 3d egg! (I used a plastic egg, paper and tape to draft it out.)

For this project, I used some extra eco felt, plus some pretty trims and buttons. Many of my embellishments were from the Target dollar aisle!

What I used:

IMG_1762

I started by cutting out the felt and choosing some pretty trims.

IMG_1763

I then sewed all my decorations on before constructing the egg. (For my pink egg, I added a flower after sewing the egg, as it landed on the final seam.) Make sure your ribbons line up when you fold the felt into a tube.

IMG_1765When sewing the egg together inside-out, I left the two flat ends open (middle side of the egg) and just sewed the triangle sections closed. I used a very small seam allowance (included in the pattern) of around 1/8″ (4mm) and hand sewed with a back stitch.

IMG_1767

Once both ends were sewn shut, I turned it right-side-out.

IMG_1769

I filled it full of stuffing.

IMG_7331  IMG_7332  IMG_7333

Using a ladder stitch, I sewed the opening shut.

ladder-stitchLadder stitch is most easily done with a curved needle. I don’t have one, but didn’t have any problems. Make a stitch across the gap you are closing, then run your needle through the felt in a small dash perpendicular to the opening. Repeat on alternating sides as shown. (In the diagram above, the lavender parts of the thread are under the felt.)

IMG_1796

I finished my eggs off by stitching a loop of ribbon and a little embellishment to the top so they can be hung up.

There are so many possibilities with how you can decorate these eggs! If you make some, you are welcome to stop by the Facebook page and share a photo of your work. Have fun!

Felt Easter Eggs

Felt Fire Station – Kitchen

IMG_1748

This fire station project will be a full stand-alone quiet book, just like the dollhouse book, but using full size 9″ x 12″ sheets of felt for each page. The fire fighters are made from the same pattern as the dollhouse dolls, so they will be interchangeable. To see the first section of the project, go here: Felt Fire Station – Fire Truck & Dalmatian and Felt Fire Station – Garage & Locker Room.

This tutorial is for the third interior page of the fire station – the kitchen!

IMG_1738

IMG_1732

Background: I started with a background sheet of honeydew green felt. I pinned down a 12″ x 2.5″ strip of chai felt for the ground. Don’t sew anything important about 1/4″ from the center edges of the two-page spread to allow for sewing the binding. But having the floor go to the edge is fine!

IMG_1735

Fridge: I sewed the white background down, catching clear vinyl pockets in my stitches as I went around. I sewed the bottoms of the pockets closed. (You can add more pockets, but I staggered mine between the doors and interior so that the fridge didn’t get too bulky. I then sewed the gray line down between the freezer and the fridge. This hide the white when the doors are closed. I sewed four small squares of snag-free Velcro on the right edge (as shown above.)

I sewed the doors around the top, right and bottom edges with the gray outside, white inside, and clear pockets layered together, then added matching Velcro squares to the corners. I positioned the doors in place on the fridge and sewed the fourth side while attaching them to the page.

IMG_1733  IMG_1734

Lower Cabinet/Oven: I started by sewing the dark brown cabinet interior down, followed by the counter. On the counter, I sewed the sink, taps, faucet and burners. I added 3 tiny buttons left over from my Snowman page. I sewed a clear pocket down where the cabinet would be, and added snaps for the cabinet and oven door.

I sewed a silver ribbon handle on to one of the gray oven door pieces and a matching snap half on the other, then sewed the two sides together with clear vinyl sandwiched between. I did a running stitch (dashed line) around the window to keep it from stretching. I sewed it down to the cabinet along the bottom.

For the cabinet door, I sewed the matching snap half to the corner of the inside felt piece, then sewed the two sides together along the top, right and bottom. I sewed the last side while attaching it to the page.

IMG_1736

Upper Cabinet: I sewed the cabinet interior down tot he page along with the clear vinyl pocket. I added snaps, then did the cabinet doors the same way as with the lower cabinet.

IMG_1737

Table & Chairs: I sewed the chairs in place on the page. Only the tops show from behind the table, so that is all I used. I unpinned the floor and basted the interior of the table in place along the floor. (See above photo showing the inside of the finished table pocket.)

IMG_1752

I decorated the table front felt piece with some red gingham ribbon. I pinned the table front to the page, lined up with the table bottom, and sewed it to the page around the sides and the bottom. Sewing only through the two table felt pieces, I sewed along the top.

Window: I sewed the blue glass felt piece down, catching some clear vinyl in the bottom to make a pocket (for potted plants included with the next page.) I sewed the white window sill down over the bottom. I sewed the red curtains in place, leaving the bottoms open, then added some more of the gingham ribbon as tiebacks.

IMG_1746

Clothes: This page includes casual clothes for the fire fighters. The dolls are sewn like the one included in the Dollhouse.

Logo T-shirts: I sewed the yellow emblem to the pocket area of the heather gray tees, then sewed them to a white felt backing with a bit of snag-free Velcro sewn to it.

Tee with Apron: I sewed the top of a red apron (only one thickness of felt) down to the white t-shirt, catching two yellow ribbons in my stitching. I sewed only the t-shirt part to a white backing with Velcro, catching the other ends of the straps between the two layers.

IMG_1747

Jeans: I decorated the jeans with a yellow dashed line of stitching at the crotch, a gray French knot button, four light indigo stitches as belt loops and 2 slanted long stitches as pockets. I stitched shoes to the bottom cuffs (decorating the white ones with red stripes) and sewed the whole thing to white backing felt with Velcro at the top.

IMG_1751Food: I’ve included a lot of food in this pattern, and will be adding a bit more when I do the back cover with a grill. You can also use food from the Dollhouse Kitchen.

Coffee Mugs: I sewed the two handle pieces together, then layered it and the coffee felt between the two sides of the mug. I sewed it together along the sides and bottom, then trimmed the extra handle inside the mug so it was less visible.

IMG_1745

Muffins: I sewed the muffin tops (hah) together, then sandwiched them in place between the muffin liner pieces. I sewed along the sides and bottom of the liners, then made a couple tiny stitches at the top to hold the muffins in.

Fruit Plate: Each little piece of fruit is sewn separately, but stitched to the top of the plate at their bottoms. The exception is the cherries, which are appliqued to the banana. I added stitched brown stems to the cherries and pear, and caught a bit of green felt in the top of the strawberry to make the green leafy top. I sewed the back of the plate on once I finished the fruit.

IMG_1750

Pizza: I sewed the cheese to the sauce and the sauce to the top of the crust, then sewed the back of the crust on. Note that I didn’t center the sauce on the crust – I had it closer to the back to created a foreshortened look.

IMG_1756

French Bread Loaf: I sewed slanted long stitches in brown to make the slashes in the crust on both sides, then sewed the sides together.

Stock Pot: I sewed the sides and bottom of the pot together, catching folded scraps of gray felt in the sides to make handles. I sewed along the curved top of the lid, catching a folded bit of gray felt in the top center ans a handle.

Donuts: I decorated both sides of the tan “blueberry” donut with periwinkle French knots and sewed the sides together. I decorated both sides of the “strawberry” donut with stitched sprinkles, then sewed the two sides together. I decorated the top of the “chocolate” donut with a curvy white line of stitching, then sewed both sides together.

You could sew the donuts to the platter as with the fruit, but I decided to let Jax have some loose food to “feed” to the dolls. So I sewed the platter separate, added a clear vinyl pocket to hold the food.

IMG_1754

Tacos: I sewed scraps of red felt to the lettuce felt, then added brown French knot “taco meat”. I placed the toppings inside the folded taco shell felt and made tiny stitches to hold it closed. Note that the taco shell is folded so the front is a bit shorter than the back.

I did the platter with a pocket the same way as for the donuts.

IMG_1755

Cake: I first stitched a curving running stitch (dashed line) on the frosting pieces, then stitched them each to a cake piece. I stitched together the candle pieces with the flame caught in the top. I placed the candle between the two sides of the cake and sewed around the edges.

IMG_1749

Dog Kibble: Puppy needs to eat too! I sewed brown French knots on both sides of the kibble felt,, then sewed the sides together along the top. I layered it between the bowl pieces and sewed along the sides and bottom. I added a couple small stitches along the top to hold the kibble in the bowl.

I’d almost say this is Jax’s favorite in the fire house so far – he’s always been a fan of play food. But, He’s been so excited about the whole thing that it is too close to call. I’ll be hiding this book away once it is done so it is new and fun during out California trip in May.

Have you been sewing along with me on this Fire Station book? I’d love to see your progress! Stop by the Facebook page and post a photo!

The next two pages in this series will be the office and bunk room. So close to finishing! Happy sewing!

Felt Fire Station – Garage & Locker Room

Felt Fire Station - Garage & Locker Room

This fire station project will be a full stand-alone quiet book, just like the dollhouse book, but using full size 9″ x 12″ sheets of felt for each page. The fire fighters are made from the same pattern as the dollhouse dolls, so they will be interchangeable. To see the first section of the project, go here: Felt Fire Station – Fire Truck & Dalmatian.

This tutorial is for the first two interior pages of the fire station: the garage for the fire truck and the locker room.

What I Used:

Background: I started with two background sheets of chai felt. I sewed down 12″ x 2.5″ strips of elephant gray for the ground.Don’t sew anything important about 1/4″ – 1/2″ from the center edges of the two-page spread to allow for sewing the binding. But having the floor go to the edge is fine!

Bench & Towel: The bench is simple sewn down to the page with the seat overlapping the legs. To make the towel bar, I folded the towel felt around the strip of gray towel bar felt. I sewed a line of stitching through just the towel, making a channel that holds it on the “bar”. I attached the bar to the page with a small criss-cross of stitches on each side, topped with French knots.

Fire Station Locker Room

Lockers: To sew the lockers, I started by embellishing the yellow door piece. I sewed down two strips of yellow ribbon to make it look like three lockers. Long stitches made the vents, and the gray panels made the handle/lock area. On the light gray felt that backs the door, I sewed down the bottoms of the clear vinyl pockets. I then pinned the door front and back together and sewed around the edges, being sure to catch the sides of the vinyl pockets as I went.

IMG_1704

I sewed down the interior felt to the page, catching the sides of the two curved pockets in the edges. I sewed the bottoms of the pockets closed, then sewed the left side of the door down to the page. To finish, I added sew-on snaps to the open corners of the locker to hold it closed.

IMG_7068

Mirror: I cut the 2″ x 4.5″ mirror out of a sheet of craft mirror. I also cut some clear vinyl slightly larger. I layered the mirror under the vinyl, and sewed the vinyl down to the page so that it held the mirror in place. I then covered the edges with folded brown ribbon. You could use strips of felt or even some bias tape.

IMG_7050

Shower: The shower was one of the rare times I went up to my sewing machine. In 5 minutes, I was able to sew a grid of squares of the shower background that look just like little tiles. Love! I sewed it down to the page, adding the bottom pocket as I went around that edge.

IMG_1714

Hi, puppy.

IMG_1705

I made the shower head by folding some scraps of aqua blue ric-rac and ribbon and stitching them together at the fold. Then I layered the fold between the two shower head felt pieces and sewed around the edges. I sewed it to the center top of the shower and sewed the shower curtain on along the top.

Fire Station GarageGarage: The garage side of the spread is very simple. I sewed the sides of the clear vinyl pocket onto the wall, then sewed the shelf down along the bottom. The shelf holds any  equipment that isn’t being used. Each piece of equipment has a snap on the back so you can mix and match what is on the fire engine.

Felt Fire Truck

Equipment: For the instructions on how to sew the safety cone and the axe, see the Fire Engine tutorial.

Fire Extinguisher: I started by sewing a snap to the back of the extinguisher body (making sure I used the side that would fit into the fire truck.) I sewed the front and back together. I took a scrap of black satin cord and sewed through one end of it to attach my thread. I layered the funnel piece over the end and sewed it securely to the cord before sewed the sides closed. I left the mouth of the funnel open. I repeated that with the other side of the cord and the handle of the extiguisher, attaching it to the top of the body.

First Aid Kit: I sewed a snap to the back and the cross to the front, then sewed both sides together.

IMG_1712

Dolls: For the instructions on how to sew the dolls, see the Dollhouse tutorial. I didn’t include a pattern for the undies. For those, I just cut little V’s or U’s out of a piece of Velcro to make the necks of their shirts, then cut the sides of the shorts to fit their hips.

IMG_1713

Protective Uniform: I started the uniform pieces by stitching the yellow ribbon on as the safety stripes (see above photo for placement.) I sewed a line of brown back stitch to make the front opening, then sewed the collar on with a few stitches on the right and a French knot on the left. I stitched the gloves and boots in place with more back stitch, then laid the tops and bottoms down on white felt and cut out backing pieces. Before I sewed the backings on, I added some of the snag-free Velcro to hold them onto the dolls.

Fire Helmets: I started by sewed the yellow felt emblem onto the front of the hat with a gold sequin star on top. I then sewed the back on along the top edge of the hat.

IMG_1710  IMG_1711

Ventilation Mask/Breathing Apparatus: I started by sewing a scrap of clear vinyl to the back of the face mask opening. I then sewed the gray circle onto the bottom of the front and added crisscrossed stitches to make it look like mesh. I sewed the back on along the outer/top curve of the mask so the dolls’ head can slip through the strap in the back.

That’s it! Now your little fire fighters are ready to go fight some fires!

Ready to fight fires!

Stay tuned for to upcoming parts of this series: the kitchen, the office, the bunk room, the building exterior/cover and a bonus building on fire!

Fire Station Quiet Book

Stop by the Facebook page to say hi and follow along as I post my progress pictures! I’ll be working on another MLP plush for my niece, then finishing up the kitchen and office pages.

DIY Dollar Store Cake Stands

DIY Dollar Store Platters

My sweet little man is 3! Yesterday we celebrated with friends and family at his bug-themed third birthday party. It was so much fun. Seeing your child SO happy just makes your heart want to burst!

3!

My budget for the party was very small. I don’t have a lot of serveware for parties, so I hit up the dollar store for inspiration. They had some great bowls in spring colors – I grabbed some in green. I didn’t find anything to feature the stars of my food table – the mini cupcakes!

bugcupcaketrio

Bug Mini Cupcakes

Picnic Ants: This was a lemon cupcake with lemon frosting (tinted green and piped with a grass tip), little black ant sprinkles, and watermelon slice candies. I baked them in red gingham cupcake liners. (I had a custom listing set up on Etsy will my three liner choices.)

Ladybugs & Leaves: These cupcakes were strawberry, strawberry swirl icing and fondant leaves I cut out with a cutting and embossing set. I added little pressed sugar ladybugs. I baked them in lime green cupcake liners.

Worms & Dirt: Our chocolate cupcakes were chocolate with fudge frosting, crushed Dark Chocolate Fudge Stripe cookies and sour worms. They were baked in simple brown cupcake liners.

I’d seen plenty of Pinterest pins with candlesticks and plates turned into cake stands. I decided to put my own spin of the idea! I got three green plates, three glass votives and some Super Glue Bond-All, all from the dollar store. I had already ordered plastic bugs and found a bag of decorative grass at the thrift store for $1, but saw both of those things at the dollar store as well.

DIY Dollar Store Platter

Pin me!

Pin me!

My supplies:

  • dinner plates
  • glass votives
  • super glue
  • plastic bugs
  • decorator grass
  • cardstock
  • hot glue & hot glue gun

I started by applying super glue to the bottoms of both the plates and the votives and letting it sit for a few minutes. Then I placed the votives on the plates and weighed them down with soup cans. They slide a little while the glue was still a little wet, so I made sure to recenter them after a few minutes. After drying for an hour, I flipped the stands right-side-up and weighed them down overnight.

The finishing touch was a butterfly hot glued to the edge of each cake stand!

This slideshow requires JavaScript.

To customize them for the party (something that can be undone, as hot glue peels off of glass), I hot glued some cute bugs to the insides of the votives, placing them so their backs showed well. I then stuffed the grass inside. I had traced and cut some circles of green card stock to fit the openings. I hot glued the those on as bases.

I’m so happy with how the cake stands turned out! they worked perfectly for the mini cupcakes and the rest of the party decor!

IMG_1653

For more details about Jax’s party, visit my personal blog, Stvlive.com.

IMG_1636