Tag Archives: Sewing

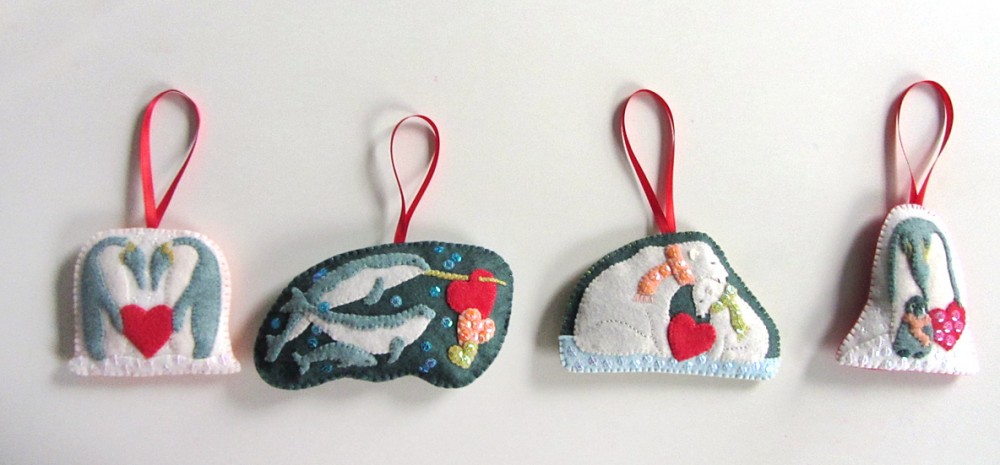
Polar Family Felt Ornament Patterns – Narwhals & Penguins

Polar Family Felt Ornament Patterns – Narwhals & Penguins

Time has been flying by with lots of projects on my plate. I can’t believe it is nearly Christmas! But I finally have the last two polar family felt ornament patterns ready for you to enjoy.

Polar Family Felt Ornament Patterns – Narwhals & Penguins

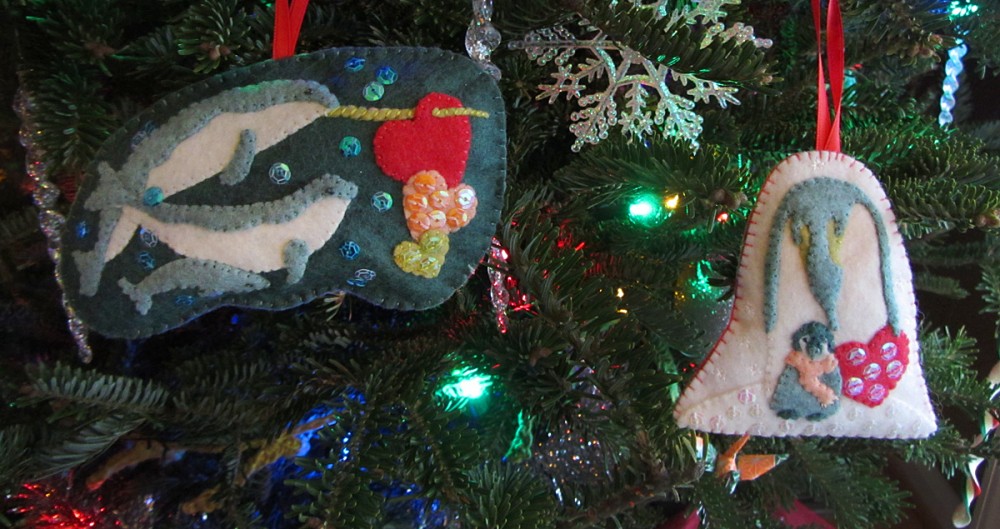
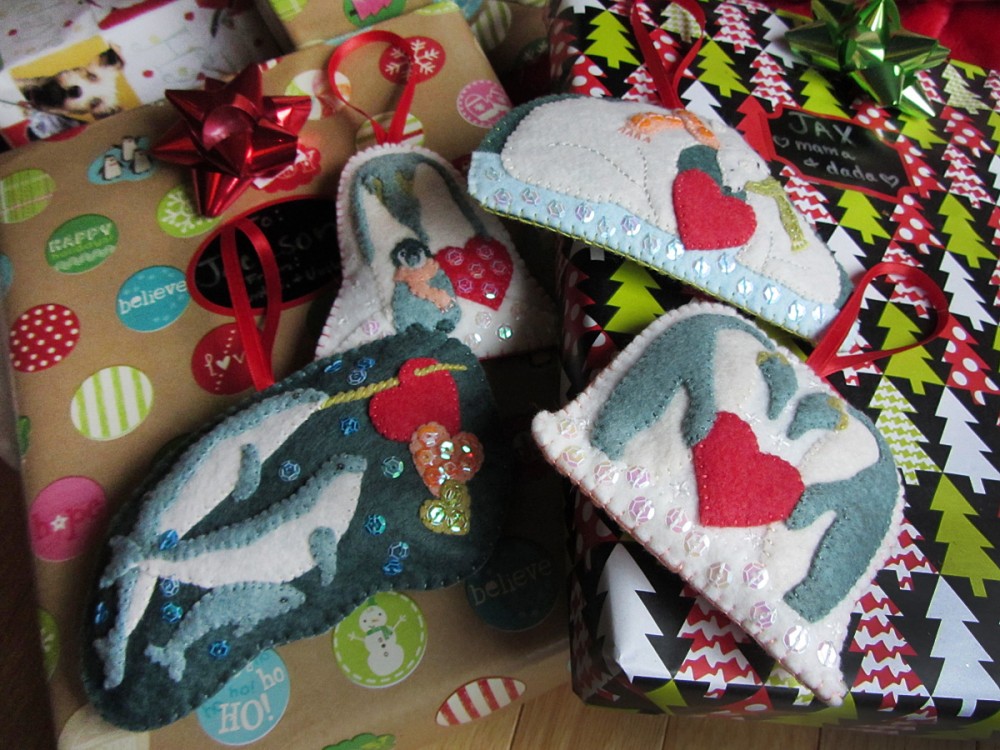
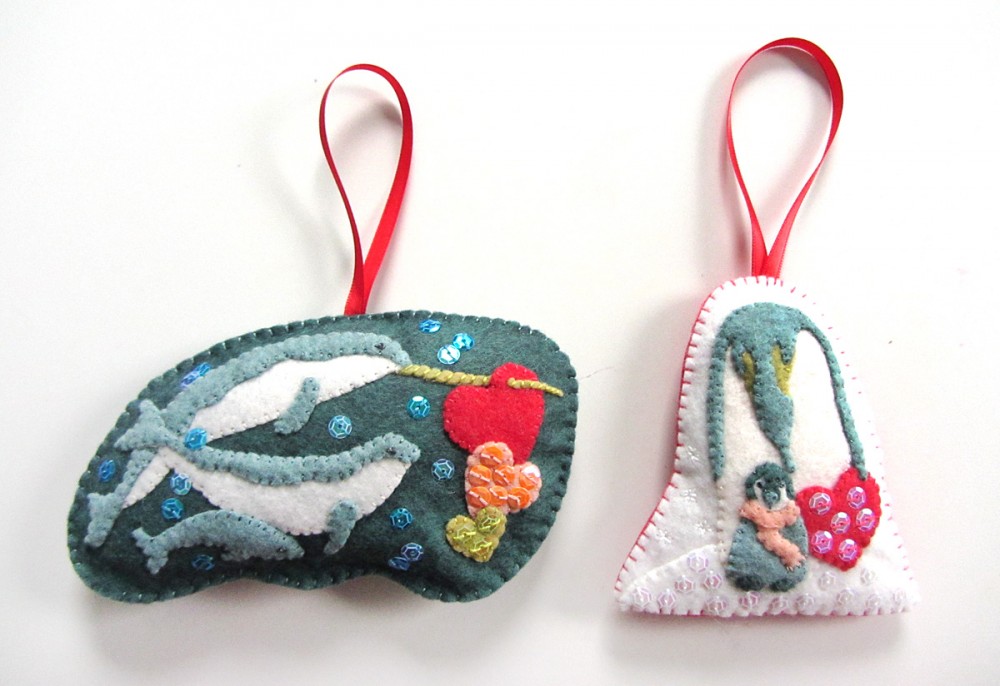
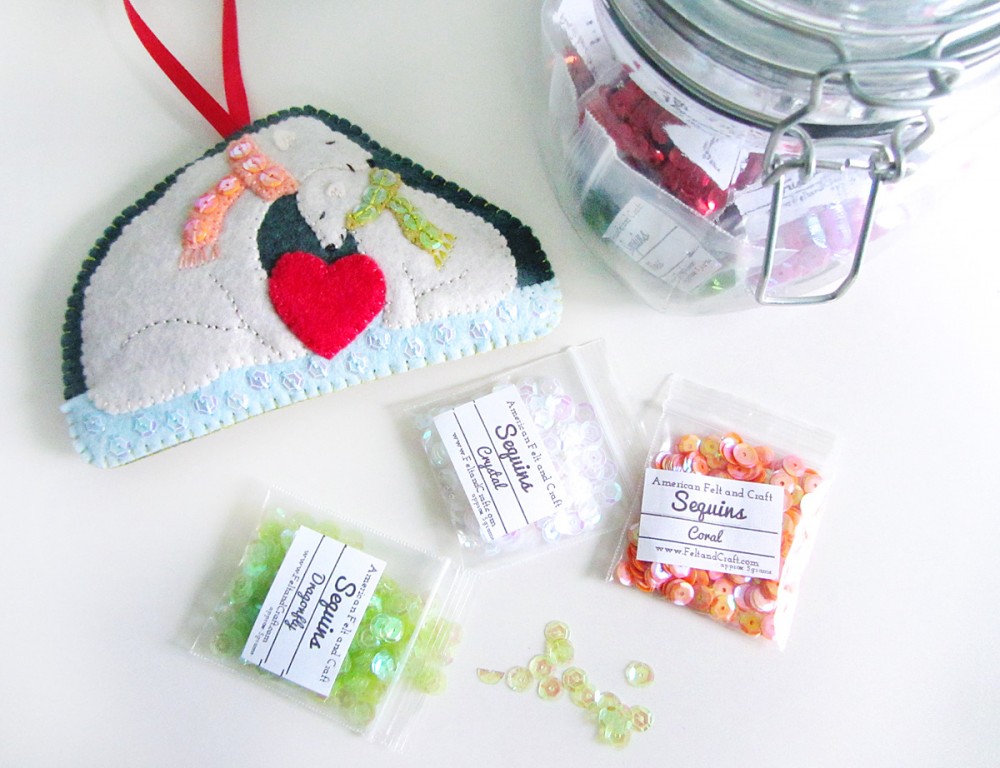
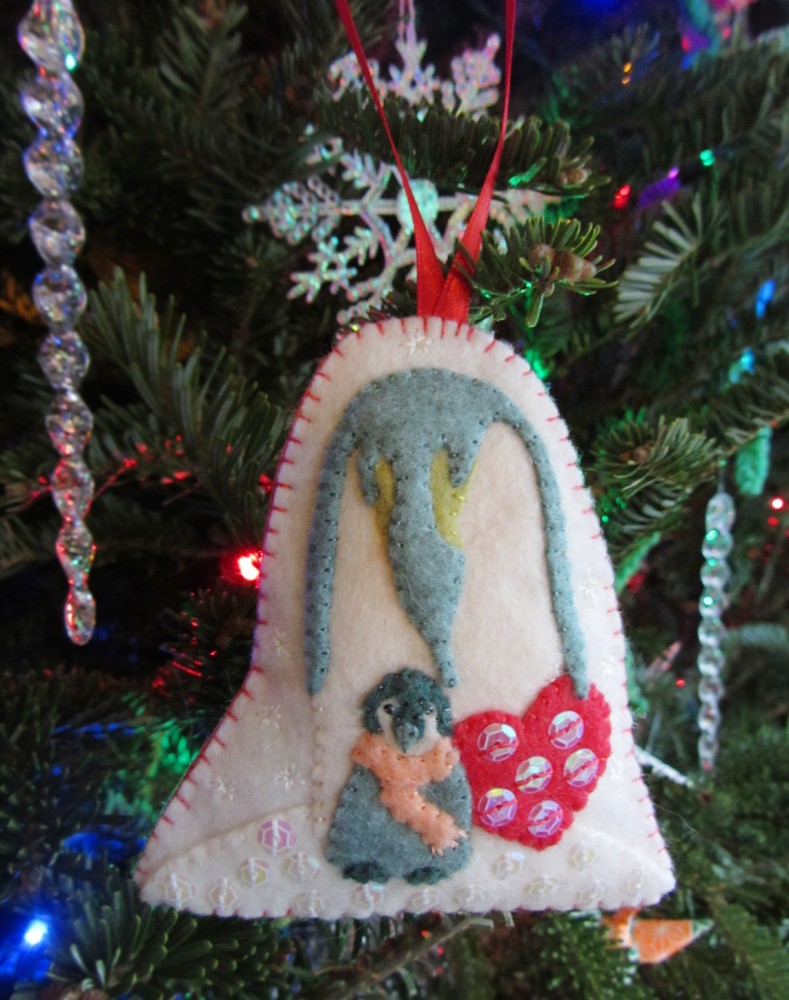
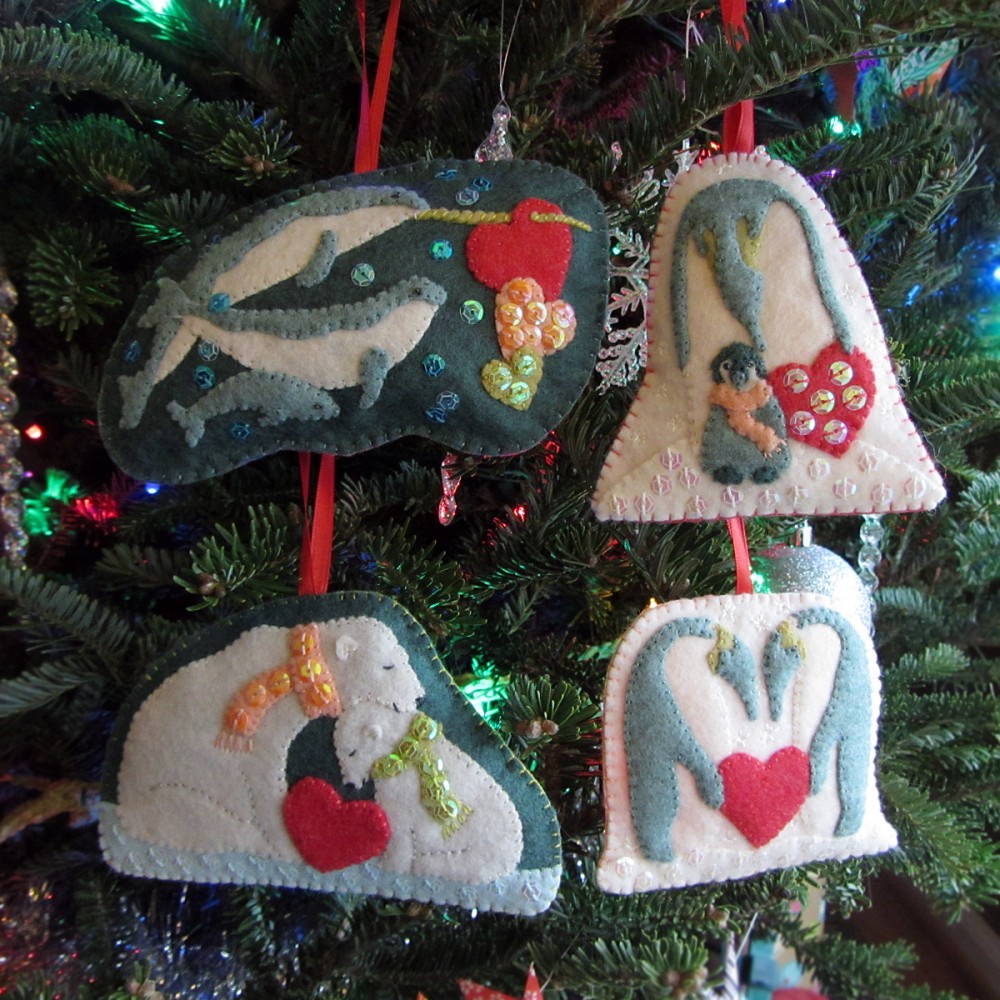
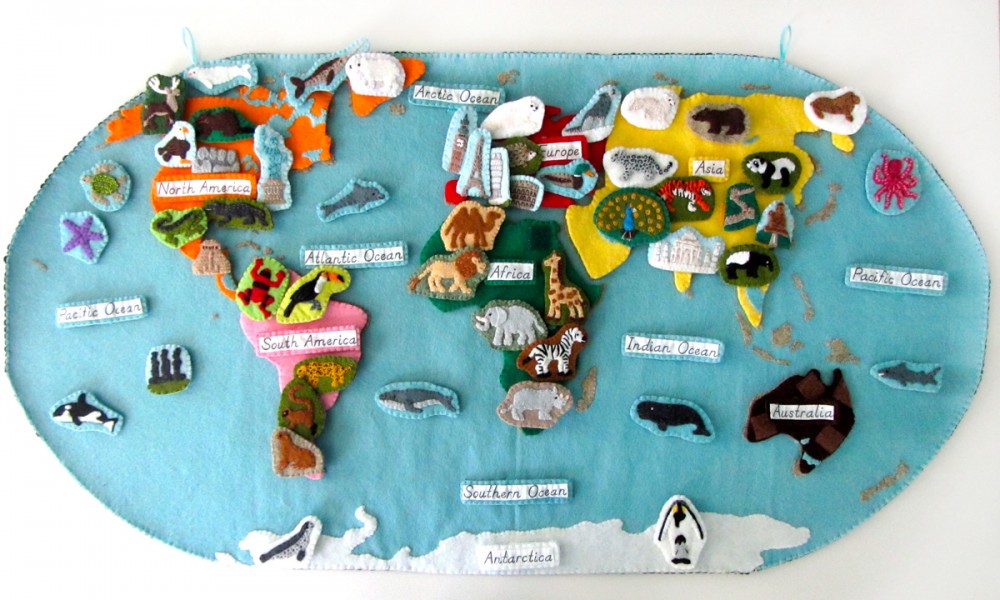
This year’s theme is Polar Families, inspired by some of the animals Jax and I have been studying in homeschool with our world continent project. There will be four designs: a penguin daddy and chick, a narwhal family, a pair of penguin mates and a polar bear mama and cub. The latter two are featured here.

Polar Family Felt Ornament Patterns – Narwhals & Penguins

What I Used

I am listing all the supplies I’ll use for the 4 ornaments, noting the ones not needed for these two.

Polar Family Felt Ornament Patterns – Narwhals & Penguins  Polar Family Felt Ornament Patterns – Narwhals & Penguins

These beautiful sequins are a new offering of American Felt and Craft!

Polar Family Felt Ornament Patterns – Narwhals & Penguins

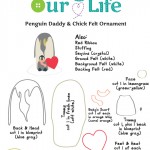
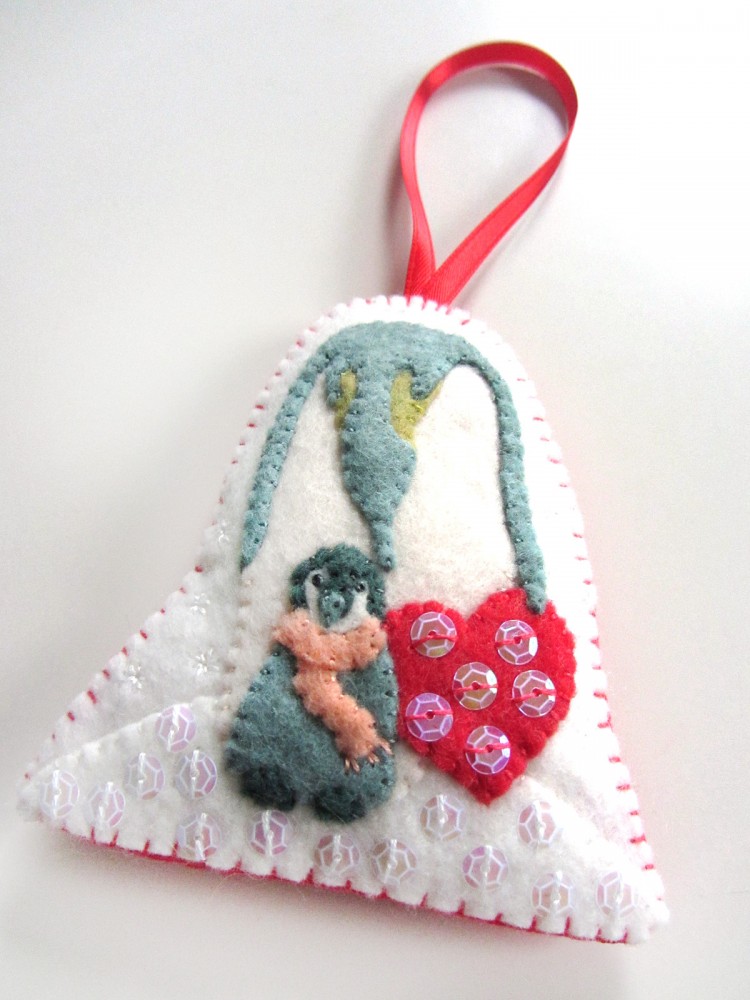
Penguin Daddy & Chick

 I cut a rounded strip of white felt for the snowy ground and tacked it down across the bottom of the white background felt with felt glue. After I cut out all my pieces, I tacked them into place as well.  Then I trimmed down the background felt so there was just a small edge around the penguins.

Polar Family Felt Ornament Patterns – Narwhals & Penguins

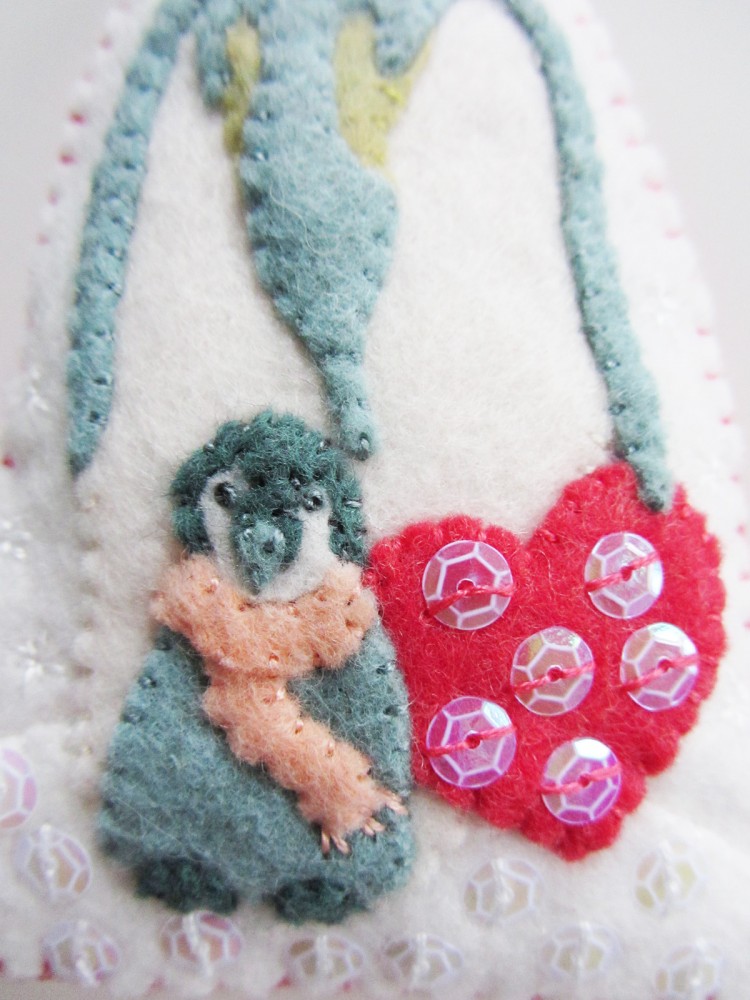
For the penguins, the heart and the top of the snowy ground, I stitched all the edges down with matching floss. (I use 2 strands.) I stitched crystal sequins randomly onto the snowy ground using 2 stitches each. I also added them to the heart. At the end of the scarf, I made upside-down V stitches as tassels. I made French knot eyes on the chick.

On the white background, I stitched snowflakes: a plus sign shape of four stitches, all stitched towards the center, then four more longer stitches on the diagonal in between.

Polar Family Felt Ornament Patterns – Narwhals & Penguins

I cut a length of red ribbon and a piece of orange whip (coral orange) felt to fit as the ornament’s backing. I stitched all the way around, adding stuffing halfway and catching the ribbon loop in the top. I used a blanket stitch.

Polar Family Felt Ornament Patterns – Narwhals & Penguins

Narwhal Family

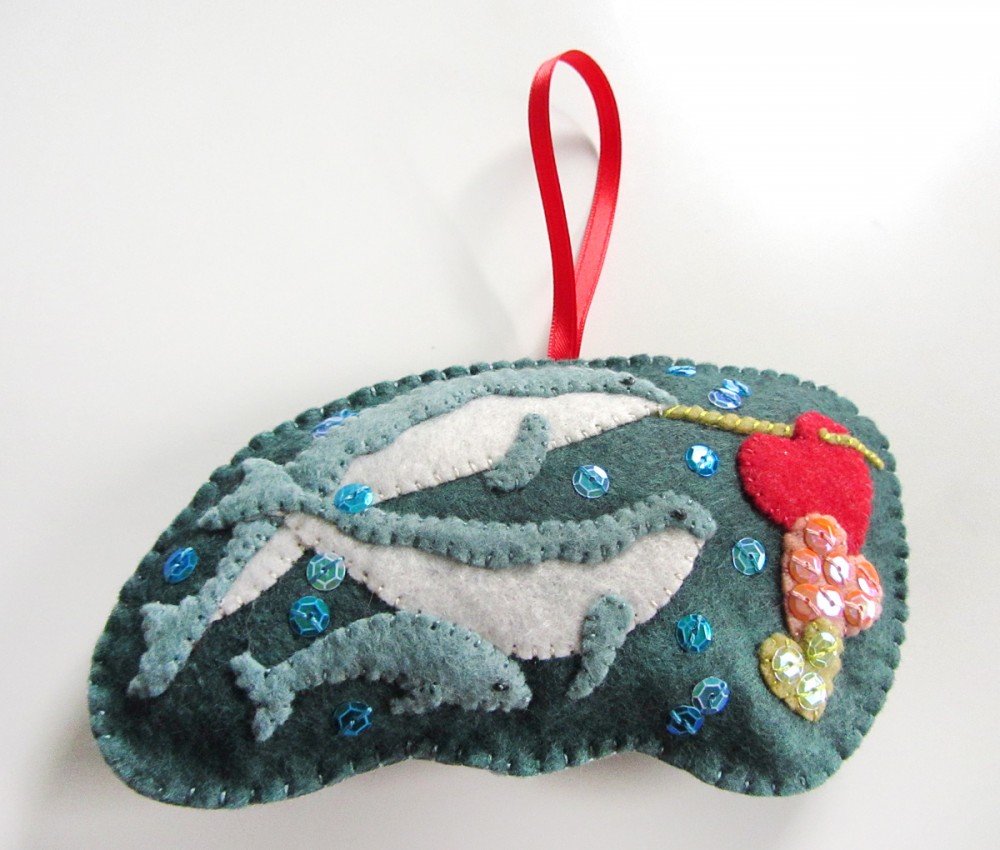
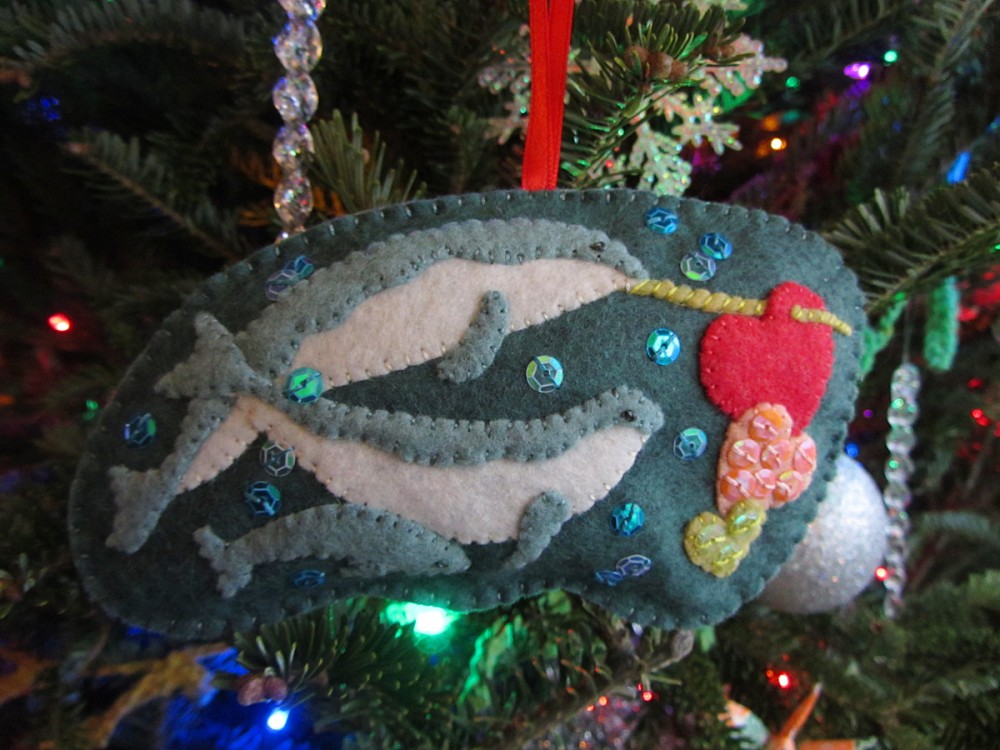
I love narwhals! They live up in the Arctic ocean, so I was happy to include them in this polar series. Narwhals are brownish grey, and they turn speckled white with age. I stuck with my color scheme, as they look blue gray under the ocean water. I had intended to use two shades of brown sequins for the adults’ speckles, but I ultimately decided to skip them. I found them distracting. [ You can see what they look like here and decide for yourself. ]

Polar Family Felt Ornament Patterns – Narwhals & Penguins

There aren’t a lot of narwhal pictures out there. I was very inspired by this drawing. Narwhals don’t typically stay in family groups, but I wanted to show all of their forms in this ornament.

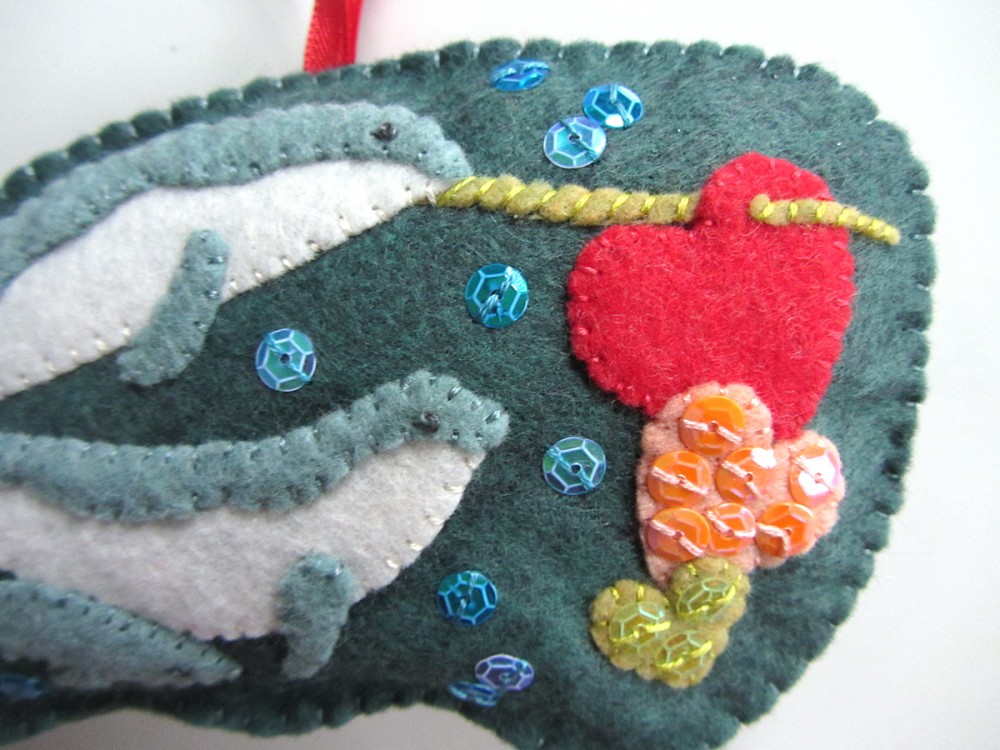
I started by tacking everything down to a dolphin teal-gray background with a light layer of felt glue, including a pointed strip I cut out of lemongrass to be the male adult’s tusk. I cut the tusk into two pieces and layered part behind the heart and part in front so that it looks like the heart is pierced. I stitched around all the edges, and added sequins to two of the hearts. The eyes are French knots with little stitches in one corner of each. The tusk was done with diagonal stitches running across it.

Polar Family Felt Ornament Patterns – Narwhals & Penguins

After sewing everything down, I cut around the outside of the ornament to trim it down, then sewed crystal and mermaid sequins on as bubbles. Add as many or as few as you’d like. I overlapped and grouped mine.

I cut a length of red ribbon and a piece of blueprint (blue-gray) felt to fit as the ornament’s backing. I stitched all the way around, adding stuffing halfway and catching the ribbon loop in the top. I used a blanket stitch.

Polar Family Felt Ornament Patterns – Narwhals & Penguins

Are you an Etsy or craft fair seller? Would you like to sell these ornaments, or any other item sewn from an Imagine Our Life pattern? Visit my Etsy shop and contact me for custom commercial licenses. All authorized sellers get featured on the website.

Polar Family Felt Ornament Patterns – Narwhals & Penguins

If you make one of these ornaments, I’d love to see it! Stop by our Facebook page, or mention me @iolstephanie on Instagram or Twitter. (If you are private on Instagram, I’ll have to request to follow you to see it.) Happy Holidays!

Mini Advent Ornaments Set Four

Mini Advent Ornaments Set Four

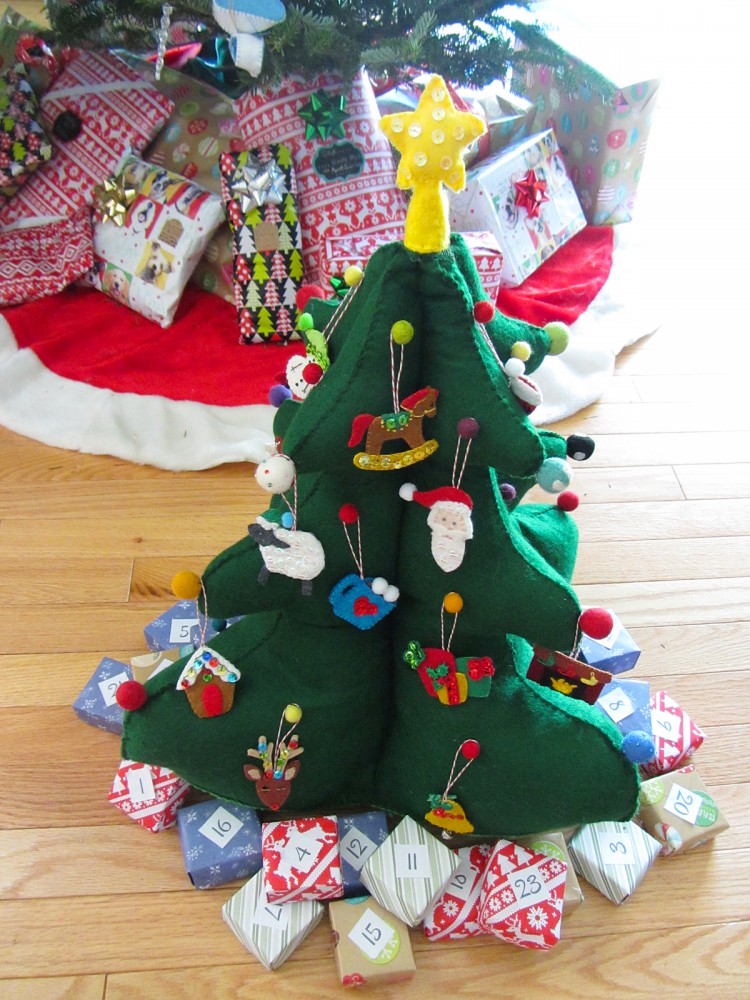
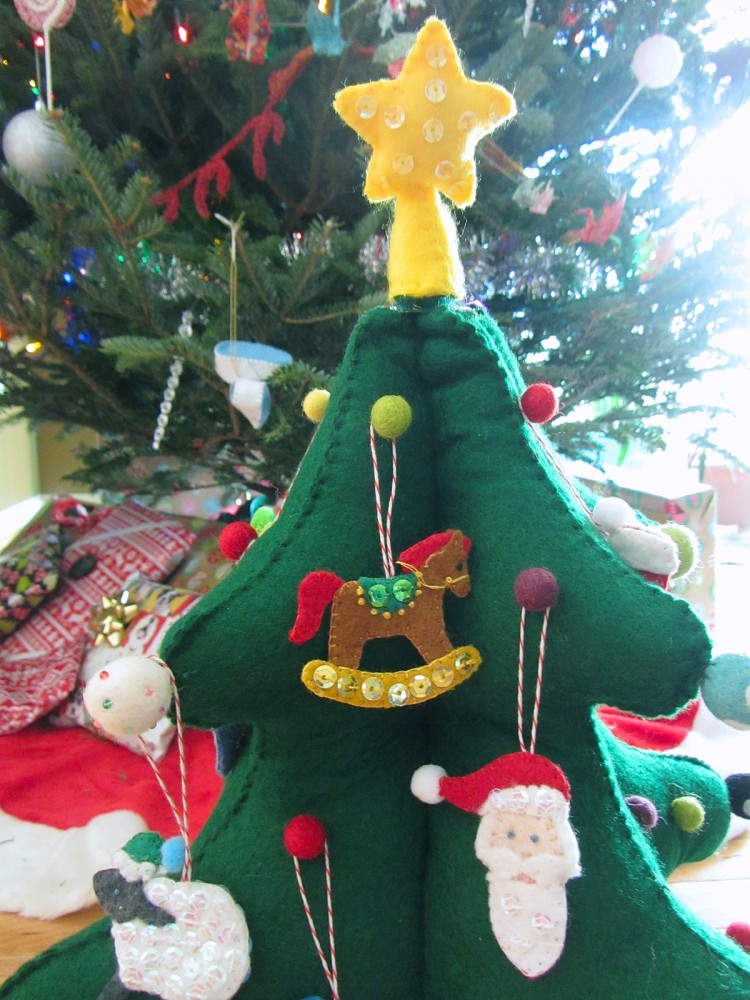
I can finally mark a major sewing project off my list holiday season! It was one that was chosen by my readers in our Facebook page: a felt Christmas tree play set! I hope you’ve been sewing along with me as I’ve shared the toddler-friendly tree pattern and tutorial and the first, three sets with you. But it’s not too late to join in! These mini ornaments bring a whole lot of holiday cheer and work up fast. Choose a few to stick in someone’s stocking or tie to a present as a gift tag!

Mini Advent Ornaments Set Four

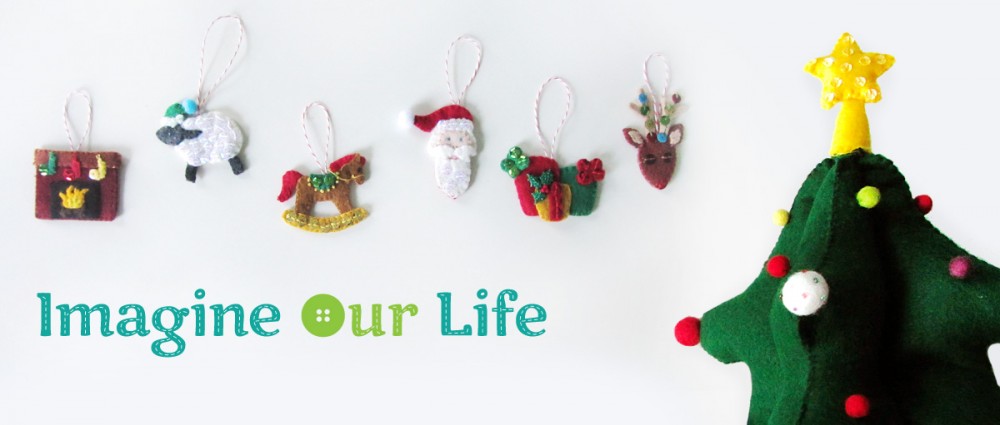
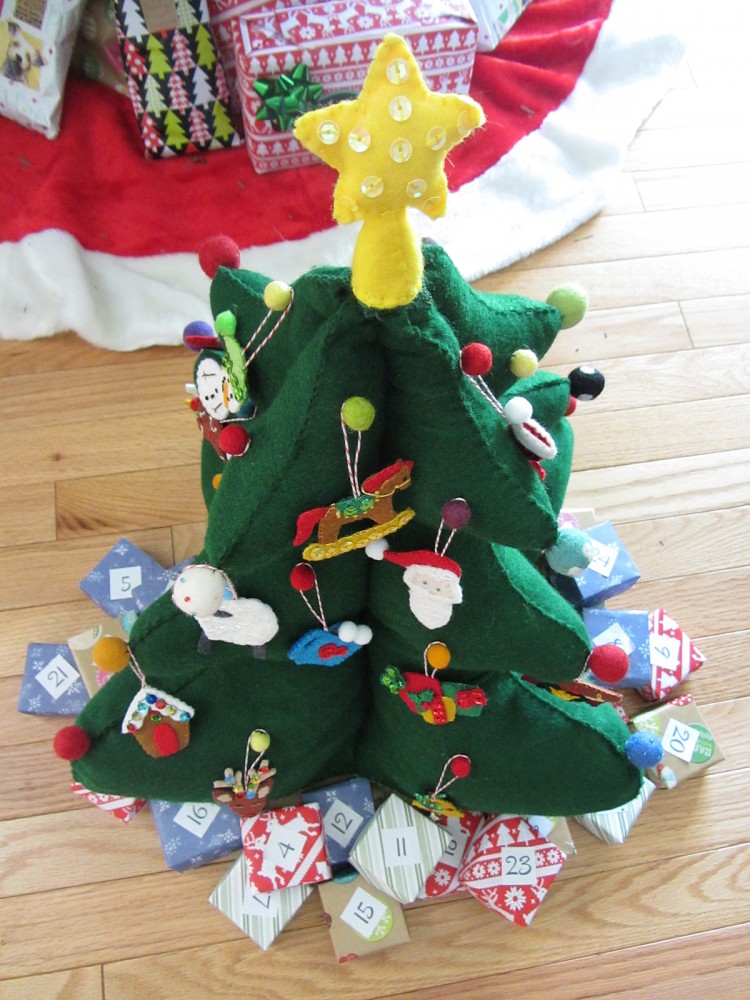
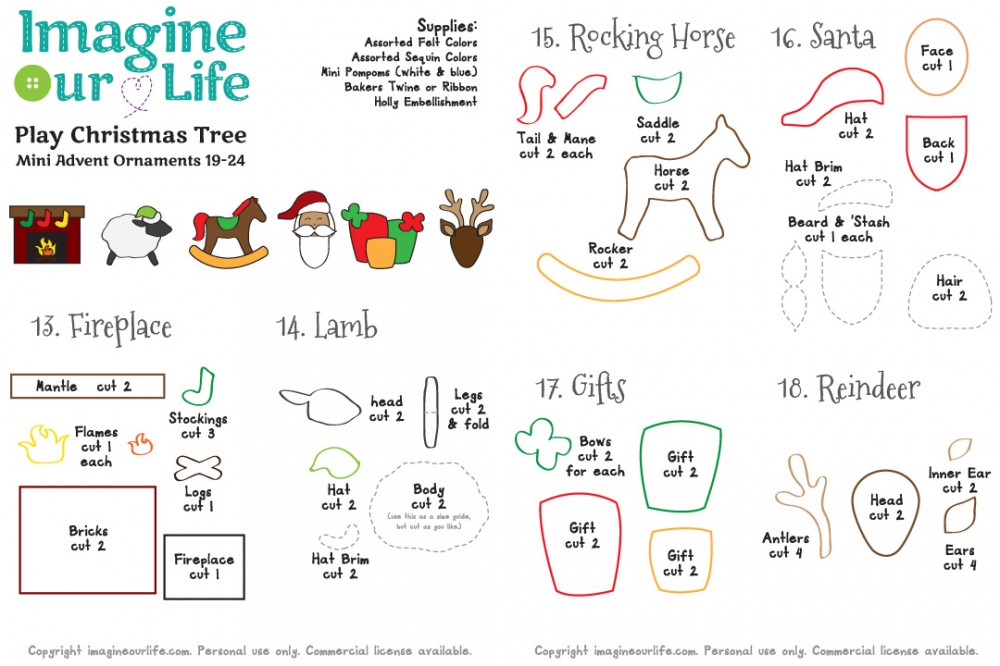
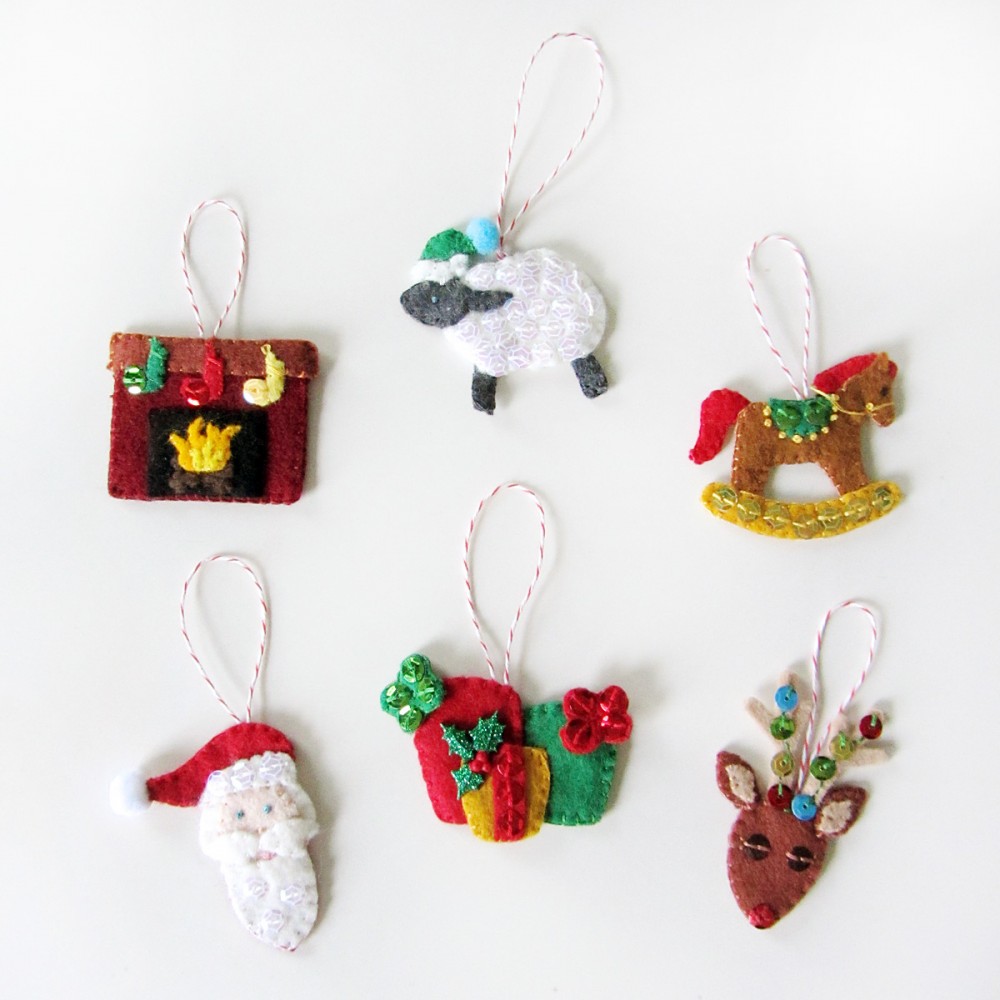
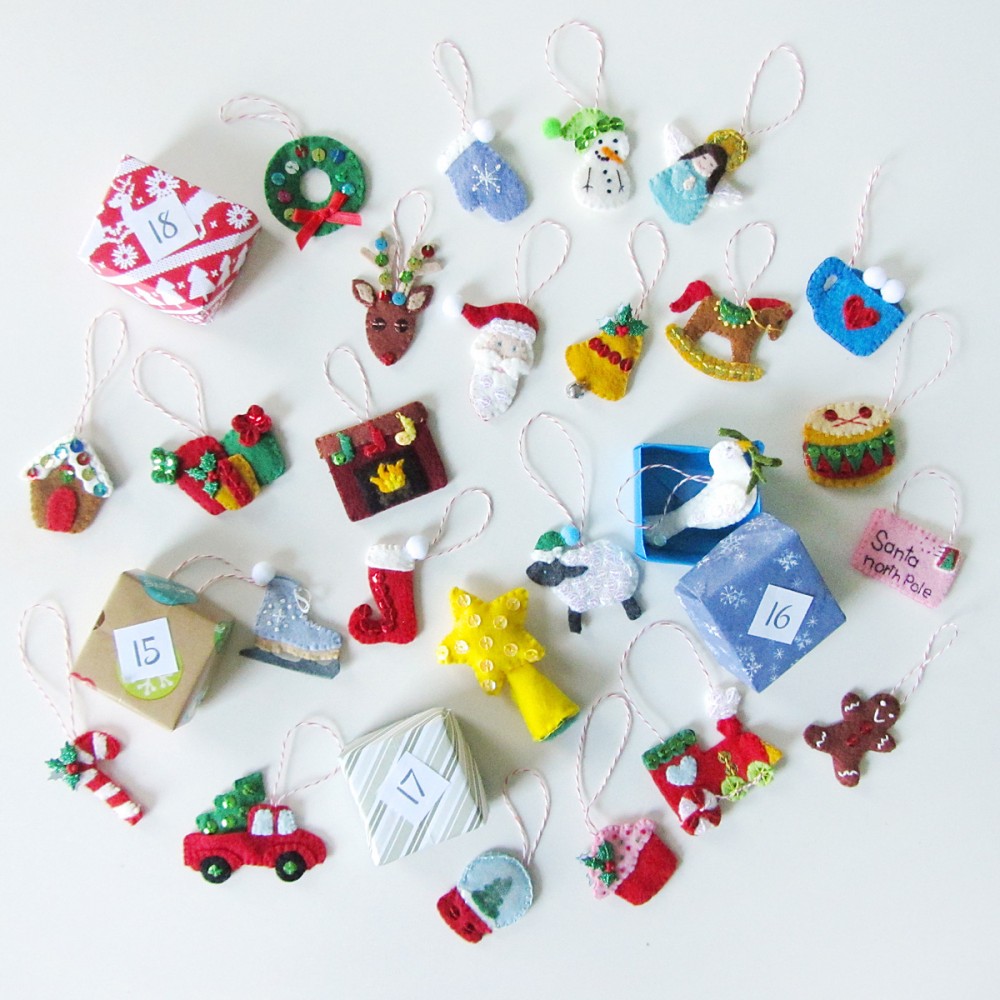
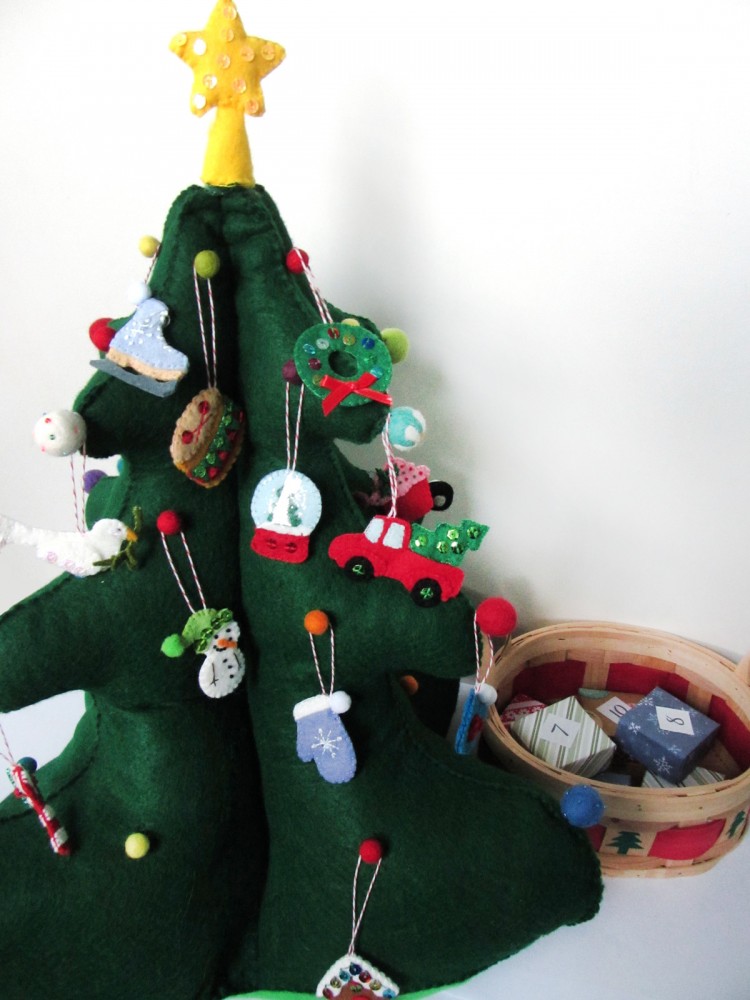
I designed 24 ornaments, and I’ve been giving Jax one to unwrap every day leading up to Christmas. I shared the ornaments in batches of 6. Ornaments 19-24 are: a fireplace, a lamb, a rocking horse, Santa, gifts and a reindeer.

To see all the posts in this series, click here.

Mini Advent Ornaments Set Four

What I Used:

Mini Advent Ornaments Set Four

For all of the ornaments: I cut pieces of baker’s twine, doubled it over and tied a knot in the ends. When stitching the tops of the ornaments together, I made sure the knot of the twine loop was inside. I also made sure to stitch through the knot to secure the loop.

Mini Advent Ornaments Set Four

19. Fireplace

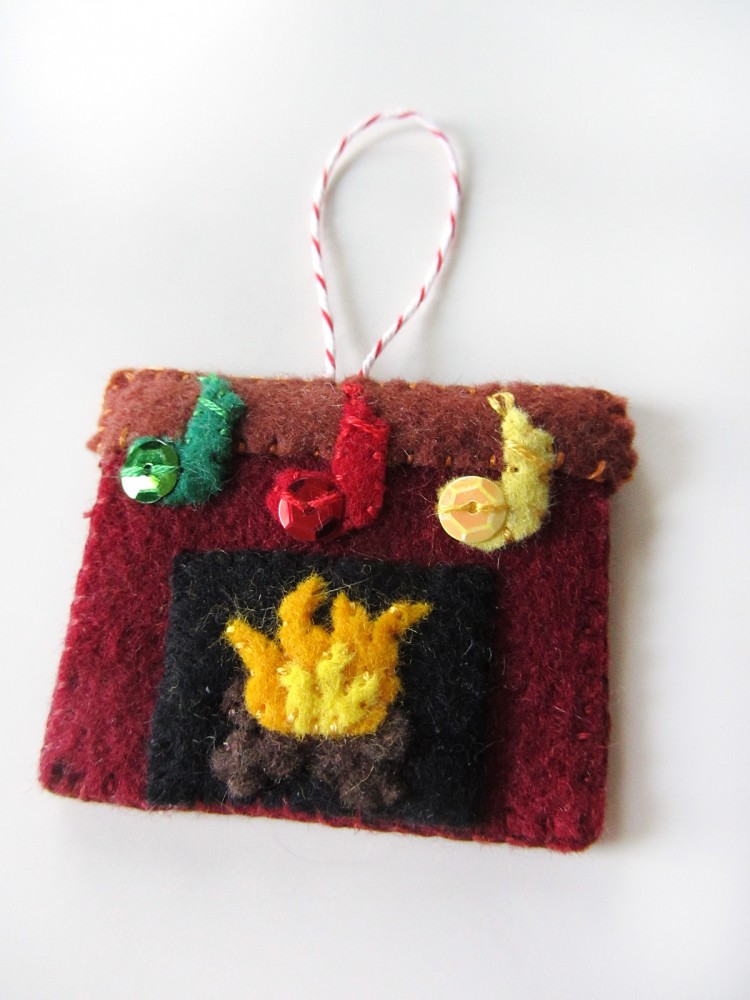
Fore the fireplace, I tacked down with glue the logs and flames to the black fireplace area, then stitched everything down. I stitched the black area to the bottom center of the front of the bricks, then stitched the front mantle on along its bottom. I glued down three stockings, then sewed them down with a sequin on the toe of each. I did a long stitch at the top of each for a cuff, and a single loop of a lazy daisy stitch at the top corner. On the back, I stitched the back mantle on along the bottom, then stitched the front and back together, catching a loop of twine at the top.

Mini Advent Ornaments Set Four

20. Lamb

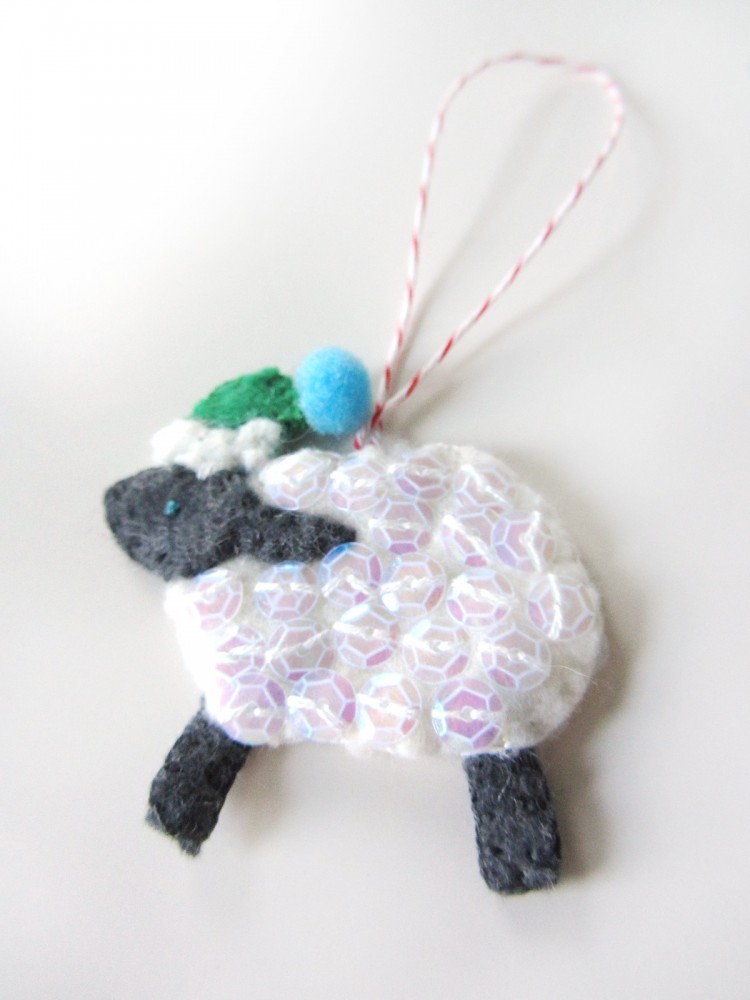
Oh, this sweet little lamb! She is quite simple, but you can believe me that all those crystal sequins are a labor of love. I started by gluing the heads onto each body piece, then sewing sequins onto the whole thing. (I provided a basic body shape in the pattern, but I found it worked best to trim the body into wooly bumps freehand.) I took the legs and folded them in half, gluing them down then stitching all around. I stitched the body of the sheep together with the twine loop at the top and the legs at the bottom. I stitched the two sides of her face together. I glued the hat brims onto the hat sides, then layered them around her head and sewed them together and onto her head.

Mini Advent Ornaments Set Four

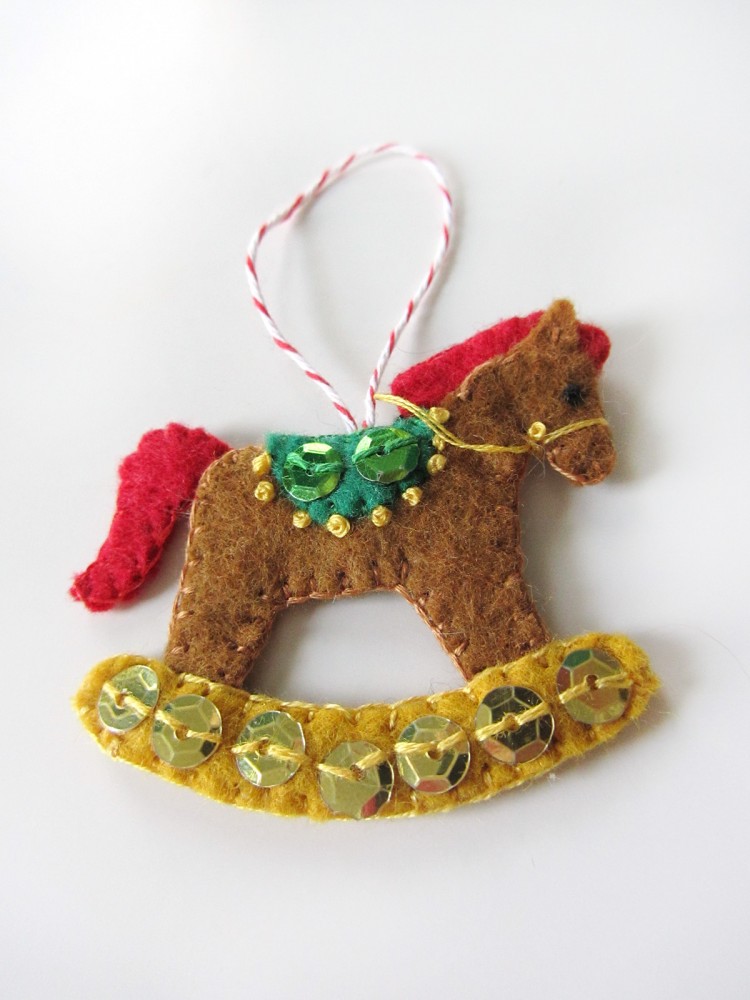
21. Rocking Horse

I started this cute rocking horse by gluing the saddle on, then sewing it. I added two green sequins on each side, then bordered it with French knots. I gave him black French knot eyes. I sewed the two sides of the main and tail together then glued them in between the two finished sides of the horse, as they are too small to pin. I stitched all around the horse catching a twine loop at the top, skipping the ears, but making a little brown stitch in the center of each. Using gold floss, I made an anchor stitch under his chin then looped the floss around his muzzle, then made a French knot on each side. I then loosely looped the floss behind his neck and made an anchor stitch to keep it from pulling out.

Mini Advent Ornaments Set Four

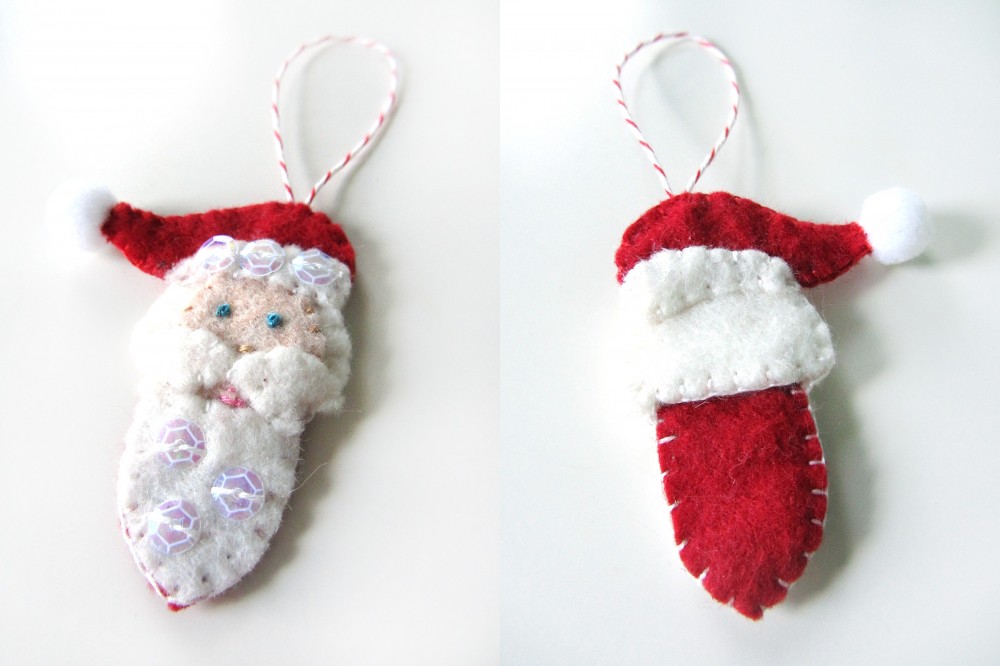
22. Santa

Ho, ho, ho! I had to do Santa! I started him by gluing his beard and mustache onto his face. I stitched them down, then added some crystal sequins to his beard. I made two straight pink stitches for his mouth, a peach stitch for his nose and two blue French knot eyes. I stitched the beard to his red back piece around the outside, the stitched his face and corners of his ‘stash onto one of the hair pieces. Then I sewed the back hair piece to the front. I glued the hat brims on and stitched crystal sequins to the front one while sewing them down. I layered the two hat sides onto his head and sewed them together and onto him. I added a white pompom to the tip of his hat.

Mini Advent Ornaments Set Four

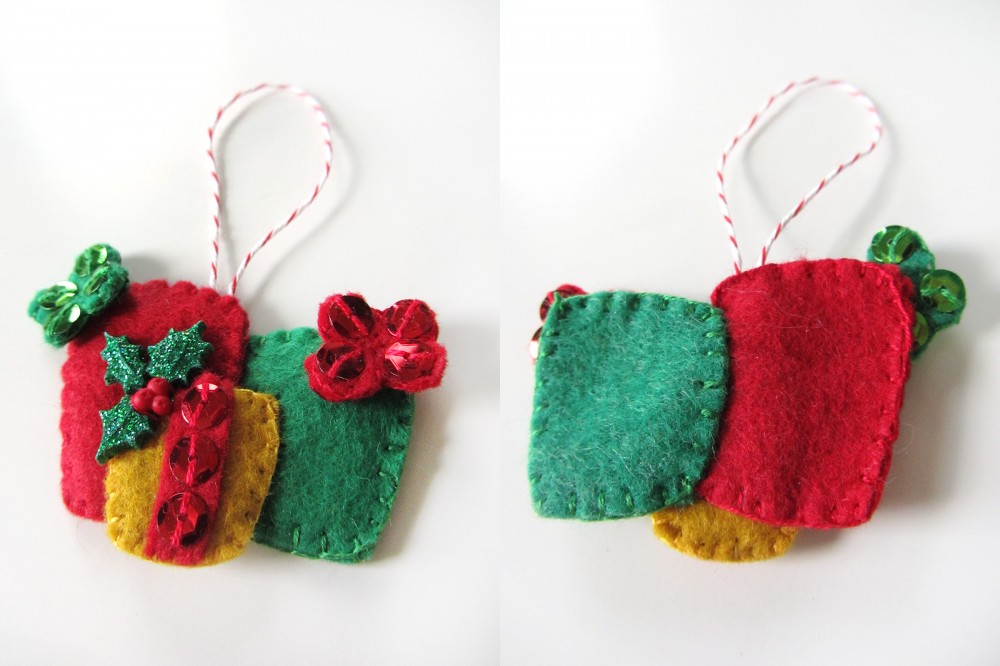
23. Gifts

These three little gifts could be made in any colors. I went with a classic Christmas palette. I stitched each of the two larger gifts separately, then stitched them together, only going through one layer of felt to hide the stitches. The corner of the red gift got the loop of twine. For the two bows, I decorated each loop with a sequin, sewed the two sides together, then stitched them on with some crossed stitches only in the center. On the gold gift, I glued down a strip of red felt as a ribbon and trimmed it to fit. I sewed a trio of sequins on to decorate it. I put the back and front together and started sewing them together with blanket stitch at the bottom, then laying it on the other two gifts and sewing through bother the gold gift and the top layer of felt of the other two while sewing the last three sides. I finished it with a plastic holly embellishment that I stitched on with red thread around the berries.

Mini Advent Ornaments Set Four

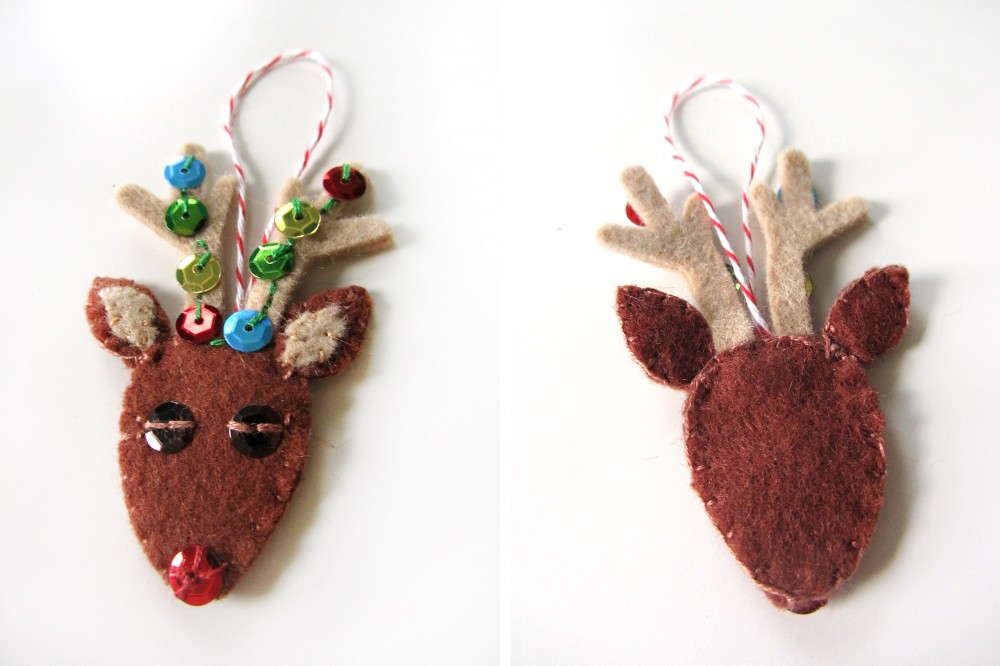
24. Reindeer

I started the reindeer by gluing the two layers of each antler together and setting them aside. I made sure to glue them edge-to-edge as I wasn’t sewing them together. I decorated the front of his face with a red sequin nose and brown sequin eyes. I glued then sewed the inner ears to the front ears, then sewed the front ears to their backs. I sewed the face pieces together with the antlers and a loop of twine at the top. I stitched the ears to the front top of the head. On the top of one antler, I made a line of back stitch running down, across and up to the top of the other. I stitched colored sequins along the way, using only one stitched in each so the dangle like holiday lights.

Mini Advent Ornaments Set Four

And now all the ornaments are complete! Which have been your favorites? It is so hard for me to choose, but I’ve really liked the tree truck, the dove and the hot cocoa cup. This project and its patterns are completely free for you to use for personal use. If you’d like to purchase a commercial license, visit my Etsy shop and contact me if you don’t see a current listing for it.

Mini Advent Ornaments Set Four

If you are making a set, I’d love to see your finished ornaments! Tag me on Instagram @iolstephanie (if you are private, I’ll have to request to follow you), mention me on Twitter @iolstephanie or post a picture on our Facebook wall. I love what I’ve seen so far! If you’d like to support my free site in other ways, visit my support page. If you’d like to get my posts the moment they go live in your email inbox, sign up here.

Mini Advent Ornaments Set Four

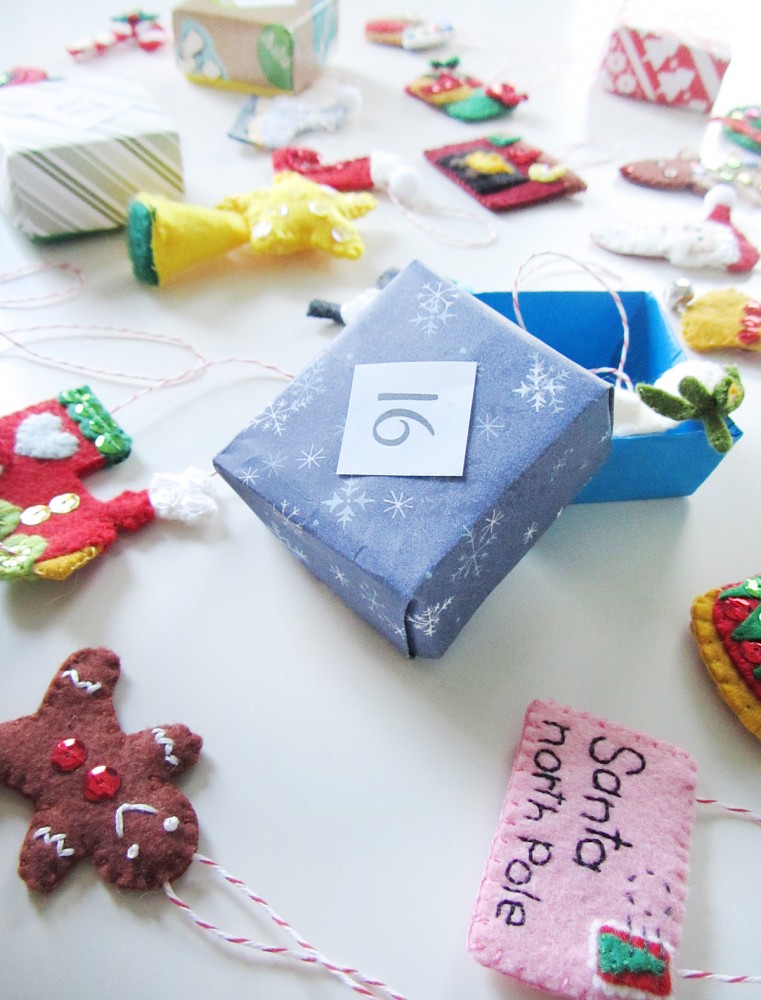
I’ve been giving Jax his ornaments in little origami boxes (mine use 6″ papers) with printed numbers on top. I have them all in in a Christmas basket and he finds the right one each night. I started out adding candy treats in there as well, but he lost interest so I stopped. He’s really gotten into opening them and asks me all day long if it is time yet.

http://greeneyed.com/2010/12/page/3/

Happy holidays!


Mini Advent Ornaments Set Three

Mini Advent Ornaments Set Three

My large sewing project this holiday season was one that was chosen by my readers in our Facebook page: a felt Christmas tree play set! I hope you’ve been sewing along with me as I’ve shared the toddler-friendly tree pattern and tutorial and the first, two sets with you. But it’s not too late to join in! These mini ornaments bring a whole lot of holiday cheer and work up fast.

Mini Advent Ornaments Set Three

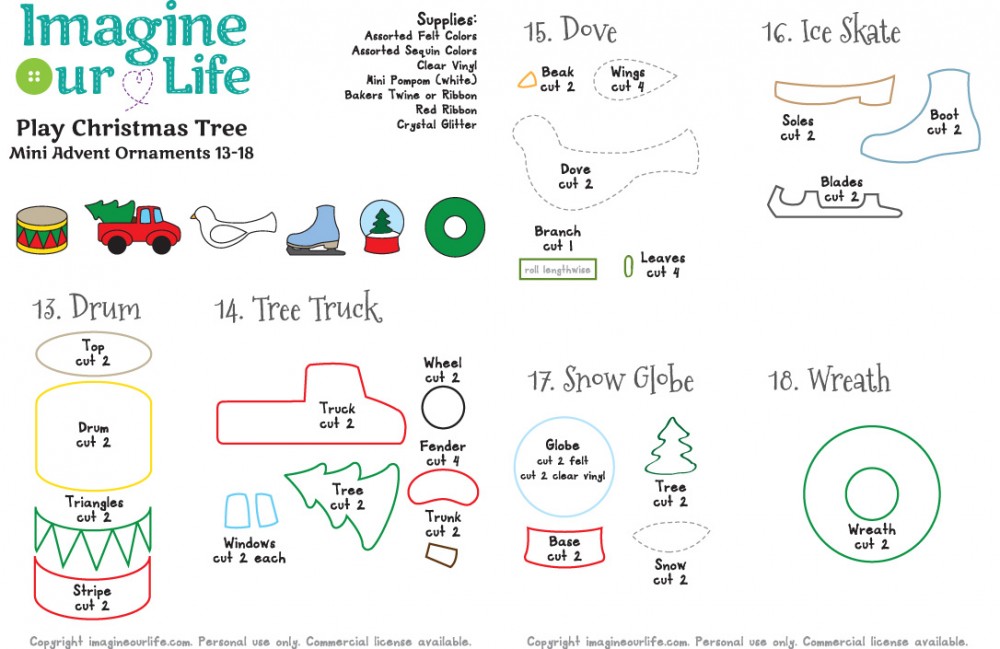
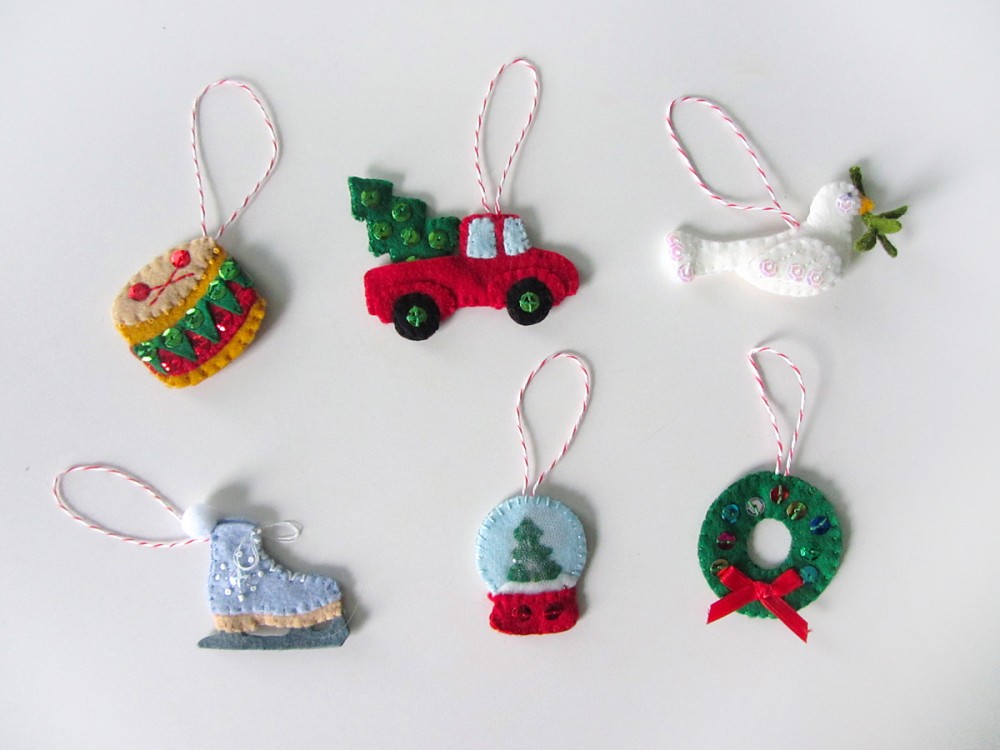
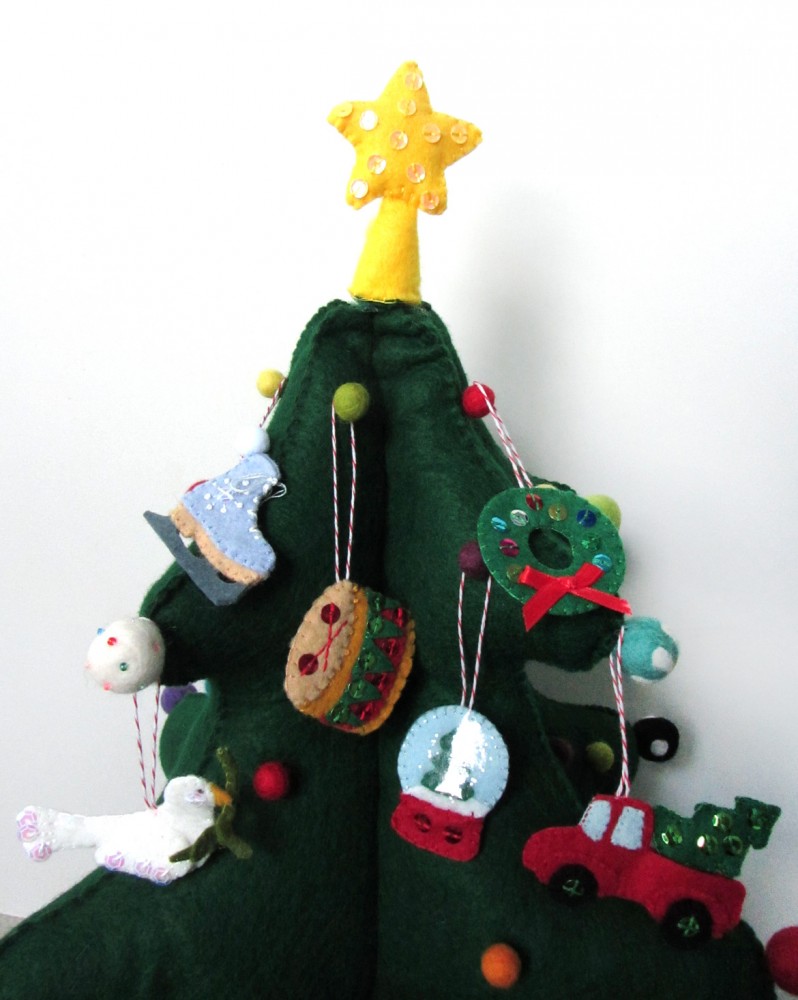
I will be designing 24 ornaments, and giving Jax one to unwrap every day leading up to Christmas. I’ll be sharing the ornaments in batches of 6. I am planning two more sets next week to finish the project. Numbers 13-18 are: a drum, a truck with a tree, a dove, an ice skate, a snow globe and a wreath.

To see all the posts in this series, click here.

Mini Advent Ornaments Set Three

What I Used:

Mini Advent Ornaments Set Three

For all of the ornaments: I cut pieces of baker’s twine, doubled it over and tied a knot in the ends. When stitching the tops of the ornaments together, I made sure the knot of the twine loop was inside. I also made sure to stitch through the knot to secure the loop.

Mini Advent Ornaments Set Three

13. Drum

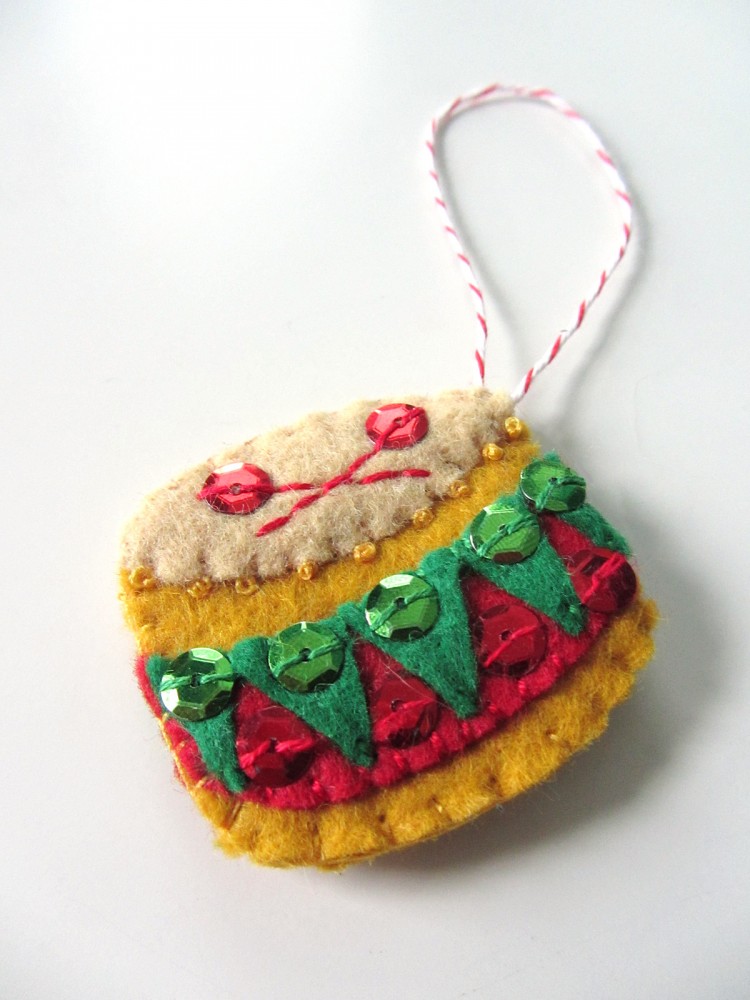
My husband is a drummer, so we already have a few little drums for Jax. All that aside, this little drum came out much cuter than I expected! I started by gluing down the red and green bands to each side of the drum, the stitched them down. I also added red and green sequins. I stitched the drum heads on, then made rows of gold French knots along their edges. On the front of the drum, I back stitched two drum mallets and used red sequins for the heads. I stitched around the edge of the drum, catching a loop of twine at the top corner.

Mini Advent Ornaments Set Three  Mini Advent Ornaments Set Three

14. Truck with a Tree

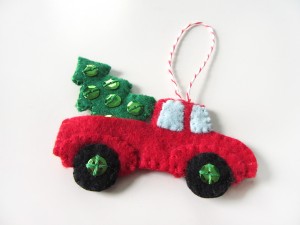
We haven’t gotten our Christmas tree yet, but I’m really anxious to! I was inspired by all the cars and trucks taking home their trees, so I designed this truck. It had to be red- Jackson’s favorite color!

To sew the truck, decorate each side the same. Tack down the parts, then sew around the fenders and windows. Stitch green sequins into the cents of each tire. Put the two sides of the truck together, and sew each pair of tires together, going through all the layers on the upper halves. Sew the truck sides together, leaving the truck bed an open pocket and catching a loop of twine in the top of the cab.

For the little tree, I stitched green sequins onto each side. I then tacked the two sides of the truck together and stitched them around the edges. I layered them between the two tree sides, and stitched it all together. The tree can stick into the truck pocket, or come out!

Mini Advent Ornaments Set Three

15. Dove

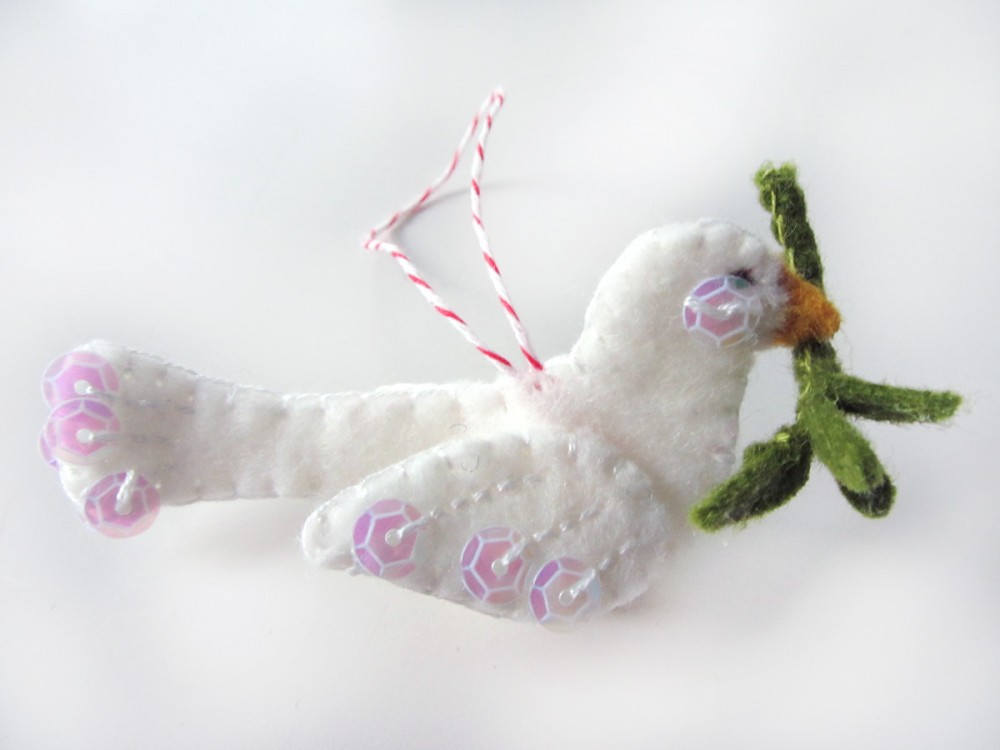
I am in love with this little dove! To begin, I stitched the outer piece of each wing with stripes of back stitch. At the end of each line, I stitched a crystal sequin. I left the bottoms of the sequins hanging free. I did the same rows of stitches and sequins on the tail of each body piece. I sewed each decorated wing piece to a plain one, then stitched them on along their fronts. I stitched sequin cheeks onto the dove’s face on each side, and added brown satin stitched eyes. I stitched the two sides of the dove together all the way around, catching a loop of twine in her back and the two beak pieces (sewn together) in her face.

To make the olive branch, I rolled the branch felt lengthwise and blanket stitched up its length. I then worked my way back down, stitching leaves on in a staggered pattern. I coated each leaf with felt glue and let them dry to make the sturdier. If you have a younger (or rougher) child, you may need to skip the delicate olive branch. Once the branch was dry, I stitched it to the under side of her beak.

Mini Advent Ornaments Set Three

16. Ice Skate

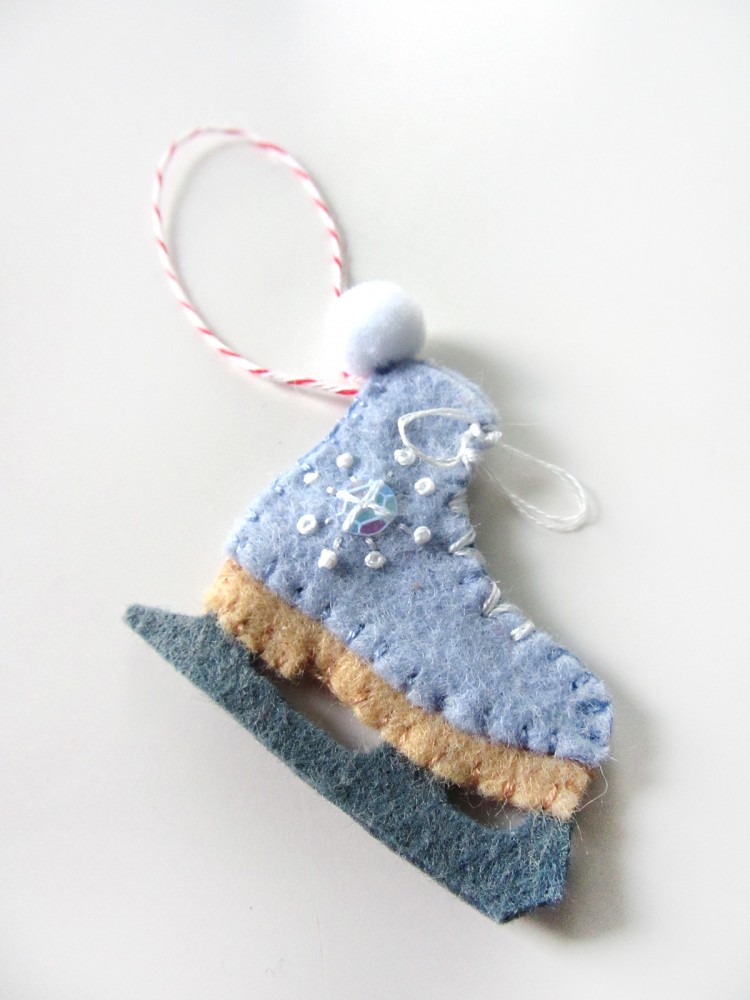
For this little ice skate, I glued together the two sides of the gray blade using a thicker layer of glue than I’d normally use. I didn’t want stitches taking away from the crisp look of the blade, so I made sure they were thoroughly glued together. I then tacked the tan sole pieces onto either side of the blade and stitched them on along the sides and bottom. I decorated each of the sides of the boot with a crystal sequin and some stitches and French knots. Then I layered the two sides around the sole and blade and stitched them on along the sides and bottom, catching a loop of twine in the upper back corner. I left the top open, like a real skate. I used white floss to stitch zig zags along where the shoelace would be, and stitched on a looped bow. I finished it off with a mini white pompom.

Mini Advent Ornaments Set Three

17. Snow Globe

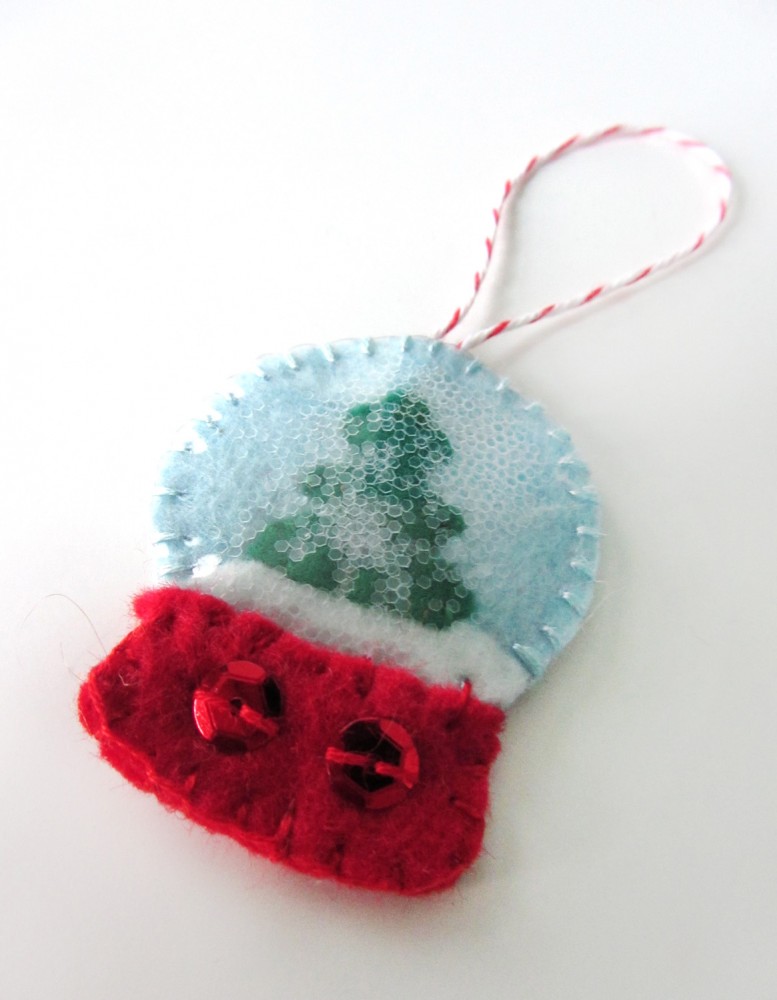
I have to give credit to American Felt and Craft for the idea of a snow globe ornament. This is my (mini) version!

I started by prepping the two sides of the red base with some stitched on sequins. I then glued the snow and trees to each of the blue globe backgrounds and letting them dry. I stitched each of the trees down, but didn’t stitch the snow as only a bit of the edge was exposed. I thin layered the two pieces back-to-back and sandwiched them between two circles of clear vinyl. Starting at the snow line, I stitched up and around through all the layers, catching a loop of twine at the top. I used a blanket stitch and pulled it firmly. I went all the way around the blue edge and stopped at the other side of the snow line.

I turned the snow globe upside-down, and carefully poured a little crystal glitter in to each side (about a 1/4 teaspoon – whatever fits but doesn’t obscure the view too much). The glitter won’t really move around, so having see-through glitter is key. Keeping it upside down, I sewed that bottom edge closed. I then sewed on the red base.

Mini Advent Ornaments Set Three

18. Wreath

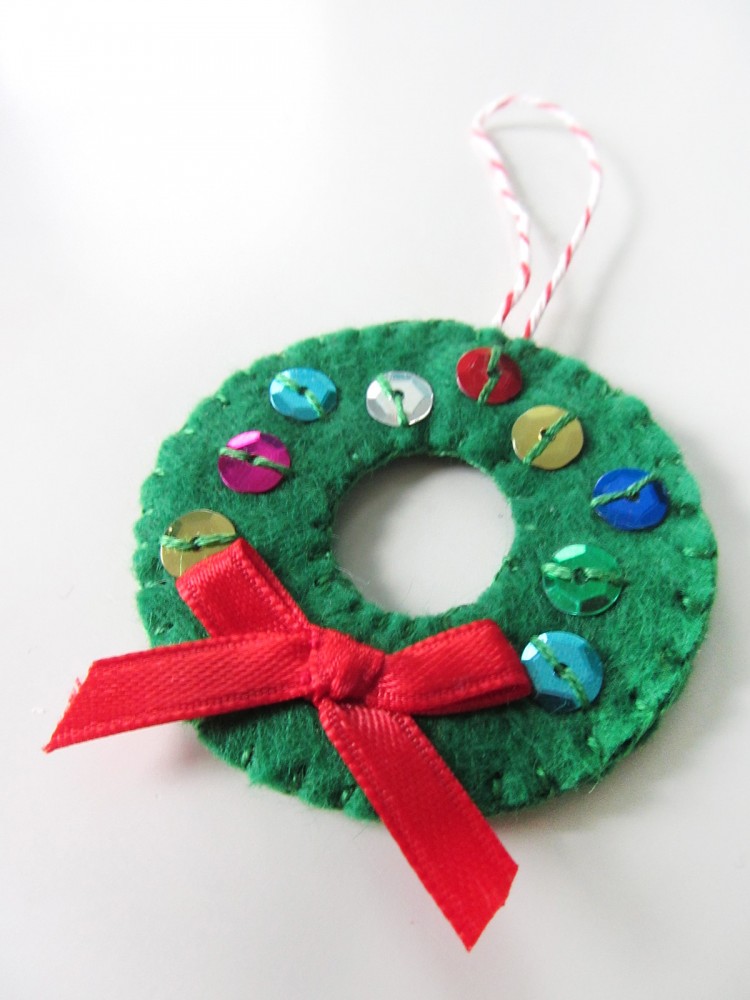
The wreath is quick and easy, but very pretty. On the front, I took a little bow I’d tied in ribbon and stitched it down using tiny stitches around the knot. I then stitched colorful sequins around the ring on both sides. I stitched the fronts and backs together, making sure to catch a loop of twine at the top.

 Mini Advent Ornaments Set Three

Which one is your favorite of this set? What would you like to see next? I have to design 24, and your idea may be one! Stop by Facebook or Twitter, or comment here with your ideas. I have a couple planned that were reader suggestions!

If you are making a set, I’d love to see your finished ornaments! Tag me on Instagram @iolstephanie (if you are private, I’ll have to request to follow you), mention me on Twitter @iolstephanie or post a picture on our Facebook wall. I love what I’ve seen so far!

I have to say a quick happy birthday to my fabulous big (and only) brother! He is so wonderful, and a big reason why I’d love a sibling for Jax (the husband disagrees.) He has been a big help on all of my more technical projects and is very creative himself. Check out his puppetry!

Happy birthday big bro!! Love you! <3


Animals of Europe for the Montessori Wall Map & Quietbook with Printables

Animals of Europe for the Montessori Wall Map & Quietbook with Printables

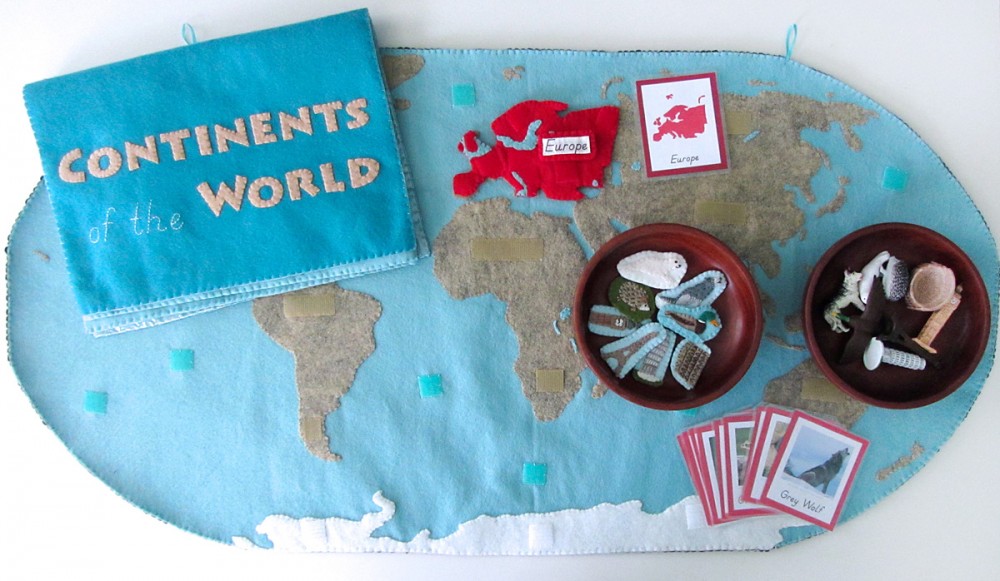
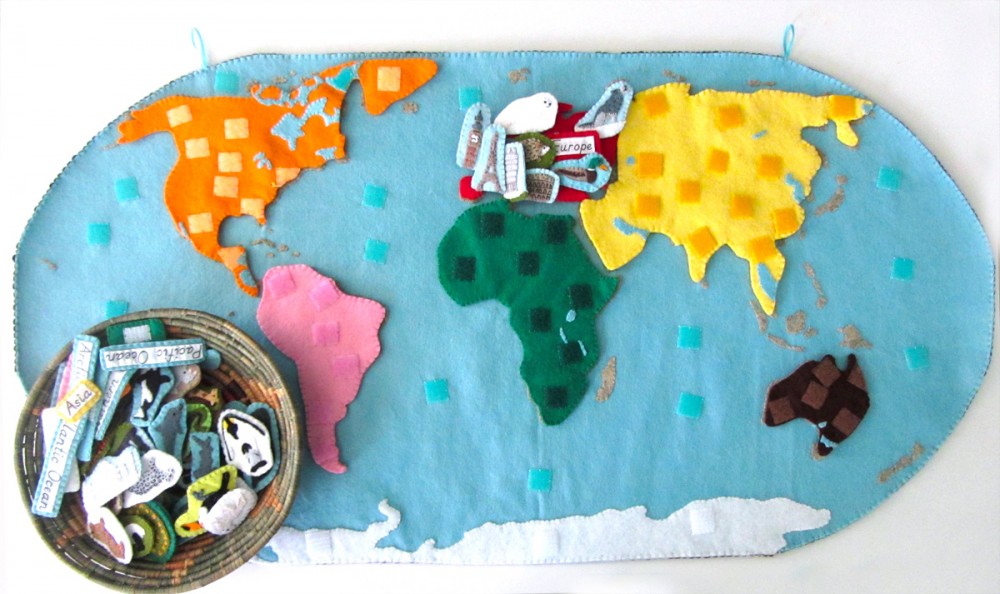
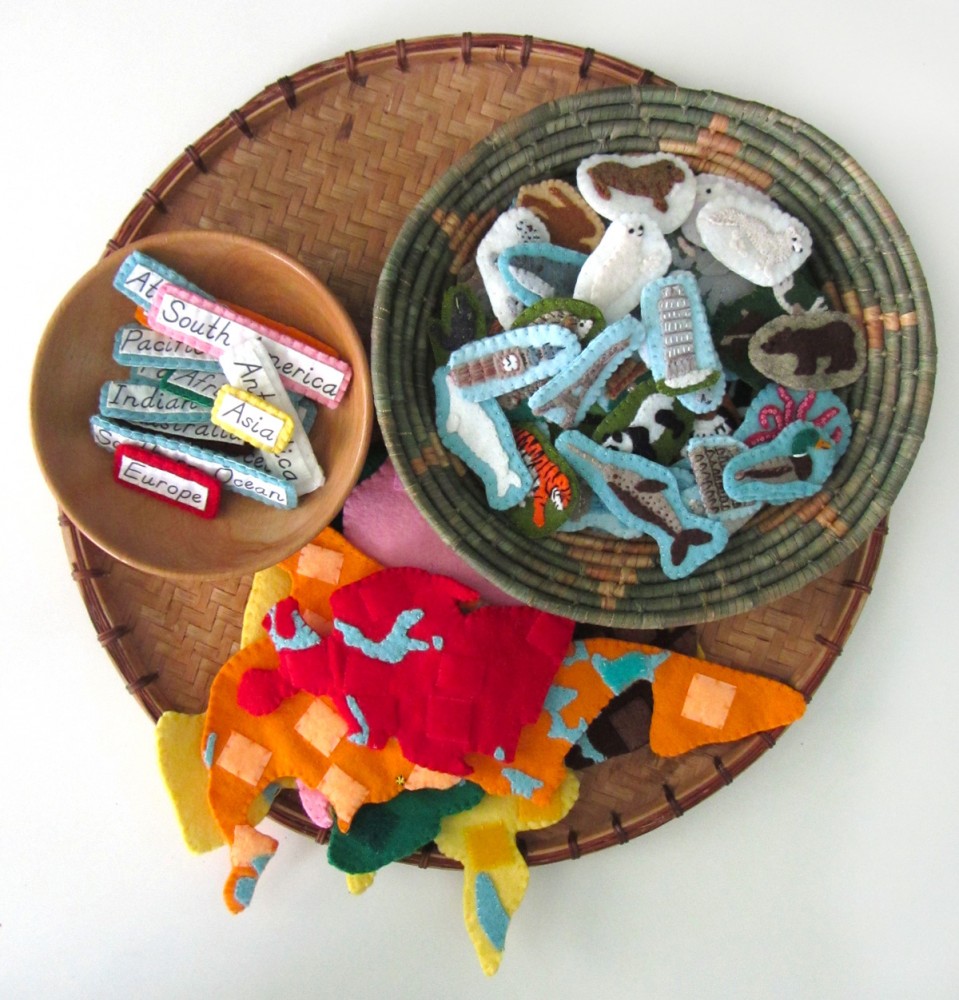
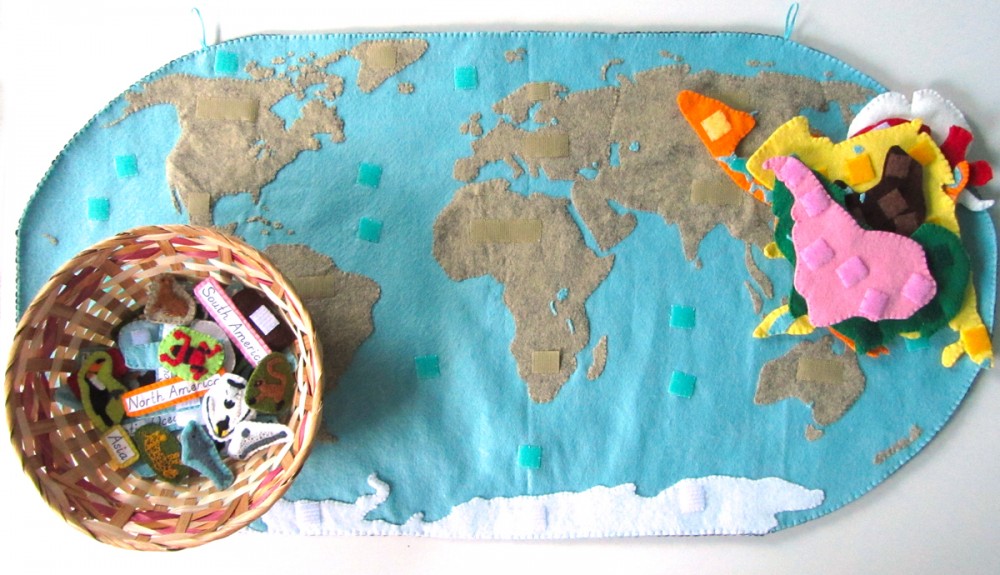
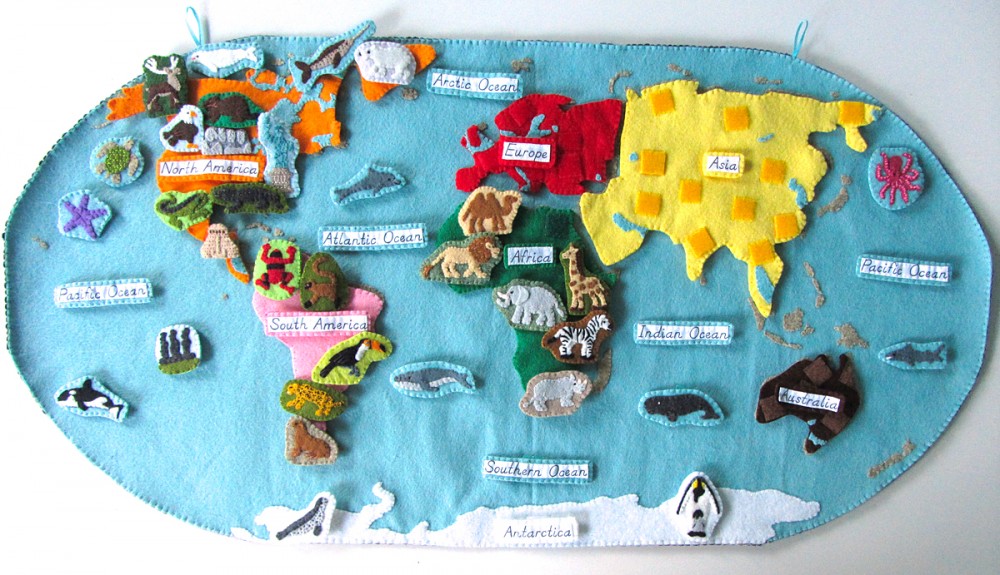
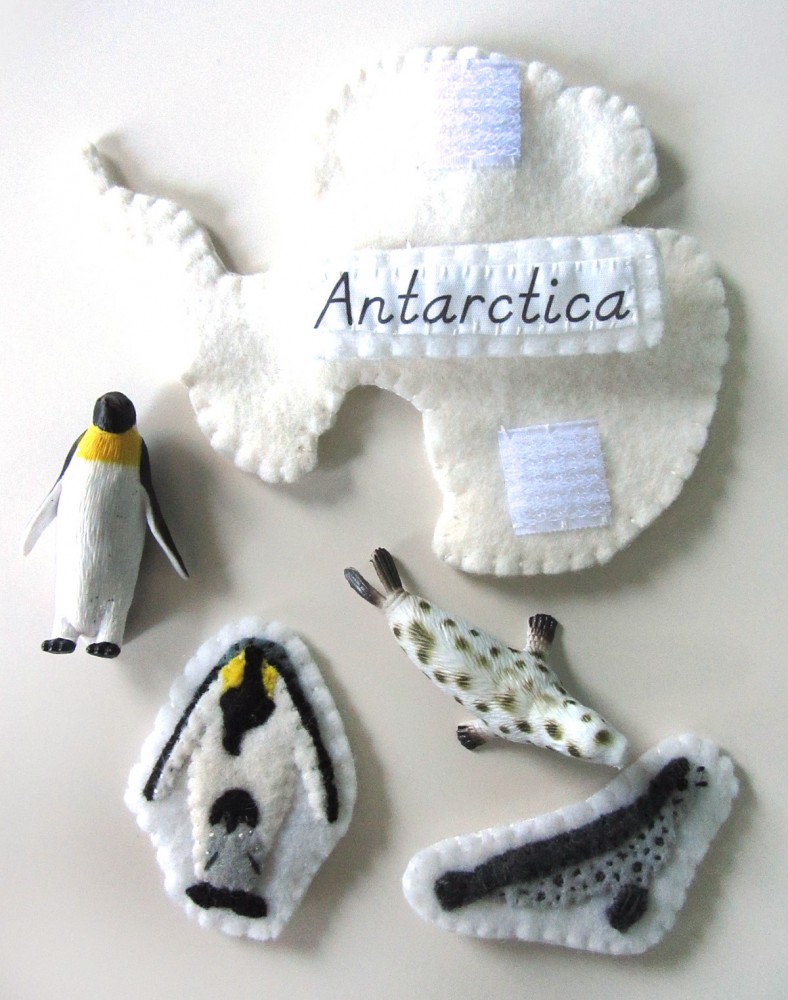
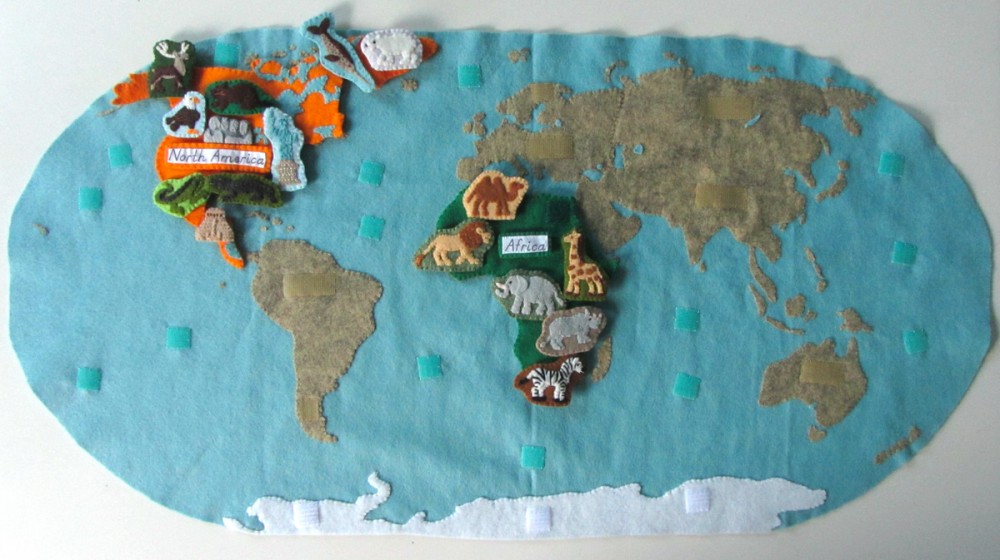
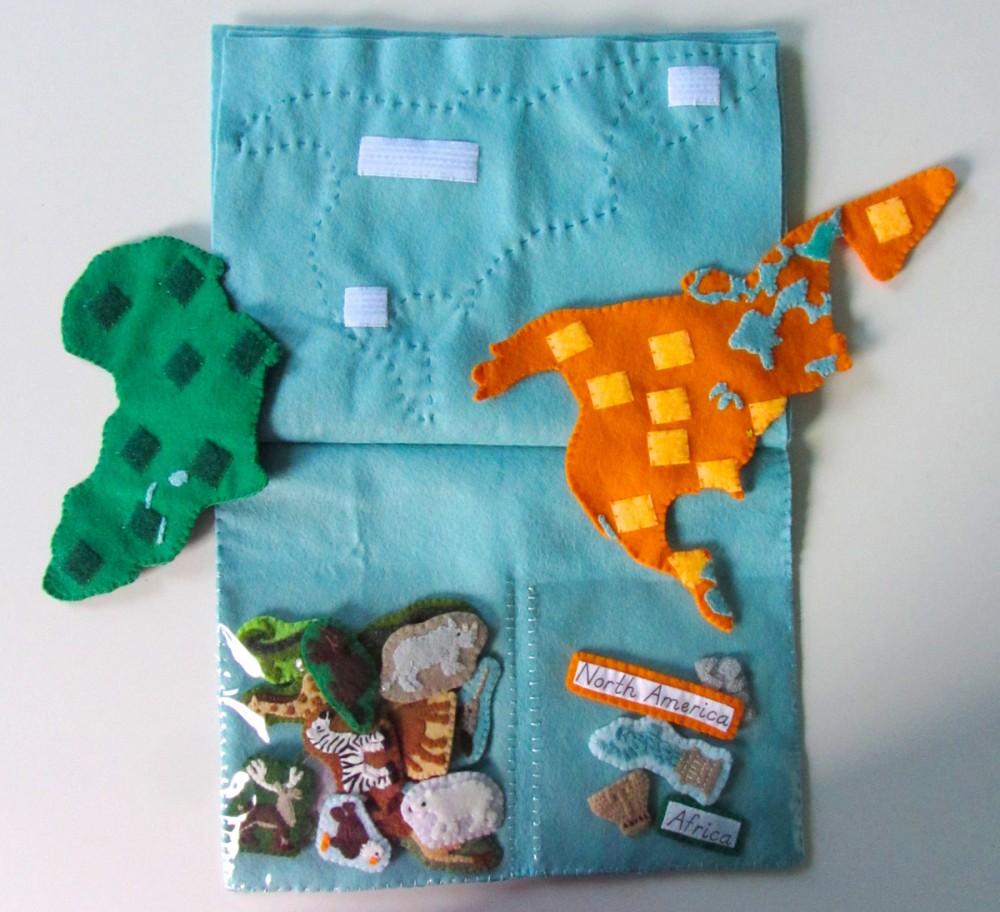
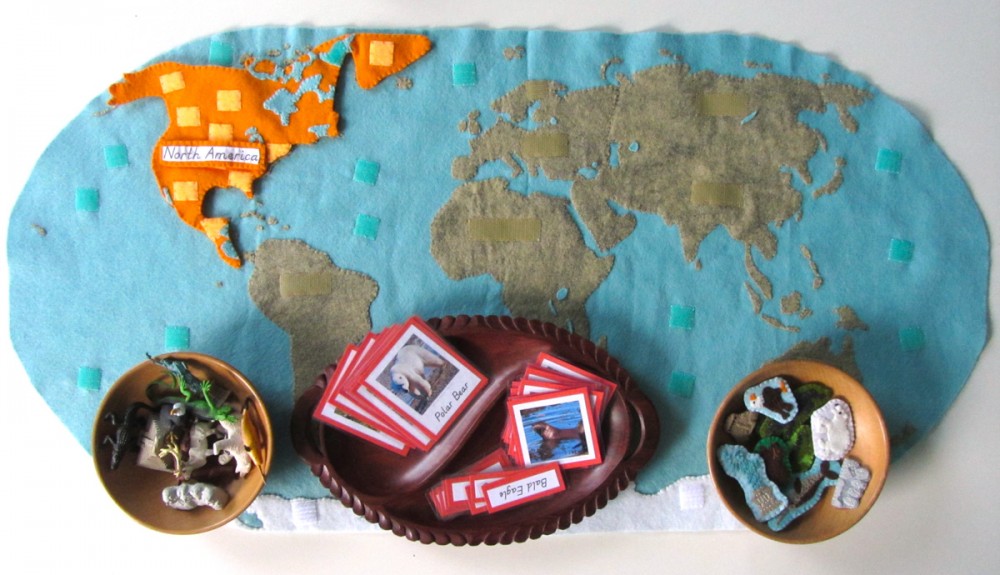
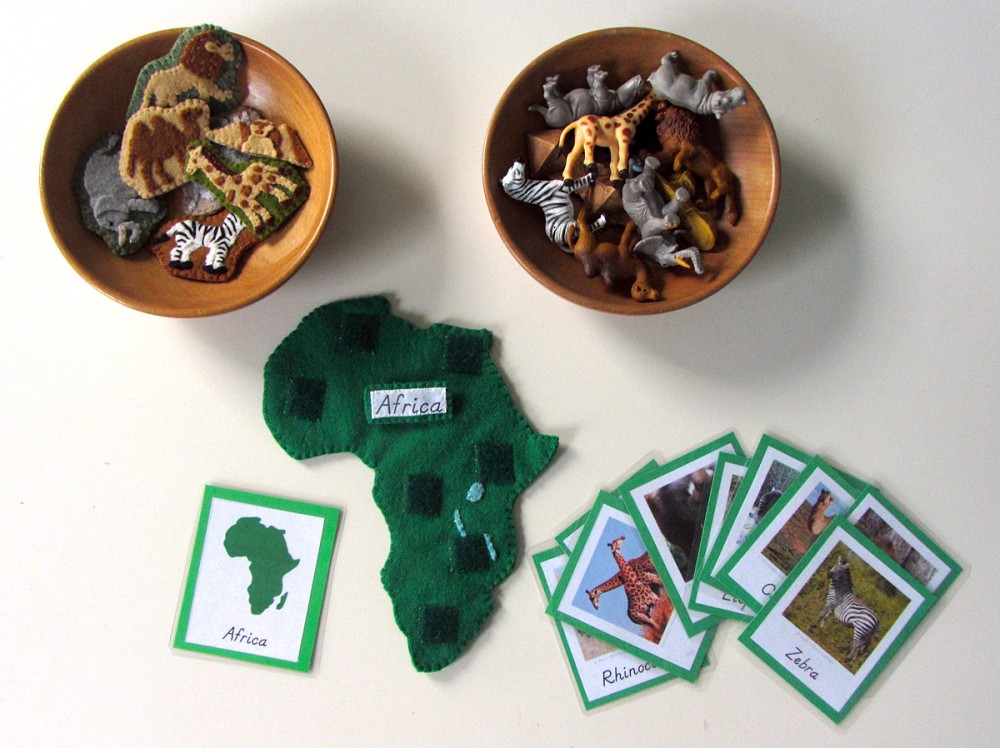
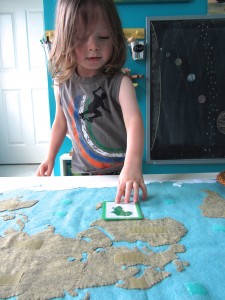
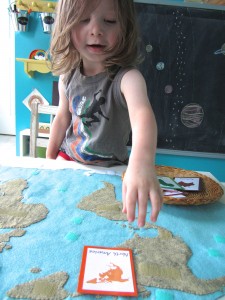
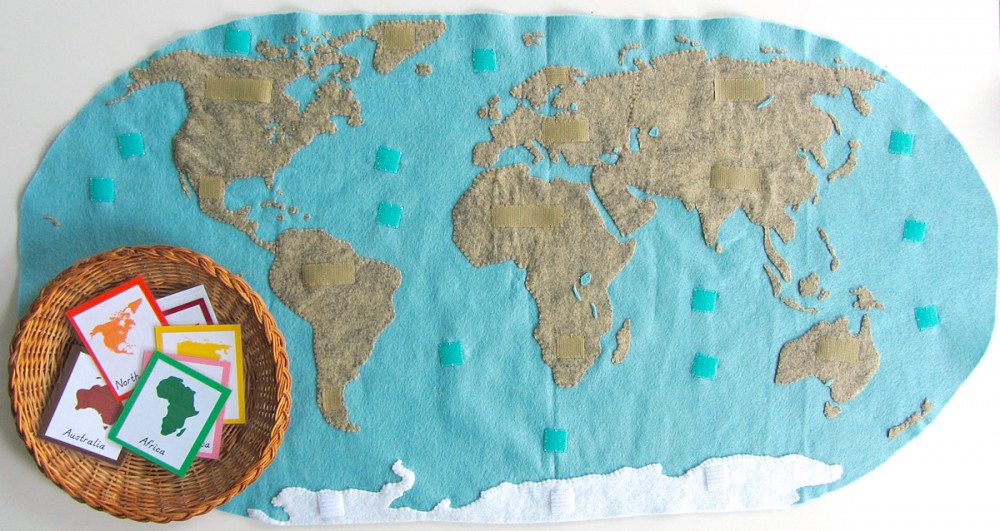
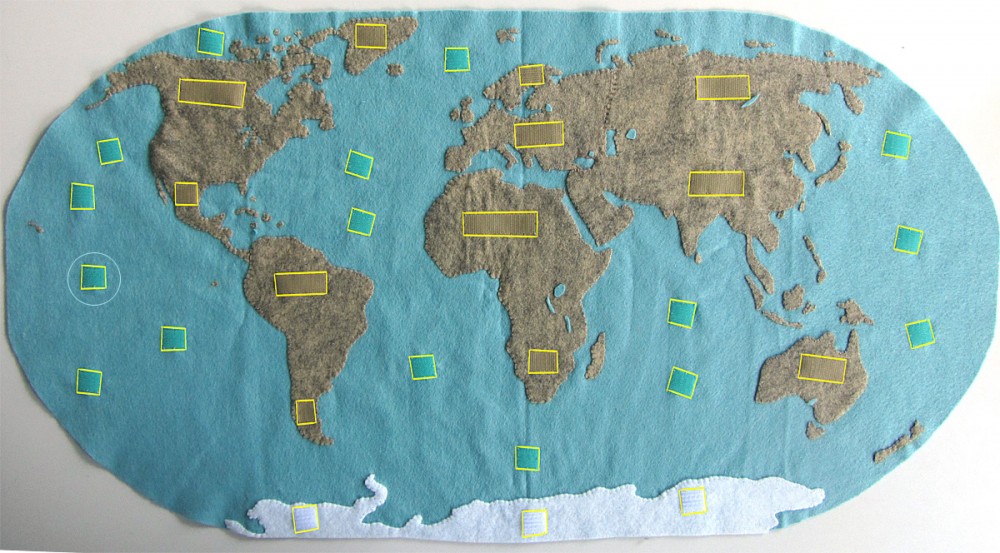
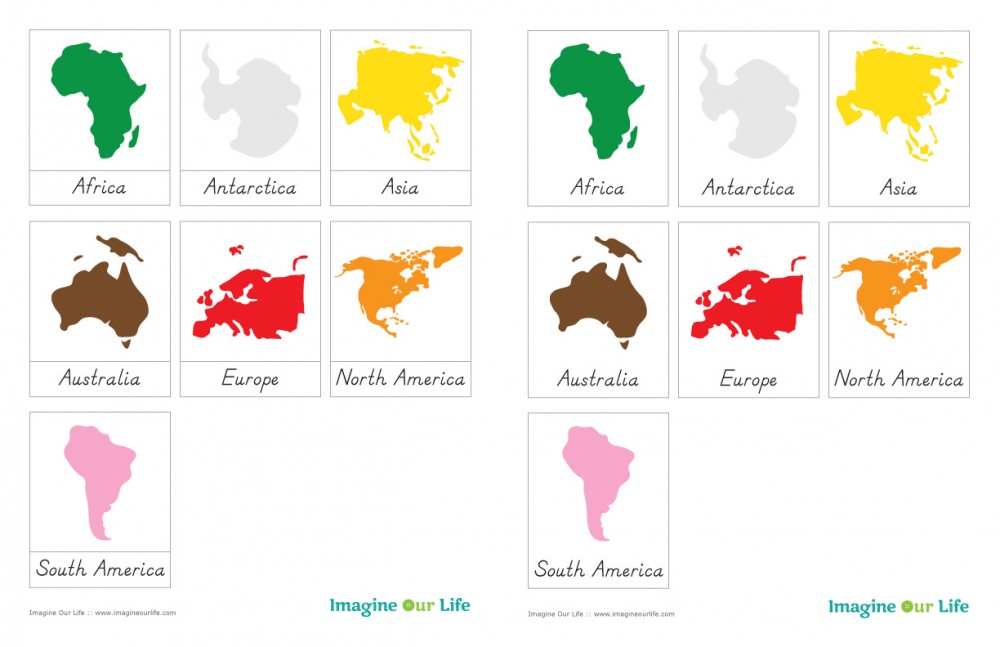
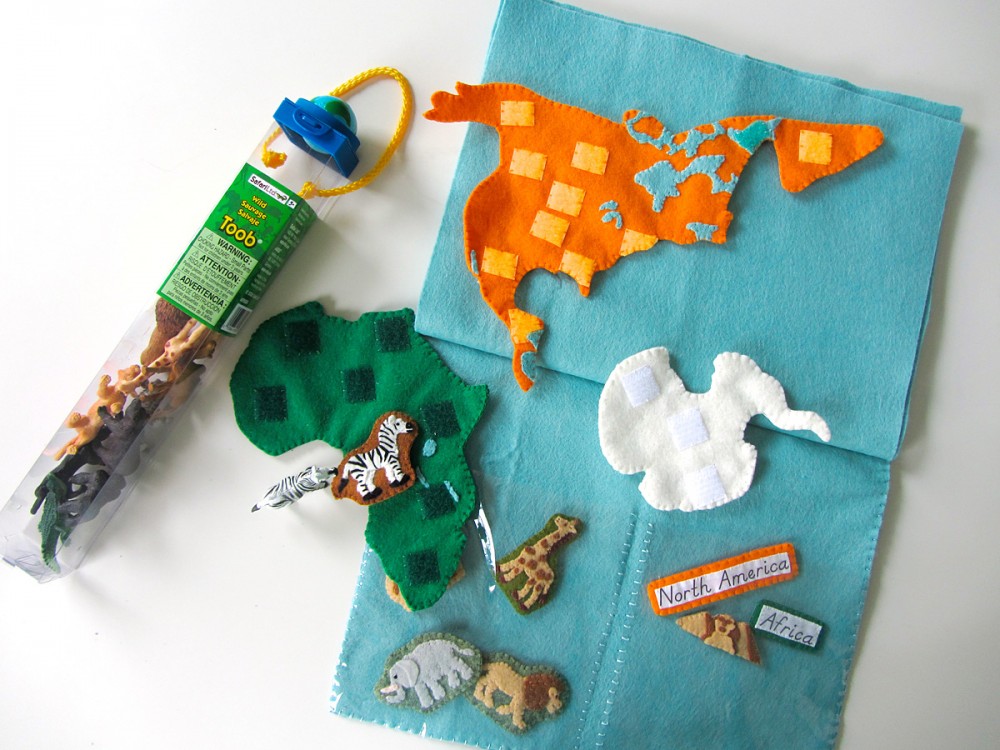
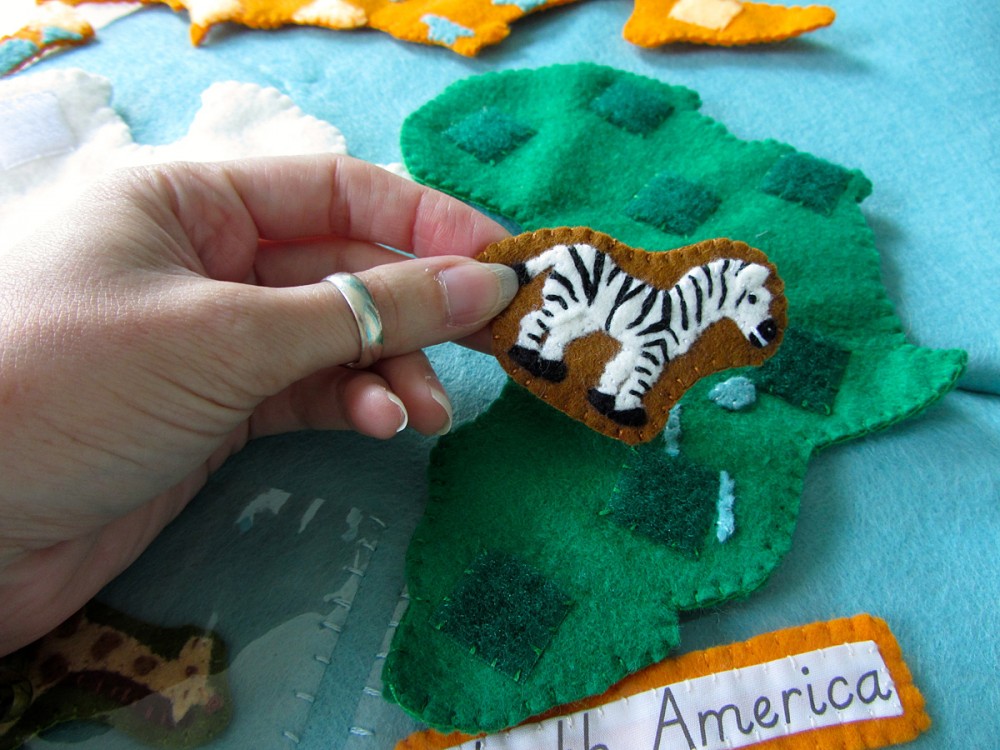
Are you ready for the next installment of the Montessori wall map? This has been the most epic sewing project ever… If you haven’t been introduced to our Montessori wall map and quiet book yet, you can read all about it here. This post is for the continent of Europe.

Animals of Europe for the Montessori Wall Map & Quietbook with Printables

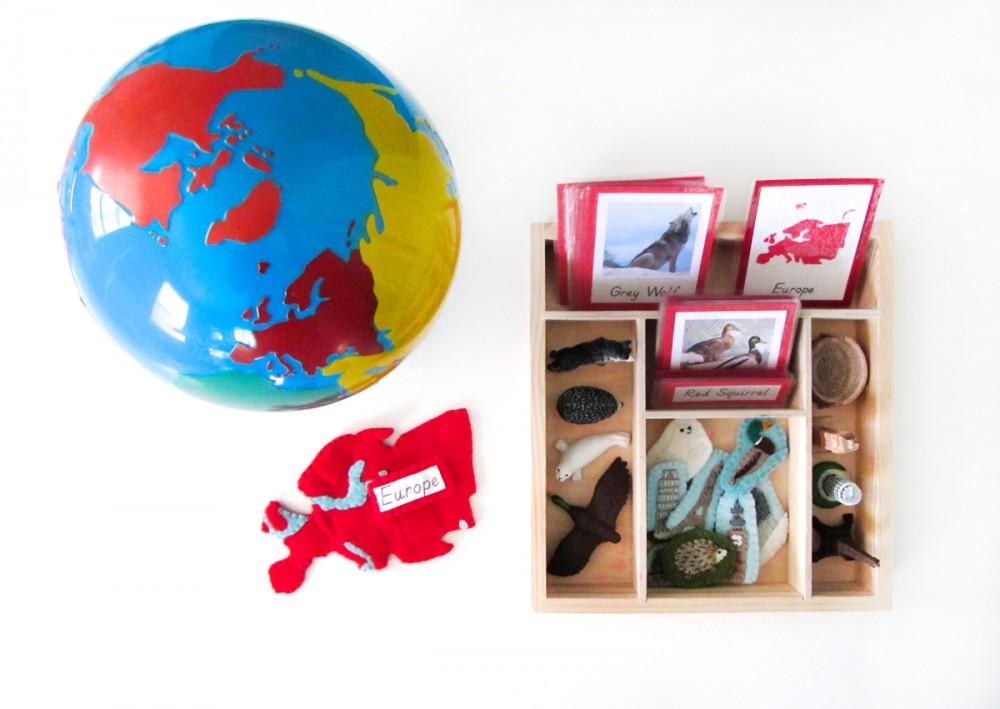
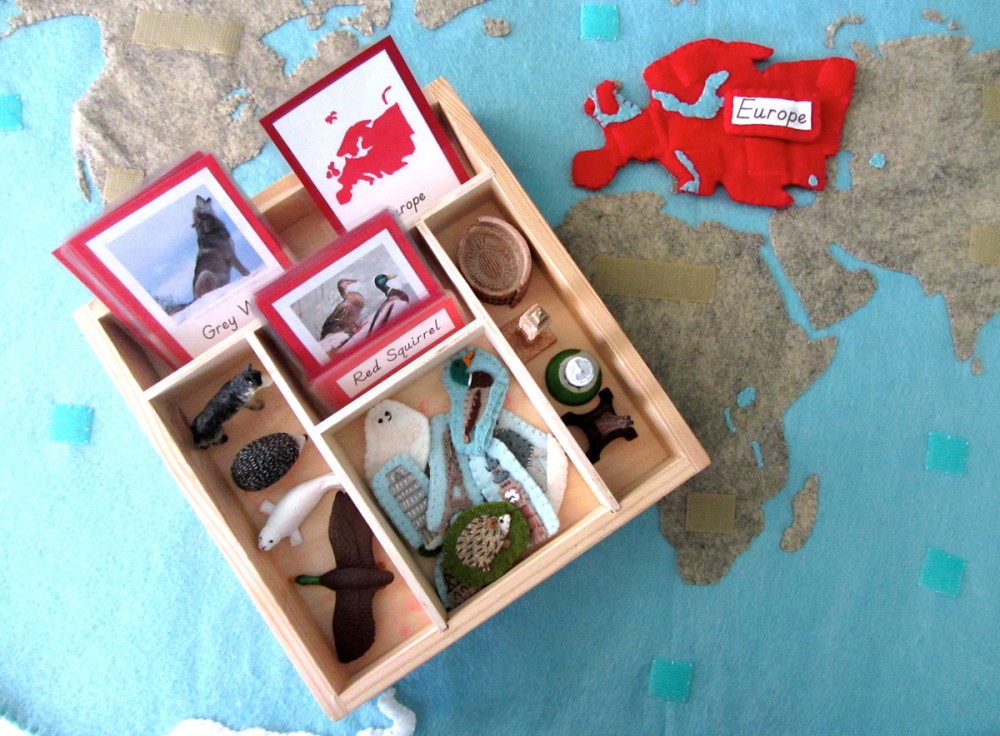
Our Europe 3-Part Card Tray

Every continent (and the oceans) will have landmarks and animals. Europe has so many amazing landmarks! I ended up choosing an even mix of animals and landmarks for this project.

Overview and Map PatternsAfricaAntarcticaAsia • Europe
North AmericaOceansSouth America

Animals of Europe for the Montessori Wall Map & Quietbook with Printables

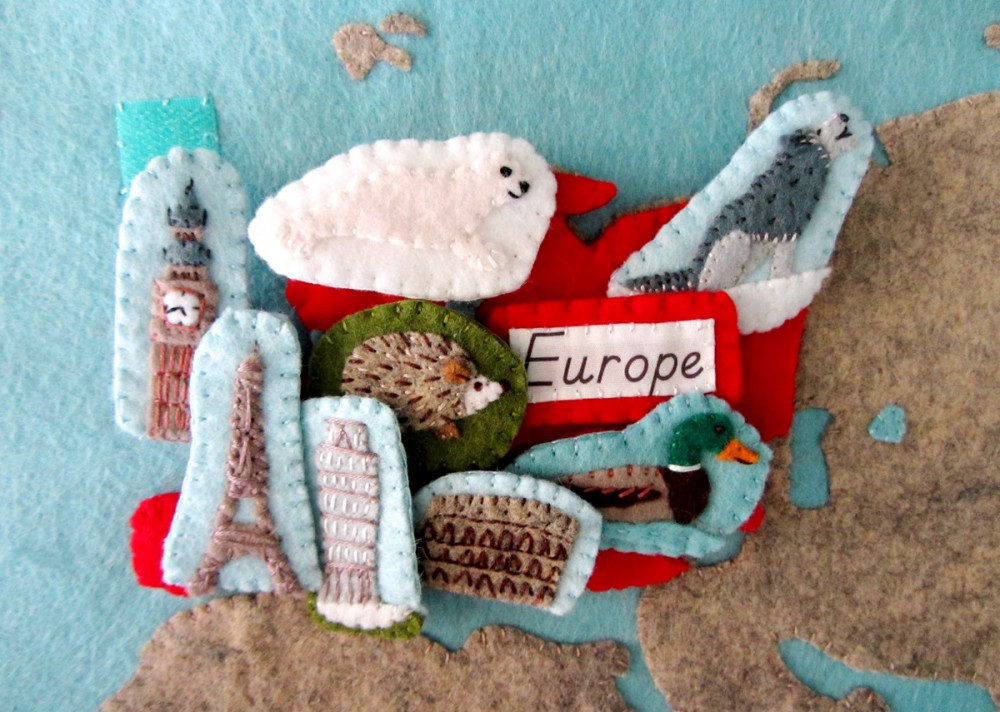
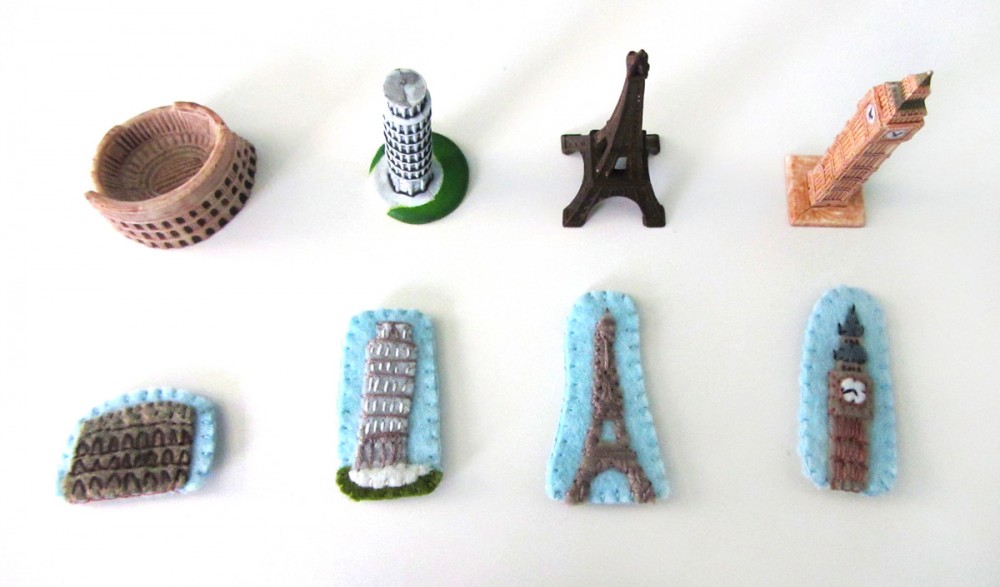
Those of you who follow along on Facebook or Instagram have been seeing what I’ve been creating for Europe. Things are definitely a tight squeeze when you put everything on the map at once. There is just so much awesome in a small area! I made: the Eiffel Tower, Big Ben, the Tower of Pisa, the Colosseum, a harp seal, a mallard, a hedgehog, and a grey wolf. My choices were influenced by which figurines were available from SafariLTD’s TOOBs.

Animals of Europe for the Montessori Wall Map & Quietbook with Printables
This project is totally free for you to use (though commercial use requires a license.) If you’d like to support my designs, one way is to make a purchase off of Jax’s Amazon wishlist. I use his list to bookmark school and craft items until I am able to get them. For more ways to contribute to this site, visit my support page.

Materials I Used

The Pattern (see the first post for the main patterns)

Felt from American Felt & Craftbig apple [red], cilantro [olive green], pastry [golden taupe], gold nugget [gold], chocolate [deep brown], fresh linen [off white], chai [taupe], doe [brown], jade [green], sparrow [light blue], ice [aqua blue], stone [heather taupe], elephant [charcoal], graywhite and black.

Hook & Loop – I used white snag-free Velcro on the backs of all these pieces and red hook & loop (loop only) on the front of the Europe puzzle piece. My red hook & loop was from here.

Felt glue to tack down the pieces before sewing, printer fabric for the continent label, embroidery floss in colors to match the felt and micro tip scissors.

Animals of Europe for the Montessori Wall Map & Quietbook with Printables

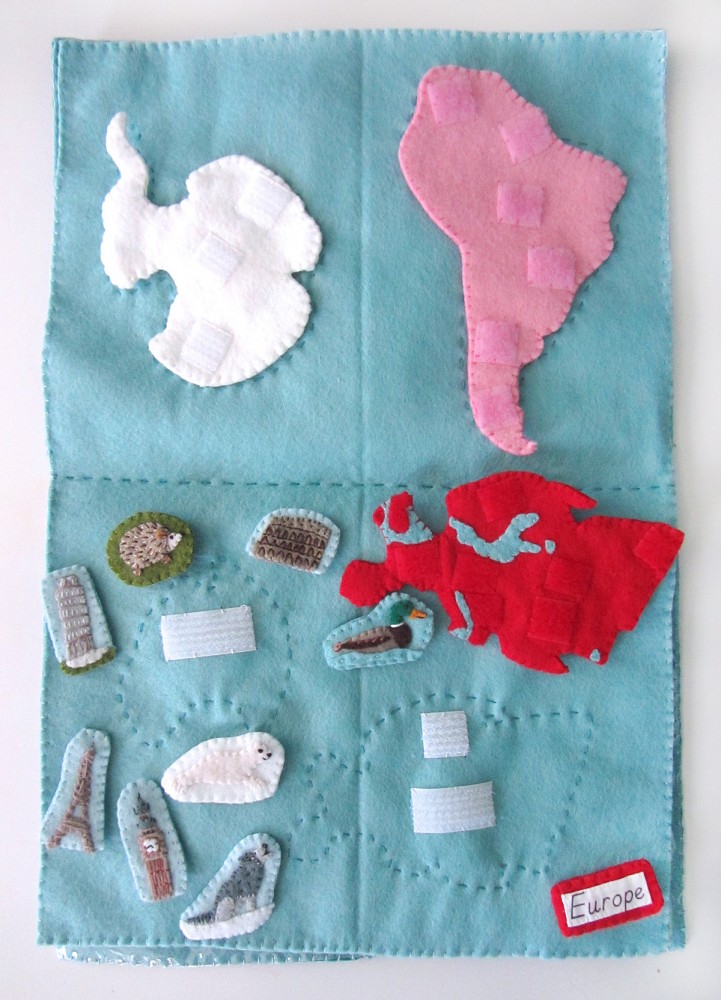
For the Europe quiet book page, I sewed a running stitch (dashed) outline around the Europe pattern piece and sewed down snag-free Velcro to line up with the Velcro on the back of the Europe piece.

Europe: (Felt used: big apple red) For the Europe continent puzzle piece, I sewed down pieces of red loop Velcro. On the back, I sewed strips of white snag-free Velcro to correspond with the Velcro in the quietbook and the wall map. I finished it by sewing the two sides together around the edge with a blanket stitch.

Animals of Europe for the Montessori Wall Map & Quietbook with Printables

Label: (Felt used: big apple red) For the continent label, I folded under the edges (just a tiny bit to hide the rough edges) and creased it with my nails. The printer fabric held the folds nicely without ironing. Then I stitched the label to some red felt and trimmed it down to be a border. I cut a matching felt rectangle for the back, sewed snag-free Velcro to it and then sewed both sides together.

Animals of Europe for the Montessori Wall Map & Quietbook with Printables

For all of the animals, I started by gluing the pieces down to a scrap of background felt with a very light amount of felt glue. I glue multiple animals at a time to give them time to dry. I sewed them down, trimmed the background and cut a matching backing piece. I sewed snag-free Velcro to the back and sewed both sides together with a blanket stitch.

Animals of Europe for the Montessori Wall Map & Quietbook with Printables

Harp Seal: (Felt used: fresh linen off-white for the baby seal, white for the background) The harp seal is super simple! I tacked down his body with glue and sewed around the edges. I made a small stitch for a mouth and satin stitched a nose. His eye is a black French knot.

Animals of Europe for the Montessori Wall Map & Quietbook with Printables

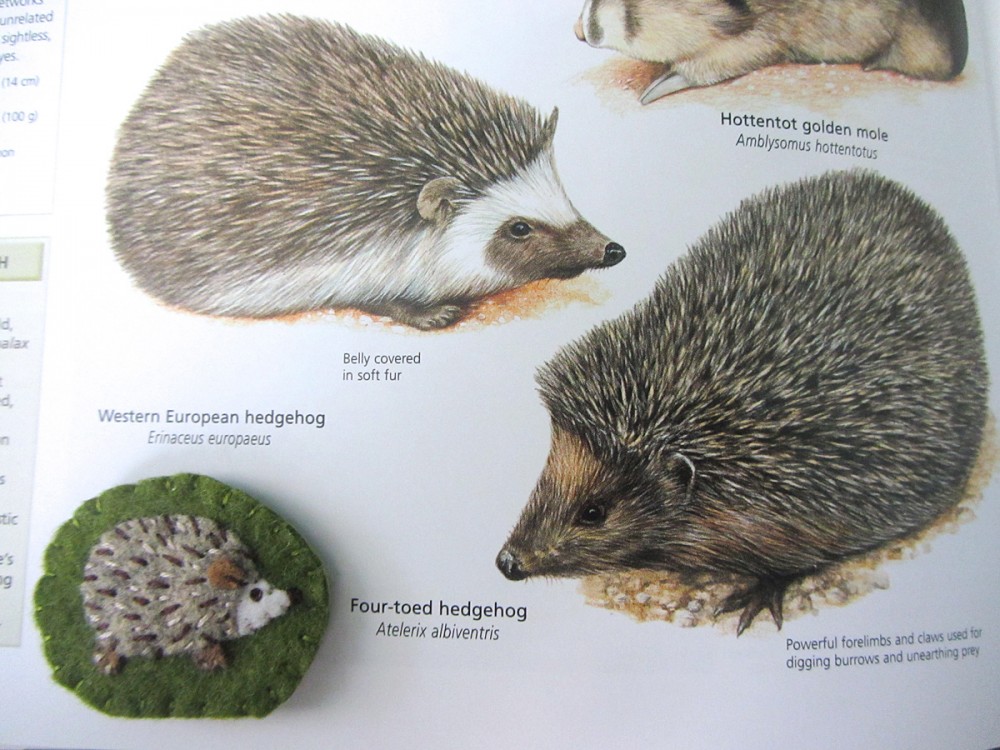
We love this animal encyclopaedia!

Hedgehog: (Felt used: stone heather taupe for the body, doe brown for the ear and legs, fresh linen off-white for the face and cilantro olive green for the background) I first glued down all her parts in the proper order, adding the ear last. I stitched all the way around the edges and made a stitch at the base of her ear. Using brown, I made a French knot eye and satin stitched nose. On her back, I used dark brown and cream to make stitches to show the texture of the spines.

Animals of Europe for the Montessori Wall Map & Quietbook with Printables

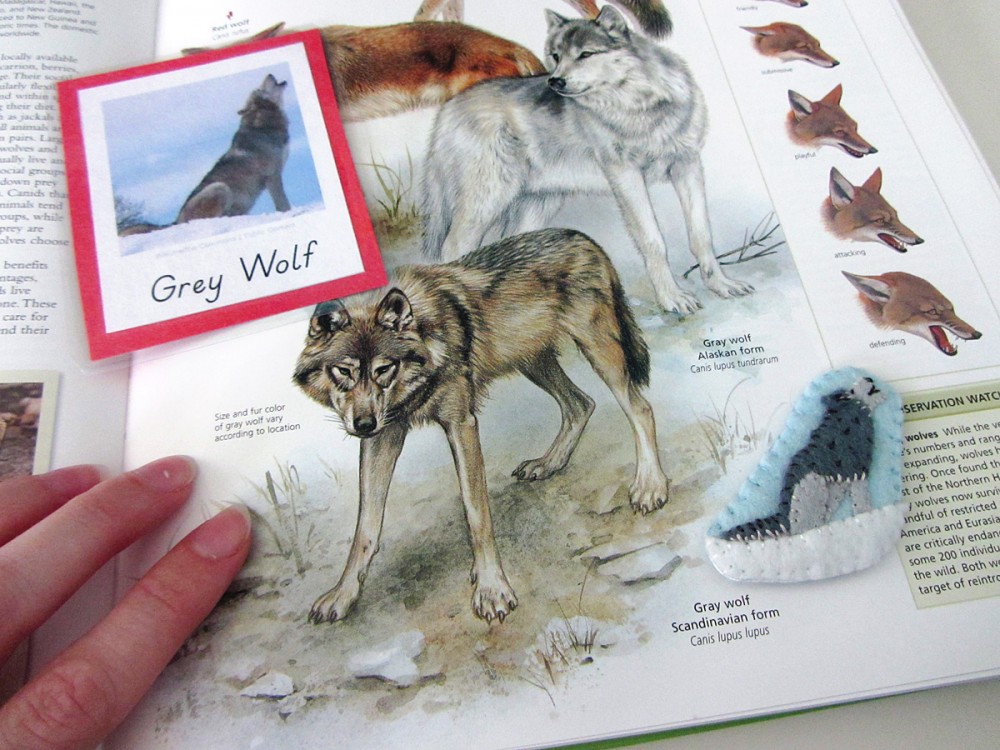
Grey Wolf: (Felt used: gray and elephant charcoal for the body and white for the snow and sparrow light blue background) I started by gluing down the front leg piece and the face (using the back/chest pieces to find the positioning. I then glued down the back/chest, followed by the hind leg and the ear. I cut a curvy piece of white and glued it down over where his feet would be to make the ground. Once it was dry, I trimmed around the wolf and stitched everything down. While stitching down the darker gray piece, I made my stitches longer and a little “sloppy” to make his fur look shaggy. Along the underside of his tail, the edge of his face and under his chest, I made light gray stitches the same way. His eye is a little stitch to make it look closed, his nose is satin stitch and his mouth is just lined with two straight stitches.

Animals of Europe for the Montessori Wall Map & Quietbook with Printables

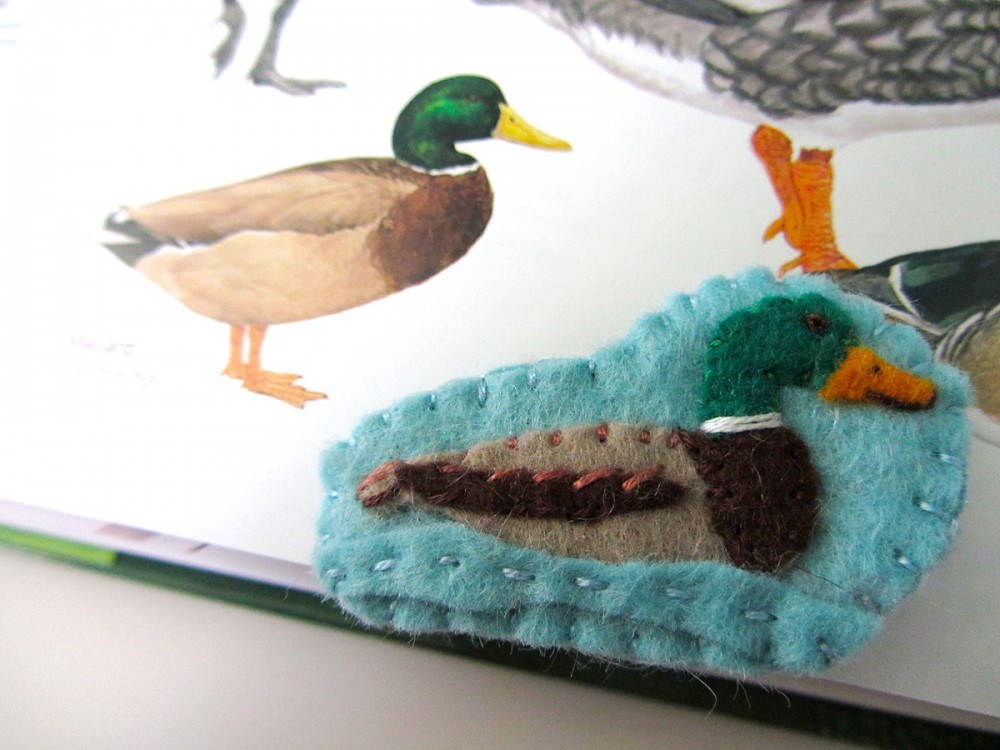
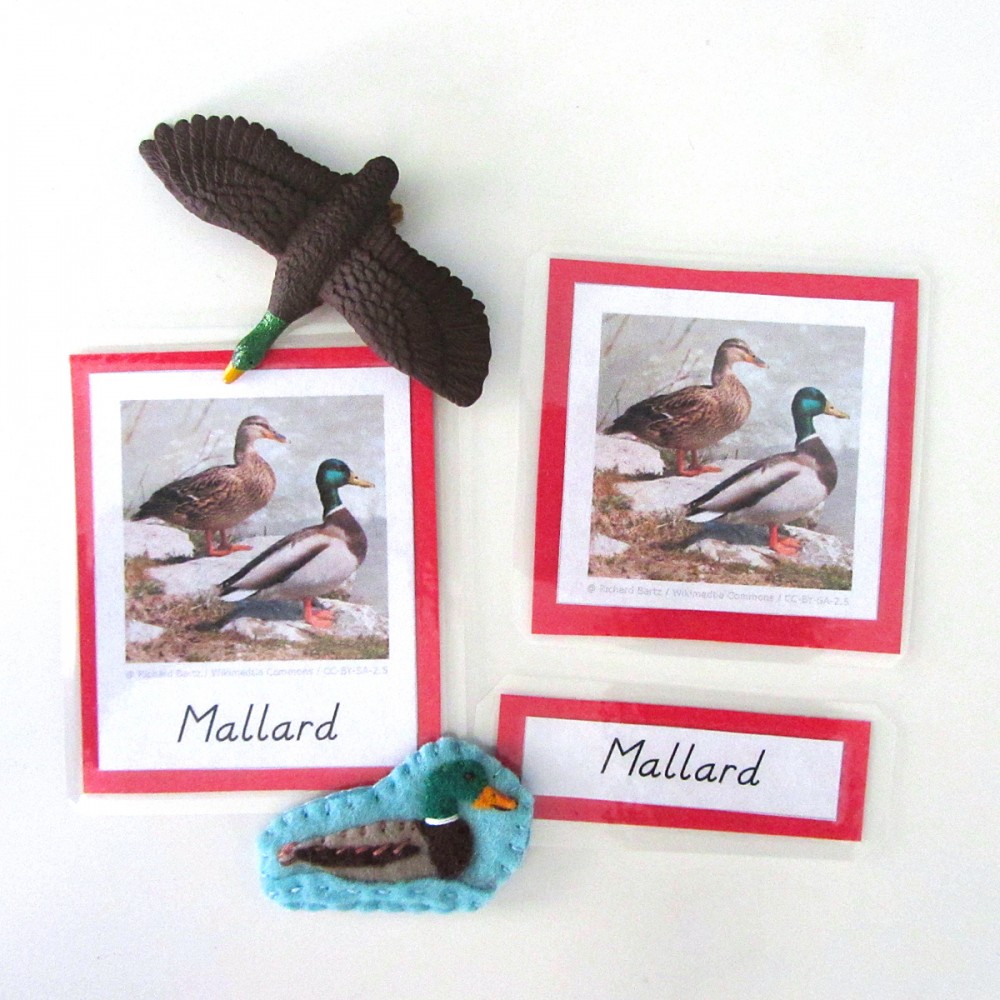
Mallard: (Felt used: gold nugget gold for the beak, jade green for the head, chai taupe for the body, chocolate deep brown for the chest and wing and ice aqua blue for the water and background) I glued down the body and head pieces, then glued the chest and wing on top. I cut a thin, wavy blue strip for water and glued it down over the bottom edge of the mallard. I stitched down all the mallard’s edges, then using dashed stitches, I stitched through the center of the water wave. At her neck, I made two long stitches in white. The eye is a French knot in brown, with a tiny stitch for a nostril and two long stitches to make the beak opening.

Sewing the Landmarks

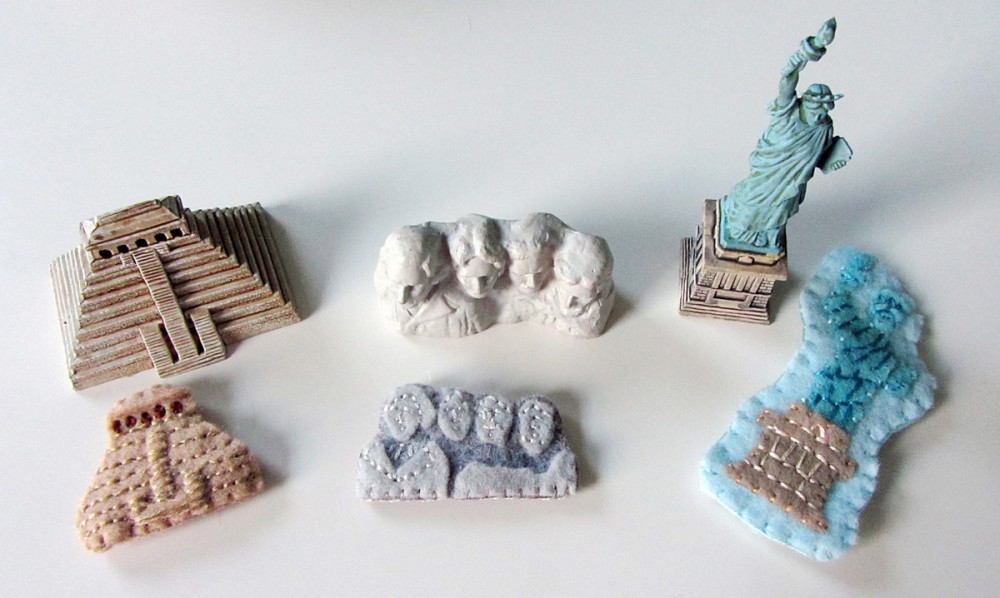
For all the landmarks, I started by sewing the front piece. Then I cut out a backing felt to match the final shape and added some snag-free Velcro to it. I finished sewed around the whole edge, switching colors where needed. For all of the detail work, see the photos for a sample of where to stitch.

Animals of Europe for the Montessori Wall Map & Quietbook with Printables

Colosseum: (Felt used:stone heather taupe for the building and sparrow blue for the background) I glued down the building and stitched down the edges. With brown floss, I stitched 3 rows with back stitch. On the lower three levels, I stitched arches using a lazy daisy stitch that is open at the bottom. On the top level, I made tiny vertical stitches for windows.

Tower of Pisa: (Felt used: gray for the building,  white  for the ground ,cilantro olive green for the ground and sparrow blue for the background) I cut out a small green piece for the ground, then glued it down with the white ground on top. I glued the building on top. Using a medium gray floss, I made long stitches across the building to make each level. On the bottom level, I used it to make vertical stitches for columns. On the top level, I made an arch with an open lazy daisy stitch. I switched to white floss and made the rest of the columns.

Eiffel Tower: (Felt used: chai taupe for the structure and sparrow blue for the background) The Eiffel Tower is tacked down in place with glue, then I stitched around all the edges. I made criss-crossed stitches all over it similar to the beams it has. In some spots I made long horizontal or vertical stitches to make the real tower.

Animals of Europe for the Montessori Wall Map & Quietbook with Printables

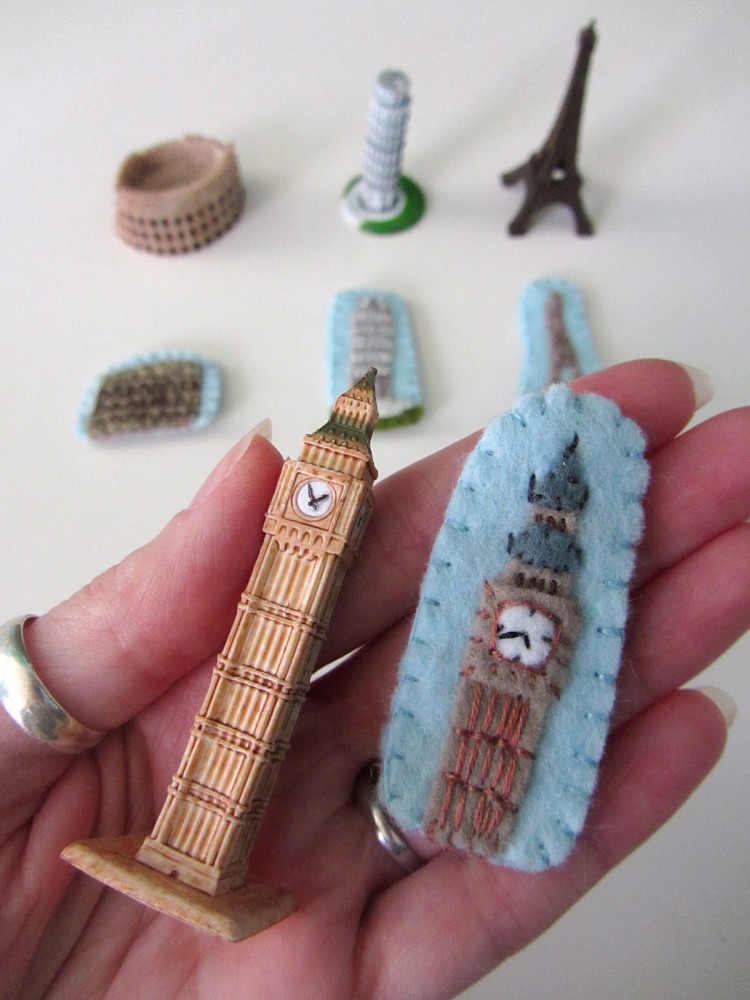
The beautiful landmark replicas seen here were provided by SafariLTD. I am working with them to make this project the best it can be.

Eiffel Tower: (Felt used: pastry golden taupe for the building, white for the clock face, elephant charcoal for the roofs and sparrow blue for the background) For Big Ben, I glued everything in place then stitched down the roofs and the sides of the clock square piece. On the tower, I made rows of back stitching with long, vertical stitches in between. I stitched black clock hands on, then stitched a square around it in the taupe floss. Using dark brown, I made little windows above the clock. Using gray, I made the points coming off of the roofs.

Animals of Europe for the Montessori Wall Map & Quietbook with Printables

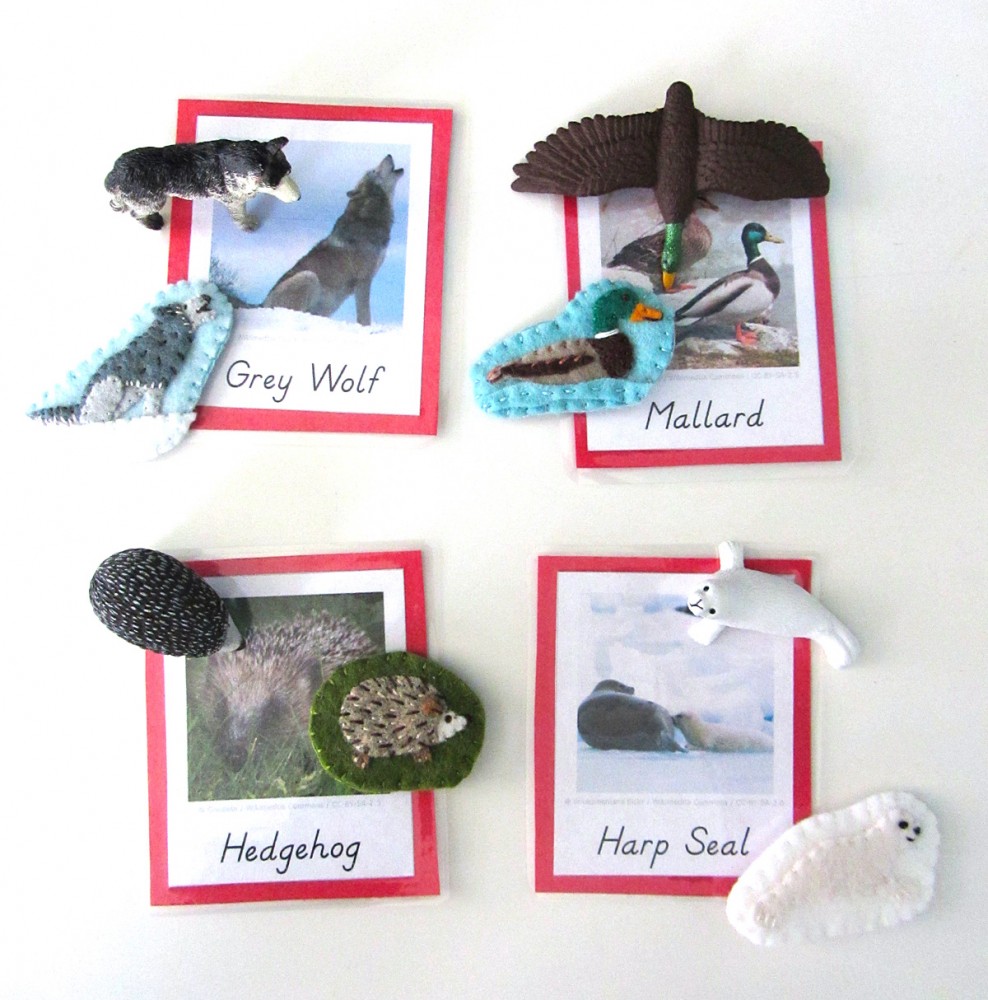
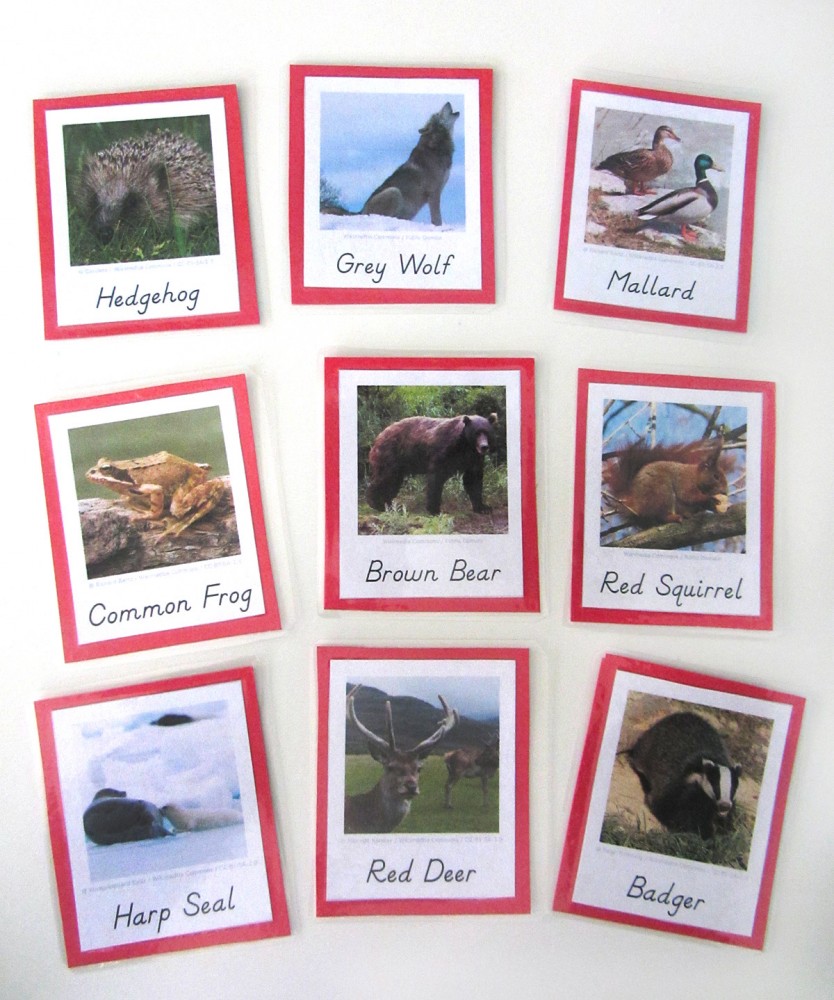
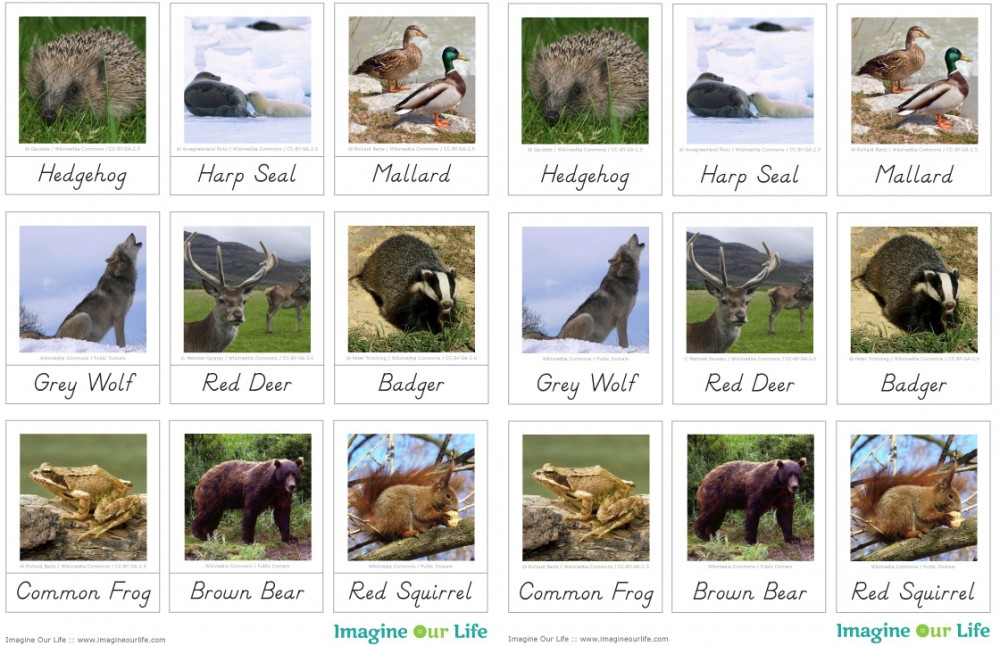
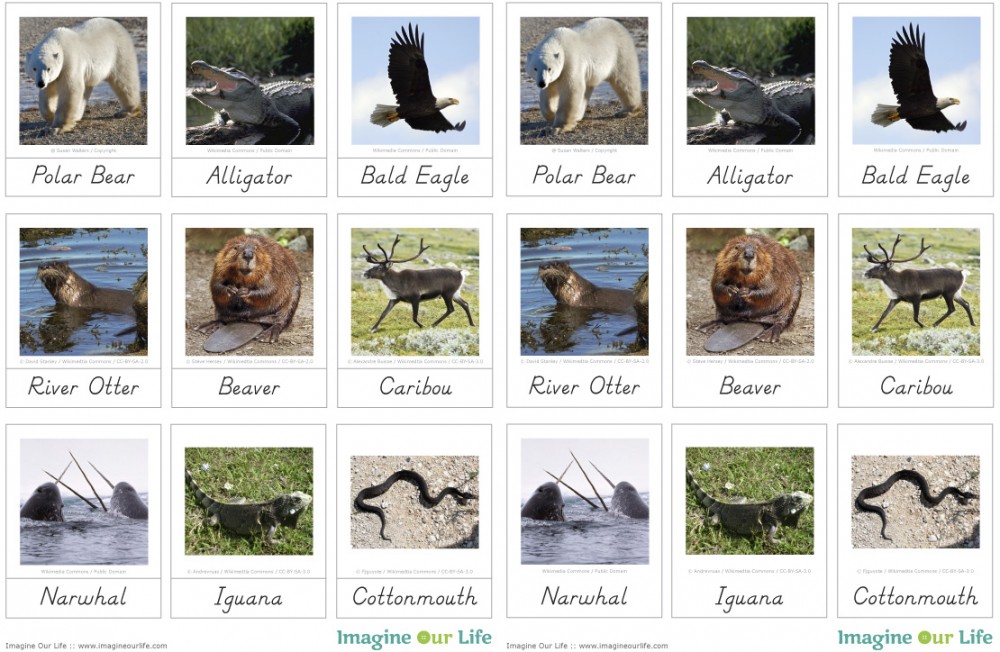
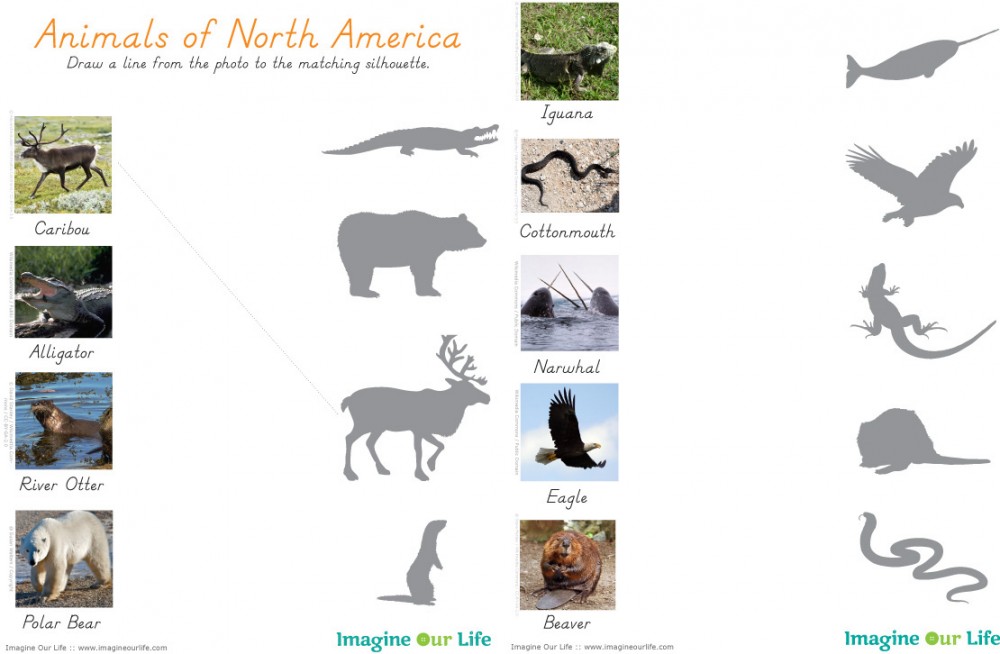
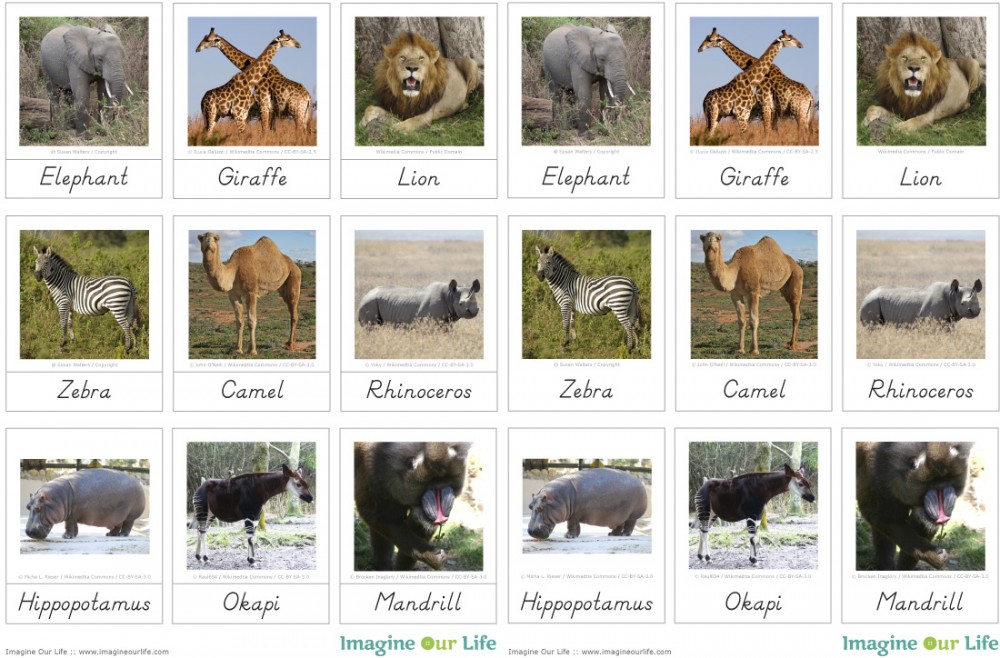
Montessori European Animals 3-Part Cards

The series of 3-Part cards I am making for this project is something that Jax will be using for many years in homeschool. I have been focusing on the animals in these posts, but at the end of the project I will make a set featuring all the landmarks we sewed. Eventually, we will expand our collection of cards even more to include cultures, more landmarks, and so much more. Three part cards are extremely flexible learning tools.

 Animals of Europe for the Montessori Wall Map & Quietbook with Printables

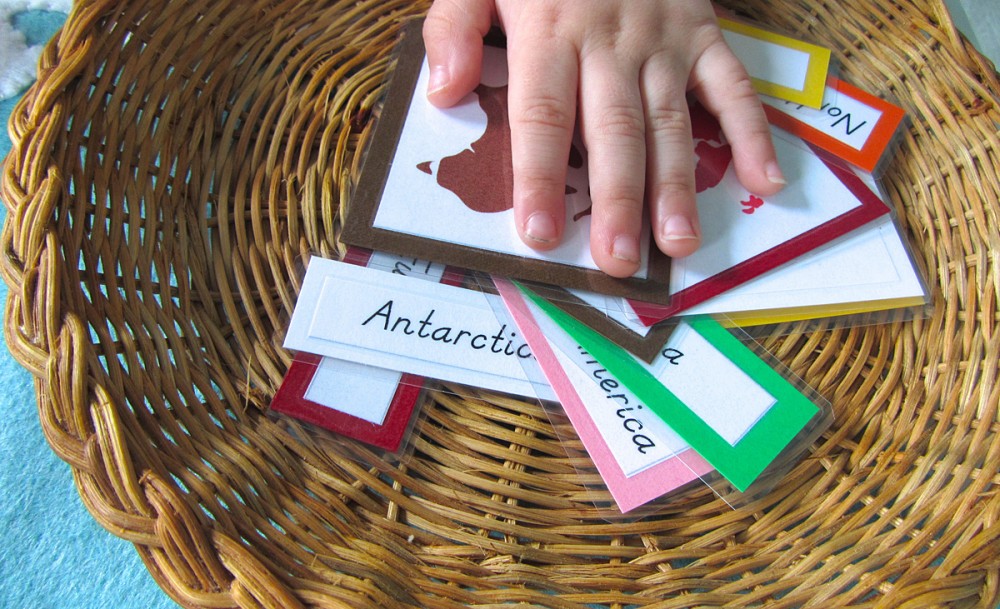
Click here to download my free pdf file to make your own animals of Europe cards. To make mine, I cut them out, glued them to red construction paper (to match Europe’s Montessori color) then laminated them. I use this laminator and I’ve been very happy with it. It makes everything so shiny and strong! My photos come out slightly faded from the printer (I use normal paper) but turn gorgeous after lamination. (Quick tip: Add a dab of glue stick on the back of your pieces before you place them in the lamination pouch to keep them from sliding around as you feed it through the machine.)

Animals of Europe for the Montessori Wall Map & Quietbook with Printables

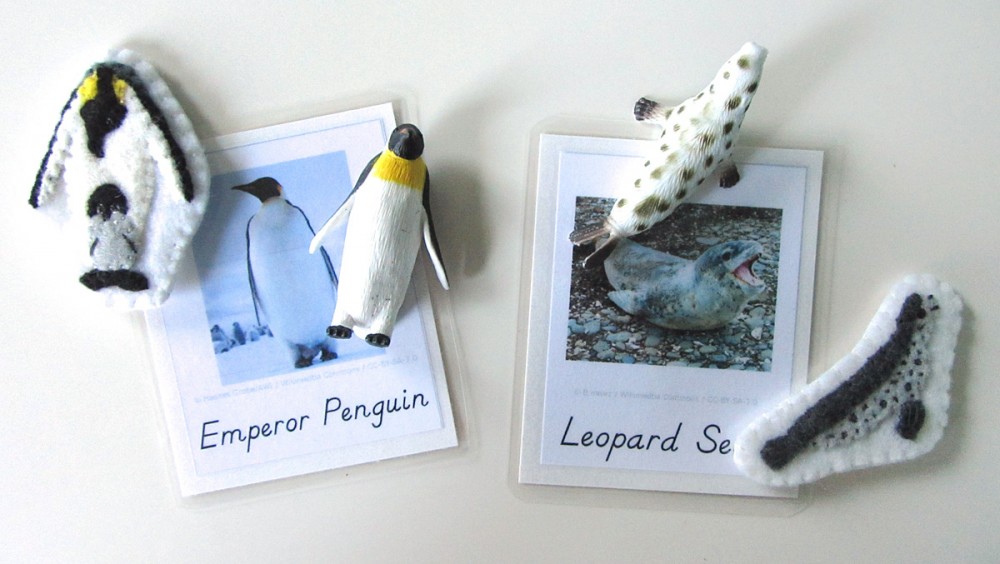
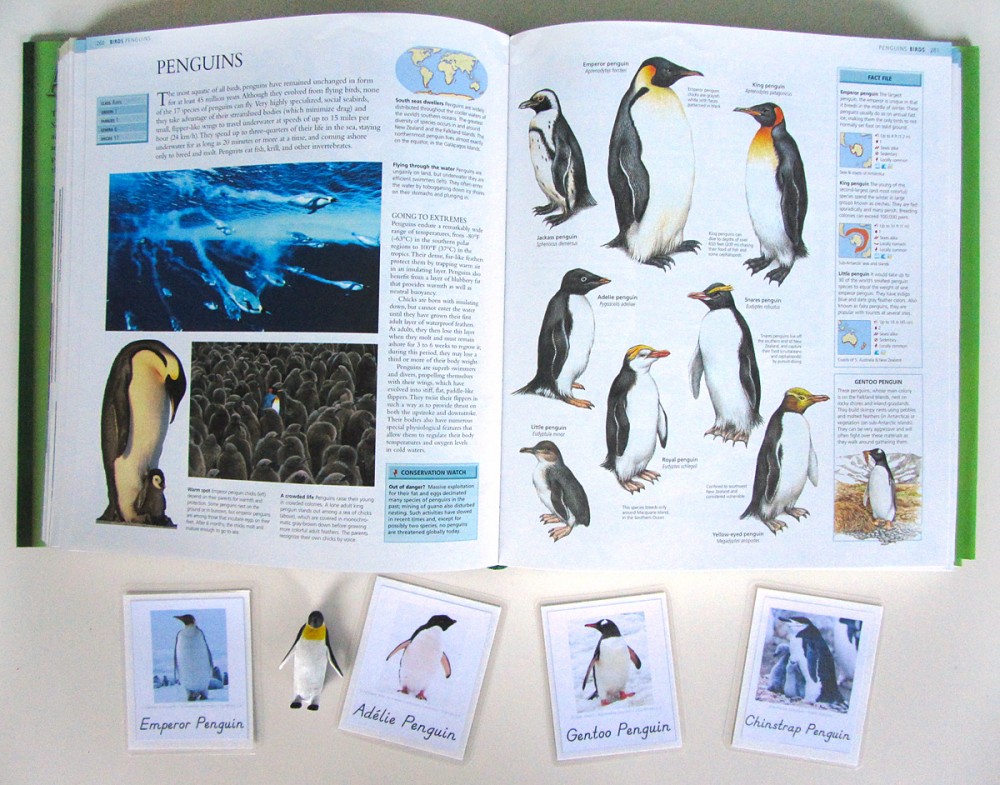
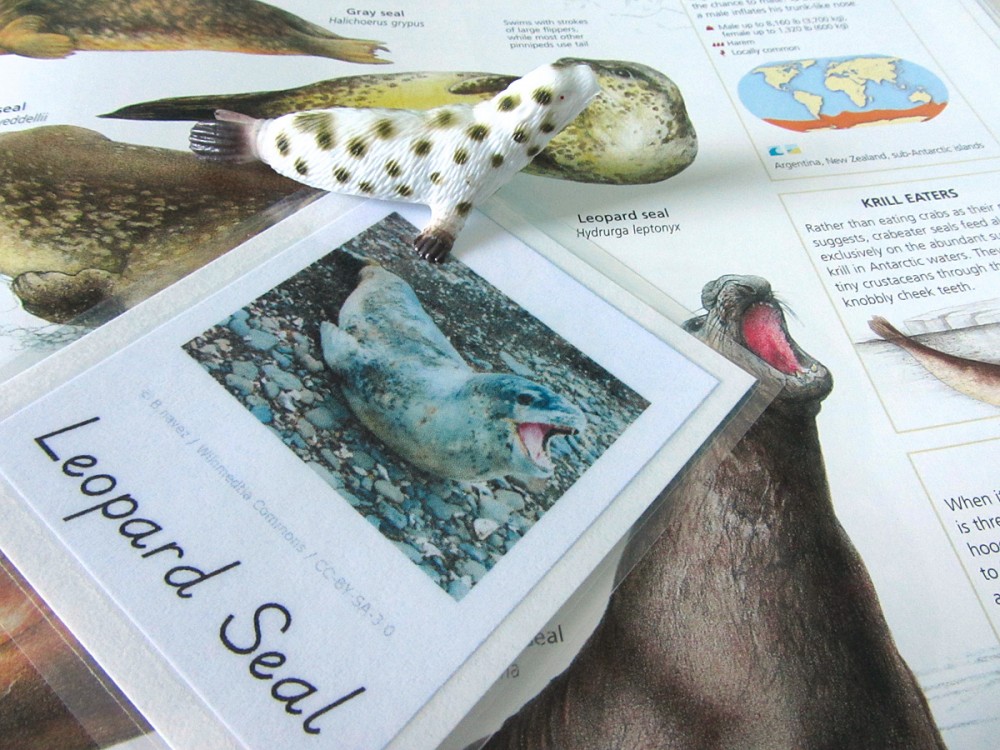
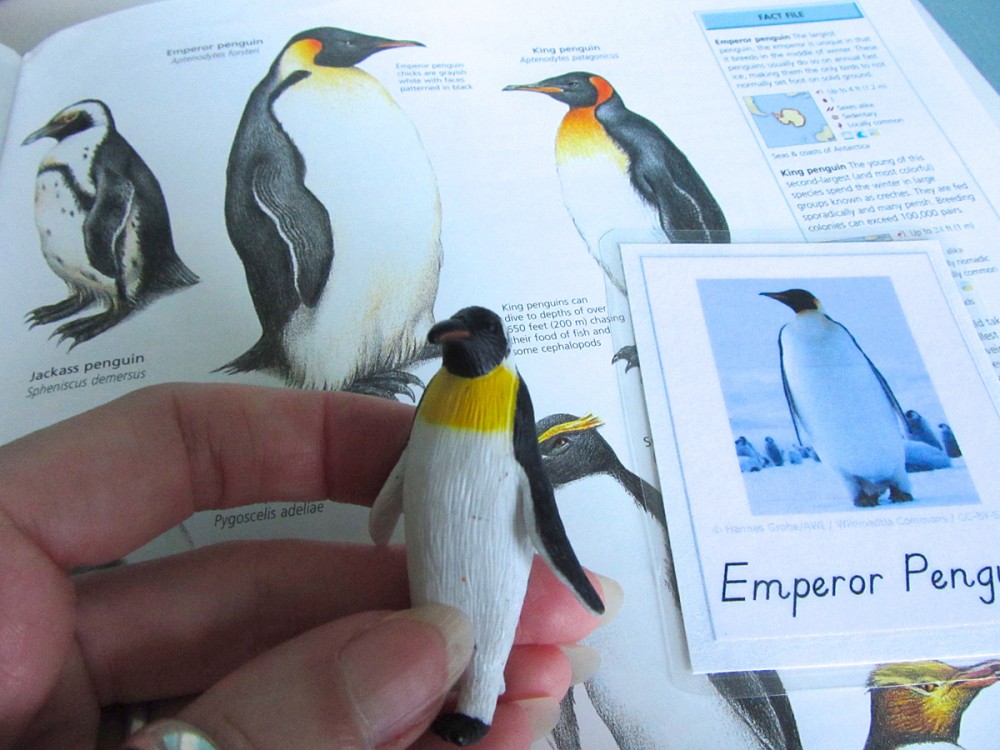
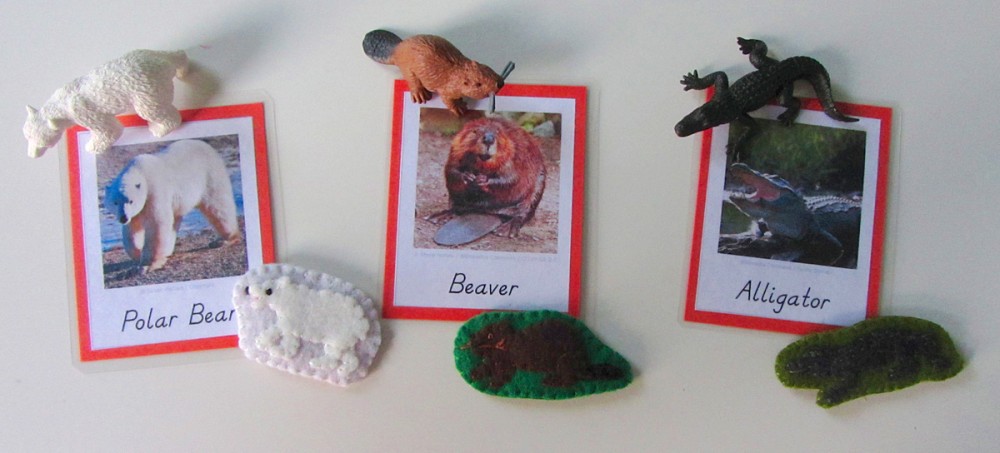
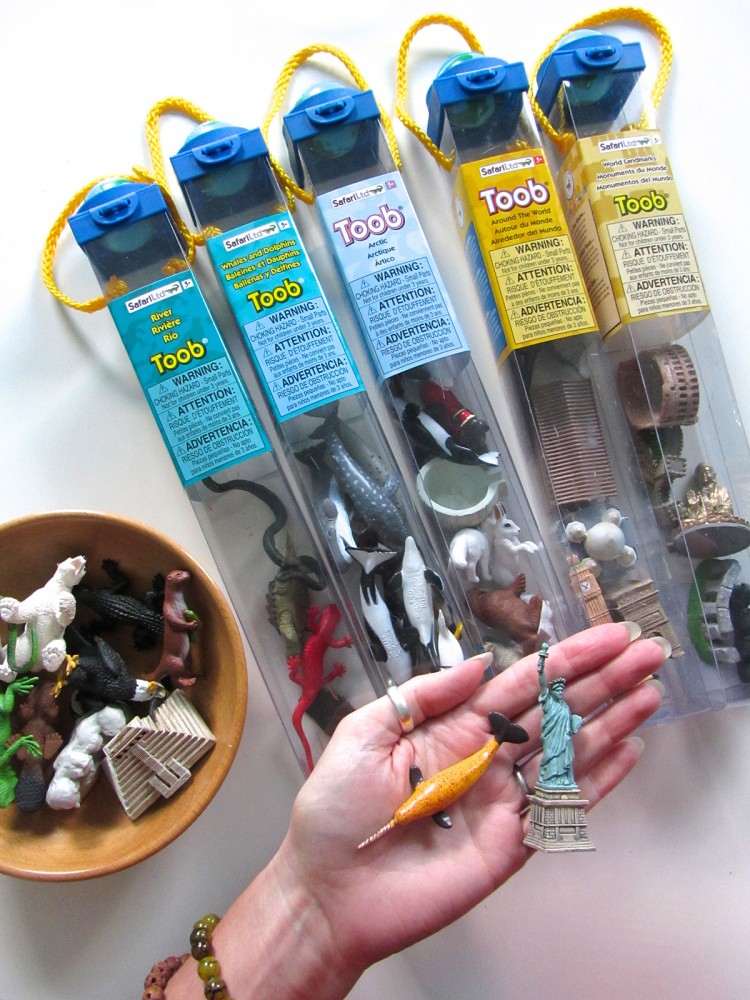
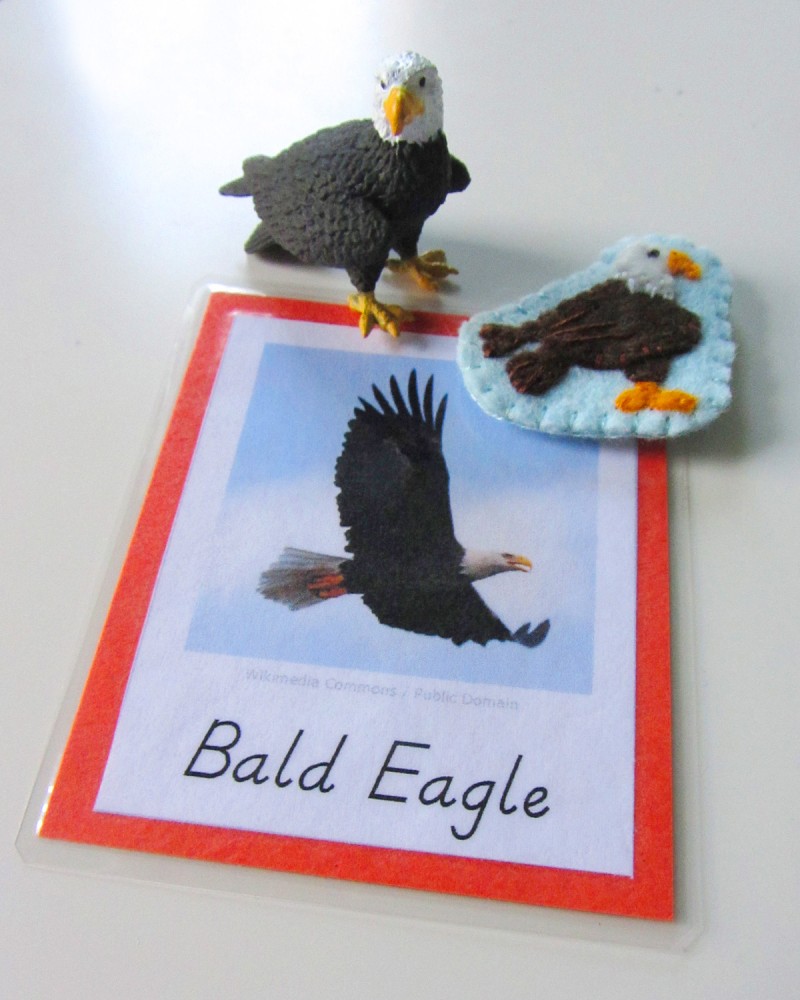
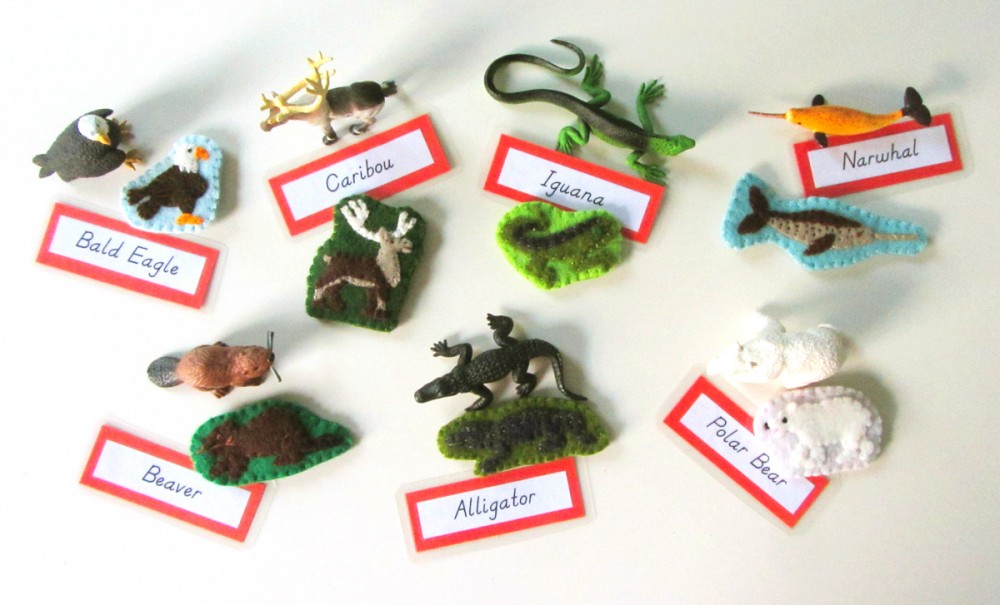
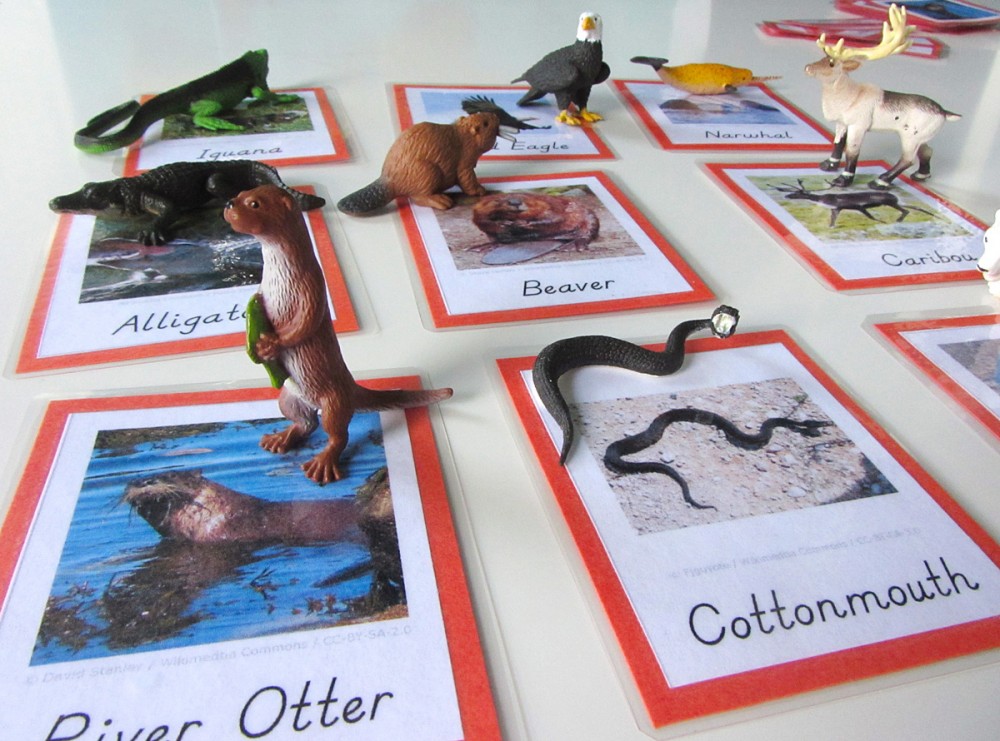
Our main way of using the cards for now is to pull out our SafariLTD’s TOOB figurines and  match them to the pictures. We like to watch short videos about an animal, then study some pictures and draw our own. The TOOBs we used for these animal cards are: River TOOB (mallard), Arctic Toob (harp seal, wolf – which is actually a husky!) and Pets TOOB (hedgehog).

SafariLTD kindly provided the World Landmark TOOB and the Around the World TOOB for this continent. We are working with them to make this project the best is can be!

Animals of Europe for the Montessori Wall Map & Quietbook with Printables

I know many of you are sewing along (or plan to after the holidays!) If you are, stop by my Instagram @iolstephanie and leave a comment on one of my photos (I can’t see your photo if it you are private, but I can request to follow you temporarily if you leave a comment on mine about it) or share photos on Facebook. You can also email me. I love seeing what others make from my patterns!

Animals of Europe for the Montessori Wall Map & Quietbook with Printables

Please be sure to visit the other ideas featured on Montessori Monday. There are many great links!

Montessori Monday

Make the World’s Best Robot Costume!

Make the World's Best Robot Costume!

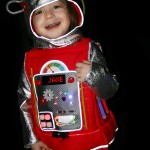
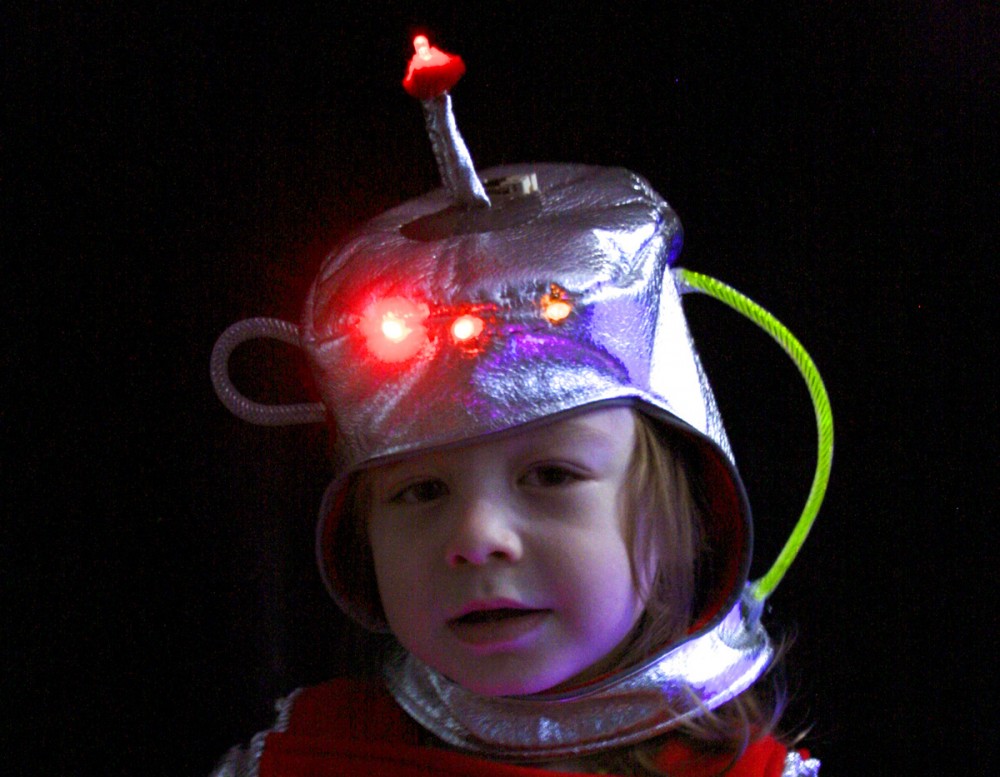
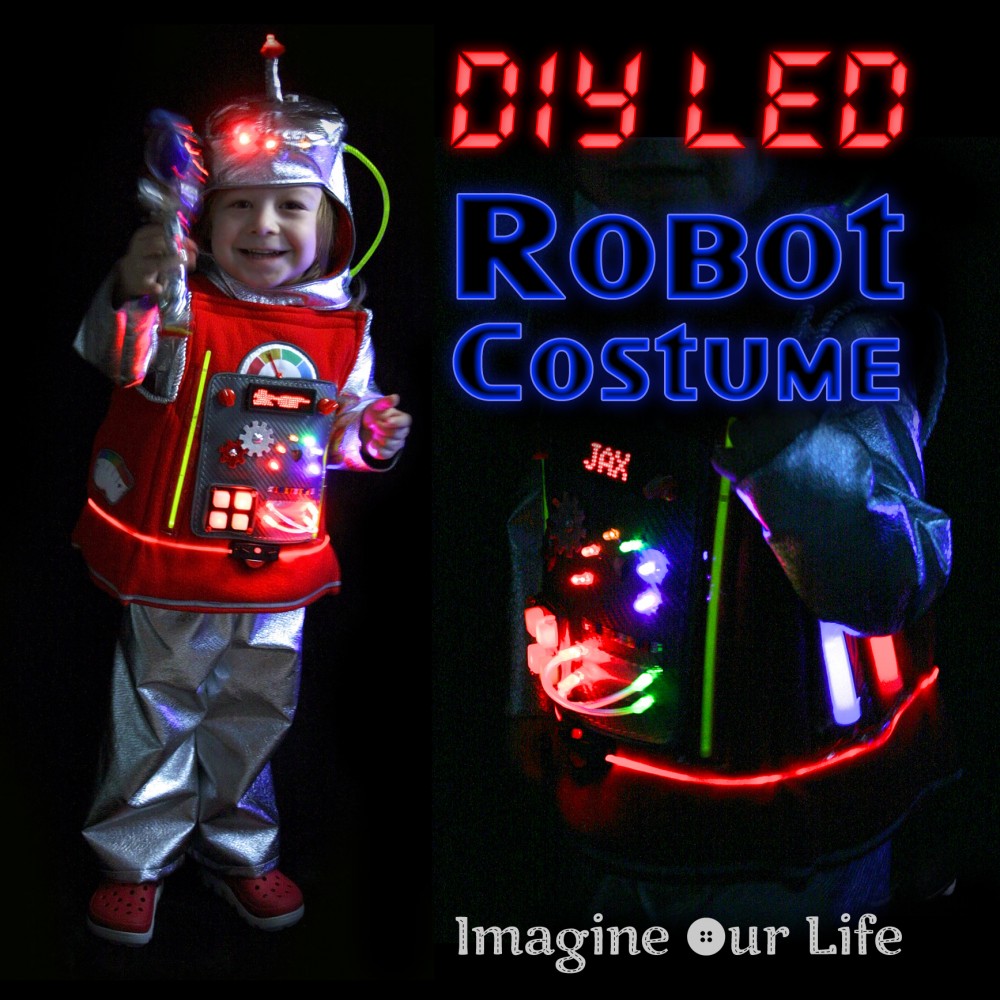
While I’m sure there are more spectacular versions out there, seeing Jax in his homemade LED robot costume rocks my world! I mean, seriously? The cutest! Jax can’t wait for Halloween, and neither can I!

Last year for Halloween, Jax was a train engineer wearing a cardboard and duct tape train I made with dollar store supplies. And it was fab! In fact, Jax loved it so much that it took me 6 months to convince him it was okay to be something new next year. When he chose to be a robot, I did a happy dance! While cardboard robot costumes are great, I wanted to sew this year. And because I love e-textiles so much, I was ready to go all out!
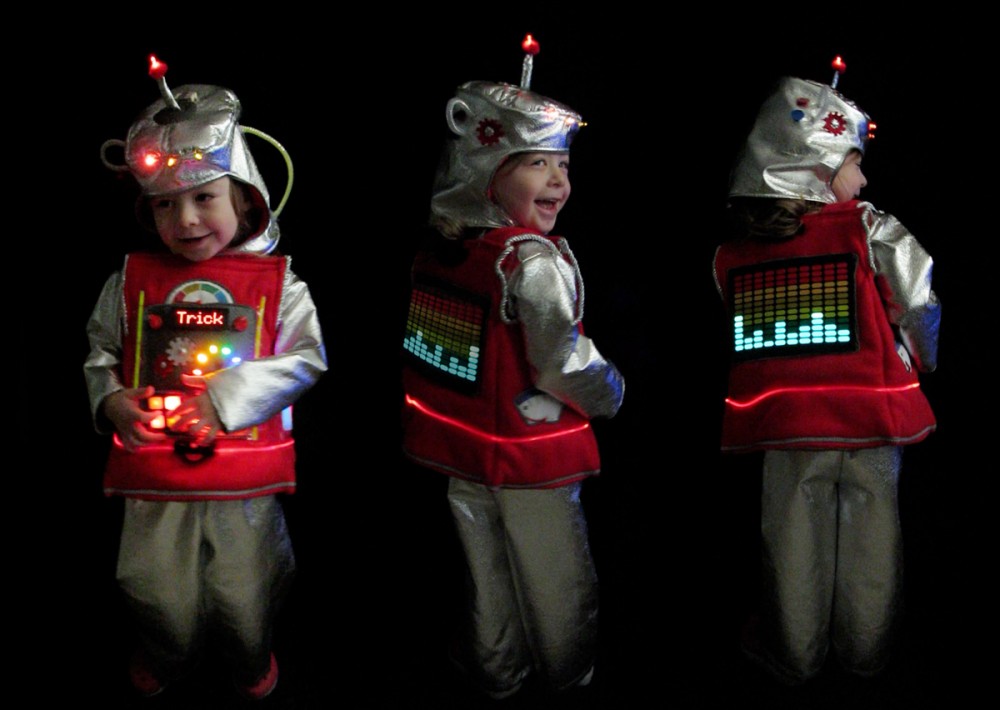
Make the World's Best Robot Costume!

Exhibit A: Jaxbot3000. Cute overload imminent!

I’m going to do my best to explain everything I did to create this costume. I will include the supplies I used in each section, but there will also be a master list sorted by purchase location at the bottom of the post. Fabric yardages and product counts are the totals for what I bought. I do have leftovers of everything but the fleece. Please feel free to contact me with questions. I’m easiest to reach via message on our Facebook page.

Prototype & Prime Directive

This costume uses a combination of LEDs sewn with conductive thread, ready-made LED components and glow sticks. There is a plain shirt and pants set with a decorated tunic/jumper for the main body that is worn on top.

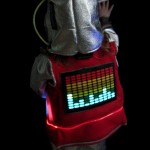
The back of the body includes a sound-activated LED faux-equalizer. The head is a soft helmet-style hat with some decorations and LEDs. In addition, I got Jax a souvenir space laser toy on an outing. It matches the retro styling perfectly.

Manipulator Arms & Dynamic Locomotion Limbs

Supplies: silver pleather (~ 1.5 yd.)
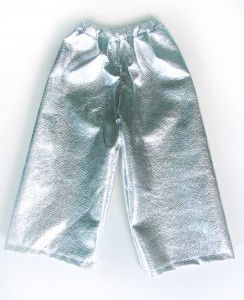
Make the World's Best Robot Costume!Also known as the arms and legs! For Jax’s costume, I sewed a very basic long sleeve shirt and pants set using a silver metallic pleather. I requested 1 yard and was given about 0.8 yds more for an additional 50% off because it was the end of the bolt.) As it is a non-stretch fabric, I had to keep that in mind while sewing the top.

The pants are very simple, made in an elastic-waist pajama style. You can find many toddler pajama pant patterns online. I cut my own pattern by tracing Jax’s existing pants and adding extra for seam allowances and wiggle room. Simple pants are actually very easy to sew!

For my shirt, I used a toddler long sleeve t-shirt pattern from here. It just happened to be the right size for Jax. Because my fabric is non-stretch, I made a long slit going down from the back neck. You could add a hook and eye closure, but I haven’t bothered so far. Getting the shirt on takes a little shoulder wiggling, but work just fine for us. You might want to wait to finish the slit’s edge until after trying on the shirt. That way you could make it long enough for ease of dressing. If you go with a stretch fabric, then you don’t need to worry about a slit.

Make the World's Best Robot Costume!

Central External Casing Assembly

Supplies: dm red anti pill fleece (~ 0.5 yd.), batting (~ 1 yd., from stash) silver rope trim (unknown, from stash), clear vinyl (scraps), reflective sew-in piping (2 packs), red velcro (6″)

Otherwise know as the main body! I started designing the body by measuring Jax. I knew I wanted it to be boxy, so I took measurements based on where I wanted it to hang. I sketched out my idea and noted the measurements. I designed it to be narrower at the top and slightly a-line at the bottom, but still keeping a very boxy shape. The shoulder straps are double thickness and Velcro to front to make it easy to step into.
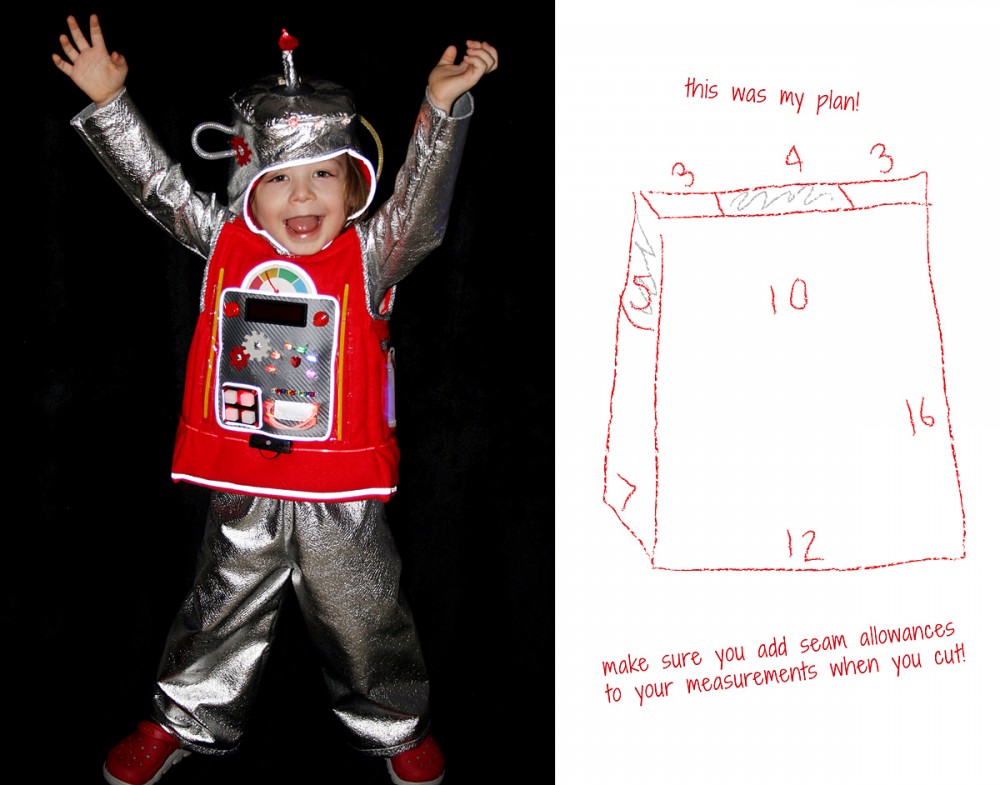
Make the World's Best Robot Costume!

Chest: (This is sewn on my machine.) I cut one layer of fleece and two layers of batting for each of the 4 body pieces. On the top and bottom edges, I cut the batting slightly smaller so I could just fold the fleece in over the batting and hem. I didn’t bother to line the body, as I was saving on fleece and Jax will be wearing the shirt underneath (to spare him from the itchy batting.)
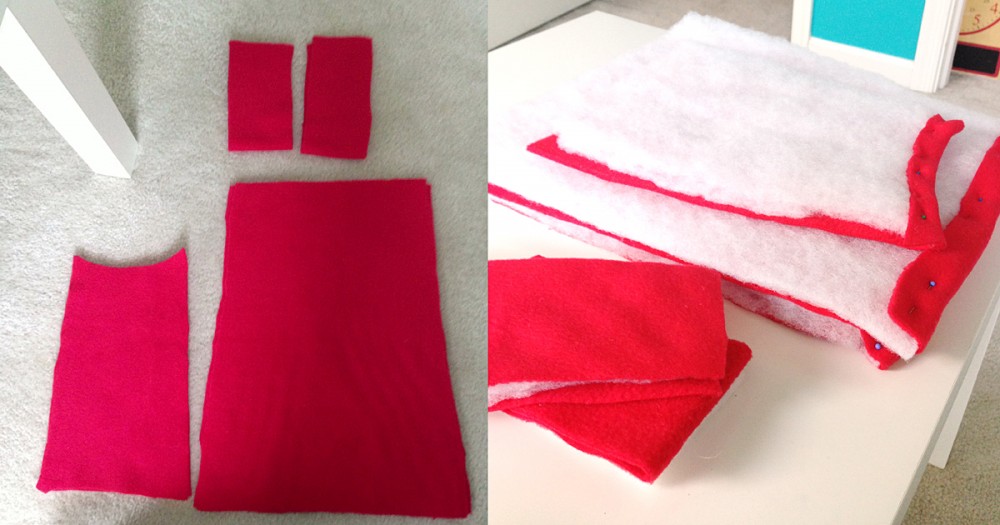
Make the World's Best Robot Costume!

I folded over the tops and bottoms of each section (towards the inside where the batting was) and hemmed them and top stitched to make a double seam. Then, lining up the bottoms, I sewed the four sides together into a rectangular tube. Along the bottom, I attached some of the reflective piping as a trim by folding over the piping seam allowance and zigzag stitching over it. At the top, I sewed two 3″ strips of Velcro, one on each end of the front panel. These are for the straps.
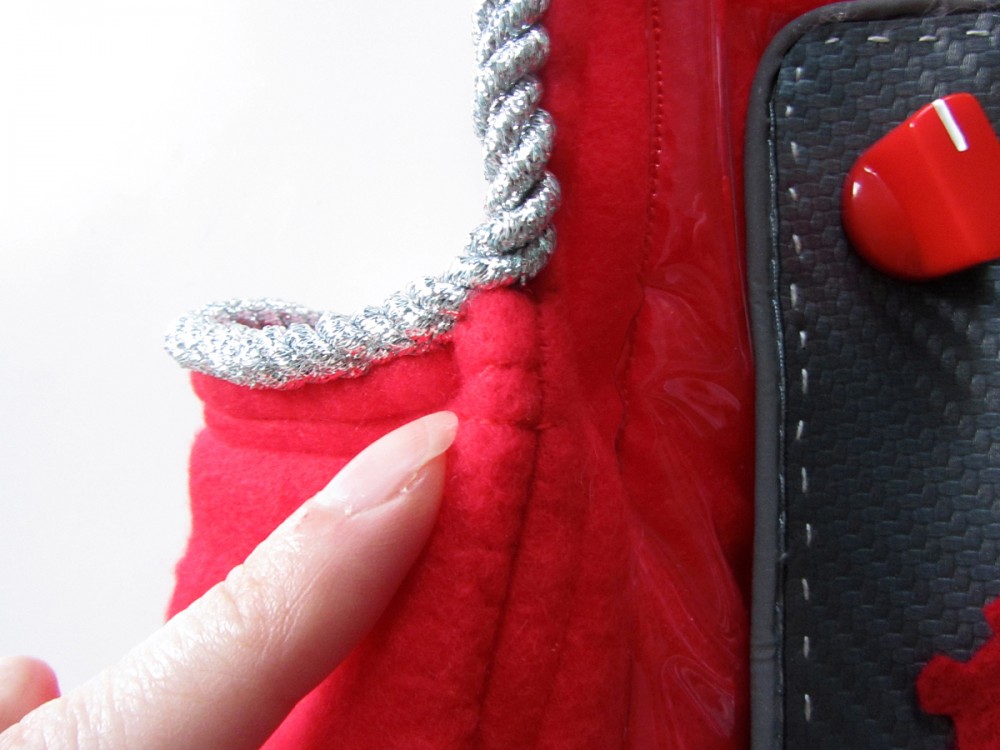
Make the World's Best Robot Costume!

At the sides of the front and back panels, I tried added a double seam along the sides to give the body sharper corners. But what worked better was pinching the seams into corners and hand stitching through all the layers to hold the pinch in place. I did this at the tops and bottoms of each corner.
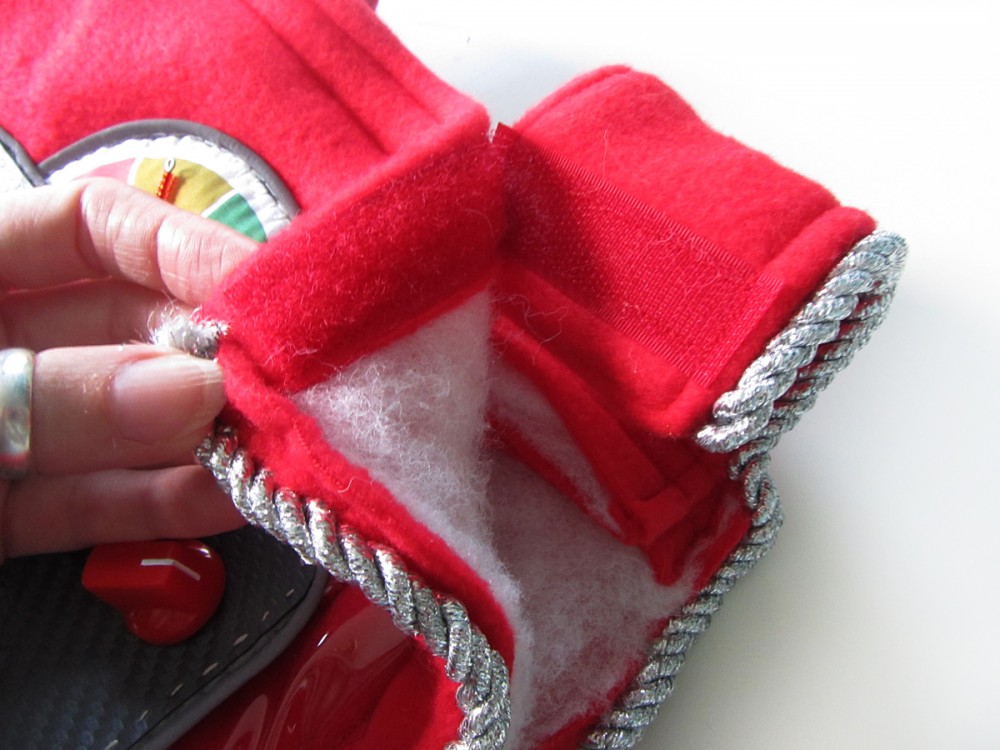
Make the World's Best Robot Costume!

Straps: (This is sewn on my machine.) For each strap, I cut two pieces of fleece and two pieces of batting. To sew a strap, I laid two pieces of fleece with right sides facing, then added two pieces of fleece on one side. I stitched around both long sides and one short side. I turned it right side out, then top stitched around the three sewn edges, pausing at the top of the strap to add Velcro. I repeated for the other strap. Lining the straps up with the Velcro on the body, I pinned and sewed them in place.

Arm Hole Trim: (This was hand sewn.) I then added silver metallic rope trim from my sewing stash all the way around the arm hole, including the outer edge of each strap. I just folded the ends of the rope towards the inside of the costume and stitched them down.

How to: Make LEDs Sewable

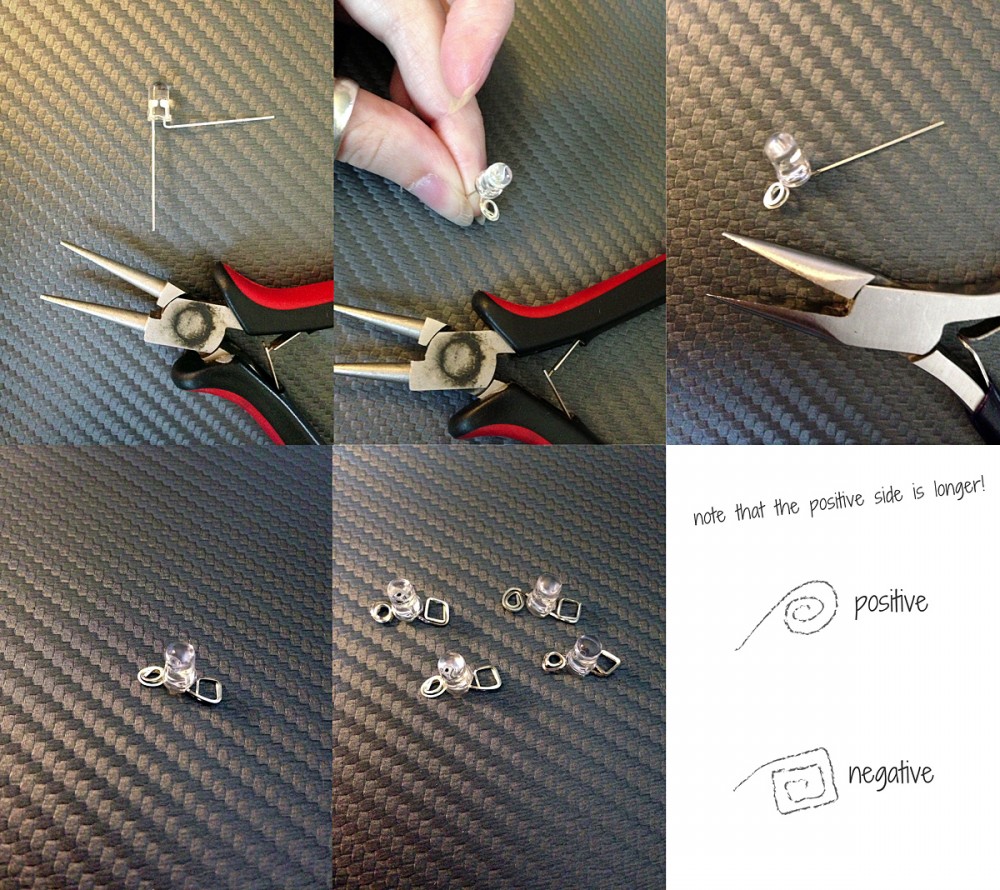
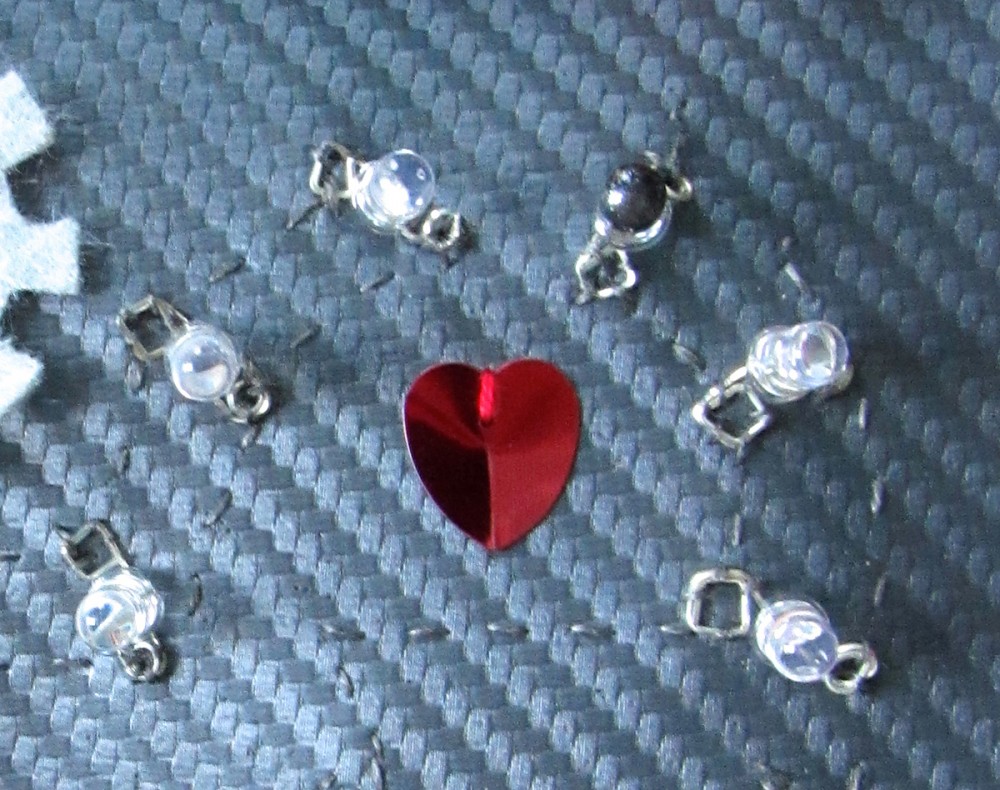
I chose to go with regular LEDs (as opposed to ones mounted to sewable boards) for two reasons: they are much cheaper and I love the large, domed look of them. But because they aren’t intended to be sewn, you need to do a little “jewelry making” to prepare them.
Make the World's Best Robot Costume!

An important note about LEDs: the longer wire is the positive wire! The shorter wire is the negative wire. You have to connect the correct sides to you battery’s two sides, or else your circuit will fail. To keep the sides distinct but still create a way to sew them on, it helps to curl the positive wire into a round coil and the negative side into a square coil. I used two jewelry making pliers to do it. You’ll need to do this for every LED you sew, but it is very quick. Sew the photo tutorial above to learn how to prepare your LEDs for sewing.

If you plan to mount the LEDs with the wires hidden, cut holes in your fabric (use Fray Check if needed on the hole’s edge) and sew the wires to the back side with the LED dome sticking through. I felt my wires went well with the robot look. I did mount my battery holders to the back side for both aesthetics and safety.

How to: Create E-Textile Circuits

Sewing circuits for your LEDs is easy, I promise! Let me show you the basics, so you are able to easily understand my circuit plans. Disclaimer: I am not an electrician! My programmer brother helped me to understand the basics over the course of all my e-textile projects. I’ll be explaining in non-technical terms.

Basic circuit examples.

Basic circuit examples.

Both the battery and your LEDs have positive and negative sides. Both sides need to be correctly connected to work. Take a look at the examples above to get an idea of how LED circuits work. You are basically making a chain going away from the battery. You must have separate lines for the + and – connections, and the cannot touch or you will short your circuit.
Make the World's Best Robot Costume!When you are making a simple line of LEDs, you can see how easy it is to sew your circuits. It gets a little trickier when you start arranging the LEDs into different shapes. It helps to sketch out your plan so you can be sure you have a clear path for each line that doesn’t touch or cross. Additionally, you need to consider the voltage your LEDs run on. This is something new I had to learn through experimenting this time! My red, orange and yellow LEDs ran on a lower voltage than my green, blue and pinks. (I’m very glad my LEDs came with a chart that helped me piece together the problem!) While my batteries appropriate for either, if I added a lower voltage LED to a chain with higher ones, the voltage was dropped down to the point where the higher ones turned off. With that in mind, I had to separate out my LEDs based on voltage.
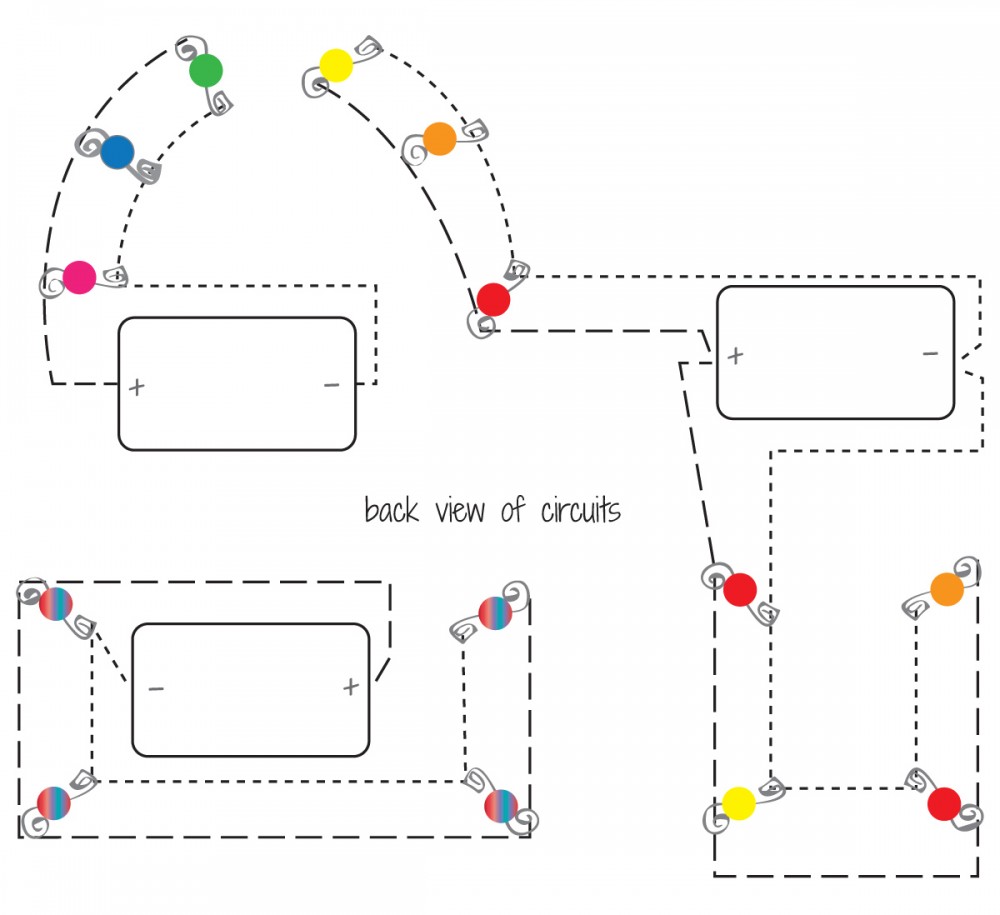
Make the World's Best Robot Costume!Here is my final plan for the LEDs on Jaxbot’s chest panel. My little man loves rainbows, so I made a rainbow. I had to keep the green/blue/pink separate from the other colors. I kept the color-change LEDs separate, then did all the red/orange/yellows together. Notice how each circuit is a chain, even if I had to stitch around the battery holder to get to my first LED.

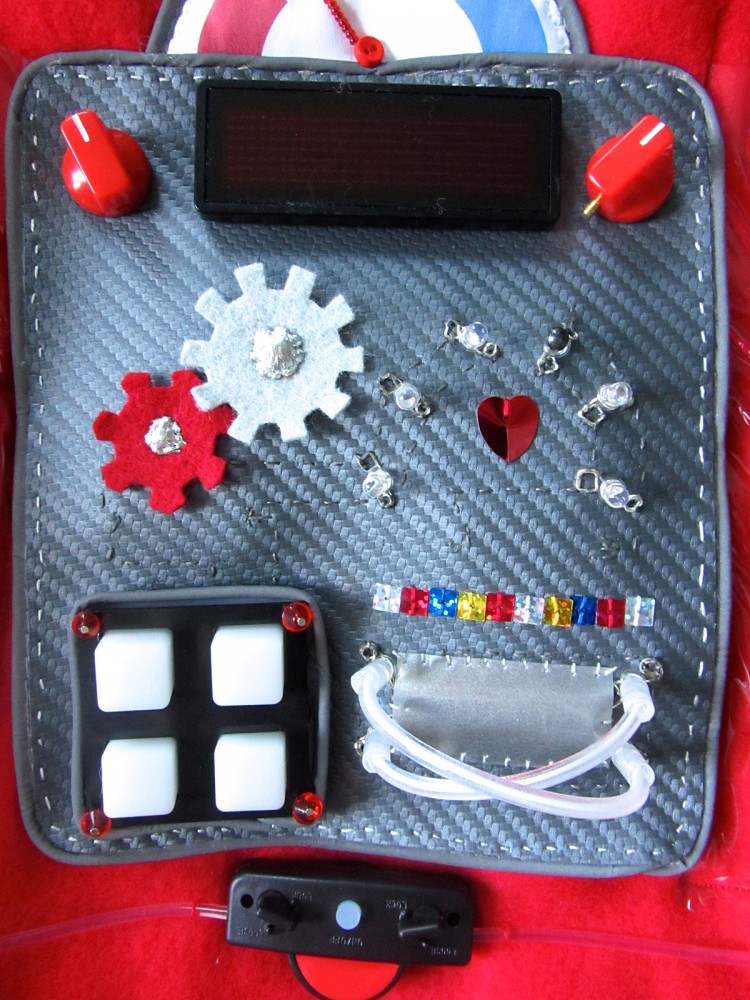
I started the chest panel by cutting a rectangle of gray vinyl that fit well on the front of the body.
Mine was [6.5″ x 8″]. I rounded the corners.
Make the World's Best Robot Costume!

Color Change Power Tubes

Supplies: circuit plans, LED – 5mm Cycling RGB (slow) x4, Coin Cell Battery Holder – 20mm SewableConductive Thread Bobbin, Light Pipe – White Core (3.5mm, 1′ long), plastic glow bracelet connectors, reflective tape

Special Tools: round nose pliers, jeweller’s pliers, super glue, sand paper

Color Change LEDs with Ropes: (All LED work is hand sewn with conductive thread.) I prepped the 4 “slow change” RGB LEDs for sewing. These are special LEDs from SparkFun that slowly cycle through different colors. When combined with fiber optic light rope (which lights up when LEDs shine into the ends), the effect is super cool!

Make the World's Best Robot Costume!
To sew my circuit, I positioned my battery holder in place on the back of my vinyl and taped across the center to hold it. I threaded my needle with conductive thread, knotted the end and made about 5 stitches on the positive side of the holder (you’ll see a plus on it). Following my circuit plan, I stitched the positive line around to the first LED. I flipped to the right side of the vinyl, then stitched several times through the positive loop of the first LED. I then stitched to the next LED and repeated until I had all the LEDs sewn down through their positive loops. I tied off my conductive thread and started a new one. I then repeated the whole process, starting on the negative side of the battery holder and working my way around to each LED, sewing through their negative loops. When both lines are complete, you can pop in a battery to test it. (Note that I had an older version of the circuit plans in these photos, but it is the same.)

 I sewed a strip of reflective tape in between the LEDs for a little extra flash.
Make the World's Best Robot Costume!
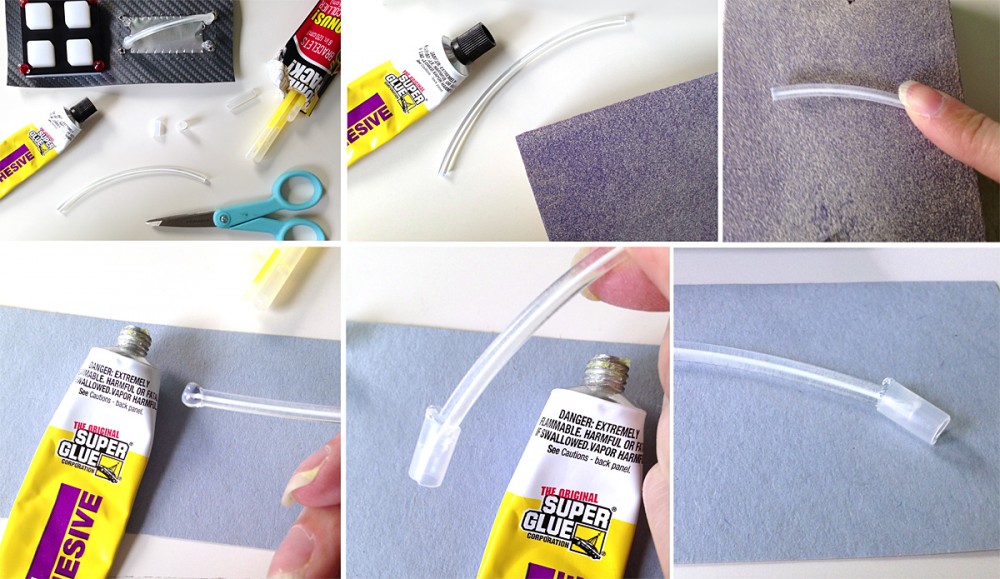
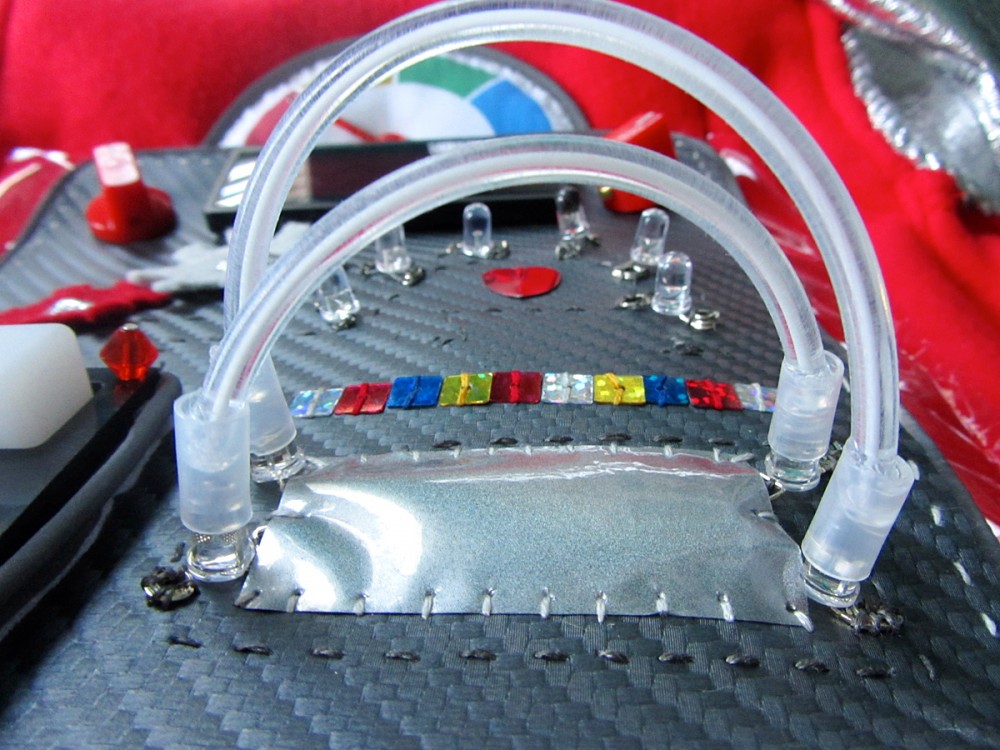
To make the “power tubes” glow, I started by sanding the surface of two lengths of light rope. Sanding the surface causes more light to “leak” out, which makes them look brighter. I cut one of my pieces a little longer than the other using sharp scissors so they could criss-cross. For each tube, I took one of the little drinking-straw-like connectors that come with glow bracelets. The perfectly fit my 5mm LEDs! I used 3mm light rope so it would be more flexible, so I couldn’t just still the rope into the connectors. I took Super Glue and put a pea-sized glob on each end, then stuck them into the connectors. I made sure they were at the angle they’d need to be when on the LEDs. After drying overnight, they were ready to stick onto the LEDs.
Make the World's Best Robot Costume!

Controller Button Pad

Supplies: circuit plans, 5mm Assorted Clear LEDs (8 Colors, Pack of 80), Coin Cell Battery Holder – 20mm SewableConductive Thread BobbinButton Pad 2×2 – LED CompatibleButton Pad 2×2 Top Bezel, 4 jewelry making head pins, 4 beads, reflective sew-in piping

Special Tools: round nose pliers, jeweller’s pliers, super glue, sand paper

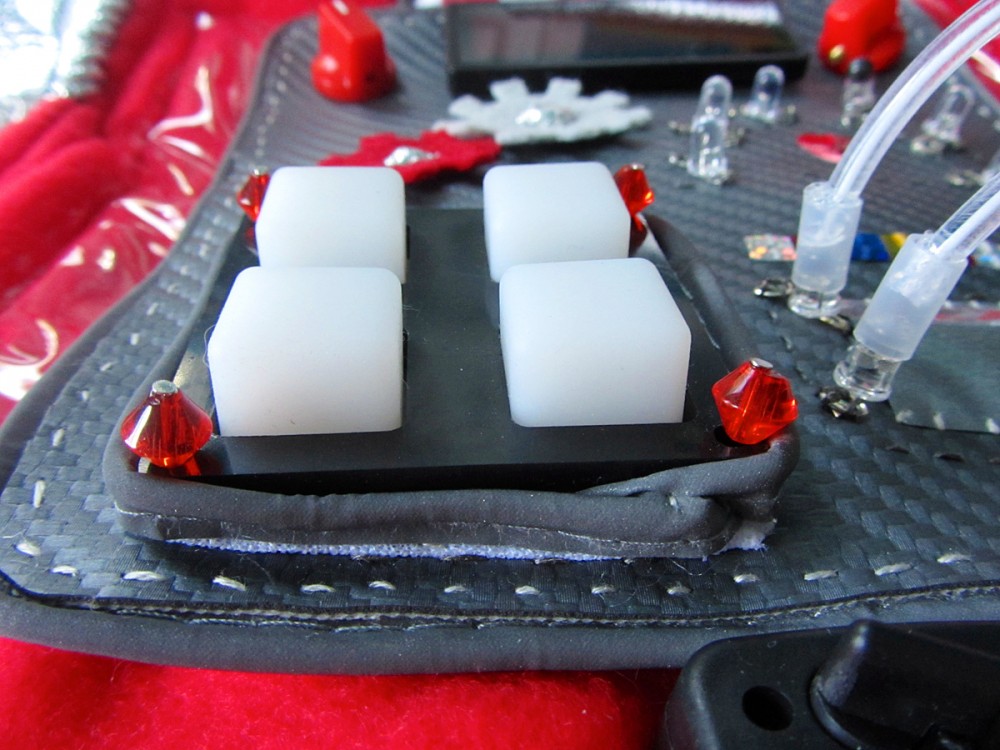
SparkFun sells so many great components to go along with LEDs. The majority are meant for traditional LED use, but I’m crafty – I knew I could adapt them! I absolutely had to have an LED button pad on Jaxbot. The button pads are molded white silicone with domes that go over the LEDs. Then you add the black plastic bezel over top (I skipped the bottom bezel.)

Make the World's Best Robot Costume!

I first sewed the battery holder and LEDs in place according to my plan. This section shares a battery with the first half of the rainbow above, so I needed to stitch down a ways from it. You need to be fairly precise with the the LED placement so they fit into the button pad grid. Using ssss decorated with red beads, I attached the button pad to the vinyl through the 4 corner holes. I used a sew needle to punch a hole for the wire, then used jeweler’s pliers to bend the wires into a coil.

For a more finished look, I sewed some reflective piping around the edge of the button pad, tucking the seam allowance towards the pad to hide it.
Make the World's Best Robot Costume!

Rainbow Central Processing Unit

Supplies: circuit plans, 5mm Assorted Clear LEDs (8 Colors, Pack of 80), Coin Cell Battery Holder – 20mm SewableConductive Thread Bobbin, large heart sequin, nail polish

I had to include a rainbow since I had the right colors. Jax loves them! (There is an LED in the set that seems like it is violet. It is actually ultraviolet – think blacklight – and not as bright as the others. I used the pink instead.)

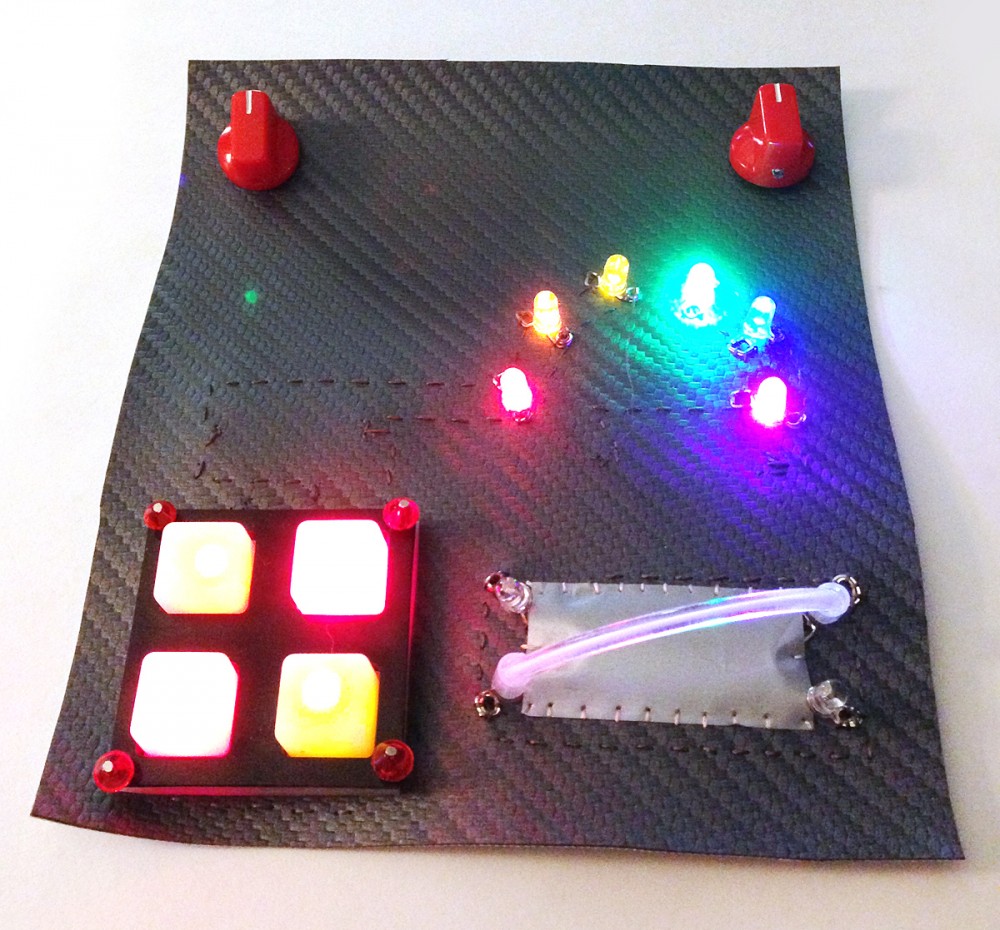
When sewing the LED circuits for the rainbow, you have to do them in two parts. The red, orange and yellow LEDs will become a second chain coming off of the button pad’s battery. You then need to start a new battery holder and LED chain for the green, blue and pink LEDs.
Make the World's Best Robot Costume!

Circuits are sewn, but ow, that green is bright!!

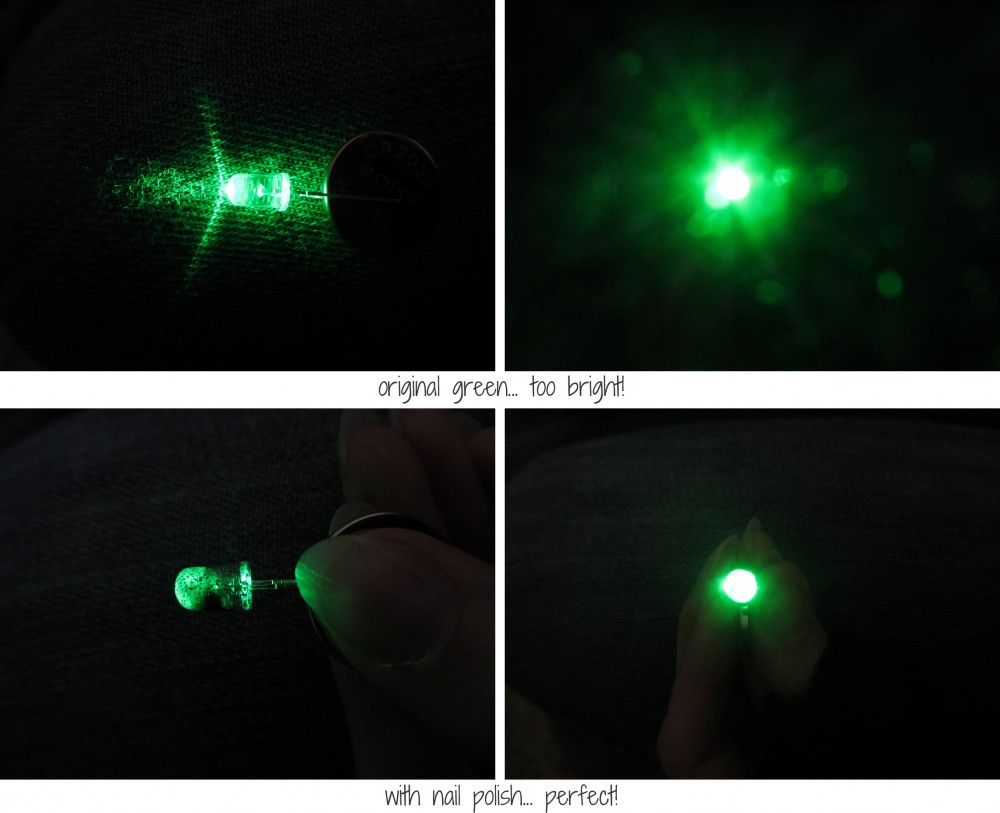
One thing you might notice if you scroll back up and look at the LED chart, is that the green’s millicandela (mcd) is higher than most of the others. The mcd is a measurement of the LED’s intensity. Woo, that green is painfully bright! I tried various things with the circuits, such as adding a resistor, but ultimately I called on my craftiness again.
Make the World's Best Robot Costume!

I grabbed to dark gray nail polish I’d just bought and coated the top 1/3 of the green LED with it. I thought for sure it would dim it too much, but it was perfect! (The LED set I got comes with 10 of each color, so it was easy to do some testing to see what worked. I started with a sheer glitter polish, but the very dark one was what I needed.)
Make the World's Best Robot Costume!

I sewed a large heart sequin (from the thrift store) under the rainbow.

Here is my circuit plan overlaid on top of a photo of my circuits. You can tell where my LEDs are by the thick clumps of stitching. You can also see the attachment points of the two knobs, which I will explain next.
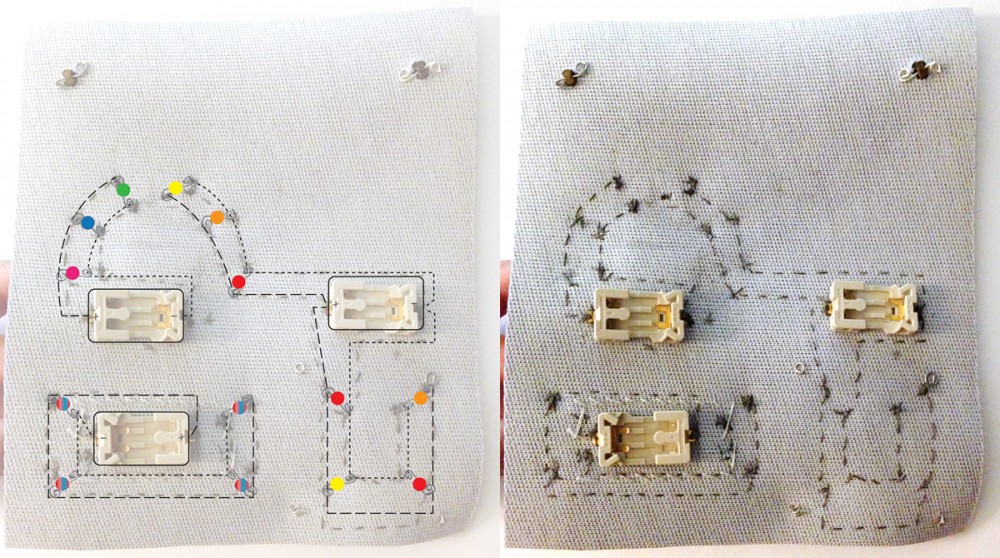
Make the World's Best Robot Costume!

Volume Control and Power Level Adjustment Knobs

Supplies: Red Knob – 15x19mm (2), shank-back buttons (2), wire scraps

Special Tools: round nose pliers, super glue

The knobs I chose are red and smaller that you might guess. But they are adorable and just the right scale for Jaxbot. They also come in black. They are intended to be placed onto a post that has a screw hole in the side, so you can screw the knob on and the whole this rotates. I had to be crafty to get mine attached but still able to turn.

Make the World's Best Robot Costume!

I ended up digging through my button jar to find two shank-back buttons that were slightly smaller than the indent in the back of the knobs. I used super glue to attach them and let them dry overnight. Using sharp scissors, I cut a hole in my vinyl. Then I used a scrap of wire to hold them in place on the back side.

Communications Center

Supplies: scrolling LED name badge

I’m all about simple and inexpensive when possible. There was no way I’d be able to figure out programing my own LED display (though SparkFun certainly sells what you’d need!) I knew that LED name badges existed, so I started searching Amazon. When I found one for $10 from the same seller I was getting my LED equalizer (I’ll tell you about that soon!), I decided to try it despite the 1 star review. I always read product reviews, but that one’s only complaint was that it was hard to figure out.
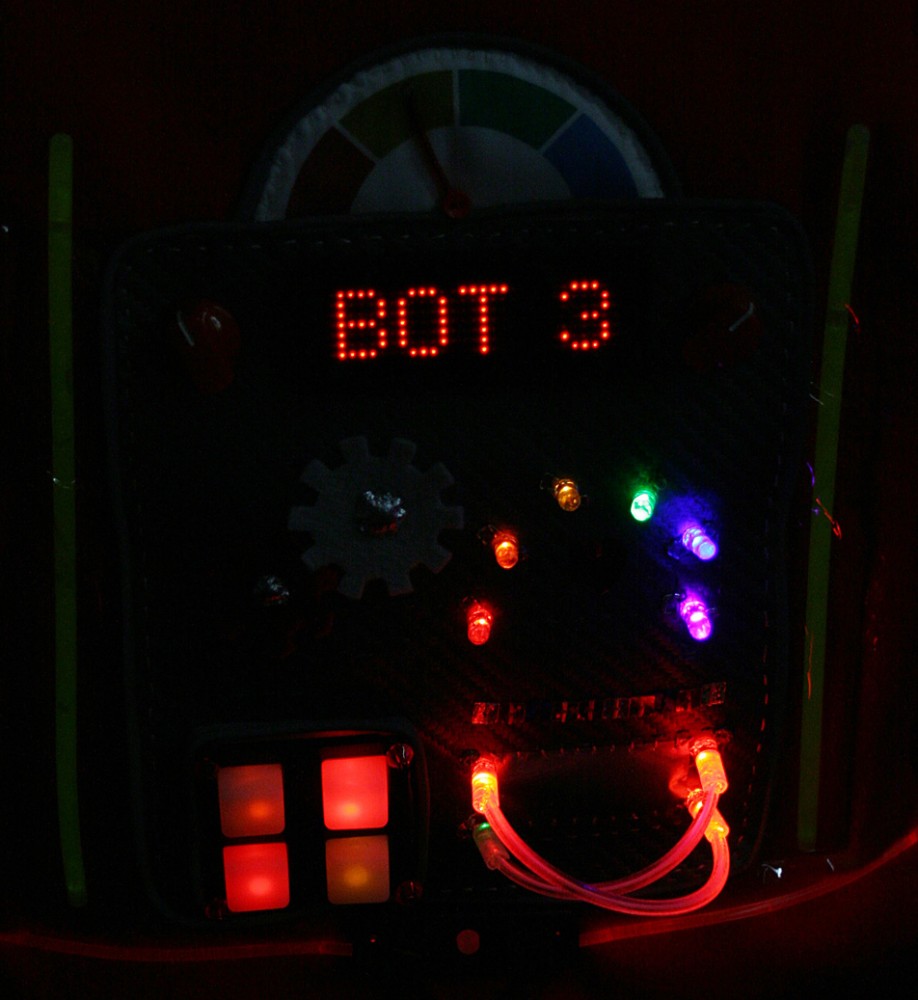
Make the World's Best Robot Costume!

I was expecting instructions in broken English and a unit that took 2 weeks to figure out. I seriously understood it in a minute. Read my Amazon review at the link above for more details. This badge is held on by a magnet panel. I placed it between the knobs.

Details and Attachment

Supplies: printables, photo fabric, gray felt, red felt, silver pleather scraps, square sequins, reflective sew-in piping, wire scraps, seed beads, tiny red button

Special Tools: round nose pliers
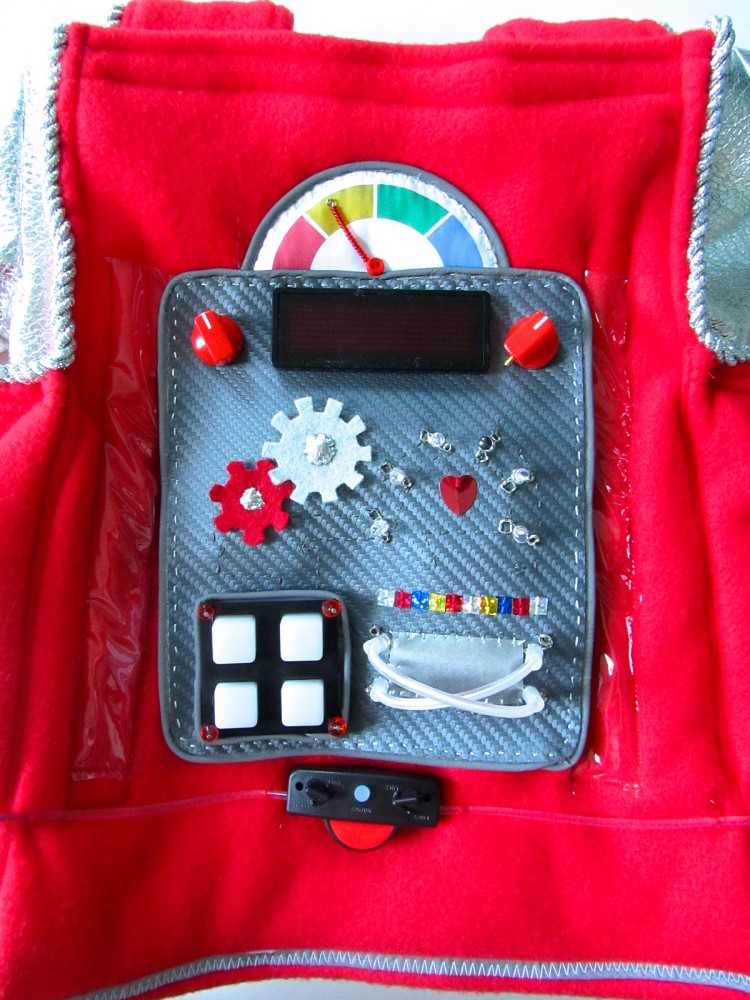
Make the World's Best Robot Costume!

I added some details to the chest panel next: a row of square sequins; some felt gears with silver pleather circles sewn in the centers. Then I hand stitched some reflective piping around the whole edge. Using my sewing machine, I sewed two tall, skinny clear vinyl pockets for glow bracelets, leaving enough room for the control panel to be in the middle.
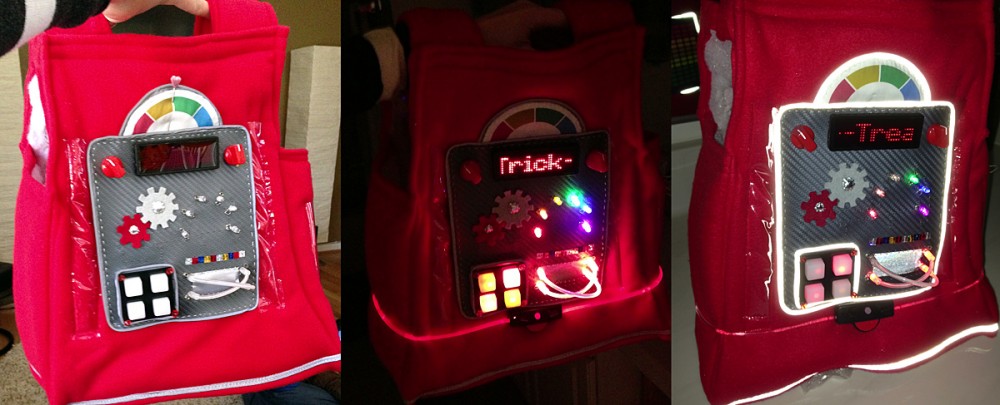
Make the World's Best Robot Costume!

Final placement of the panel and Dial. Everything in the dark. Everything in a flash/headlights.
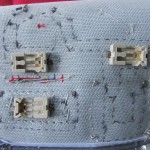
Make the World's Best Robot Costume!I printed out the printables onto photo fabric then cut out the front dial with a 0.5″ seam allowance. I added a layer of white felt behind the photo fabric before folding back the seam allowance. This gives it dimension and keeps you from seeing the folds through the fabric. I folded under the allowance and pinned the dial in place with a strip of reflective piping along the curve. I hand stitched along the curve to sew it to the chest.

I then laid the control panel in place at the bottom of the dial, and hand stitched along its piping on the top edge to attach it to the chest as a big flap. You need to be able to get to the back side of the panel to insert batteries, so I added 4 sew-on snaps to hold it in place (bottom corners and one on each side.)
Make the World's Best Robot Costume!

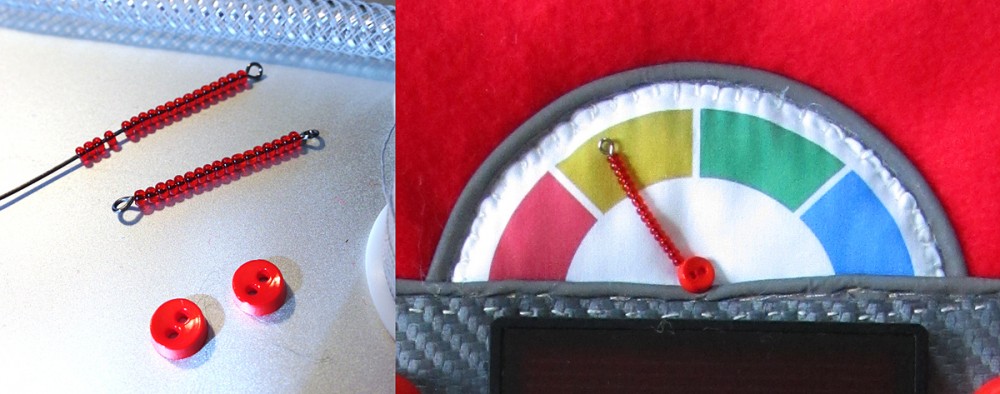
To make the dial’s needle, I made a loop at the end of a piece of wire, then loaded it up with red seed beads. When it was nearly long enough, I made another loop to hold the beads in place. I then placed it on the dial and sewed a button on, making my stitches all go through the bottom loop of the dial needle. This lets the needle turn. You may want to curve it in towards the chest a bit so it doesn’t flop down.

Midpoint Illumination Band

Supplies: LED shoelaces (only used one of them)

Also known as the glow belt! When I saw LED shoelaces in Target’s Dollar Spot, I grabbed a pair in red. I wasn’t sure what I would do with them, but they are basically a cheaper version of fiber optic light rope. If you can’t find them at Target, amazon has similar items.

I turned one of the shoelaces into a belt. It was just the right size! I just had to find the point on the A-line shirt that it was a perfect fit. Then I made little stitches around the tubing to hold it in place. The little power unit is not actually attached to the shirt. It is held in place by the tubes, but you can also pop it off to change the battery.

Audio Input Visualizer

Supplies: LED sound-activated equalizer panel, black elastic scrap, red fleece scrap

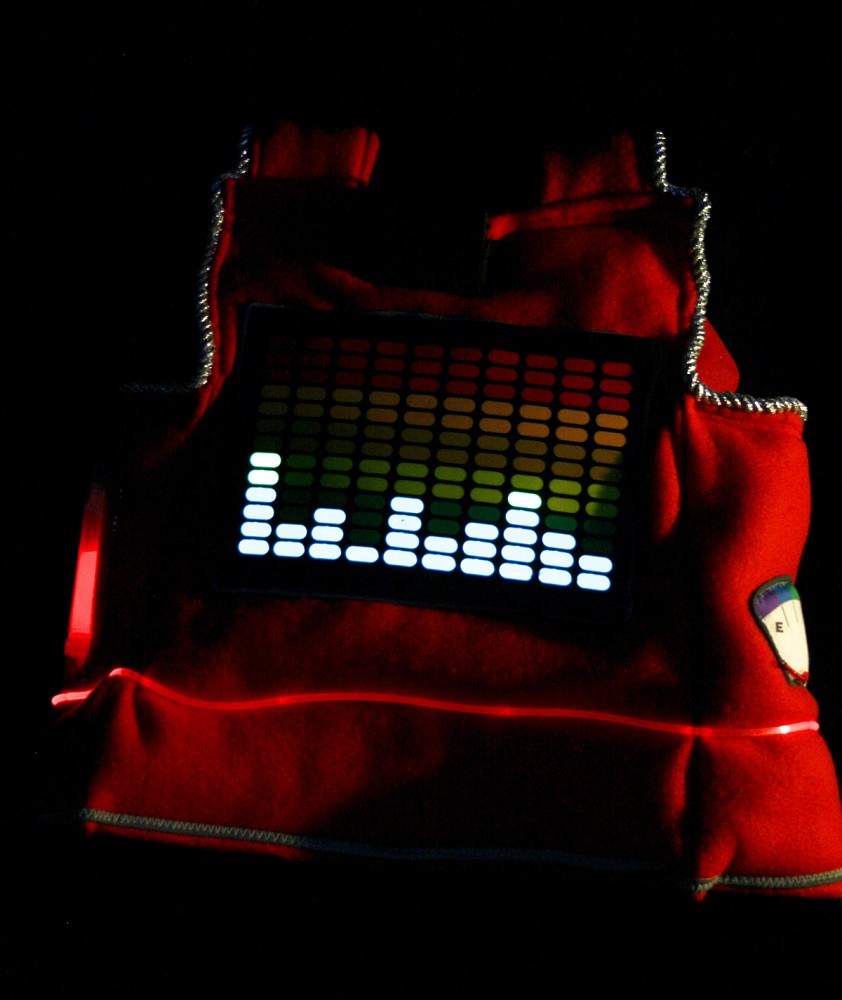
I definitely wanted the back of Jaxbot to light up, but I didn’t want to have to wire LEDs on both sides. I knew I’d seen sound-activated LED t-shirts before, so I did some hunting. It turns out, you can purchase the LED panels separately from the shirts for $7! It does need you need music or noise to have the panel light up. I plan to load my phone up with robotic songs and keep a custom Jaxbot soundtrack going as we trick-or-treat. Loud voices can trigger it as well.
Make the World's Best Robot Costume!

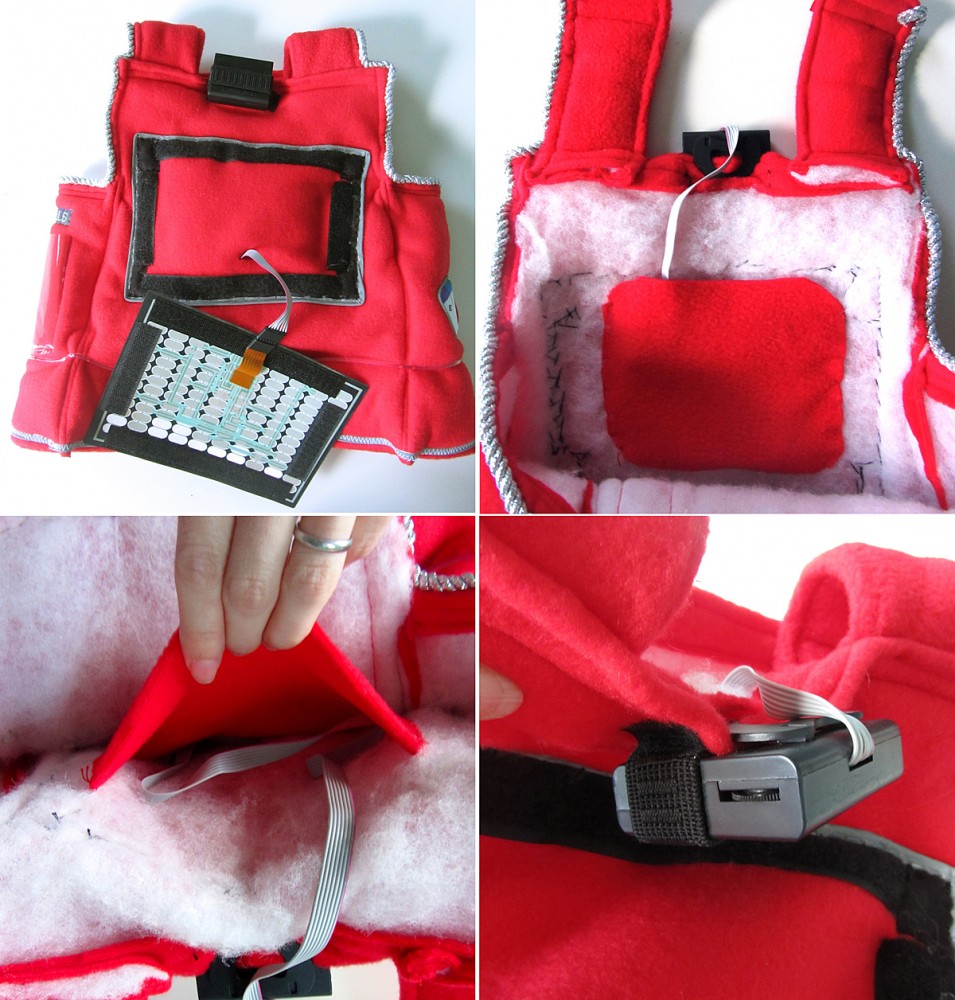
There isn’t a lot you need to do to the panel. You do need to make sure you plug it in correctly. The plug isn’t labeled and if you do it upside-down it with light up oddly. It comes with sticky Velcro (ugh, always annoying!) that you can press in place. I found it didn’t stick that great, so I spent an uncomfortable hour stitching mine down with an old needle. I threw the needle out afterwards, as it was all sticky. You may want to ditch their Velcro and use the sew-on kind (loop side). I added some black felt scraps to fill in the corners of the panel area, then surrounded it with reflective piping.
Make the World's Best Robot Costume!

I cut a slit in the tunic and fed the cord through. I basted a scrap of fleece inside so I could keep the excess cord neat and out of Jax’s way. I clipped the sensor unit to the back collar and added some elastic to keep it from flopping.

Fuel Cells

Supplies: printables, glow braid, clear vinyl, glow tubes (red and blue)
Make the World's Best Robot Costume!

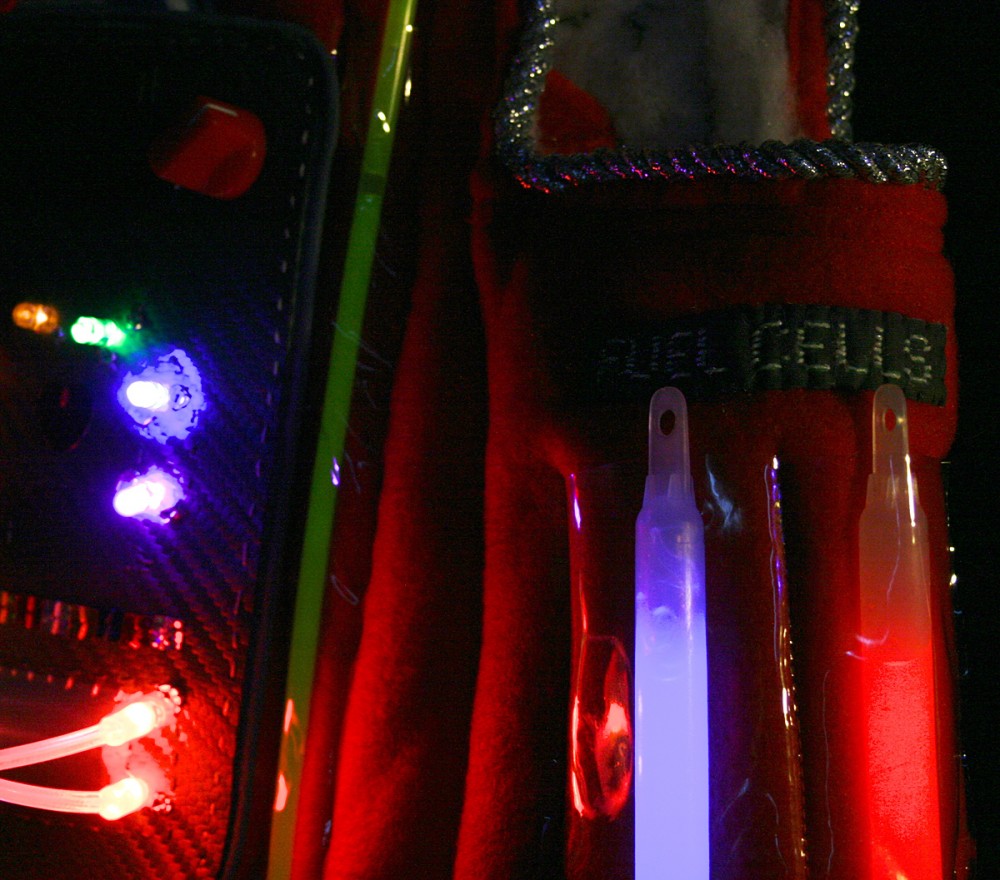
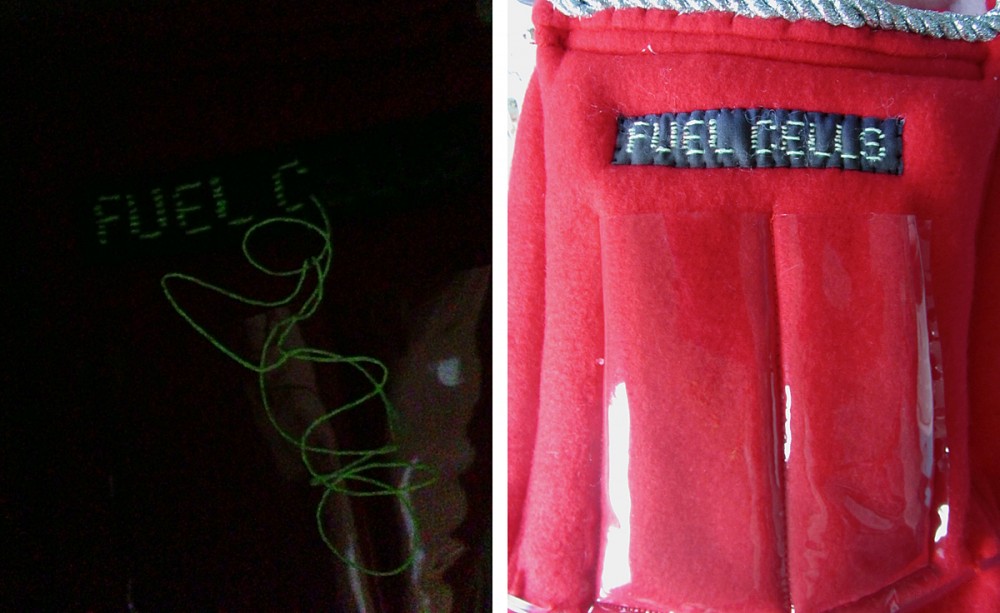
To decorate one side panel of the body, I machine sewed a clear vinyl pocket with a divider in the center. I made the two sections large enough to hold standard glow stick tubes. I took the “fuel cell” printable and stitched over the letters with glow-in-the-dark braid.
Make the World's Best Robot Costume!

You could leave your printout as-is, but I was running out of yellow ink and mine printed too dark. I stitched the label in place above the pockets. When we put the costume on, I activate two glow tubes to act as our fuel cells!
Make the World's Best Robot Costume!

Fuel Gauge

Supplies: printables, photo fabric, reflective sew-in piping, white felt, wire scraps, seed beads, tiny red button

Special Tools: round nose pliers

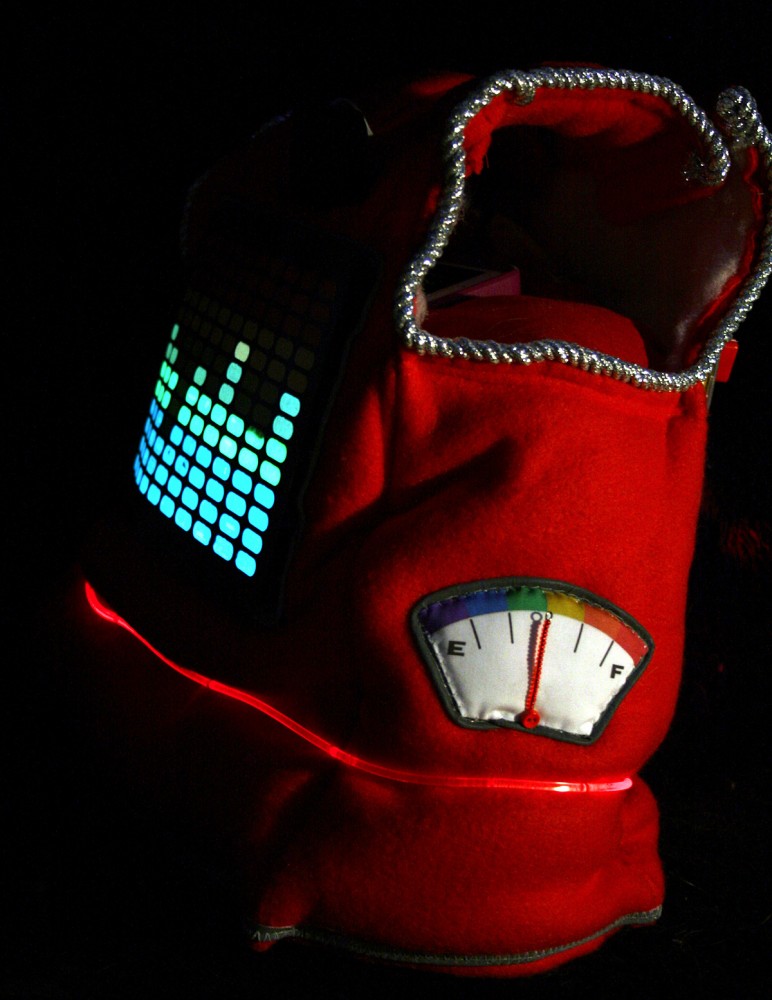
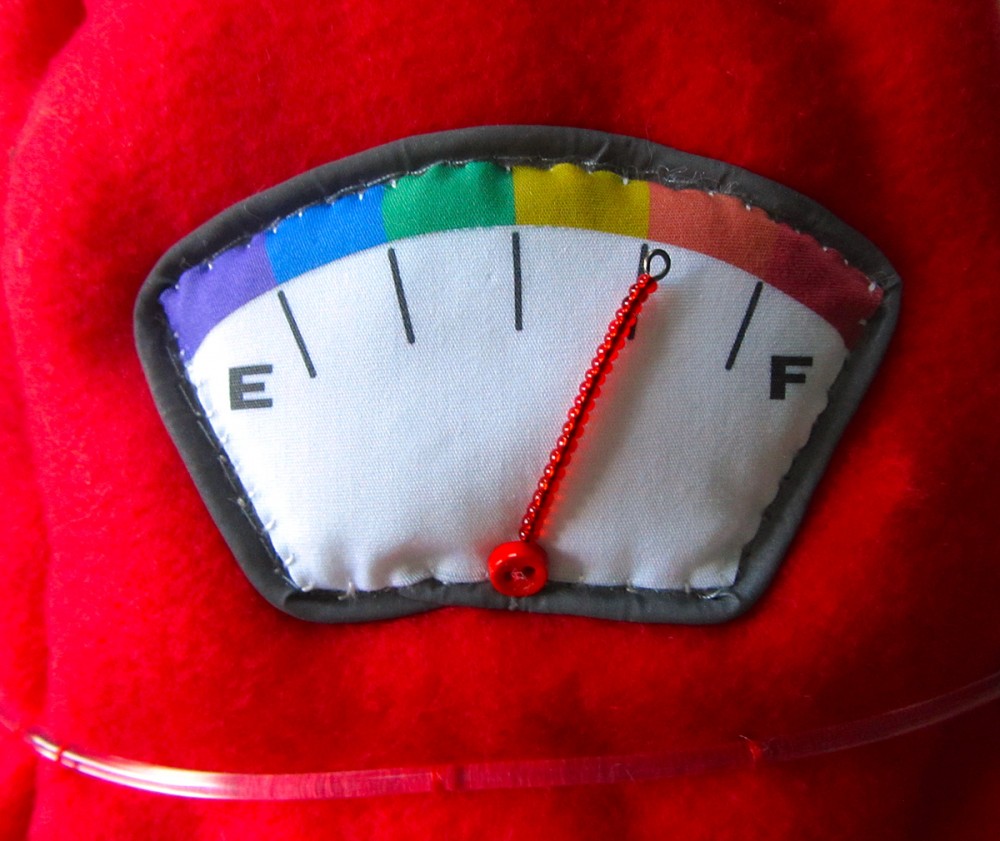
This gauge is made the same way as the one above the control panel, except you add the reflective piping all the way around. I added a layer of white felt behind the photo fabric before folding back the seam allowance. Then I sewed it down with reflective piping, beaded a gauge needle and sewing it on with a button.
Make the World's Best Robot Costume!

Head Encasement Unit

Supplies: printables, dm red anti pill fleece (~ 0.5 yd.), silver pleather (~ 1.5 yd.), batting (~ 1 yd., from stash), gray textured vinyl scraps, mesh tubing, red pompom, large circle sequins (2), reflective sew-in piping (2 packs), photo fabric, red felt, gray felt, pipe cleaner, glow bracelet, sew-on snaps (4), 5mm Assorted Clear LEDs (8 Colors, Pack of 80), Coin Cell Battery Holder – 20mm SewableConductive Thread Bobbin, helmet circuit plans
Make the World's Best Robot Costume!

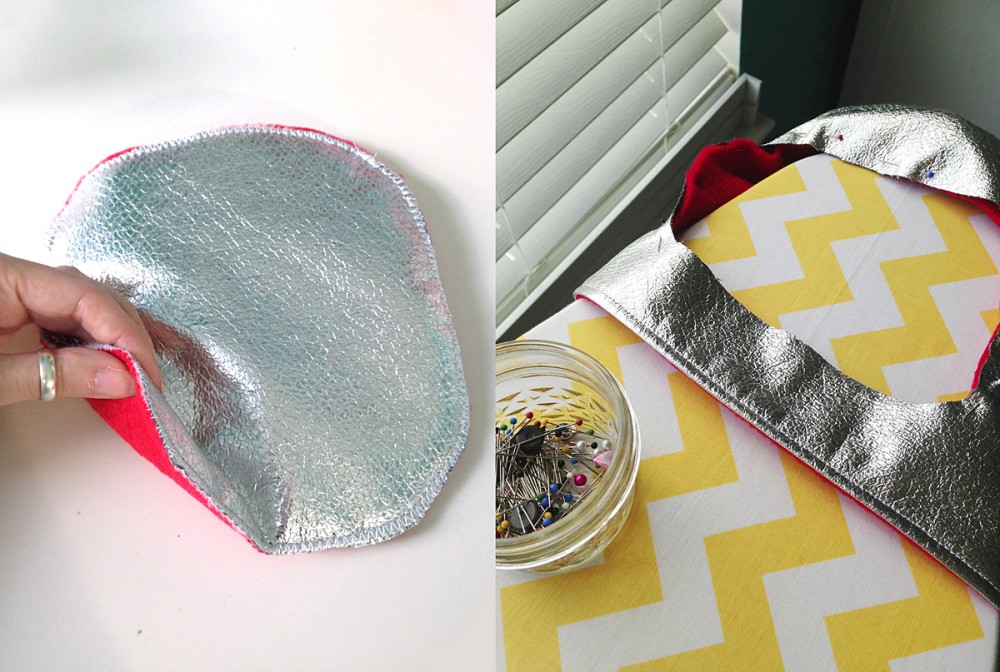
That’s the helmet! I didn’t use a pattern for this. I took basic measurements of how long and wide the top of Jax’s head is, then cut a rounded-corner rectangle slightly larger than that. I cut 1 layer of silver pleather, 2 layers of batting and 1 layer of red fleece. I zigzag stitched all the way around the layers.
Make the World's Best Robot Costume!

I then used a sewing measuring tape to measure the circumference of the of the helmet top (add 1″ for seam allowance) and the height of the distance from the top of Jax’s head to his shoulders (add 1″ for seam allowance) I cut this long rectangle out of 1 layer of silver pleather and 1 layer of red fleece. With right sides facing, I sewed along one of the long sides. I turned it the right way and top stitched along the hem. I then sewed it into a tube, making the fleece the inside, and then sewed the tube to the helmet top.
Make the World's Best Robot Costume!

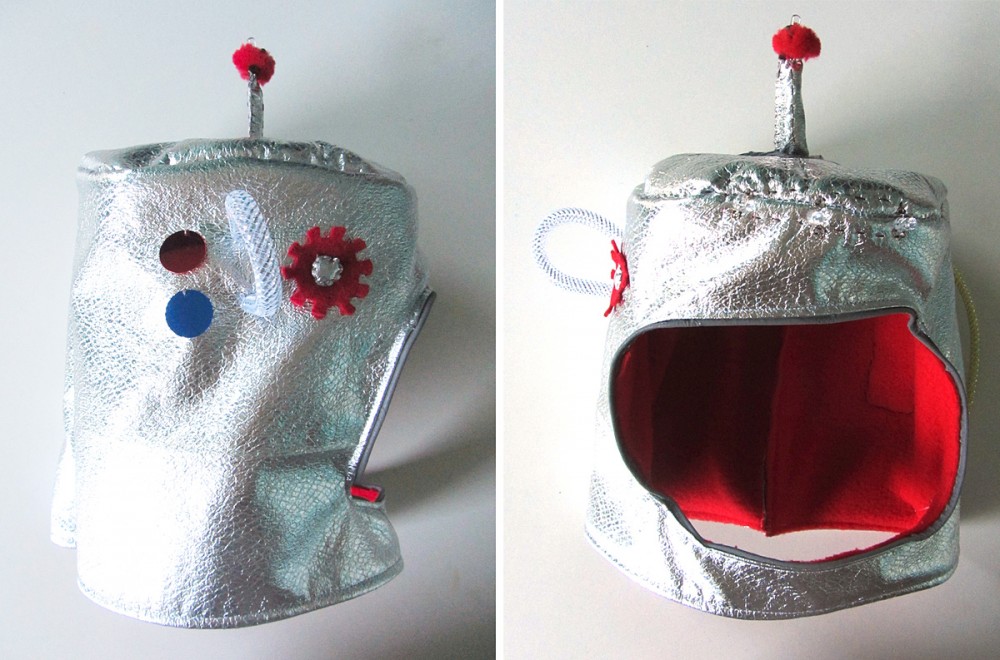
I cut my face hole afterwards. I used the same rounded rectangle as the top of his helmet. Try making the shape out of paper and holding it up to your child’s face first. Once I cut it, I carefully folded in both layers of the hole’s edge, layering reflective piping between them. I machine sewed it in place, but hand sewing might be easier. It was slow and awkward, and I had to go back and hand stitch some places.

On the right side of the helmet, I sewed two large round sequins, A loop of mesh tubing and a red felt gear with a silver pleather center.
Make the World's Best Robot Costume!

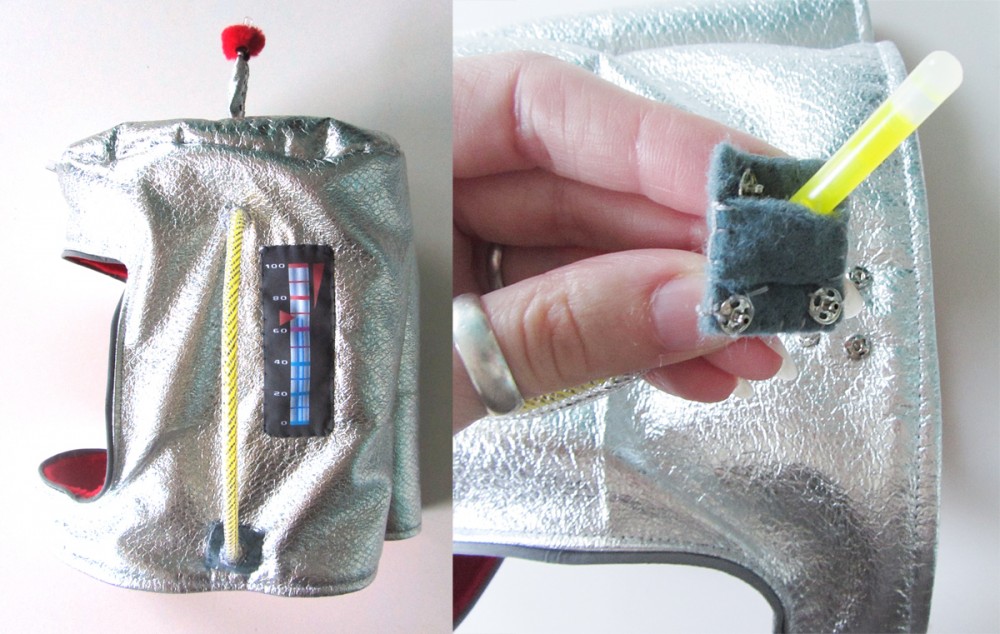
On the left side of the helmet, I sewed down the dark gauge with the edges folded under. I didn’t line that one. I cut a length of mesh tubing long enough for a glow bracelet and sewed the top end to the helmet.

Make the World's Best Robot Costume!

I cut two squares of gray felt and cut a hole in the center, large enough for a glow stick to fit through. Then I cut a strip of felt to be a cover over the hole and sewed all around the edges to hole it together. I sewed the other end of the mesh tubing to the top of the felt square (the side without the cover) and sewed four snaps to the bottom. I figured out where I wanted the tube to be positioned and sewed down the other half of the 4 snaps. You’ll have to sacrifice a glow bracelet to get the positioning just right, so be sure you have an extra.

To make the antennae, I folded a pipe cleaner in half and sewed a casing of silver pleather around it. at the top, I sewed on a pompom. I cut out a circle of gray vinyl and made a hole in the center for the antennae. I put the antennae through the hole, sewed the end to the center of the helmet and then sewed down the vinyl circle.
Make the World's Best Robot Costume!

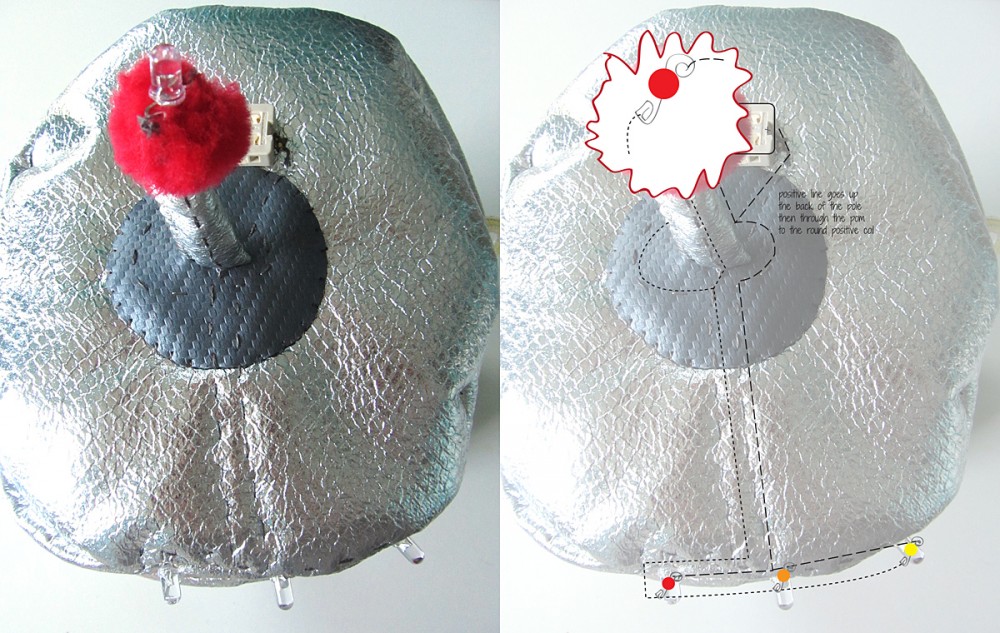
Helmet Circuitry: The helmet circuitry is hard to draw because at one point the lines go up either side of the antennae to an LED sitting on the pompom. Take a close at both the helmet circuit plans and the perspective view above.

I’ll try to explain best I can. I placed the battery holder just outside the gray circle towards the back of the helmet. I sewed the positive side of the holder down with several stitches, then stitched a line out and over to the antennae. On the back side of the antennae, I sewed a line of stitching up to the pompom. Make sure you only go through that side of the pleather so the folded pipe cleaner acts as a barrier between the circuits on each side of the antennae. I brought the positive thread up through the pom pom about 1/3 of the way in from the far side of it and made a few stitches. You can’t stitch super securely on a pom pom, so I tied off and put some Fray check on the stitching. I started another conductive thread and connected it to the positive line at the base of the antennae. I stitched around to the front in an arc and the straight out to the front of the helmet. I stitched through the round positive coil of the orange LED then stitched over to the yellow and did the same. I then stitched back to the orange over top of the stitches I’d just made. It’s fine because it is the same circuit. I continued my stitched out to the red LED, stitching through its round positive coil and tying off.

I started the negative line by stitching several times in the negative side of the battery holder. I stitched out in an arch to the front side of the base of the antennae, making sure to stop before reaching the positive line. I stitched up the antennae along the front side the same way as the positive line, this time attaching the negative side of the LED. I started a new conductive thread and linked it to the negative line at the front base of the antennae. I stitched out parallel to the positive line and then went around the outside of the LEDs as shown, sewing in each of their square negative coils.

I hope that made sense!

And now you should have…

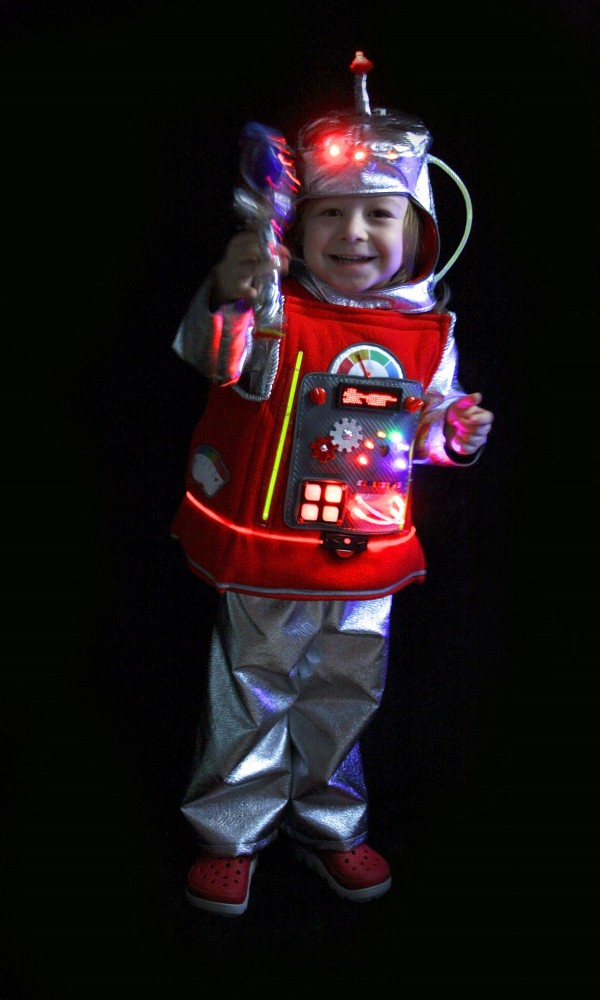
The World’s Best Robot Costume!
Make the World's Best Robot Costume!

Final Shopping List

Joann’s Fabric

Amazon.com

SparkFun.com

American Felt & Craft

Target

Dollar Store

  • yellow glow bracelets (3)
  • glow tubes (red and blue)

Unknown/Already Owned

  • silver rope trim (unknown, from stash)
  • jewelry making pliers (round and flat)
  • large heart sequin
  • large circle sequins (2)
  • red pompom
  • pipe cleaner
  • shank-back buttons
  • black elastic scrap
  • red seed beads
  • tiny red buttons (2)
  • jewelry making head pins (4) and wire (2 scraps)
  • glow braid

What do you think of Jaxbot 3000? Do you think you are up for the challenge of sewing your own? I’d love to see photos of your little one’s home made costume. Stop by my Facebook page and post a photo to our wall, or tag me in an Instagram photo @iolstephanie.
Make the World's Best Robot Costume!

Autumn Leaves Quiet Book & Fall Homeschool Unit

Autumn Leaves Quiet Book & Fall Homeschool Unit

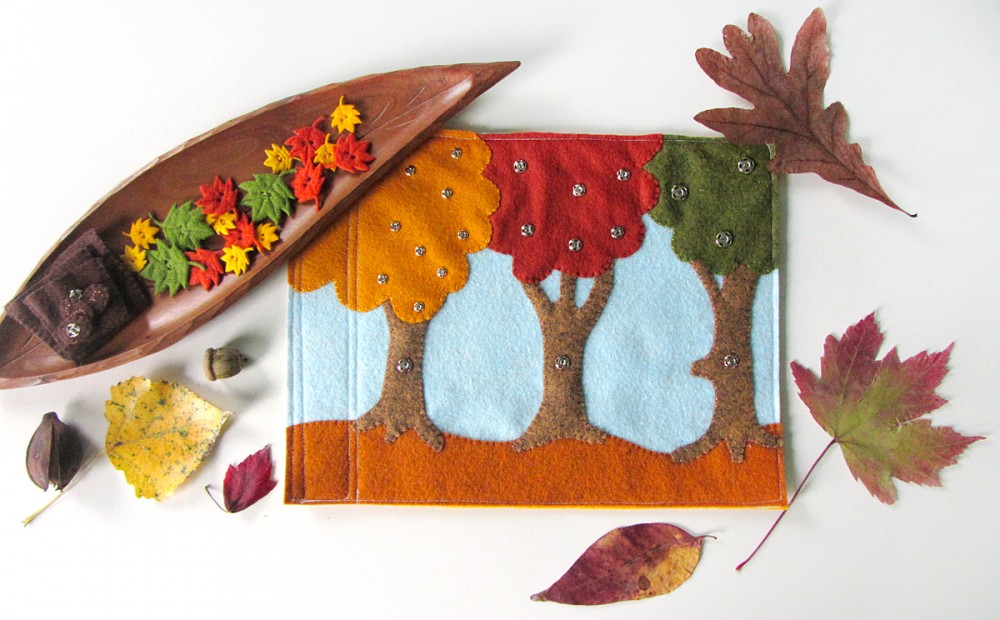
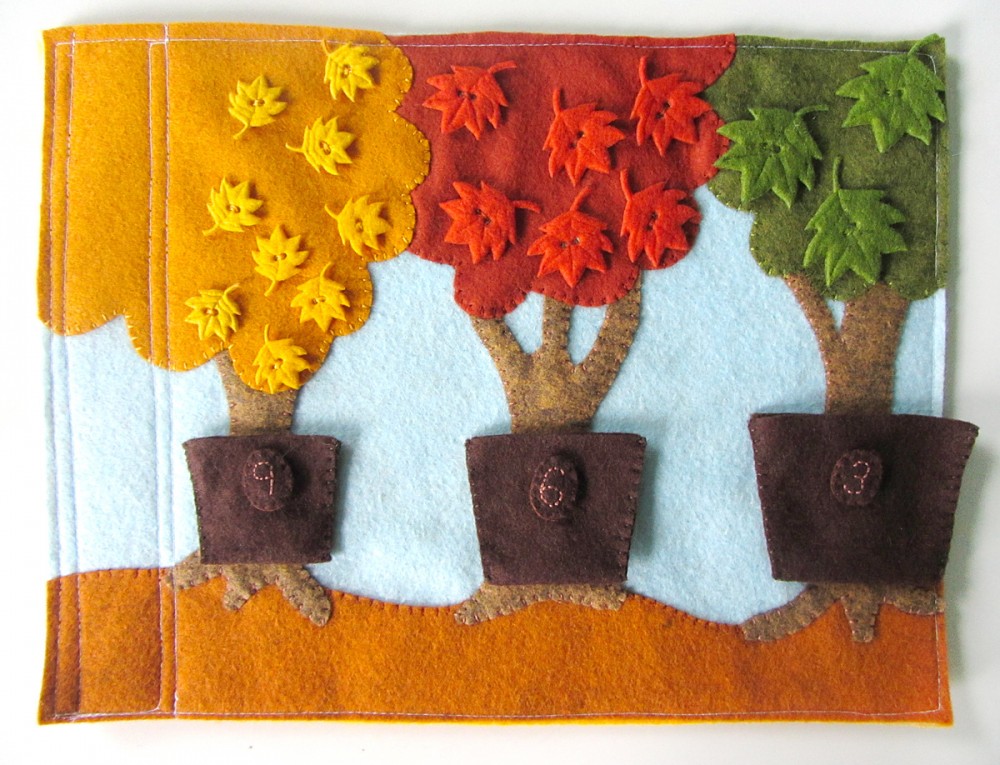
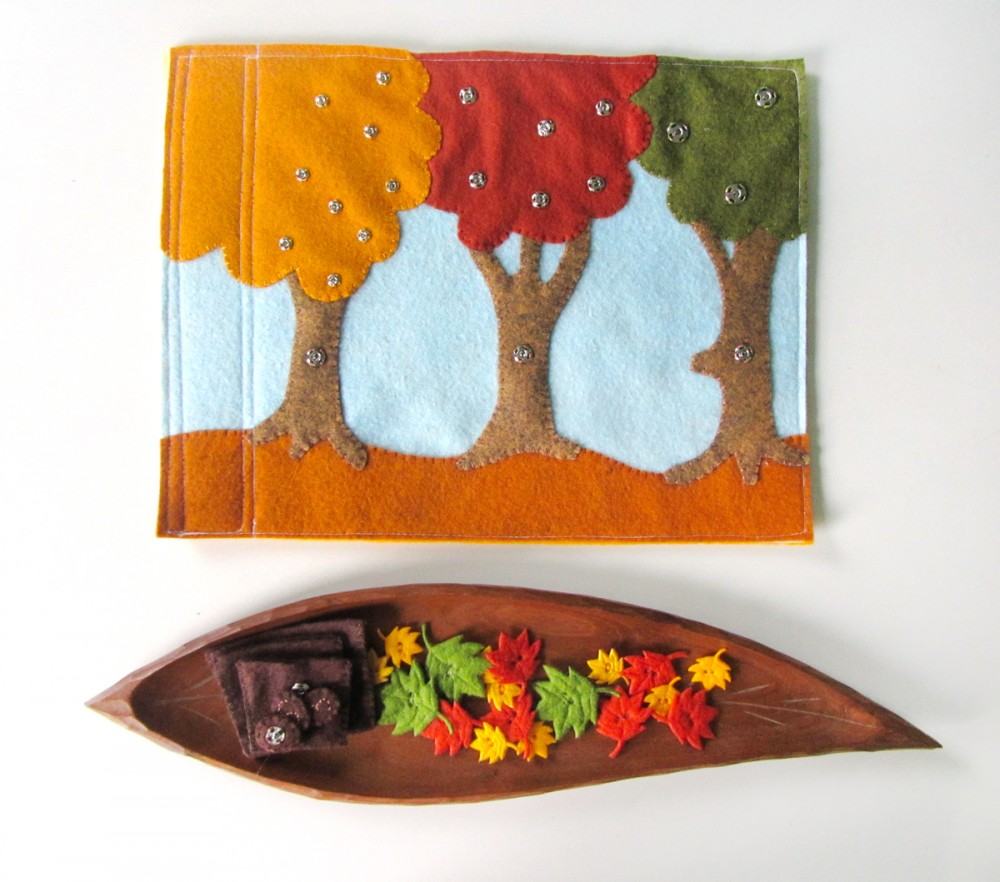
This quiet book page was designed last year, but I ran out of time before autumn ended to actually sew it. This year I made sure to pause my projects and get it finished. We don’t have any trips coming up that require a quiet book, so I especially like making ones that fit in well on our Montessori homeschool shelves. This page certainly does!

Autumn Leaves Quiet Book & Fall Homeschool Unit

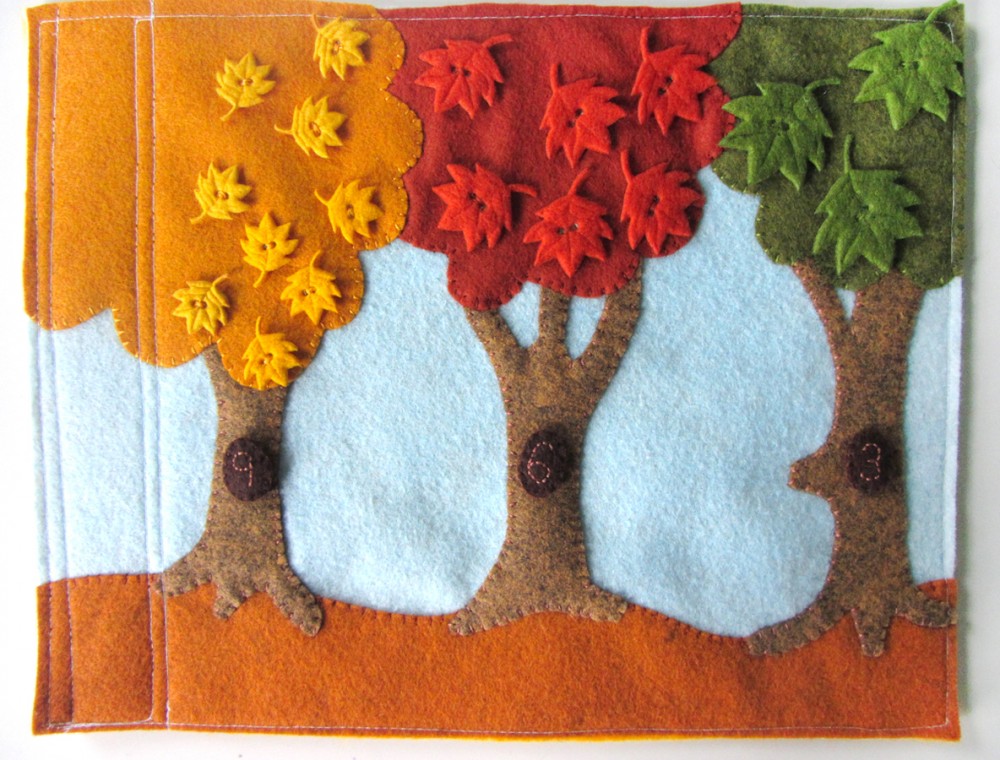
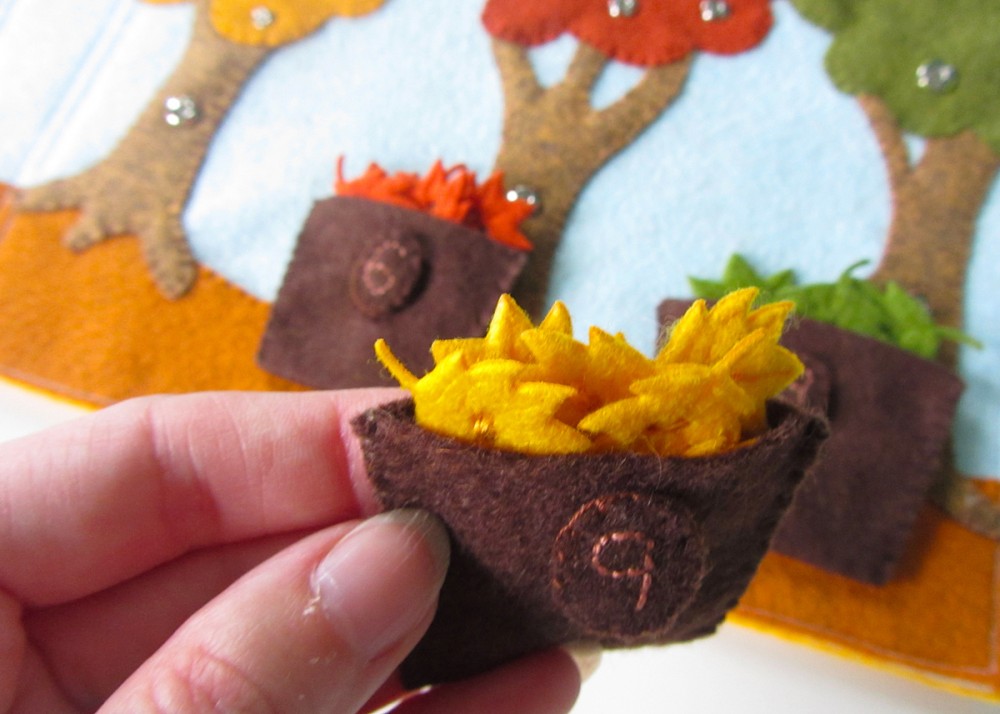
There are a number of features to this page: practice with snaps (which improves motor skills and the ability to dress yourself), sorting colors,  sorting sizes, and counting.

Autumn Leaves Quiet Book & Fall Homeschool Unit

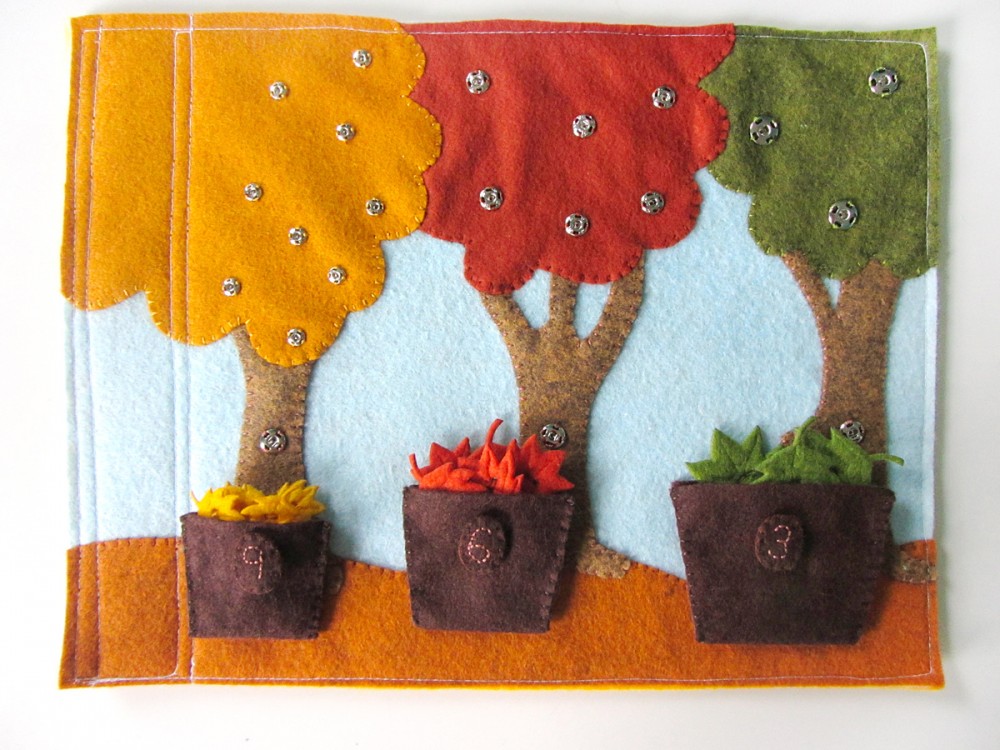
I included three bins with snaps to add number labels. (The labels can also be placed on the trees!) I left it open for Jax to decide how to use the bins. He could potentially put the largest quantity of leaves in the largest bin, or he could put the largest sized leaves in it. This is something you could explore with your child.

Autumn Leaves Quiet Book & Fall Homeschool Unit

When you are finished with the page, you can snap the bins to the trees for storage.
What I Used:

This biggest bummer about this project is that I bought the leaf buttons last year, and now they are no longer made by the manufacturer! When I posted to our Facebook page about it, I linked to the one source I had seen so far. But now all 10 packs are sold out.
Autumn Leaves Quiet Book & Fall Homeschool Unit

Here are a few non-felt button options you could try. I’m not sure how well sewing a snap to a plastic button would work though. There is a pack of 12 buttons that match the colors and sizes I used, but you’d need multiple packs to have the same number as me. Here is a larger listing of those buttons. This is another brand, but the colors and sizes seem more assorted. There are a number of felt die cut leaves on Etsy, but they all seem to be larger. This seller has some that are 25mm. (Last photo below copyright Planeta Costura.)

etsy

You may be better off cutting out your own out of felt. If you want to skip snaps, you could just cut one layer of felt for each leaf (I recommend thicker wool-blend felt), but be aware they are more likely to get damaged or lost. You could take the time to cut 2 layers per leaf and sew them together. It’s so frustrating that they aren’t sold anymore!

Sewing the Page

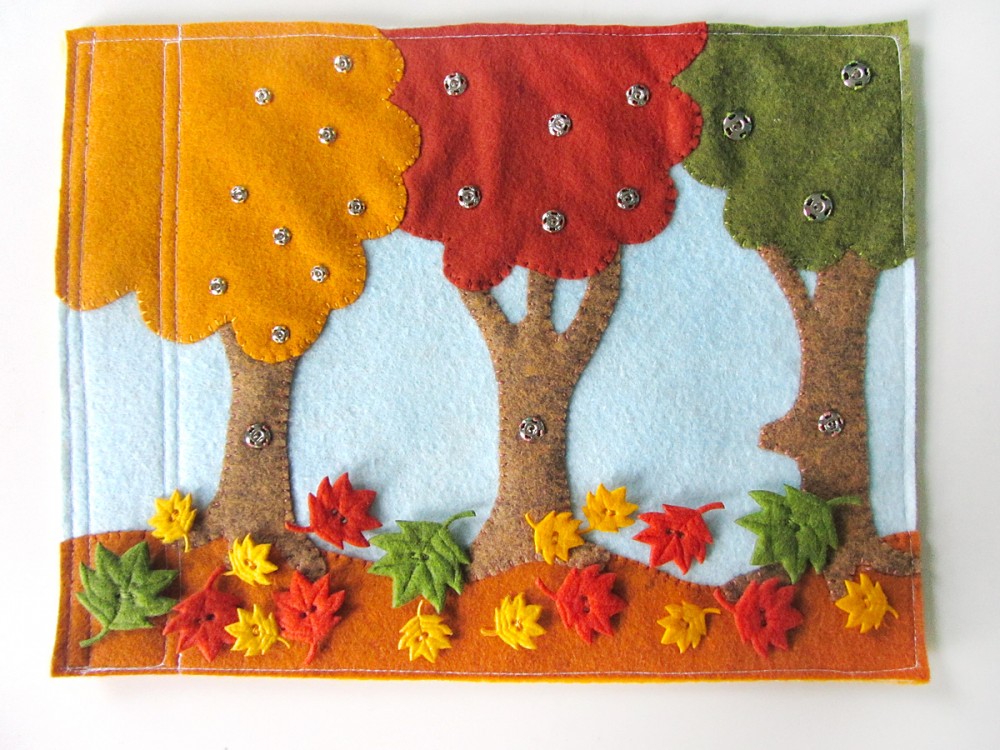
Background: I started by cutting everything out and pinning it down: first the ground, then the trunks, then the tree tops (green, red, then yellow). I sewed down the tree trunks, then sewed down the tree tops. Then I sewed down the top edge of the ground that was showing between the trees.

Note: This is how I sew my quiet book pages together. Because I sew all the way around the edge while sewing on the backing, I don’t usually bother to sew elements along the edges of the page.

Autumn Leaves Quiet Book & Fall Homeschool Unit

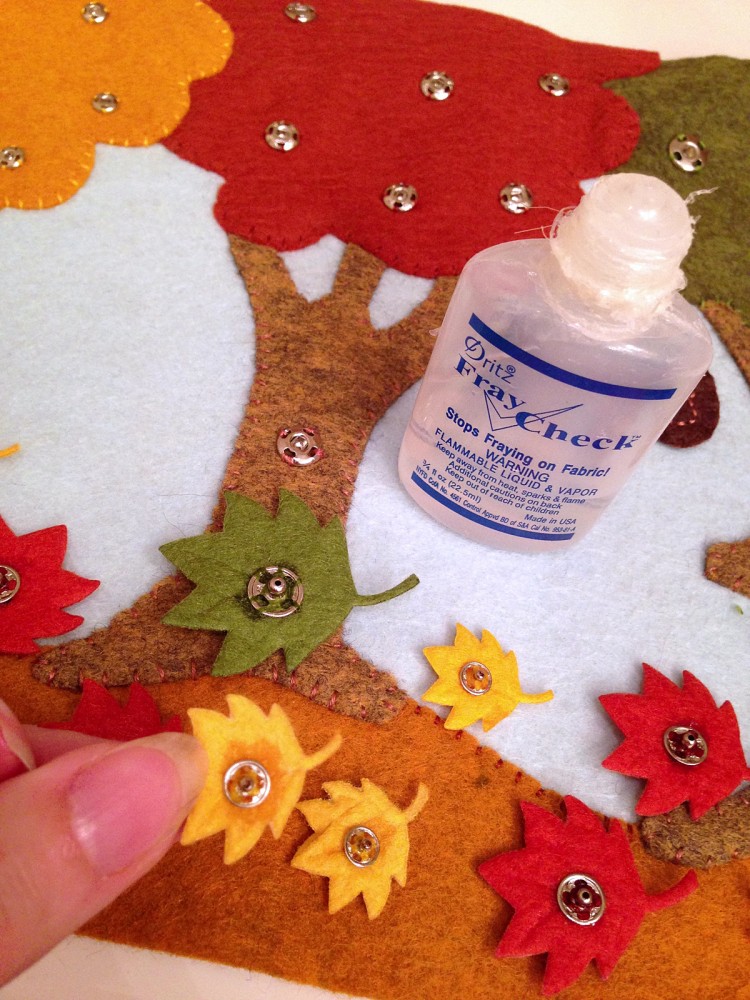
Leaves: For all of the leaf buttons, I used A LOT of stitches to attach snaps to the backs. Then I coated the stitches with Fray Check and let them dry overnight.

Tree Snaps: On the green tree, I sewed down 3 size 1 snaps. I sewed the matching halves to the backs of the green leaf buttons. On the red tree, I sewed 6 size 2/0 snaps on to the tree top and the red leaves. On the yellow tree, I sewed down 9 size 4/0 snaps to the tree top and leaves. Not that I left a 2″ area on the left without snaps to allow for where I sew my binding and add grommets. I have not added grommets yet. I usually do that right before a trip when I need to link pages together.

I added a size 1/0 snap to each tree trunk to hold either the numbers or the bins.

Numbers: I back stitched numbers on the fronts of each number pieces and the other half of those 3 size 1/0 snaps to the backs. Then I sewed them together.

Autumn Leaves Quiet Book & Fall Homeschool Unit

Bins: The bins were just sewn together with an open top. I cut mine on a fold so I didn’t have to sew the bottom. I added a snap to each one – one half of the snap set on each side of a bin. These snaps let you either attach the number label or attach the bins to the trees.

Montessori Use

Autumn Leaves Quiet Book & Fall Homeschool Unit

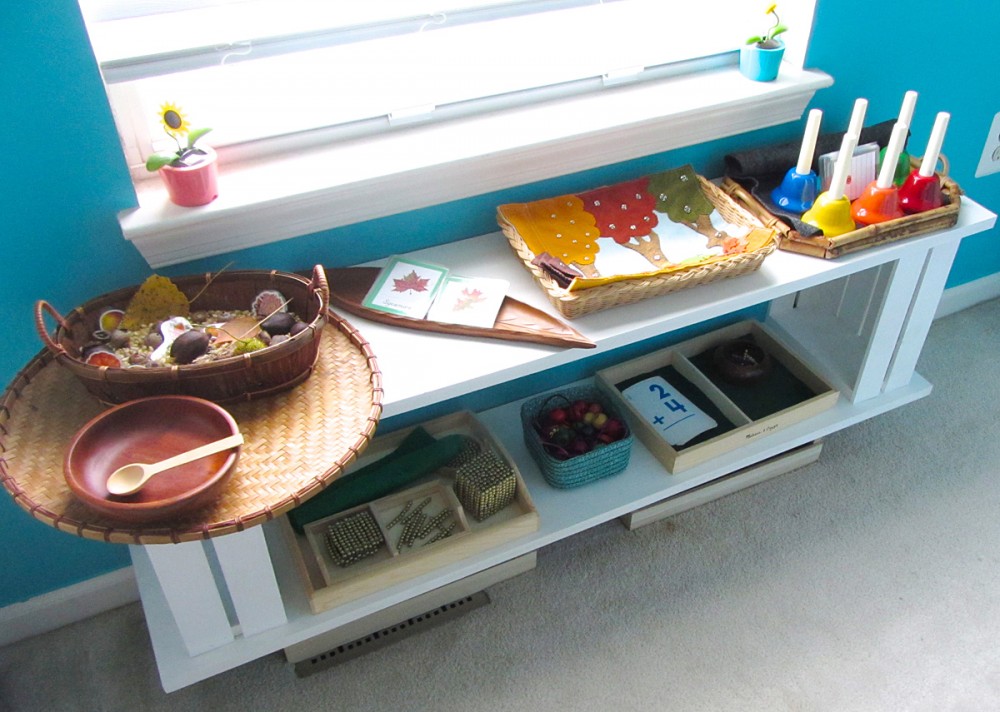
This page works well as a Montessori activity for our autumn unit. I adore this wooden leaf tray I found at a thrift store! It is perfect for presenting the leaves or other autumn supplies. I’ve also laid it out in a tray with the leaves spread out on the ground just like Jax finds them outside.

Autumn Leaves Quiet Book & Fall Homeschool Unit

Here is our current main shelf of our homeschool room. The bells will be featured in an upcoming post!

Autumn Leaves 3-Part Cards

Autumn Leaves 3-Part Cards

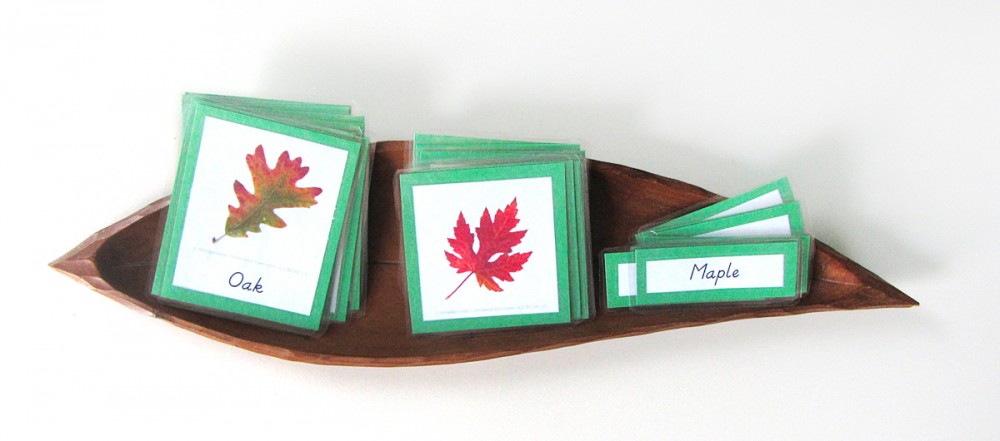
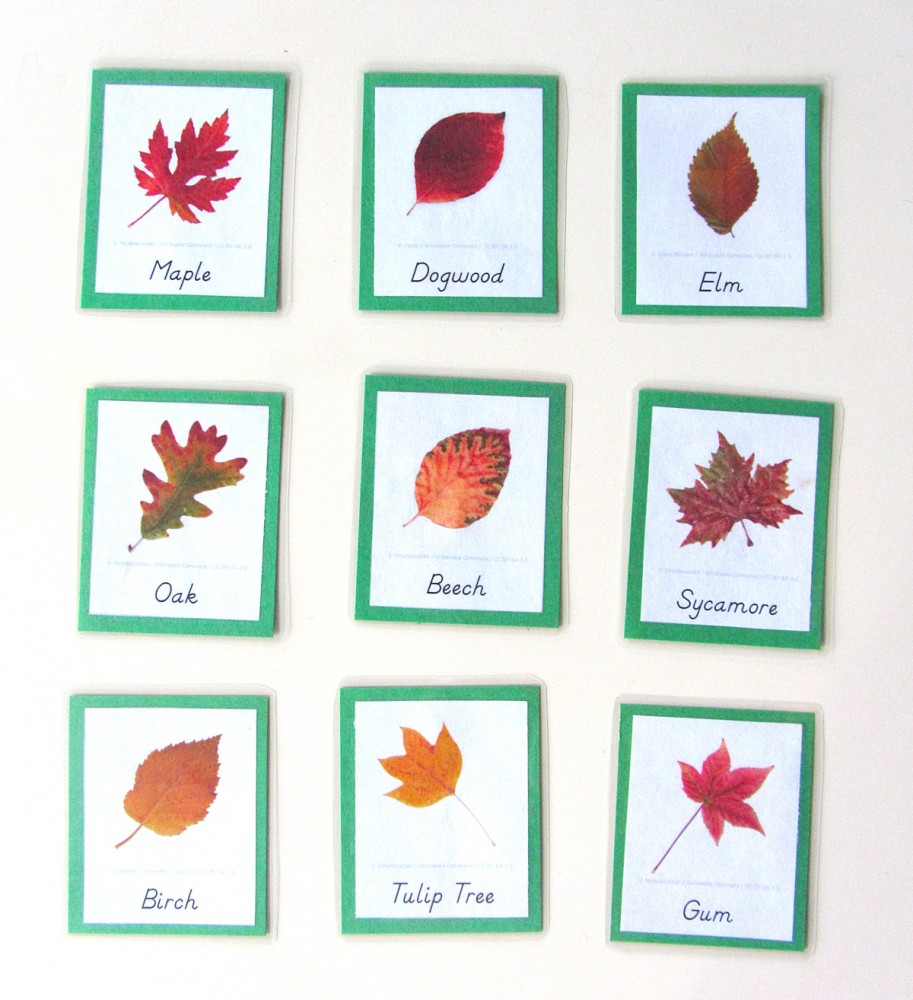
In the Montessori method, 3-part cards are an essential tool that can follow your child through multiple levels of development. They can be used in any subject to aid in adding vocabulary, learning to sort/classify, reading practice and so much more. Three-part cards are made up of two photos – one with a label, one without – as well as a separate label. Younger children start with the labeled card to help them learn the vocabulary. One of the best ways to use them is with small objects that match the photos. Older kids can work with the unlabeled card, matching the correct words or writing their own.

Autumn Leaves 3-Part Cards

I put together a set of 3-part cards for Jax to learn how to recognize various leaves in our area. I used only trees that can be found in our area, but they are very common ones. You are welcome to use my free pdf to make your own set! I am hoping to take our cards out on a walk once more leaves start changing colors so we can match them up. (Our server caching is causing troubles for some people. Here is an alternate download link!)

Autumn Leaves 3-Part Cards

To make mine, I cut them out, glued them to green card stock (this is simply a color I chose to assign to all my future botany collateral) then laminated them. It makes them shiny and strong. I really love my laminator – as everyone told me I would!

Autumn Leaf Watercolors

Autumn Leaf Watercolors

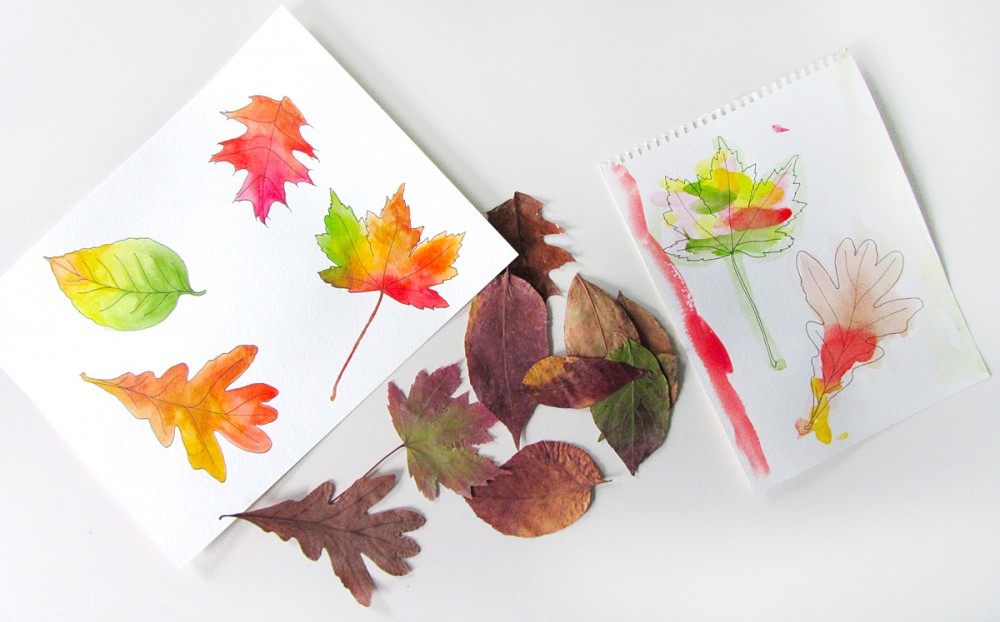
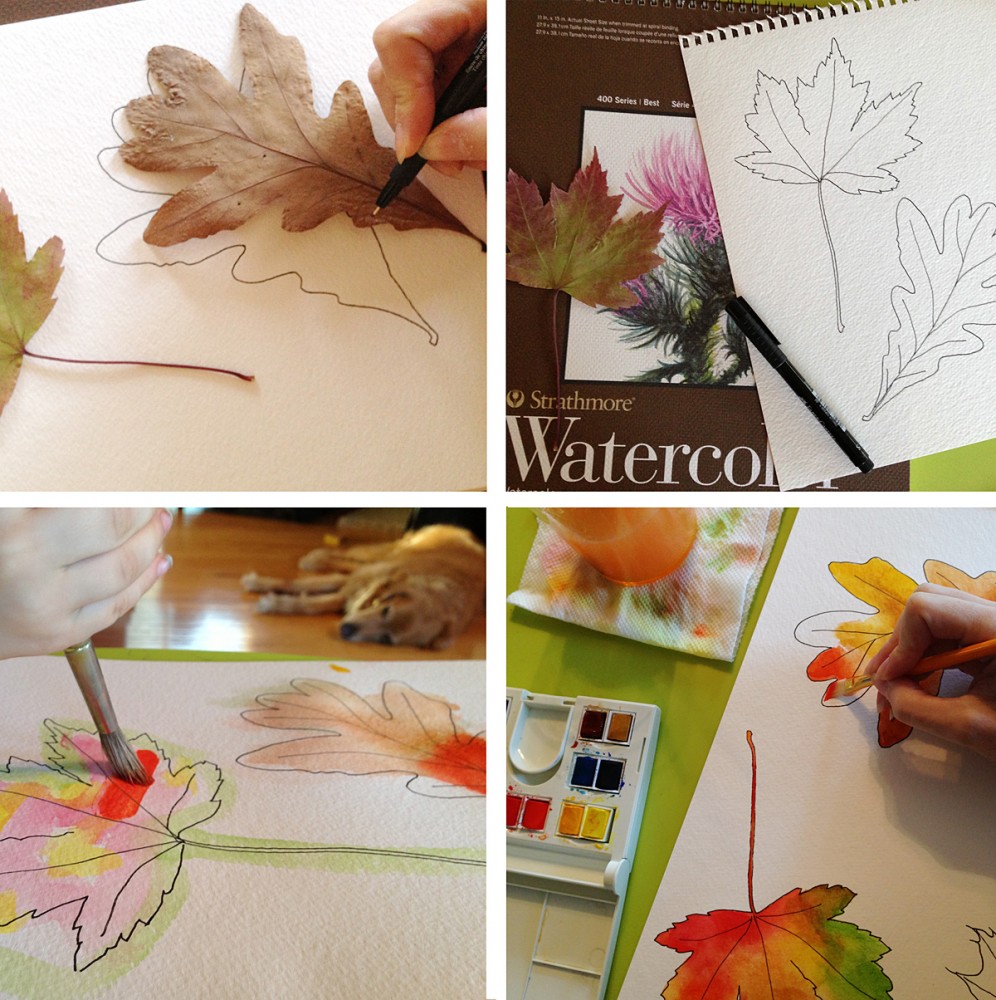
We needed a quick afternoon activity the other day, so I took some watercolor paper and traced some leaves using my artist pen. (For the exact materials and techniques I used, see my recent watercolor post.) Then Jax and I each painted in our leaves with watercolor paints.

Jax was very set on painting his leaves only the proper colors you’d find in nature. He also wanted to add a red sky and green ground (he still does sky and ground as little strips at the edges of the page!)

Autumn Leaf Watercolors

We both ended up with beautiful artwork, worthy of a frame!

For an even quicker activity, print out my free leaf coloring sheet!

Autumn Nature Walk

Autumn Nature Walk

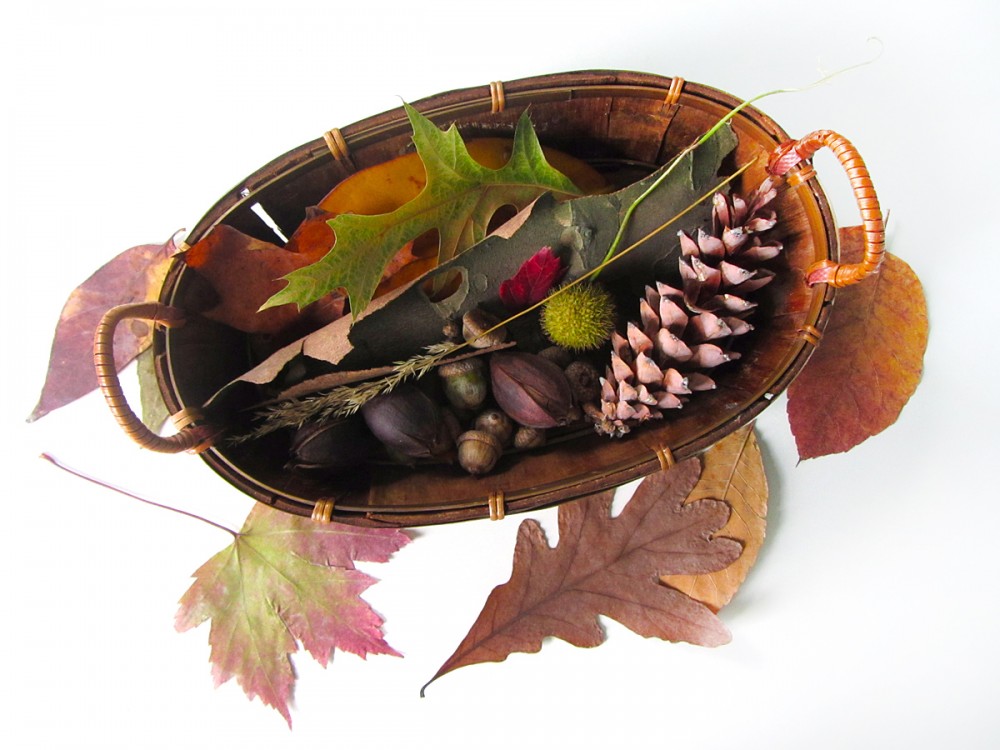
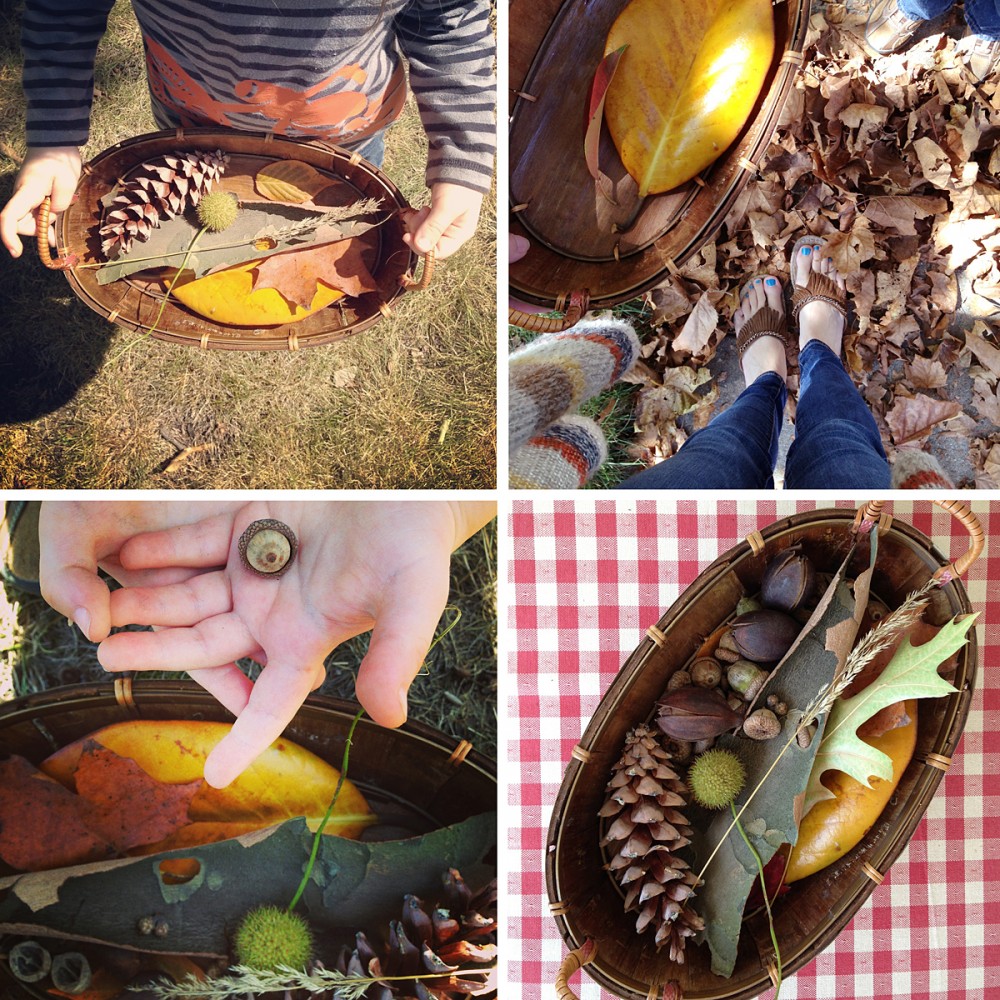
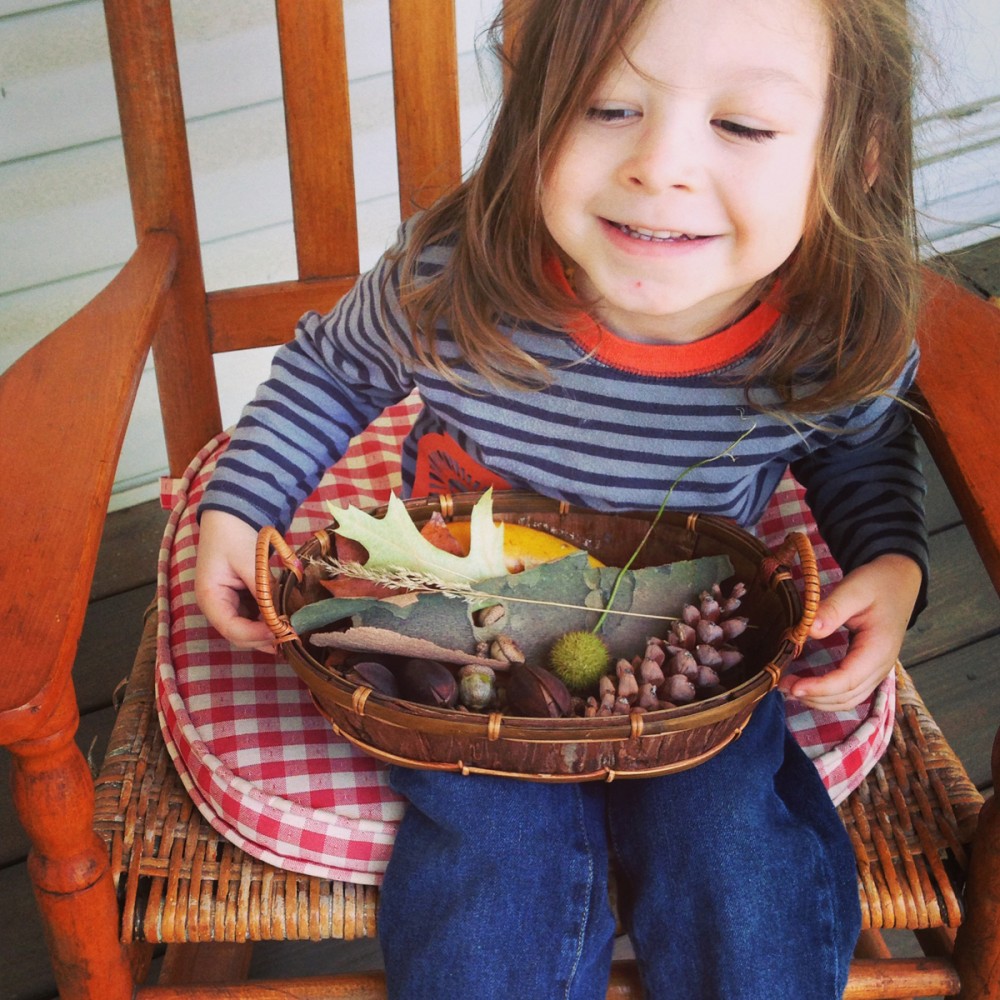
This past weekend was beautiful here in northern Virginia! Jax and I grabbed a basket and set out looking for early autumn treasures. The leaves are just now starting to turn, so we focused mainly on other items.

Autumn Nature Walk

We found all sorts of seeds and acorns, bits of birch bark, leaves and acorns. Jax quickly got into our “treasure hunt” and was very excited to show me each new find!

Autumn Nature Walk

We brought our bounty home to look through and enjoy.

Autumn Sensory BinAutumn Sensory Bin

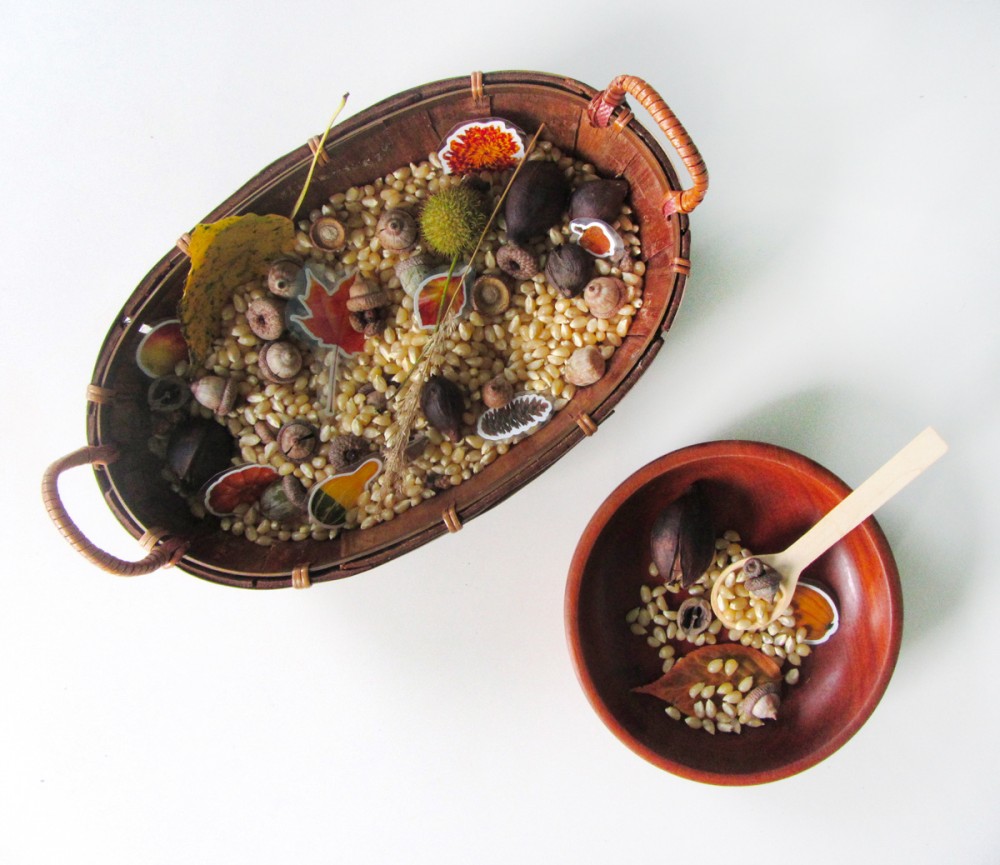
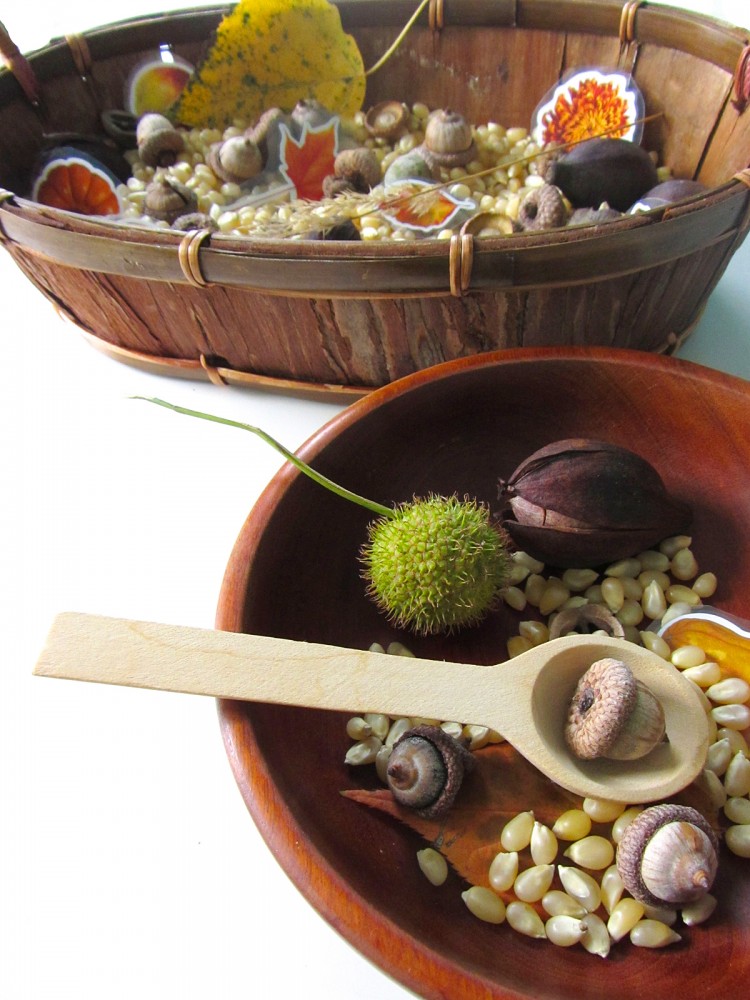
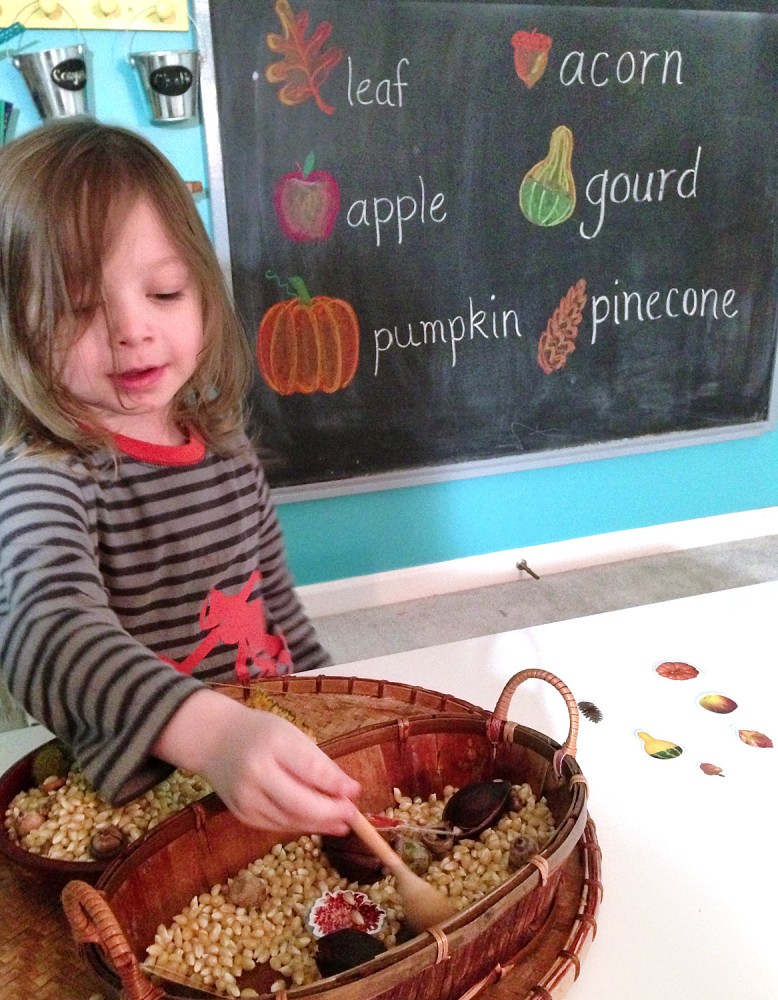
I don’t do many sensory bins, but I should! I pulled together an autumn sensory bin for Jax using our nature walk treasures. I added them to a basket of dried corn, and autumn season stickers I’d laminated and cut out. I provided a wooden bowl from the thrift shop and a little wooden spoon (from an old brown sugar jar.)

Autumn Sensory Bin

Jax jumped right in and started scooping the contents and exploring the textures. I’d drawn a few autumn items on our schoolroom chalkboard along with writing the words. I had Jax hunt for those three stickers in the sensory bin, then let him choose three more for me to draw. Next time he can hunt for all six.

Autumn Sensory Bin

We plan on doing many more autumn-themed activities throughout the season. Do you have any fun ideas for us? Let me know here, or send me ideas via Pinterest, Twitter, Facebook or Instagram.

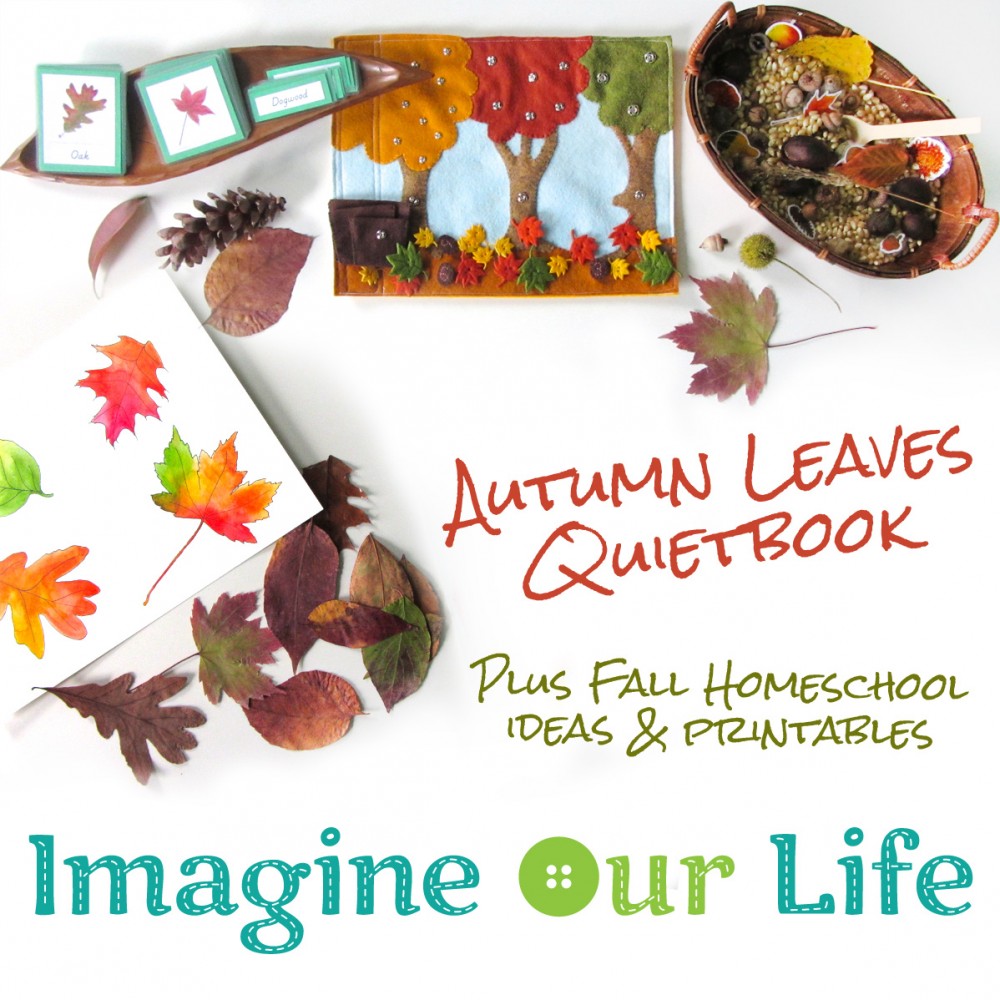
Here is a Pinterest-ready photo for you to pin!

Autumn Leaves Quiet Book & Fall Homeschool Unit

I am linking up to the wonderful Montessori Monday! If you do any homeschooling, I urge you to check out the weekly link up for great ideas!

Montessori Monday

Animals of South America for the Montessori Wall Map & Quietbook with Printables

Animals of South America for the Montessori Wall Map & Quietbook with Printables

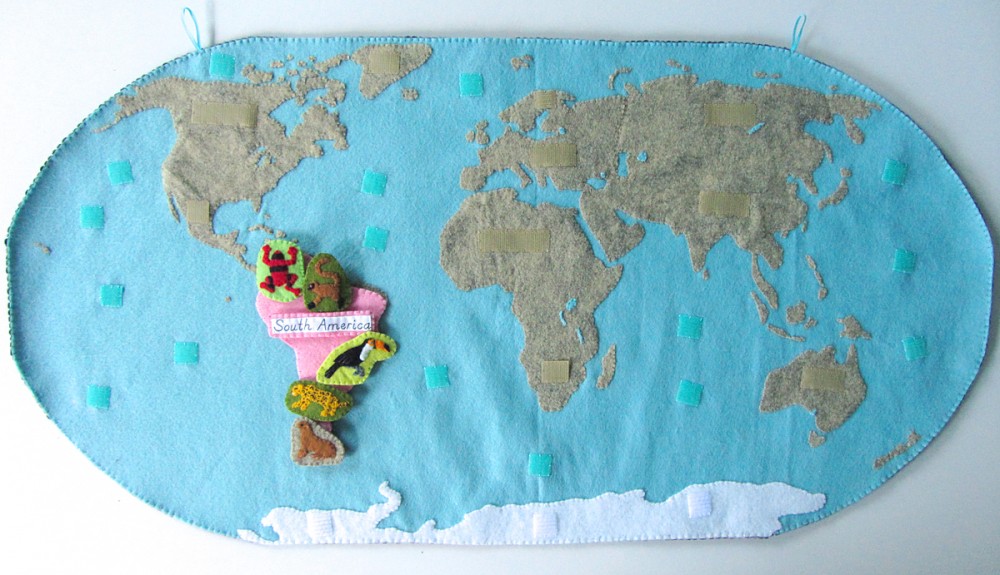
If you haven’t been introduced to our Montessori wall map and quiet book yet, you can read all about it here. This post is for the continent of South America! Every continent (and the oceans) will have landmarks and animals. Some, like Europe, have more landmarks than animals. South America has all animals, as it has so many great ones to choose from!

Overview and Map PatternsAfricaAntarcticaAsiaEurope North AmericaOceans • South America

All our pieces so far!

All our pieces so far!

A quick note: Do you have a website that fits in with our readers’ interests: sewing, felt, homeschool or Montessori? I am trying out a new sponsor banner system and I have my 125×125 spots open for free swaps! There are currently 3 spots left, so please visit the Sponsor page to read more! Check it out to the left! Thank you for the help!

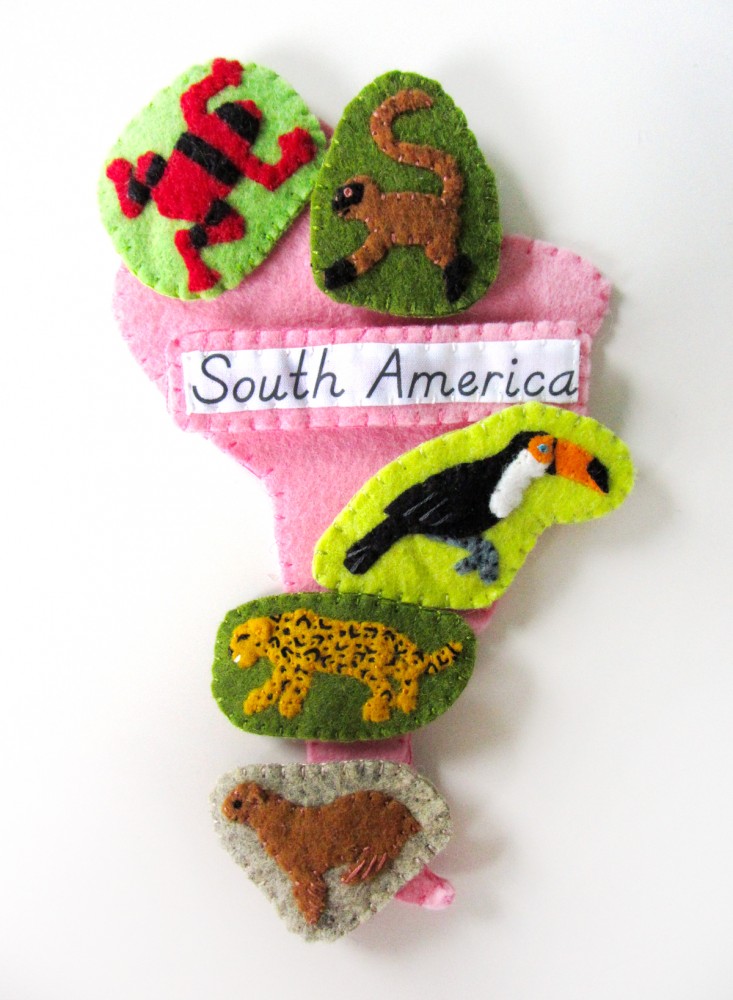
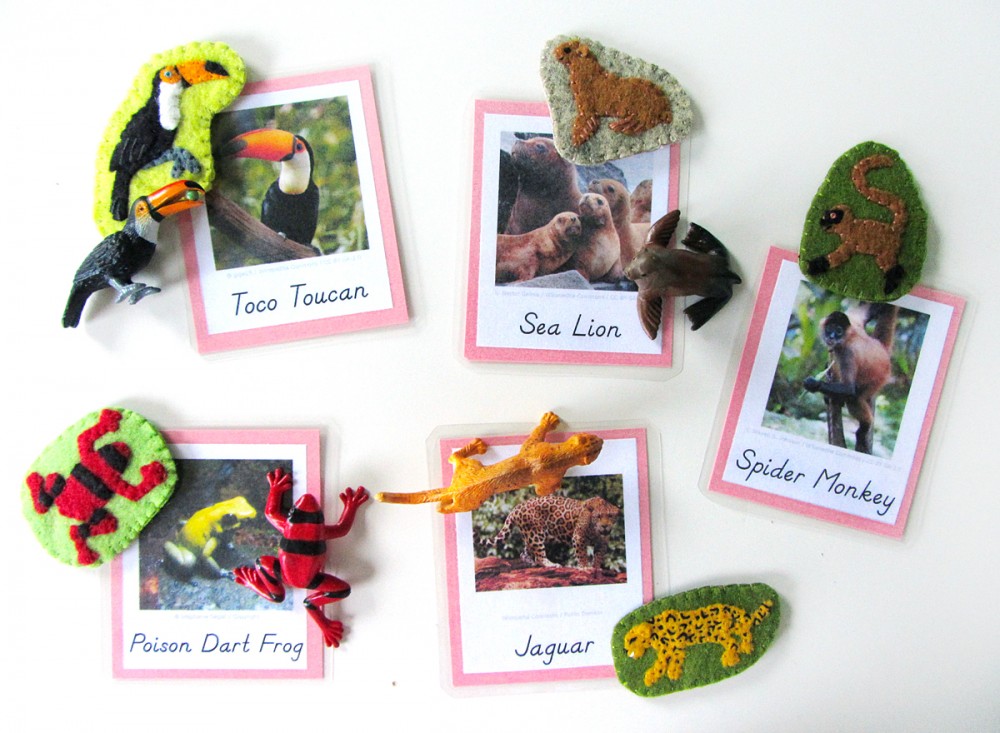
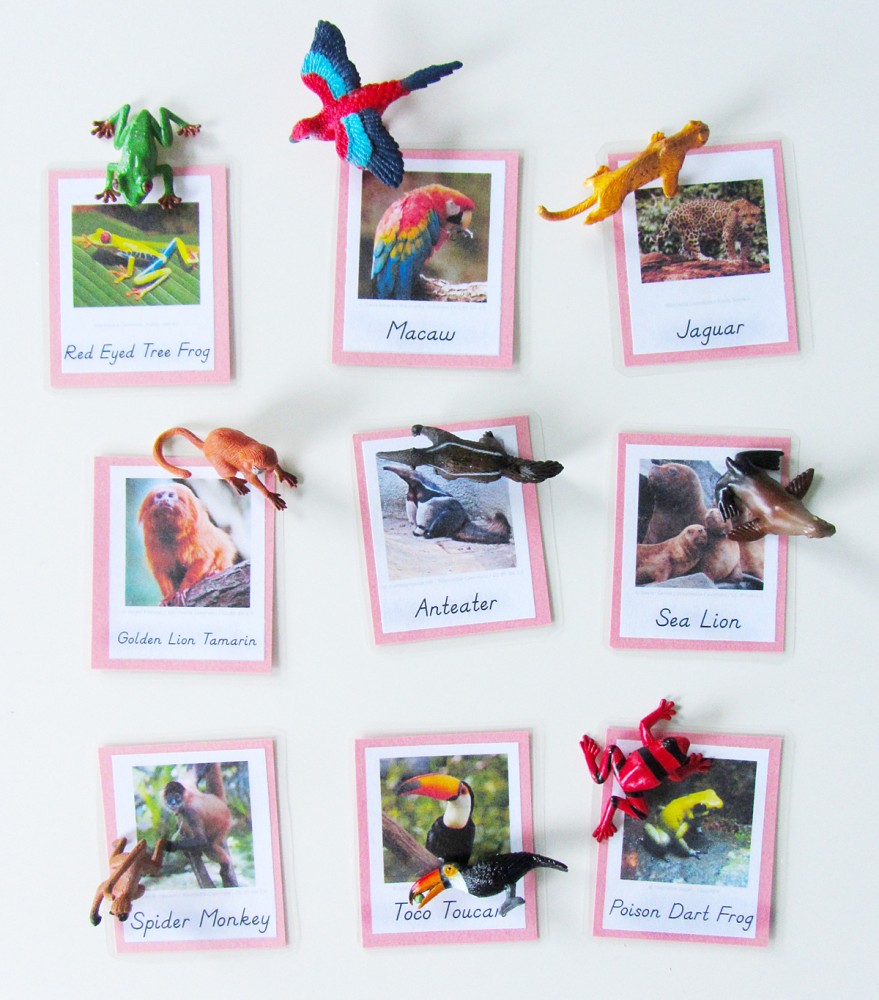
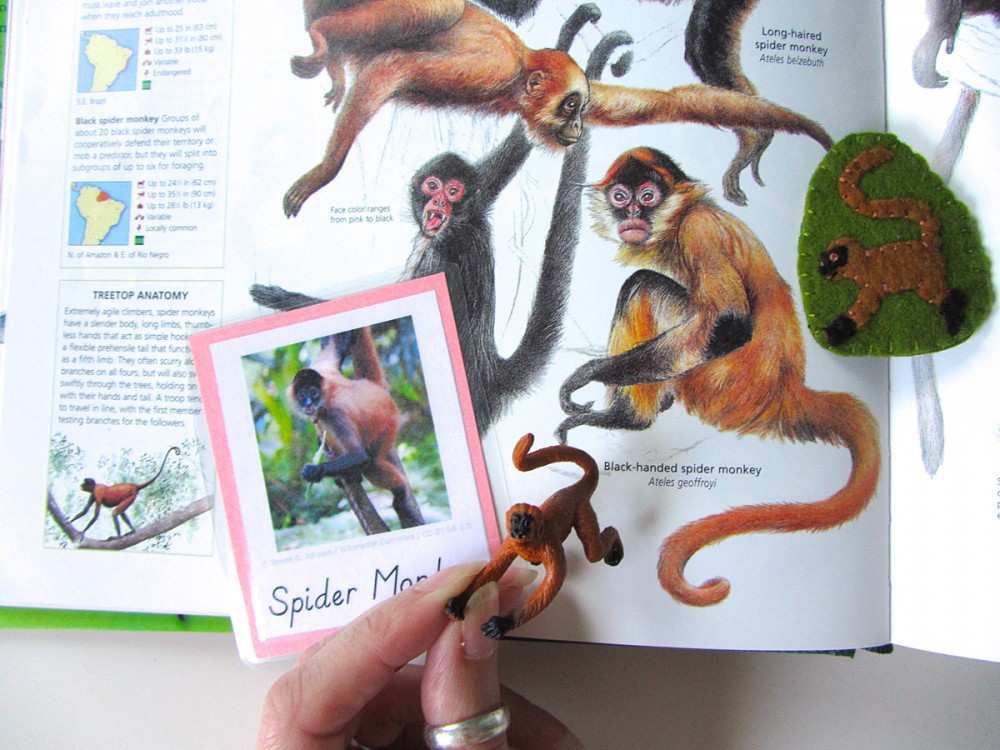
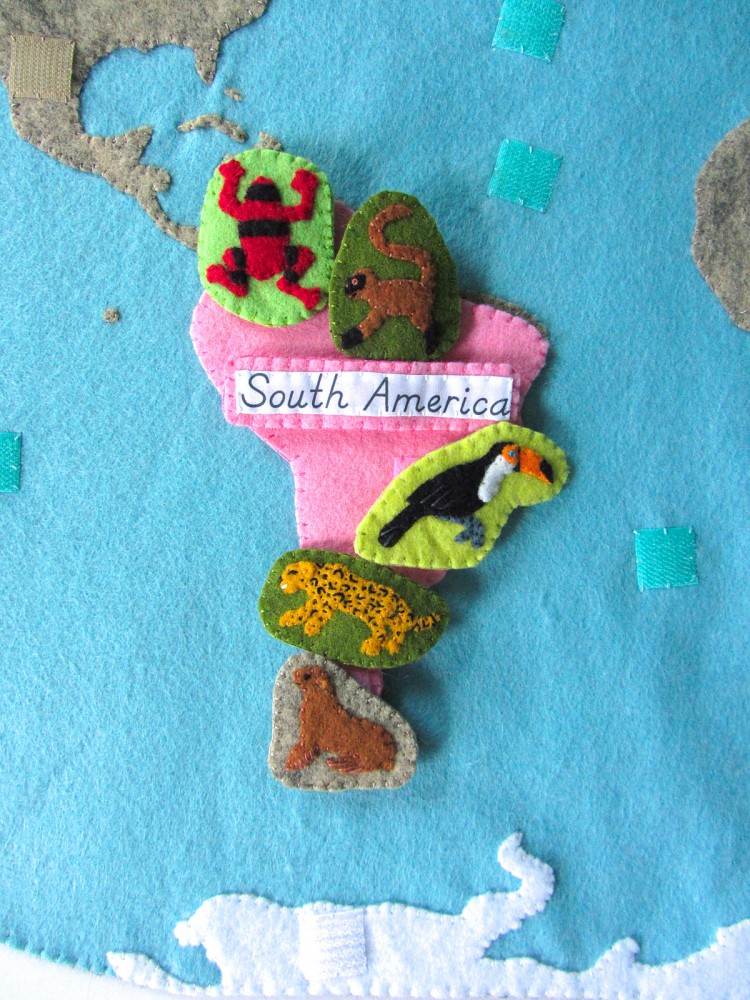
Those of you who follow along on Facebook or Instagram have been seeing all the fun South American animals I’ve sewn. I love that there were some brighter colors, thanks to the rainforest animals! I made: a poison dart frog, a toco toucan, a spider monkey, a jaguar and a sea lion.

Animals of South America for the Montessori Wall Map & Quietbook with Printables

I want to say a quick thank you to Libby A. for the surprise off of Jax’s Amazon wishlist! I use his list to bookmark school and craft items until I am able to get them. I’d added some trims I need for Jax’s robot Halloween costume (which will be featured here!) and they arrived in the mail to us this week! Thank you!! For more ways to contribute to this site, visit my support page.

Animals of South America for the Montessori Wall Map & Quietbook with Printables

Materials I Used

The Pattern (see the first post for the main patterns) Felt from American Felt & Craftbig apple [red], orange juice [orange], gold nugget [gold], limeade [lime green], cilantro [olive green], stone [taupe]  doe [brown] elephant [med gray], white and black. Hook & Loop – I used white snag-free Velcro on the backs of all these pieces and pink hook & loop (loop only) on the front of the South America puzzle piece. My pink hook & loop was store brand at Joann’s but you can find all colors here. Felt glue to tack down the pieces before sewing, printer fabric for the continent label, embroidery floss in colors to match the felt and micro tip scissors.

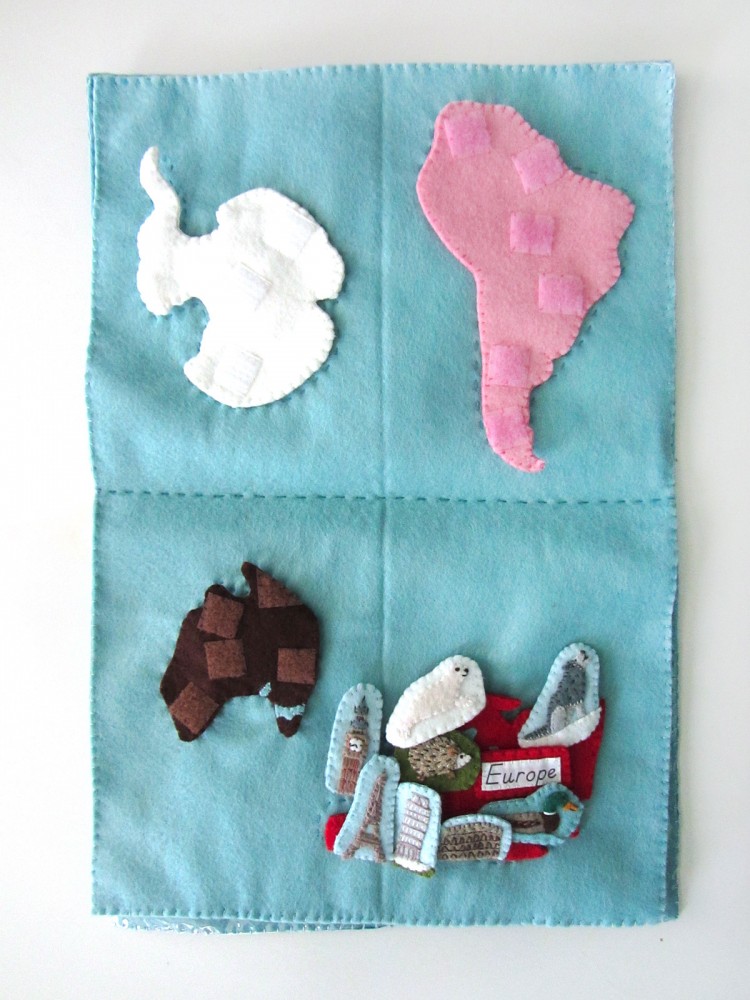
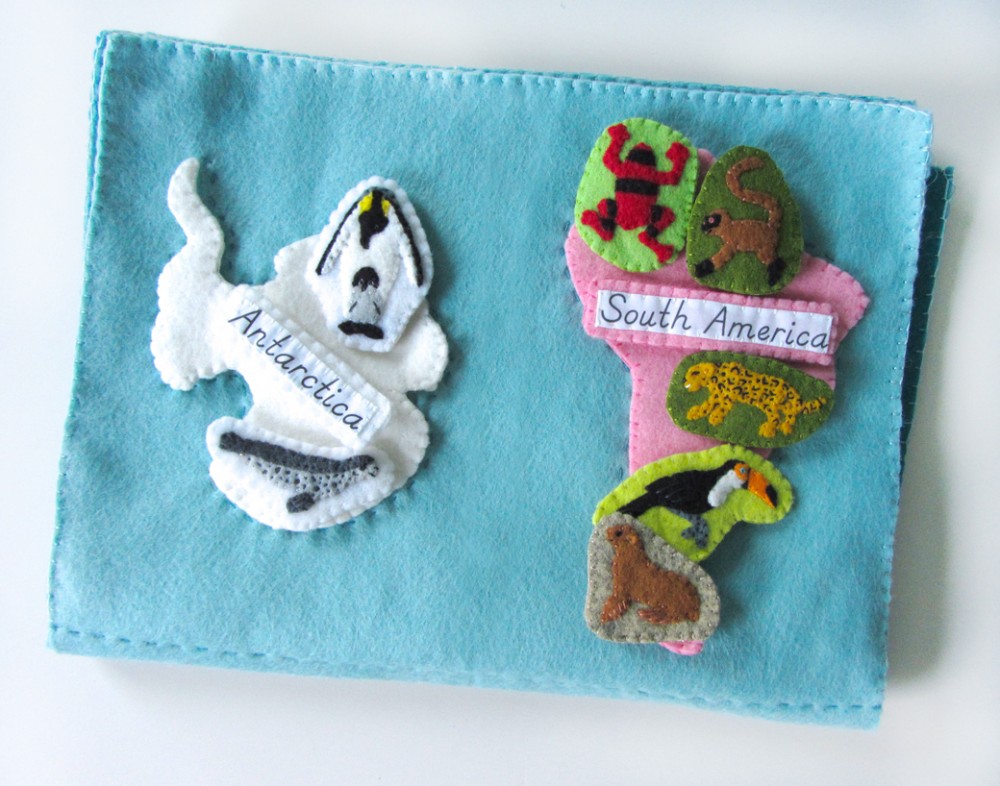
South America shares a page in the quietbook with Antarctica.

South America shares a page in the quietbook with Antarctica.

Sewing the Pieces

South America: (Felt used: bubble gum pink) For the South America continent puzzle piece, I sewed down pieces of pink loop Velcro. On the back, I sewed a strip of white snag-free Velcro to correspond with the Velcro in the quietbook. I finished it by sewing the two sides together around the edge with a blanket stitch. Label: (Felt used: bubble gum pink) For the continent label, I folded under the edges (just a tiny bit to hide the rough edges) and creased it with my nails. The printer fabric held the folds nicely without ironing. Then I stitched the label to some white felt and trimmed it down to be a border. I cut a matching felt rectangle for the back, sewed snag-free Velcro to it and then sewed both sides together.

Animals of South America for the Montessori Wall Map & Quietbook with Printables

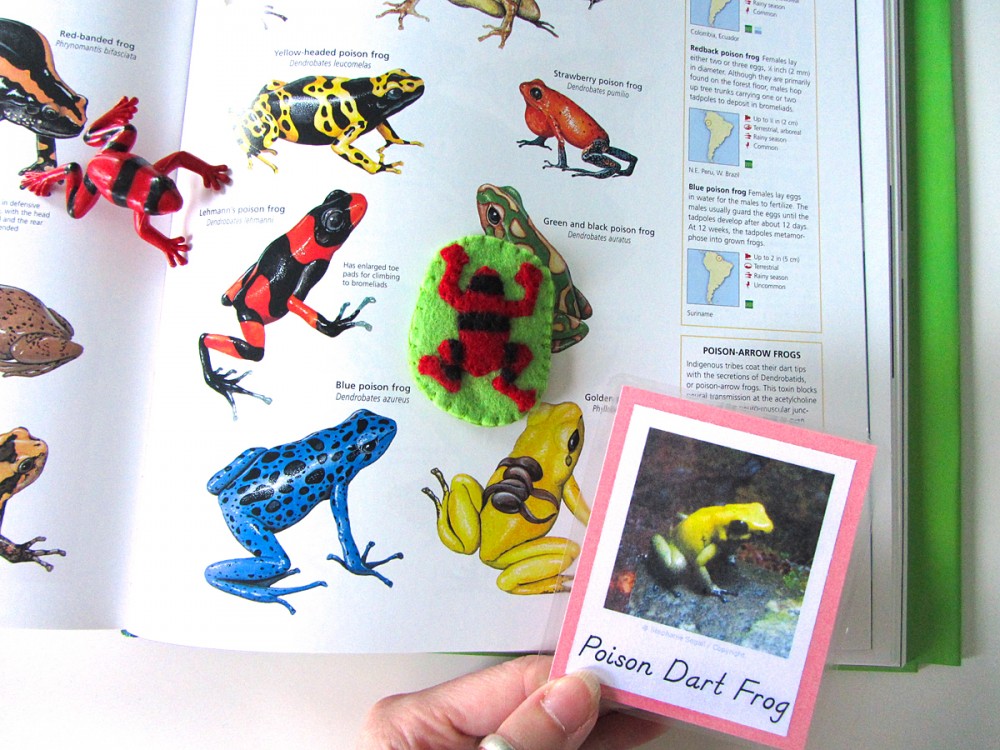
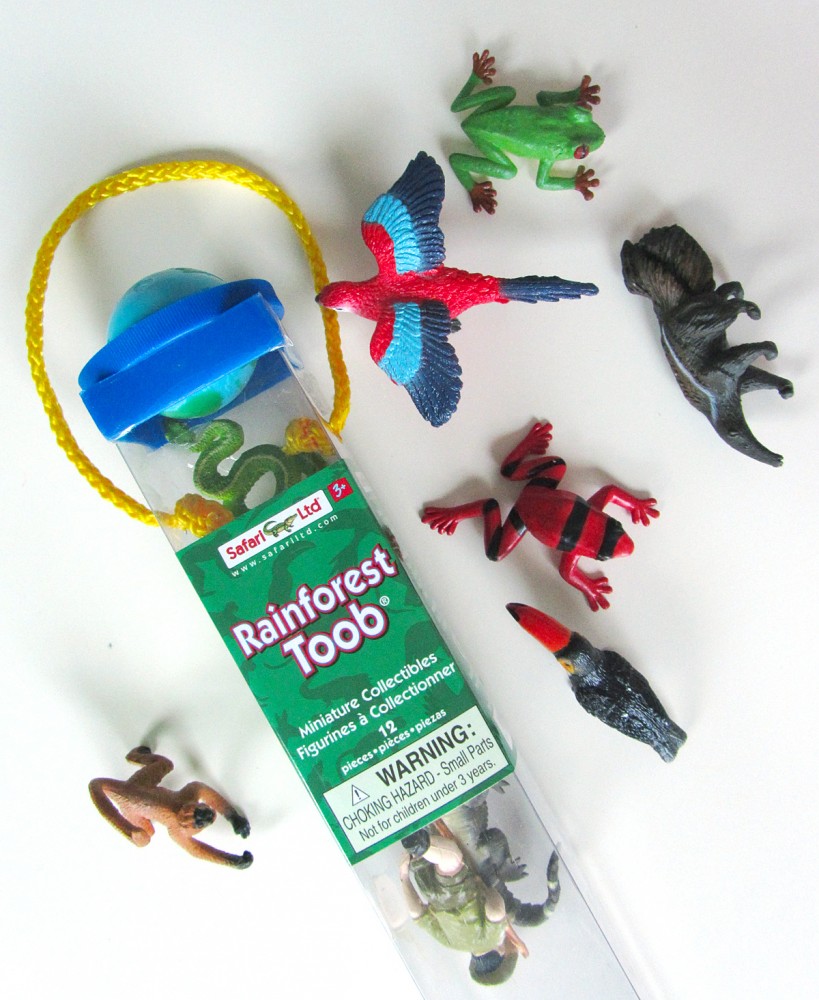
For all of the animals, I started by gluing the pieces down to a scrap of background felt with a very light amount of felt glue. I glue multiple animals at a time to give them time to dry. I sewed them down, trimmed the background and cut a matching backing piece. I sewed snag-free Velcro to the back and sewed both sides together with a blanket stitch. Poison Dart Frog: (Felt used: big apple red for the body, black for body details and limeade lime green for the background) I started by gluing down the red body, then gluing the strips on top. I sewed around all the edges. I matched my frog to the one in the Safari Ltd Rainforest Toob, which our animal encyclopedia says is Lehman’s Poison Dart Frog. You could make yours any color, especially if you have the Frogs and Turtles Toob. (My 3-part card is not a red Lehman’s. I never use photos without permission and I was unable to find a photo I could use of one. But the photo I took of a Golden Poison Dart Frog at the aquarium makes for a fun lesson where we can match them to our book.)

Animals of South America for the Montessori Wall Map & Quietbook with Printables

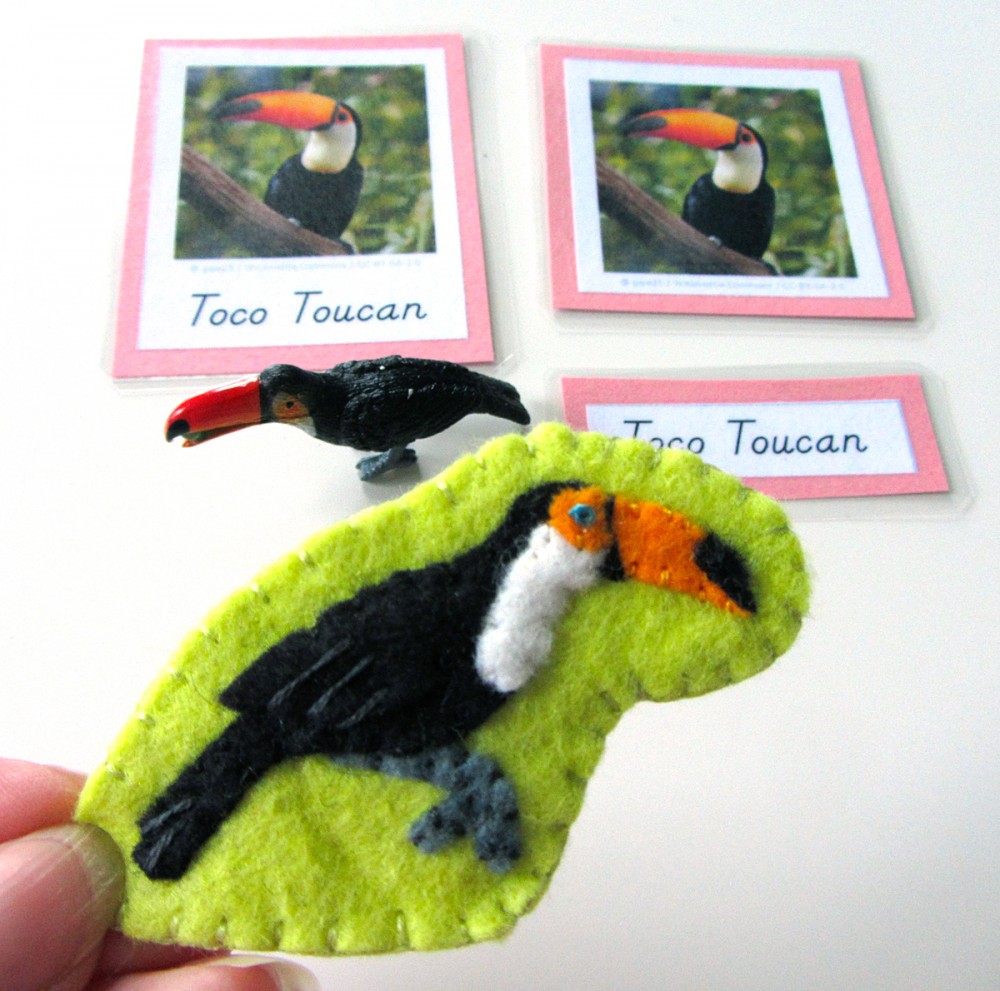
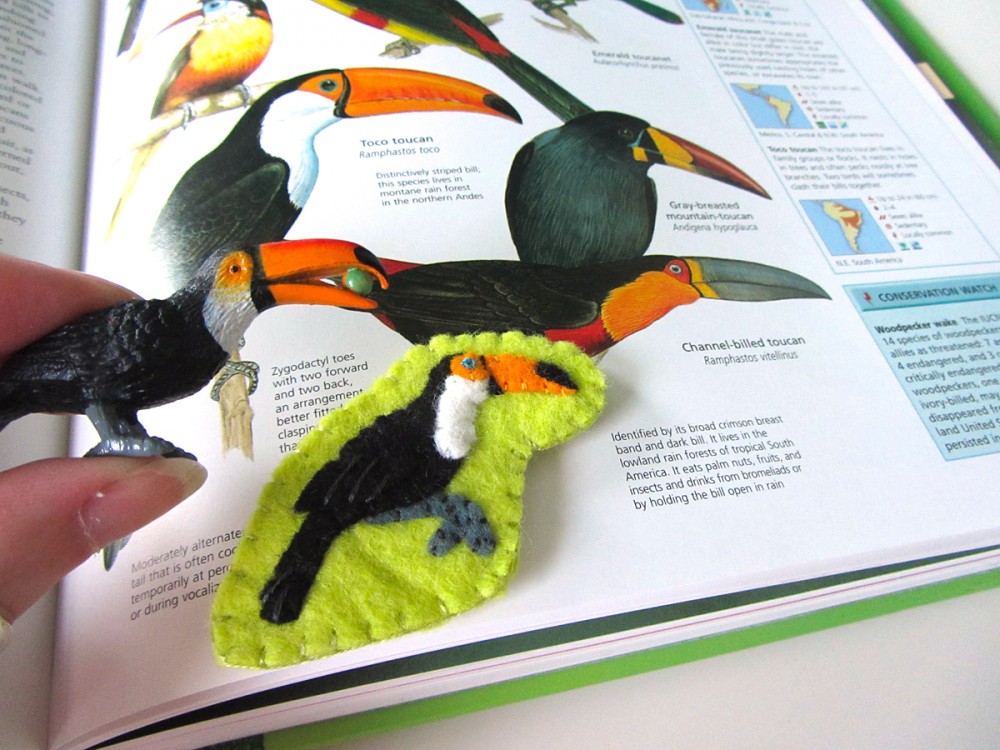
Spider Monkey: (Felt used: doe brown for the body, black for body details and cilantro olive green for the background) I glued the brown body of the spider monkey down first, then his hands, feet and face. I sewed all around the edges. I gave him French knot eyes, a little brown stitch for his nose, and a long black stitch to make an open mouth. Toco Toucan: (Felt used: black for body, orange juice for the beak,  limeade for the background and white) I first glued down her orange beak and gray leg, then her black body and wing. I glued the white chest on top and then the orange eye area. On top of the beak, I added the black felt piece. I sewed around all the edges then I gave her a bright blue French knot eye. (Their eyes are not really blue – that is a ring of blue skin around their black eye.) On her wing and tail, I made long straight stitches to show the feathers.

Animals of South America for the Montessori Wall Map & Quietbook with Printables

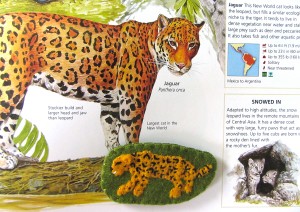
Jaguar: (Felt used:gold nugget gold for the body and cilantro olive green for the background) I glued the golden body of the jaguar with his far legs layered underneath. I glued one side of his ear down, then added a stitch to hold it once it was dry. I gave him a French knot eye with little black stitches on either side to make a cat-eye shape. I used white to make a mouth and black to make a small nose. For the spots, I made the larger ones using a similar technique to the lazy daisy stitch (a loop of thread that is pinned down by a small stitch at the peak) but used arch shapes instead of closed loops. The smaller stitches are just tiny stitches – some with a few close together to make medium spots.Animals of South America for the Montessori Wall Map & Quietbook with Printables Sea Lion: (Felt used: doe brown for the body and stone taupe for the background) I glued the brown body of the sea lion, then sewed around the edges. I made long stitches on his flippers to show the webbing. I glued one side of his ear down, then added a stitch to hold it once it was dry. I gave him a French knot eye and a little black mouth.

Animals of South America for the Montessori Wall Map & Quietbook with Printables

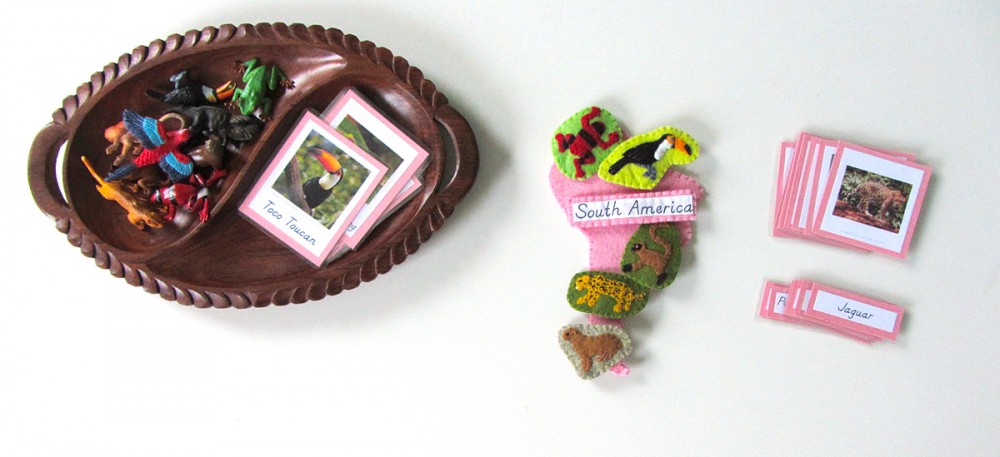
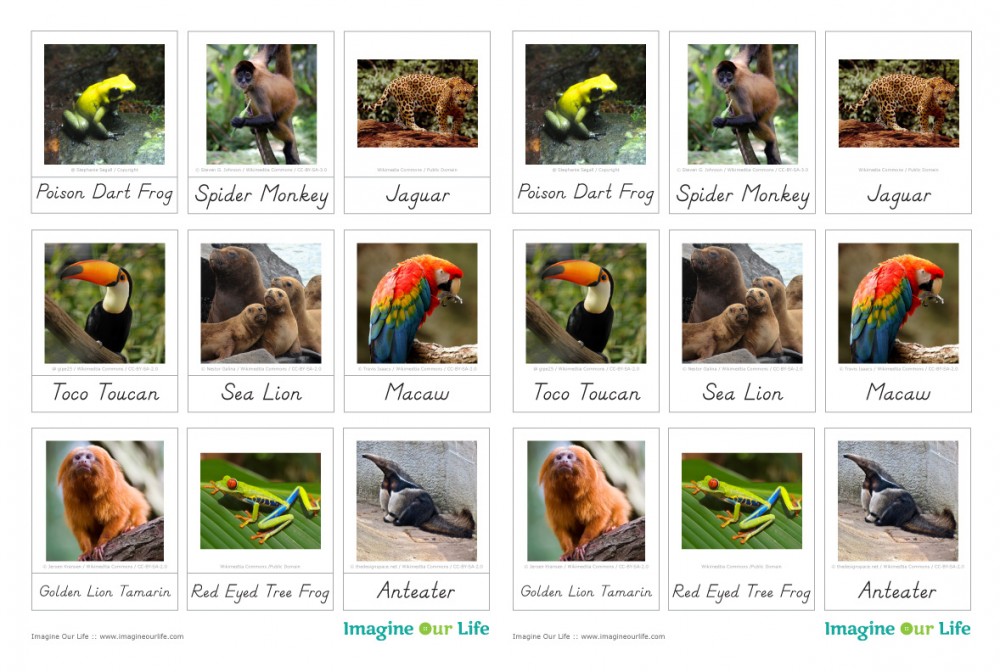
Montessori South American Animals 3-Part Cards

Currently jax is focusing on his world continent 3-part cards, but we’ve done a small session with each of the animal card sets as I’ve made them. He sees me making them and insists! We will study the animals with more depth when we focus on a particular continent.

Animals of South America for the Montessori Wall Map & Quietbook with Printables

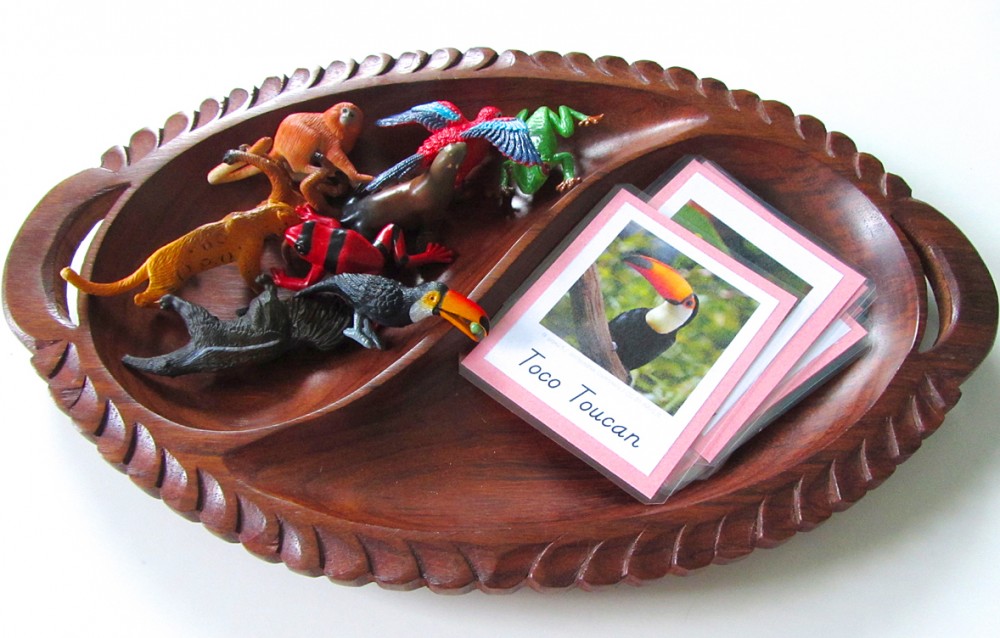
For now, we pull out our SafariLTD’s TOOB figurines and use our 3-part cards to match them whenever he shows interest. We like to watch short videos about an animal, then study some pictures and draw our own.

I used the Rainforest Toob for these cards. The sea lion is from the Ocean TOOB.

I used the Rainforest Toob for these cards. The sea lion is from the Ocean TOOB.

Click here to download my free pdf file to make your own. To make mine, I cut them out, glued them to pink construction paper (to match South America’s Montessori color) then laminated them. I love my new laminator! It makes everything so shiny and strong! I’ve been giving it a workout!

Animals of South America for the Montessori Wall Map & Quietbook with Printables

Exploring South America’s Animals

I’m still so happy I found my The Encyclopedia of Animals: A Complete Visual Guide when our basement flooded! (Though I’m less happy that my dining room table is covered in 2′ high piles of books.)

Animals of South America for the Montessori Wall Map & Quietbook with Printables

It has a lot of beautiful photos and useful facts about many different animals. Jax and I will be using it to match up with our 3-part cards and read more about the animals. We also use my iPad and YouTube to watch short video clips.

Animals of South America for the Montessori Wall Map & Quietbook with Printables

Here we used the encyclopedia to identify which kind of spider monkey we had.

Animals of South America for the Montessori Wall Map & Quietbook with Printables  Animals of South America for the Montessori Wall Map & Quietbook with Printables

I know many of you are sewing along (or about to!) If you are, stop by my Instagram @iolstephanie and leave a comment on one of my photos (I can’t see your photo if it you are private, but I can request to follow you temporarily if you leave a comment on mine about it) or share photos on Facebook. You can also email me. I love seeing others’ take on my patterns!

Animals of South America for the Montessori Wall Map & Quietbook with Printables

It’s not even slightly Montessori Monday still, but I hope you’ll check out the other great links!

Montessori Monday

DIY Sewing Labels

DIY Sewing Labels

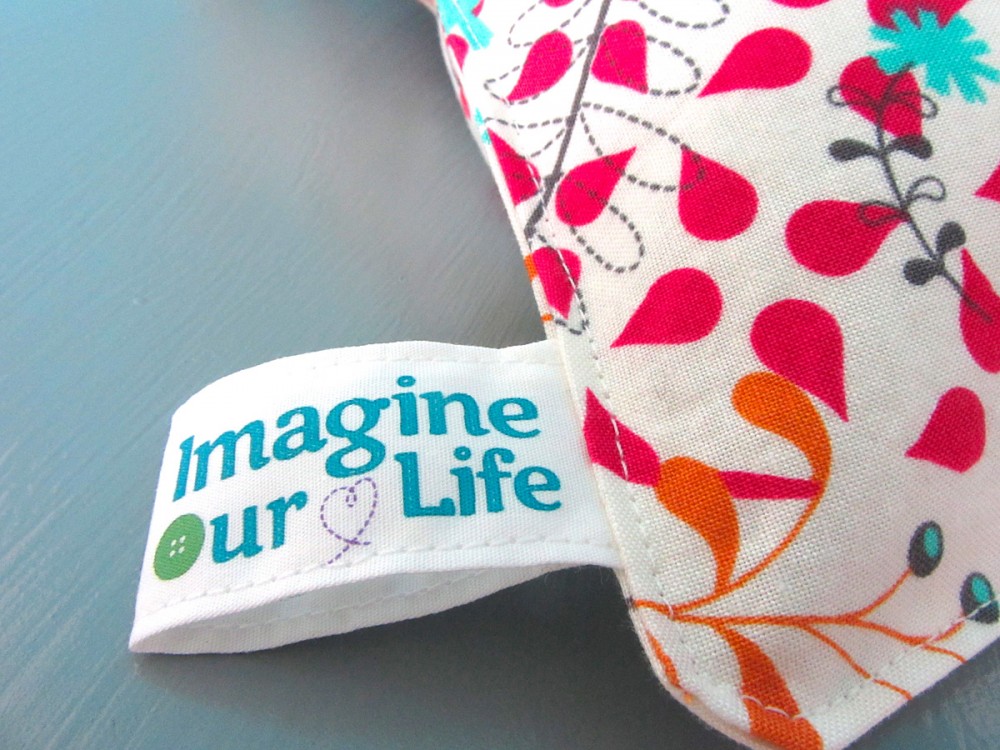
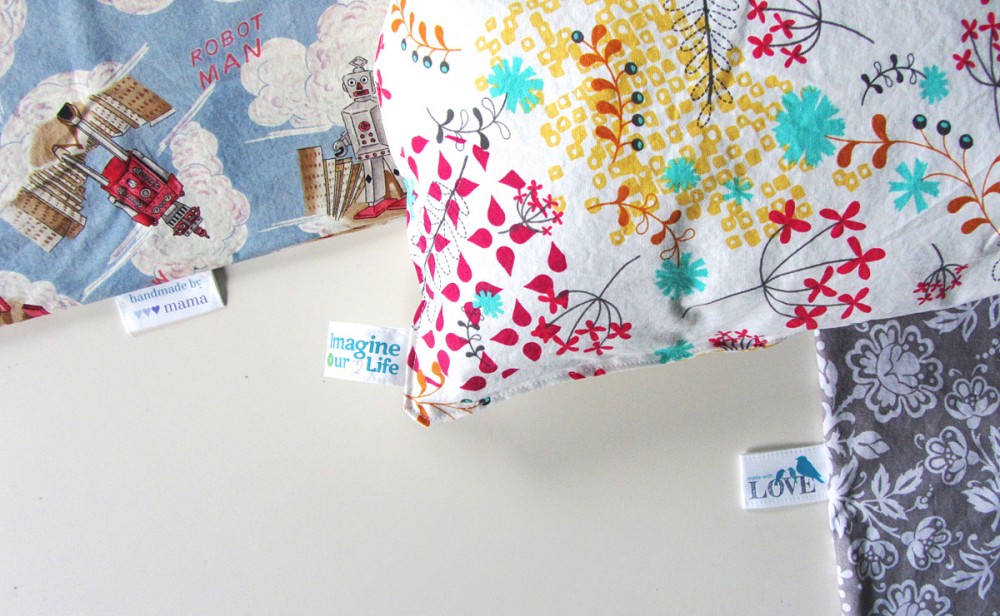
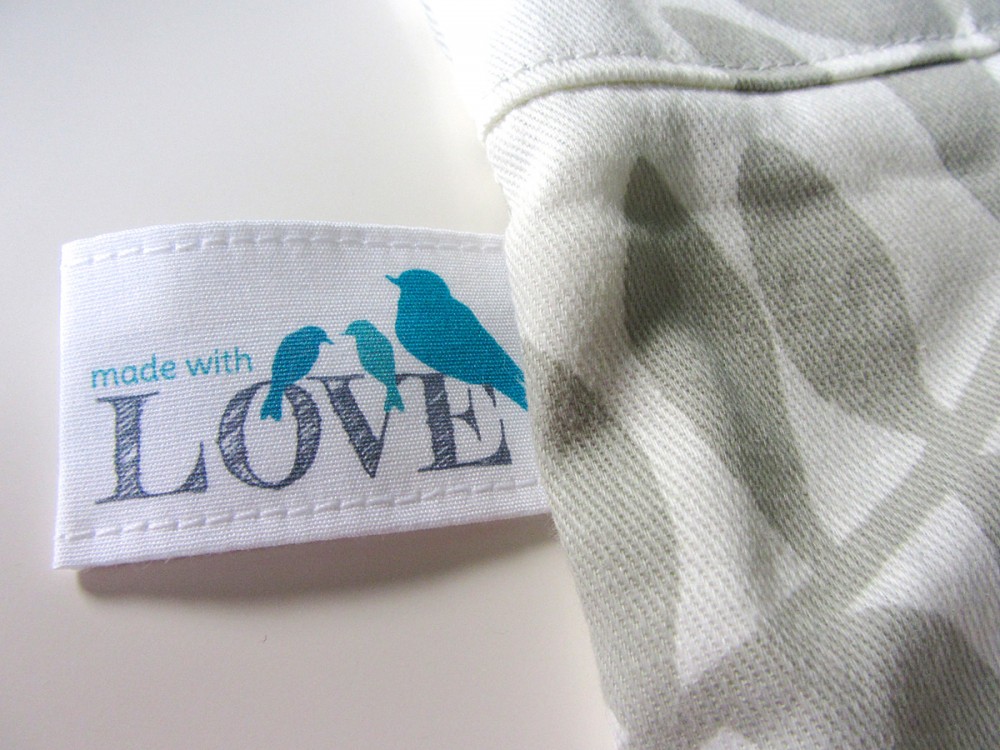
Here is a quick little project you can do to personalize your sewing projects: DIY sewing labels!

Materials

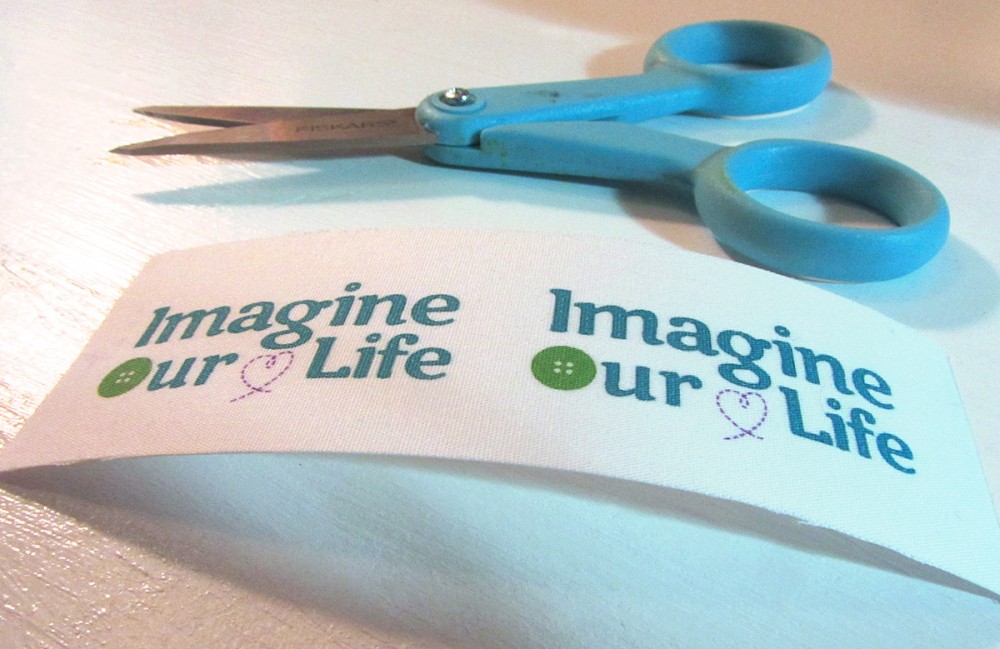
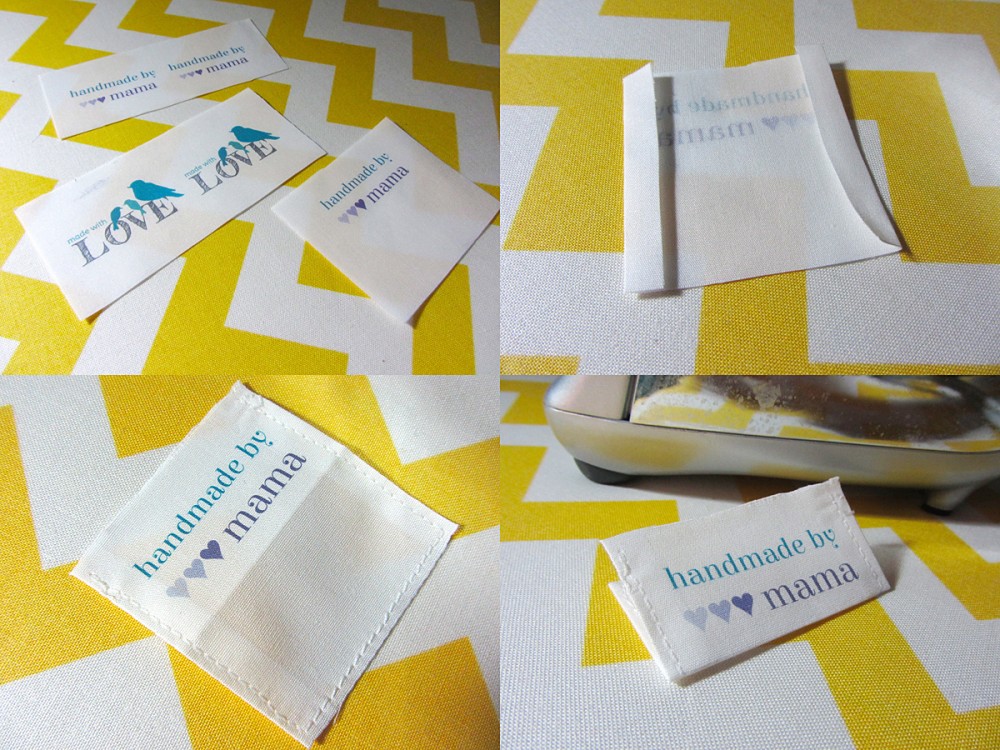
 To create your own sewing labels, you need to start by designing them. I made mine in Illustrator and just used my logo. For side tags, I laid out two logos side by side so they could be folded in the middle. For top tags (like the kind that would be in the neck of a shirt), I just had the design on the top half. If you wanted washing directions (or anything else), you could put it on the other side.

DIY Sewing Labels

I created a couple of quick Word files to get you started. I included some free designs you can use. If you use the designs I made, you’ll need to download two free fonts from Google: Elsie Swash Caps & Crafty Girls. Of course, you can totally do your own thing!

DIY Sewing Labels

Side Labels

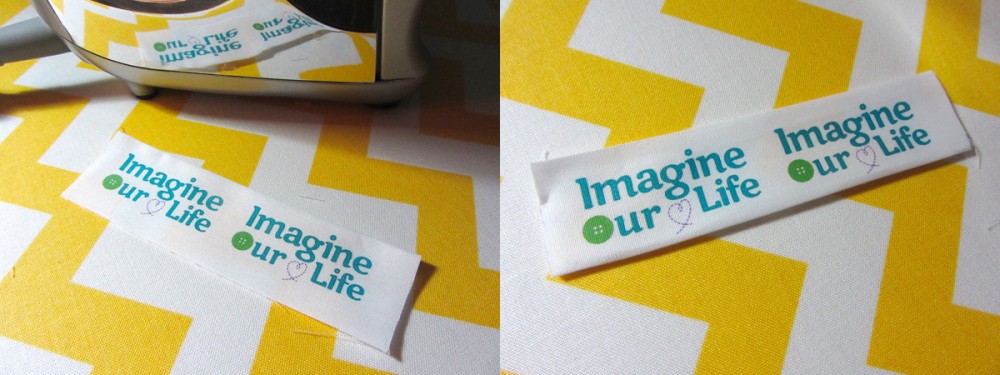
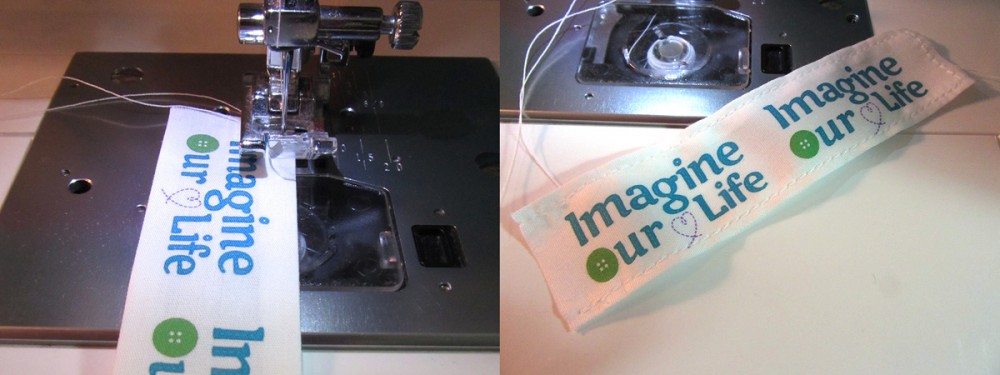
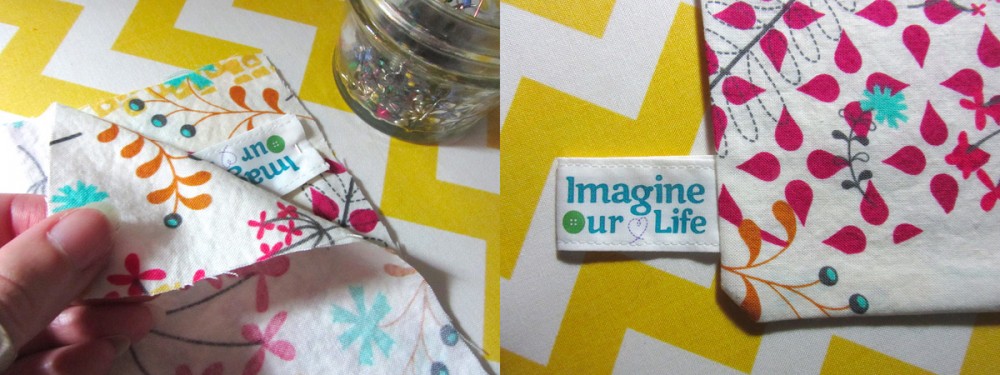
Follow the directions on your printer fabric, then cut out your label, making sure you have enough space to have .25″ extra all around. Iron the label flat. Iron the two long sides towards the back of the label.

DIY Sewing Labels

On your sewing machine, sew the folded edges, staying very close to the edge. I used my presser foot as a guide. (See the photos.) I sewed around three sides because I didn’t want to have to stop and start again. You could even go all the way around if you wanted to.

DIY Sewing Labels

Iron the seams flat again, then fold the label and press the fold well.

DIY Sewing Labels

To add your tag to your sewing project, place it between the right sides of the fabric with the non-fold end in your seam.

DIY Sewing Labels

Turn your project right side out and press your seam. I added a top stitch to this quick pillow.

DIY Sewing Labels

Top Labels

Top labels are made the same way, but the two short sides are the ones you want to fold under.

DIY Sewing Labels

If you want to be sure your labels don’t unravel inside the fold, you could add some Fray Check, or have a larger seam allowance and fold the edges under twice. I didn’t bother, though.

DIY Sewing Labels

If you make a project with a custom sewing tag, I’d love to see! Tag a photo to me on Instagram @iolstephanie (I can’t see it if you are private. Just come comment on one of my photos and I’ll follow you.) Or stop by our Facebook page and post a photo!

DIY Sewing Labels

Happy sewing!

Here’s a Pinterest – ready photo for your boards! You can find me on Pinterest here.

DIY Sewing Labels

Animals of Antarctica for the Montessori Wall Map & Quietbook with Printables

Animals of Antarctica for the Montessori Wall Map & Quietbook with Printables

If you haven’t been introduced to our Montessori wall map and quiet book yet, you can read all about it here. This post is for the fastest continent to sew for – Antarctica! Every continent (and the oceans) will have landmarks and animals. Some, like Europe, have more landmarks than animals. Antarctica just has two animals featured, as there are mainly just seals, penguins and other birds.

Animals of Antarctica for the Montessori Wall Map & Quietbook with Printables

Antarctica was a bit different than the rest in another way: it is the only continent that is hugely affected by the map projection. On the wall map, it is shown as a long, unraveled strip at the bottom. So Antarctica is sewn to the map, but I also made a piece in its actual shape that Jax can compare to it or to his globe.

Overview and Map PatternsAfrica • Antarctica • AsiaEurope
North AmericaOceansSouth America

A quick note: Do you have a website that fits in with our readers’ interests: sewing, felt, homeschool or Montessori? I am trying out a new sponsor banner system and I have my 125×125 spots open for free swaps! There are currently 5 spots left, so please visit the Sponsor page to read more! Check it out to the left! Thank you for the help!

Animals of Antarctica for the Montessori Wall Map & Quietbook with Printables

My pyramids are still missing… Time to sew a new one!

Those of you who follow along on Facebook or Instagram might have seen there was a bit of a mishap in Antarctica. Well, the Antarctica in our house, at least. Our golden retriever got a little too excited about my penguin and ate him! Since I had to sew him a second time, I made him even cuter. He now is a daddy penguin with a little chick!

Regardless of that excitement, I still love working on this project! This will be an amazing resource for Jax throughout his school years. Yes, I am giving you all my patterns and printables for free! If you’d like to contribute, visit my support page. School items off of Jax’s Amazon wishlist always help! Especially because our heating/cooling unit just just freaked out and flooded our basement. We are now $6k poorer, despite insurance help. Yikes. I am currently saving up Amazon credit for the handbells on his wishlist. If I can get those, I’ll share a music unit with you all! but it looks like I won’t have enough until the end of September.

Animals of Antarctica for the Montessori Wall Map & Quietbook with Printables

Materials I Used

The Pattern (see the first post for the main patterns)

Felt from American Felt & Craftwhitesalt & pepper [dark gray], elephant [med gray], black, rubber duckie [yellow] and gray.

Hook & Loop – I used white snag-free Velcro on the backs of all these pieces and on the Antarctica puzzle piece.

Felt glue to tack down the pieces before sewing, printer fabric for the continent label, embroidery floss in colors to match the felt and micro tip scissors.

Animals of Antarctica for the Montessori Wall Map & Quietbook with Printables

Shown here on the quietbook page that Antarctica will share with South America.

Sewing the Pieces

Antarctica: (Felt used:white) For the Antarctic continent puzzle piece, I sewed down pieces of white snag-free Velcro. On the back, I sewed a strip of white snag-free Velcro to correspond with the Velcro in the quietbook. I finished it by sewing the two sides together around the edge with a blanket stitch.

Label: (Felt used: white) For the continent label, I folded under the edges (just a tiny bit to hide the rough edges) and creased it with my nails. The printer fabric held the folds nicely without ironing. Then I stitched the label to some white felt and trimmed it down to be a border. I cut a matching felt rectangle for the back, sewed snag-free Velcro to it and then sewed both sides together.

Animals of Antarctica for the Montessori Wall Map & Quietbook with Printables  Animals of Antarctica for the Montessori Wall Map & Quietbook with Printables

For all of the animals, I started by gluing the pieces down to a scrap of background felt with a very light amount of felt glue. I glue multiple animals at a time to give them time to dry. I sewed them down, trimmed the background and cut a matching backing piece. I sewed snag-free Velcro to the back and sewed both sides together with a blanket stitch.

Penguin: (Felt used: white for the body and background, black for body details, elephant for the shoulders, gray for the chick and rubber duckie yellow for the neck) I started by gluing down the shoulders, the gluing the black wings to the back of the white body. I glued the body down over the shoulders, then glued the neck, feet and head. I then glued down the two parts of the baby chick penguin.

I sewed down all the edges with matching thread. For the baby, I sewed two long, dark gray stitches for wing flaps. I made French knot eyes then highlighted them with a ring of white stitches. The daddy penguin got a dark gray French knot eye.

Animals of Antarctica for the Montessori Wall Map & Quietbook with Printables

Leopard Seal: (Felt used: white for the background, salt & pepper dark gray for the back and flipper, and gray for the body) I first glued the gray body down, then added the darker back and flipper. To make the spots, I just made lots of little stitches. The tiny spots are just one stitch. The larger ones are a few stitches side-by-side. She has a French knot eye, a little stitch nose and a longer stitch mouth. On the tail and flipper, I made long dark gray parallel stitches.

Animals of Antarctica for the Montessori Wall Map & Quietbook with Printables

Montessori Antarctic Animals 3-Part Cards

Jax is still focusing on his world continent unit with the world continent 3-part cards I made up for him. We are using our Montessori globe and singing the continent song I made up. So far, He can point out the continents I ask for, and he can usually tell me the names of Africa ans Antarctica without prompting. We’ve also started using the ocean cards a lot. For the animals, we haven’t done a lot of formal lessons yet. We will when we focus on a continent. For now, we pull out our SafariLTD’s TOOB figurines and use out 3-part cards to match them whenever he shows interest. We like to watch short videos about an animal, then study some pictures and draw our own.

Animals of Antarctica for the Montessori Wall Map & Quietbook with Printables

These Antarctica cards don’t really have a good match in figurines. I would LOVE if SafariLTD would create continent-themed TOOBs! (Contact them if you are interested too!) You can match the Penguins Toob to their penguins. They don’t have any antarctic seals. Mine is from the craft store where they sell diorama supplies. I mention it in more detail in my ocean homeschool post.

Click here to download my free pdf file to make your own. To make mine, I cut them out, glued them to white construction paper (to match Antarctica’s Montessori color) then laminated them. I love my new laminator! It makes everything so shiny and strong!

Animals of Antarctica for the Montessori Wall Map & Quietbook with Printables

Exploring Antarctica’s Animals

One thing that came of our basement flood – I had to move all our books out of the bookshelves and I found my The Encyclopedia of Animals: A Complete Visual Guide!

Animals of Antarctica for the Montessori Wall Map & Quietbook with Printables

It has a lot of beautiful photos and useful facts about many different animals. Jax and I will be using it to match up with our 3-part cards and read more about the animals.

Animals of Antarctica for the Montessori Wall Map & Quietbook with Printables

I didn’t notice until after I took these pictures that there is a penguin called a “jackass penguin“. Oh my! Poor little penguins!

Screenshot courtesy Google Earth.

Screenshot courtesy Google Earth.

I have Google Earth installed so Jax I I can explore the earth. It is great! If you’d like to load a special Antarctica map with all sorts of points already saved, visit this site. Make sure you have Google Earth installed already!

Animals of Antarctica for the Montessori Wall Map & Quietbook with Printables

I hope you are enjoying this project as much as I am! I’ve gotten see the maps a few of you have started! If you are sewing along, stop by my Instagram @iolstephanie and leave a comment on one of my photos (I can’t see your photo if it you are private, but I can request to follow you temporarily if you leave a comment about it) or share photos on Facebook. You can also email me.

It’s not even slightly Montessori Monday still, but I hope you’ll check out the other great links!

Montessori Monday

Animals of North America for the Montessori Wall Map & Quietbook with Printables

Animals of North America for the Montessori Wall Map

If you haven’t been introduced to our Montessori wall map and quiet book yet, you can read all about it here. This post will be for the second continent in the series: North America! Every continent will have landmarks and animals. Some, like Europe, have more landmarks than animals. North America has a good mix of animals and landmarks.

Overview and Map PatternsAfricaAntarcticaAsiaEurope
North America • OceansSouth America

Animals of North America for the Montessori Wall Map & Quietbook with Printables

Those of you who follow along on Facebook or Instagram have been seeing the animals and landmarks I created for North America. I’m so exciting to be working on this project! This will be an amazing resource for Jax throughout his school years.

Animals of North America for the Montessori Wall Map & Quietbook with Printables

Animals of North America for the Montessori Wall Map & Quietbook with Printables

I am posting this project in segments instead of all at once so that you can sew along with me! You can head to the Facebook page right now to choose which continent (or the oceans!) I should start next.

Animals of North America for the Montessori Wall Map

Materials I Used

The Pattern (see the first post for the main patterns)

Felt from American Felt & Craftorange juice [orange], ice [blue], pastry [tan], doe [brown], cactus [gray-green], chocolate [brown], cilantro [green], white, black, gray, chai [beige] and fresh linen [off-white]. From Benzie Design – swan [blue] for the water.

Hook & Loop – I used white snag-free Velcro on the backs of all pieces, including Africa. I used the soft loop side of orange hook & loop on the front of Africa. I used once piece of aqua blue loop where the narwhal attaches.

Felt glue to tack down the pieces before sewing, printer fabric for the continent label, embroidery floss in colors to match the felt and micro tip scissors.

Animals of North America for the Montessori Wall Map & Quietbook with Printables

My North America page is not sewn around the edges yet, as I still need to sew the page behind it!

Sewing the Pieces

North America: (Felt used: orange juice orange and scraps of swan blue for the water) For the North American continent puzzle piece, I started by gluing then sewing the water down to the front side. Then I sewed down pieces of orange loop Velcro. (I worked from my stash, so I only had light orange left. American Felt & Craft sells normal orange too!) On the back, I sewed strips of white snag-free Velcro to correspond with the Velcro on the wall map and quietbook. I finished it by sewing the two sides together around the edge with a blanket stitch.

Animals of North America for the Montessori Wall Map & Quietbook with Printables

Label: (Felt used: orange juice orange) For the continent label, I folded under the edges (just a tiny bit to hide the rough edges) and creased it with my nails. The printer fabric held the folds nicely without ironing. Then I stitched the label to some green felt and trimmed it down to be a border. I cut a matching felt rectangle for the back, sewed snag-free Velcro to it and then sewed both sides together.

For all of the animals & landmarks, I started by gluing the pieces down to a scrap of background felt with a very light amount of felt glue. I glue several animals at a time to give them time to dry. I sewed them down, trimmed the background and cut a matching backing piece. I sewed snag-free Velcro to the back and sewed both sides together with a blanket stitch.

Animals of North America for the Montessori Wall Map & Quietbook with Printables

Eagle: (Felt used: chocolate brown for the body, white for the body, orange juice orange for the beak and feet and sparrow blue for the background) I glued down the all the parts, then sewed around the edges. I gave him a black French knot eye and made some long brown stitches for the feathers on the wings.

Caribou: (Felt used: chai beige for the body, chocolate brown for the overlays and hooves, fresh linen off-white for the antlers and fresh cut grass green for the background) I glued everything down, then stitched around all the edges in the appropriate colors. I used a brown French knot for his eye and a long stitch for his mouth. A tiny stitch made his nostril.

Iguana: (Felt used: cilantro green for the body, salt and pepper for the body shading and limeade lime green for the background) I glued and sewed down all the parts, with his neck beard the bottom layer. On the beard, I made long perpendicular stitches to look like the ribbing. He has a French knot eye and long stitch mouth.

Narwhal: (Felt used: chai beige for the body, chocolate brown for the overlays and fins and swan aqua blue for the background) Oh, narwhals, I love you! A bit of a guilty pleasure, as narwhals are one of my favorite animals (my most favorite will be in the Ocean post.) Most of the world’s narwhals are concentrated in the fjords and inlets of Northern Canada and western Greenland,” so for this map, I’ve included them in North America After gluing and stitching around the edges, I gave him a French knot eye and made diagonal stitches along the tusk. To make the spots, I just made lots of little stitches. The tiny spots are just one stitch. The larger ones are a few stitches side-by-side.

Animals of North America for the Montessori Wall Map & Quietbook with Printables

Polar Bear: (Felt used: white for the body, soap sud for the background [discontinued]) For the polar bear, I glued the back legs and body down, then glued the ear on, only pushing one side down so it stuck up. I used a French knot to make the eye, a long pink stitch for the mouth, and black satin stitch for the nose. I stitched all around his body, making longer stitches on his toes for claws, and made one stitch to secure the ear to his head. The background felt I used was one of my last scraps of a beautiful off-white color called “soap sud” which is now discontinued. Fresh linen is another open. It is more taupe then lavender, though.

Beaver: (Felt used: chocolate brown for the body, black for the tail and four leaf clover for the background) The beaver’s tail, back legs and body were glued down, then I sewed all around them. I attached the ear the same as with the polar bear. I used a French knot for the eye and some straight stitches for a stick in his mouth.

Alligator: (Felt used: salt and pepper for the body and cilantro green for the background) I glued his body down and stitched all around. I used olive green to do a French knot eye and a long stitch mouth. I made two lines of tiny dashed stitches to show the bumps running down his back.

SafariLTD provided me with these beautiful World Landmarks and Around the World TOOBs. I am working with them to make this project as amazing as possible. All opinions of these products are honest and my own. We are planning an exciting giveaway for you at the end of this project!

SafariLTD provided me with these beautiful World Landmarks and Around the World TOOBs. I am working with them to make this project as amazing as possible. All opinions of these products are honest and my own. We are planning an exciting giveaway for you at the end of this project!

Sewing the Landmarks

Animals of North America for the Montessori Wall MapFor all the landmarks, I started by sewing the front piece. Then I cut out a backing felt to match the final shape and added some snag-free Velcro to it. I finished sewed around the whole edge, switching colors where needed.

Statue of Liberty: (Felt used: rainy day gray-blue [discontinued] for the statue, pastry tan for the base and sparrow blue for the background) I used a pretty gray-blue felt that is now discontinued. It’s one of the problems with using scraps on a project! Blueprint looks like a good option.

For lady liberty, I glued all the parts down. There are some tiny ones! I used a light tan thread to stitch the designs on the base. I used a dark aqua thread to sew details on the statue itself. Don’t worry about too much detail! The overall effect doesn’t really need it.

See the photos for a sample of what stitches to do. I worked from the lovely SafariLTD replica.

Animals of North America for the Montessori Wall Map & Quietbook with Printables

Mt Rushmore: (Felt used: gray flannel for the mountain and gray for the details) For Mt Rushmore, I glued the lighter gray details down, then stitched a light gray design to give them some faces. Very simple stuff like their hairlines, eyes/nose/mouth and some shirt details for Washington.

Temple of Inscriptions: (Felt used: pastry tan) I think the temple came out pretty for having only used one color of felt. I glued the stair overlay down, then started stitching rows of back stitch. When I’d get to the overlay, I’d do one long stitch across it. I did an additional long stitch in between rows to make small stairs. At the top, I stitched little brown triangles to make the arched windows. I didn’t pull the stitches super tight, which let them have the curved shape of an arch.

Montessori North American Animals 3-Part Cards

Jax just started his world continent unit with the world continent 3-part cards I made up for him. I finally ordered a Montessori globe after saving up for it, so I’m not really rushing the lessons. However, he saw me working on the cards and asked to have a lesson. He is loving them! I created these cards to be used along with SafariLTD’s TOOB figurines. North America’s animals use a wide range of TOOBs: Arctic Toob, Whales and Dolphins Toob, and River Toob.

Animals of North America for the Montessori Wall Map & Quietbook with Printables

Click here to download my free pdf file to make your own. To make mine, I cut them out, glued them to orange construction paper (to match North America’s Montessori color) then laminated them. I love my new laminator! It makes everything so shiny and strong!

Animals of North America for the Montessori Wall Map & Quietbook with Printables

North American Animal Silhouettes

Another activity that will help Jax with him reading and writing skills is the North American animal silhouette match. Drawing lines between the matches help with writing skills, and recognizing the similarities between the photos and silhouettes helps build visual skills needed for reading. Silhouettes from All-Silhouettes.com, 2, 3.

Animals of North America for the Montessori Wall Map & Quietbook with Printables

Animals of North America for the Montessori Wall Map & Quietbook with Printables

Activities:

Introductions and Matching: There are so many activities that can be done with all of these materials. You could start with the SafariLTD figurines and introduce the name of each animal to them. You can then present the felt versions for them to match up. Once they are comfortable with the animals and know them by name, you can show them the labeled photo cards and have them match them. Once they have advanced some, you can use the unlabelled cards and have them match the right words to each card or figurine.

Animals of North America for the Montessori Wall Map & Quietbook with Printables

Starting Sounds: For a great language activity, have your child tell you the starting sound for each animal. To make games like this extra engaging for Jax, I call them “letter races” and have him run to our movable alphabet and grab the right letter. For correction of error, match your 3-part cards to see if the answers were correct.

Animals of North America for the Montessori Wall Map & Quietbook with Printables

On the Map: You can move the wall map to the floor and have your child place the right SafariLTD figurines on each continent. While you are still introducing them, you can stick to one continent at a time and match the names or photo cards. Seeing the animals on the maps is a great way to help them remember!

And of course your child can match the correct felt animals and landmarks on the wall map or in the quietbook while on the go.

Animals of North America for the Montessori Wall Map & Quietbook with Printables

Animal Videos: After Jax matches his animal, I like to have him choose one and then I queue a video about them on YouTube. I like the NatGeo and BBC clips. Seeing the animals in motion really captures his interest and helps him remember them. He was really taken by the mandrill video when we did your African animal cards.

Animals of North America for the Montessori Wall Map & Quietbook with Printables

I hope you are enjoying this project as much as I am! I’ve gotten see the maps a few of you have started! If you are sewing along, tag me on Instagram @iolstephanie (I can’t see your photo if it you are private, but I can request to follow you temporarily) or share photos on Facebook. You can also email me.

I’m very late for Montessori Monday this week, but I hope you’ll check out the other great links!

Montessori Monday

Animals of Africa for the Montessori Wall Map & Quietbook with Printables

Animals of Africa for the Montessori Wall Map & Quietbook with Printables

If you haven’t been introduced to our Montessori wall map and quiet book yet, you can read all about it here. This post will be for the first continent in the series: Africa! Every continent will have landmarks and animals. Some, like Europe, have more landmarks than animals. Africa is heavy on the fun animals!

Overview and Map Patterns • Africa • AntarcticaAsiaEurope
North AmericaOceansSouth America

Animals of Africa for the Montessori Wall Map & Quietbook

Those of you who follow along on Facebook or Instagram have already seen the animals and landmarks I created for Africa. I’m so exciting to be working on this project! It was YOU who voted on the Facebook page to make a world map the next quietbook project, and I’m so glad! This will be an amazing resource for Jax throughout his school years. I am posting this project in segments instead of all at once so that you can sew along with me!

Animals of Africa for the Montessori Wall Map & Quietbook

Materials I Used

The Pattern (see the first post for the main patterns)

Felt from American Felt & Craftjungle vine [green], pastry [tan], doe [brown], cactus [gray-green], chocolate [brown], cilantro [green], white, black, gray, chai [beige] and fresh linen [off-white]. From Benzie Design – swan [blue] for the water.

Hook & Loop – I used white snag-free Velcro on the backs of all pieces, including Africa. I used the soft loop side of green hook & loop on the front of Africa.

Felt glue to tack down the pieces before sewing, printer fabric for the continent label, embroidery floss in colors to match the felt and micro tip scissors.

Animals of Africa for the Montessori Wall Map & Quietbook

Sewing the Pieces

Africa: (Felt used: jungle vine green and scraps of swan blue for the water) For the African continent puzzle piece, I started by gluing then sewing the water down to the front side. Then I sewed down pieces of green loop Velcro. On the back, I sewed strips of white snag-free Velcro to correspond with the Velcro on the wall map and quietbook. I finished it by sewing the two sides together around the edge with a blanket stitch.

Label: (Felt used: jungle vine green) For the continent label, I folded under the edges (just a tiny bit to hide the rough edges) and creased it with my nails. The printer fabric held the folds nicely without ironing. Then I stitched the label to some green felt and trimmed it down to be a border. I cut a matching felt rectangle for the back, sewed snag-free Velcro to it and then sewed both sides together.

Animals of Africa for the Montessori Wall Map & Quietbook

For all of the animals, I started by gluing the pieces down to a scrap of background felt with a very light amount of felt glue. I glue several animals at a time to give them time to dry. I sewed them down, trimmed the background and cut a matching backing piece. I sewed snag-free Velcro to the back and sewed both sides together with a blanket stitch.

Animals of Africa for the Montessori Wall Map & Quietbook with Printables

Lion: (Felt used: pastry tan for the body, doe brown for the main/tail and cactus gray-green for the background) For his ear, I put glue on the entire back side but only stuck it down where it attached to the head. The glue dries to stiffen the ear. I made one stitch across the bottom of the ear to keep it secure. I sewed around all the edges, then made some long stitches in the mane and tail. His eye is a French knot with a black stitch going vertically through the center. His mouth is a long stitch and his nostril is a little stitch.

Animals of Africa for the Montessori Wall Map & Quietbook

Camel: (Felt used: doe brown for the body, pastry tan for the background) I started sewing the camel from the SafariLTD figurine before I’d done anything more than check where in Africa camels were located (northern and the horn). Once I started researching for the 3-part cards, I learned that African camels have one hump – Asian camels have 2! Oops! I’ve included patterns for both, so you can take your pick. I sewed all around his body. His ear is done the same as the lion’s. He has a French knot eye and a long stitch for his mouth.

Elephant: (Felt used: gray for the body, fresh linen off-white for the tusks and cactus gray-green for the background) The elephant’s ear is glued down on one side. I actually forgot to put some stitches in, so I have to go back to that. I added some back stitching to make the wrinkles around her legs and a French knot eye. I used gray floss to stitch a line over the eye for an eyelid. The mouth is a long stitch.

Animals of Africa for the Montessori Wall Map & Quietbook

Giraffe: (Felt used: pastry tan for the body, doe brown for the spots, chocolate brown for the hooves and mane and cilantro green for the background) I glued down the mane and body (with the body on top), then glued the hooves, tail end and spots on. I stitched all the way around, making longer stitching in the edge of the mane and tail to look like hair. I used a few small stitches to sew each spot down. There is a French knot at the top of the horn and for the eye. I stitched a little nostril and a mouth. The ear is attached the same as the lion’s.

Animals of Africa for the Montessori Wall Map & Quietbook with Printables

Zebra: (Felt used: white for the body, black for the hooves/muzzle and doe brown for the background) The zebra has the most intricate stitching. After I sewed all around her body, hooves and muzzle, I made a French knot eye, white long stitch mouth and attached the ear the same as the others. Then, using black floss, I stitched on the stripes, using my SafariLTD figurine as inspiration. The stripes were stitched almost in a kind of satin stitch (where you fill in an area with stitched that all go in one direction). I just kept added stitches to widen the lines, often at angles to make them slightly triangular. At the neck where the mane would start, I made sure to start a new stitch in the stripe at a different angle to show the neck’s edge.

Rhinoceros: (Felt used: gray for the body, chai beige for the background and fresh linen off-white for the horns) The Rhino was stitched very simply, though I did add some back stitching to show the wrinkles at the tops of his legs. He has a stitched mouth and nostril and a French knot eye.

Animals of Africa for the Montessori Wall Map & Quietbook with Printables

SafariLTD provided me with these beautiful World Landmarks and Around the World TOOBs. I am working with them to make this project as amazing as possible. All opinions of these products are honest and my own. We are planning an exciting giveaway for you at the end of this project!

Pyramids & Sphinx: (Felt used: doe brown and pastry tan) I combined two landmarks into one felt piece for the pyramids of Giza and the Sphinx, as they needed to be at the same spot on the map. I will eventually make 3-Part cards for the world landmarks, and there will be two for these to make the beautiful SafariLTD figurines.

Animals of Africa for the Montessori Wall Map & Quietbook with Printables

I started by gluing down the layers: the pyramid sides onto the pyramids, then the sphinx, torso, face and finally the features. You may need tweezers for those. Goodness, they are small! I made some small stitches in the features to keep them secure, but didn’t sew down anything else. I cut out a backing felt to match the final shape and added some snag-free Velcro to it. Then I sewed around the whole edge, switching colors where needed.

Animals of Africa for the Montessori Wall Map & Quietbook with Printables

Montessori African Animals 3-Part Cards

Jax just started his world continent unit with the world continent 3-part cards I made up for him. I’m saving up for a Montessori globe at the moment, so I’m not really rushing the lessons. When we start on his Africa unit, I will present these cards. I created these cards to be used along with SafariLTD’s TOOB figurines. My African animals use the Wild Toob and Monkeys and Apes Toob. I also need to pick up an okapi figurine. It will be a larger scale than the TOOB animals, but it is worthwhile for Jax to have something 3 dimensional to look at.

Montessori African Animals 3-Part Cards

Click here to download my free pdf file to make your own. To make mine, I cut them out, glued them to green construction paper (to match Africa’s Montessori color) then laminated them. I’m still loving my new laminator! It makes everything so pretty and durable!

Animals of Africa for the Montessori Wall Map & Quietbook with Printables

Africa Maze

Jax is really into mazes right now, and they are great for pre-writing skills! I’ve designed two mazes for him – one basic and one advanced. Grab them here! We’ll most likely laminate them so we can reuse them. I’ve included an answer key page on this if you want some correction of error. Silhouettes from All-Silhouettes.com.

Animals of Africa for the Montessori Wall Map & Quietbook with Printables

African Animal Silhouettes

Another activity that will help Jax with him reading and writing skills is the African animal silhouette match. Drawing lines between the matches help with writing skills, and recognizing the similarities between the photos and silhouettes helps build visual skills needed for reading. Silhouettes (except for mandrill) from All-Silhouettes.com.

Animals of Africa for the Montessori Wall Map & Quietbook with Printables

Activities:

Introductions and Matching: There are so many activities that can be done with all of these materials. You could start with the SafariLTD figurines and introduce the name of each animal to them. You can then present the felt versions for them to match up. Once they are comfortable with the animals and know them by name, you can show them the labeled photo cards and have them match them. Once they have advanced some, you can use the unlabelled cards and have them match the right words to each card or figurine.

Animals of Africa for the Montessori Wall Map & Quietbook with Printables

Starting Sounds: For a great language activity, have your child tell you the starting sound for each animal. To make games like this extra engaging for Jax, I call them “letter races” and have him run to our movable alphabet and grab the right letter. For correction of error, match your 3-part cards to see if the answers were correct. (We haven’t started on the soft G sound, so we might skip giraffe for now.)

Animals of Africa for the Montessori Wall Map & Quietbook with Printables

On the Map: You can move the wall map to the floor and have your child place the right SafariLTD figurines on each continent. While you are still introducing them, you can stick to one continent at a time and match the names or photo cards. Seeing the animals on the maps is a great way to help them remember!

And of course your child can match the correct felt animals and landmarks on the wall map or in the quietbook while on the go.

Animals of Africa for the Montessori Wall Map & Quietbook with Printables

I hope you are enjoying this project as much as I am! A number of you have told me you’ve already begun the huge wall map. I’m really excited to see how they turn out! Tag me on Instagram @iolstephanie (I can’t answer on your photo if it you are private, but I can try to comment in a different place) or share photos on Facebook. You can also email me.

Animals of Africa for the Montessori Wall Map & Quietbook

I’m a bit late for Montessori Monday this week due to vacation, but I hope you’ll check out the other great links!

Montessori Monday

Montessori Continents Map & Quietbook with 3-Part Cards

I am so excited to introduce you to make latest big project! Those of you who follow along on Facebook or Instagram have already seen a lot of fun sneak peeks. Plus, it was YOU who voted on the Facebook page to make a world map the next quietbook project!

Montessori Continents Map & Quietbook with 3-Part Cards

This project will be presented a little different than normal. Because it is SO BIG, I’ll be giving you a chance to sew along with me by posting a great deal of the patterns today. I am creating each piece by hand and then drawing up patterns from the finished product, so some elements will be provided in later posts.

Overview and Map Patterns • AfricaAntarcticaAsiaEurope
North AmericaOceansSouth America

Montessori Continents Map & Quietbook with 3-Part Cards

The Plan

Today I am giving you the massive pattern for the world wall map and the continent puzzle pieces that can be attached to it. I also included the cover text for quietbook stores all the pieces. Here is pattern. [The pattern was updated 07/24/13 to add the water beside Baja California on North America. Sorry I forgot it!] And here is a pdf with the continent and ocean labels that get printed onto printer fabric. There will be additional posts for the other continents that will include patterns for regional animals and landmarks.

Montessori Continents Map & Quietbook with 3-Part Cards

Materials

Felt: I am mainly using scrap felt to create the continents and smaller pieces of this project. The beautiful wool blend felt I get from American Felt and Crafts is just too good to waste! So I am digging into my scrap basket and using all I can. However, this project does require some larger cuts of felt. I ordered 1 yard of “Swan” blue felt from Benzie Designs. This was used to make the 34″ x 18″ wall map and then three 12″ x 18″ pages for the quietbook. I also ordered a 12″ x 18″ sheet of “Peacock” aqua blue felt for the cover, 2/3 yard of white (you only need enough for the long strip version of Antarctica, but I bough extra for other projects) and 1/3 yard of “Peppercorn” tan for the wall map continents. The continents are in traditional Montessori colors including: white, orange, pink, red, green, yellow and brown. I will eventually buy some backing felt or fleece for the back of the map to finish it off, but I have a few little bits to finish sewing first. Note – Antarctica is sewn down to the wall map due to the map projection. But I did also make a continent piece in its actual shape. You just can’t place it on the map.

Montessori Continents Map & Quietbook with 3-Part Cards  Montessori Continents Map & Quietbook with 3-Part Cards

Other: If you plan to print out the continent and ocean labels, you’ll need printer fabric. I use a roll that I can cut down to use in my 4″ x 6″ photo printer when I just have a little bit to print. I’ve also seen sheets for sale. For the pockets in the back of the book, you’ll need clear vinyl. I get mine in the home decor department of the fabric store. I am using felt glue this time around to lightly tack down small felt bits before sewing them. It is working out great! I have that exact kind, but found a better price in the craft store. I will be adding some closures to the quietbook – two buttons and some elastic cord loops. I’m still looking for the right ones. The big thing you need… hook and loop! I use snag-free Velcro inside the quietbook and on backs of all the loose pieces. It won’t fuzz up your felt when you close the book or store the pieces together. I also use a lot of colored hook and loop. I use the soft loop side on the fronts of the continents (for the animals and landmarks to stick to). For a stronger hold on the wall map, I used the hook side. This means I will have to put some tissue paper over it if I ever roll or fold it for storage to avoid fuzzing up the felt. I got this turquoise hook and loop for the ocean. The tan Velcro is sold with black and white Velcro in the store. All the novelty colors are available from AFC. I didn’t have the best match in orange, but I am using pieces from my stash.

Montessori Continents Map & Quietbook with 3-Part Cards

Felt Wall Map

This piece is not yet finished (it needs a backing and loops at the top), but it is almost there! To make it, cut out all the large pieces and arrange them on the blue backing. Use a thin layer of glue to tack them down. Too much glue will make it tougher to sew through. Then cut out the zillion little islands and glue them down as well. I cut mine free-hand. I didn’t feel like it had to be super accurate at that scale – the overall effect when they are all in place is good enough! Once everything is glued down and dry, sew around all the edges. I used “Dual Duty Button & Carpet” thread in tan. Worked great!

I updated this 8/6/13 to add one more ocean Velcro piece in the Pacific near Hawaii!

I updated this 8/6/13 to add one more ocean Velcro piece in the Pacific near Hawaii!

After that, sew strips of hook and loop on to the map where indicated in the above photo. The ocean ones are for sea animals, the land ones are to hold the continents. I will eventually sew a backing on with some hang loops at the top.

Montessori Continents Map & Quietbook with 3-Part Cards  Montessori Continents Map & Quietbook with 3-Part Cards

Quietbook

I have started this, but it is only about half done. To start the book, I stacked the 12″ x 18″ sheets with the cover piece on top, then sewed a dashed running stitch through the center. I then folded along the stitching to make the book. Once the sewing is done, each page is made by sewing two layers together. I have the first and last (cover) pages done in these photos.

Montessori Continents Map & Quietbook with 3-Part Cards

I will go into more detail later, but the cover has the title letters sew on (“of the” is back stitched), and the last inside page has two clear vinyl pockets sewn on – one for animals of the world and one for labels and landmarks.

Montessori Continents Map & Quietbook with 3-Part Cards

Montessori Continents Map & Quietbook with 3-Part Cards

The pages will be sewn with dotted outlines and snag-free Velcro so you can match and store the continents. Some pages will have more than one continent, as shown.

Montessori Continents Map & Quietbook

I came back to this post after finishing the continent pieces so I could share the final positions of the loop Velcro. Africa’s and North America’s are already posted in their patterns. See the rest above.

Montessori Continents Map & Quietbook with 3-Part Cards

Montessori Continents Map & Quietbook with 3-Part Cards  Montessori Continents Map & Quietbook with 3-Part Cards

Montessori Continent 3-Part Cards

Jax just started his world continent unit with these 3-Part cards I made up for him. Click here to download my free pdf file to make your own. To make min, I cut them out, glued them to card stock then laminated them. I’m loving my new laminator!

Montessori Continents Free 3-Part Cards

So far, I am presenting them to him to introduce the names and shapes, and we are matching them and finding them on the felt map. As he learns the names, he can start matching the labels to the pictures. Once all the felt continents are done, we will use them with the cards as well.

Montessori Continents Map & Quietbook with 3-Part Cards

World Animals & Landmarks

One of the most exciting parts of this project is still to come… I’ll be making little felt animals and world landmarks that can be placed on the continents and matched to the beautiful miniature replicas made by SafariLtd! I’ve been slowly collecting each TOOB I’ll need whenever I have 50% off coupons or store credit. They are so neat that I want to play with them myself!

Shopping List

√ Wild TOOB
√ Arctic TOOB
√ Around the World TOOB
√ World Landmark TOOB
√ Rainforest TOOB
√ panda cub
√ Whale TOOB
Ocean TOOB
Land Down Under TOOB
√ River TOOB
√ Pets TOOB (hedgehog only)
√ snow leopard cub
√ peacock
√ leopard seal – other brand


Montessori Continents Map & Quietbook with 3-Part Cards

I’ll be working with SafariLtd to bring you a great giveaway at the end of this project, so stay tuned!

Montessori Continents Map & Quietbook with 3-Part Cards

I hope you’ll sew along with me!

I am giving you these patterns totally free, despite the days of work going into them. I think it will really help out teachers and homeschoolers alike! If you’d like to contribute in some way, you can read more here. Also, Jax’s wishlist is where I add homeschool items I need to buy. One easy way to help? Share this project and Imagine Our Life with your friends! Thank you!
 

For more great Montessori ideas, visit:
Montessori Monday