Tag Archives: Sewing

2011 Quiet Book Pages

Here is a look back at the quiet book pages I completed in 2011. I didn’t start working on them until September, so I’m proud I created 19 pages! A few were created to go together in 2-page spreads. (Number 20 is complete but not posted.)

Click a thumbnail below to visit a post:


Sock Matching

Top 5 Most Popular Patterns

  1. Sock Matching – 4 comments – 3002 views
  2. Circus Train – 3 comments – 1842 views
  3. Forest – 4 comments – 1773 views
  4. Starbucks – 0 comments – 1573 views
  5. Rocket Ship – 2 comments – 1428 views

Related Tutorials

Cover Tutorial

What People Are Making

Taking Requests!

This year I’m taking requests! Drop by my Facebook page with your suggestions. Page 19 was my first completed request, and I’ll be posting a page to match it very soon!

Happy New Year!


Forklift Quiet Book Page

This quiet book page is a special request. If you have a request, leave comment on my Facebook page and I’ll see what I can do.


I knew nothing about forklifts when I started this page, so I had to look at a lot of pictures and figure out how to simplify it down. The basic mechanism on this page is a strip of felt matching the background that a sleeve of clear vinyl slides up and down on. The vinyl gave me a place to sew down the forklift platform and some snaps to attach the pallet and boxes. I added spinning wheels, numbers and the words “Up & Down” to add to the educational elements.

Here is what I used: a 9″ square dark green felt background, felt (in dark green, brown pebble texture, gold, light blue, tan, natural, gray and black, clear vinyl, green ribbon, sew-on snaps, two grommets, two buttons and embroidery thread. I sewed this page by hand, with the exception of sewing it down to the actual page.

I started by pinning everything down to get placement (don’t pin into vinyl – it leaves holes) then sewed down the light blue window the gray steering wheel and the brown ground (cut that out freehand.) Take your strip of felt that matches your background (dark green in my case) and sew the gray bar along the left side. Pin it in place on the page then sew down the gold cab of the forklift. It will overlap the bottom of the gray bar. You can then sew down the bottom of the background strip.

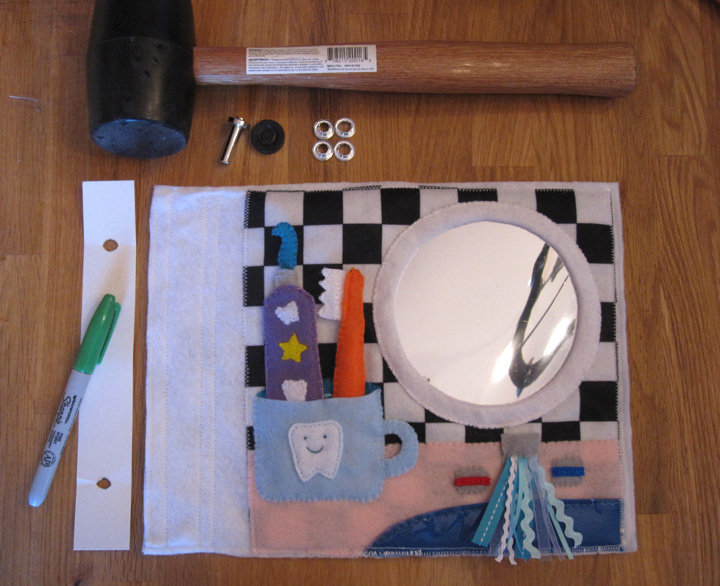
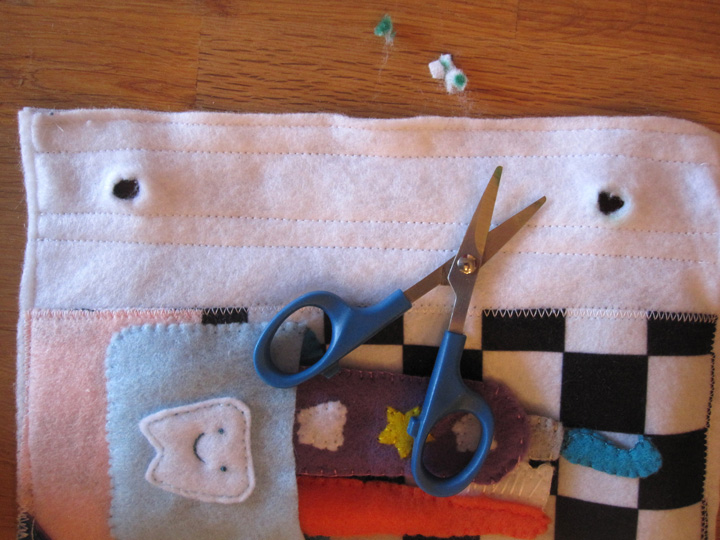
To make the wheels, cut them out just outside of the circle template using pinking shears. Insert a grommet into each wheel and sew a button to the page through the grommet hole. The wheels will be able to spin around but will be held in place by the buttons.

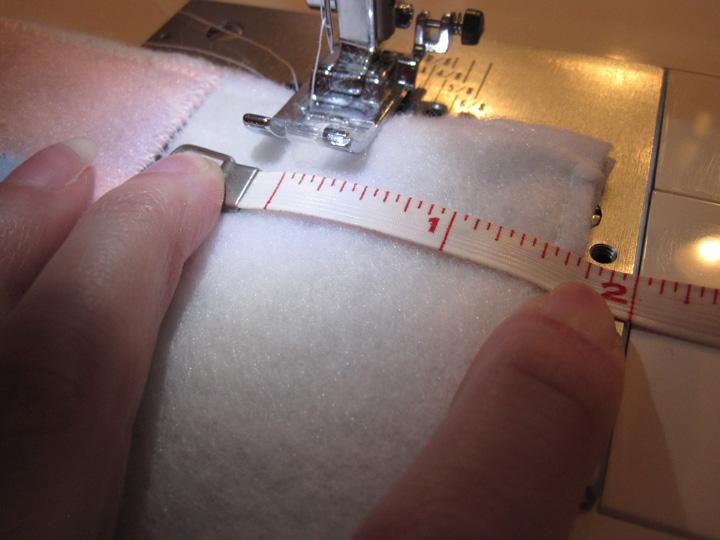
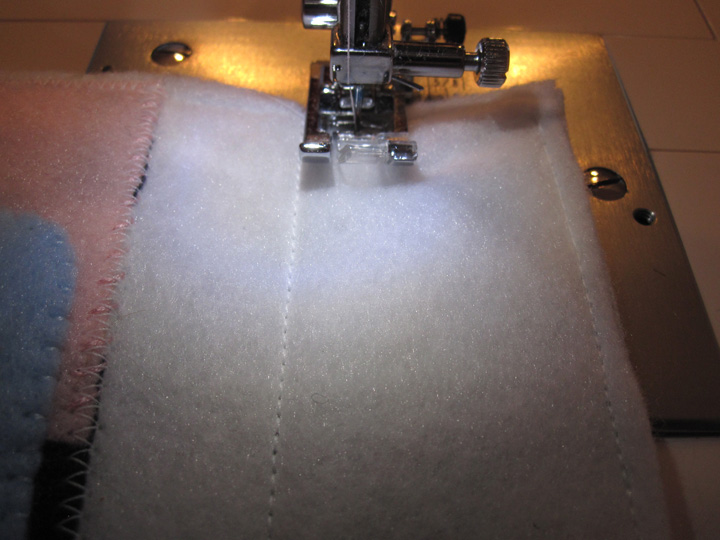
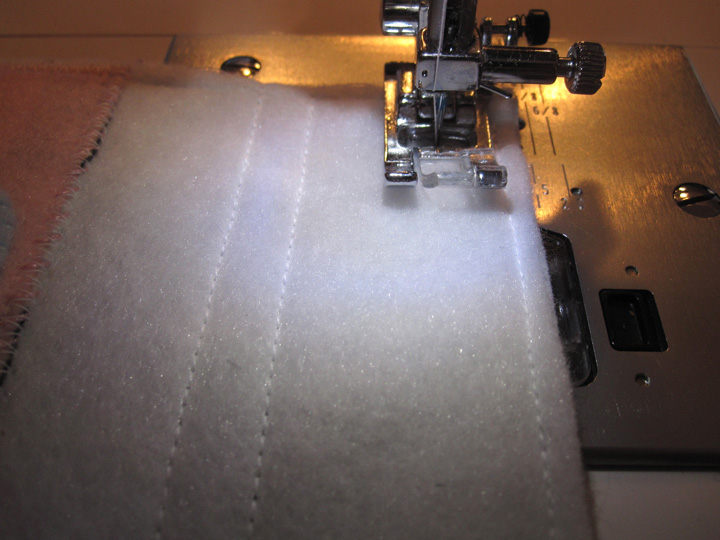
To make the sleeve for the forklift mechanism, start by sewing the gold forklift platform to one piece of clear vinyl. See the pattern and photos for placement. Sew down some snaps for the pallet and boxes to attach to. Sew a loop of ribbon to the top center and another to the bottom center. Place the second piece of vinyl behind the first and sew them together along the sides only. Slide the sleeve onto the background strip then sew down the top of the strip to keep it in place. You should be ale to slide it up and down to look like the forklift is lifting.

For each of the crates, I freehand stitched the numbers to the front and a snap to the back, then sewed the two sides together. For the pallet I sewed a line across the front to add dimension, sewed a snap to the back, then sewed the two sides together. I added more snaps to the ground to give the crates and pallet somewhere to go when they aren’t on the forklift. (I ended up using 1.5 small snap sets per crate and 1.5 medium snaps for the pallet.)

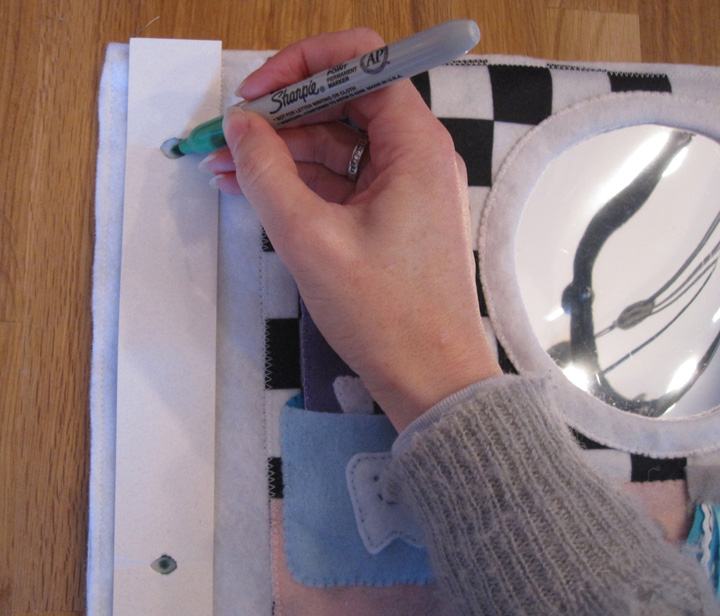
The final embellishment was the words embroidered at the top. To transfer the writing, I pinned my pattern down and basted over each latter with one strand of thread. I left 2″ tails at the end of each letter instead of knotting. I then cut the paper away from each letter and puled off the remaining bits. This left me with a basted pattern to stitch over using stem stitch. When I was done, I pulled out the basting threads, clipping them wherever they were caught in the embroidery.

I am currently working on a dump truck that will be the other side of the two page spread. I think they’ll be really cute together!

Let me know i you use this pattern. I’d love to see your version!
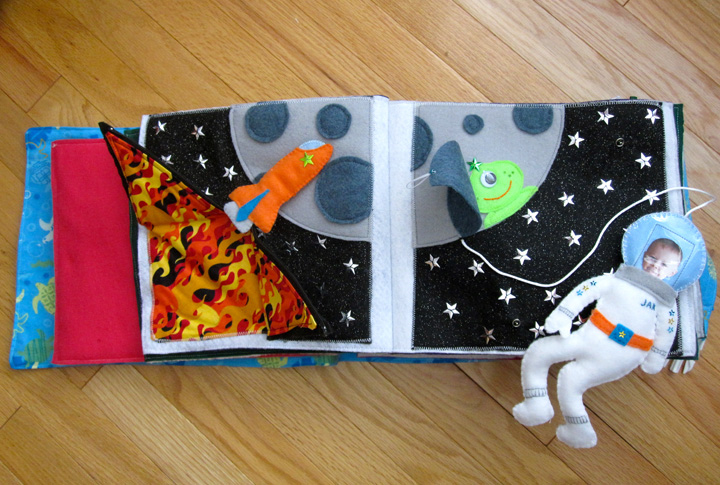
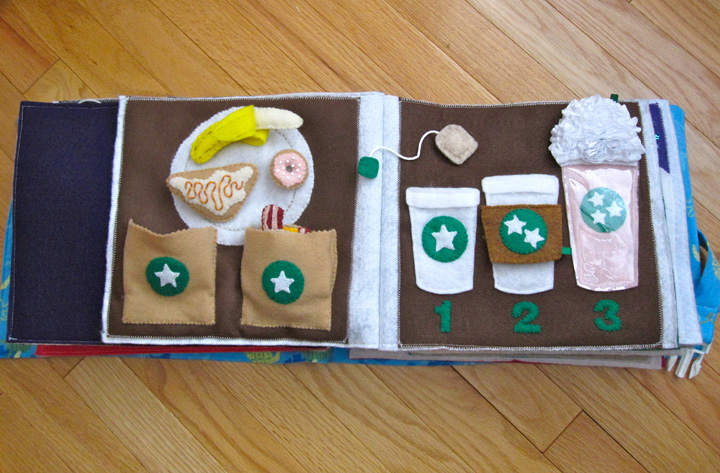
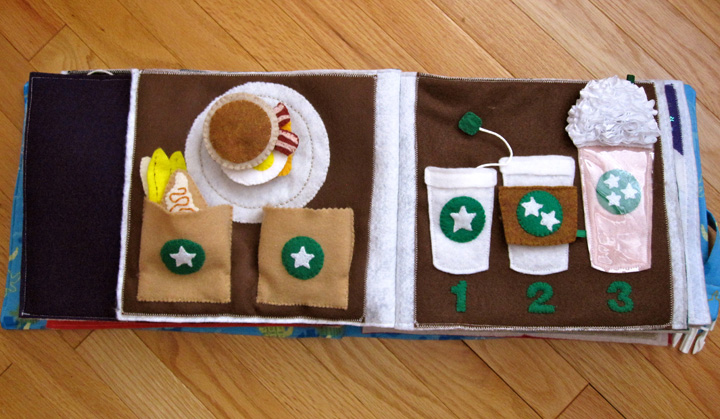
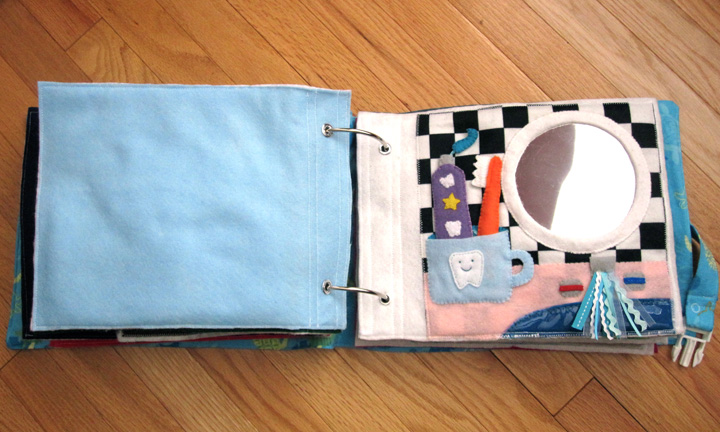
Mailbox & Letters Quiet Book Page

I finally have another quiet book page done! First there was vacation, then working to make up lost hours, Thanksgiving and a bad cold. And there went November!

There’s nothing super original or crazy about this page, but it was one I wanted to include. “Mail” was one of Jax’s first words thanks to the mail song on Blue’s Clues. I have to give a shout out to Handmade By Jill, as her mail page was the first I came across.


Here is what I used: a 9″ x 9″ sky blue felt background, felt (in light gray, dark gray, red, brown, white, and assorted colors for the envelopes), ribbons and ric-rac, buttons, 1 grommet, Velcro and thread to match.

To make the page: I stared by sewing the two sides of the red flag together. I installed a grommet at the end – the same kind I use on the finished pages. I then sewed the lettering down onto the side of the mailbox. Placing the flag where I wanted it, I sewed on a button through the grommet hole. This lets the flag move just like on a real mailbox. To make the mailbox door, I sewed the two sides together with a loop of ribbon at the top. You could use elastic as well. I sewed the brown stake to the page, followed by the dark gray mailbox interior (the dashed line on the pattern shows where I sewed a decorative line to add dimension to the inside). I sewed the top, back and bottom of the outside of the mailbox down leaving the front open to put the letters in. To finish the page, I sewed down the bottom of the mailbox door and attached a button above it.

The mail is a blast to make! Get out your ribbon and ric-rac stash and  have some fun! I used my sewing machine for them and had to rush. Please excuse the shoddy stitching in my example – I was actually nursing at the same time!


To make the envelope: Fold the envelop flap over and stitch beside the fold to set it in place (felt doesn’t fold well on its own.) Sew a piece of Velcro on the inside of the flap and decorate the outside with a scrap of ribbon or felt. Fold the envelope body up to find where the other half of the Velcro should be, the sew it on. Cut a little rectangle of white felt with your pinking shears. Sew it on as the stamp with a scrap of ribbon or felt. I used ribbon and folded under each end. Cut some ribbon or ric-rac and position it where the address would be. Sew it down. Fold the envelope back up and sew around the sides and bottom. All done!

To mail a letter: Sew ribbons or ric-rac down on the bottom half of the white felt rectangle. Fold the whole thing in half and sew along all four sides and trim it to neaten it up. I just did two ribbons on each, but you could go crazy!


I hope the pattern is helpful! This page came out very cute thanks to the mail. I had to stop myself after 5 letters because the mailbox was getting too full! If you use this pattern, I’d love to see your end result. I hope you’ll share it with me!

Peace & Love Felt Ornament Patterns

I plan to design and sew a couple felt ornaments every week until Christmas. I’ll be sharing the patterns here for anyone who is interested!

Peace & Love

Here are my first two ornaments: Peace and Love. Some of the photos came out with the colors off, but the photo at the top is accurate.

The supplies you’ll need are:
Felt (in red, sky blue, aqua blue and green), embroidery floss (in red, aqua blue and green), red ribbon or ric-rac, batting/stuffing, needle, scissors, pins, water-soluble marker or thin Sharpie and the pattern print out.

  • Start by cutting out your pattern pieces, pinning them to the felt and cutting all the elements out.
  • Decorate the fronts of each ornament. For the Peace sign, I did the stitch I usually use when sewing a felt applique: short, perpendicular stitches across the edge of the applique all the way around. I did the same for the berries, but sewed the leaves down first. For the leaves, I did a simple back stitch ⅓ of the way up the centers and left the rest loose. On the Love ornament I did the little heart and the holly with the same techniques. To transfer the text, I pinned the pattern behind the felt and held it up to a light. I was then able to trace over the word with a marker. I sewed the word using a chain stitch with 4 strands of floss (I normally use 2 strands for everything else.)
  • Cut two 6″ length of ribbon or ric-rac. Fold them into loops and pin them in place between the two sides of each ornament. Sew halfway around each ornament with a blanket stitch (I used red floss as an accent.) Add batting or stuffing (I used batting and cut them ¼” smaller than the main shape) then continue all the way around to finish them.

Peace & Love Felt Ornaments

Simple and sweet!

If you make your own, I’d love to see them! Send me a photo or link and I can add yours to this post.

Sewn Paper Mobile Tutorial

This post is dedicated with love to baby S. If you find this post helpful, please consider making a donation to help the March of Dimes fund the research that will get us closer to stronger, healthier babies.
 

At first I thought I was completely insane and over-ambitious to decide to make a huge paper butterfly mobile. Turns out, it wasn’t bad at all! After late night inspiration struck, I was able to whip this up in no time (*not* counting the time to cut out the butterflies!)

This technique is great for paper garlands as well. I’ll be doing a tutorial for one soon.

You’ll need:

  • Card stock and/or vellum. I used both.
  • Butterfly template. I printed mine on card stock so it was easy to trace.
  • Paper punch(es) for little flowers. I used the McGills Petite Petals Punch
  • Sewing machine, thread and beading needle.
  • Assorted beads, including some drop beads. I used pink flowers.
  • The inner ring of a sewing hoop.
  • Ribbon and glue to cover the hoop.
  • String or ribbon to make the hanger. I used crochet cotton.

I started by wrapping the inner ring of a wooden embroidery hoop with ribbon and gluing down the end (I “clamped” it with tape overnight while it dried.) I cut two lengths of crochet cotton that were longer than the diameter of my hoop. I tied one so it split the hoop in half, then tied the other perpendicular to that so it split the hoop in quarters. I then grabbed the centers of both strings and tied a ribbon to the center so the mobile could hang from the slack in the strings.

The time consuming part was cutting and punching the paper. You need to cut out at least 36 butterflies for the layout I used, more if you used single-sided paper and use two pieces back-to-back. I did some of both. I punched a zillion flowers since I wasn’t sure how I was going to use them. Luckily, my punch cut out 3 at a time! I used some solid paper, some vellum (solid and patterned) and some patterned paper. They were all from the scrapbooking aisle of the craft store.

Sewing the strands of the mobile is so easy! I sewed mine from the bottom up. Leave about 10″ of spare thread before starting (you’ll need that for adding beads later) then start sewing as you feed the bottom of a butterfly into the machine. When you get to the top of the butterfly, position a flower the distance you want it from the butterfly and push it under the foot as you continue sewing. My patter was 3 flowers between each butterfly and I ended with 3 flowers on top. I did four strands with 4 butterflies and 4 strands with 5. When you end your strand, back stitch a bit, then leave another 10″ tail so you can tie the strand to the hoop.

Once you’ve sewn your strand, you need to weigh it down with beads. I made a little pattern I liked and ended with a drop bead. To put the drop bead on, I threaded one strand of my thread through the hole one way and the other strand the other way. then I made a knot above the bead and clipped the tails. You could add some Fray Check to the knots for security. (I used Fray Check on the strings that tie the braids in my hair closed!)

Tie your strands of butterflies and flowers to the hoop. I tied 4 of them right to where my hanger threads were attached, then the other 4 in between. To make it easy, I hung mine from the adjustment arm of a camera tripod.

To pretty-up where the strands are tied on, I made some little flower embellishments. You could easily hot glue some purchased silk flowers or butterflies too. I took a length of thread and a beading needle and ran the thread halfway through the center of some flowers. I added a bead then went back down through the center of the flowers with the other half of the thread. I used the two tails to tie each beaded flower over the knots of the butterfly strands.

Then you are done! Hang it by it’s ribbon and enjoy! (Mine is just taped up for a photo. You’ll want a nice hook.)

Quiet Book Cover Tutorial

There are a million ways to sew a quiet book cover, but this tutorial covers (ha!) what I did. To see how I sewed together my pages, read this post.

I used 3″ diameter binder rings I bought here. I had 1 yard of flannel and a 29″ x 11″ piece of fusible fleece from my leftovers pile. I also used a white, 1″ plastic buckle from my dog collar supplies. They sell black ones in fabric stores.

  1. I started with two rectangles of flannel. You could use different fabric for the cover and inside, but I was using some I already had. My width was 30″ and height was 12″. To find your width: (page width x 2) + the diameter of your rings + 2″ for overhang + 1″ seam allowance. To find your height: page height + 2″ for overhang + 1″ seam allowance. I also cut a piece of fusible fleece 1″ smaller and ironed it to the back of one piece.
  2. I sewed the two sides together, right sides facing, leaving a 4″ hole to turn it.
  3. Turn it right side out and press. (Clip the corners first if you’d rather they not be rounded. I like that.)
  4. Top stitch all the way around, closing your hole in the process.
  5. Fold the cover in half to find your center, then measure half the diameter of your rings from the fold. Use the same template you used on your pages to mark grommet holes. Repeat on the other side.
  6. Install your grommets. You will have two sets of grommets centered on your cover piece that are set apart the diameter of your rings (3″ for me.)
  7. I made two lengths of straps with half of the buckle on the end of each one. I believe my finished sizes were 30″ x 1″ and 8″ x 1″. I attached the short one to the front with the buckle aimed away from the spine.
  8. I attached the long strap right behind the short one going in the opposite direction, across the spine and around the book to hold it closed when buckled.
  9. With the buckle closed, I determined how tight I wanted the strap and sewed the extra into a handle by sewed the strap down on the other side of the spine (see photos for clarification.)

That isn’t even all of my pages! I bought extra rings so I can keep the pages not in use organized. Swapping the pages out regularly will keep the quiet book interesting for Jax.

I’m bringing about half the pages shown there on the plane ride. I chose the ones most exciting to him that don’t have tiny parts. I also punched holes in the top of a freezer bag and have that in there with a notebook, crayons and stickers.

We should be in the air right now as this post goes live. Wish us luck!

Friday Follow-up

This post is to show some updates to my Starbucks felt food quiet book page (that goes with my Starbucks coffee and tea page.)

When I started the food page, I wasn’t able to find and brown felt to match the background I’d used on the drink page. I went with green and called it a day. But when I decided to make the two pages face each other, I realized I would have to move the pastry bags from the top to the bottom to make room for all that whipped cream. I’d just found that brown again, so I ripped everything off and sewed it to the new background.

I think it came together nicely. It’s still Jax’s favorite page. He is in love with the tiny strawberries!

Make your own with my free patterns at the links above.

How To Sew Quiet Book Pages

Here is a little tutorial on how I sew up my final quiet book pages. My designs are 9″ x 9″ on a felt background. I sew my final pages using 9″ x 12″ felt sheets – white for the front and colored or patterned for the back. If your pages are a different size you’ll have to modify accordingly.

  1.  Pin your design to the white felt. I put mine close to the right edge but leave about a half inch.
  2. Zigzag stitch around all four sides. If you have dangly bits, make sure you hold them out of the way!
  3. On the reverse side, pin on the background (wrong sides facing.)
  4. Sew all the way around.
  5. On the front, I sew a line 1.75″ from the left edge. I use a hole on my machine as my guide.
  6. Sew another line just inside of it. I use my presser foot as my guide.
  7. Sew a line just to the side of the far left seam like in step 6.
  8. Gather what you need to put in grommets. I made a template so all of my pages would match up.
  9. Mark your holes. Place them in the channel you made for strength.
  10. Cut out holes as directed on your grommet package.
  11. Put in your grommets as directed on the package.
  12. All done!

When I have a 2-page spread, I sew the right-hand page with steps 1 – 4. Sew the left-hand page like steps 1 – 4 but align everything to the left of the page instead of the right. Place the pages together, right sides facing. Sew over the far left seam, then make the same seams as in steps 5 – 7. Continue on to make your grommets. You’ll now have a separate page you can take out of the book and the two halves will always stay together!

I hope this helps! I’ll post about my cover soon… I still have to make it!

Jax’s Homemade Brobee (Little Green Monster) Costume

Happy Halloween!

I’m so glad I was able to finish sewing Jax’s Halloween costume in time for trick-or-treating! This will be his first year for it, but I don’t think we’ll go to too many houses. I think he’ll enjoy handing out candy.

This is probably the last year I get to choose his costume. I’ve wanted to sew him a Brobee costume since last year, but it was just too much effort for a baby that wasn’t going trick-or-treating. I know Yo Gabba Gabba is a little obscure, but everyone recognizes that he is dressed as a “little green monster” just fine!

When I started planning the costume, I knew I needed to have a base pattern to work with. I originally was looking at long pajama patterns, but when I figured out how much work the costume would be, I wanted to make something he could wear beyond Halloween. So I ended up going with a coat and pants. I went to Joann’s at naptime with Jax in the Gemini and found this great Burda pattern. I made the center look, in size 2T, but left off the embelishments.

The outside is made with fleece that I sewed darker green stripes on before sewing it together. I lined the coat in green flannel. I added the horns in red fleece and sewed the eyes and mouth out of felt. The unibrow is marabou sewn to a strip of hook & loop tape so I can remove it to put the coat in the washer. I modified the hood by adding a casing with elastic around Jax’s face to keep it up. The sleeves have to be cuffed, pants are hemmed up 3″ and I cinched in the elastic waist for now as he is not a 2T yet, but he has room to grow into it!

Yesterday we joined the neighborhood costume contest and parade in the local park. Jax won 3rd prize and was thrilled that his prize involved a new pack of crayons!

Brush Your Teeth Quiet Book Page

A while back I picked up a beat-up fabric book at the thrift store for 75 cents because it had a great 5.5″ circular mirror in it. I knew I wanted to cut that out and add it to Jax’s quiet book. Since he is a huge fan of brushing his teeth (he signs asking to do it, then hums the song I made up for him to brush to) I had to do a sink scene!


The toothpaste and brush are attached by a ribbon inside the cup. The toothpaste tube actually slides on its ribbon and makes a crinkly noise. The toothpaste swirl is at the end of the ribbon so you can put it on the toothbrush. I didn’t want it separate or it would get lost. The water in the sink is a bluish vinyl from my scrap stash layer over aqua felt and the running water is a bunch of blue and white ribbon scraps.

Here’s what I used: checkerboard printed felt background, kid-safe mirror cut from an old book, felt (in pink, aqua, sky blue, lavender, orange, red, blue, gray and white), ribbons and ric-rac, batting/stuffing, a crinkly cereal bar wrapper and embroidery thread to match.

My pattern doesn’t include the counter or sink shapes since everyone’s pages are different sizes. Depending on what size mirror you are able to rind, freehand it to what fits your layout best.

I did all the sewing by hand on this page (sewing machine time is rare in my house!) To start, I sewed down the counter, sink and mirror. I sewed the hot/cold stripes on the faucet knobs and sewed them down (you could make yours circles with buttons and have them turn if you want to get fancy!) I sewed the bottom 3/4 of the faucet on, then folded down the top. I folded a variety of ribbon scraps in half and stitched them into a bunch. I sewed them down under the fold of the faucet then stitched the edge down.

Next was the cup. I sewed down the inner cup piece. I made a smiley face on the tooth and sewed it to the cup front. I sewed the handle pieces together and pinned them in place. I took a long ribbon – long enough for both the toothpaste and toothbrush – and folded it in half. I stitched the mid-point down under where the cup would go. Then I just sewed the cup front on, leaving the top open to make the pocket.

On the toothpaste, I sewed the teeth and stars to the front piece. I cut a piece of crinkly wrapper (mine was a Trader Joe’s cereal bar) to fit in the tube and put it and one of the halves of the ribbon in between the two sides. I sewed along the sides of the tube and along the bottom, but left a gap in the bottom-middle so the ribbon could slide. At the top, I sewed the grey cap pieces to each side of the toothpaste tube, then sewed them into a tube around the ribbon. At the end of the ribbon, I sewed the two halves of the toothpaste. I may add a stripe of glitter paint to the toothpaste if I have a color that works.

For the toothbrush, the toothpaste bristles were sewn together then decorated with long stitches. I layered them between the two handle pieces along with some batting with the ribbon sandwiched at then and sewed it together.

Do you like it? Jax sure does! He keeps looking in the mirror and saying “Baby!”

If you use this pattern, leave me a comment with a link so I can check your version out!

Quiet Book Progress

While the majority of my Quiet Book sewing is on hold while I work on Jax’s Halloween costume, hand sewing pages can still be worked on during the times I am watching Jax and can’t get to the sewing machine.

So what to make next?

Here’s some options on my list: a city map page for driving cars, a toothbrush and mirror page (Jax LOVES to brush his teeth!) and a mailbox page (his would be Blue’s Clues themed. He gets to watch a Blue’s Clues episode after dinner.)

Any pages you’d like to see? What do you think I should work on next?

Halloween Costume Progress

I got most of Jax’s hoodie completed for his Halloween costume. Can you guess who he will be?

Next step: zipper! I’ve never done a separating zipper and I’m going to have to shorten it.

I need to figure out if I should fit a mouth on him somehow. There wasn’t room on the hood. I’m going to the thrift store tomorrow morning to look for a stuffed animal with black fur to cut up and use to make the unibrow furry. Cheaper then the craft store!

Are you making a costume for your little one(s) this year?