I’m back with another pattern in my new Holiday Quietbook series. I’m planning to create these throughout the year, and I hope you sew along with me!
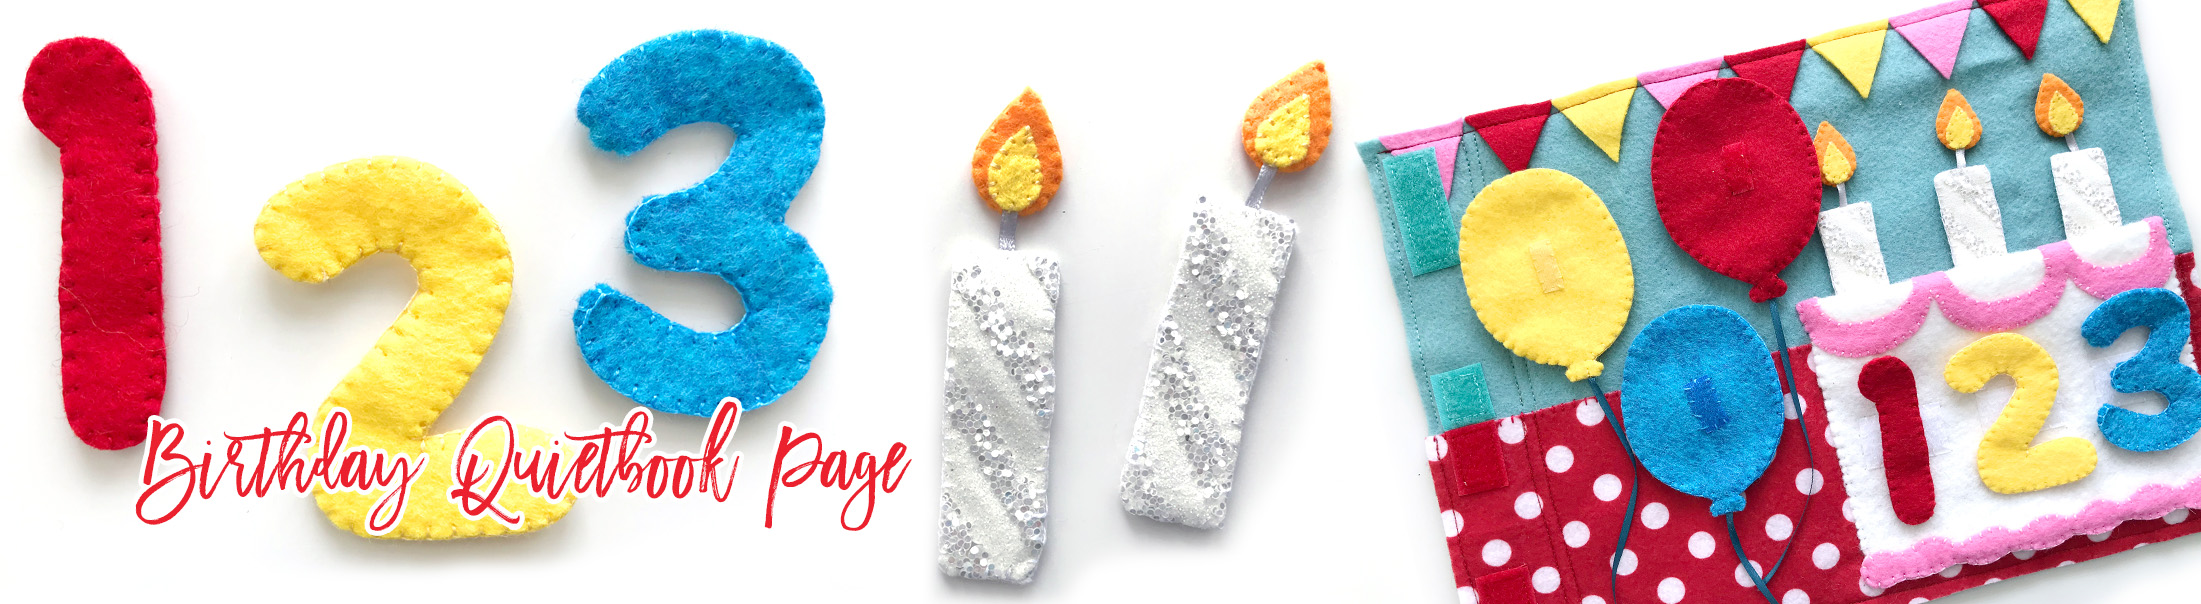
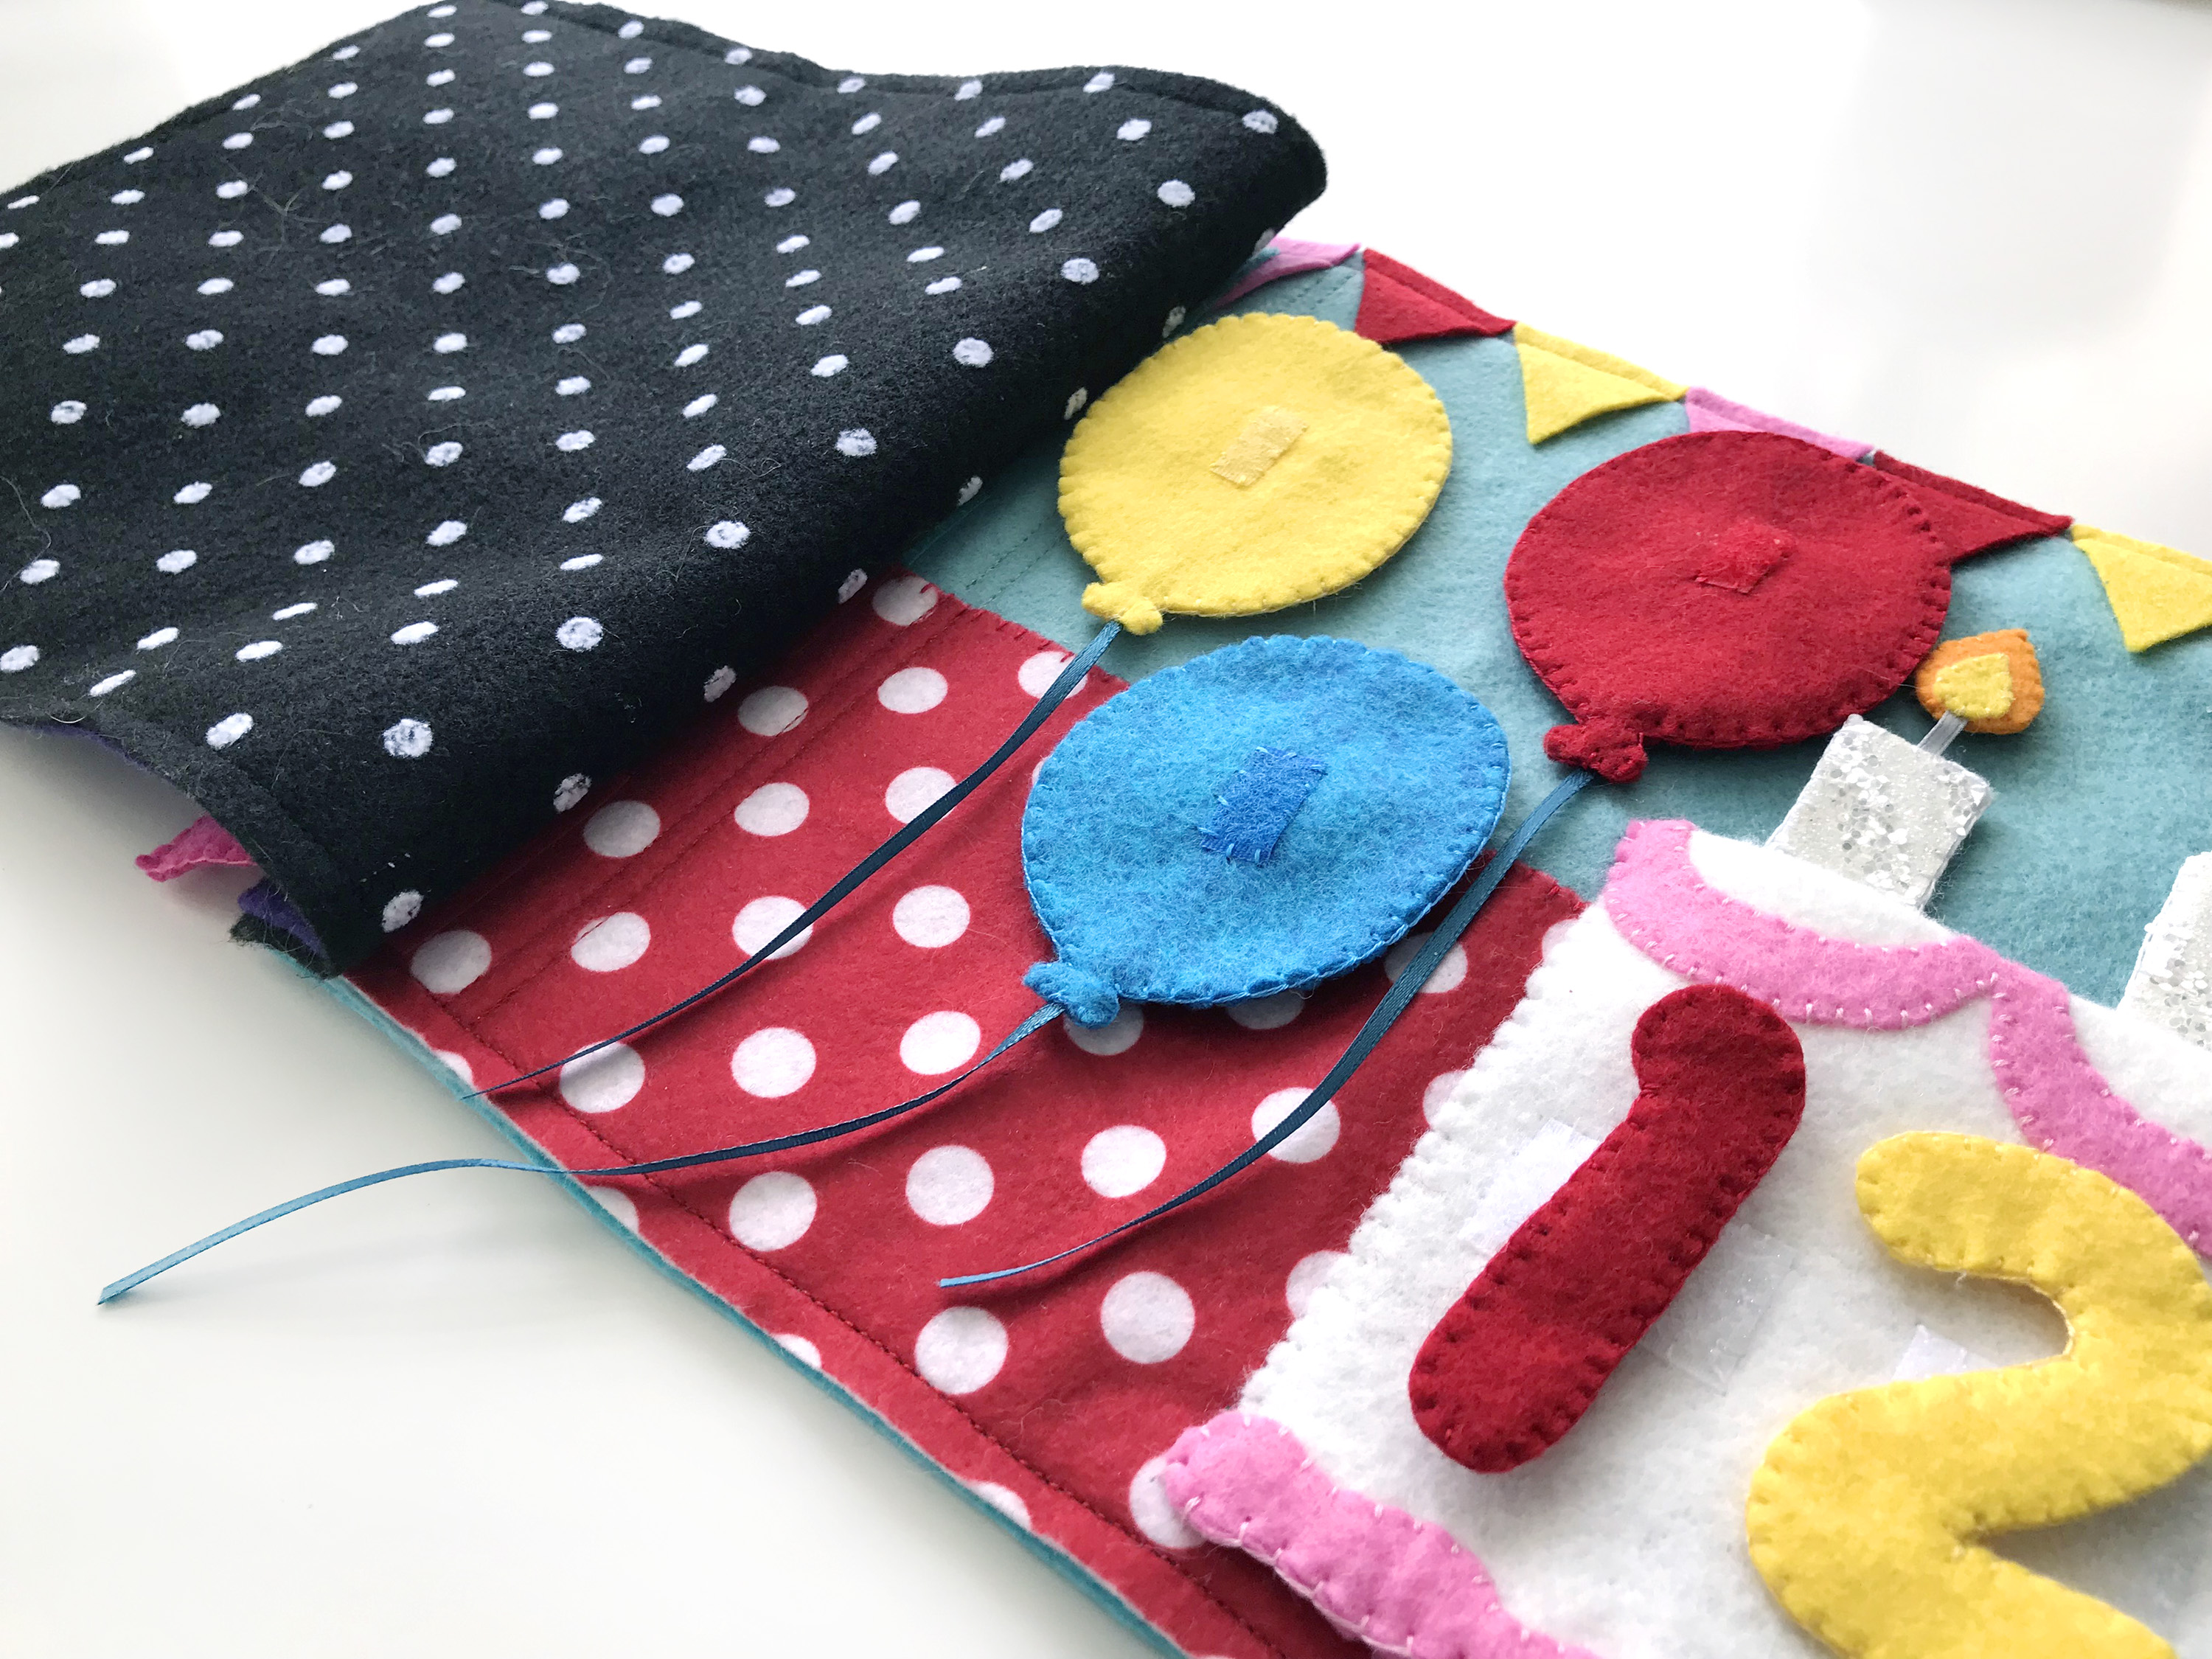
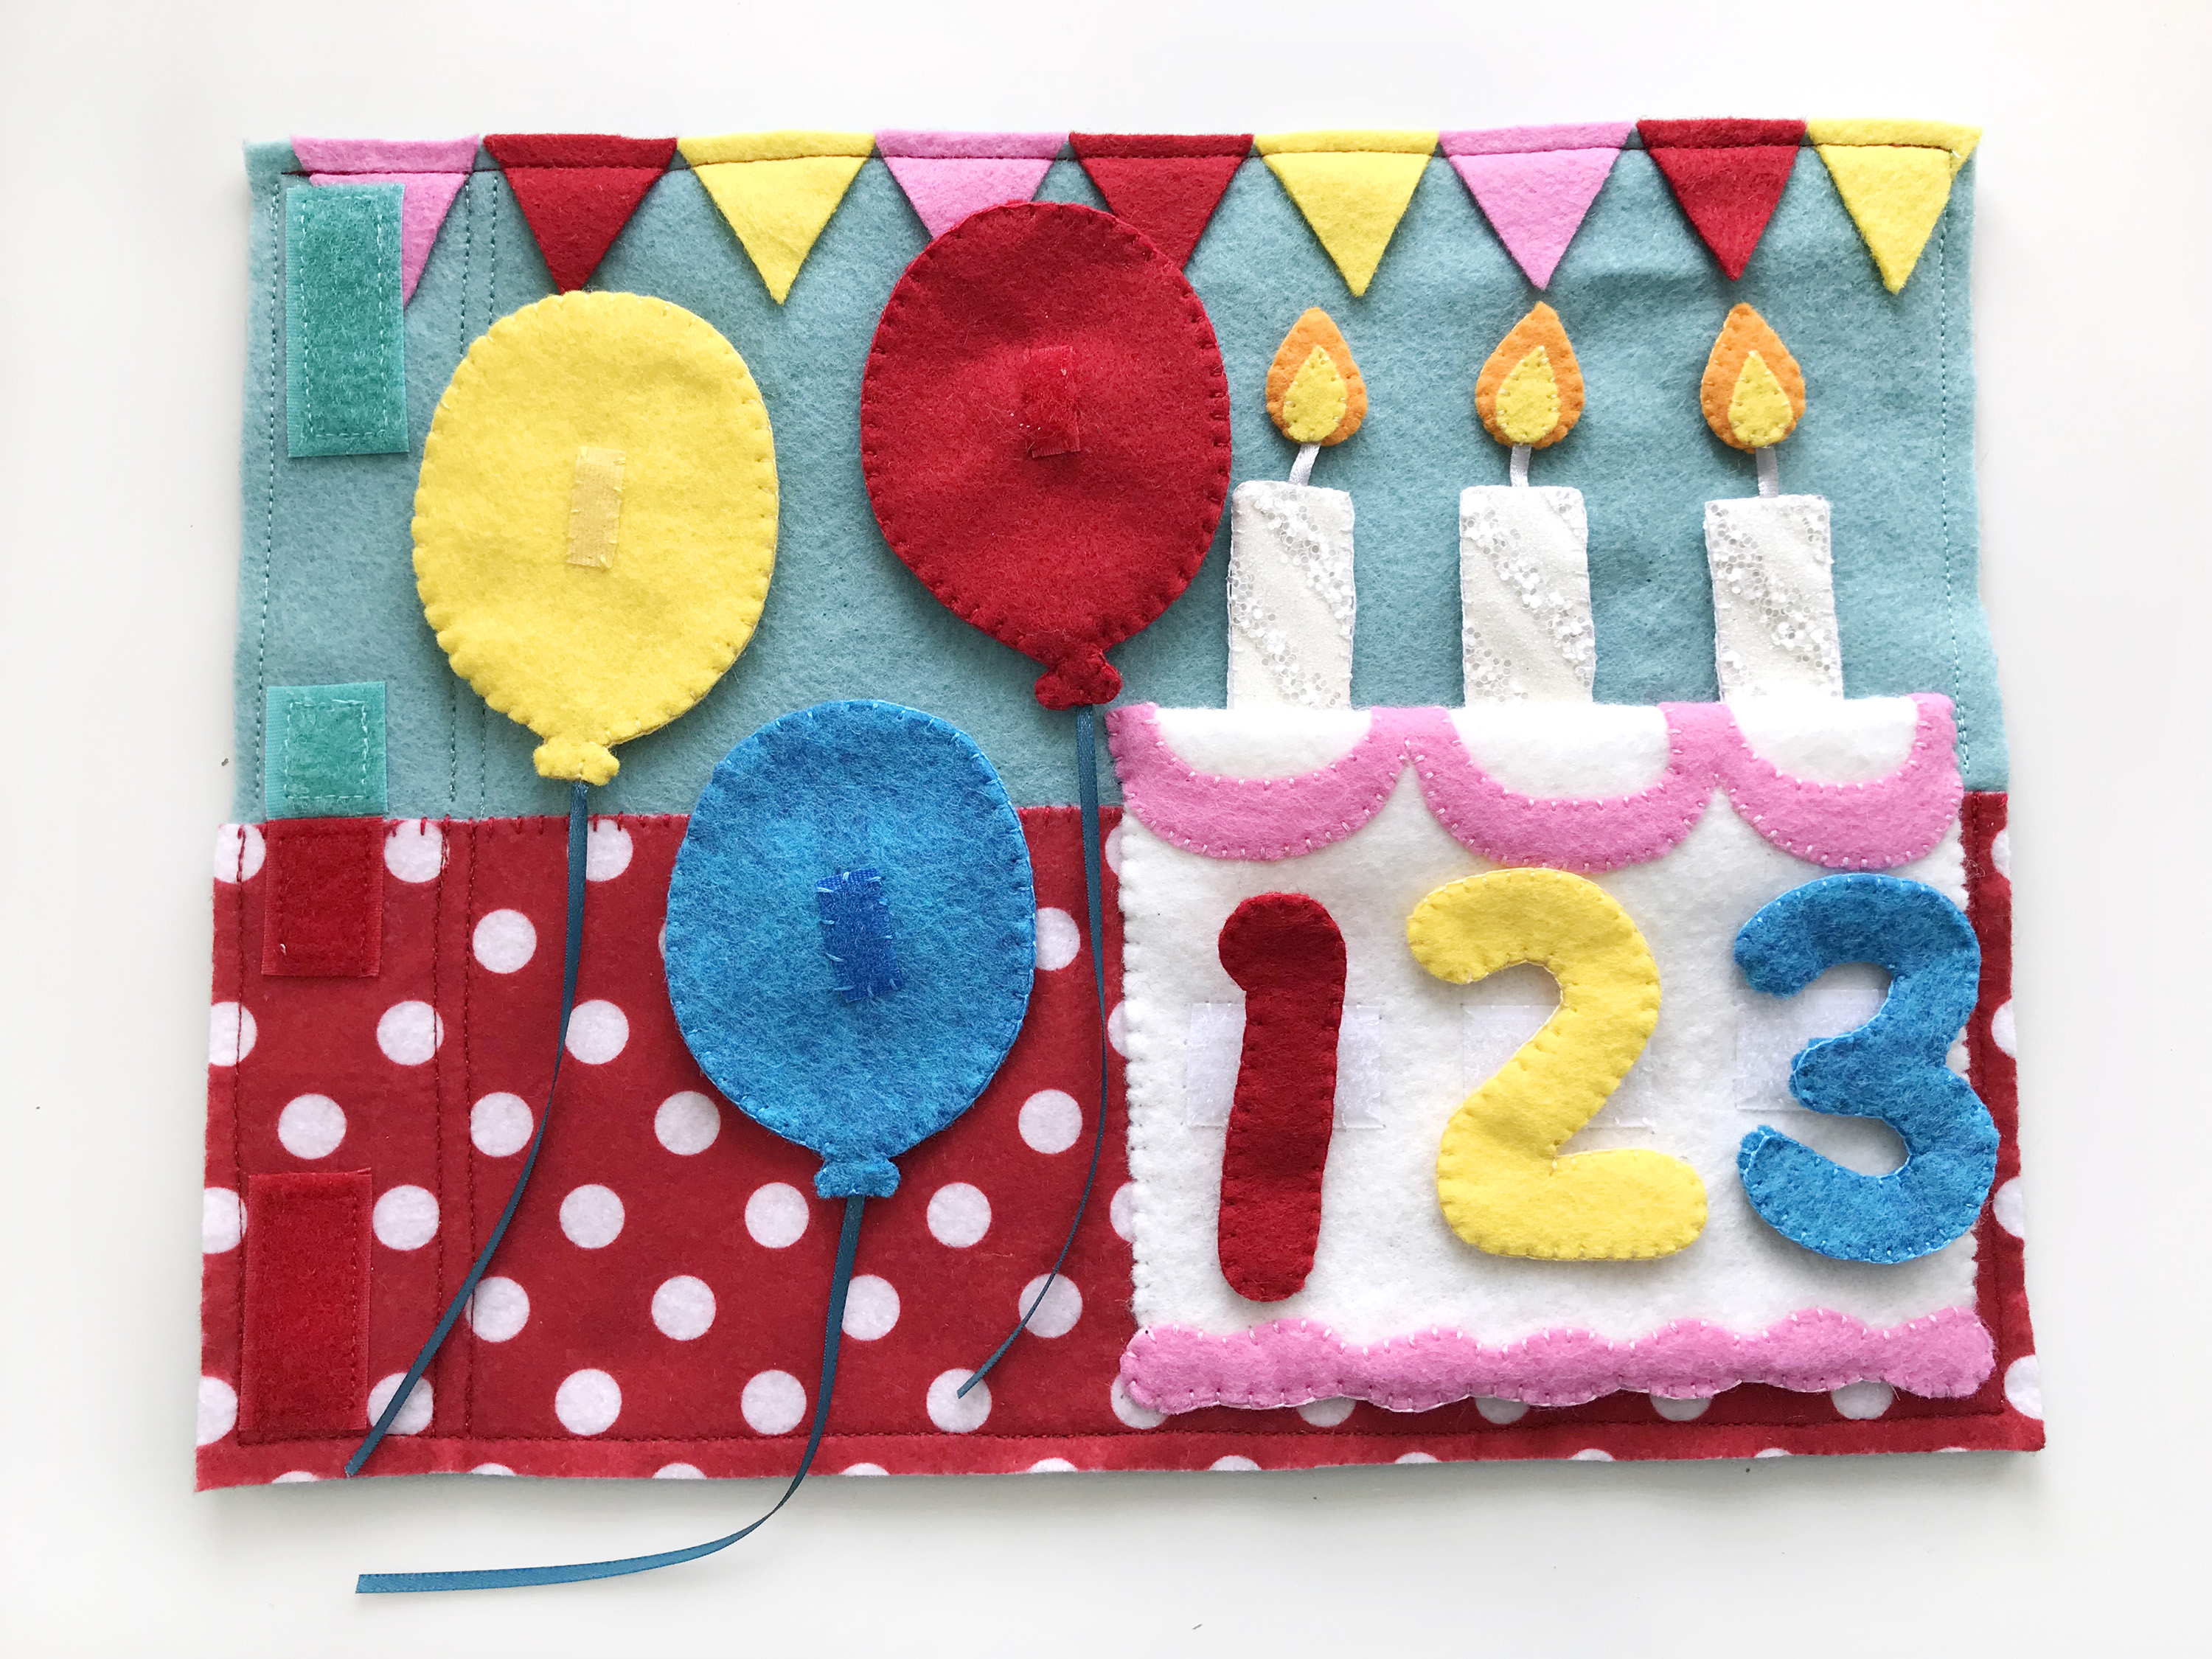
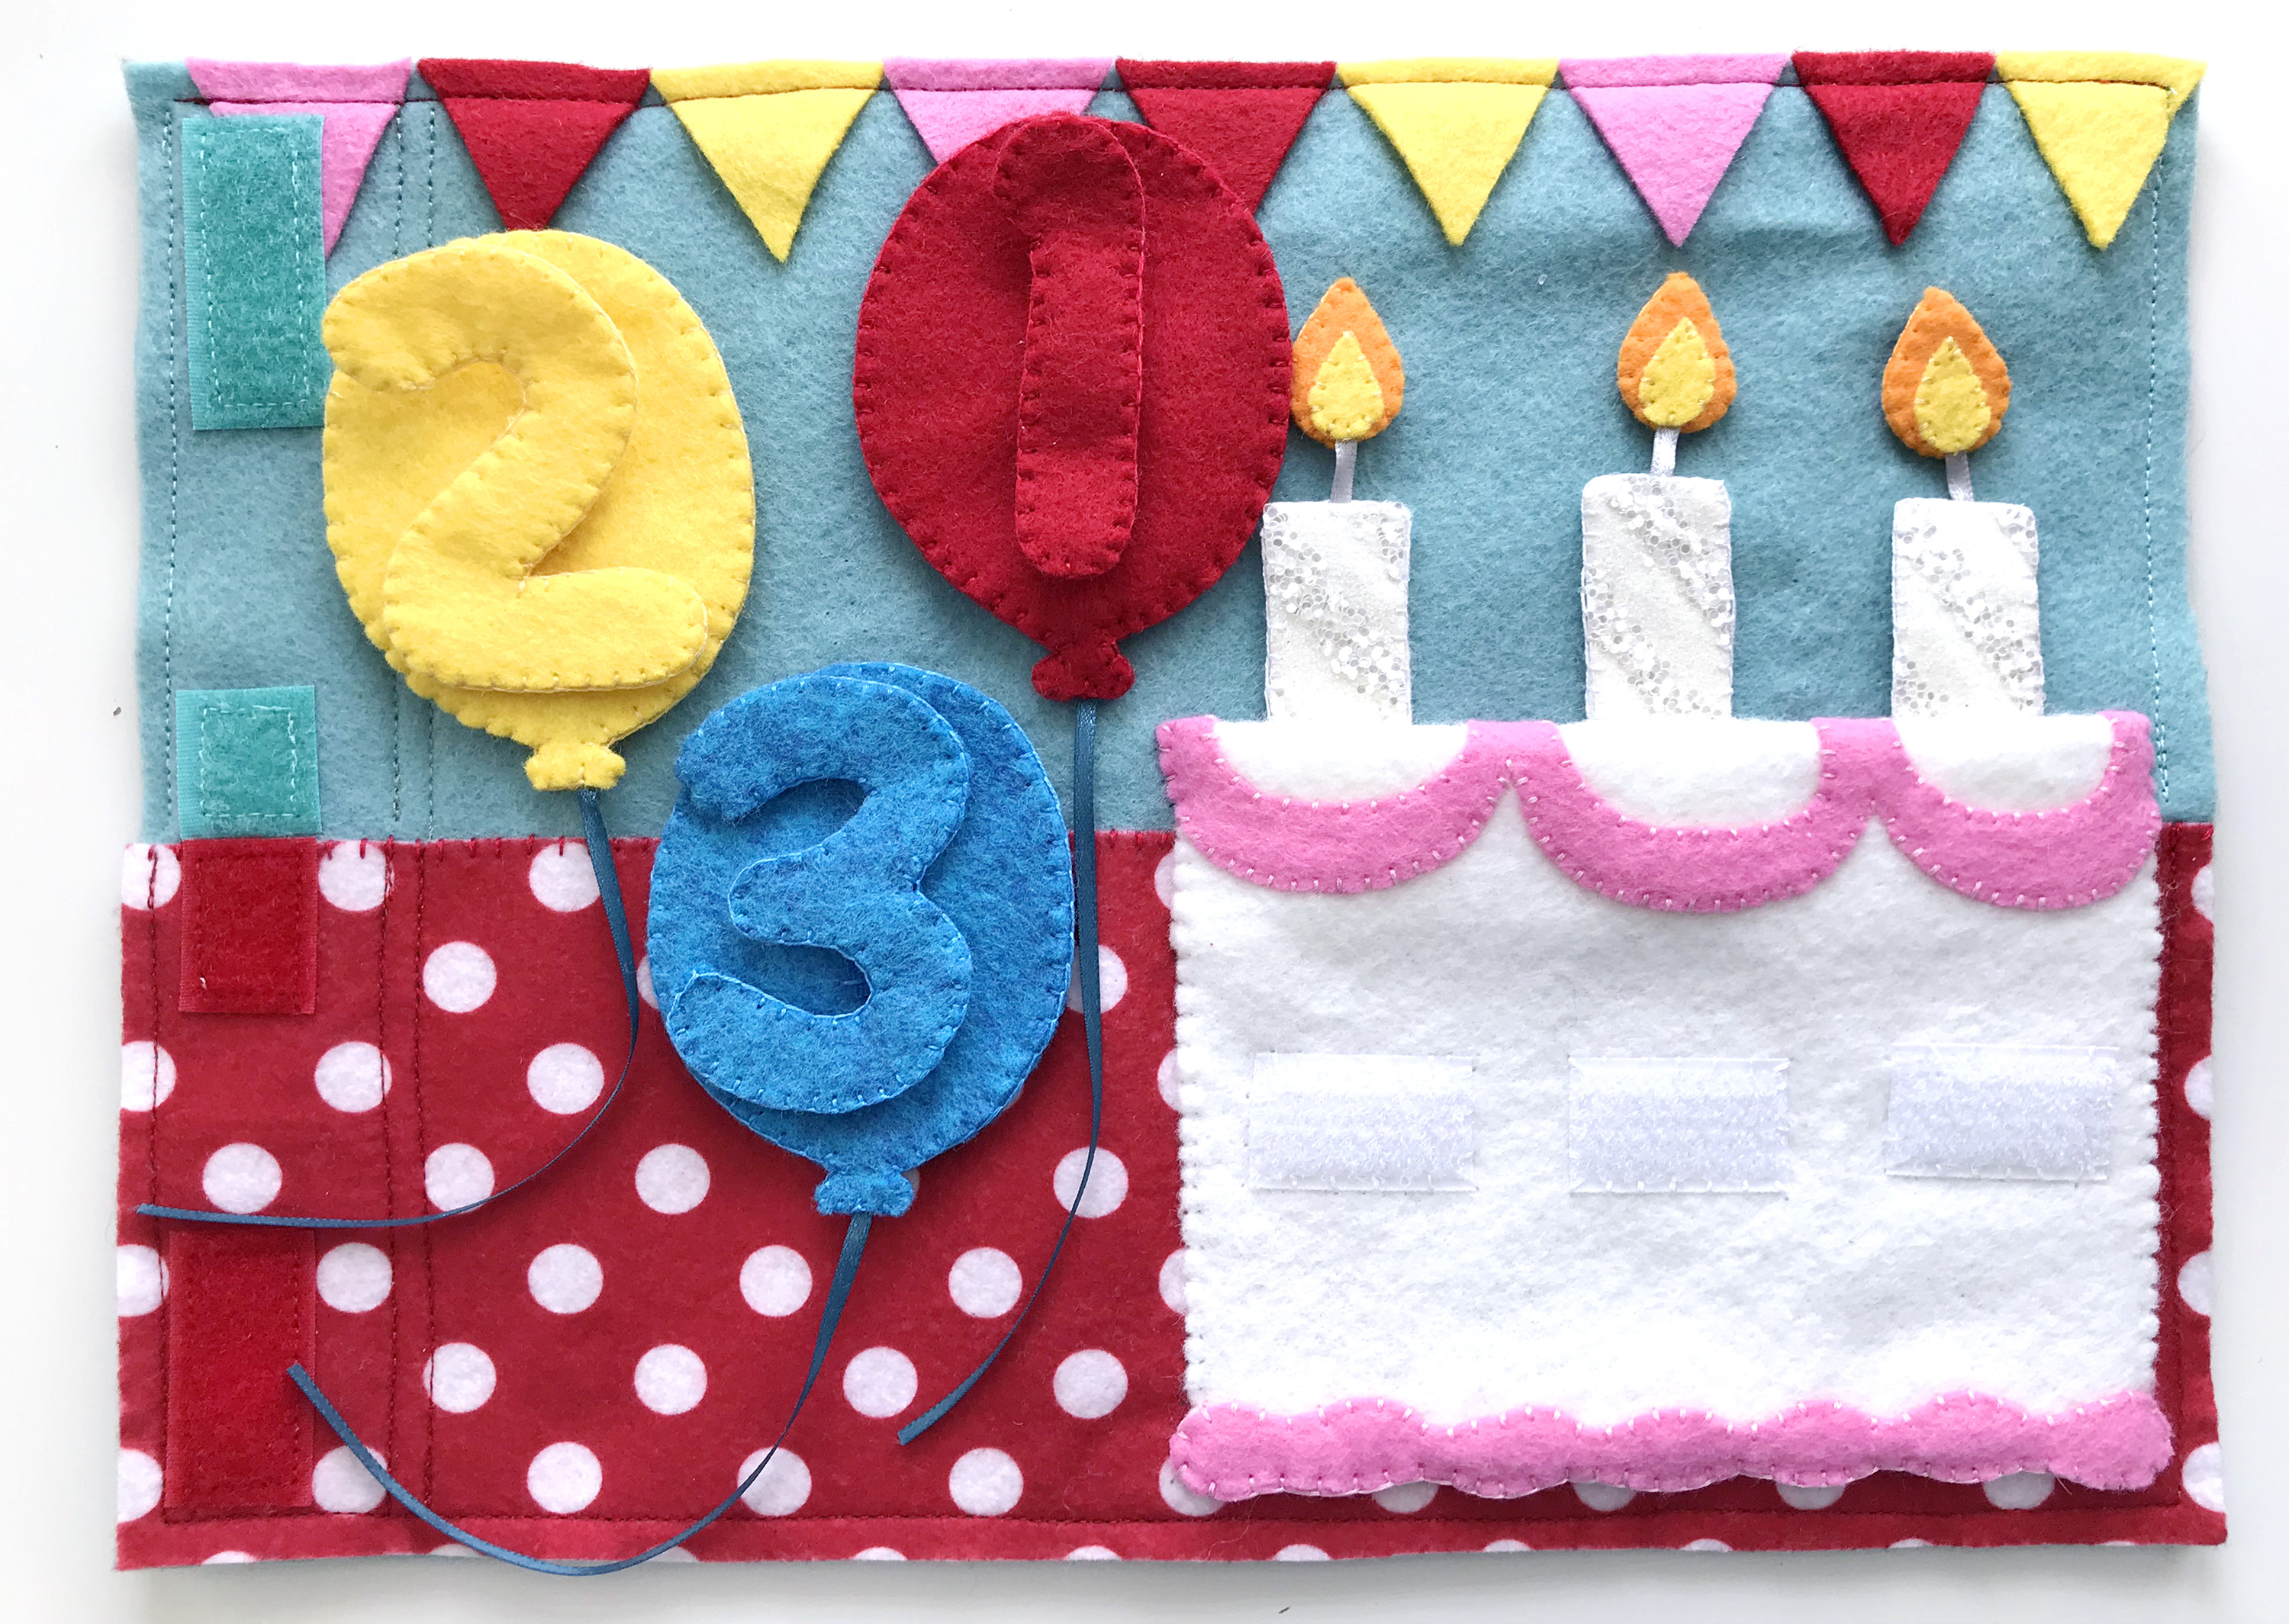
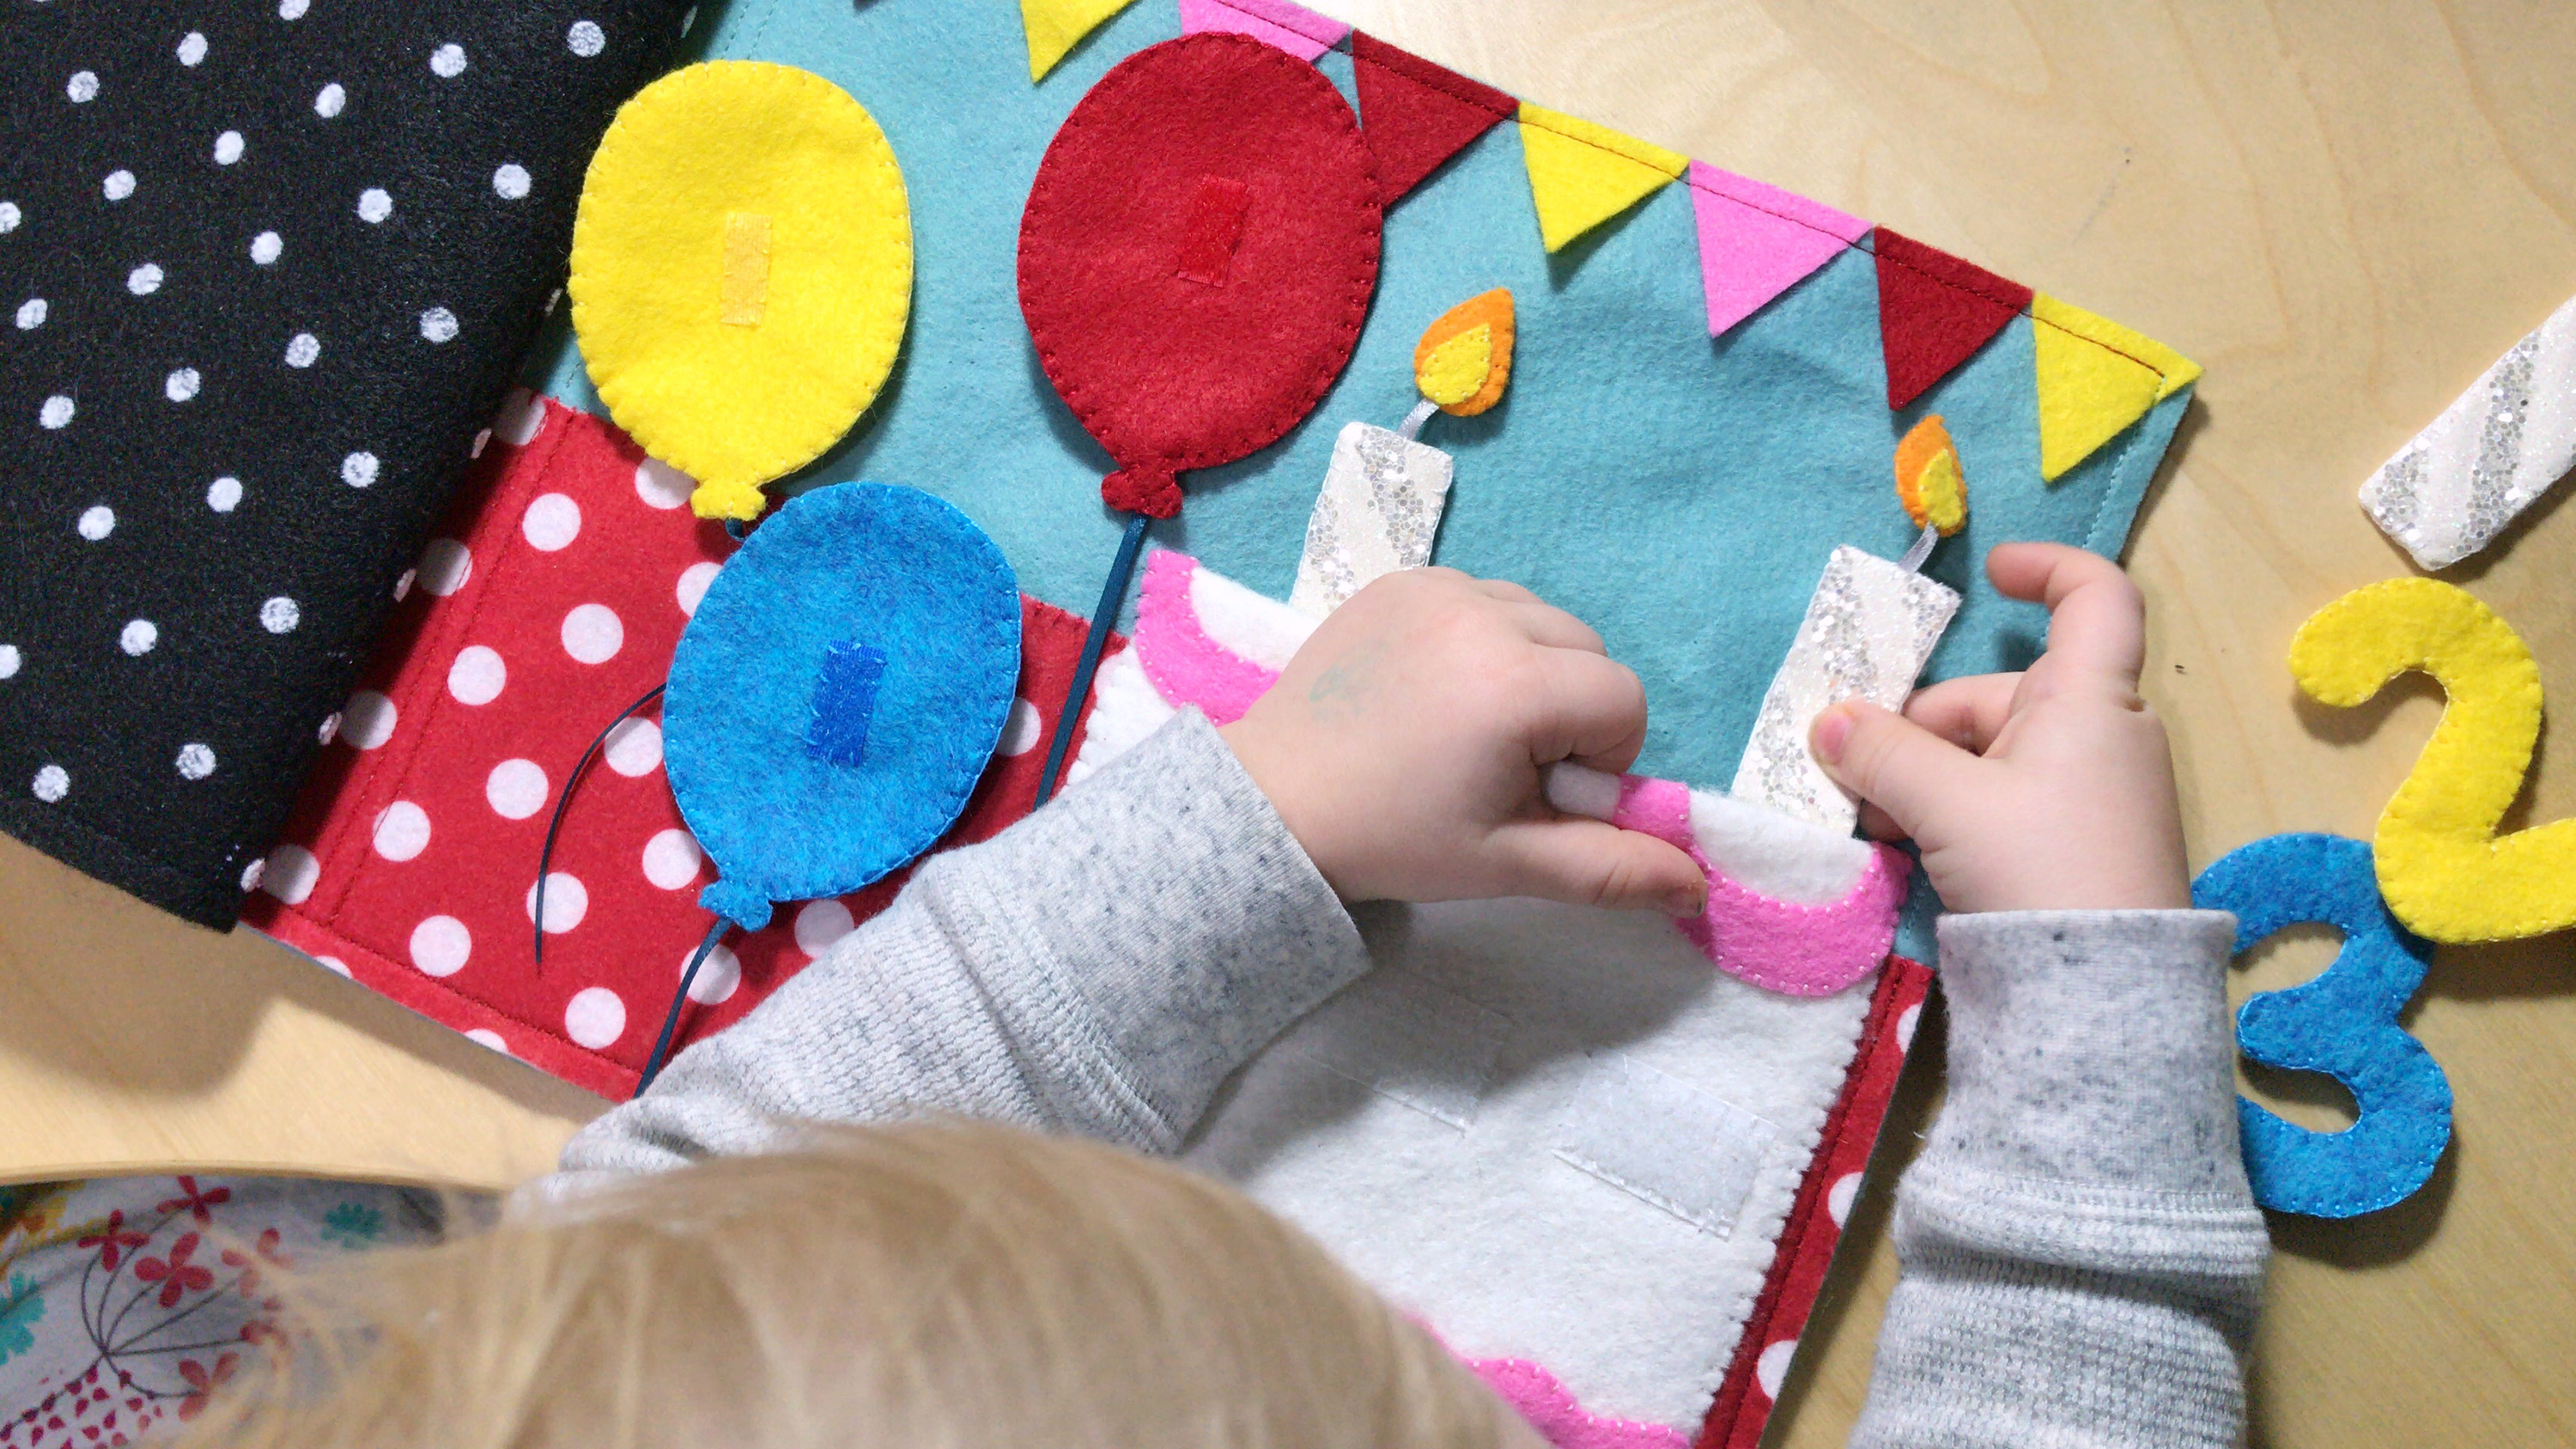
This page is a birthday page you could place anywhere in the holiday book, or make it as a stand-alone page. You can convert it to a 2-page spread by having two background pages and moving the balloons to the second page. It is an easy page to swap up the colors on, though I do like having the primary colors for the balloons and numbers.
To make this page I used:
The Pattern: download it here
Felt in: aqua, red polka dot, flamingo, orange juice, lemon, big apple, white, pool party, and glitter stripe
Sequins in: white snag-free, red, yellow, and blue
Assorted Ribbon: I used thin teal ribbon for the balloons and thin silver for the candle wicks.
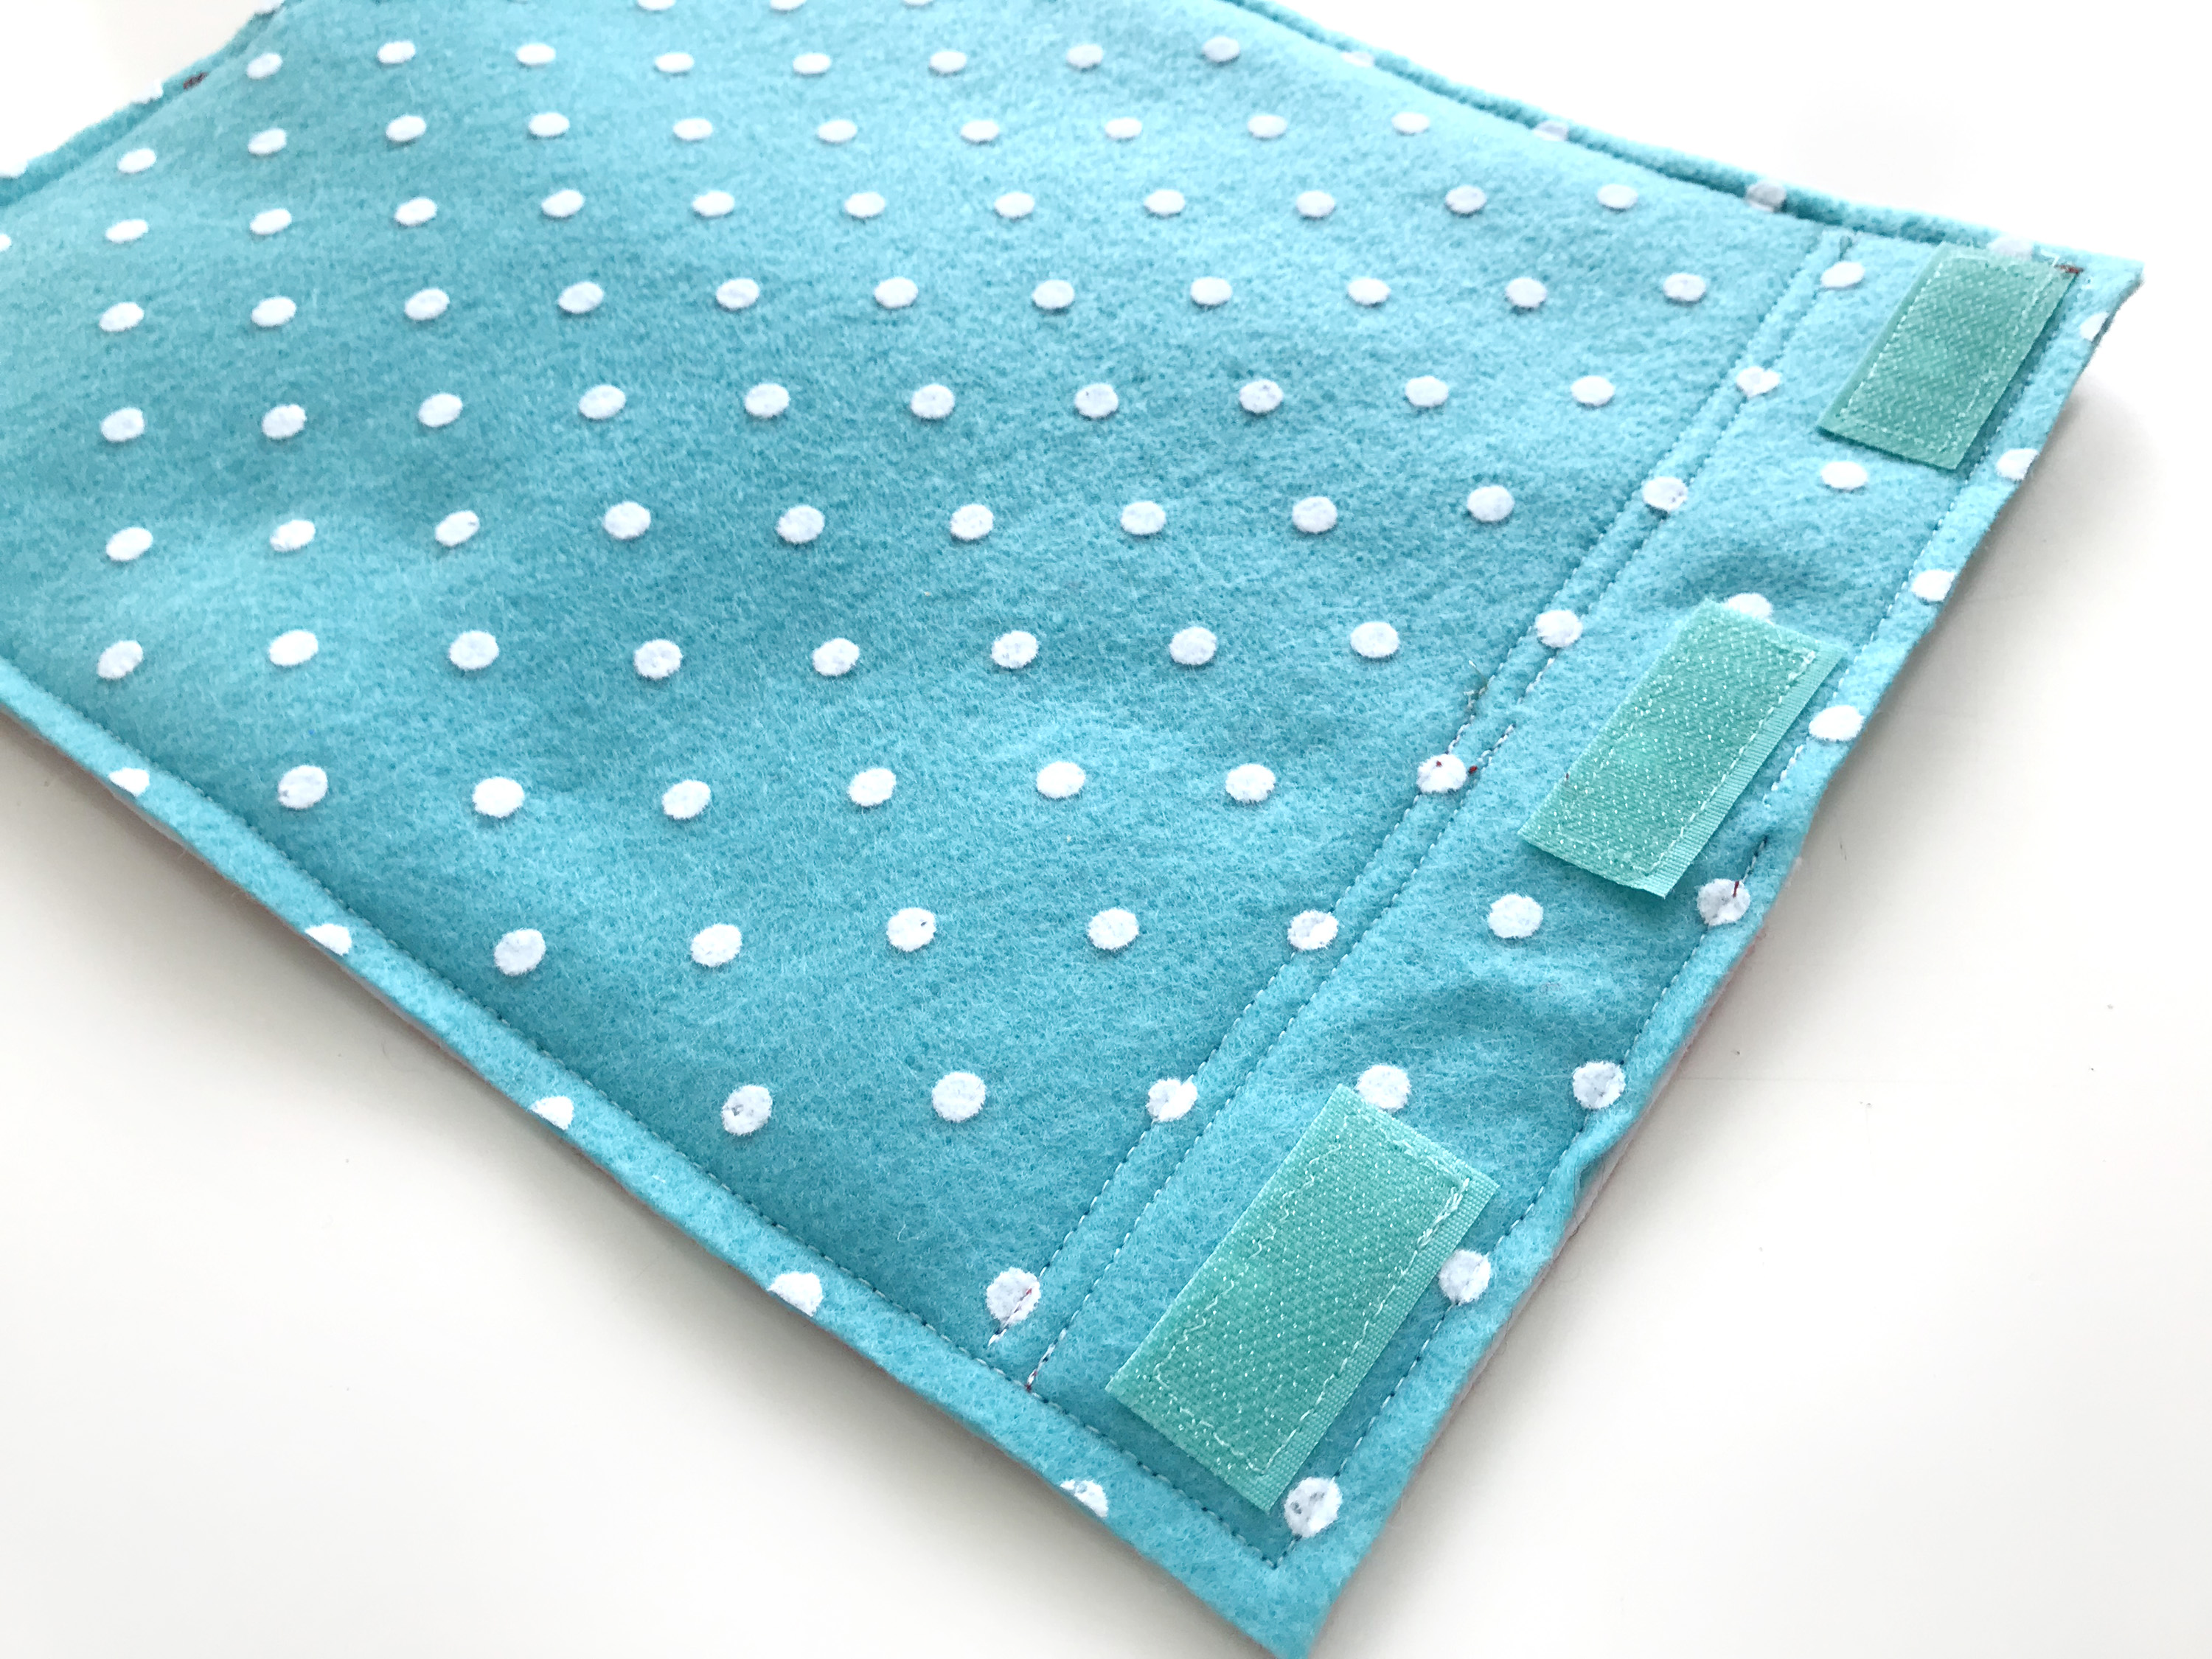
Your Choice of Binding Method: I’ve always used 3 grommets, but I’m testing out three 2″ hook & loop strips.
Other: felt glue and embroidery floss to match felt
Sewing the Background
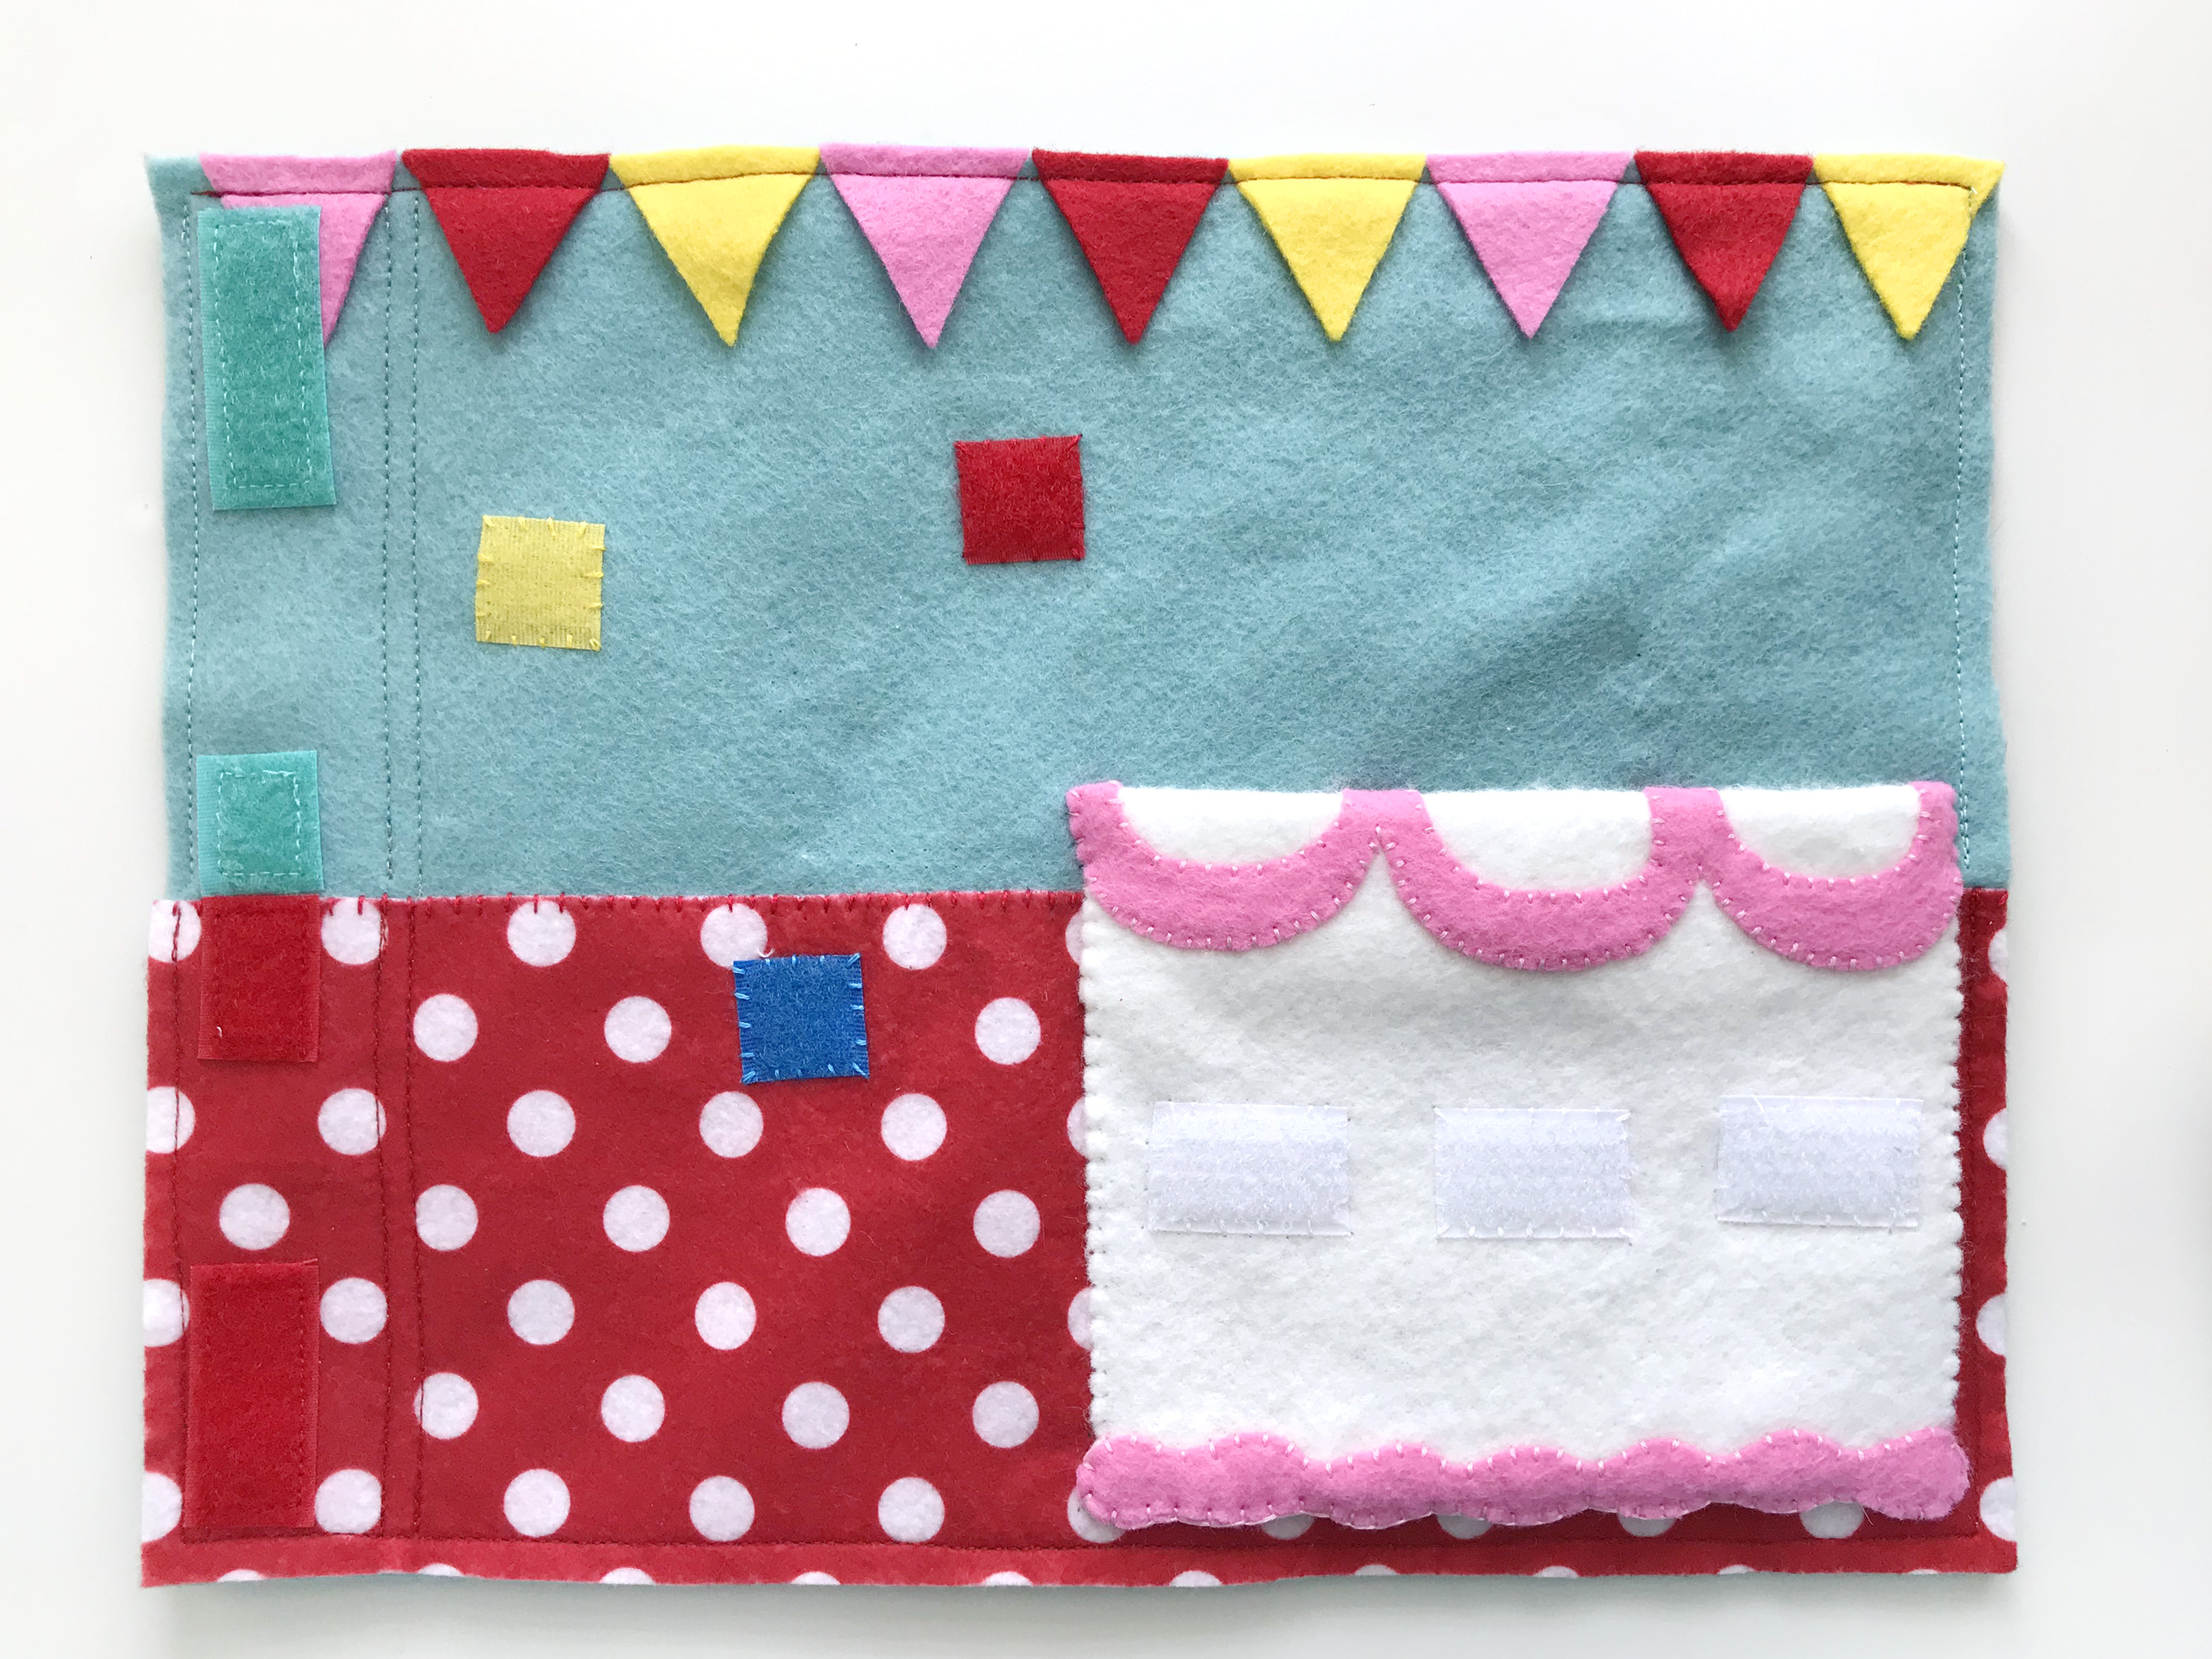
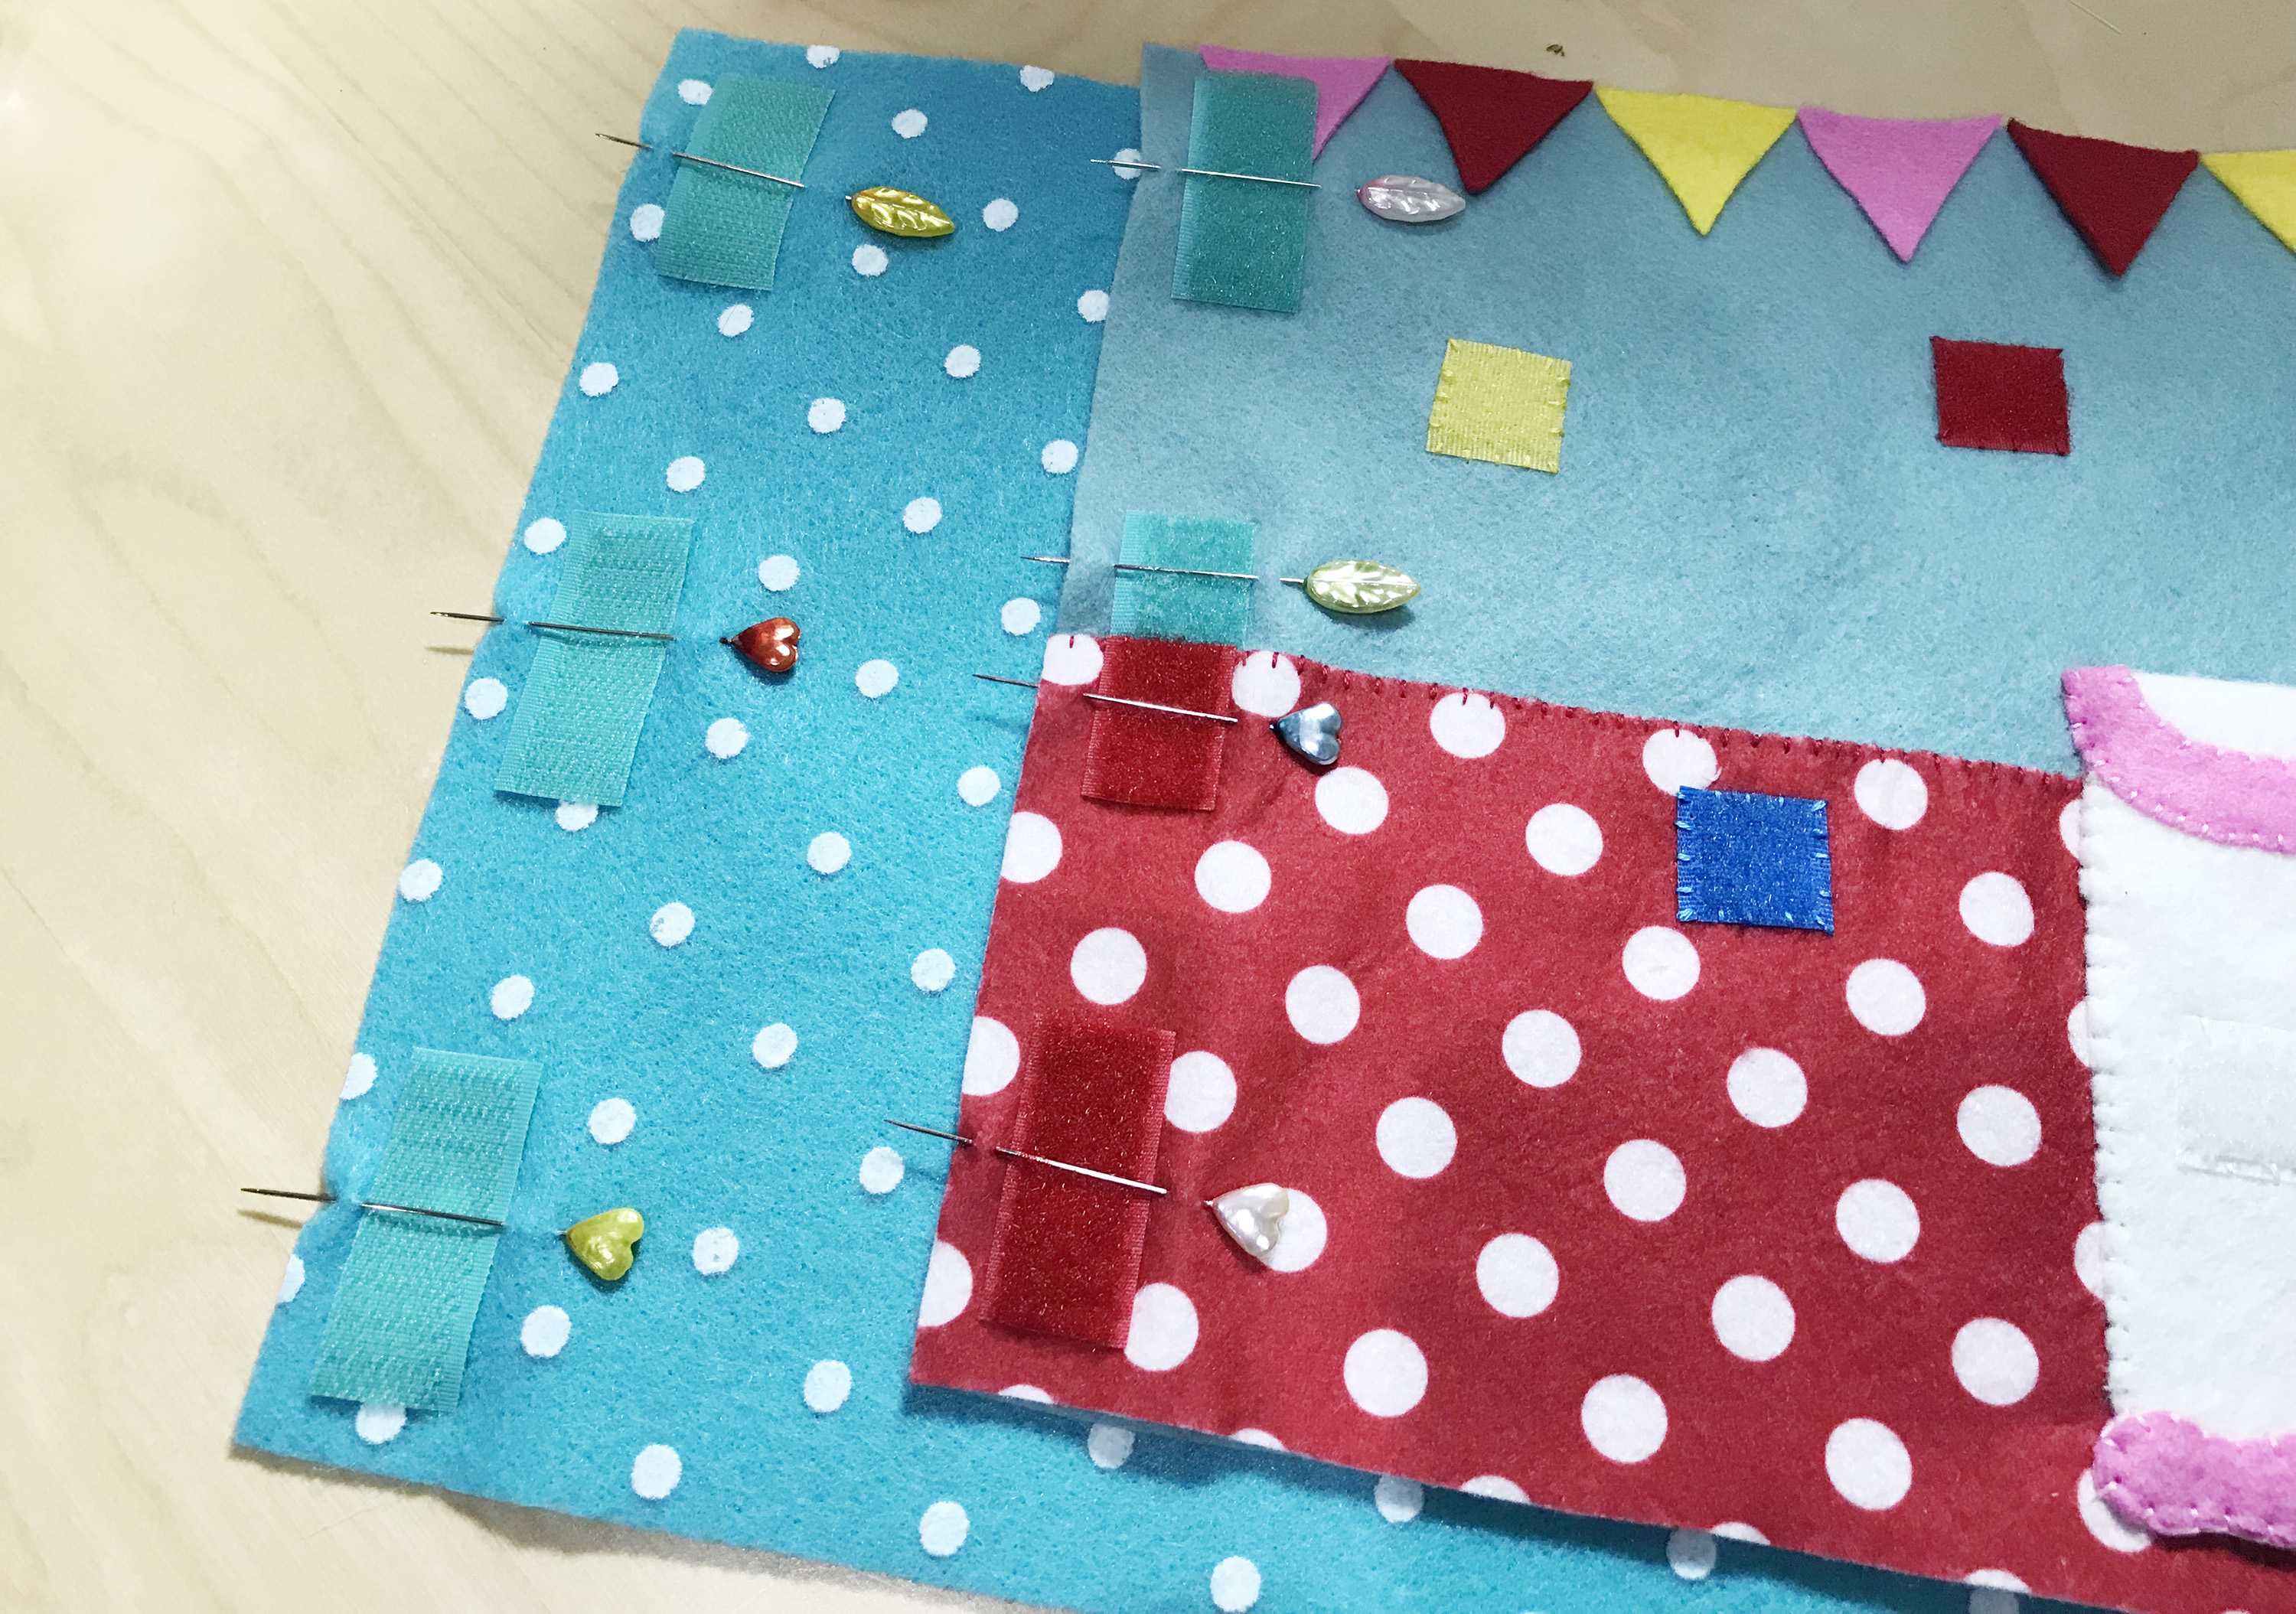
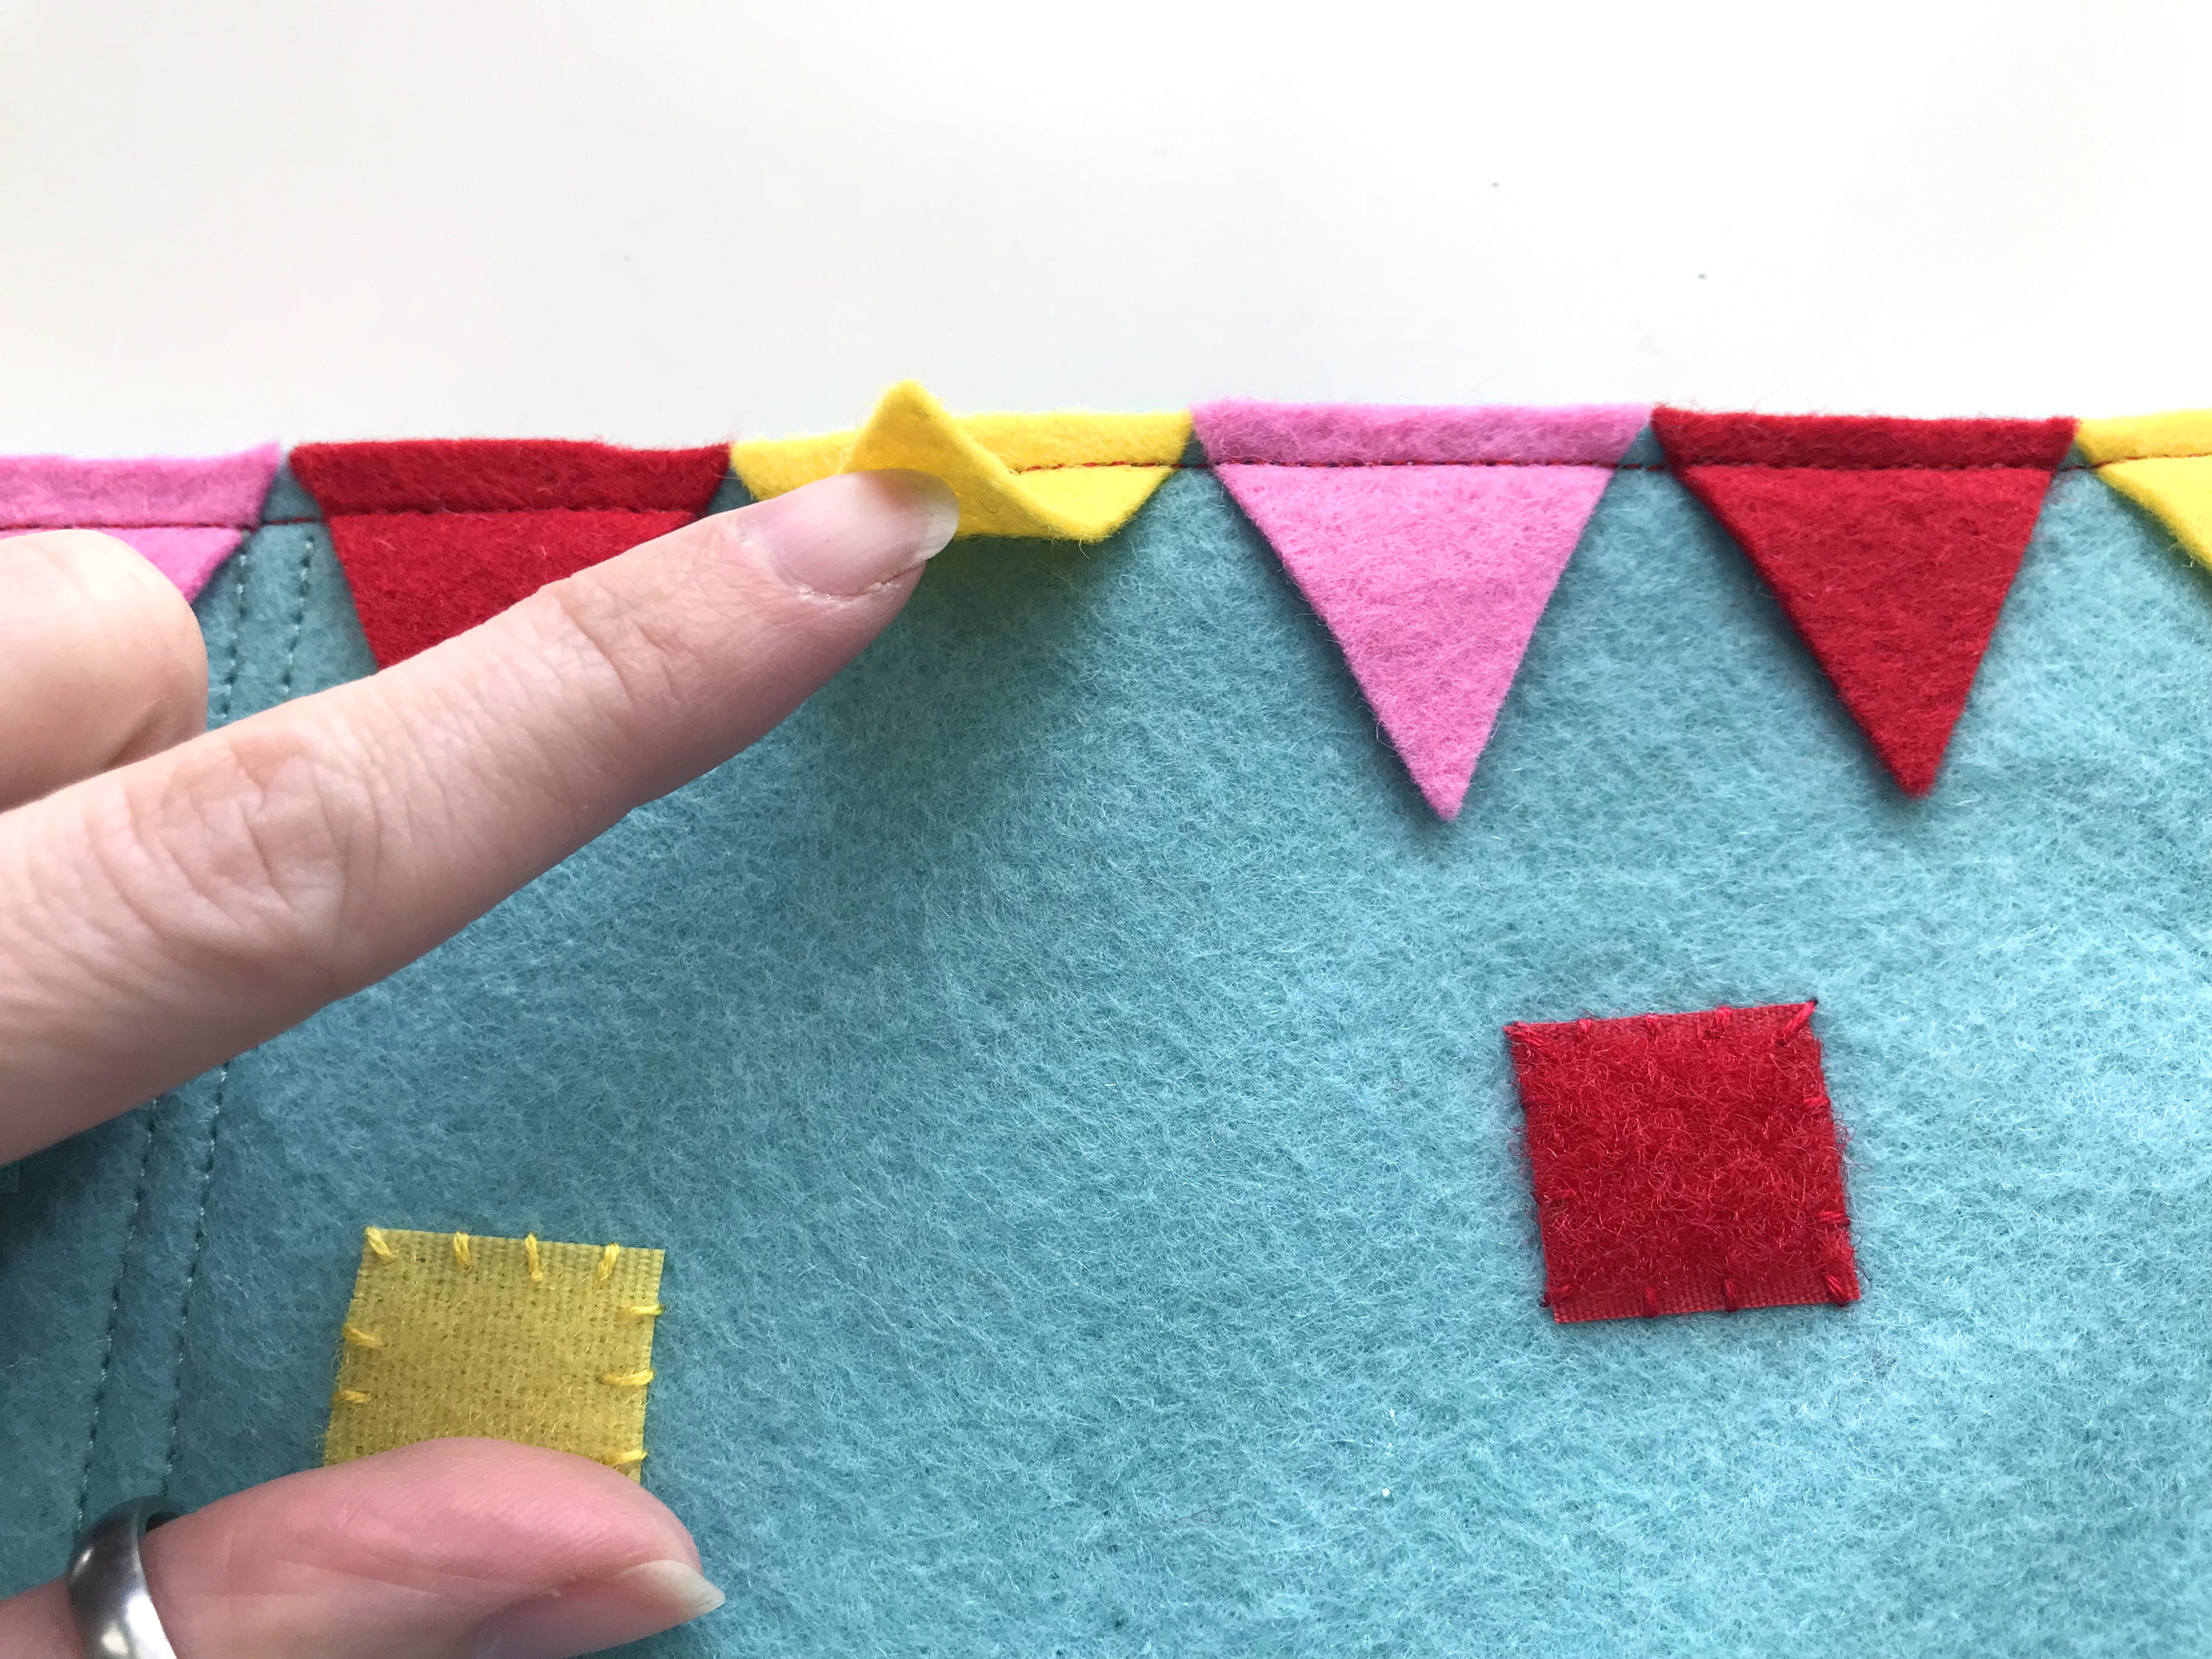
I used an appliqué stitch to sew down red polka dot felt onto the lower half of the page (mine was 12″ wide by 4.5″ high.) Refer to the picture above for where to sew three colored squares of hook and loop (soft side) for the balloons. I recommend doing that after the cake and balloons are sewn so you know everything has room.
To attach the triangle flags, I just did a light line of glue across the top to tack them on to the top of the page. They got sewn down when I attached the backing onto the page with my sewing machine.
Sewing the Cake
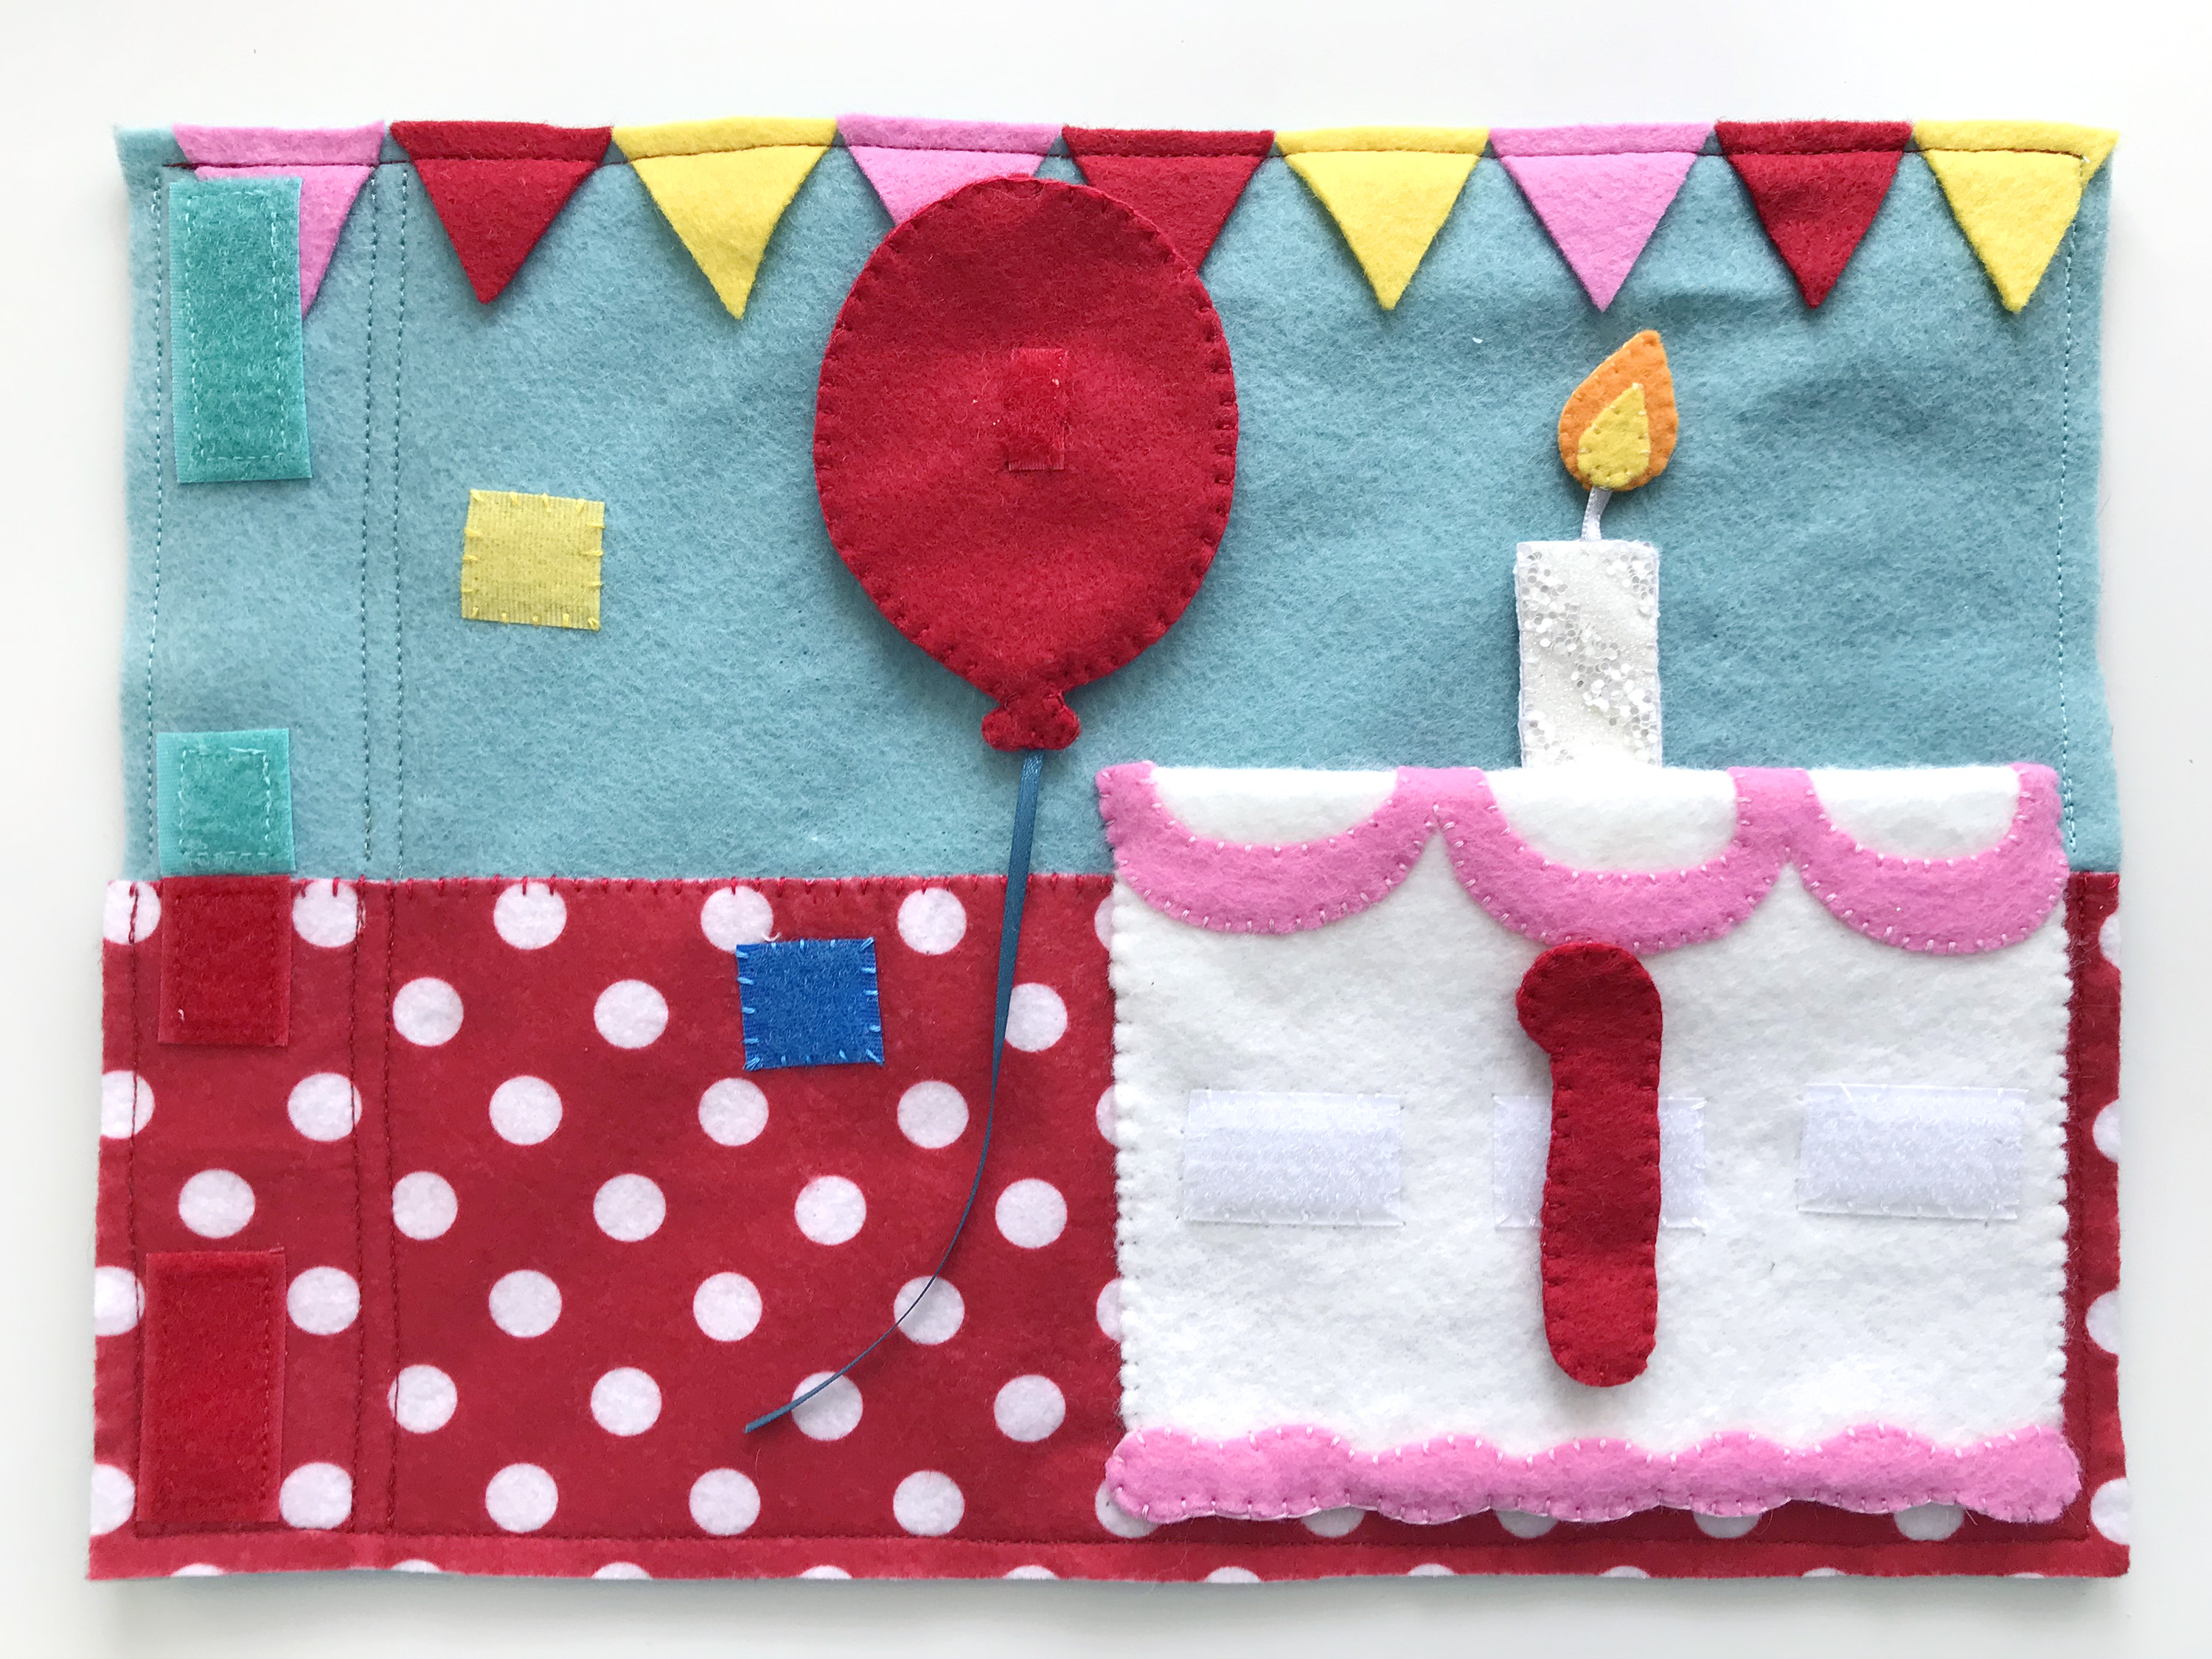
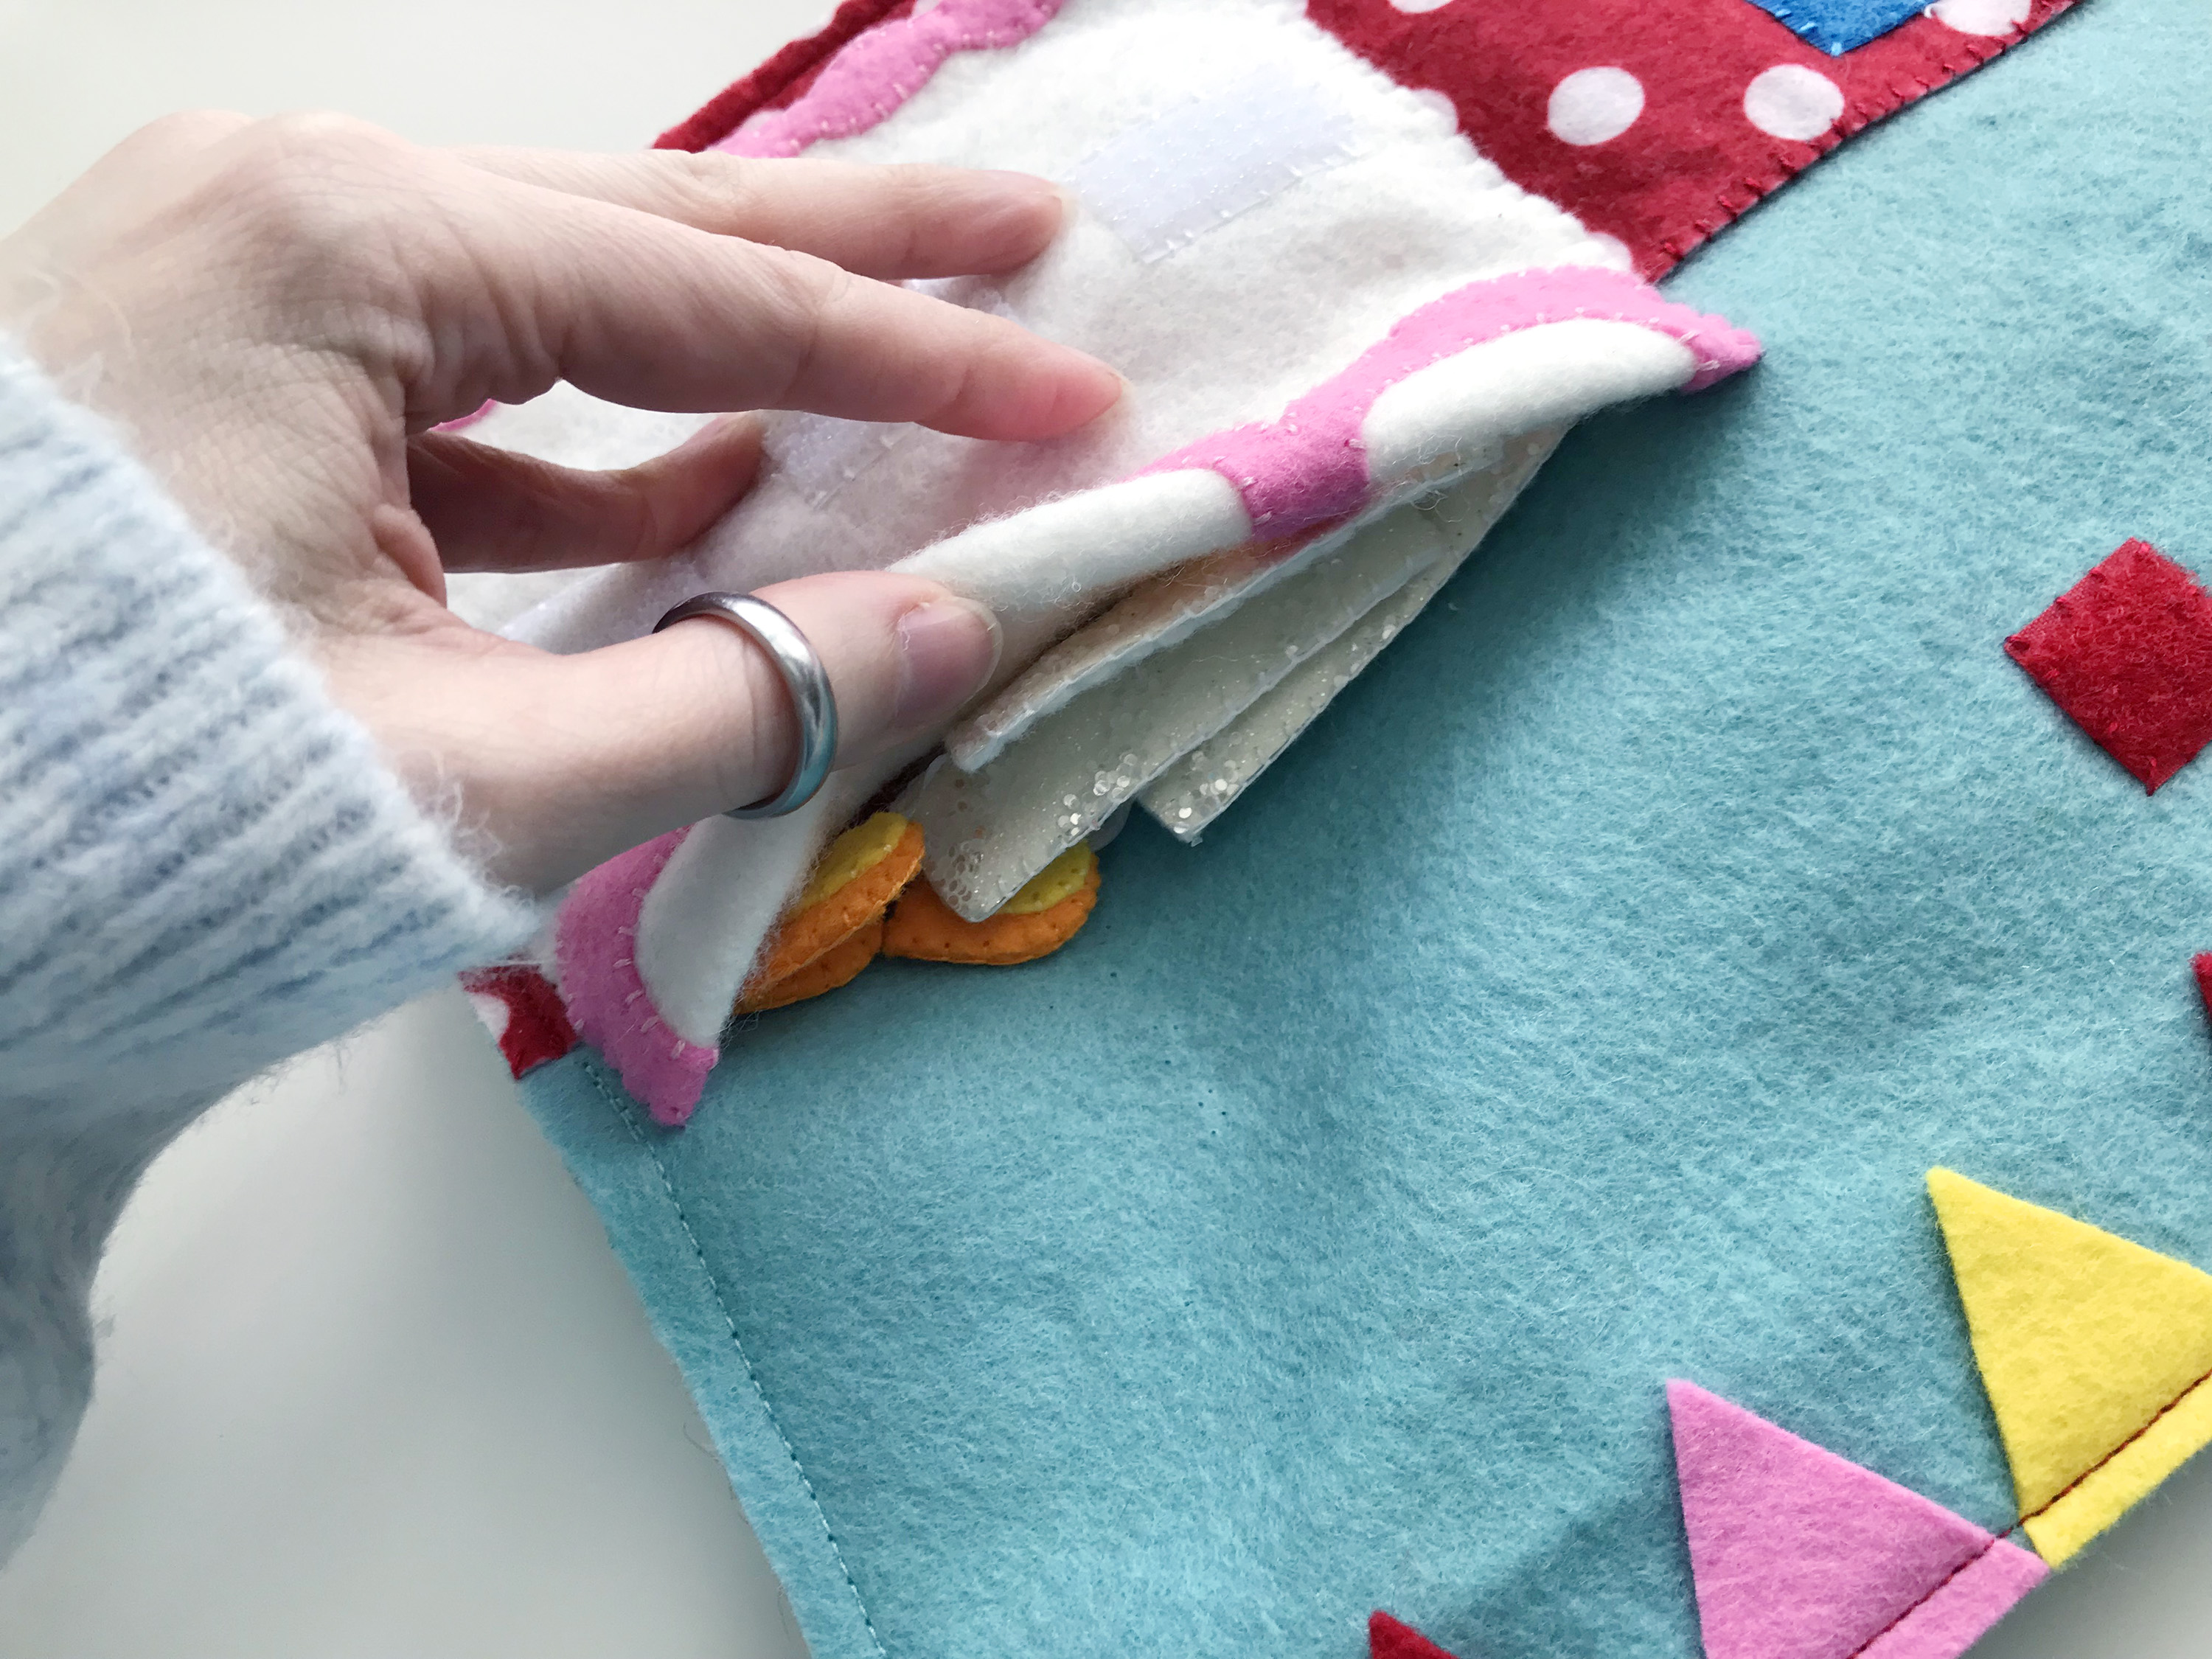
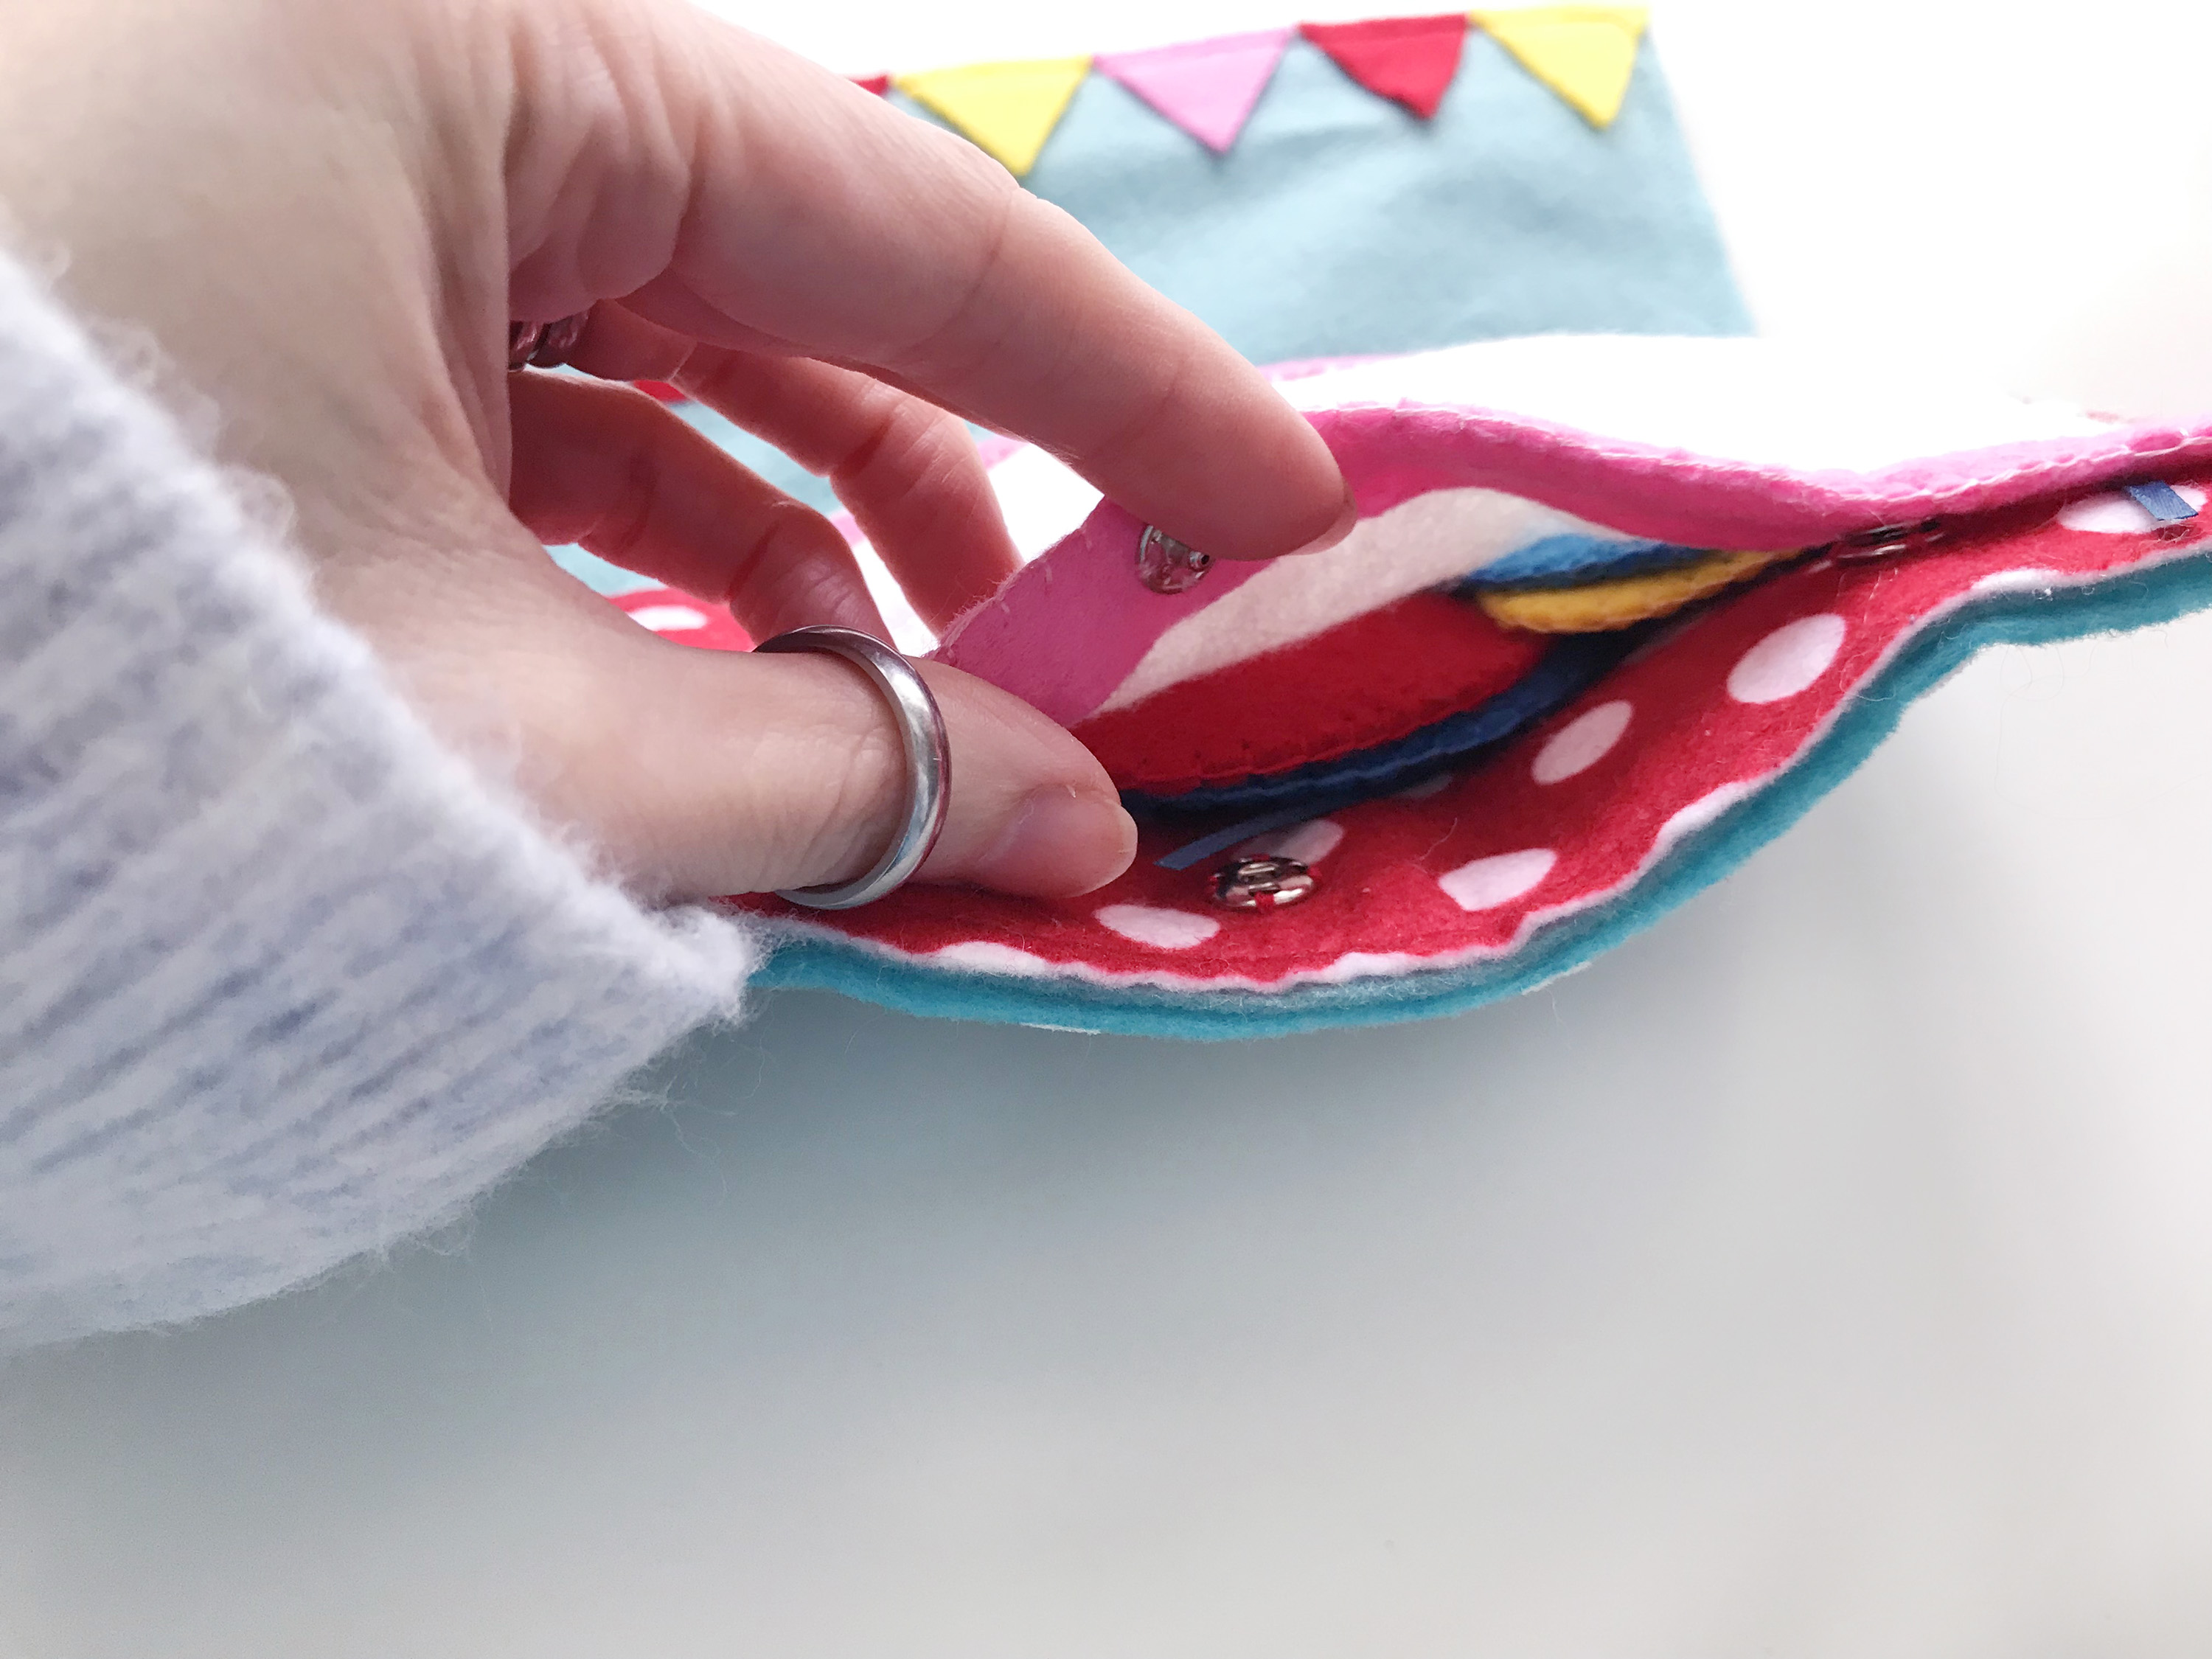
The cake is actually a bit more complicated then it looks. It has a shallow open pocket on the top and the rest is a pocket you access from the bottom and snap closed.
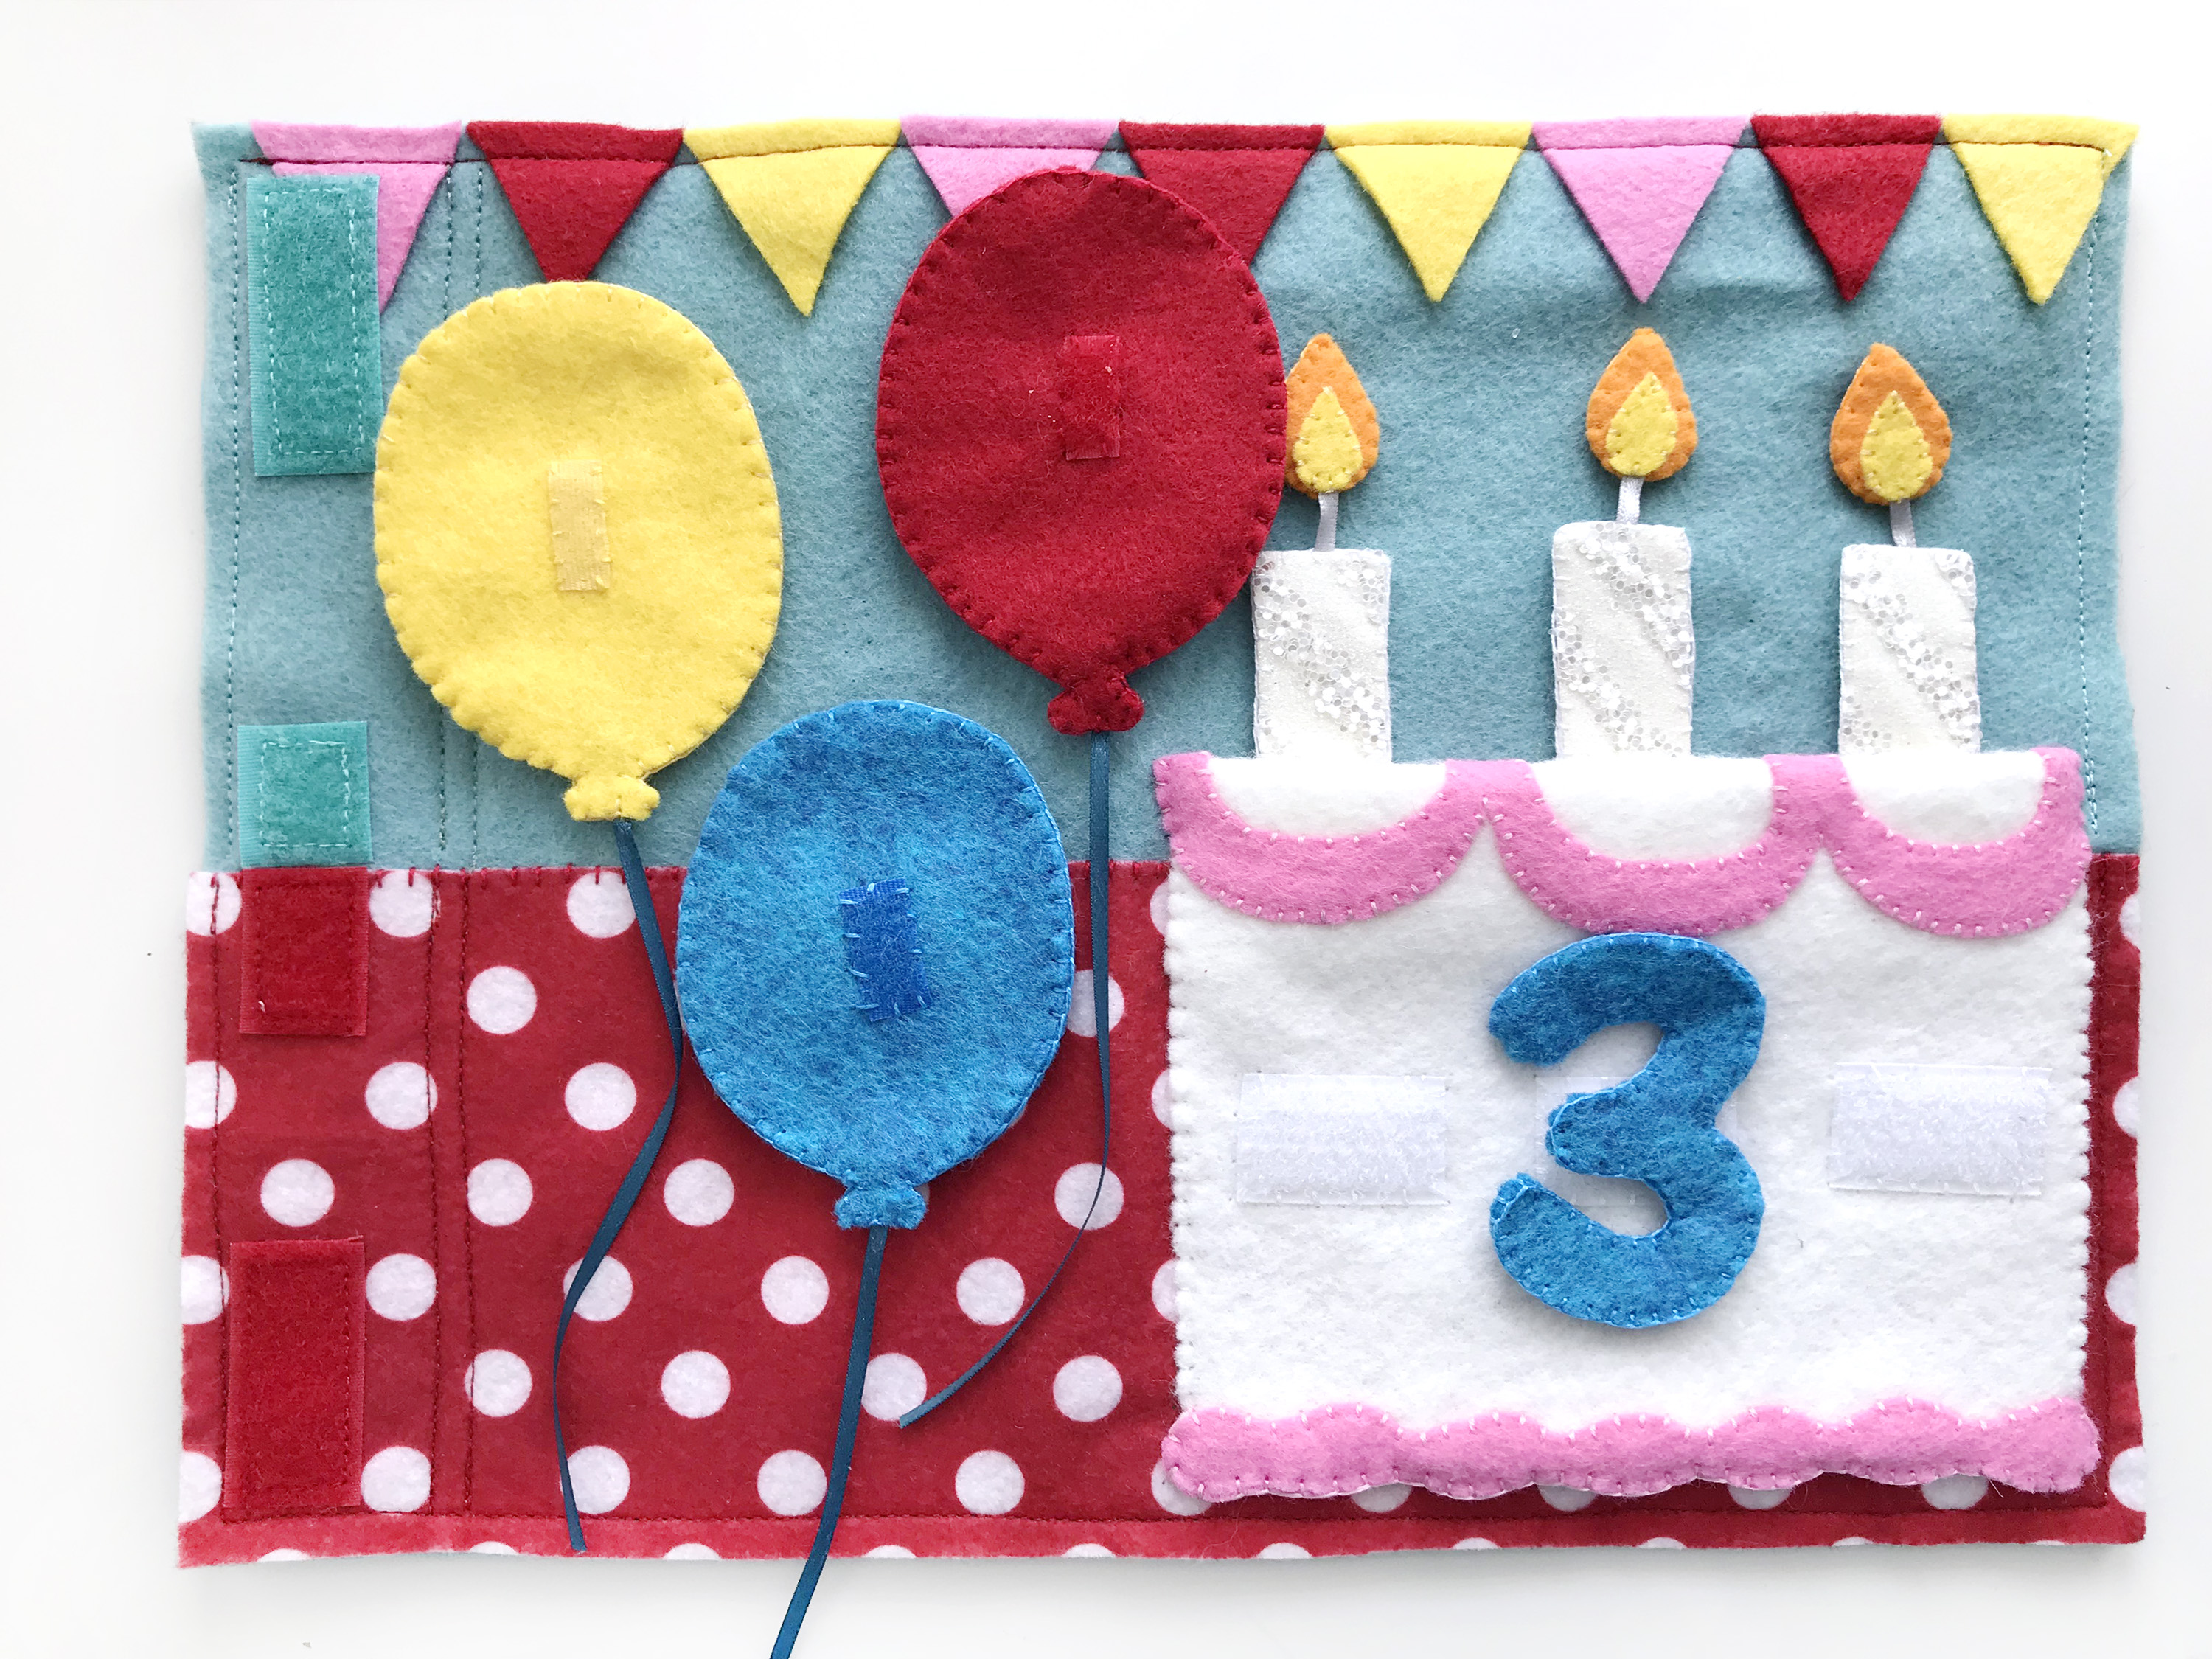
Start by decorating the cake. Sew down the icing swap and the top edge of the bottom icing. There is a larger bottom icing piece that goes on the other side of the cake. I glued it down lightly while lining it up with the front bottom icing, then I blanket stitched around the bottom edge through both layers. Sew three white snag free velcro bits onto the cake. I prefer to use snag free wherever I need the rough side of hook and loop on an actual page. Even though it doesn’t quite hold as well as traditional Velcro, the rough side is just too snaggy with felt.
Sew two snaps onto the inner bottom icing to hold the bottom pocket closed. Scroll down to the end of the cake section for a picture of the snaps.
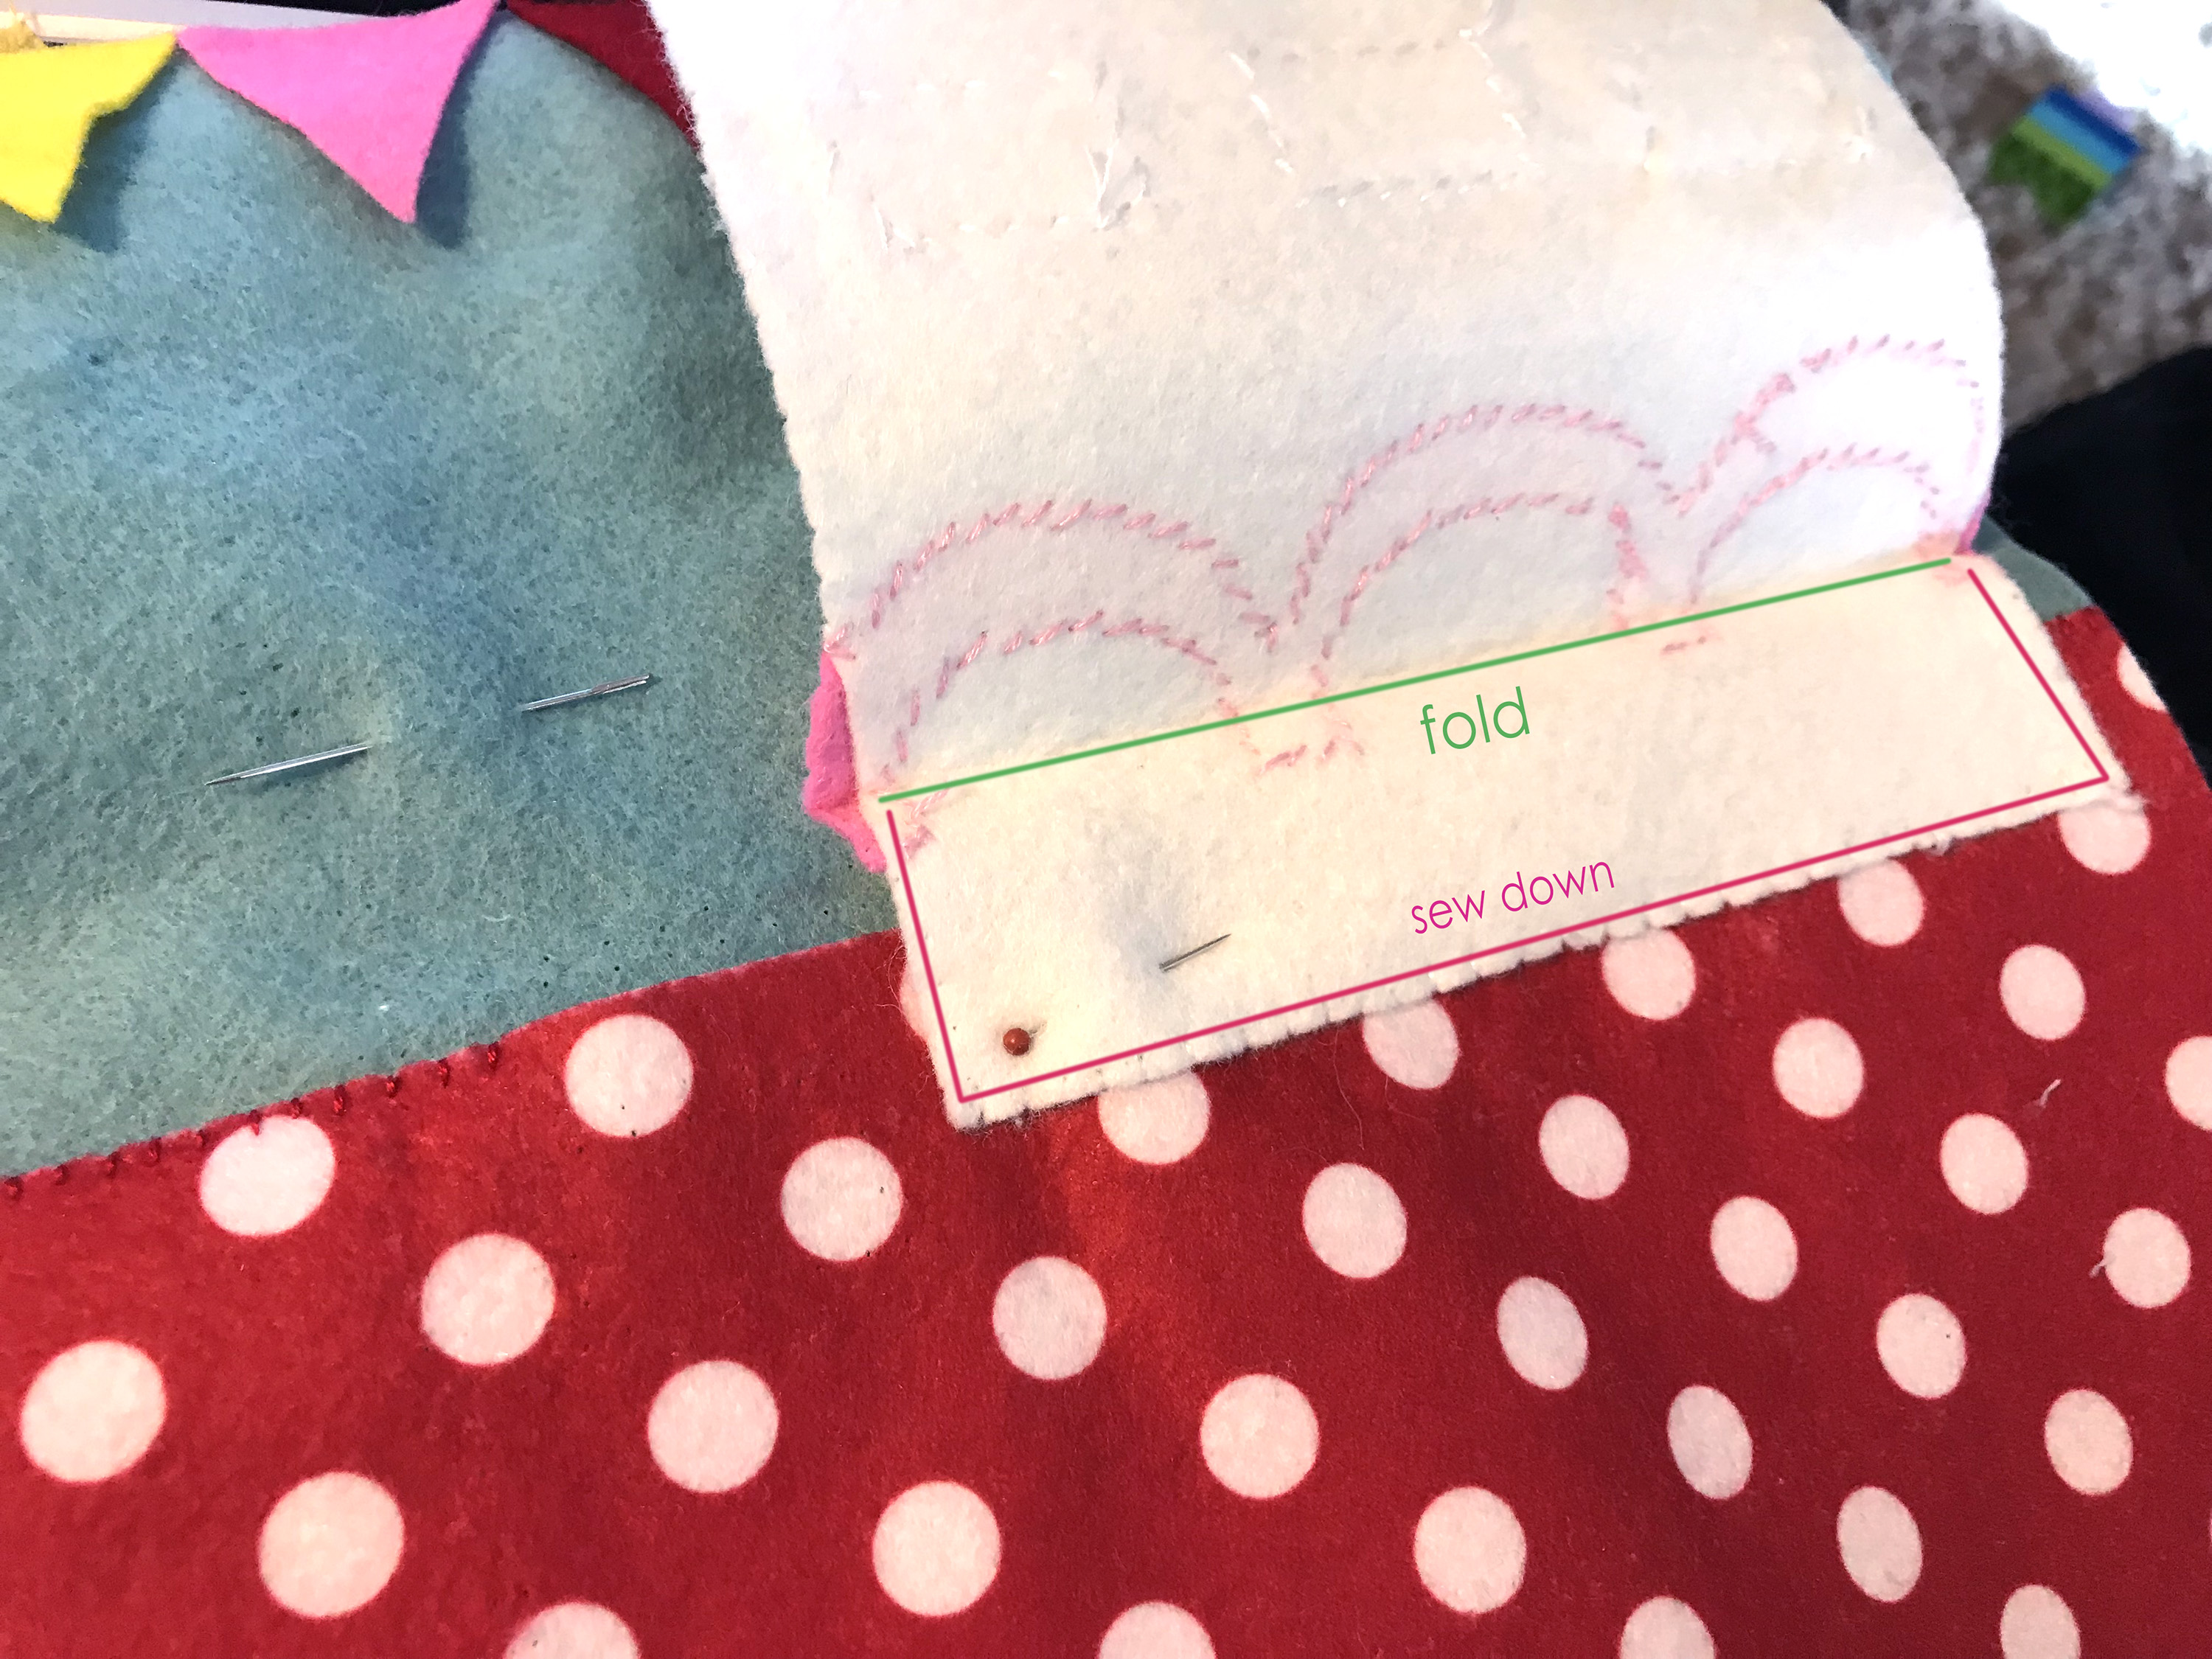
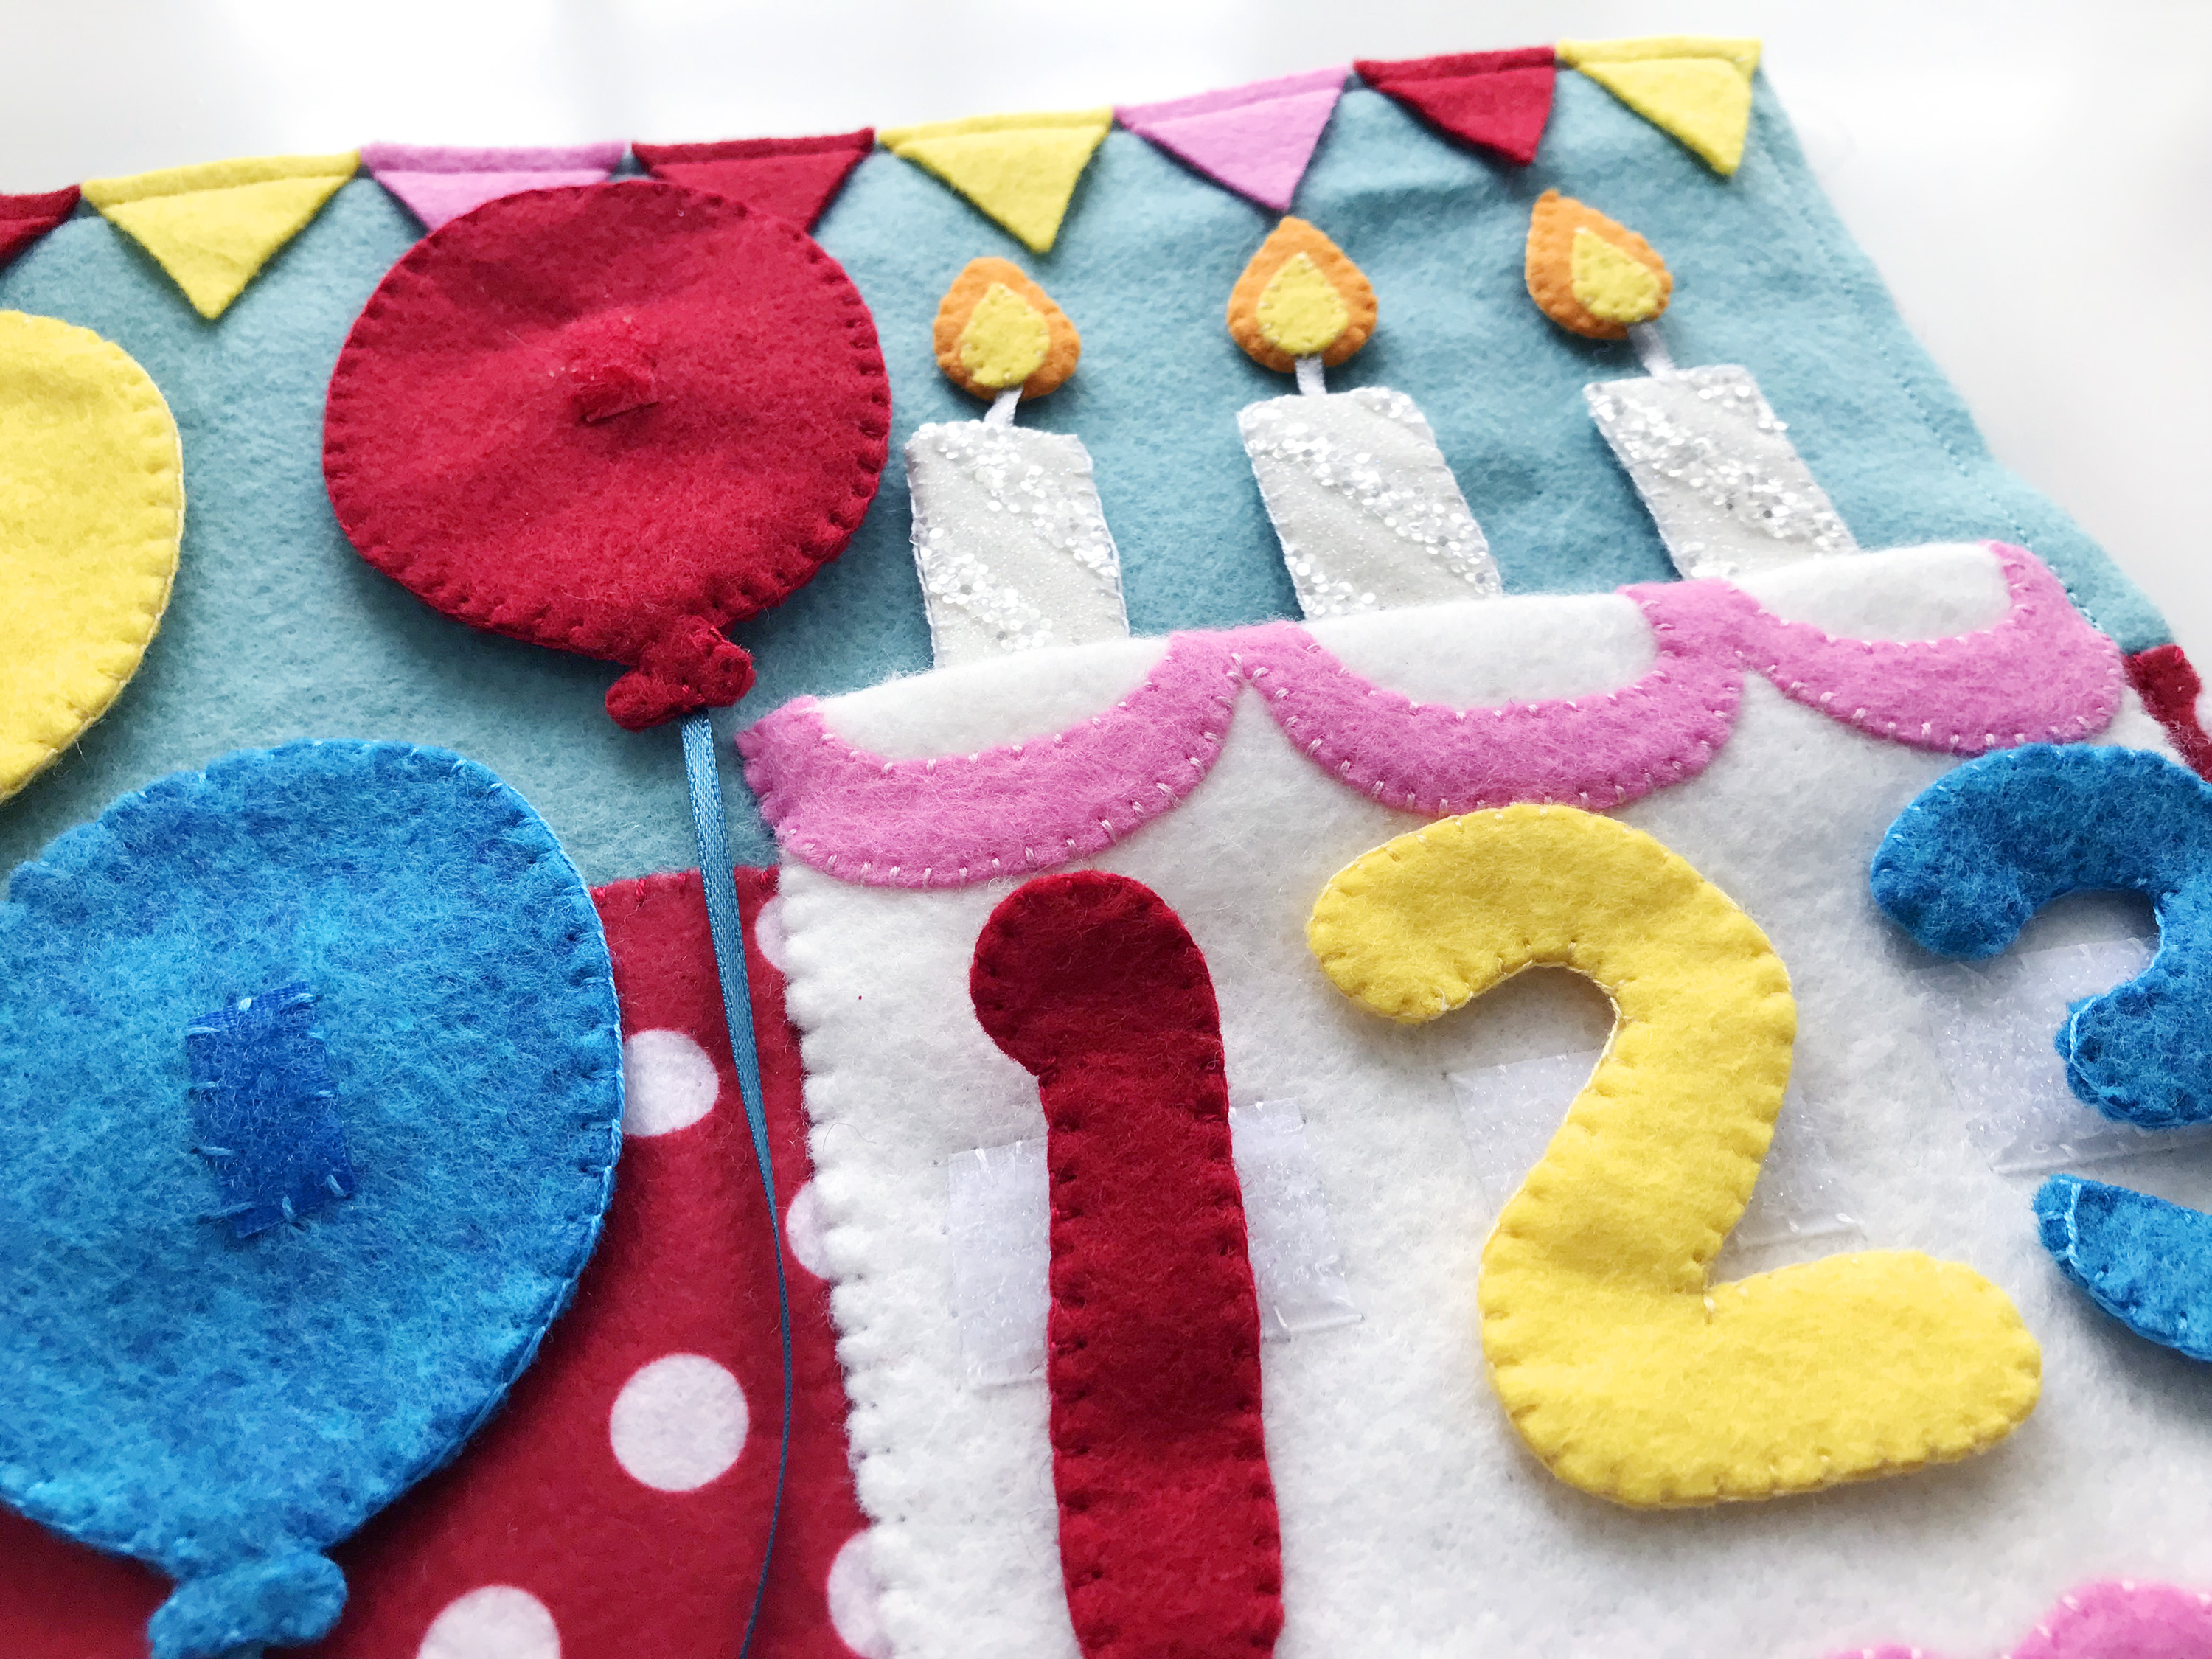
The tricky part is sewing the cake down to the page. You need to make a good crease where shown on the pattern. (I can use a light ironing on my felt, but test yours first! Sometimes using a straight edge to crease it works fine.) Place the cake piece as shown above: upside-down and wrong side facing out with the fold a bit above the table line. Make sure your cake fits well on the page when folded back down before sewing down the three sections shown above in hot pink.
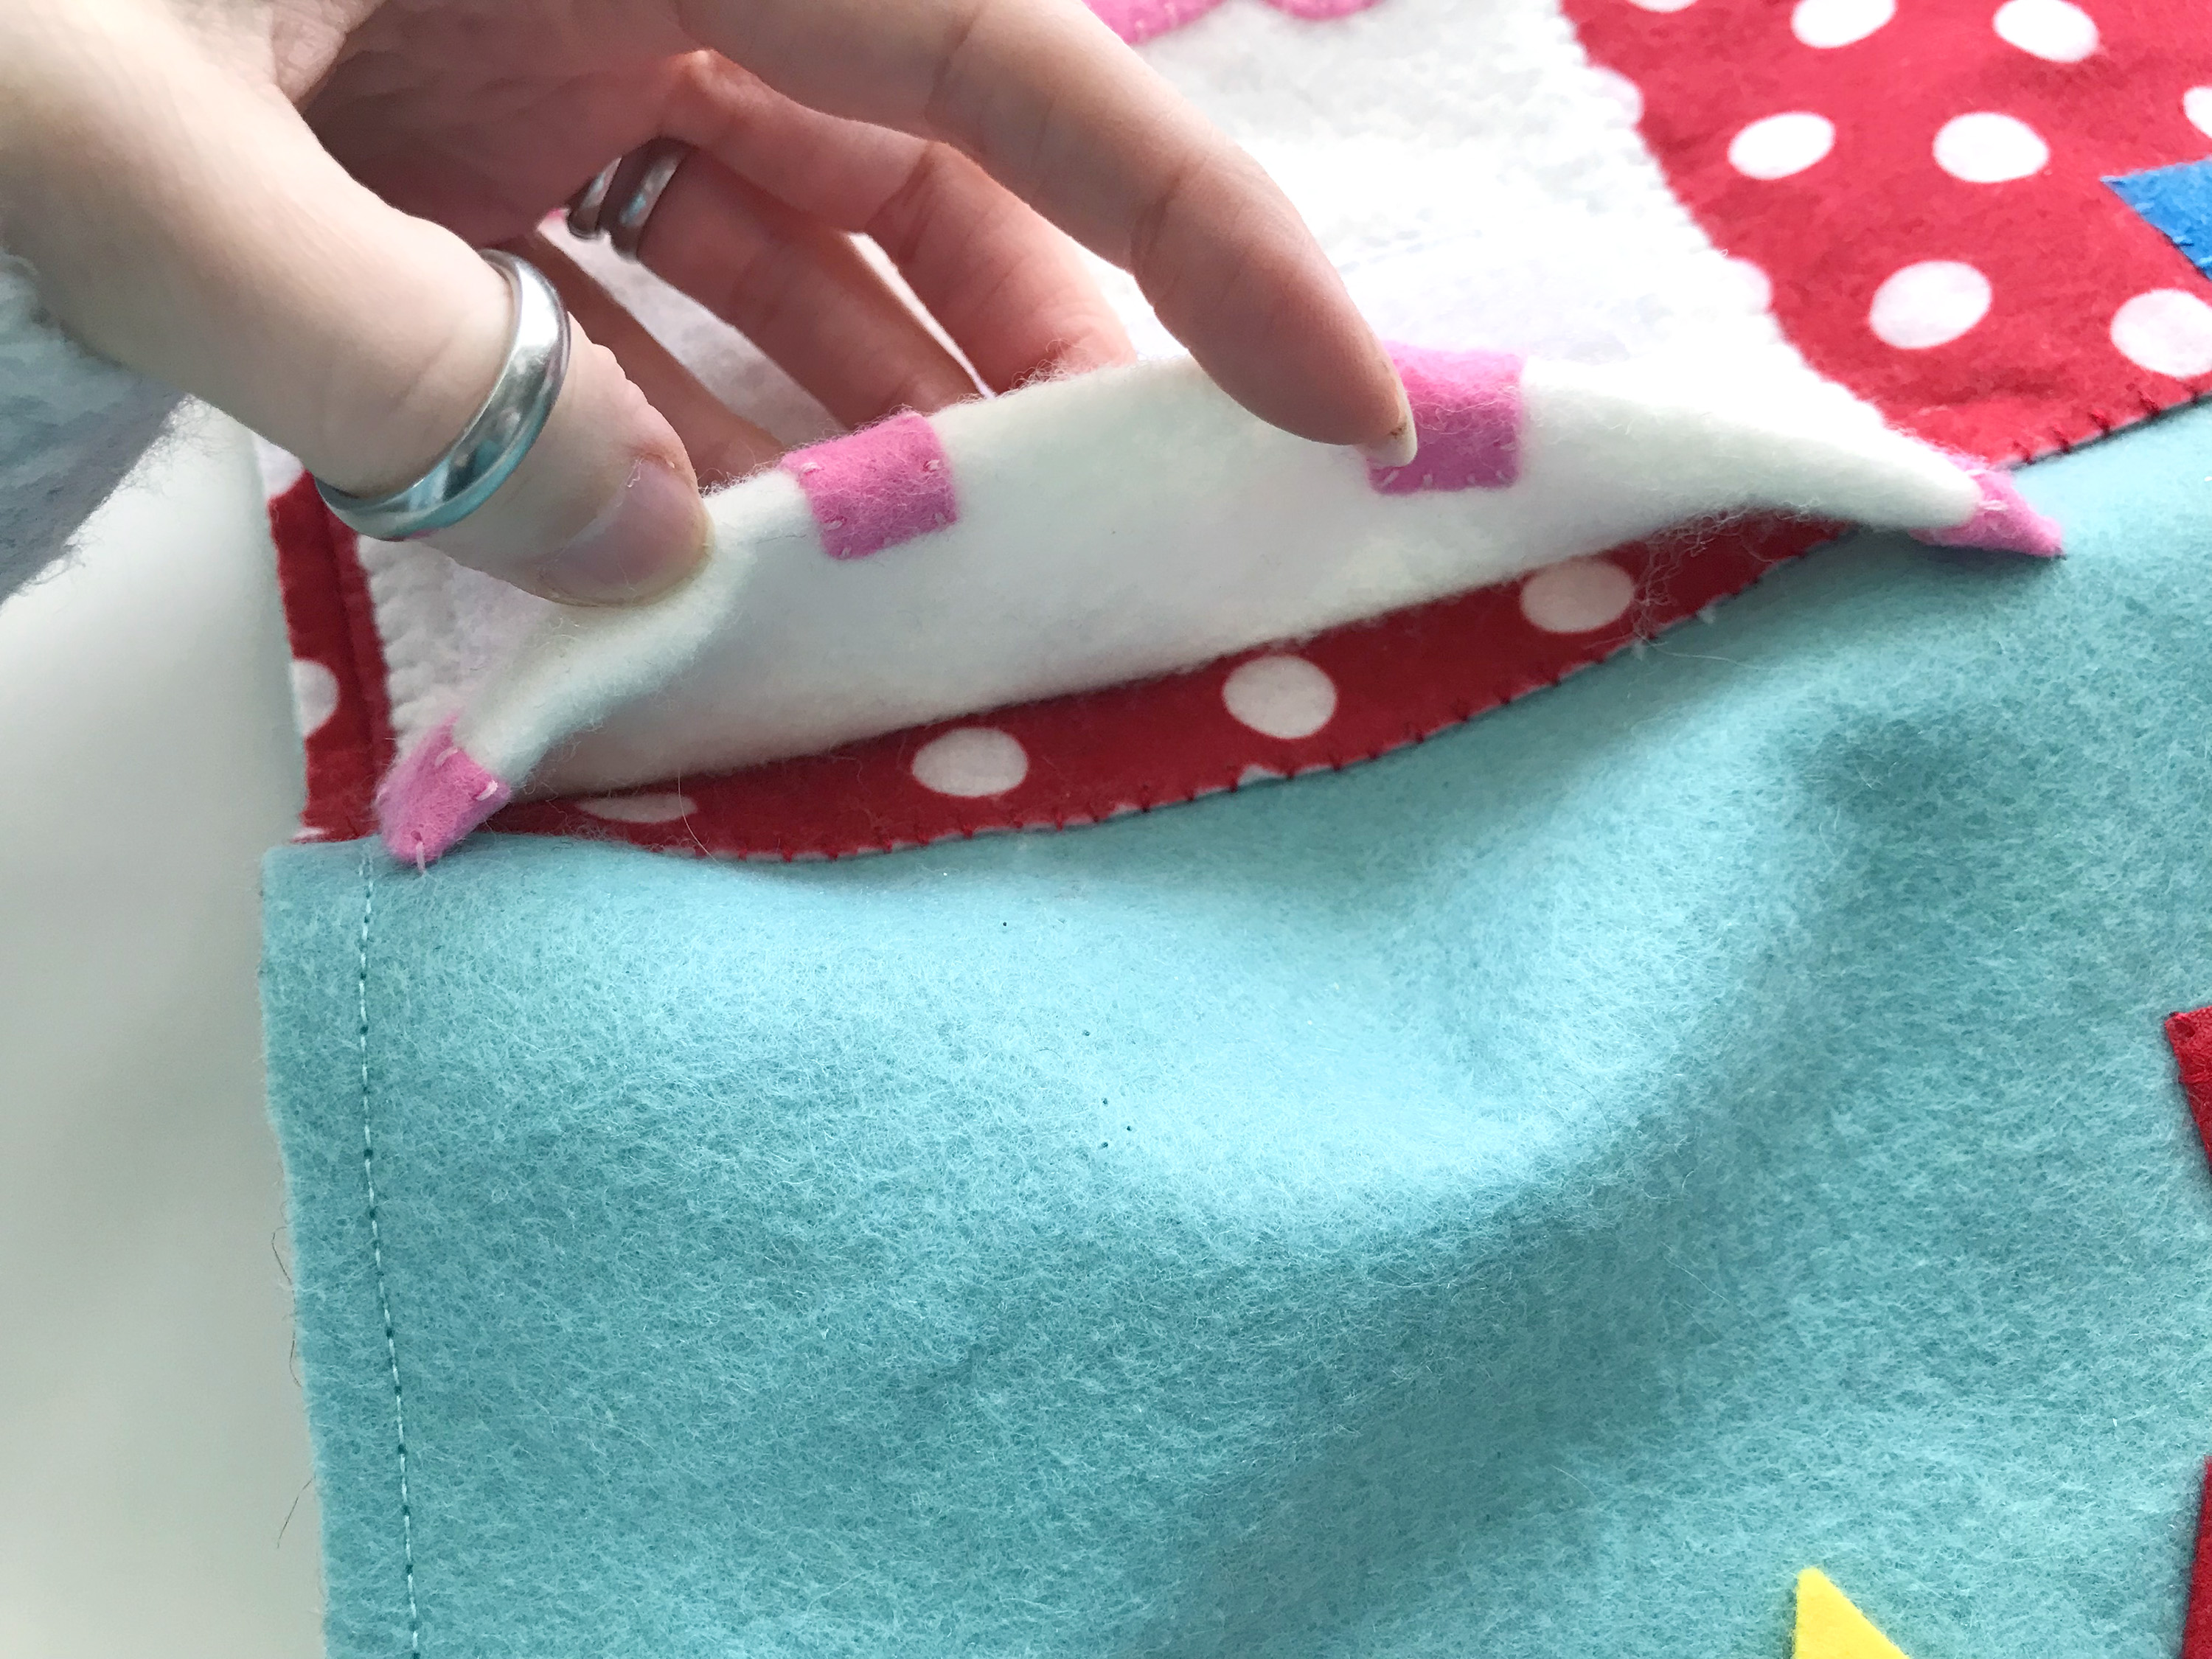
When folded back down, you’ll have a shallow pocket at the top for the candles to sit in (or be stored sideways in.) Finish the cake by sewing down the sides of the cake. I did sew down the sides of the pink parts as well as the white cake sides. The last step is the sew the other halves of the snaps down to the page.

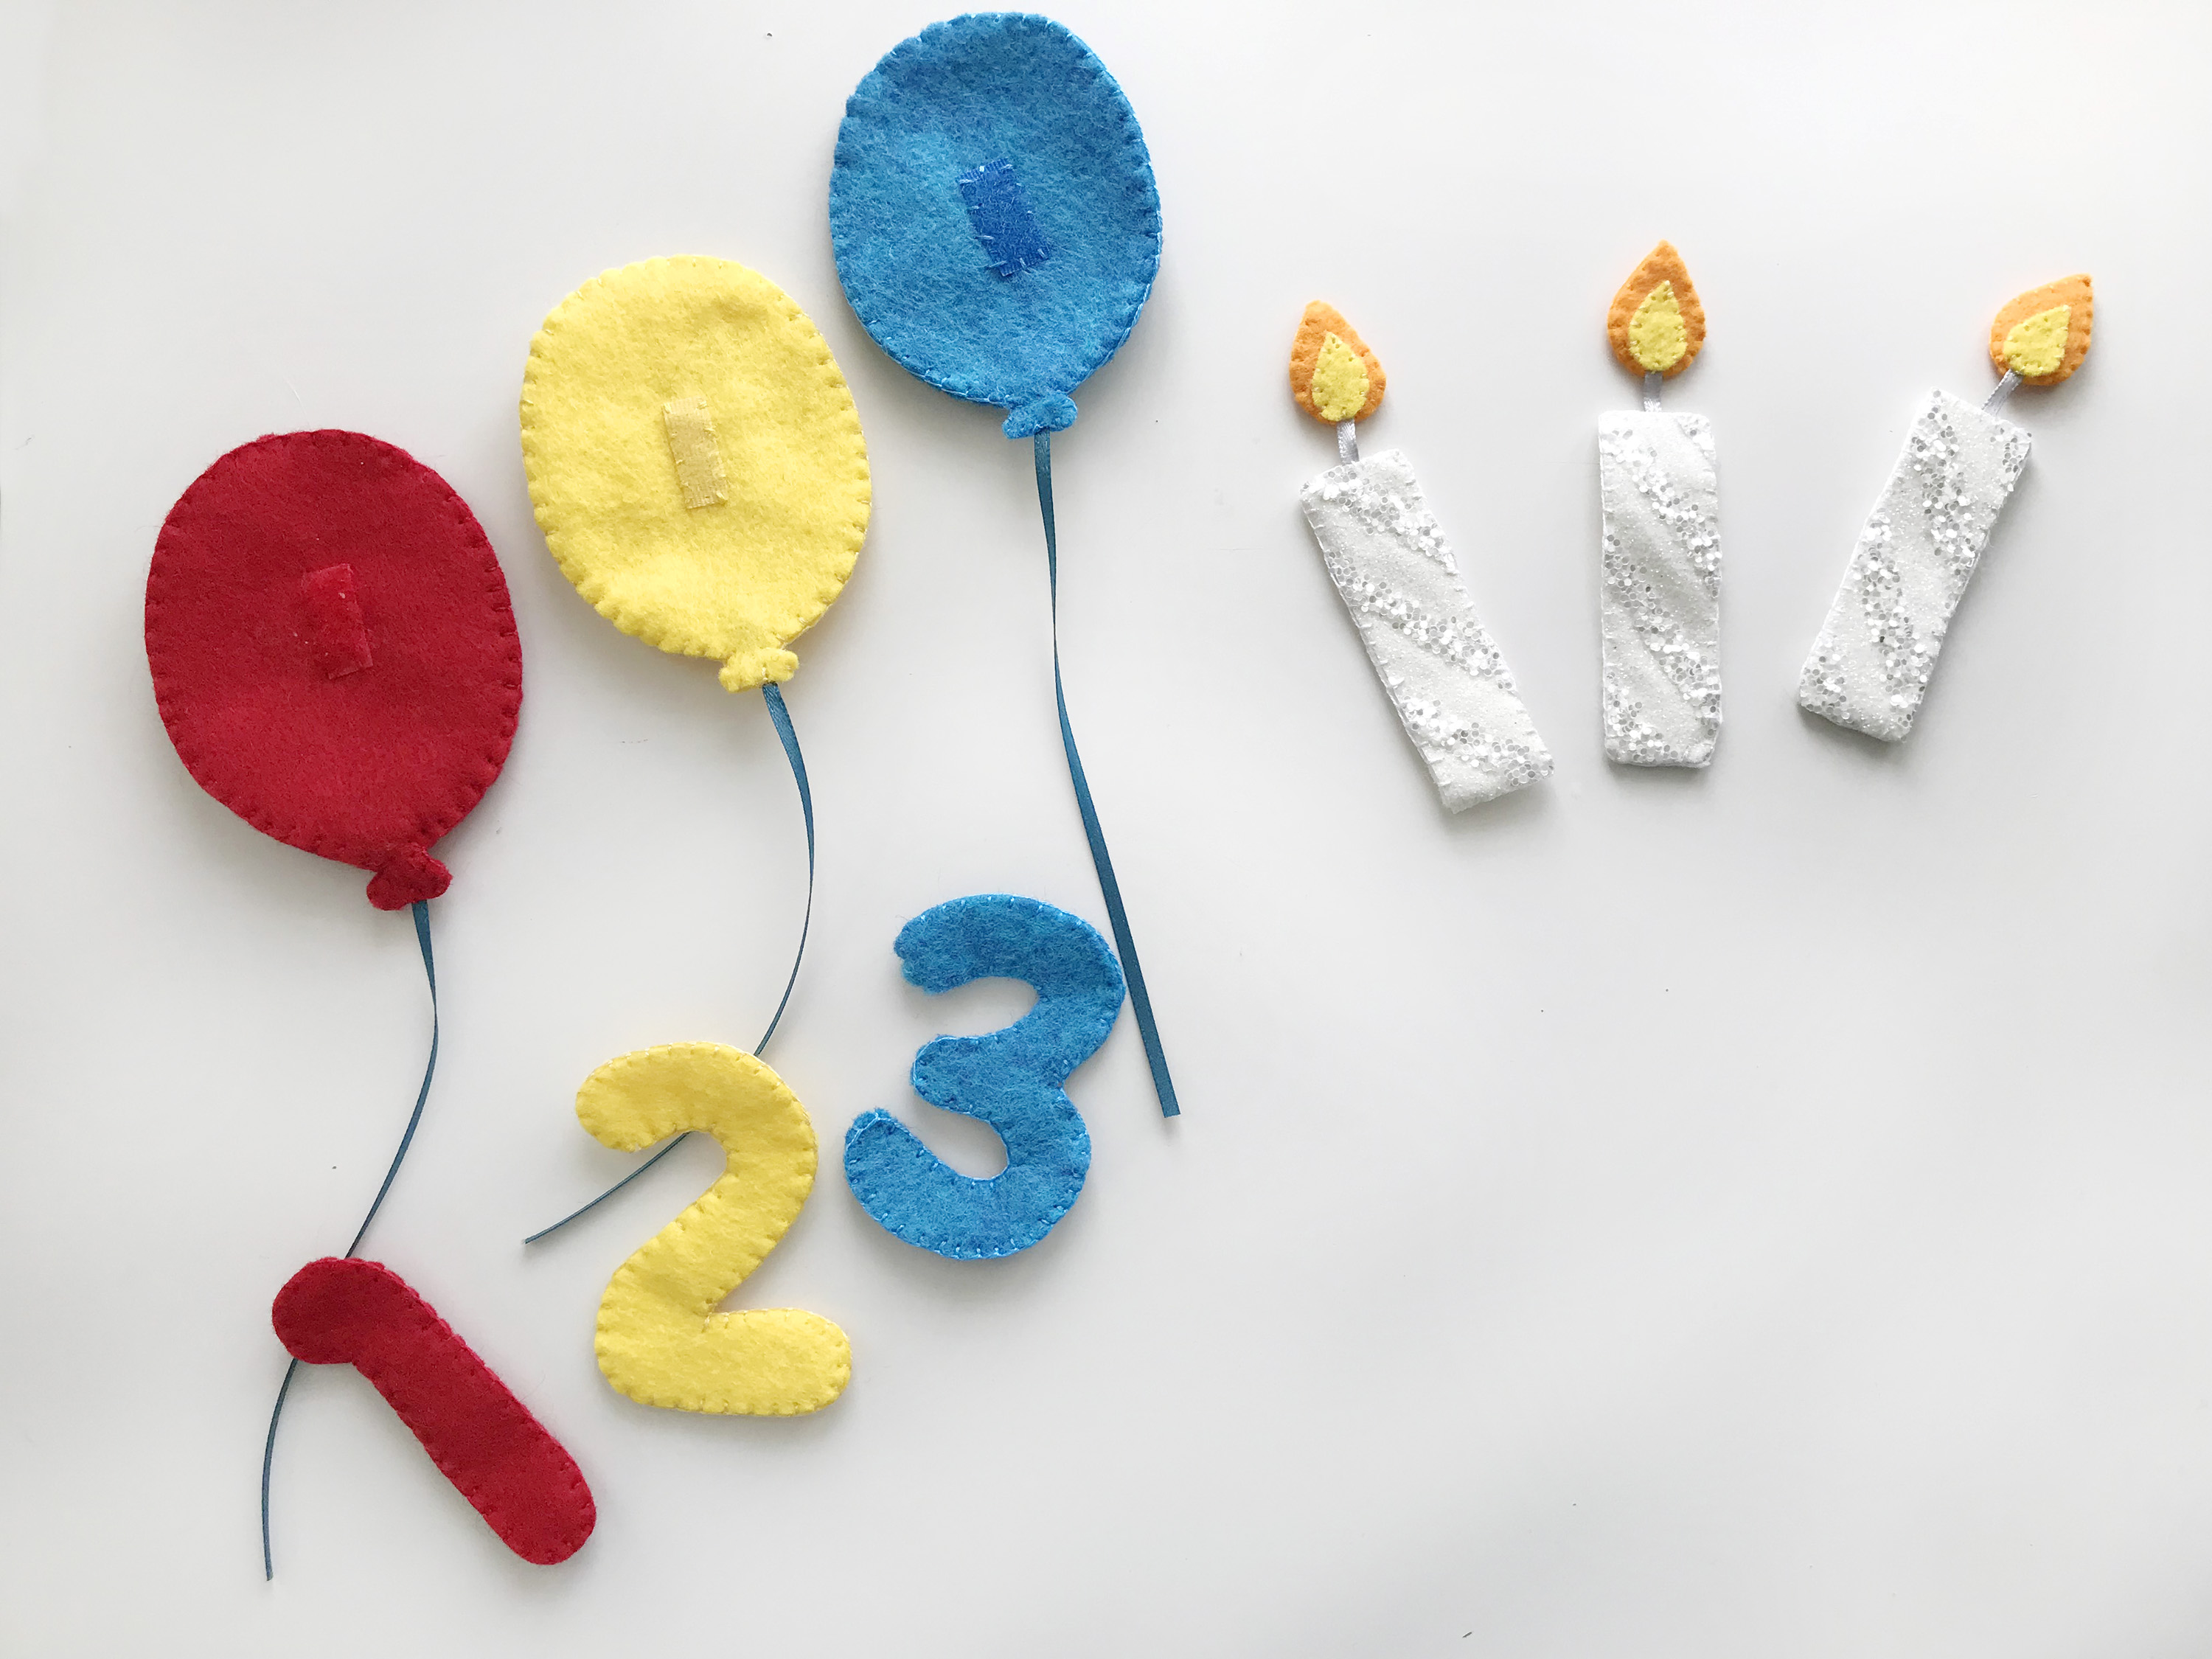
Sewing the Candles
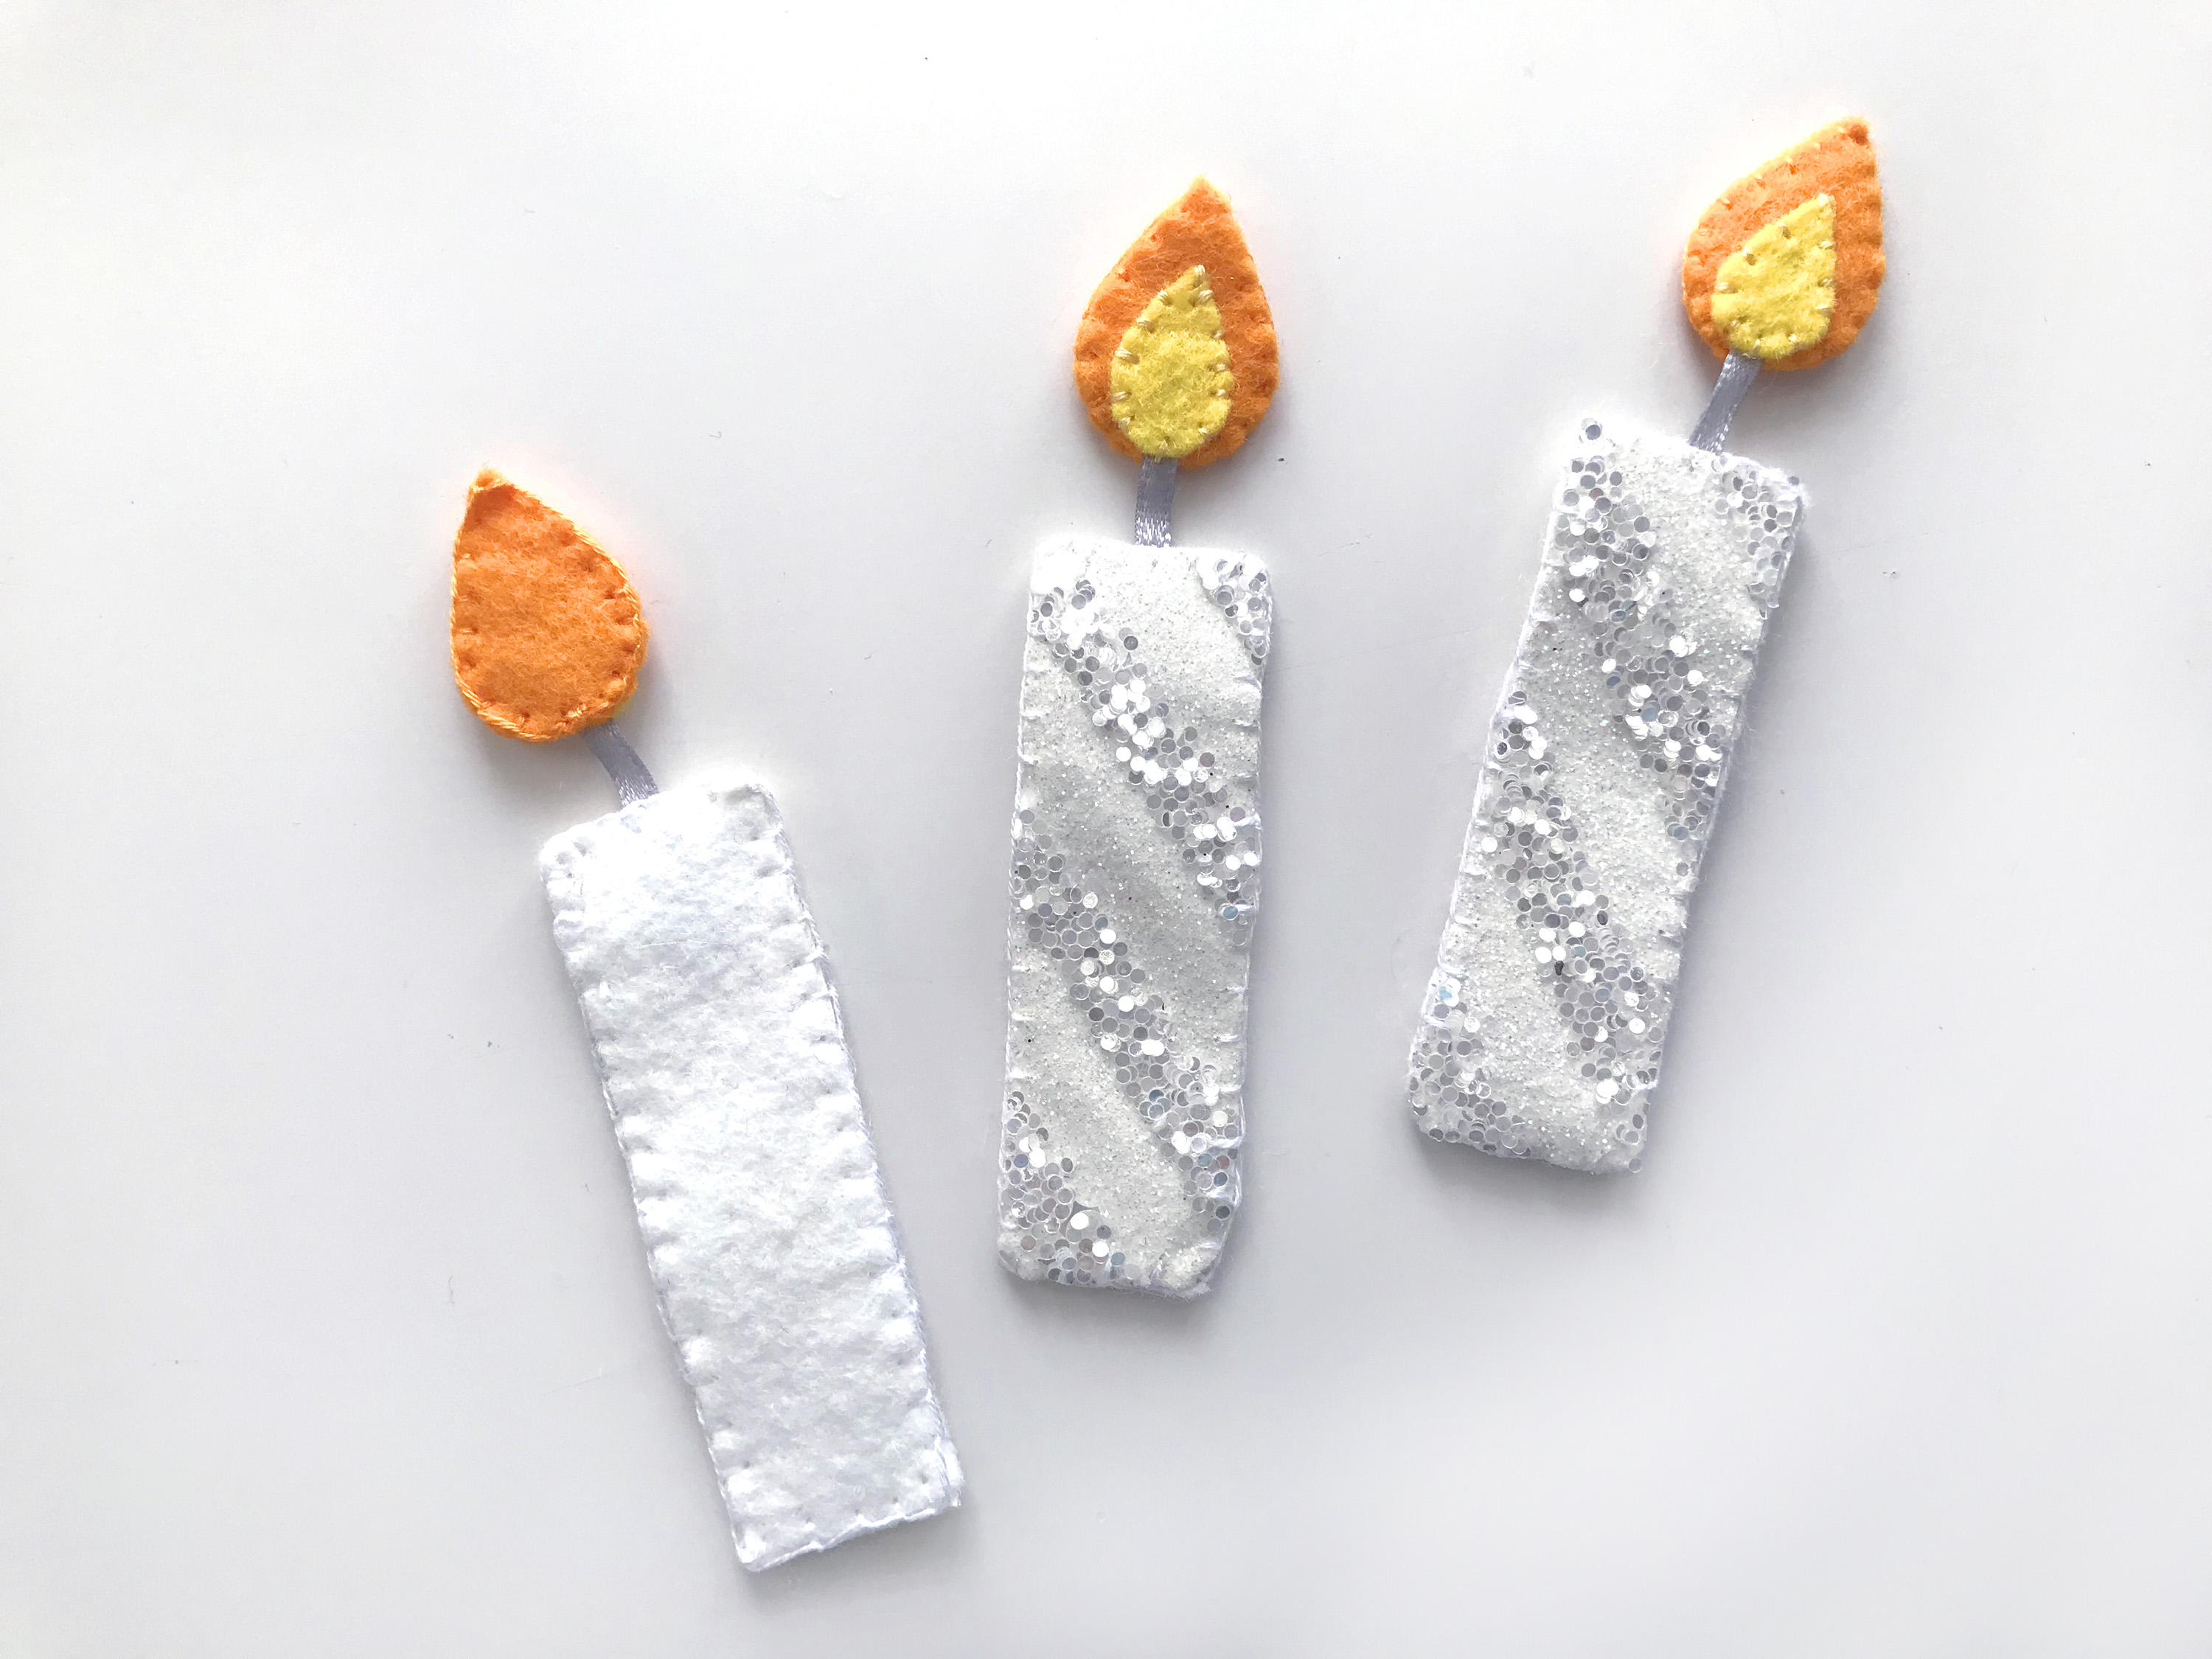
Start your candles by sewing each yellow flame onto three of the orange flames, lining up the bottoms. I tacked them down with a touch of glue first. Then sandwich a bit of ribbon between the flames and the rest of the orange flame pieces. The ribbons should stick out of the bottoms. The candle part is made of of the glitter stripe material and white felt. When you blanket stitch around it, be sure to catch the other end of the ribbon/wick in the top of the candle.
Sewing the Balloons & Numbers
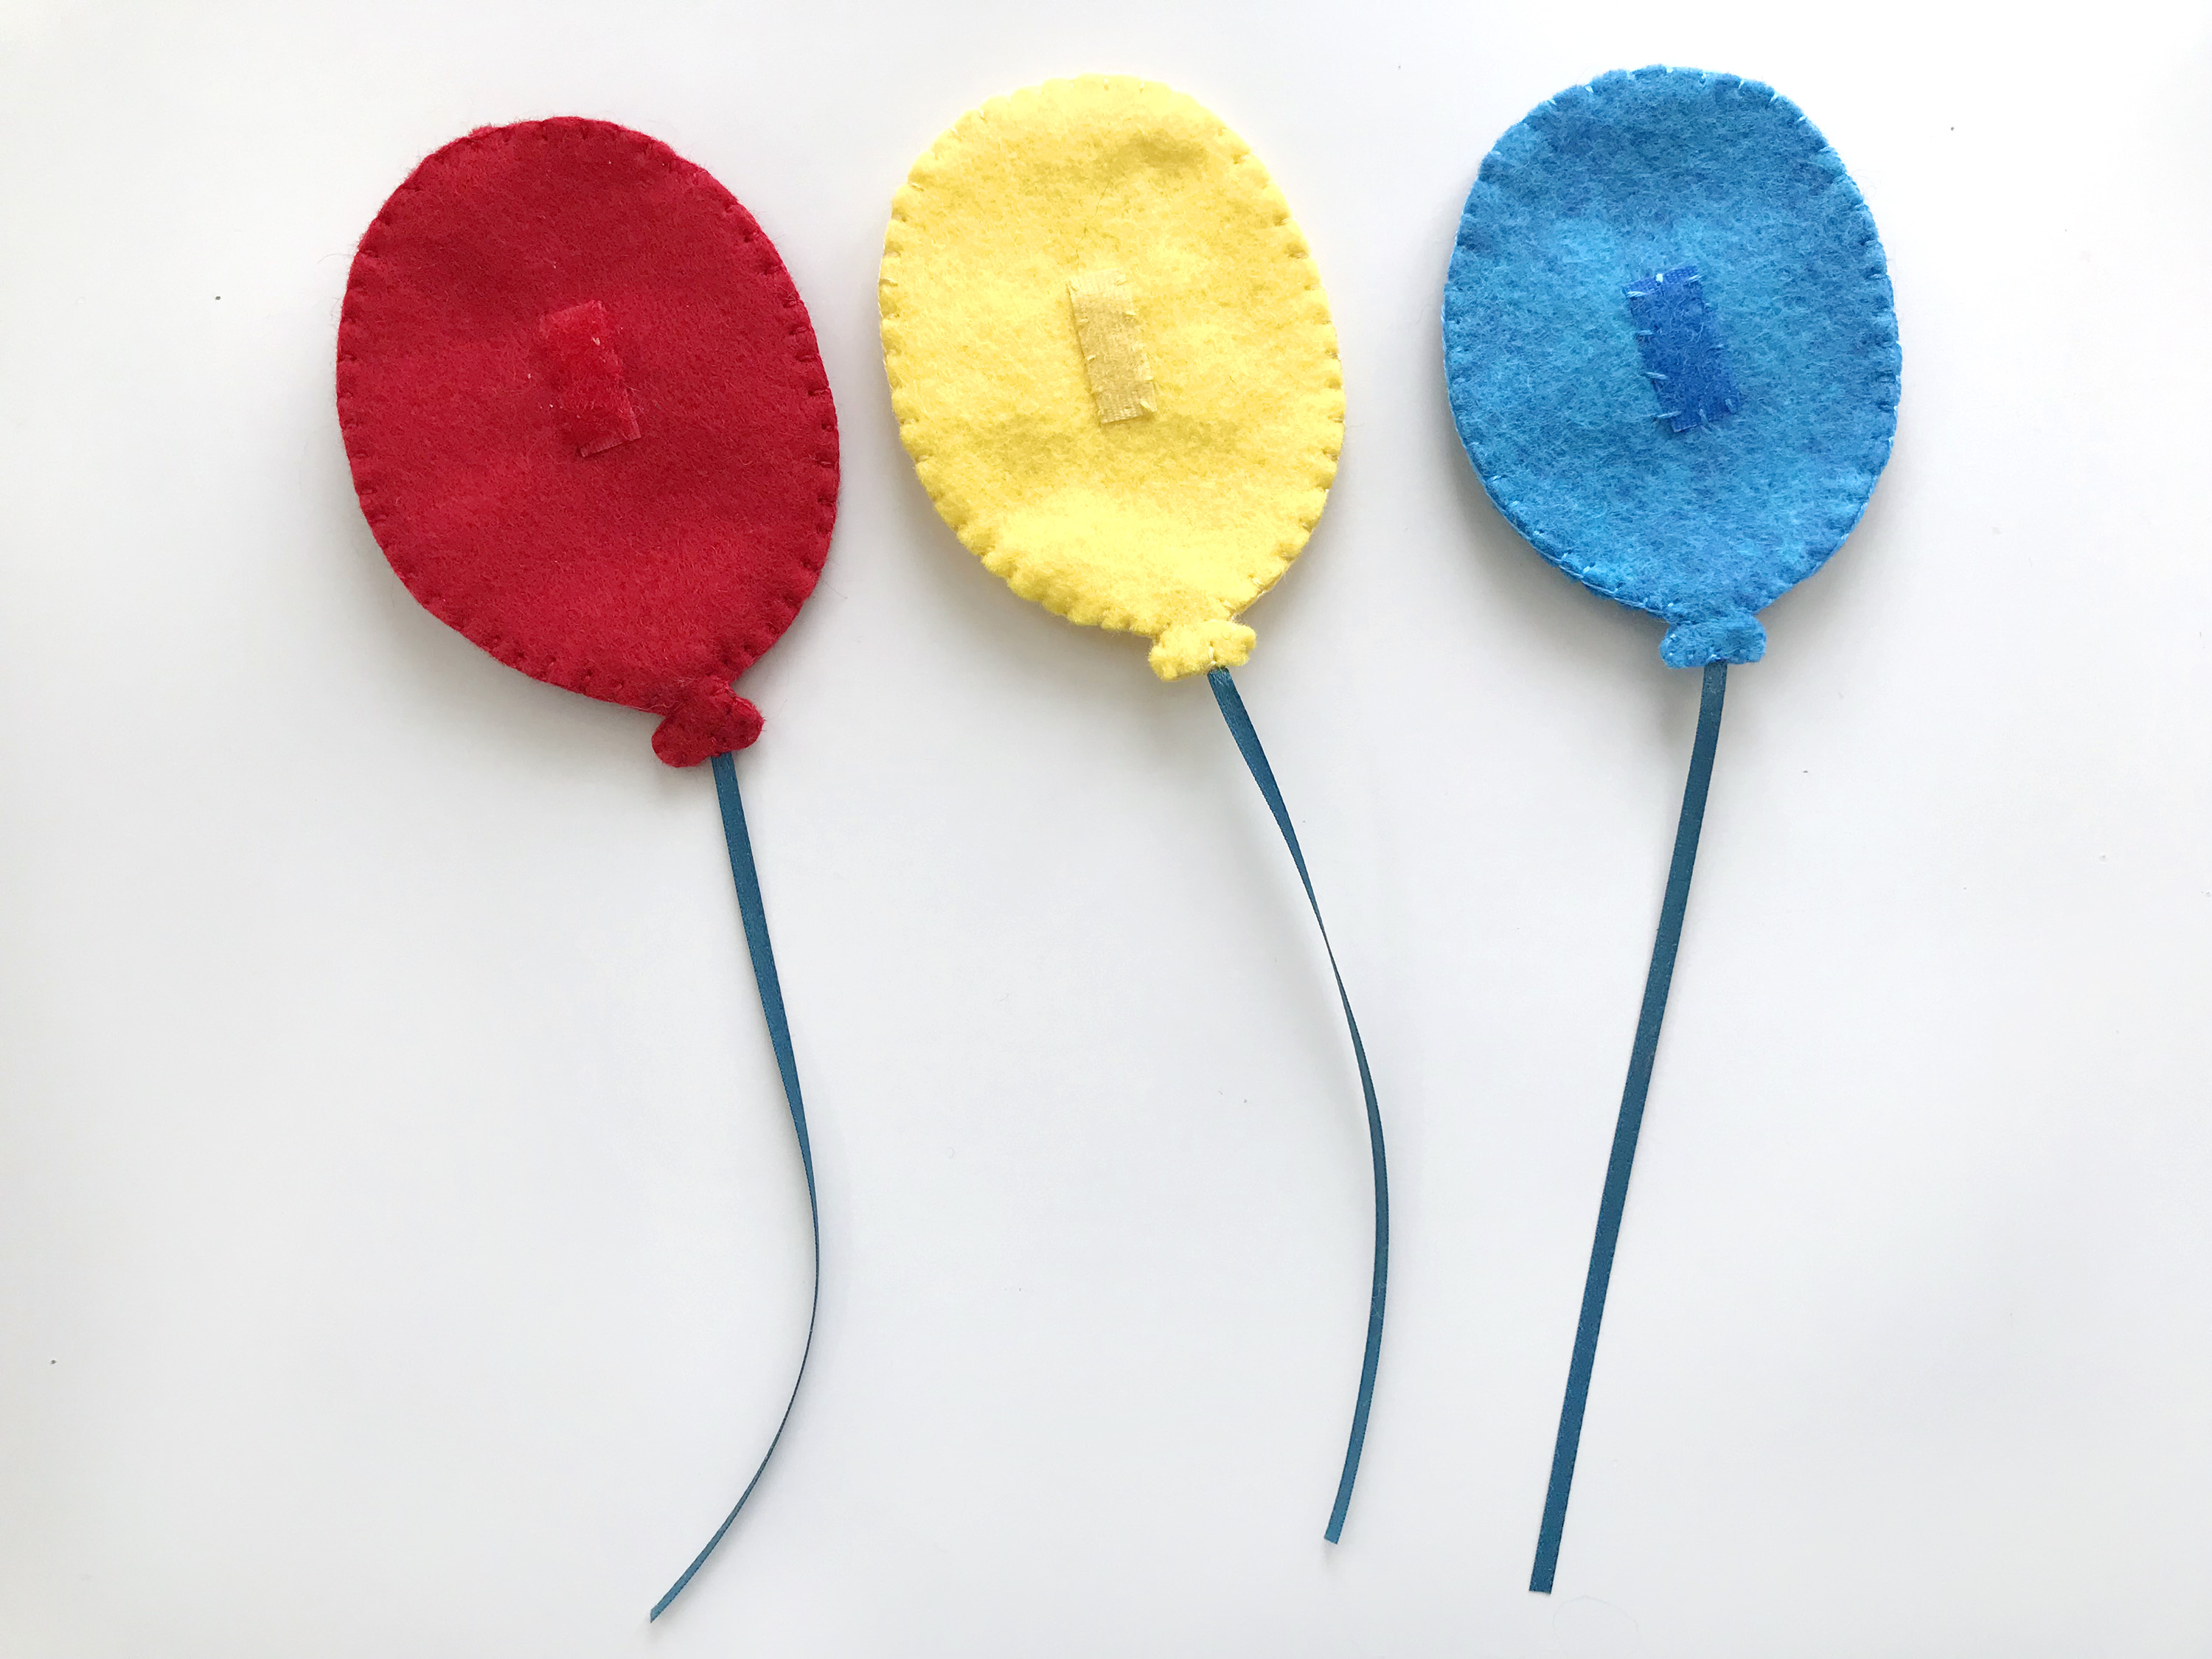
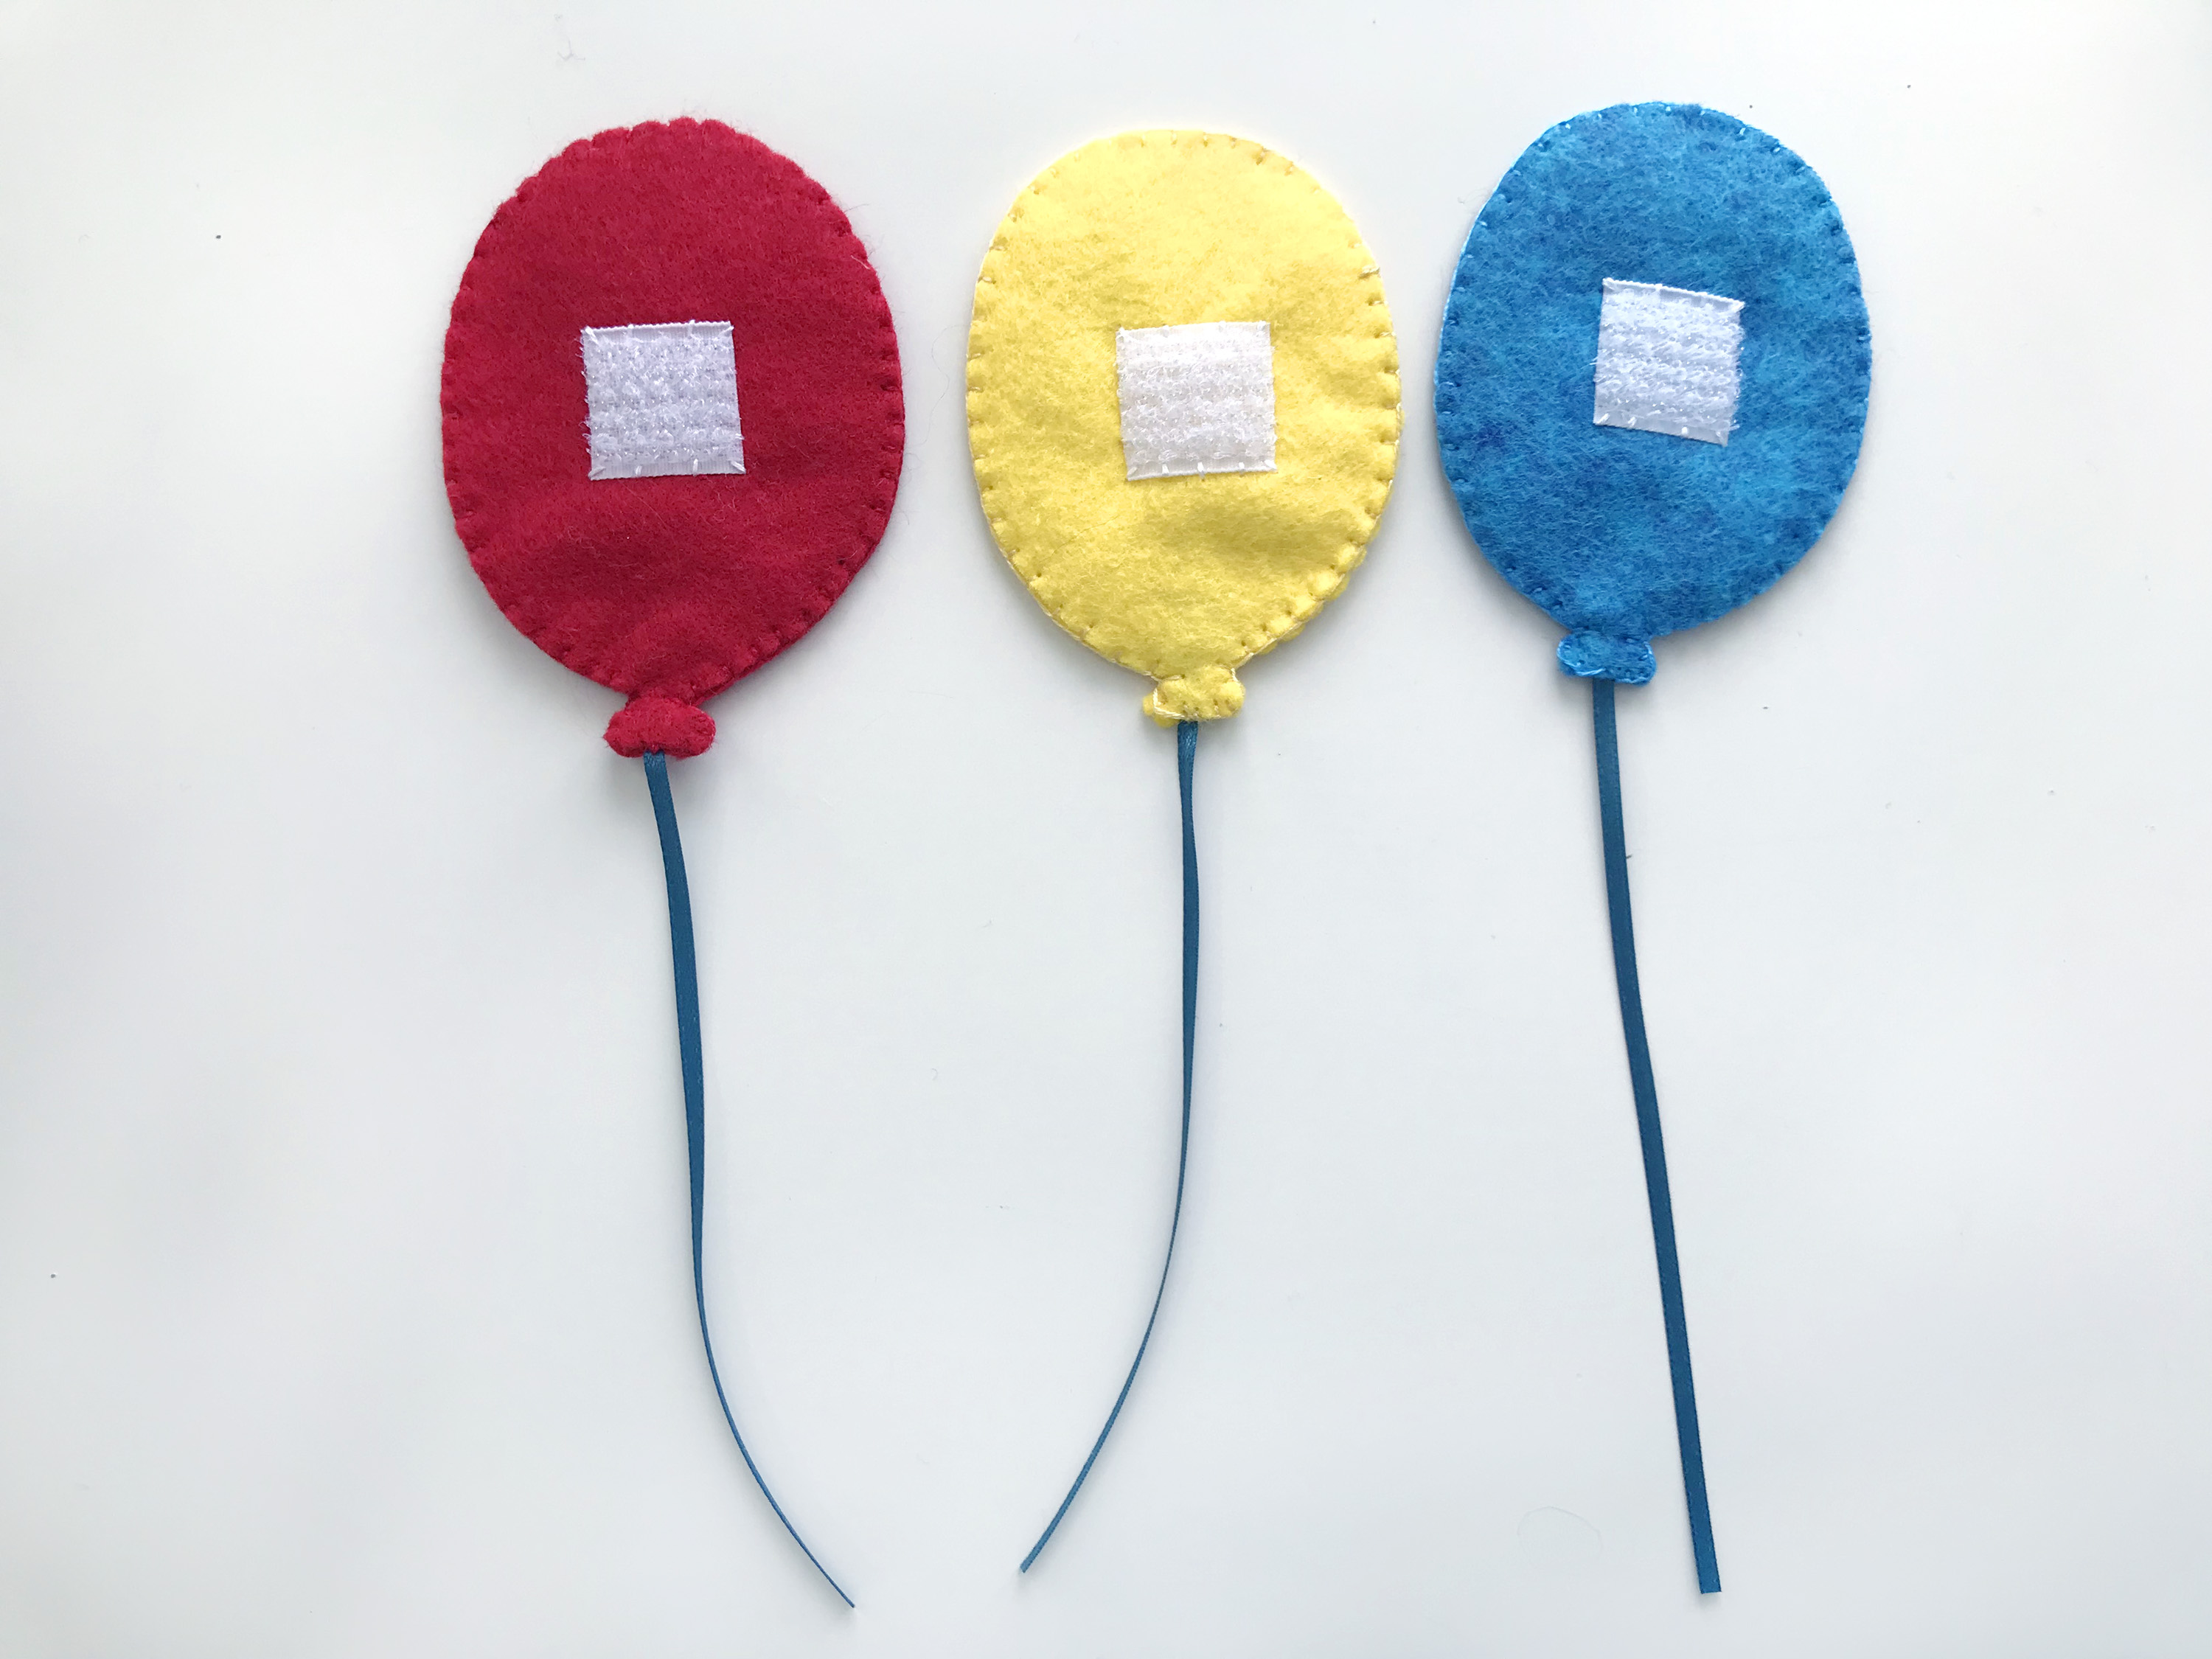
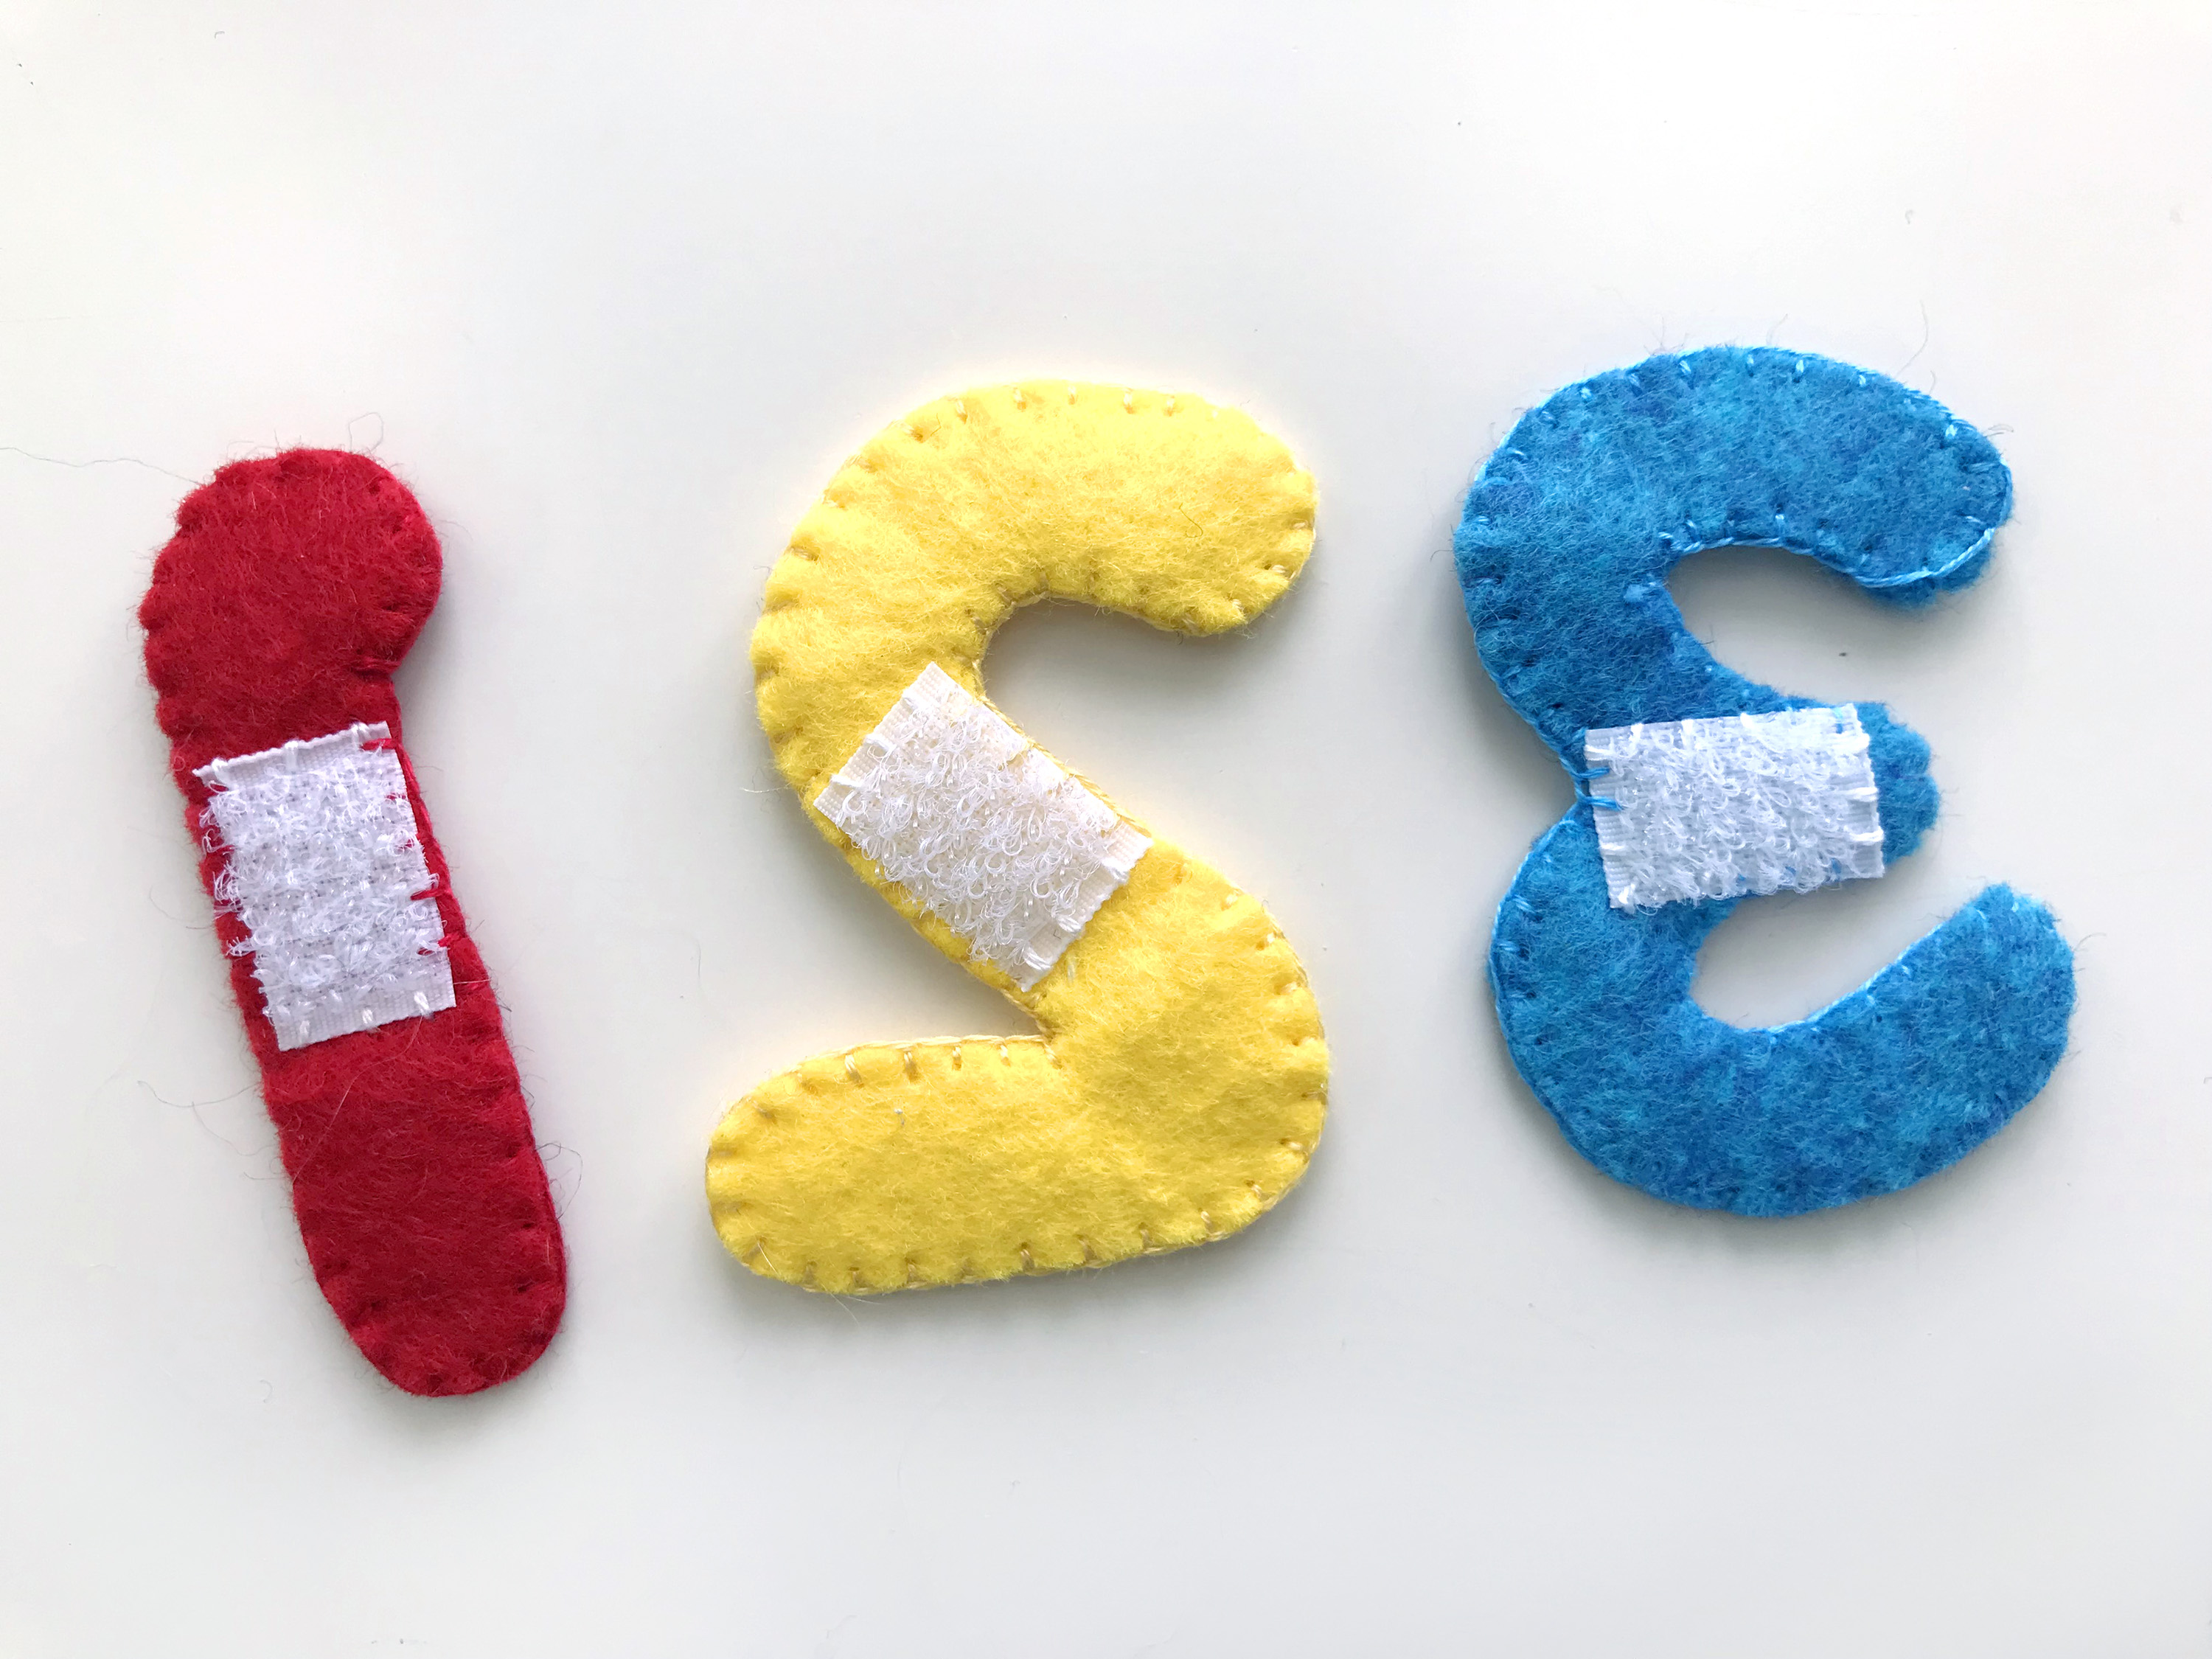
The balloons are fairly straightforward. Sew a square of white snag-free Velcro to the backing pieces. Sew a bit of matching hook and loop (soft side) to the fronts. Blanket stitch the fronts and backs together, catching a thin ribbon for the balloon string in your stitching at the bottom.
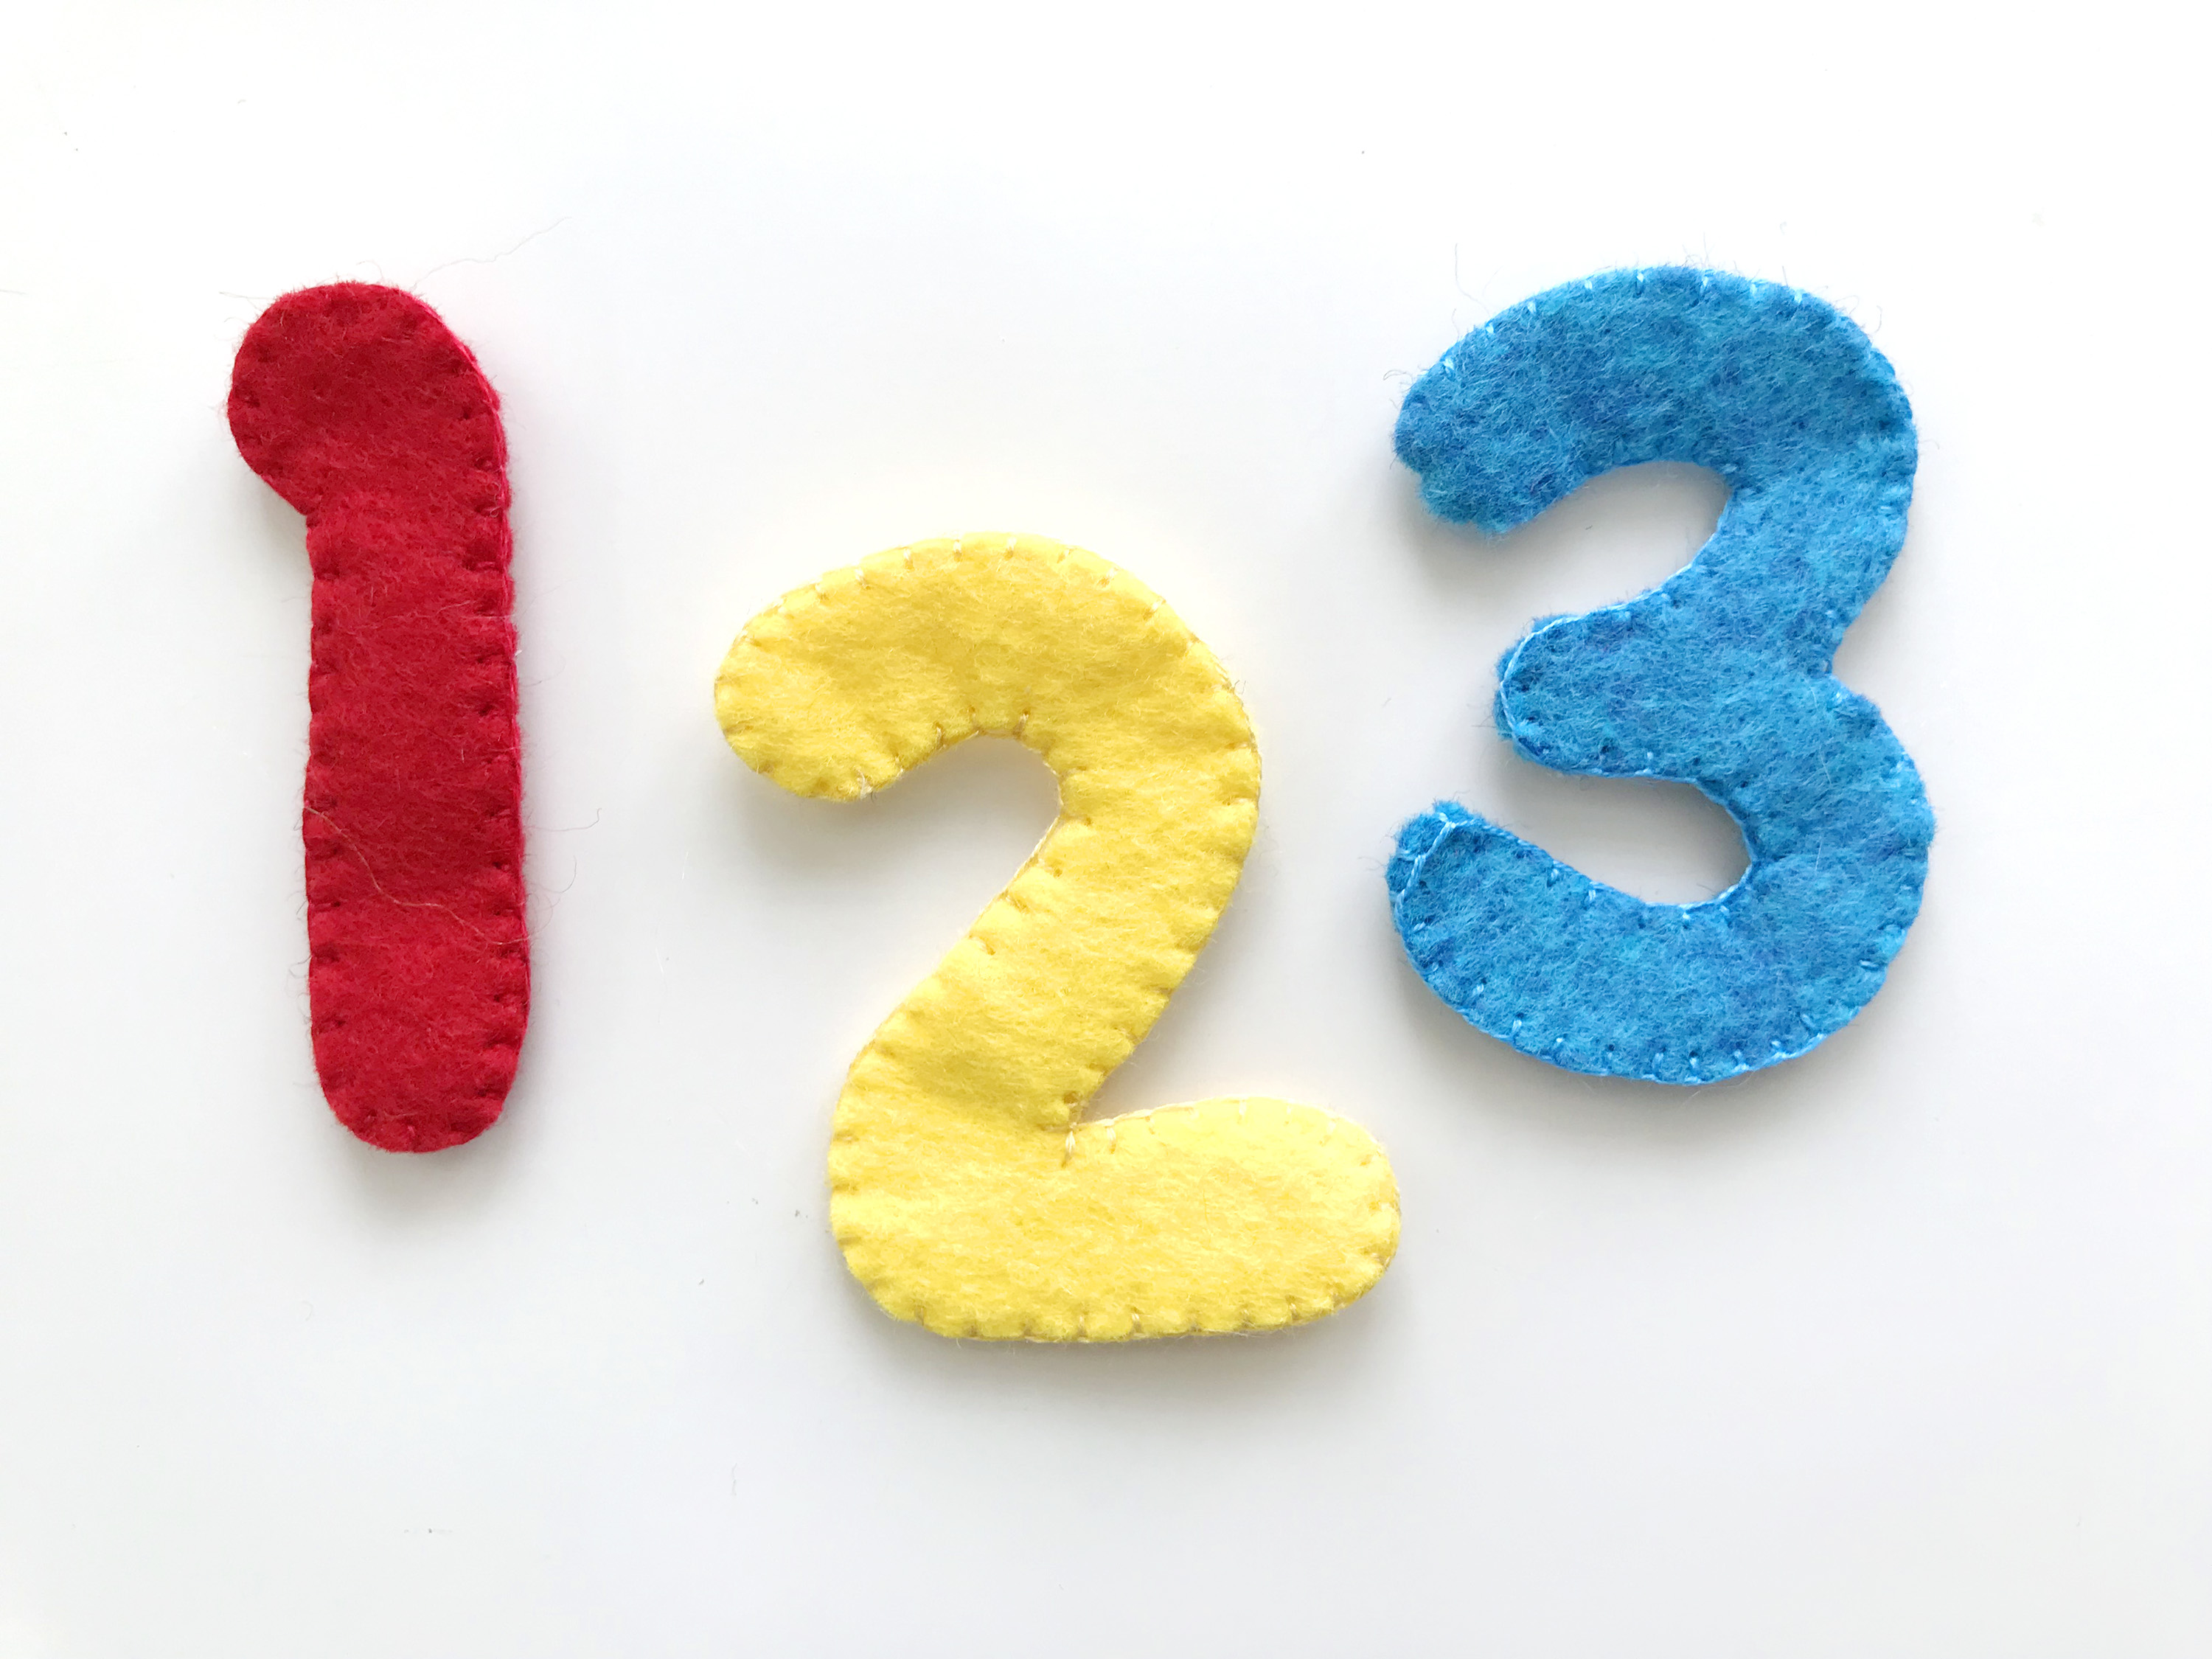
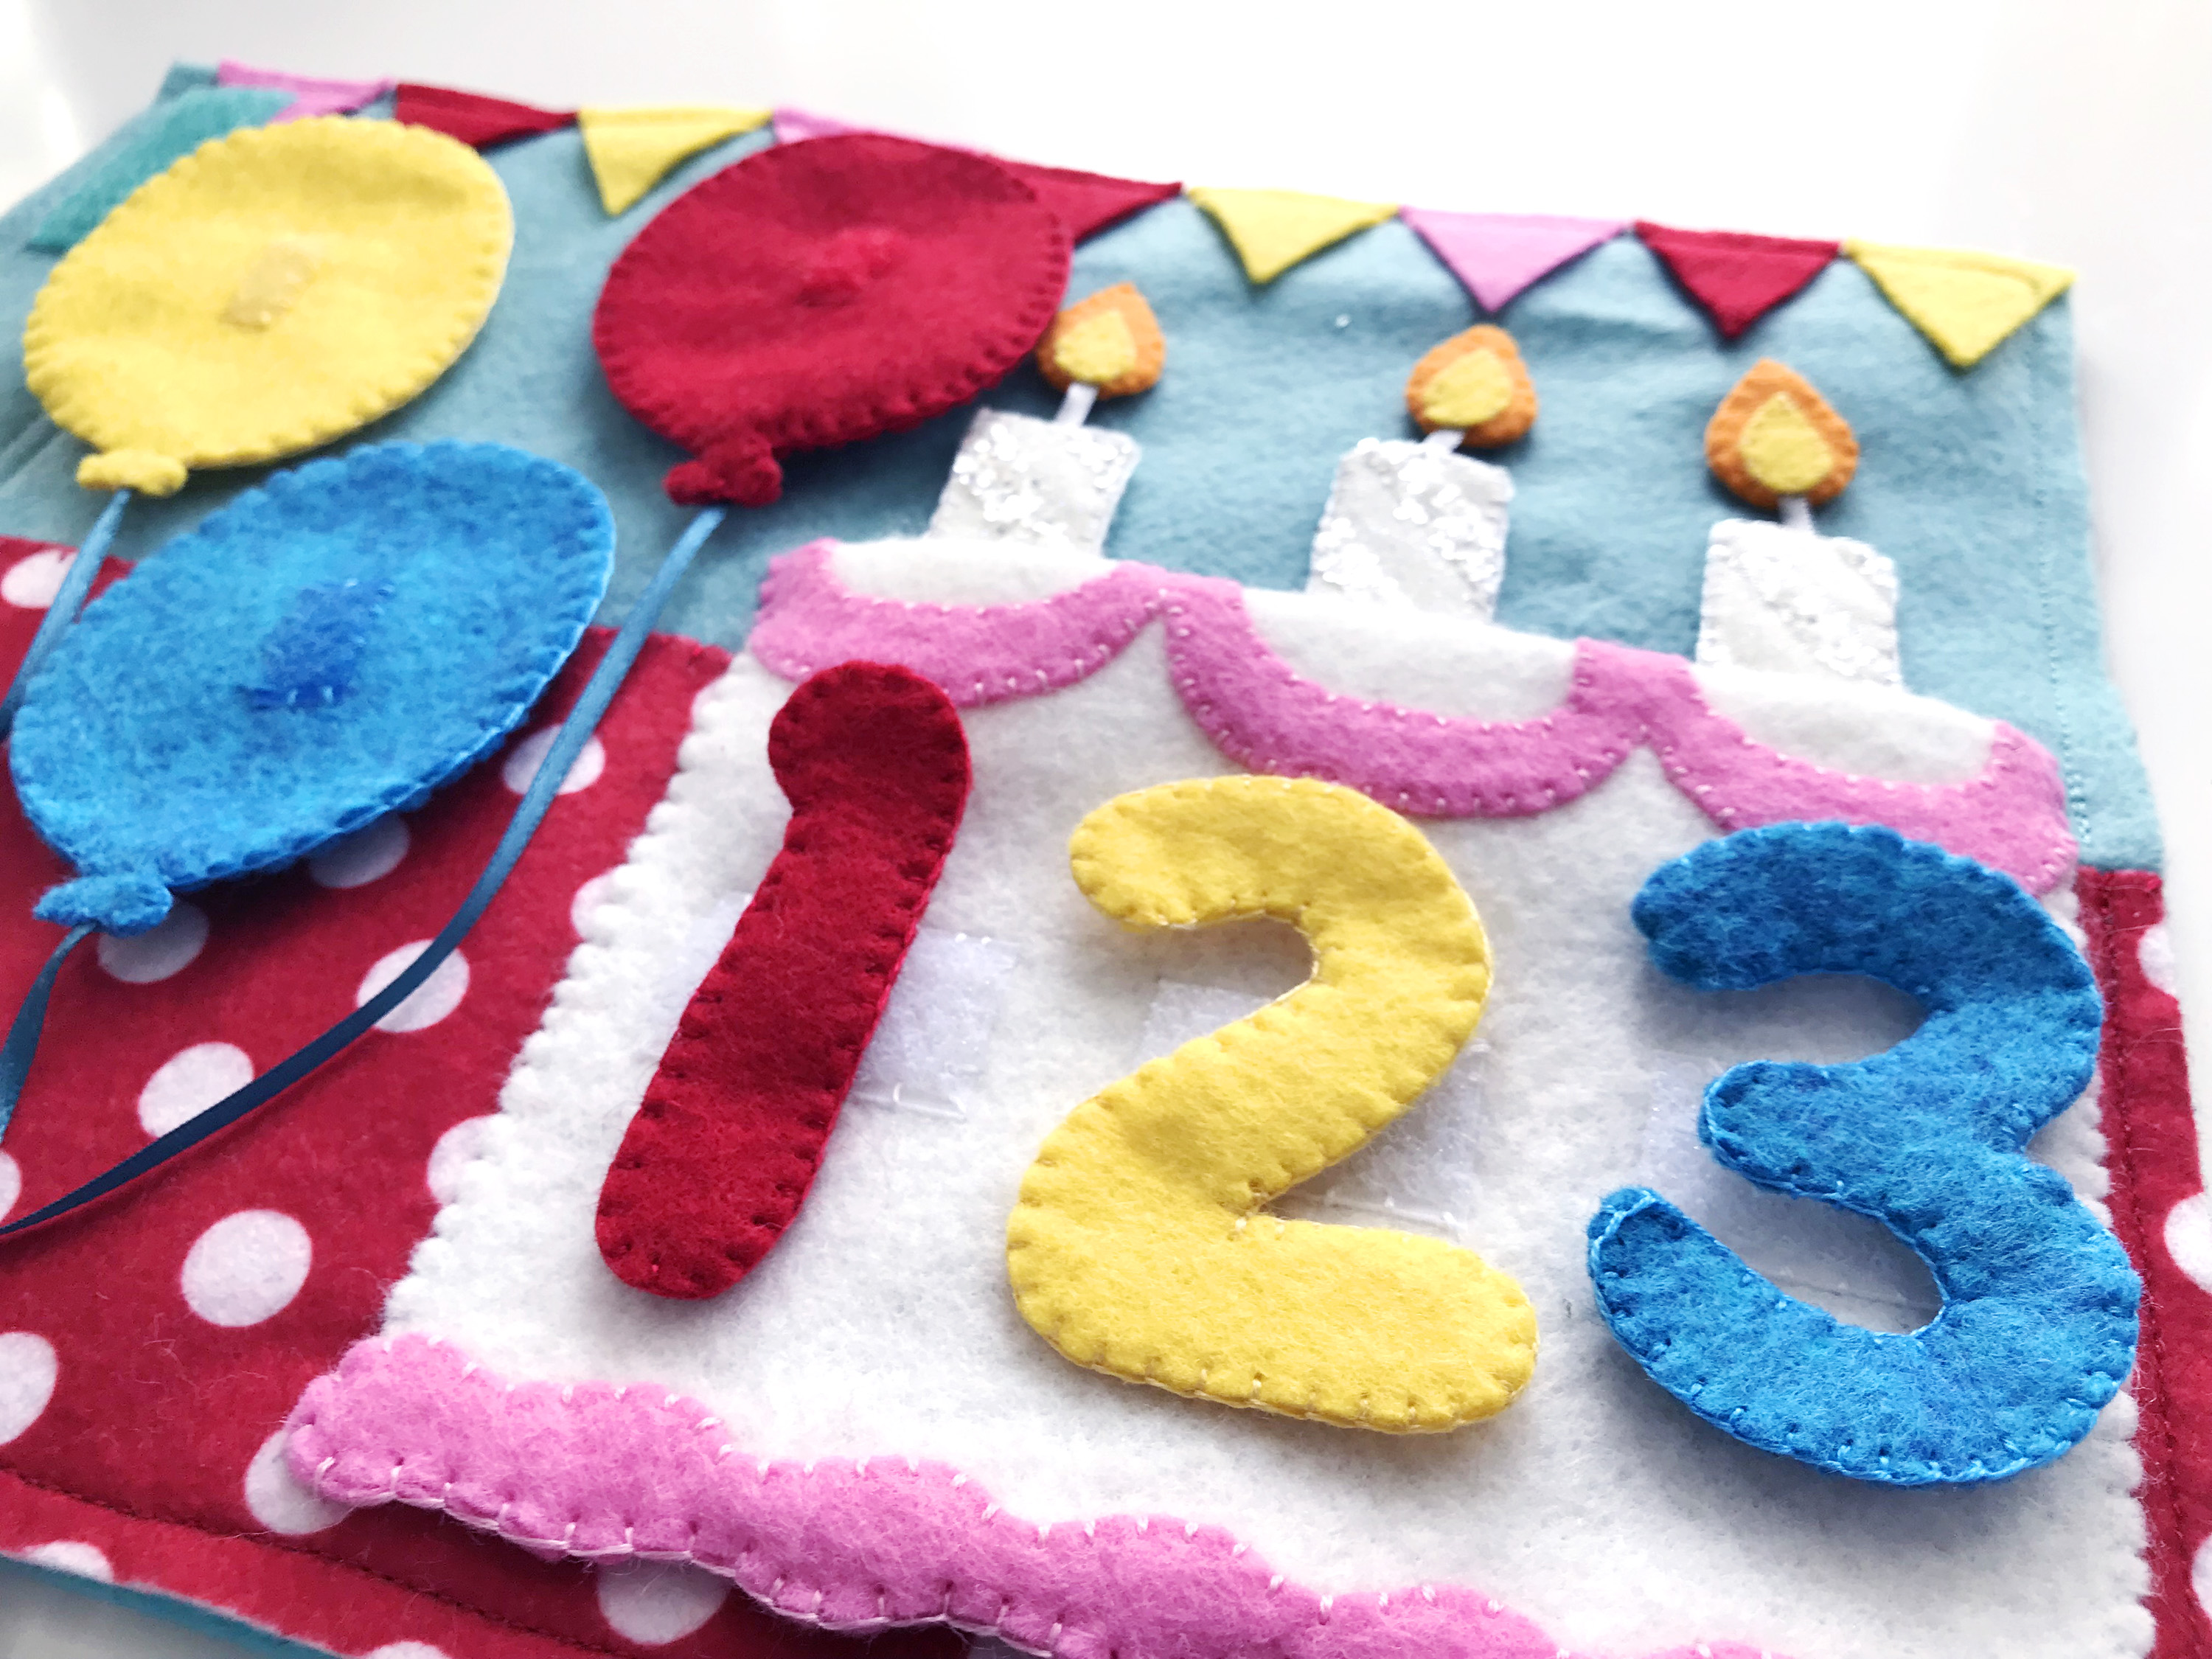
The numbers are done very similarly, but without a string and no hook and loop on the front.
Finishing the Page
You can finish the page however you prefer. I normally sew a backing on, reinforce the binding edge with a couple rows of stitching, and add three grommet holes. This time I am trying something new. So far, so good! The two pages I’ve done this way are holding together nicely. I’ll definitely need a back cover to stop snagging, though.
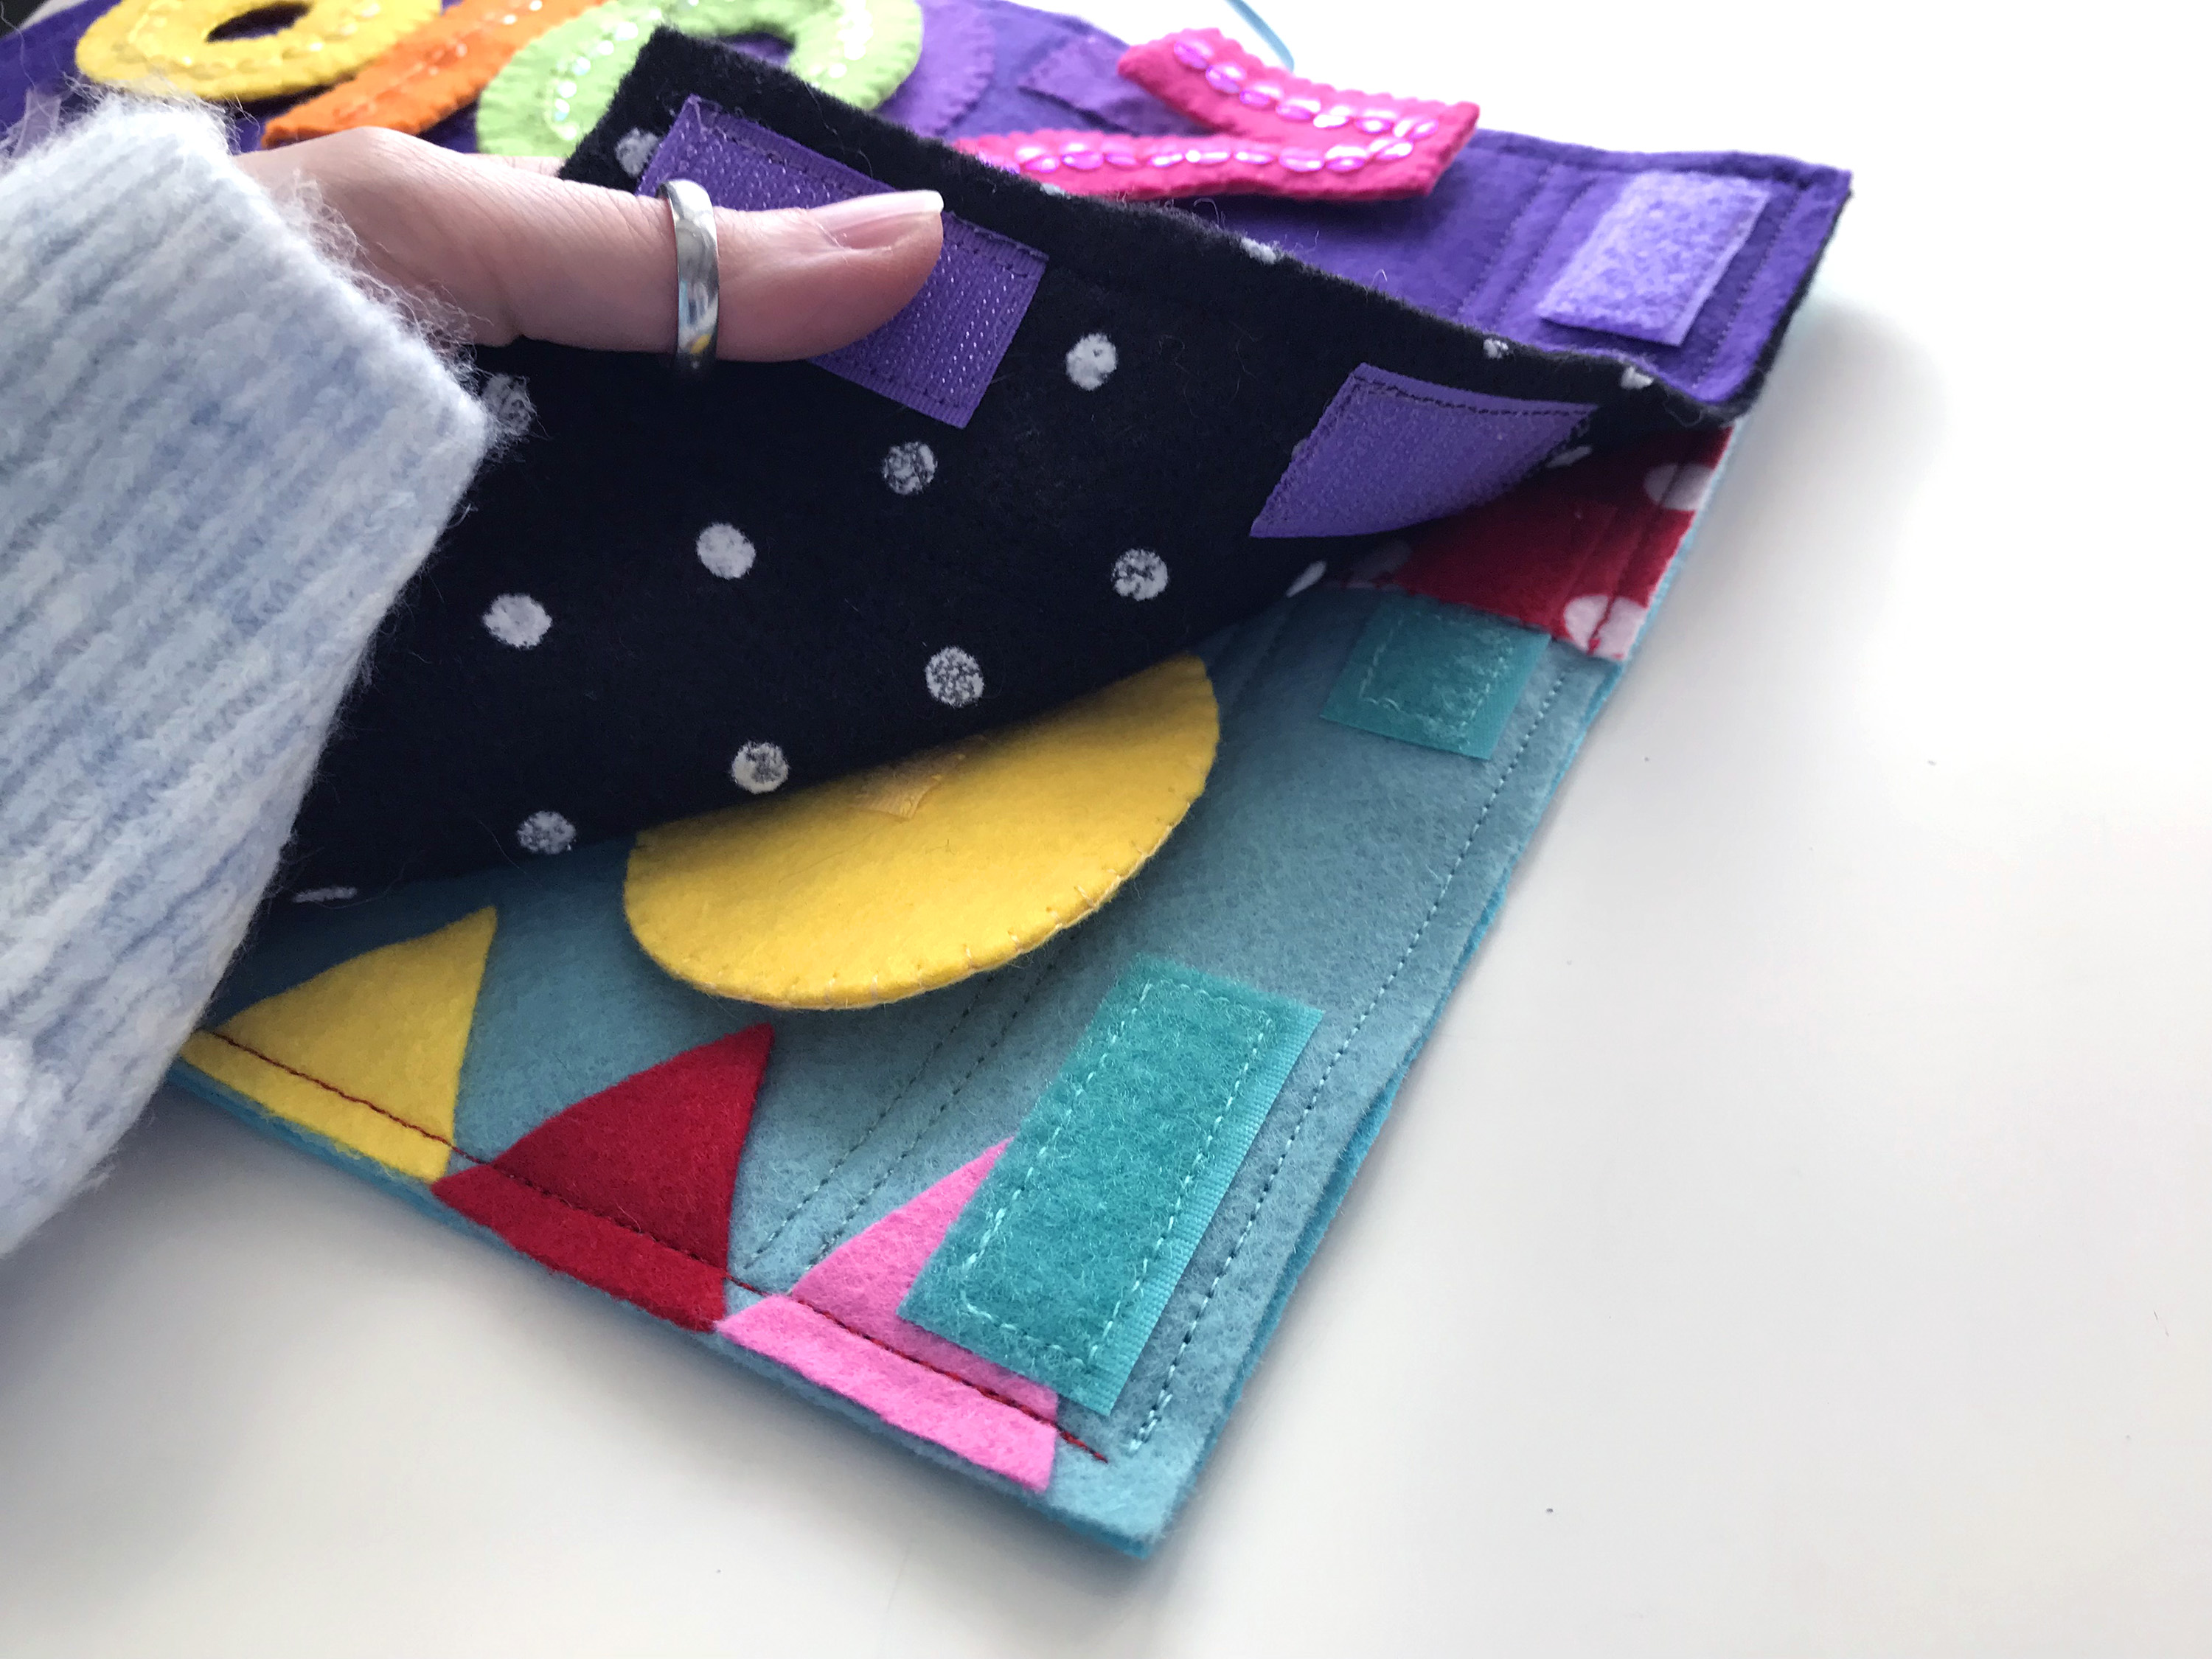
I did everything the same as I normally would, except I sewed three 2″ strips of hook and loop tape to the page and the backing in the binding area. I put the rough side on the backing and the soft side on the page. The idea is you can stack the pages together but the child and separate them easily. I plan to do a cover that will attach to the top and bottom pages in the stack, once I see how big this holiday project ends up. Or maybe I’ll make separate front and back covers… We’ll see how it goes!
If you sew along with me on this holiday project, please tag me on any Instagram photos you post! My IG is @iolstephanieand you can use the hashtag #imagineourlife. You can also post to my Facebook page. I love our little community there and I hope we can all be more active in 2019! I’m not the best at social media as I try to spend my time creating. I don’t even watch tv, as I’d need more hours in the day!!
Something fun we’ve been doing is daily vlogging on YouTube! I include clips of sewing projects whenever I can. Please subscribe here, and click the bell to be notified of new videos. I post every night! Leave a comment to let me know you came from the blog!
A Valentine page is up next! I’ll see you soon with that!
This is really gorgeous Stephanie. Your work is so inspiring and uplifting. My little ones are a bit big for this now, but I just love looking at the things you create. Will have to make a set for a friend’s little one sometime soon.