Want to sell items sewn from this pattern? A commercial license is available!
I’ve been a busy bee, so it’s taken a while to get this latest free pattern up for you! Seems fitting that it is a page about a very busy bee!
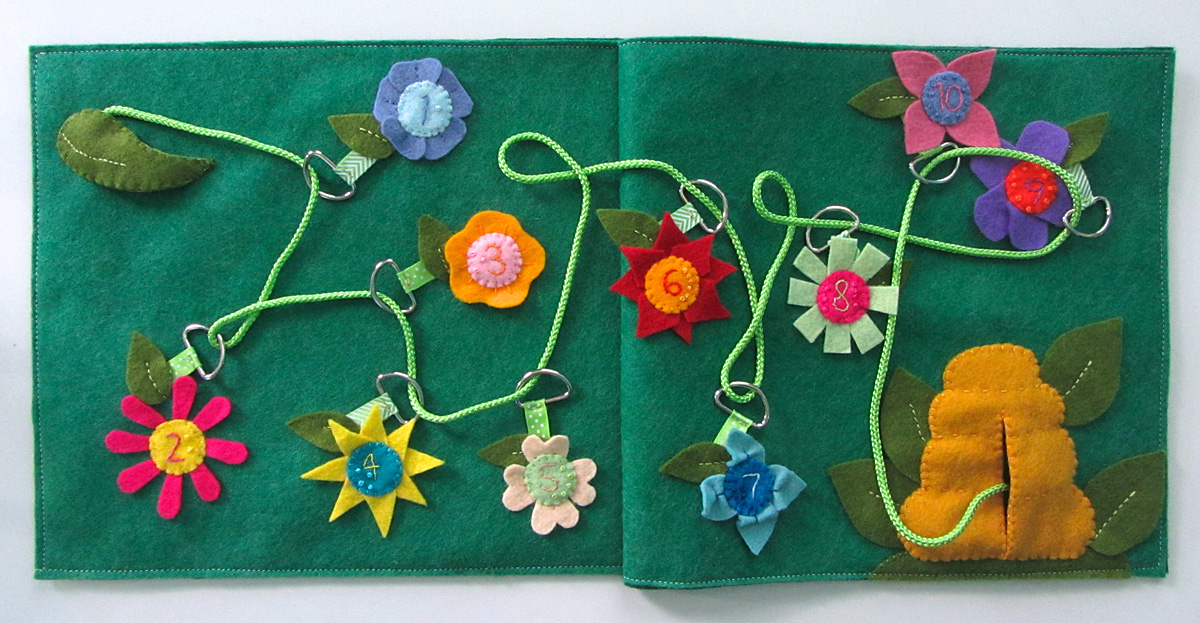
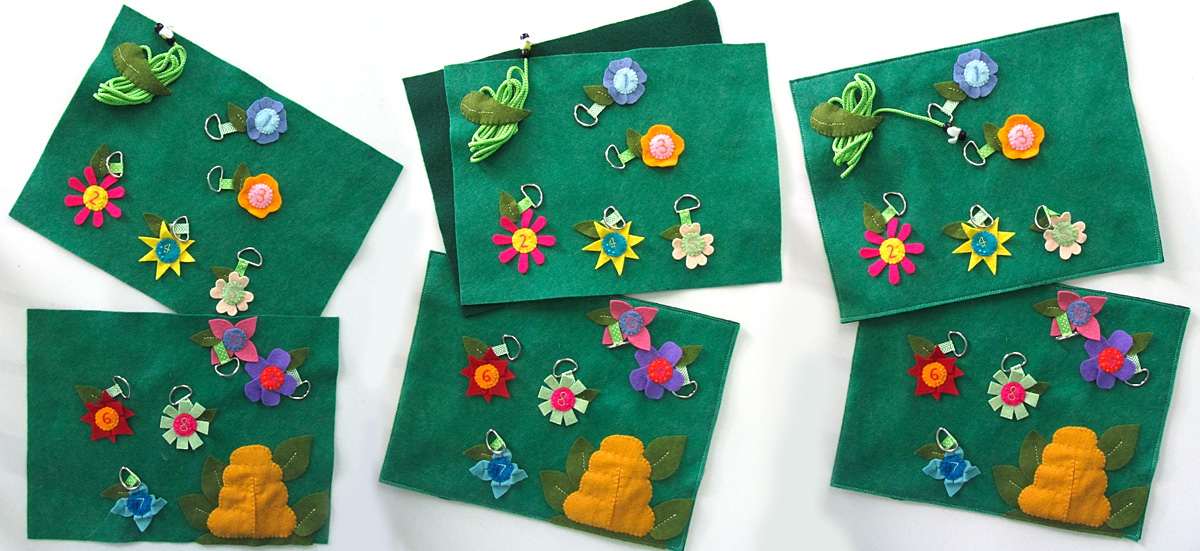
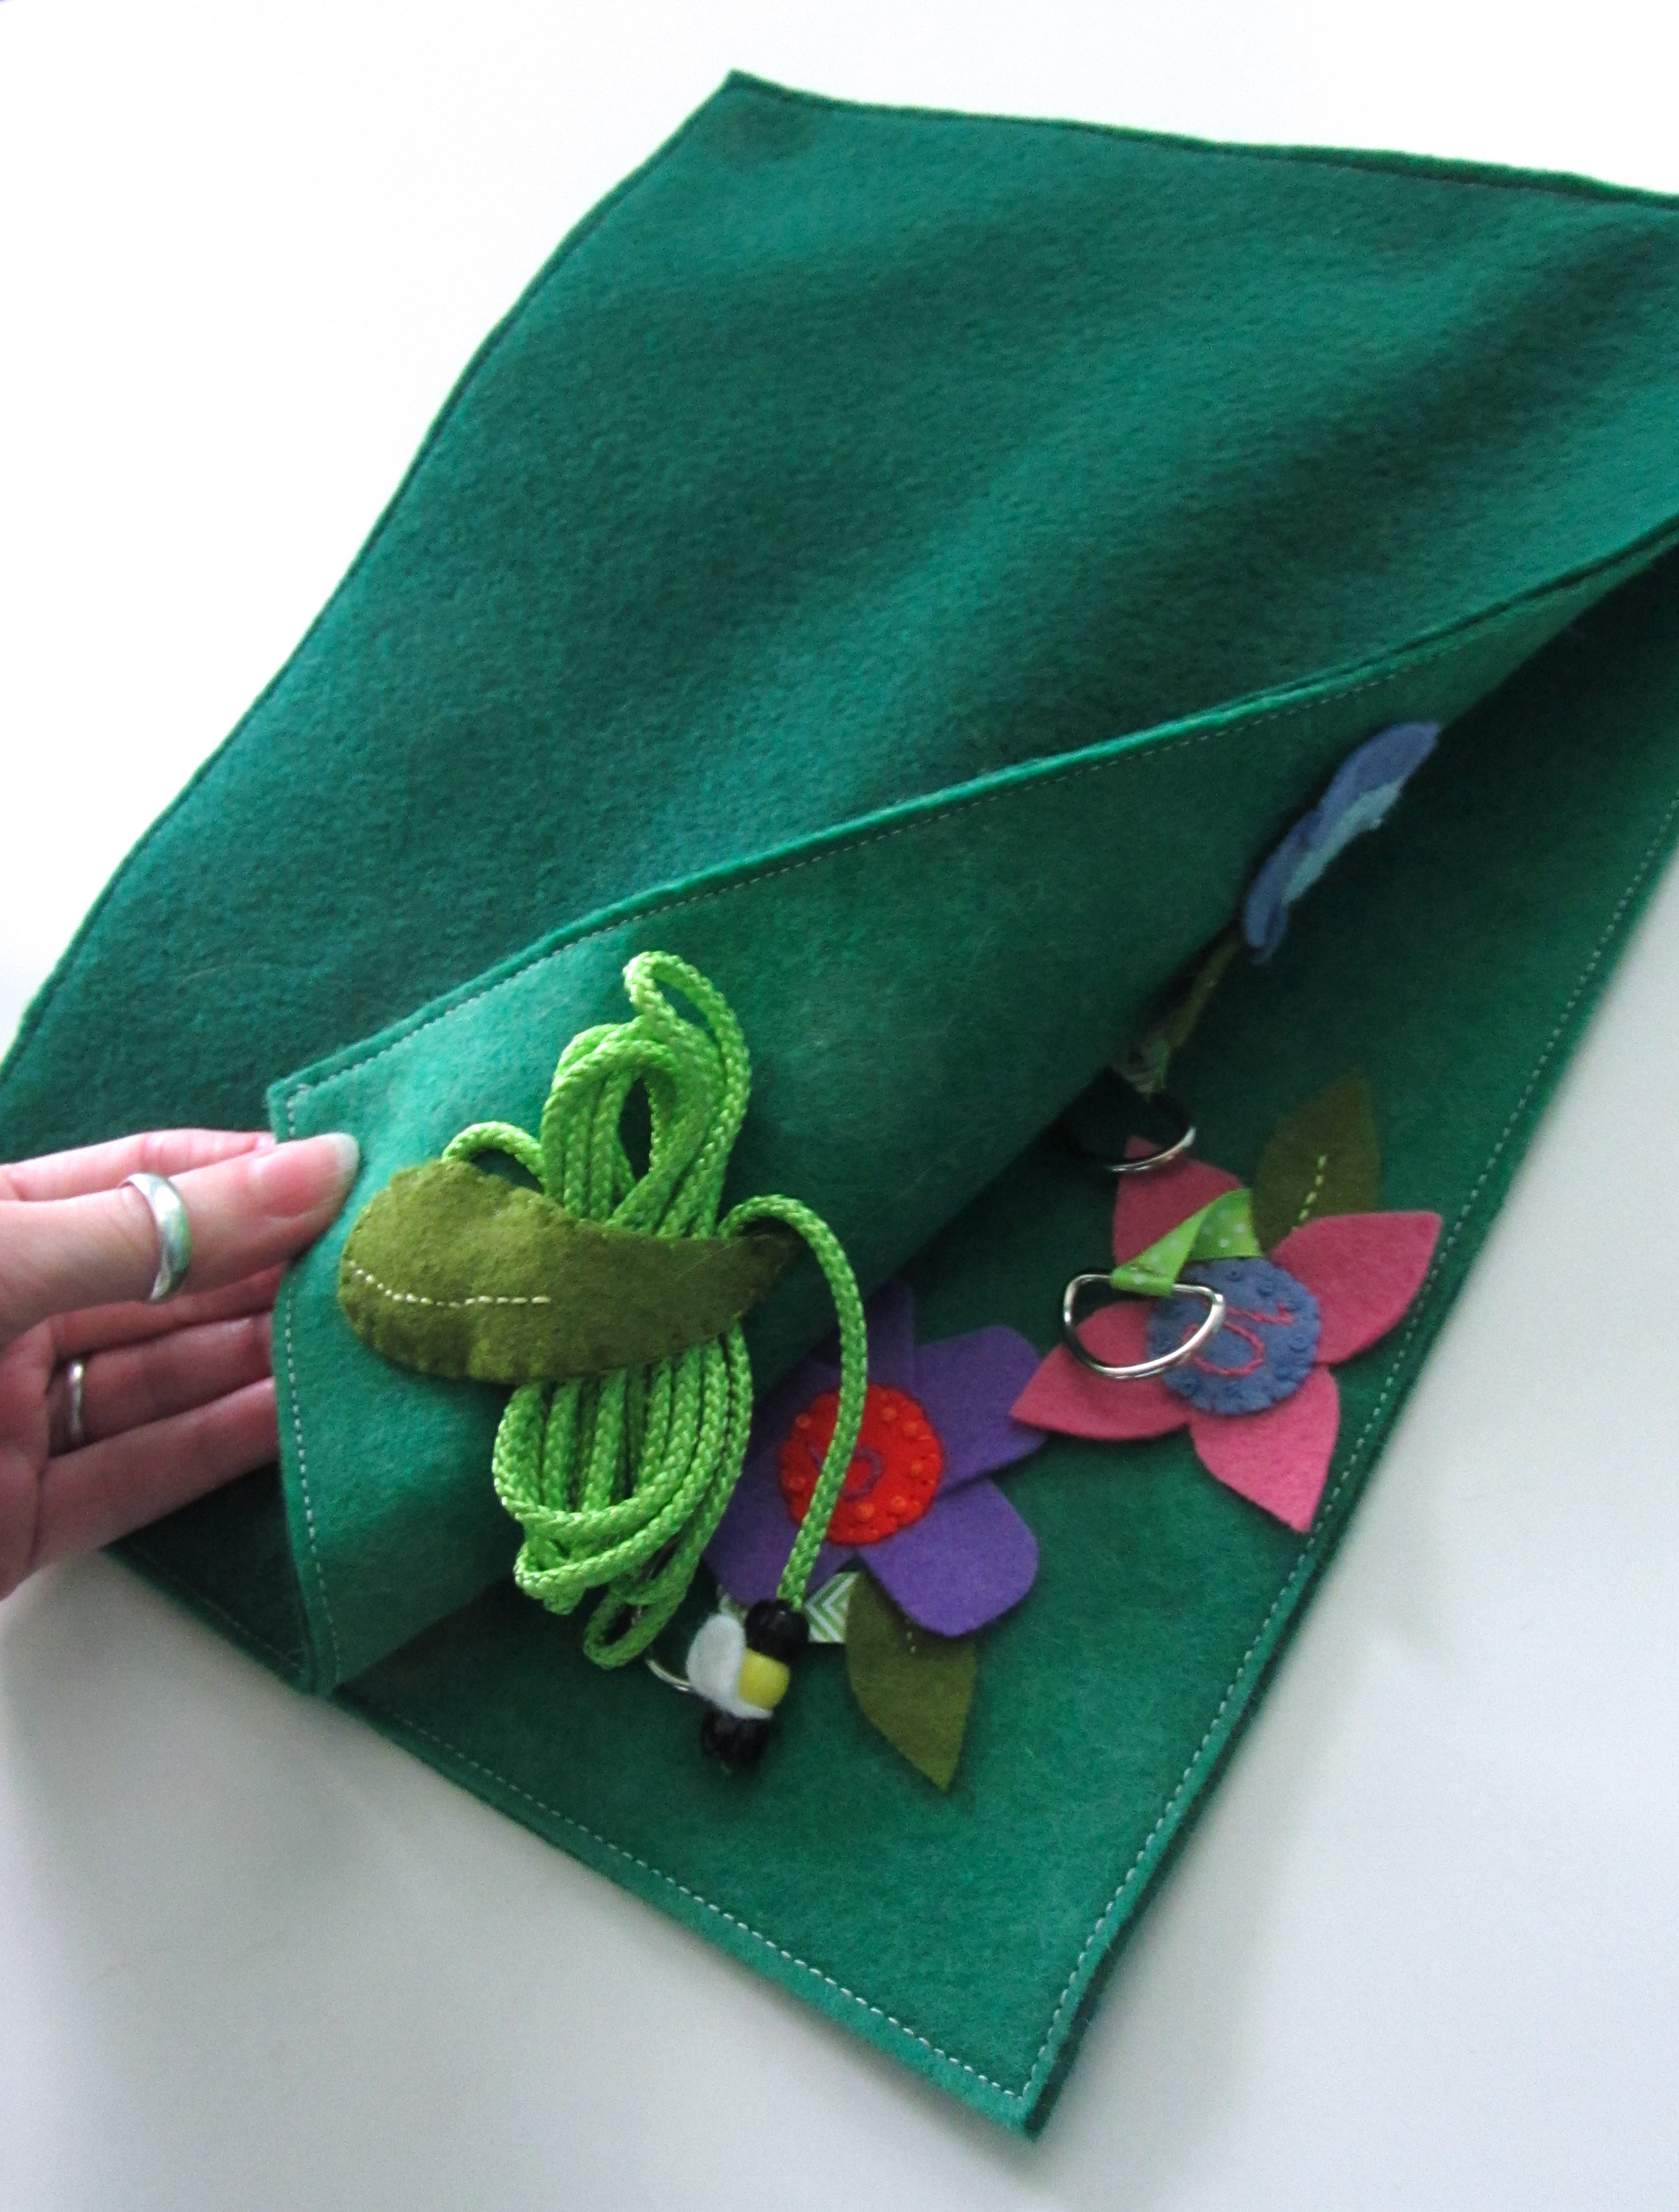
This page came about because I wanted to do a page about spring flowers and bees, but I also wanted to do something to help Jax with his manual dexterity. A lacing activity was the perfect combination! Since Jax is in to dot-to-dots and mazes, I numbered the flowers so the bee needs to follow the correct path to collect pollen and bring it back to the hive.
This two-page spread is a scrap-buster. All the flowers are made from my scrap felt from American Felt and Craft. Their felt is way to pretty to throw away even the smallest scraps. But my scrap bucket is overflowing! This was a perfect way to use up a bit of it.
What I used:
- The Pattern
- Two 12″ x 9″ felt sheets in jade
- Felt (in gold nugget, cilantro and white)
- Wool-blend felt scraps from American Felt and Craft
- 10 D-rings (3/4″ size)
- Green cord (mine is Wright’s Creative Classics 1/8″)
- Ribbons (Mine were two little dollar bin spools – chevron from this pack
and dots from this pack
)
- Pony Beads
(two black and one yellow)
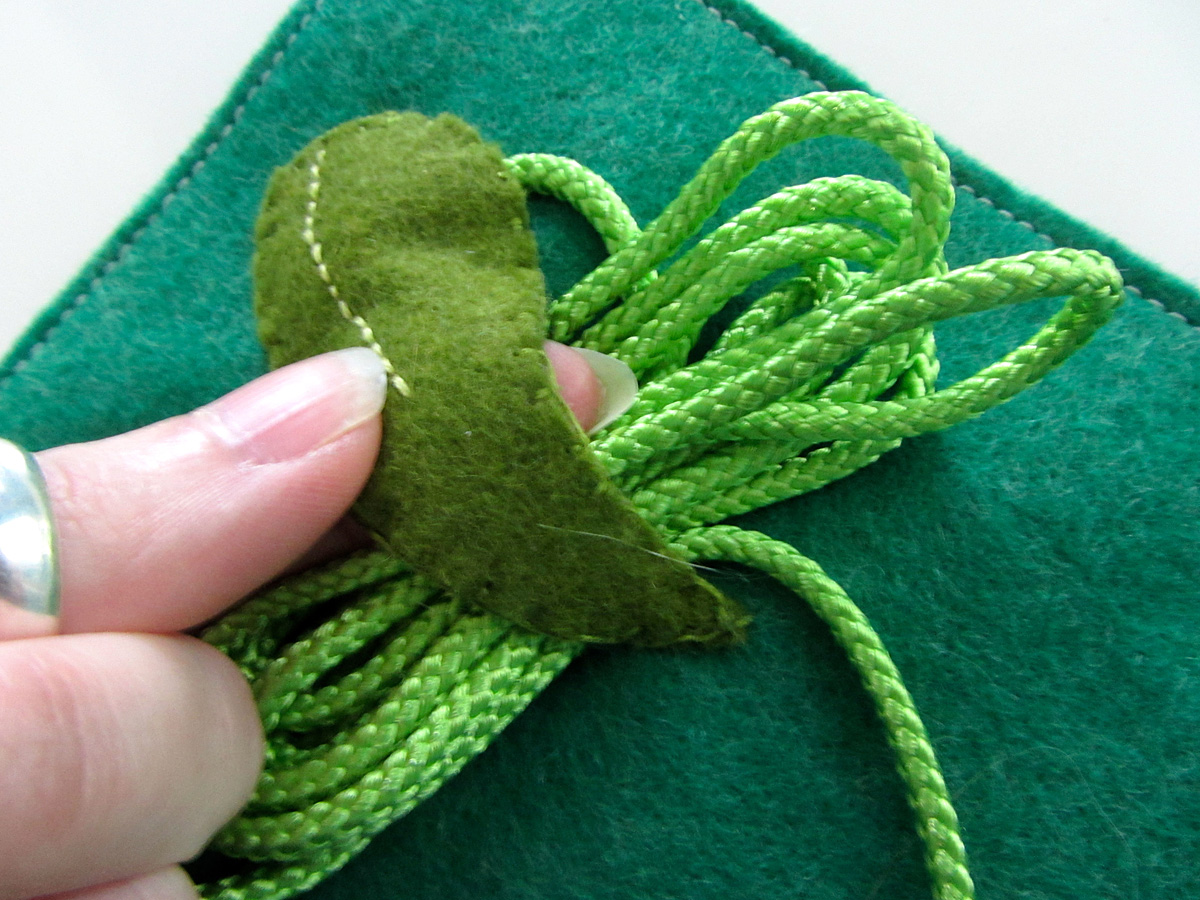
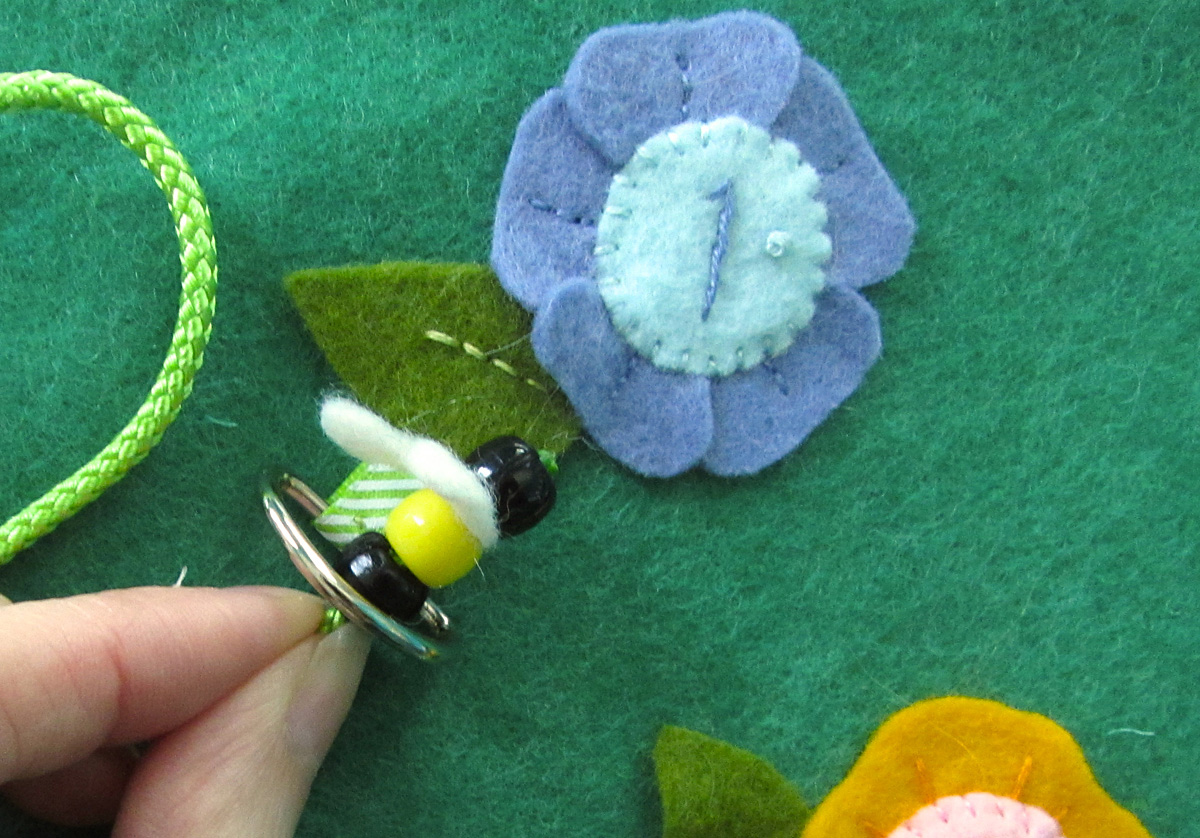
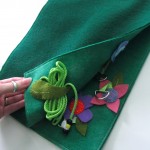
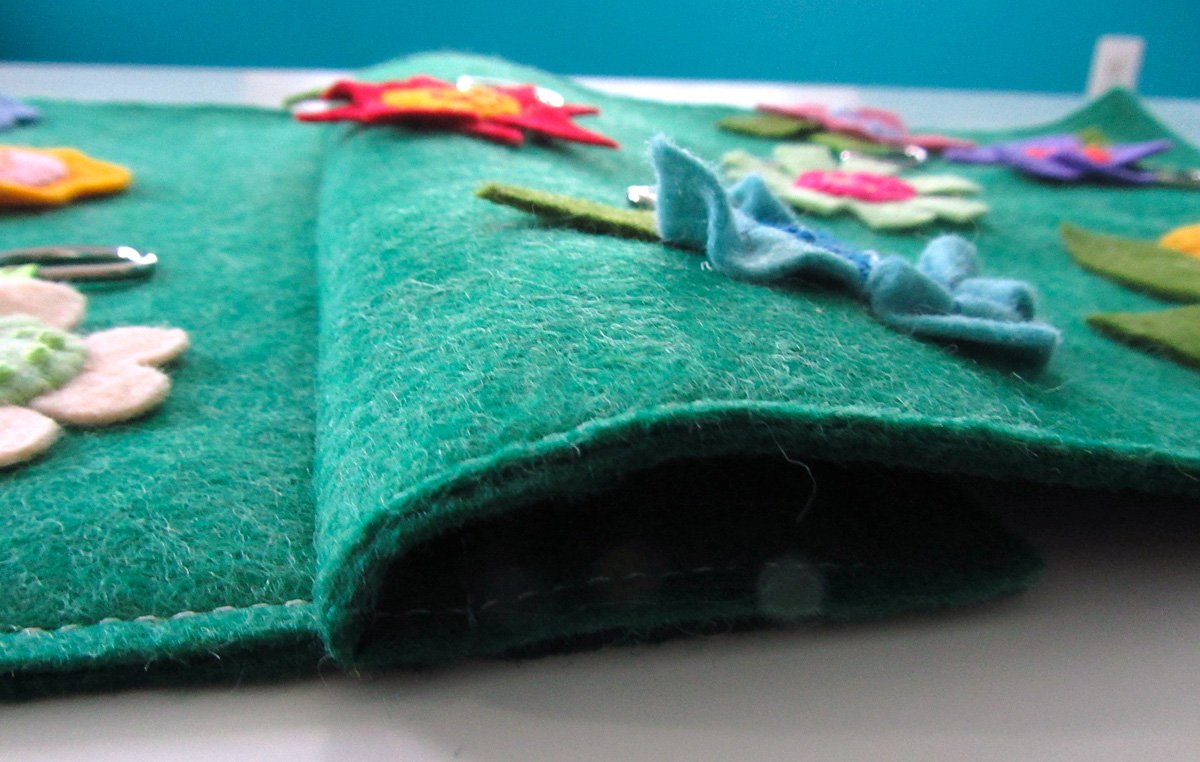
Starting Leaf: Back stitch a vein on the top leaf piece then sew both layers together. Stitch one end of your cord to the page, then sew the leaf to the page one each end, leaving the center open to hold the extra cord. My cord is sewn to the page under where the leaf is sewn down.
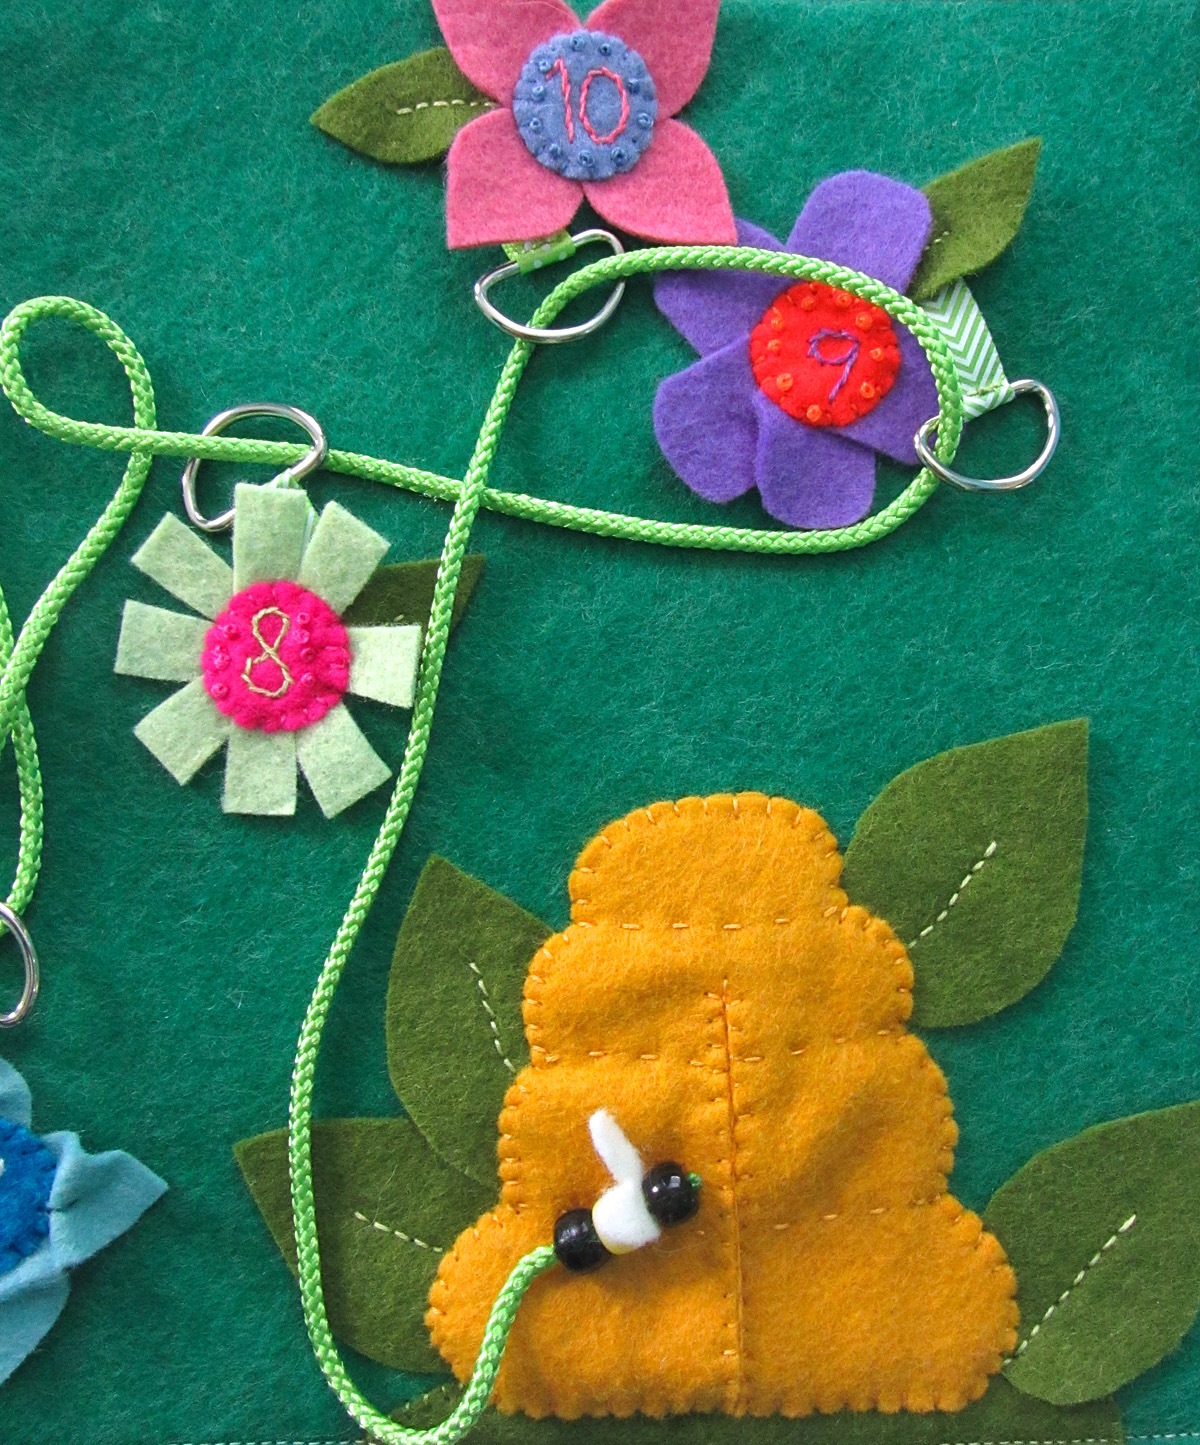
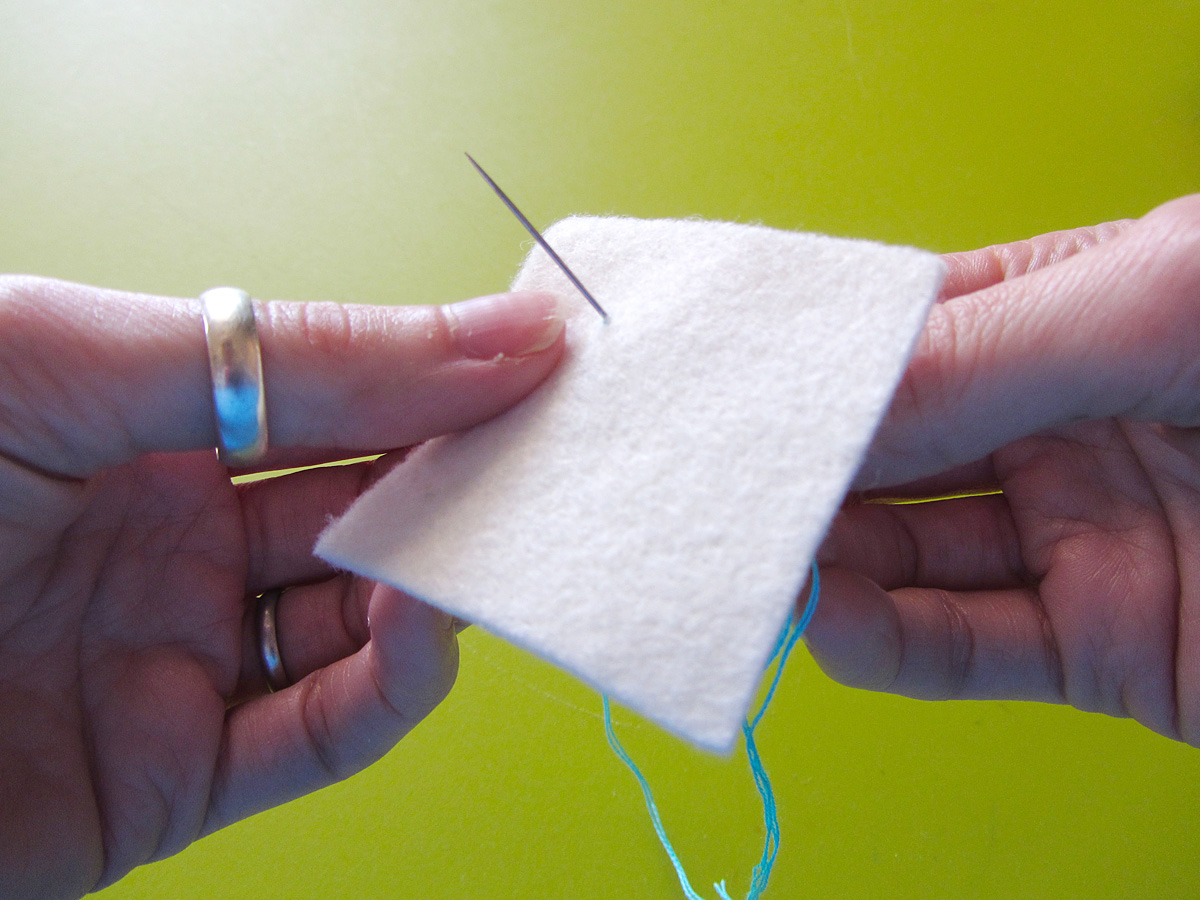
Hive: Stitch the ground piece to the page on the ends. The rest will get sewn down under the hive. Sew the leaves down one at a time by back stitching a center vein.

Cut the center slit in both hive pieces, then sew a running stitches (dashed lines) to show the layers of the hive. Pin the two layers of the hive together and sew both sides of the slit using a blanket stitch. Pin the hive onto the page and sew it down around the outside edge.
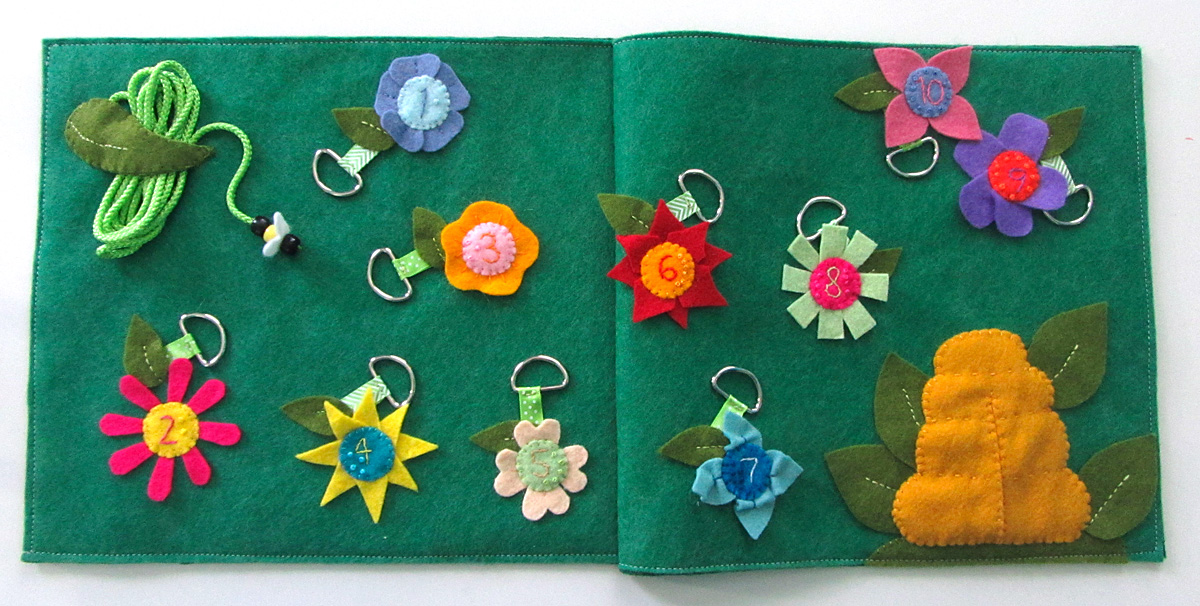
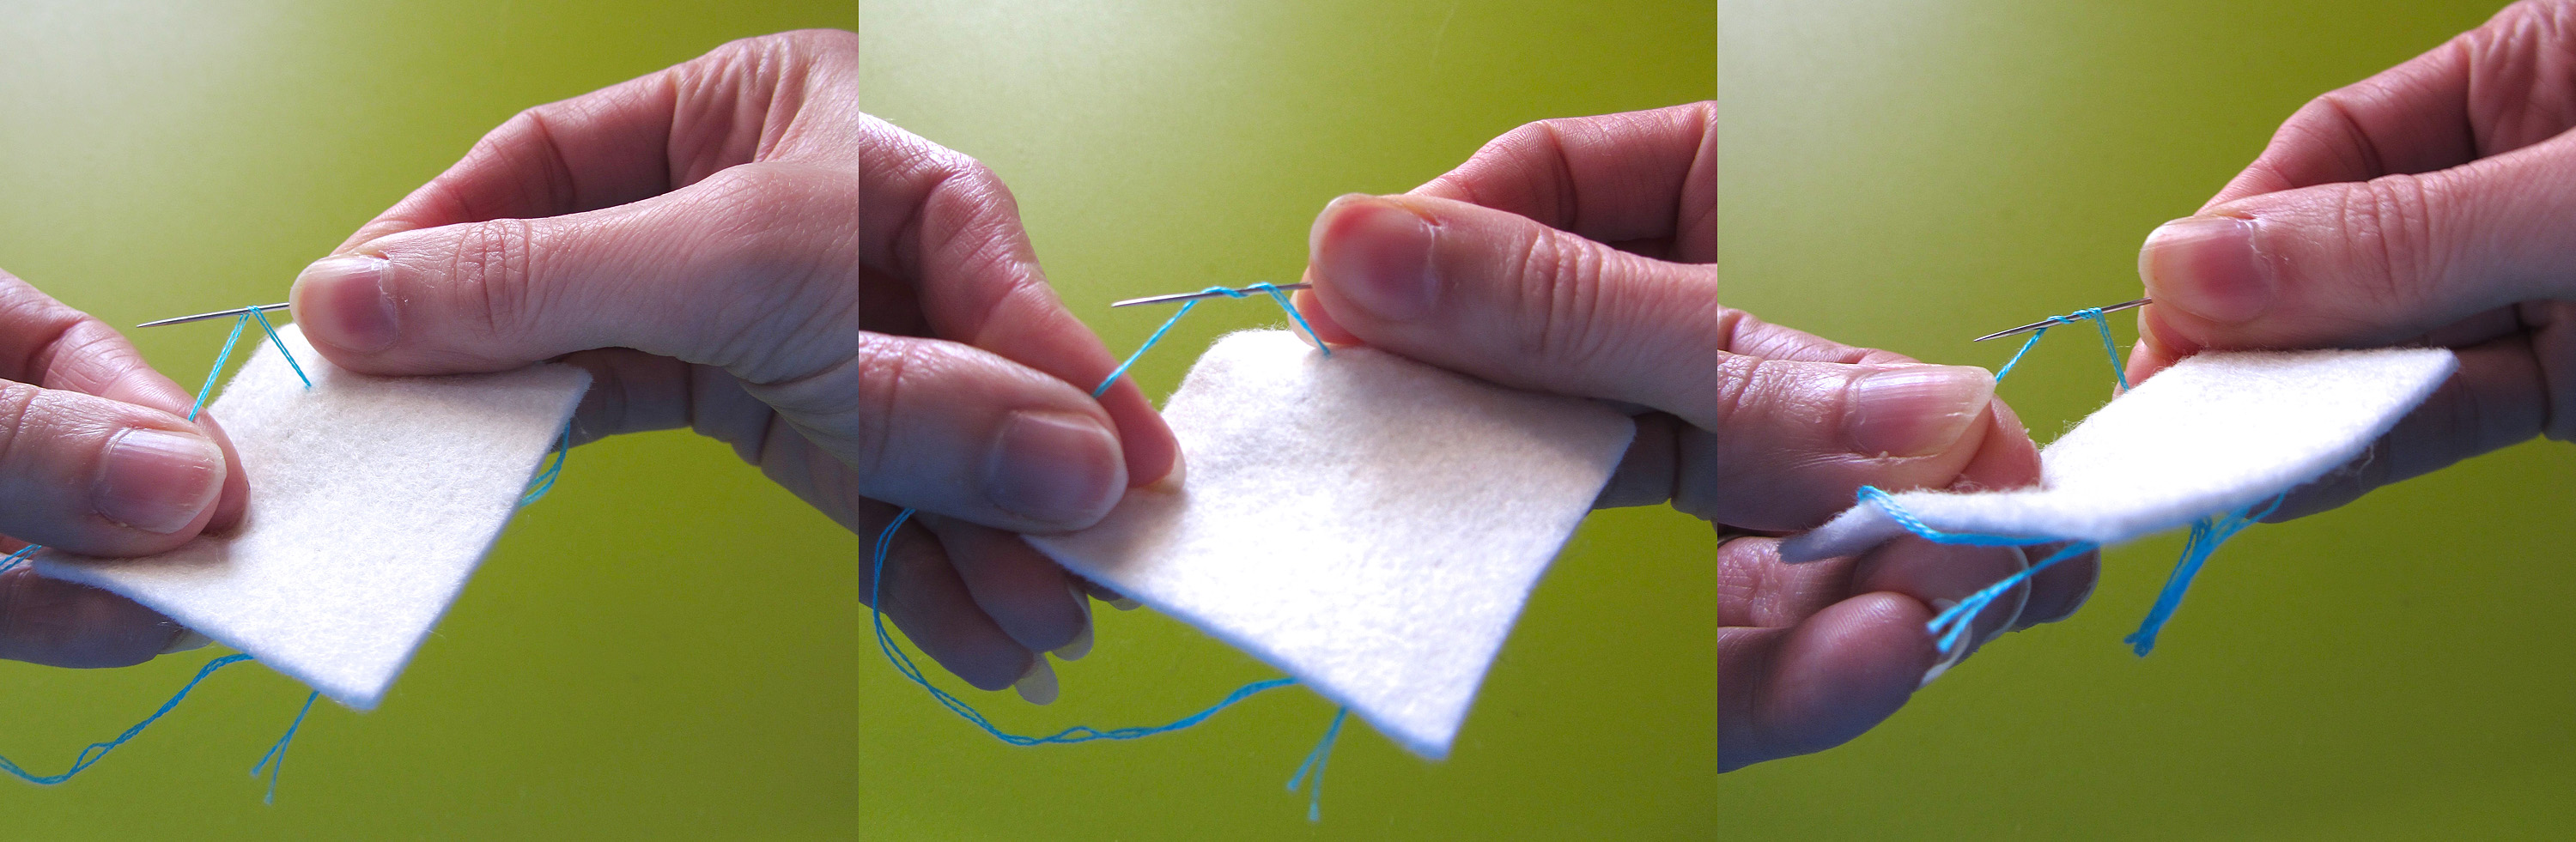
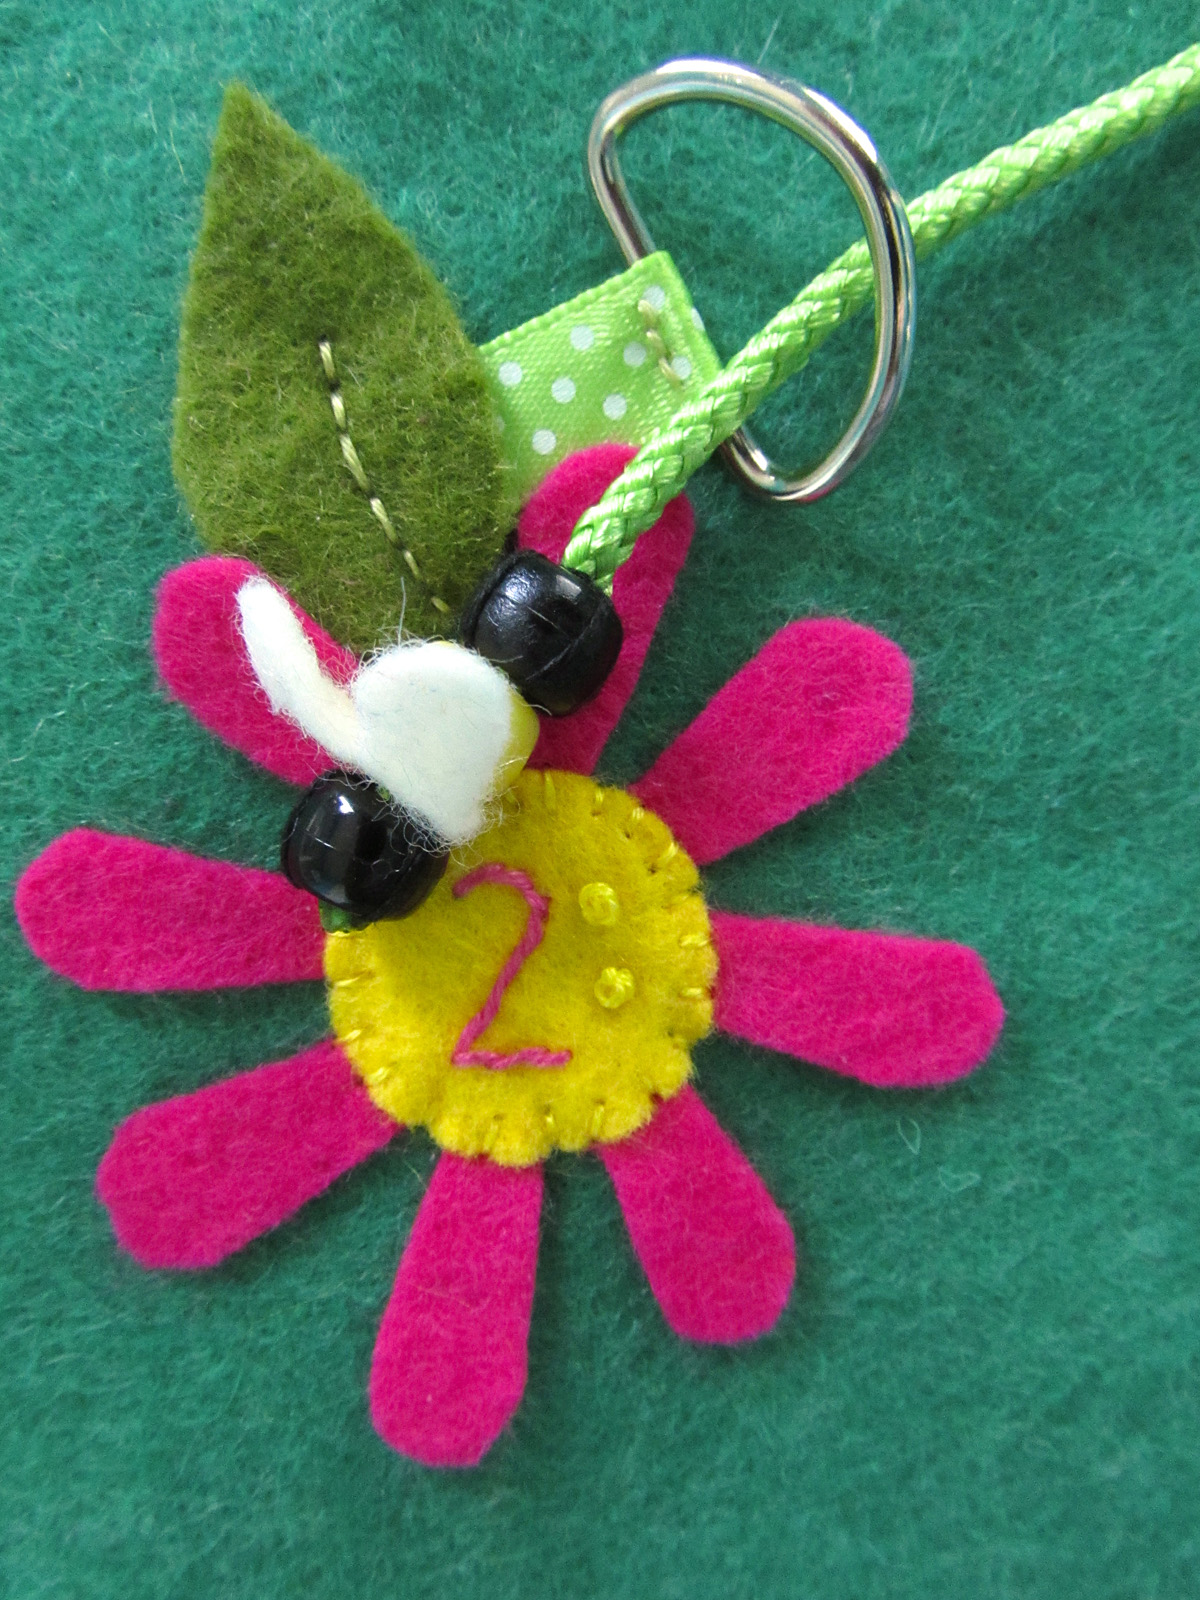
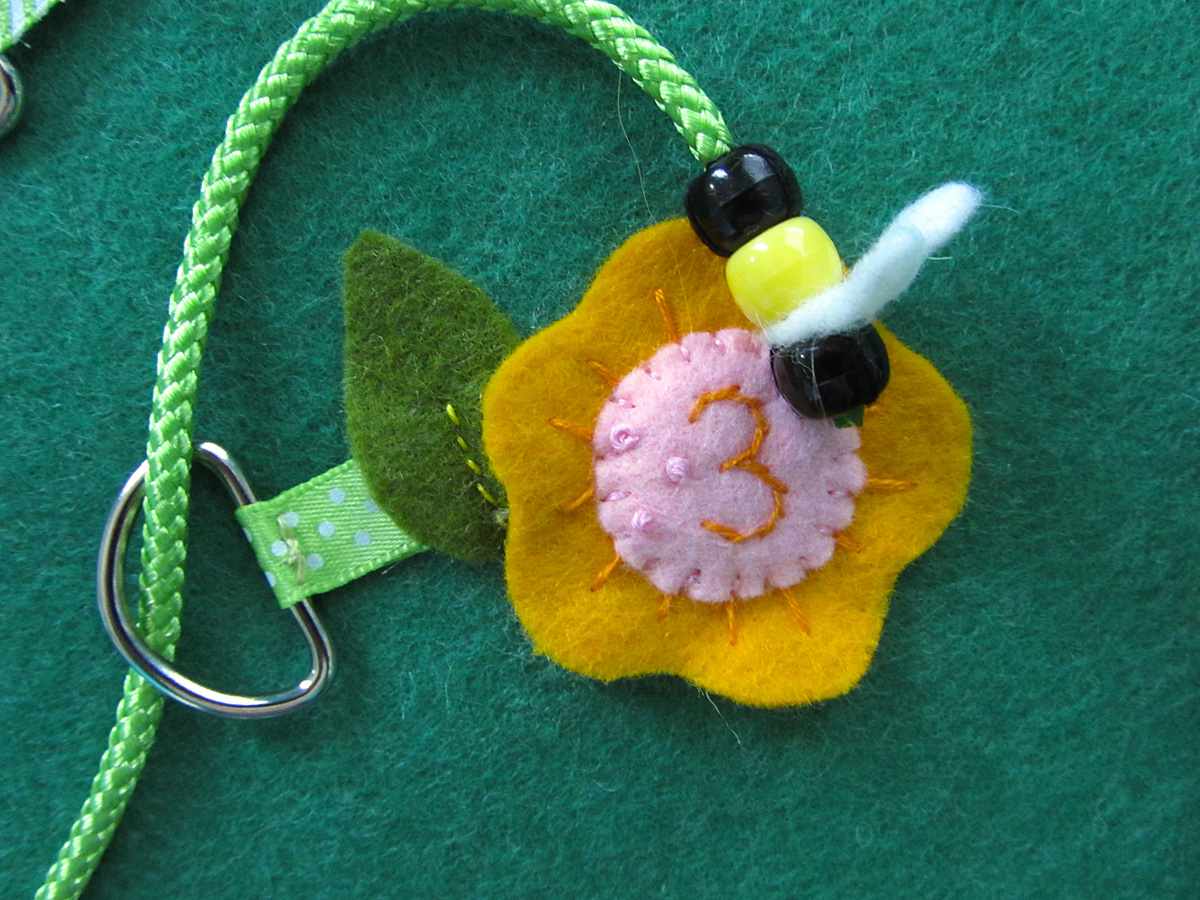
Leaves and D-rings: For each flower, cut about 3.5″ of ribbon and fold it in half through a D-ring. Stitch through the ribbon just below the D-ring to hold the ring in place at the end of the folded ribbon. (Zoom in to the above photo to see!) Place each ribbon and D-ring where it will be on the page, and pin a leaf over the end. Stitch the center vein of the leaf, making sure your stitching goes across the end of the ribbon to secure it to the page.
Flowers: You can definitely get creative with your flowers. I’ll tell you what I did for each, but go for it and make this page your own!
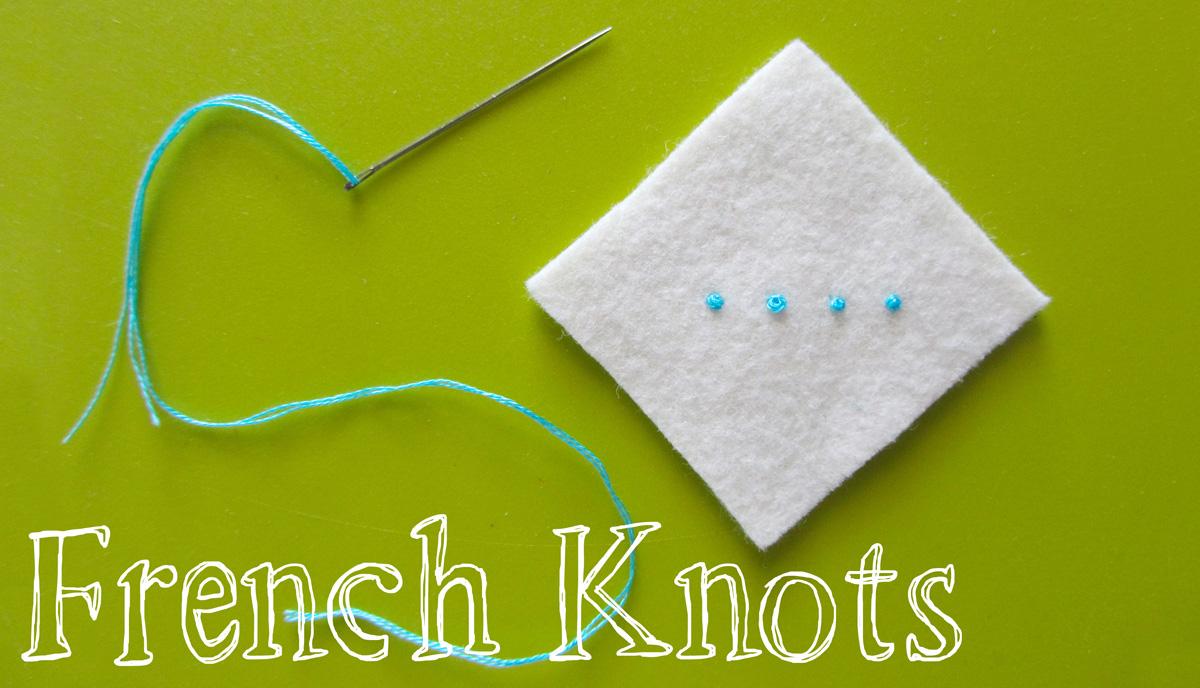
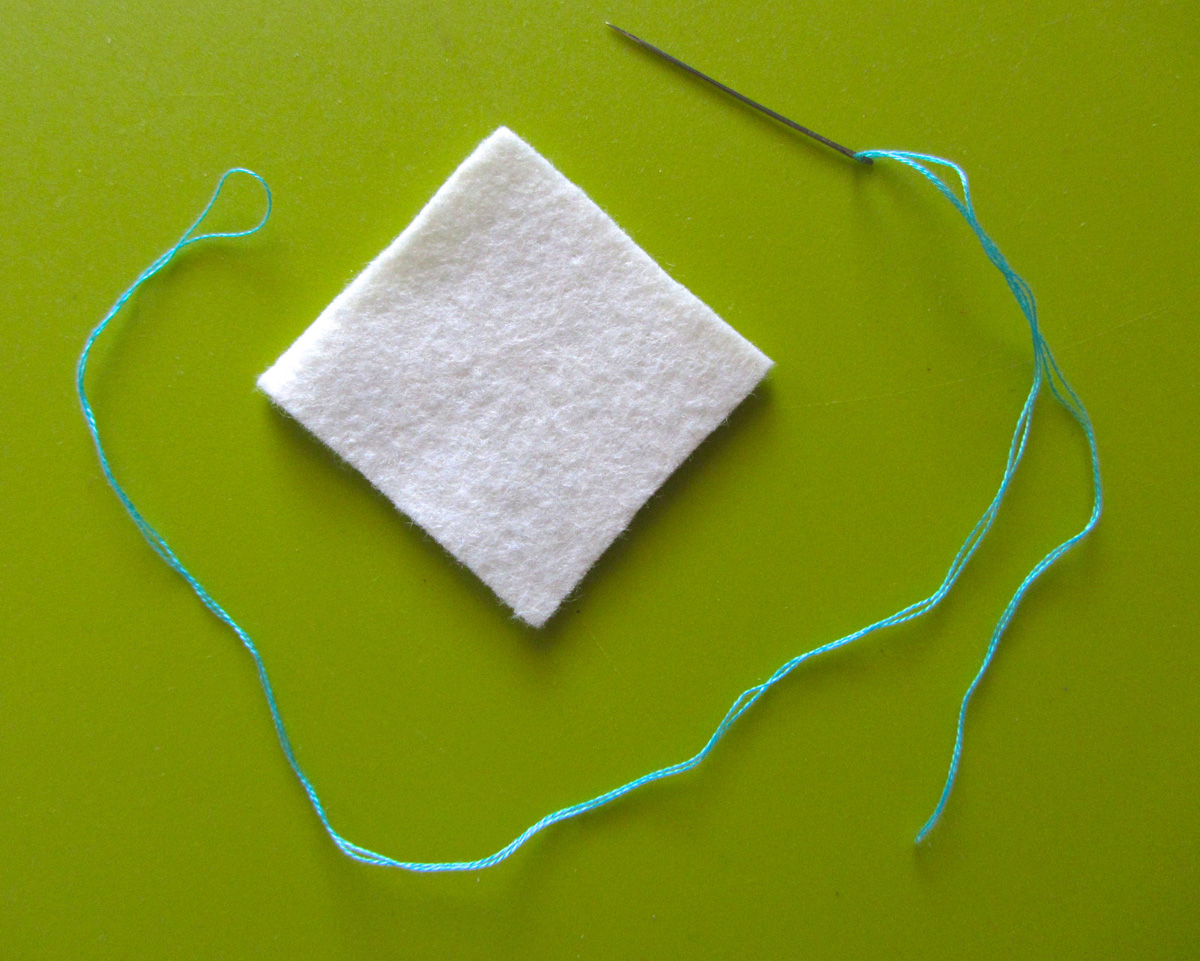
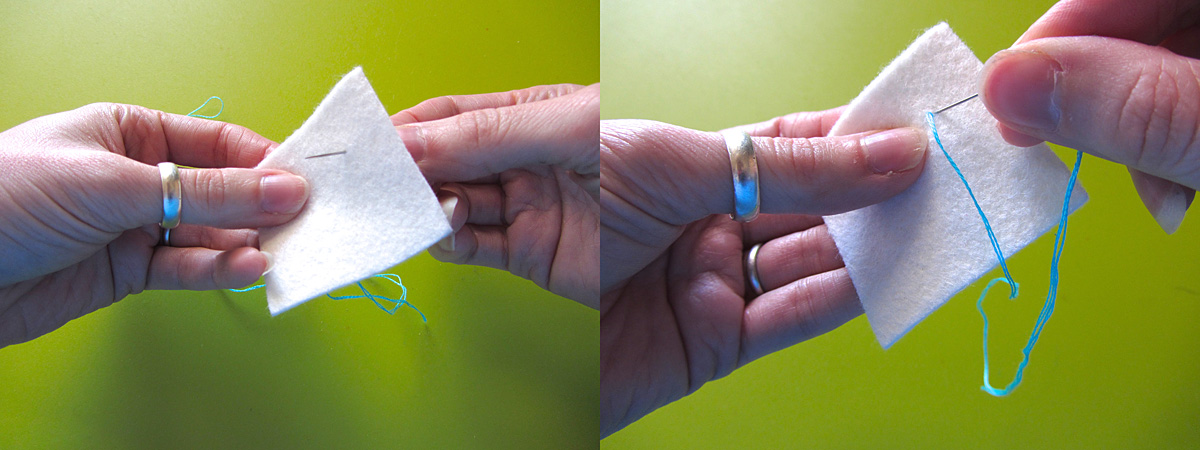
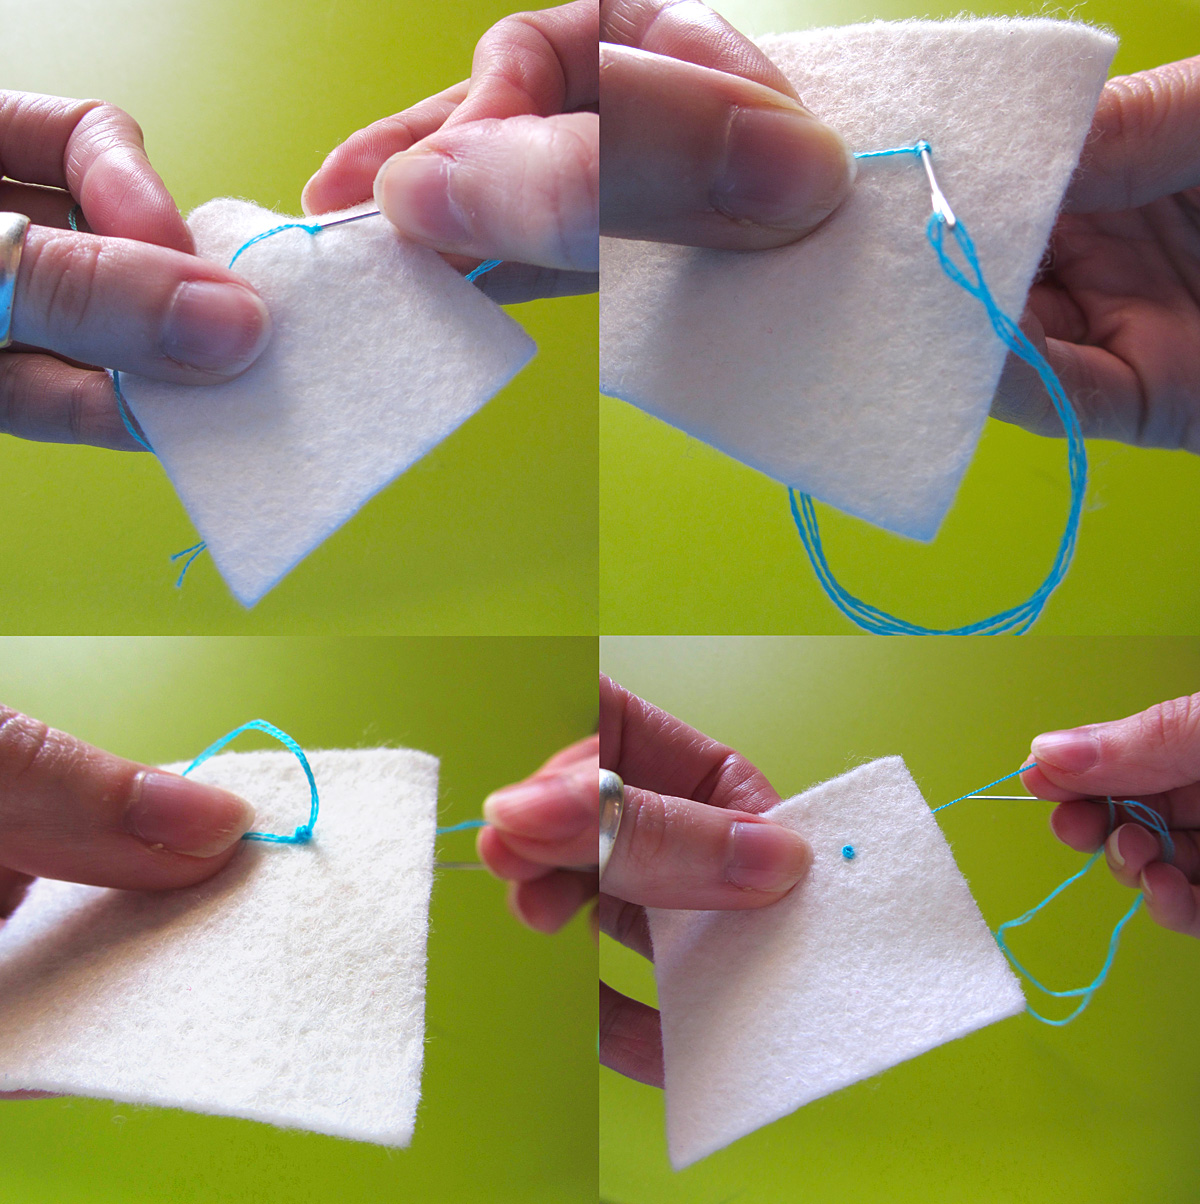
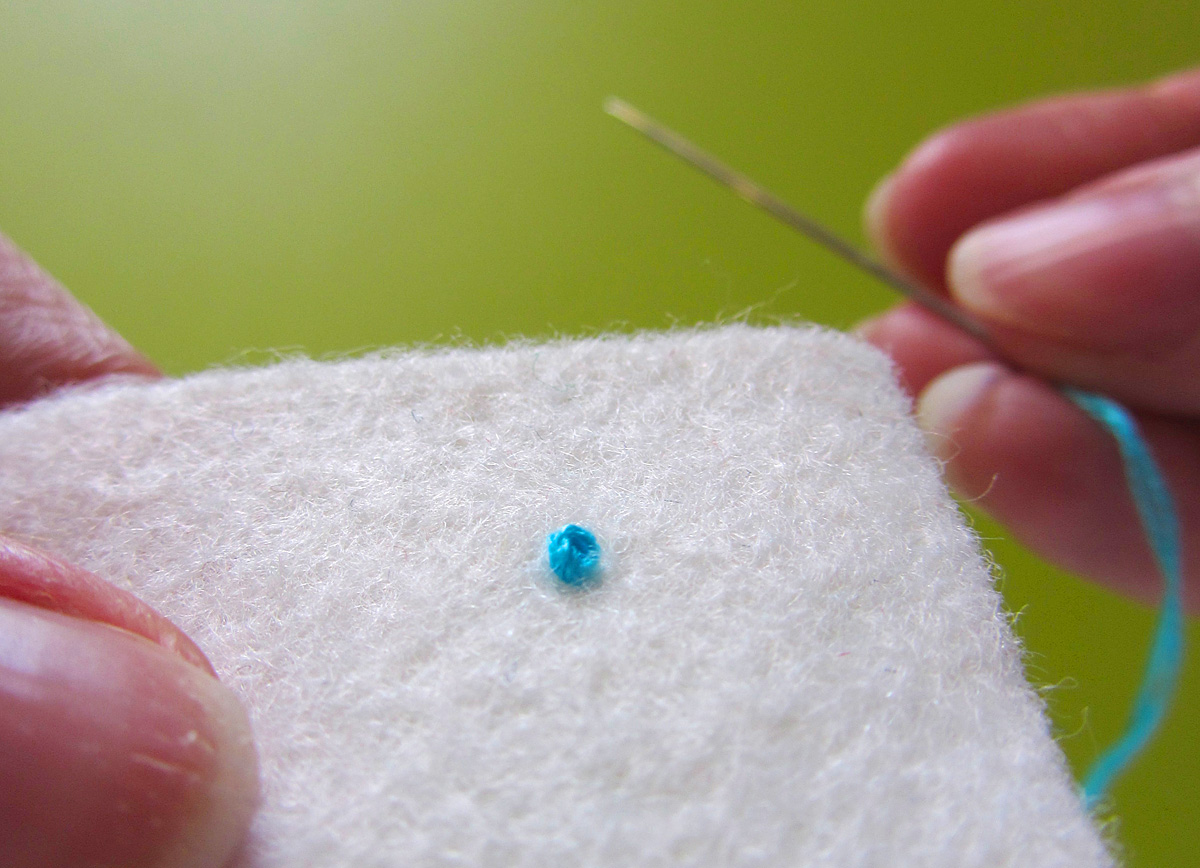
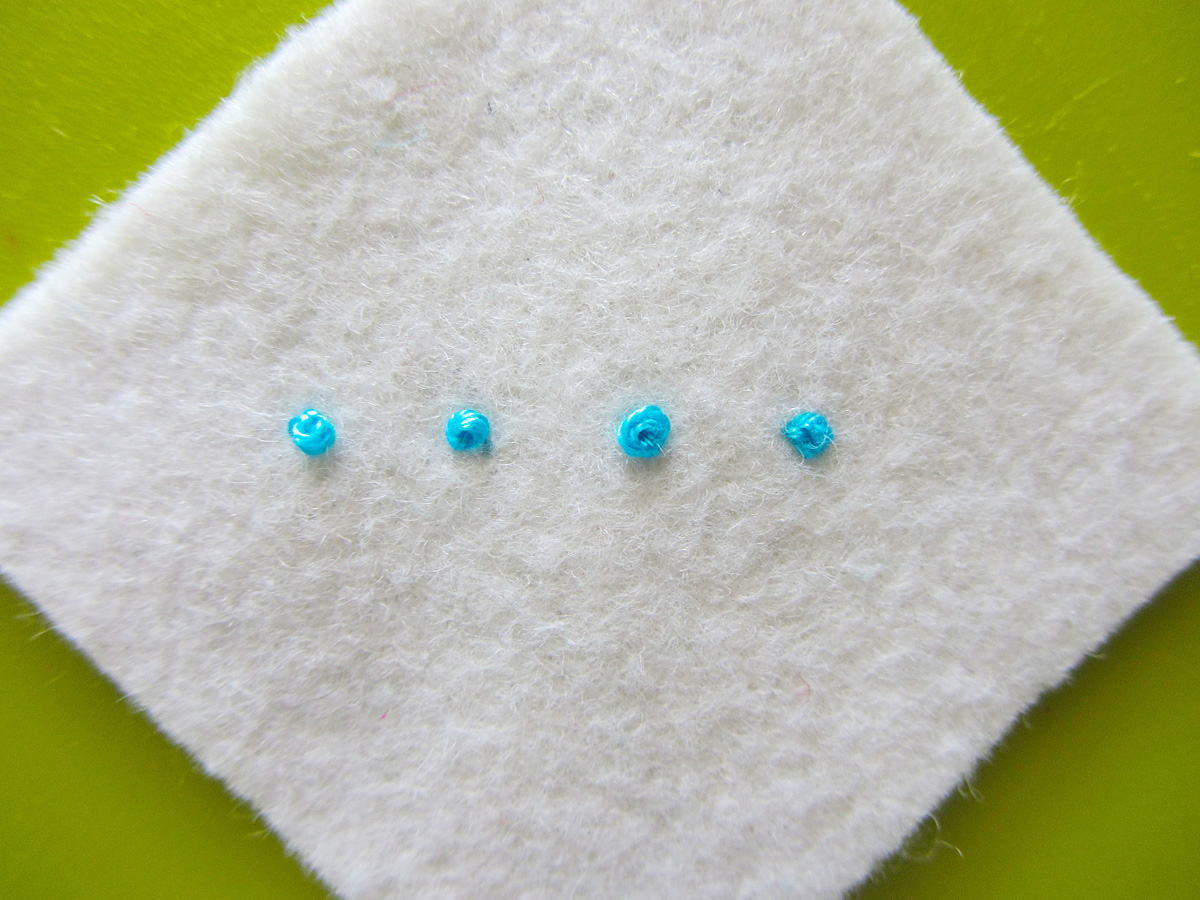
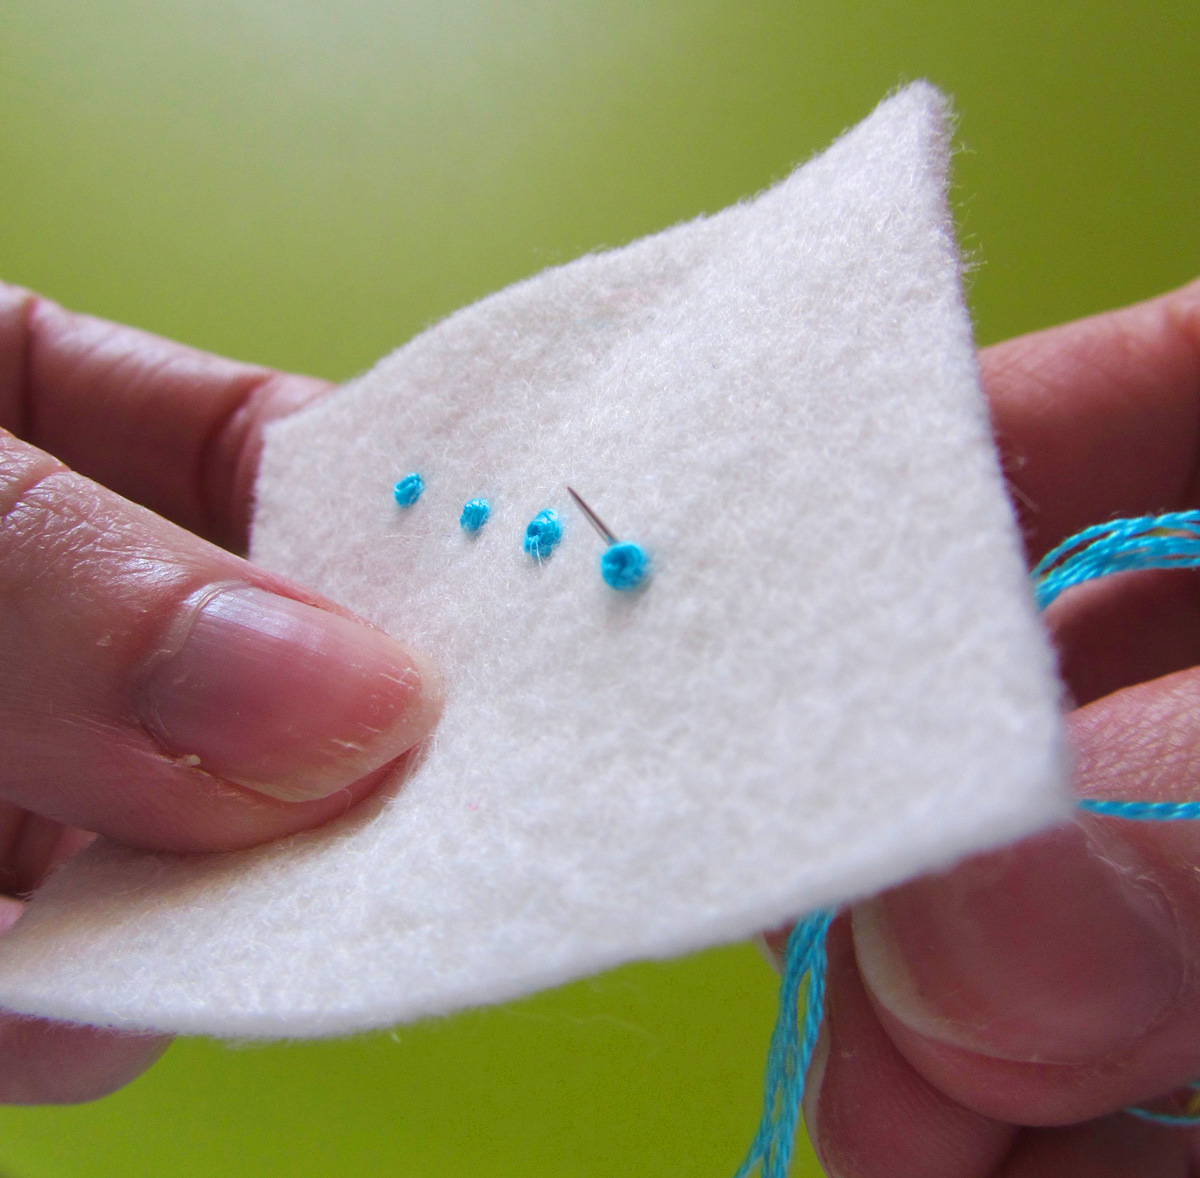
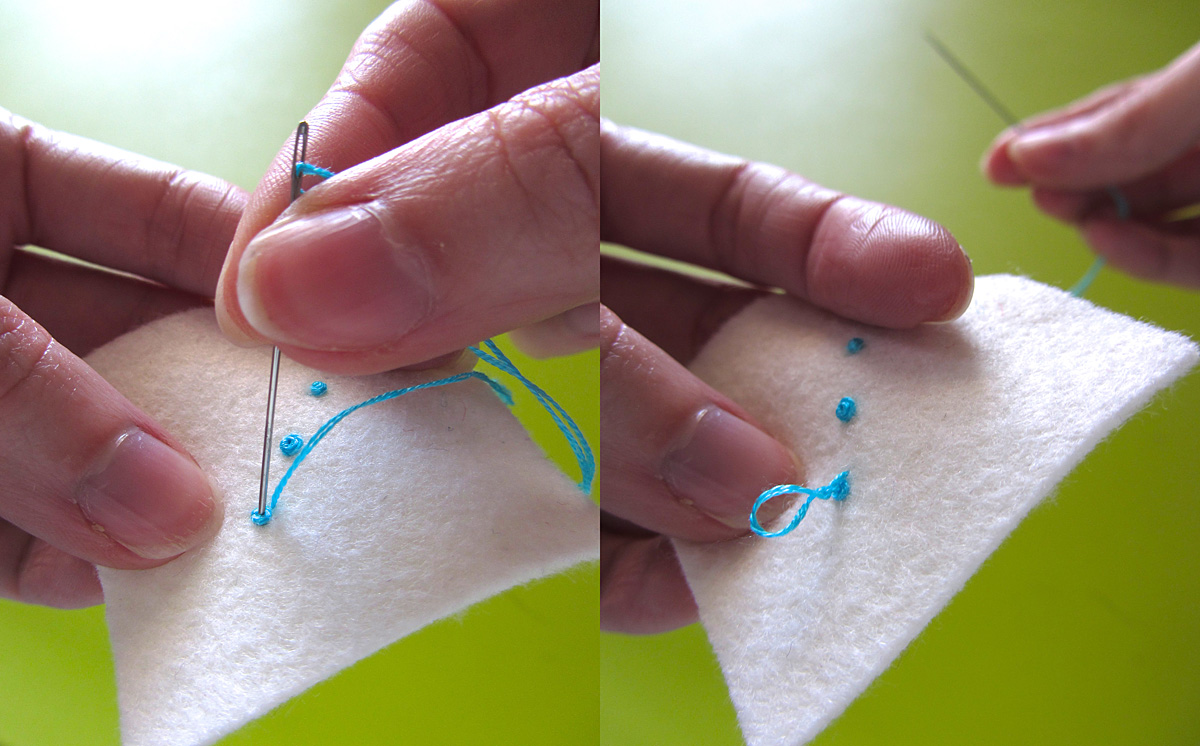
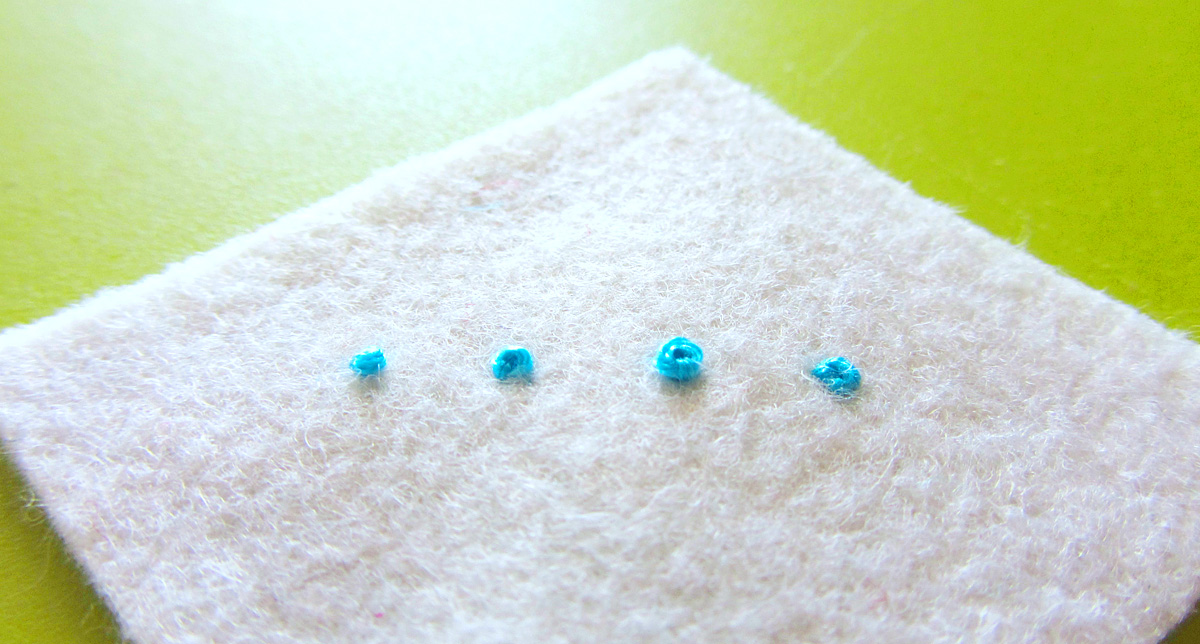
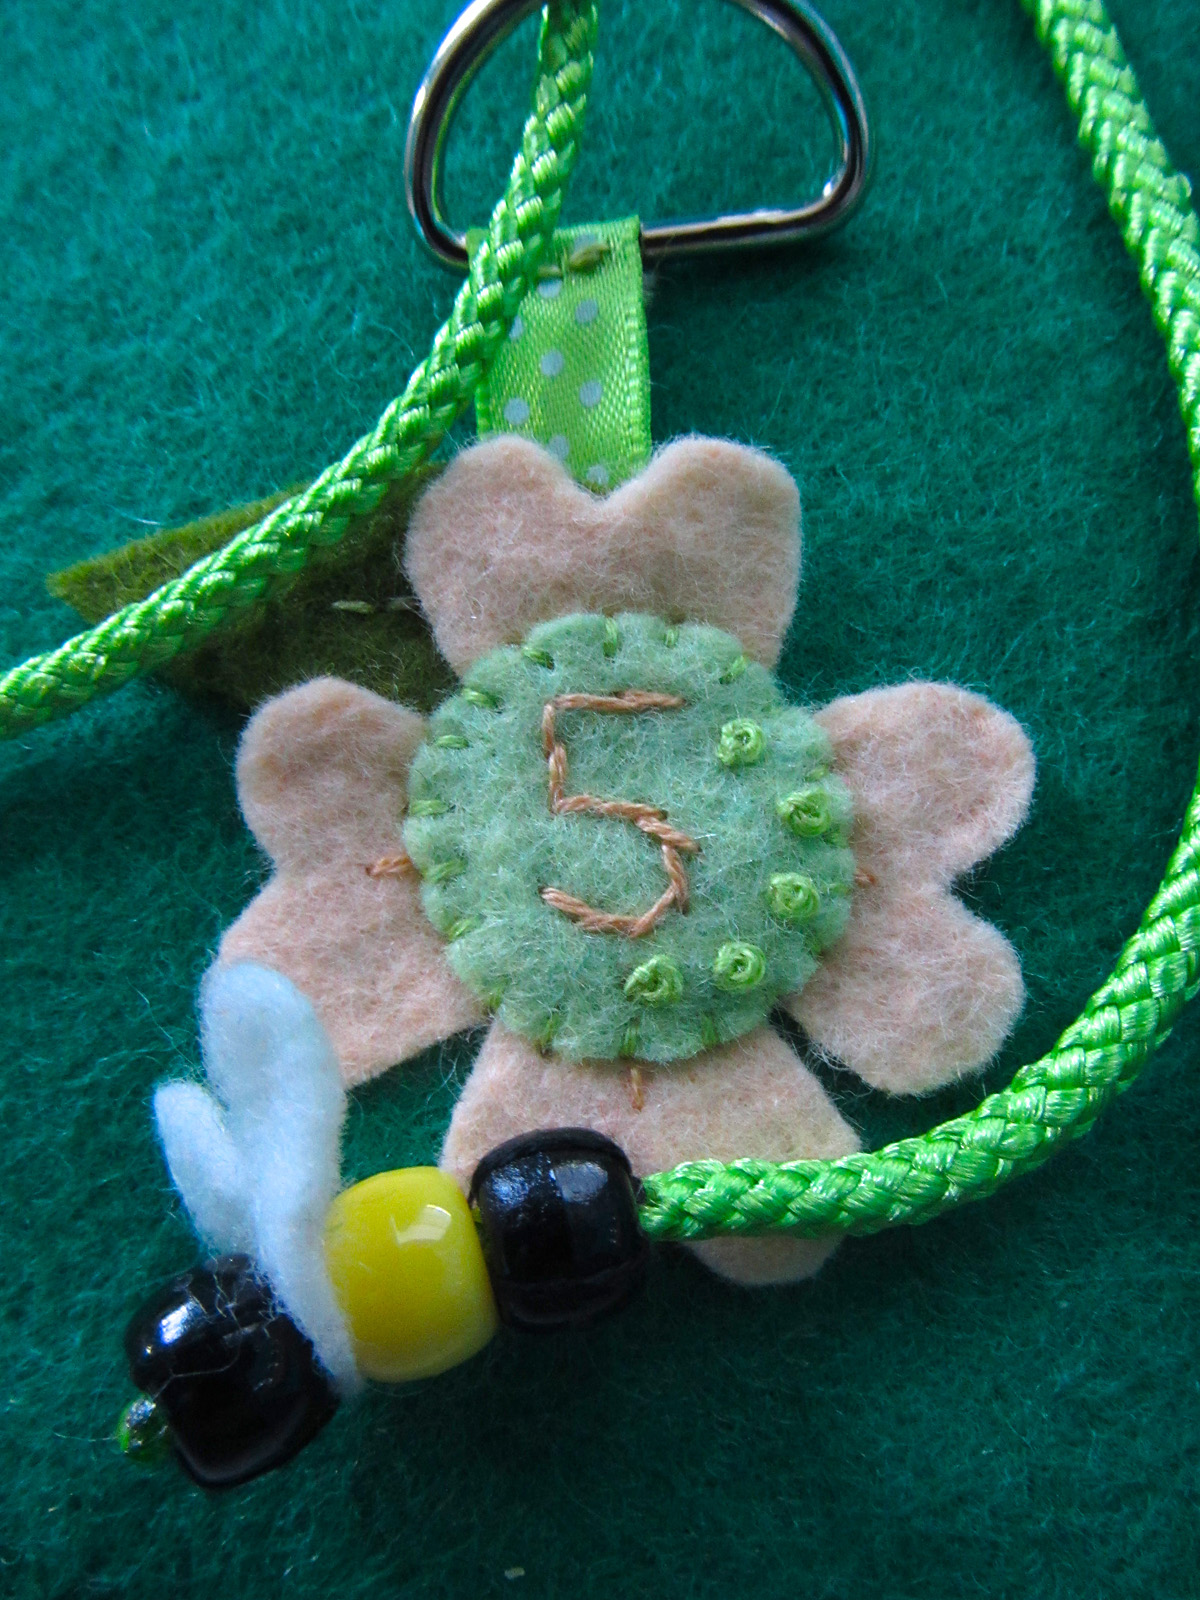
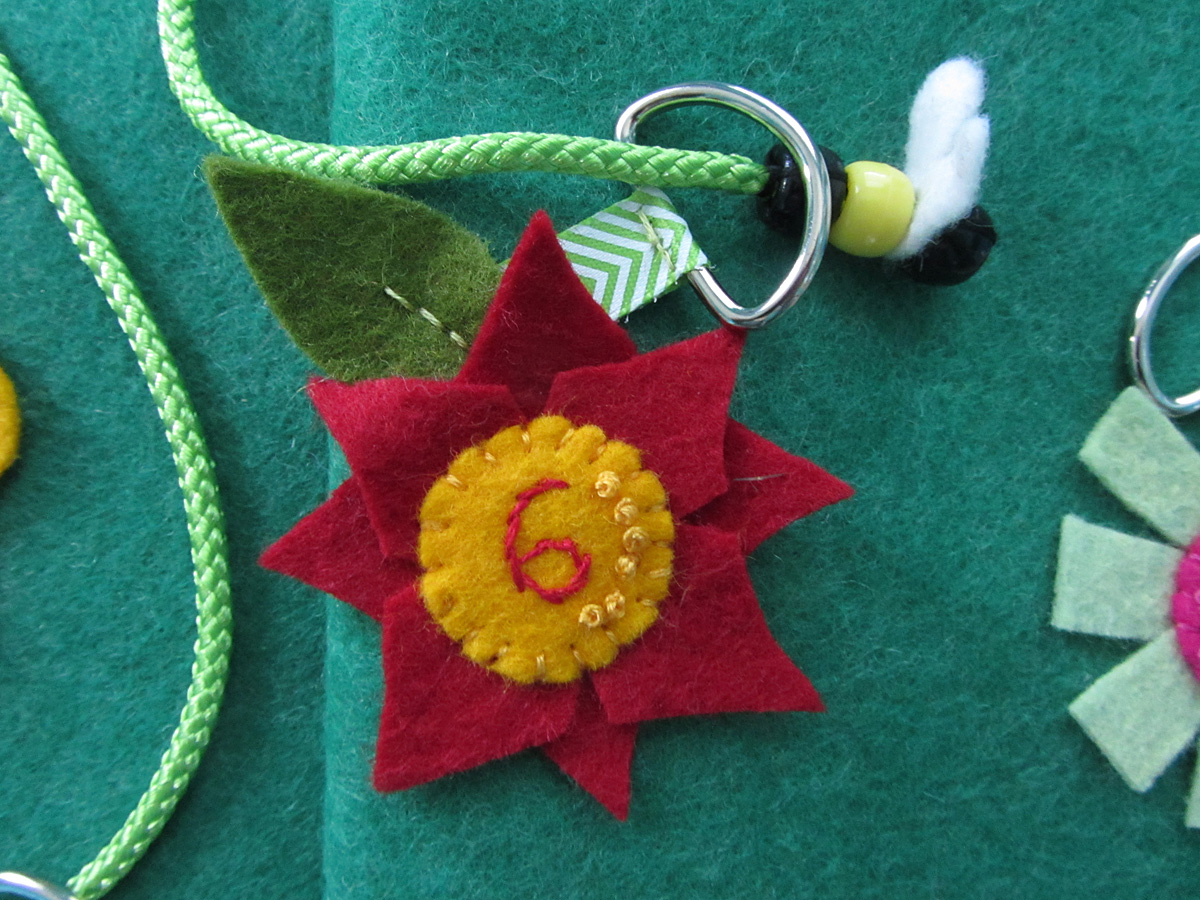
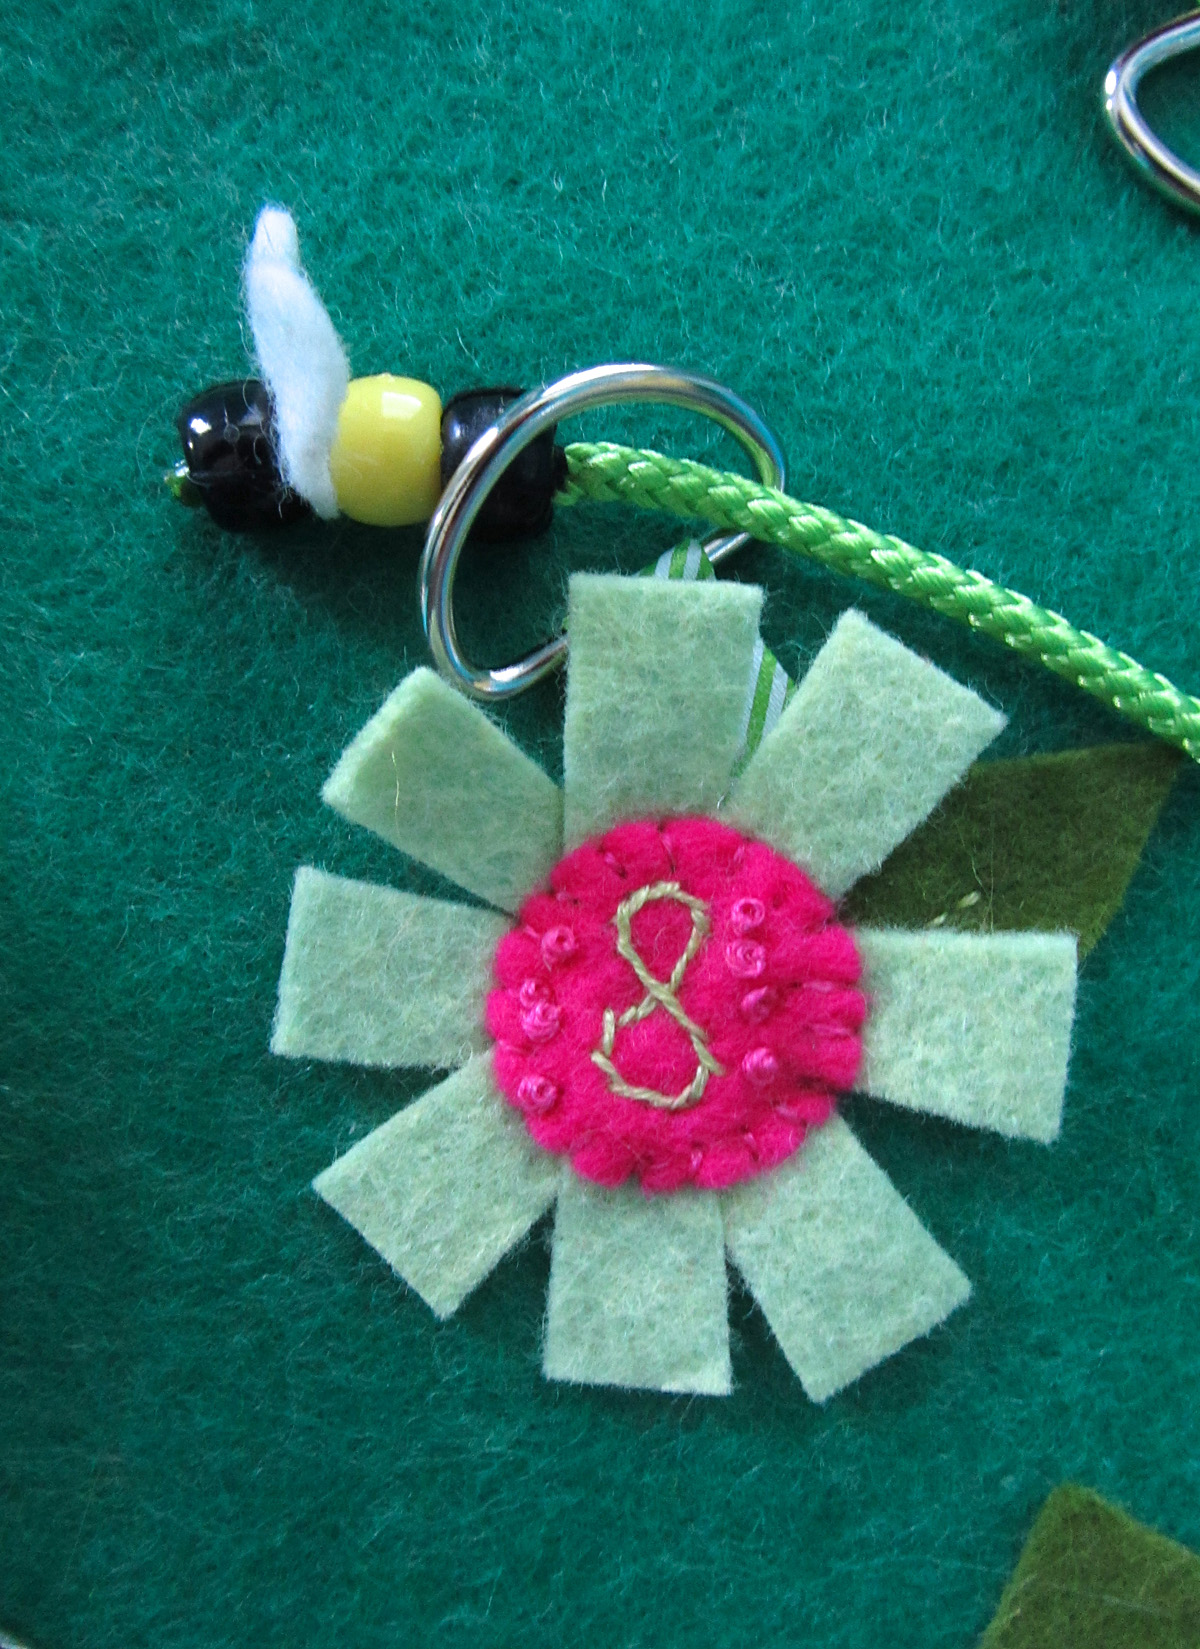
For each flower, I used a stem stitch to embroider the number on (using a thread that matches the petals.) I also made French knots in floss that matched the centers – the number of knots corresponding to the flower number.
Flower 1: I layered the petals evenly under the center and stitched the center on. Then I back stitched the center line of each petal.
Flower 2: The petals on this flower were evenly spaced around the center.
Flower 3: I centered the center on the flower petal piece and stitched it down. I made some straight stitches around the center.
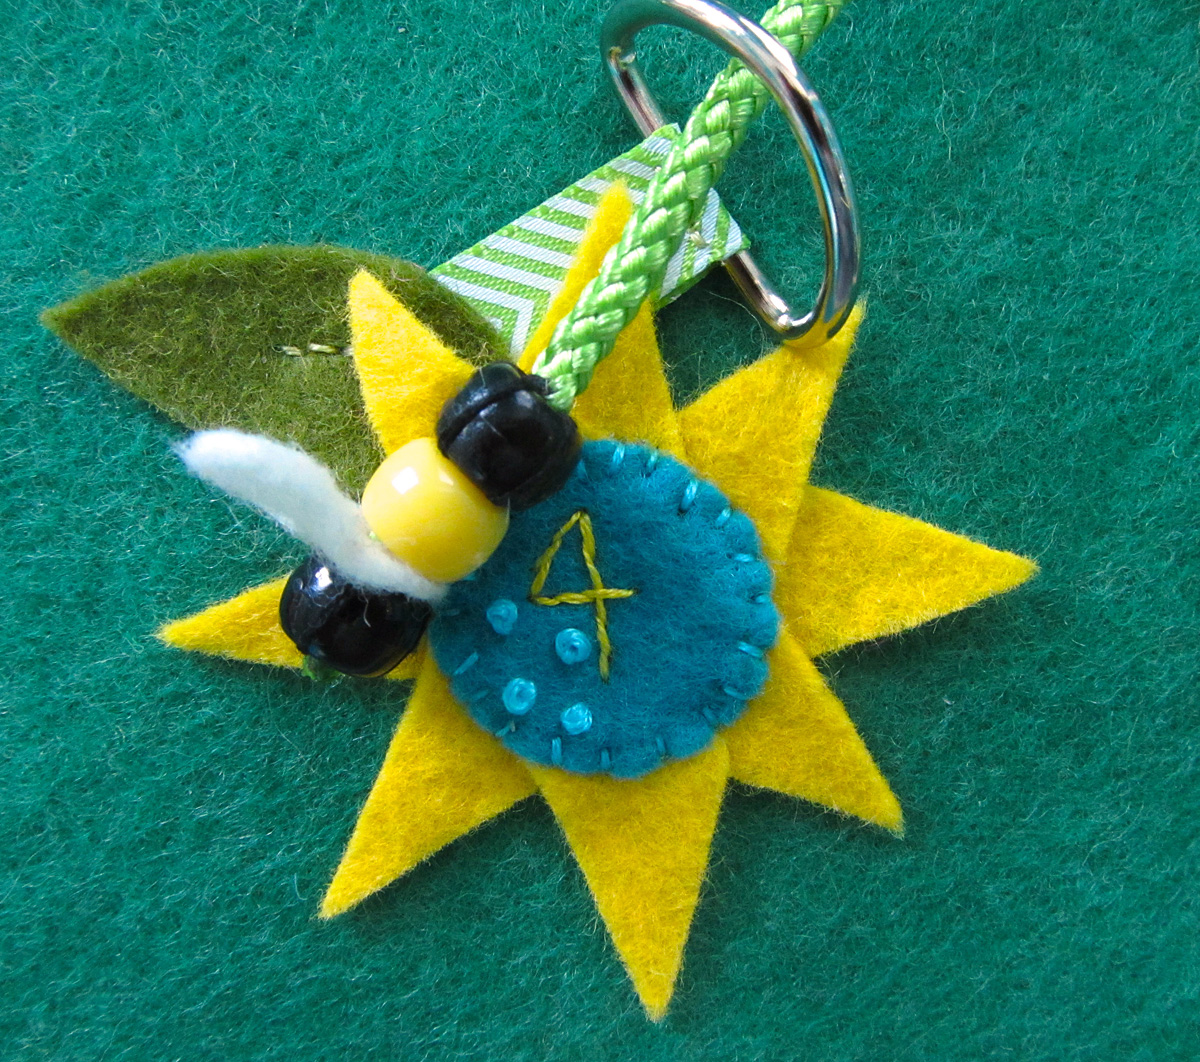
Flower 4: I overlapped the petals under the center so they were evenly spaced.
Flower 5: The center is just sewn down over the middle of the petal piece on this flower.
Flower 6: The two petal pieces are layered with the top one rotated. The center was sewn down on top.

Flower 7: I sewed the center down onto the evenly spaced petals. Then I made long stitches in the center of each petal (but not the page) and pulled tight to ruche the petals up.
Flower 8: The petals on this flower are evenly spaced under the center.
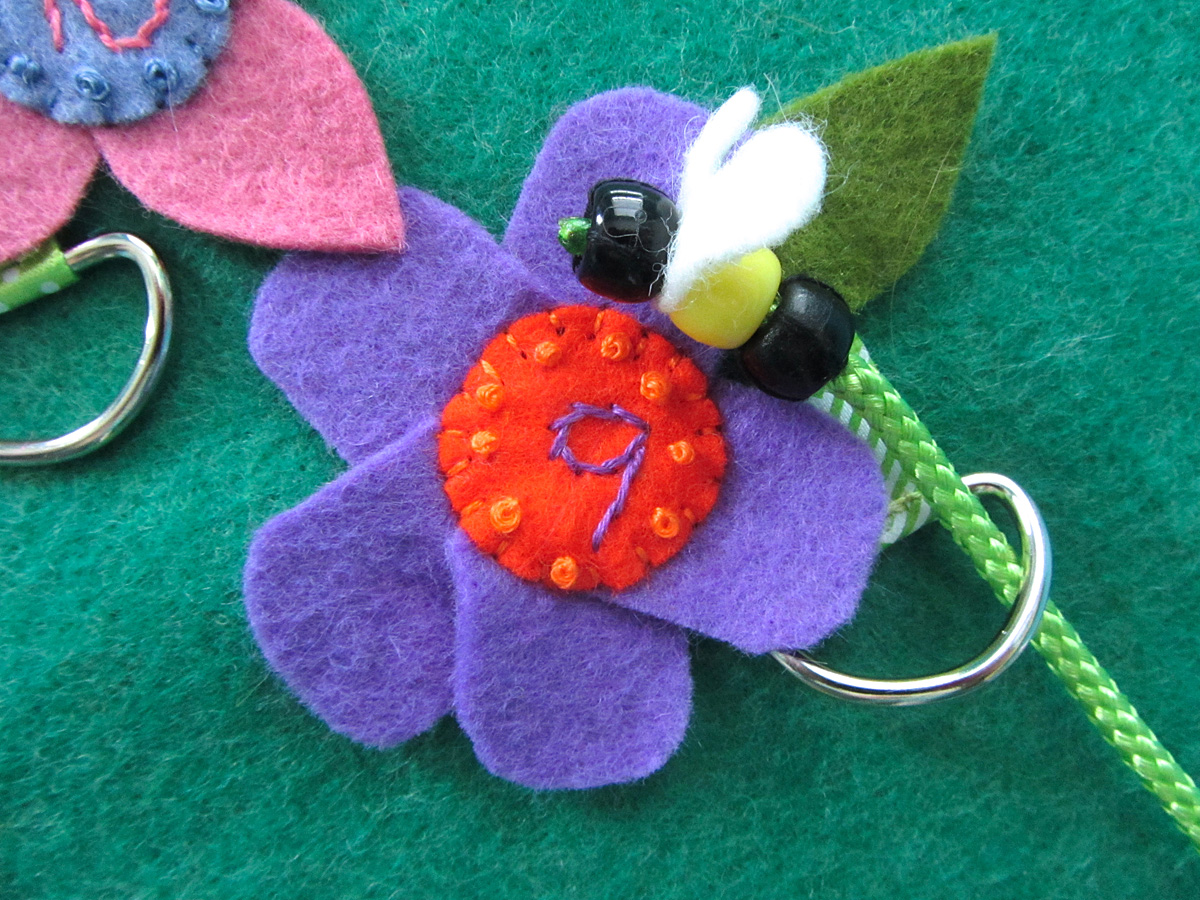
Flower 9: The petals are spaced evenly, each one overlapping the petal to the right.
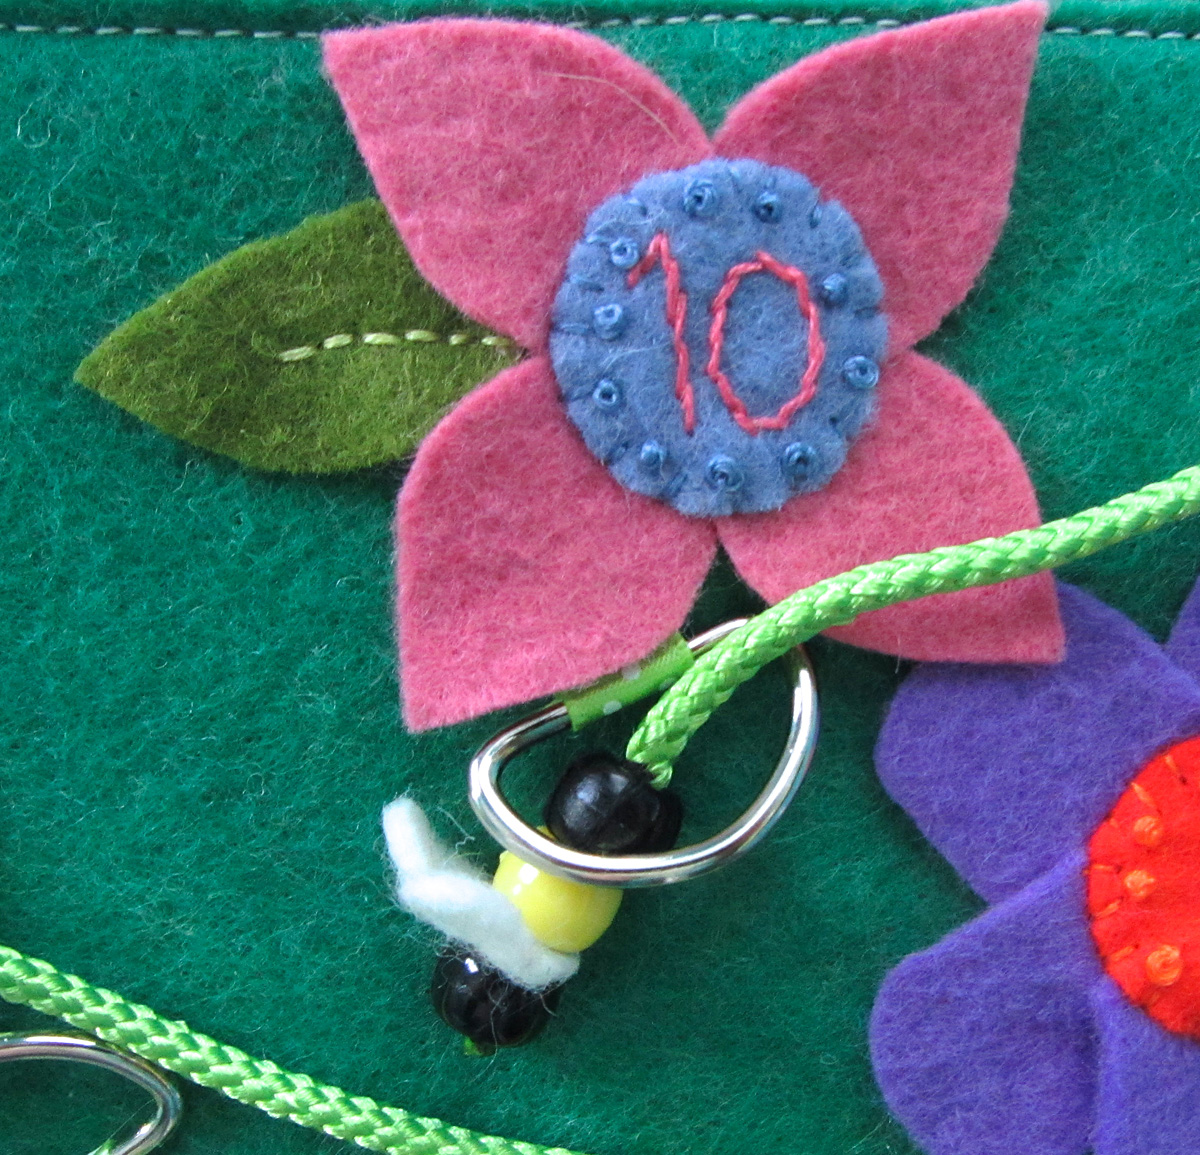
Flower 10: The four petals on the past flower were evenly spaced.
Bee: I melted the loose end of the cord in a candle flame so it couldn’t unravel. I threaded on a black pony bead, yellow pony bead, the wings (with a tiny hole cut in the center of the base) and a black pony bead. Using black thread, I made stitched through the cord and around the black beads to hold them in place. (Look closely at the above picture to see the black thread.)
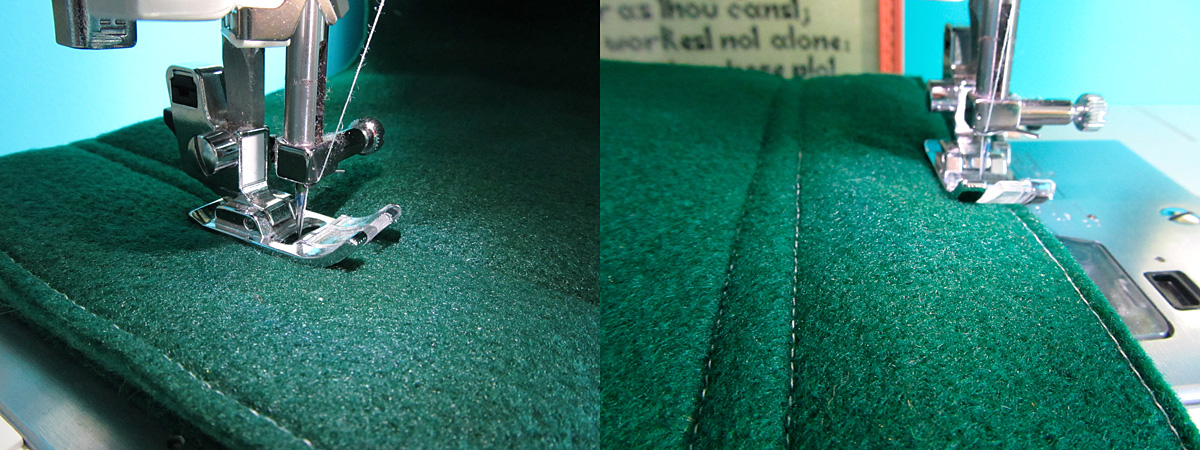
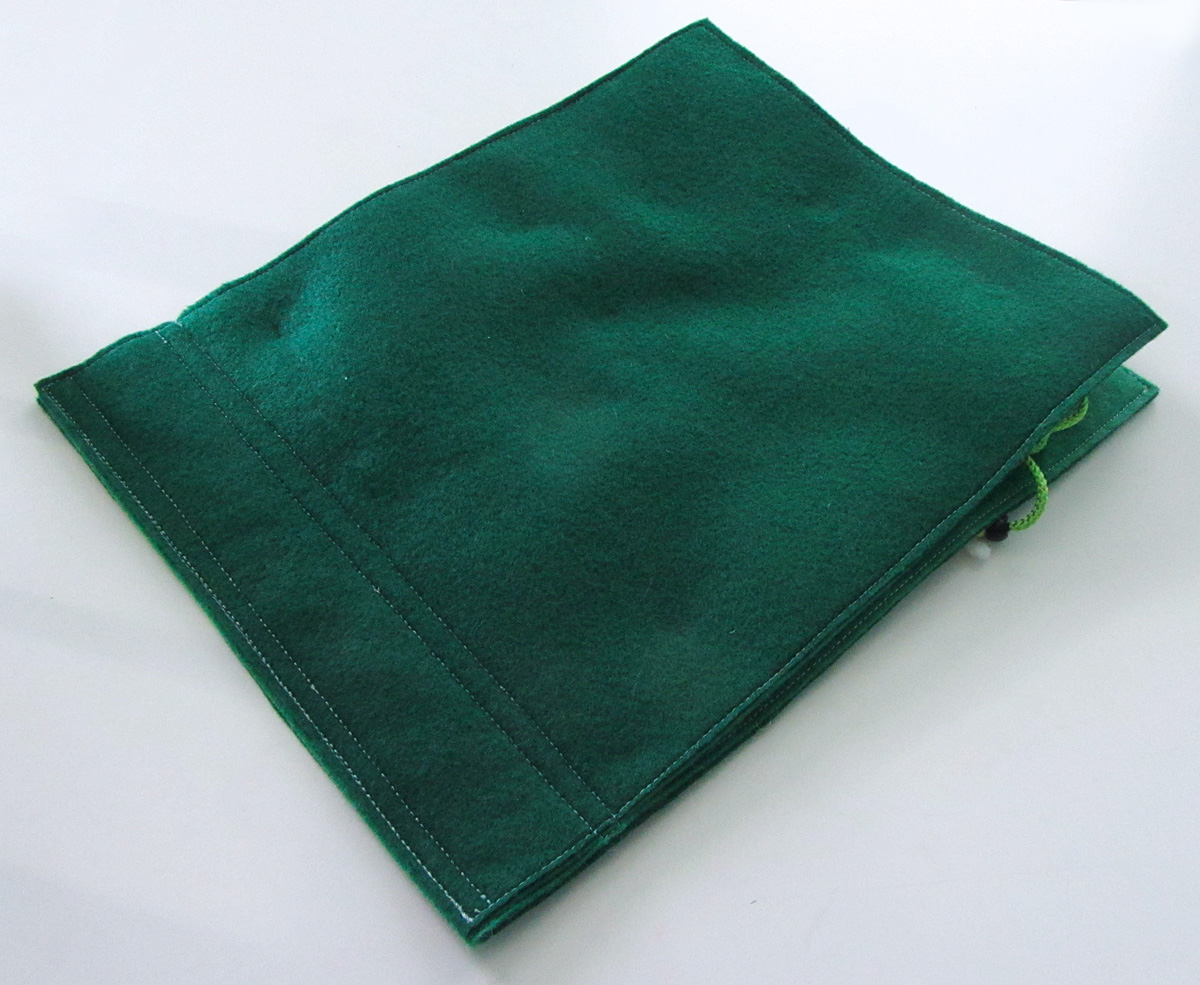
Here is a quick overview of how I sewed the two pages together.
-
- Lay the two pages facing each other.
-
- Sew two seams a couple inches in (I use the edge of the plate on my machine as a guide.) Sew two more seams along the edge.
-
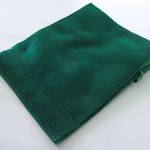
- Add grommets in between the two double seams. I wait until I have a few pages and do the grommets in a big batch.
-
- Here is the finished center seam.
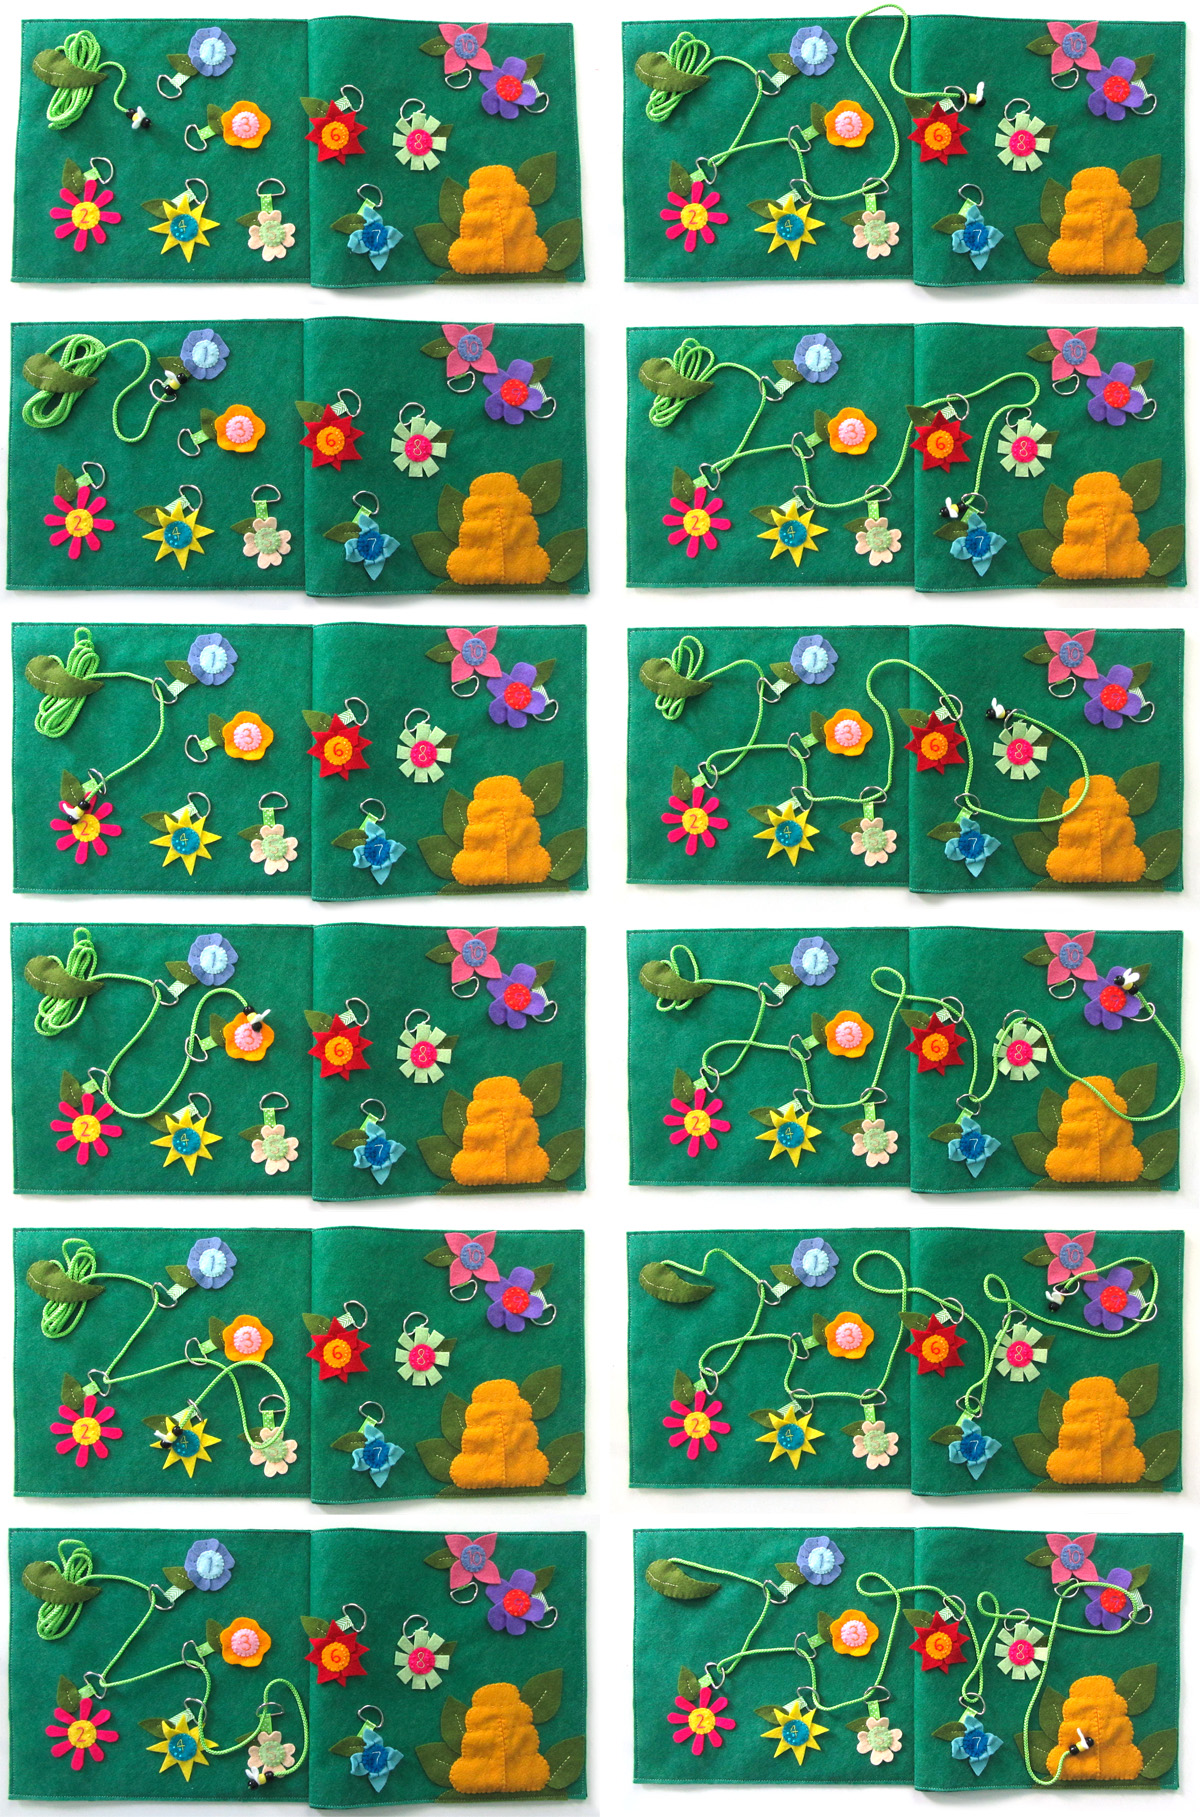
Jax is thrilled with this page and started playing with it before it was even finished! He begged me every time I finished a flower to let him lace the bee through. I think this page with be a big hit right now.
Stop by my Instagram or the Facebook page to see updates of my current project. It’s a fun one!