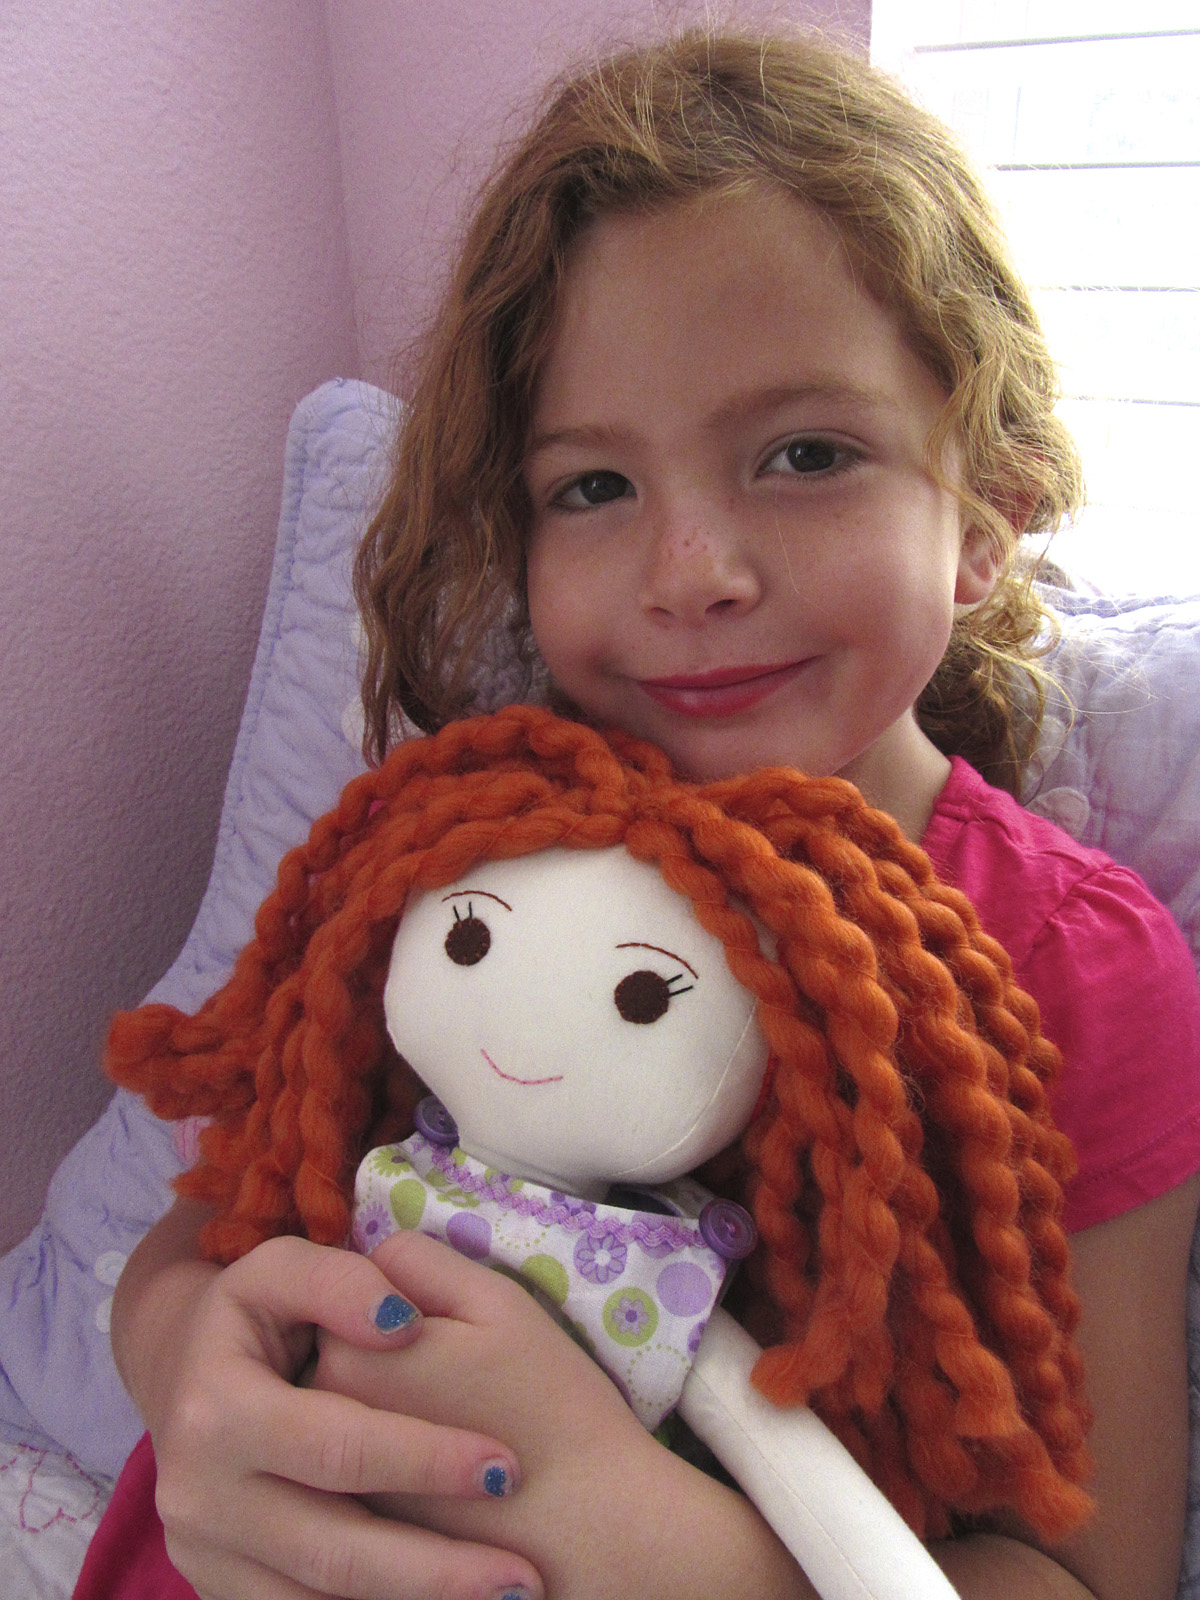
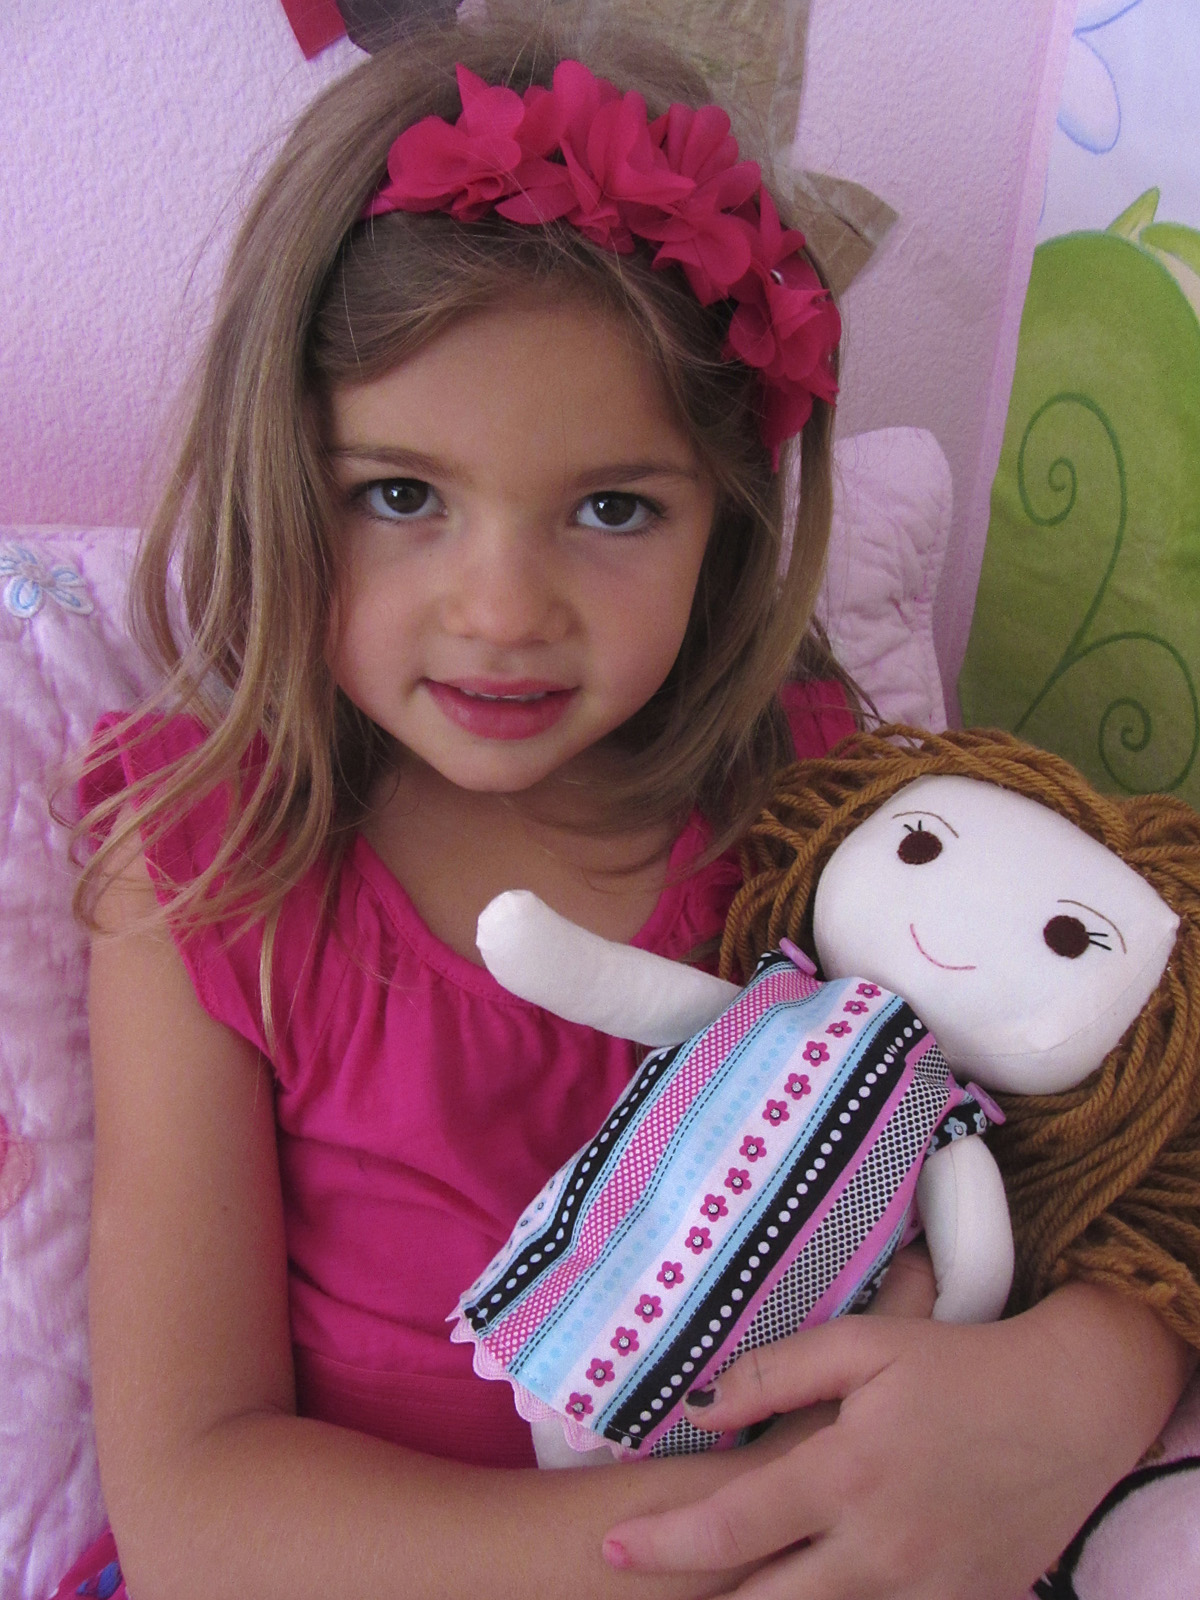
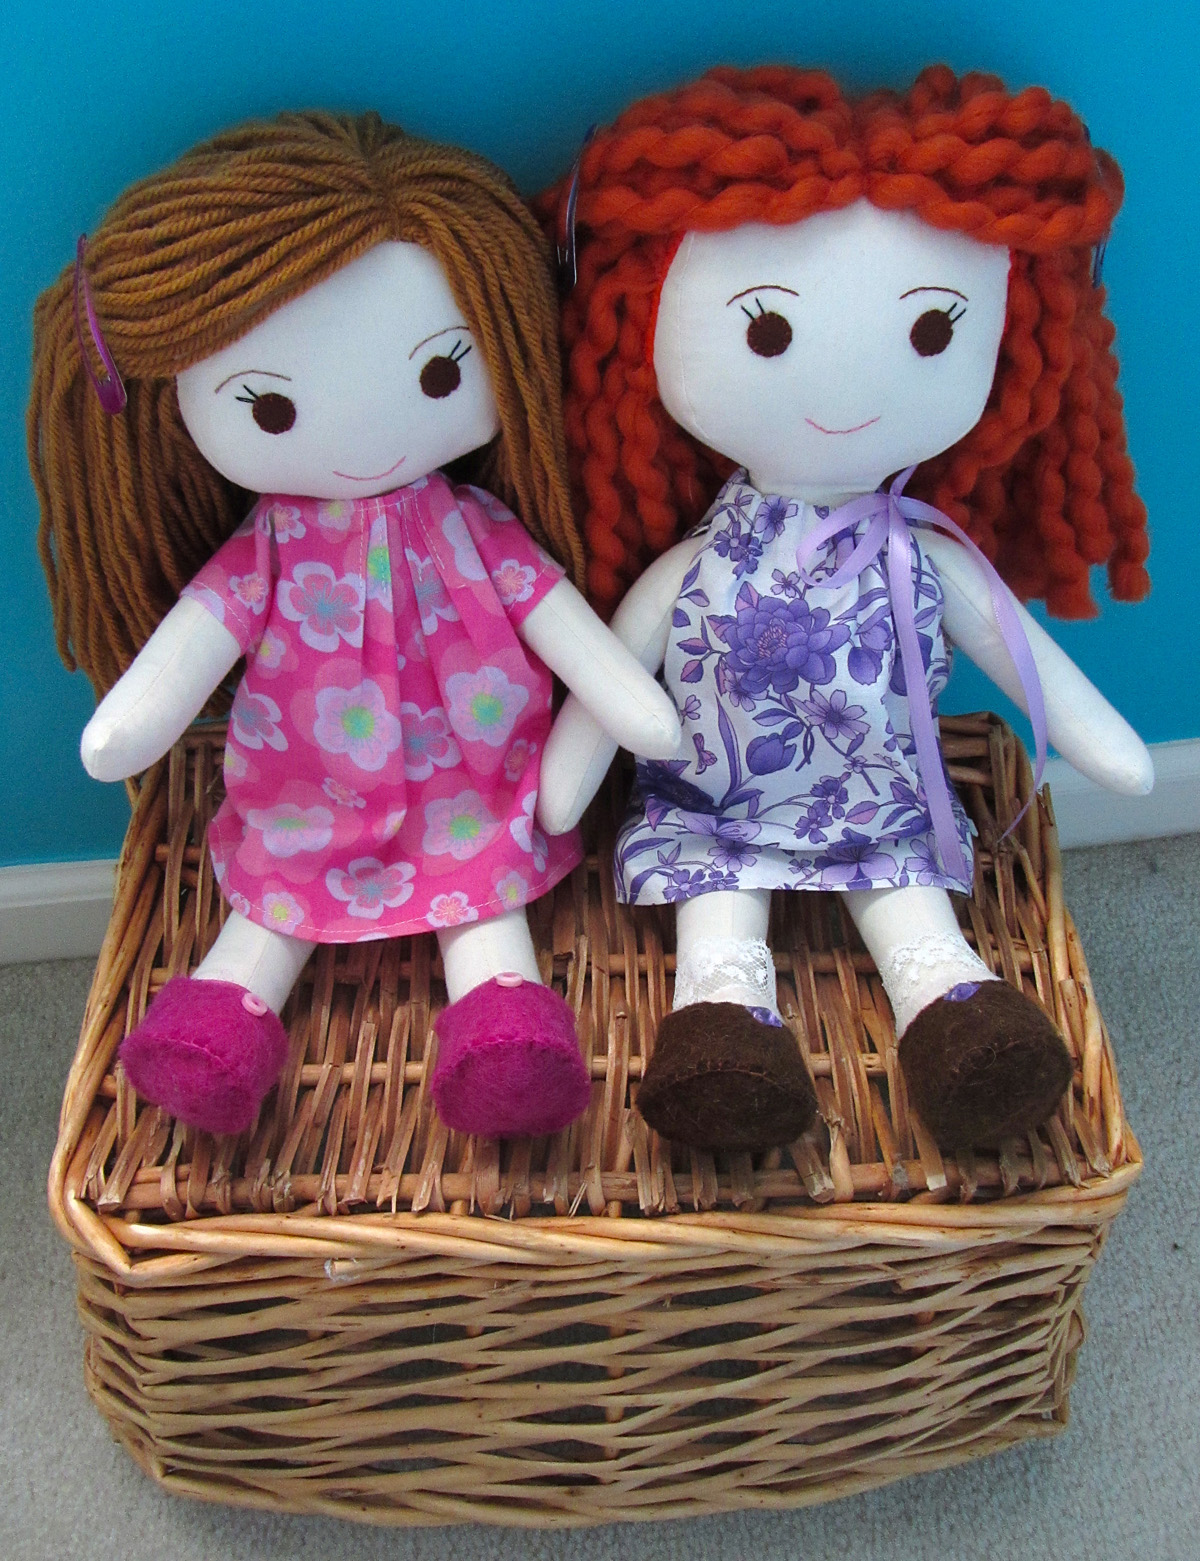
When we let our family know we’d be visiting them for a day while we took our California vacation, my husband’s aunt reached out to me to see if I’d like to do a sewing craft with her adorable twin girls. They are 5, and S loves fashion design. I was very excited at the idea, but once it was mentioned we’d likely do a trip to Legoland with them, I needed to think of something I could leave with them.
I decided to try sewing two Wee Wonderfuls rag dolls, making a lookalike dolly for each girl. That way, I could also pack up a little box of sewing goodies – felt buttons (in pink and purple – their favorite colors), floss, ribbon scraps and some needles. I threw in some barrettes and headbands from the dollar store, thinking I could sew the buttons into pretty hair clips for the girls and their dolls if we had time. If not, the felt buttons would be simple for their mom to help them with.

We ended up at Legoland. Jax LOVED it! (Despite the rain.)
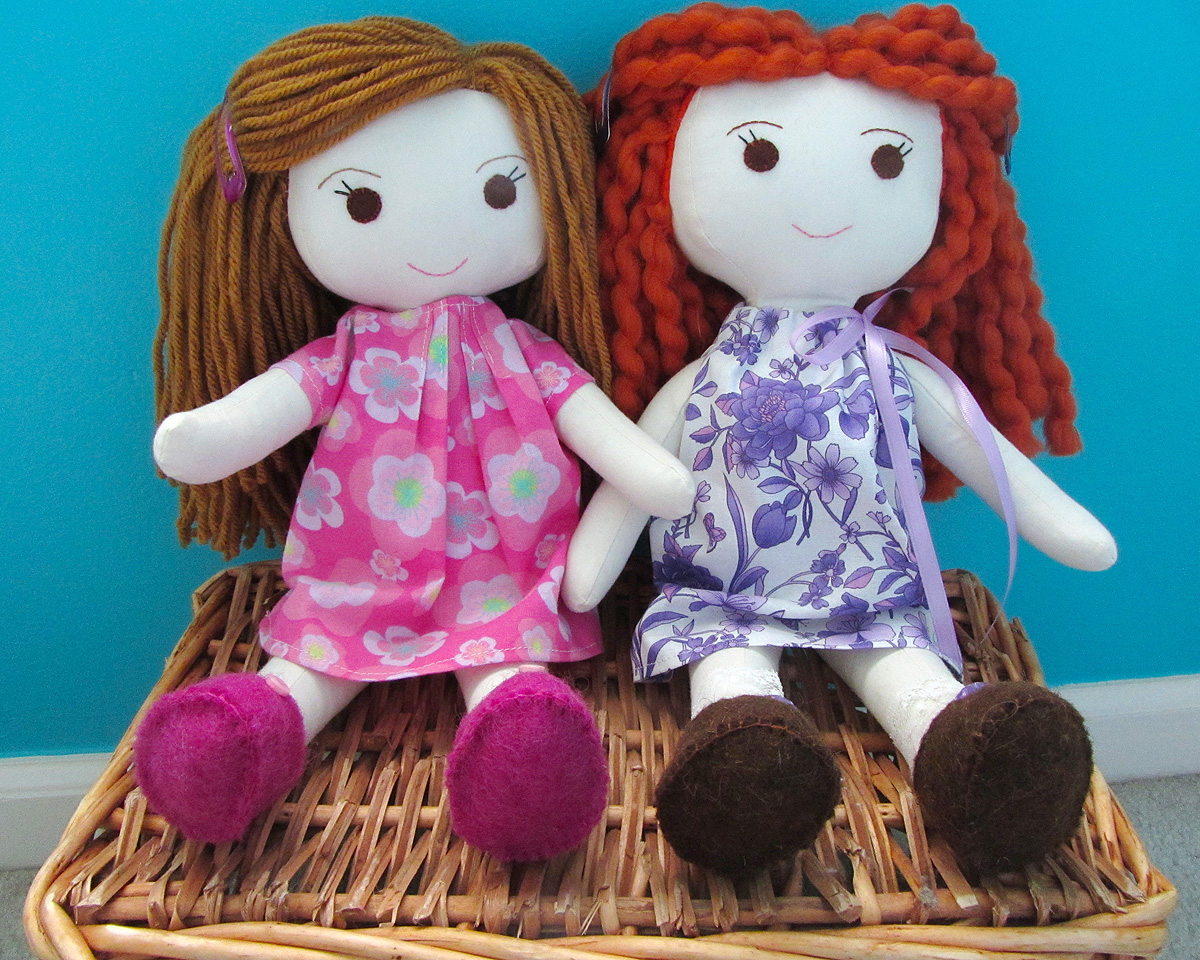
I used the Kit, Chloe and Louise pattern for the dolls. It included a lot of clothing options, so I was able to make two outfits per doll. (Sewing tiny doll clothes was NOT fun for me! Some I made did not make the cut. The pajama top I attempted looked like that Cosby shirt.) I actually made three dolls – my first a test doll for Jax. I was glad I did – I learned a lot!
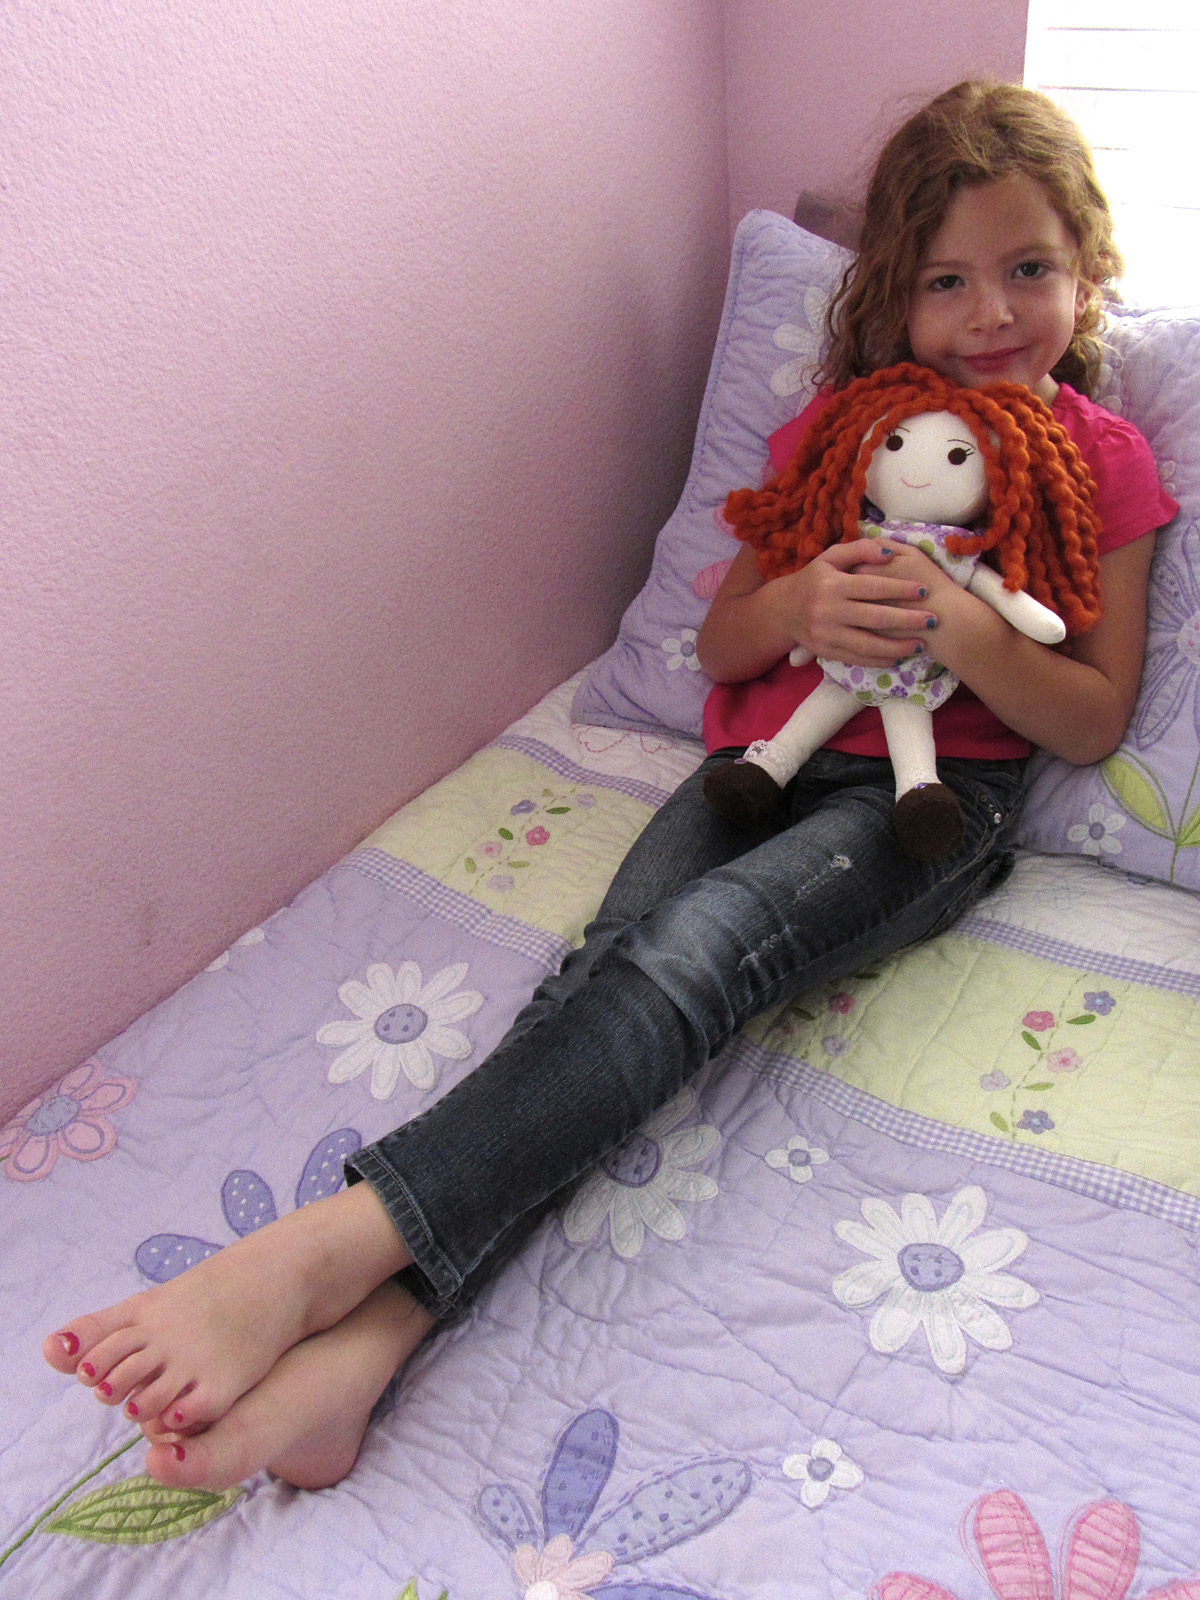
I think the girls liked them! They were still in that shy phase after not seeing us for a year and a half when I gave them to them. It was very sweet seeing them with their lookalikes.
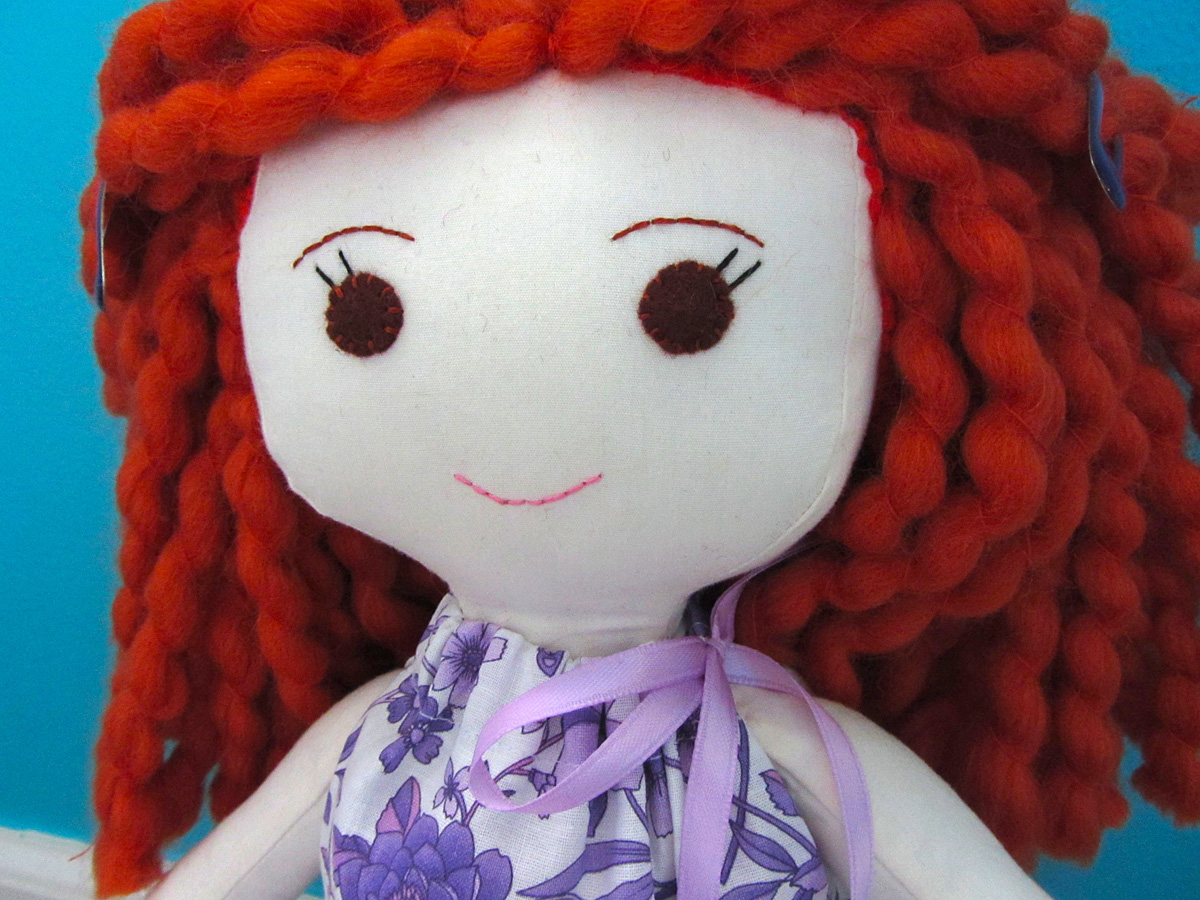
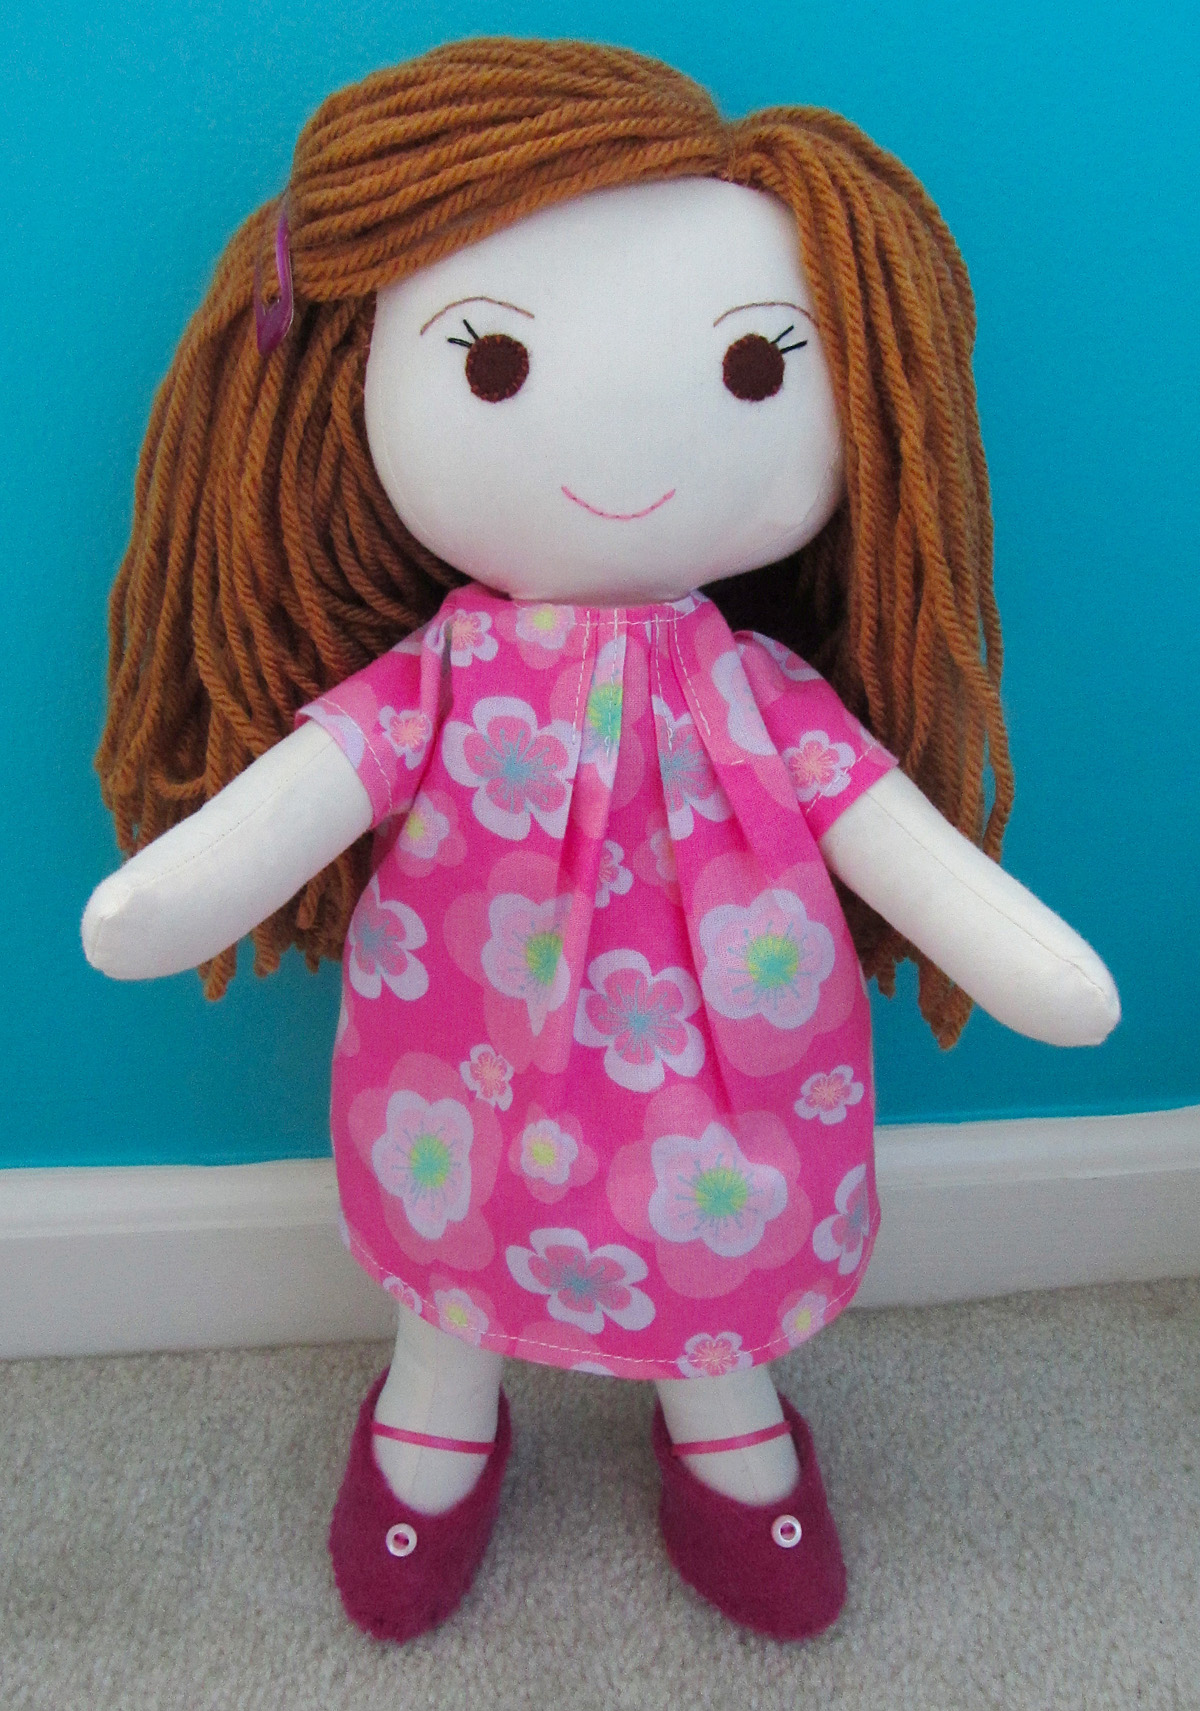
The Redhead – A’s Doll
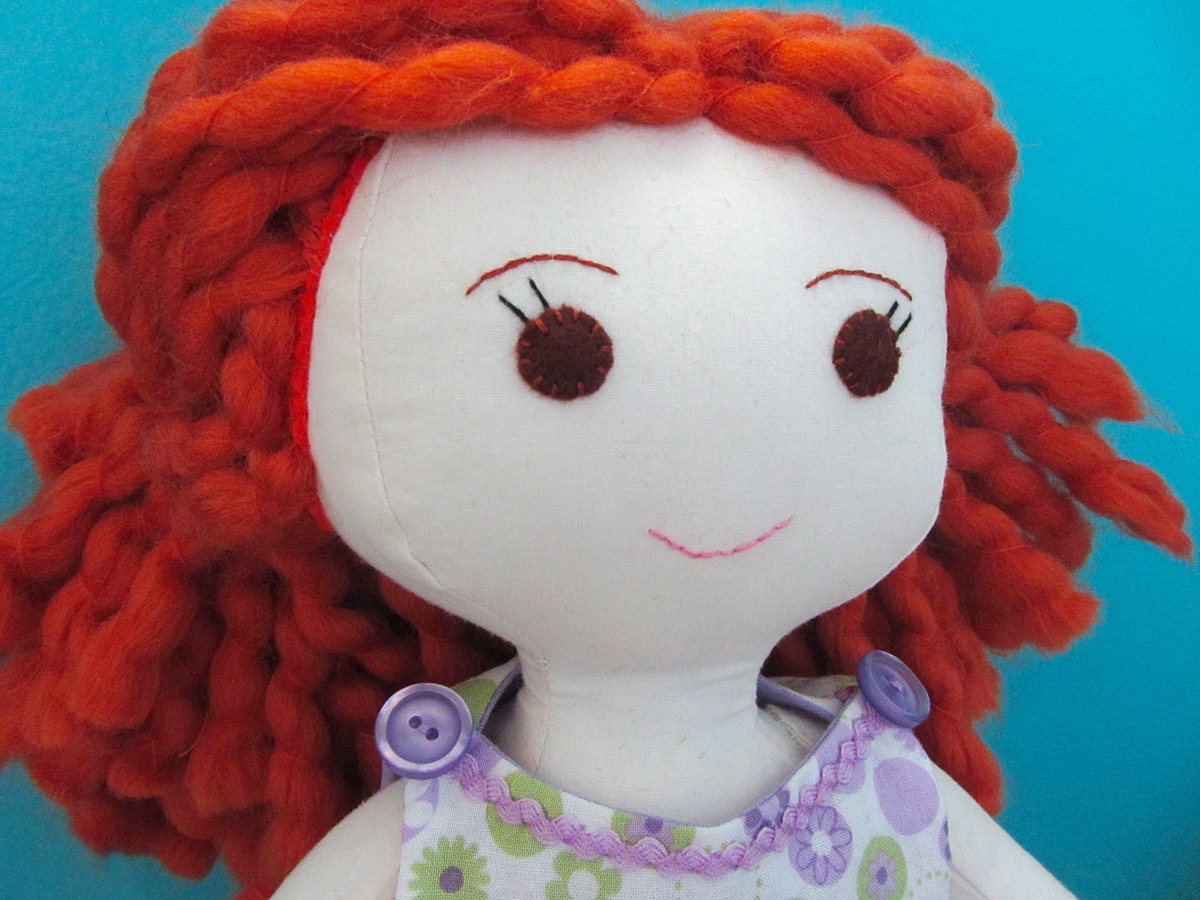
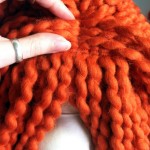
Curly red hair! Swoon! Beautiful, but how do you make it translate to yarn? I actually found the perfect yarn for A’s doll, and purchased it when it was 50% off (I used 1.5 skeins.) It’s Martha Stewart’s Lofty Wool Blend. I sewed my hair on differently than the pattern called for. More on that below.
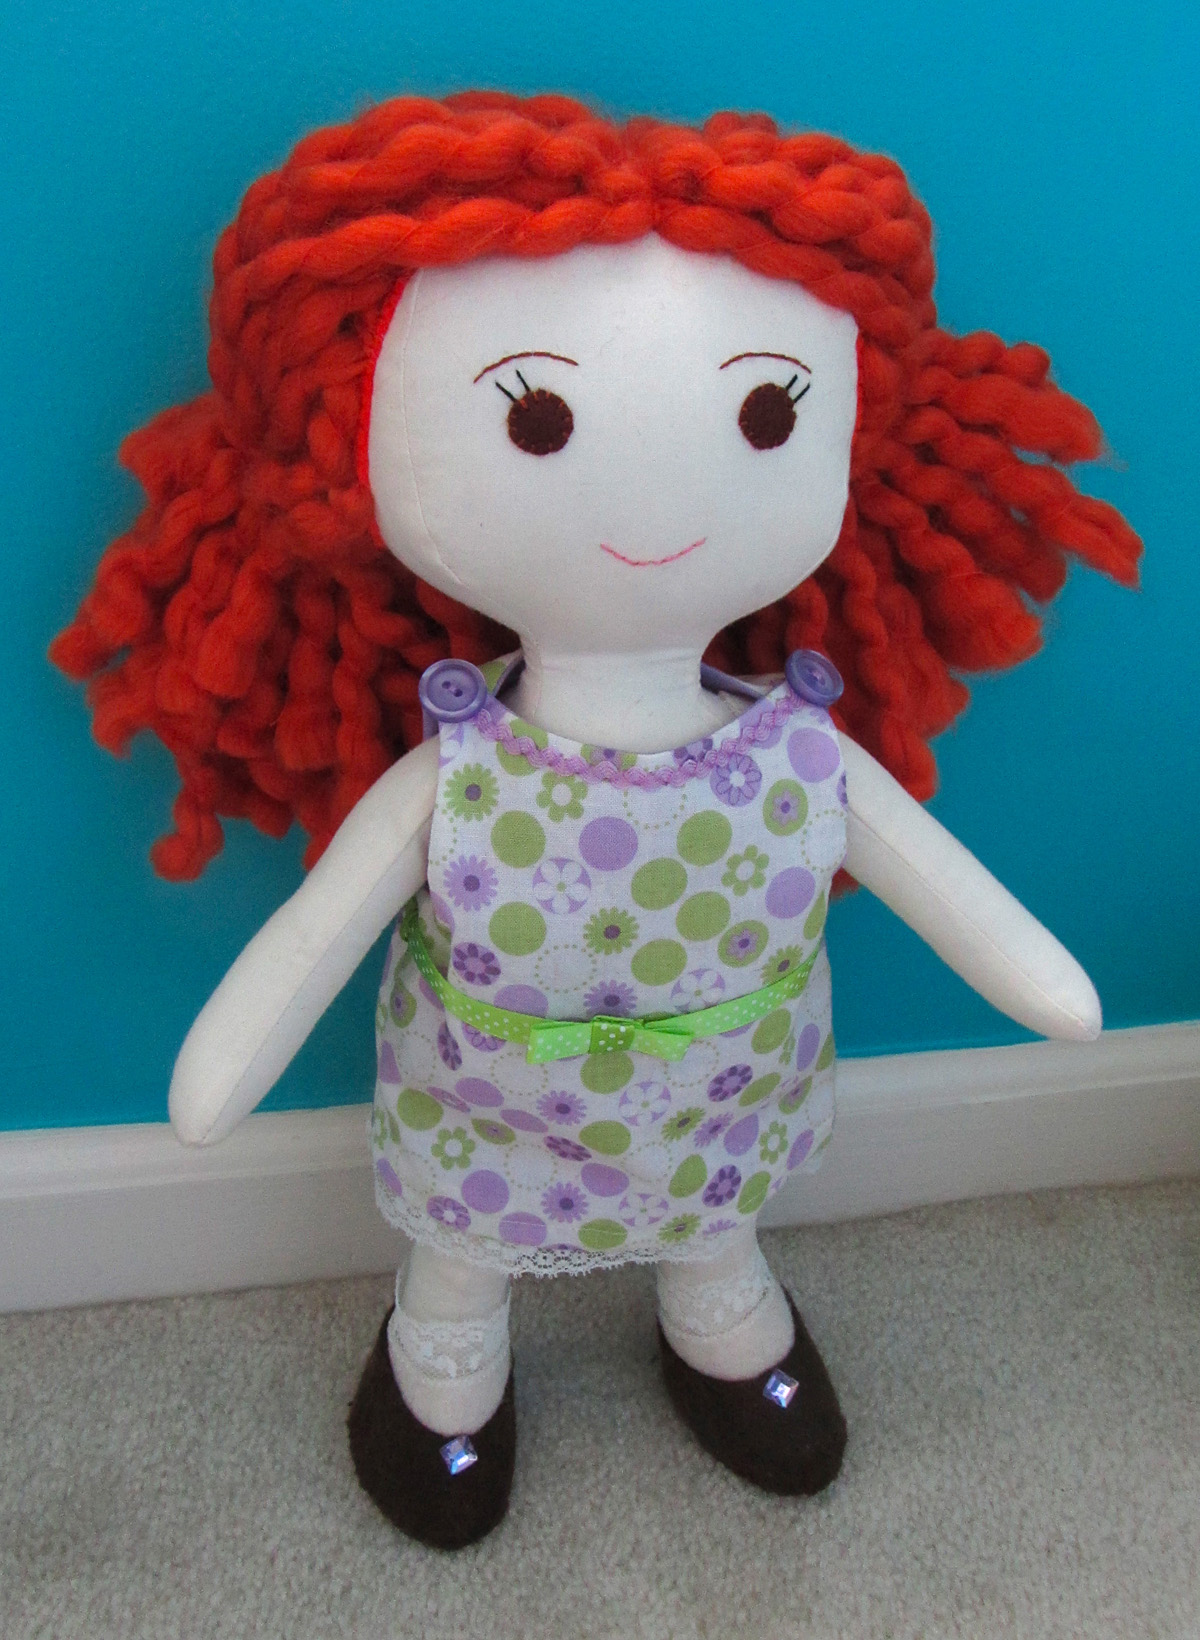
Both dolls got a lined jumper with trim and vintage button’s from my mom’s collection as their main dress. A’s doll had a purple and lime pattern on the outside and lavender solid on the inside. I added vintage lace trim, a little ribbon belt and some mini ric rac around the neck.
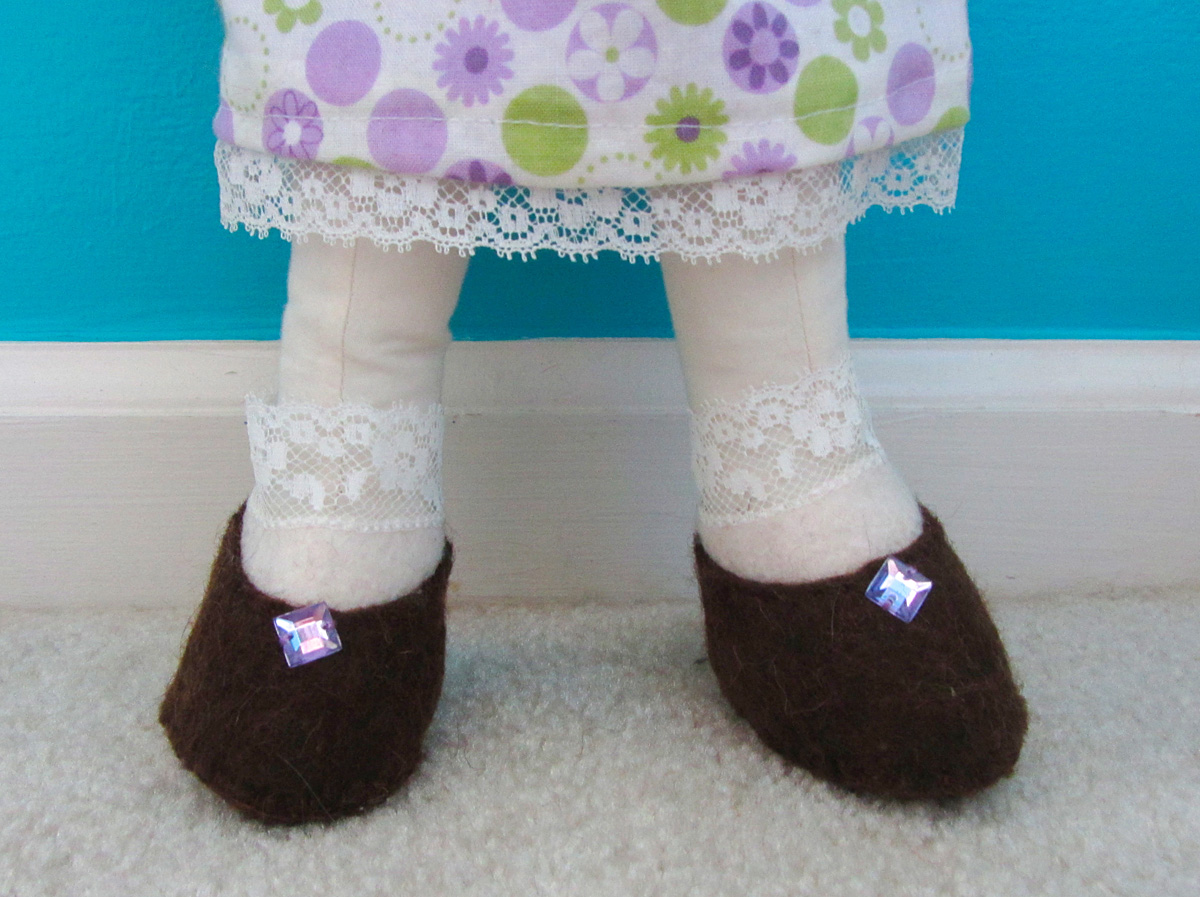
Both dolls got shoes, but I used the shoe pattern in two different ways. For A, I did brown 100% wool felt, with a white wool blend felt crescent sewn in to look like a sock. I added a ring of lace and a sew-on jewel to each.
I really liked this jumper pattern because the lining made it so finished looking.
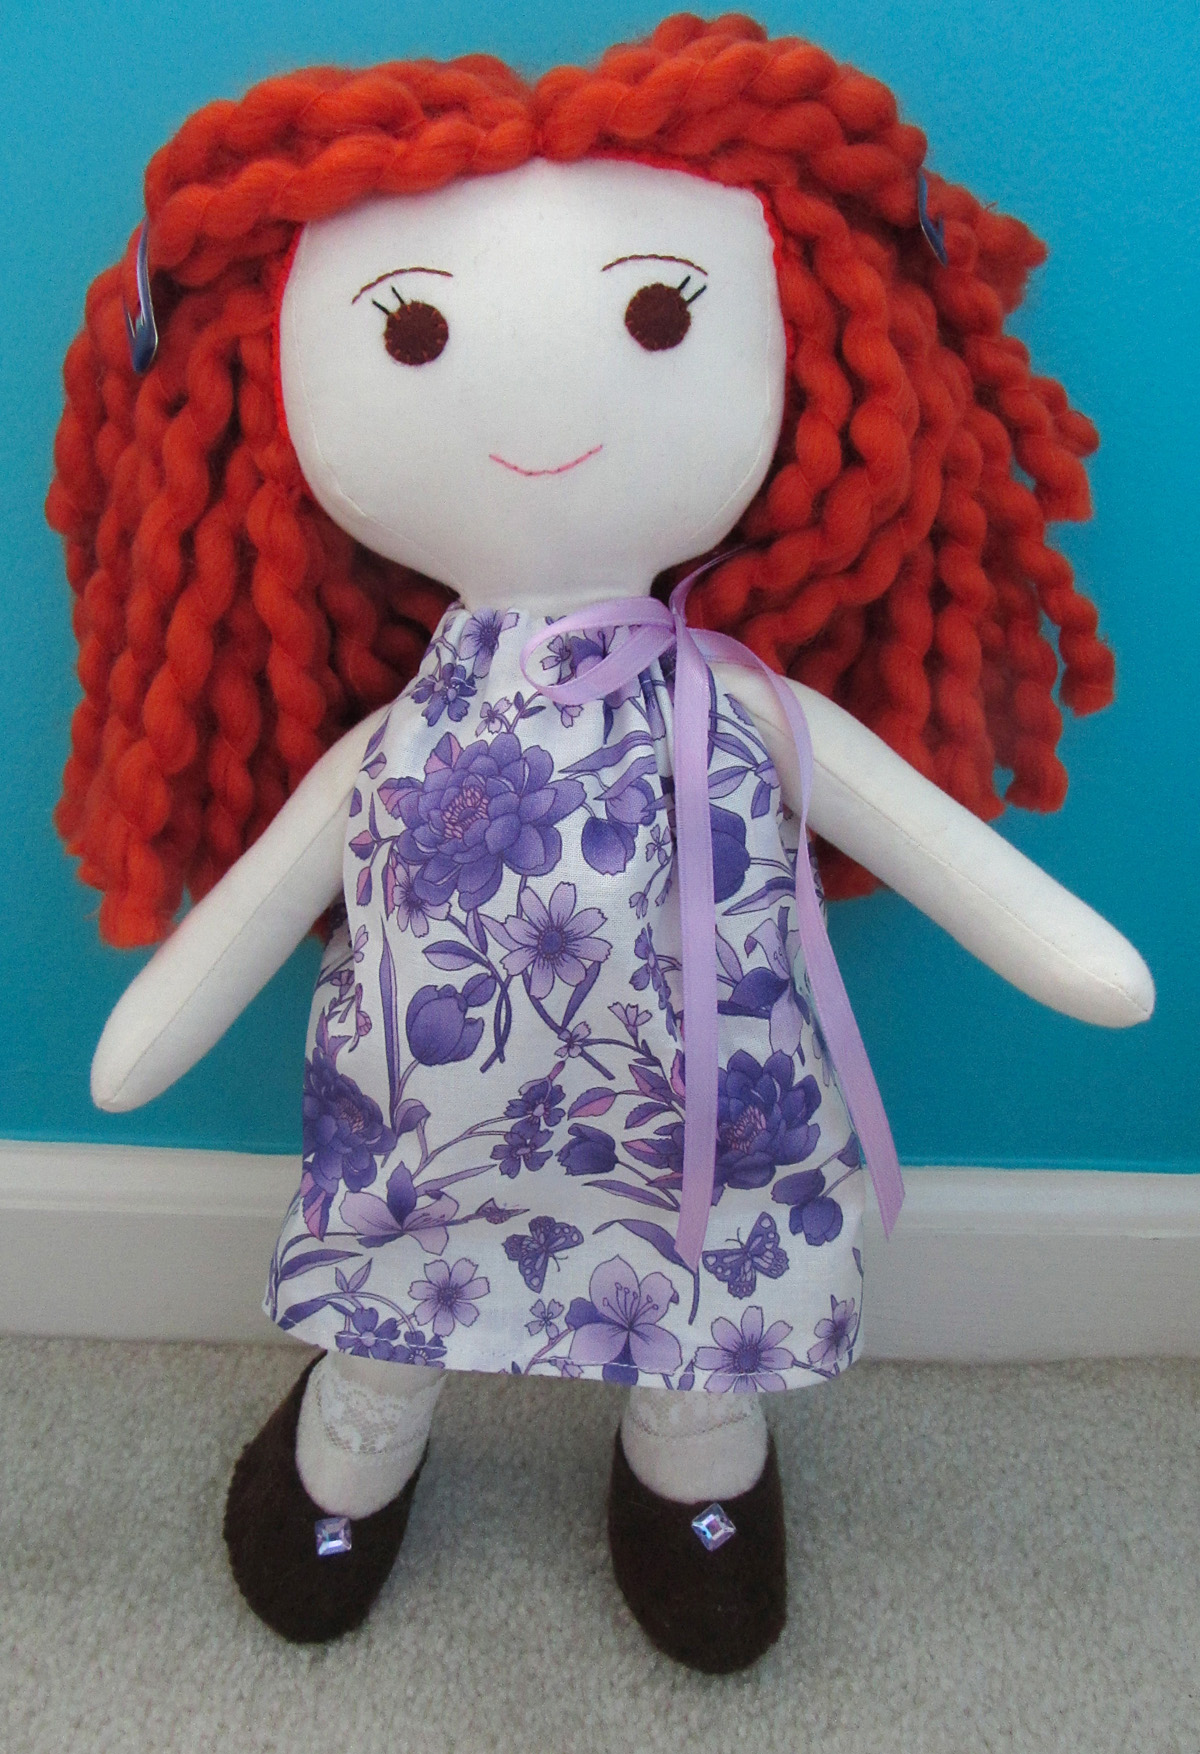
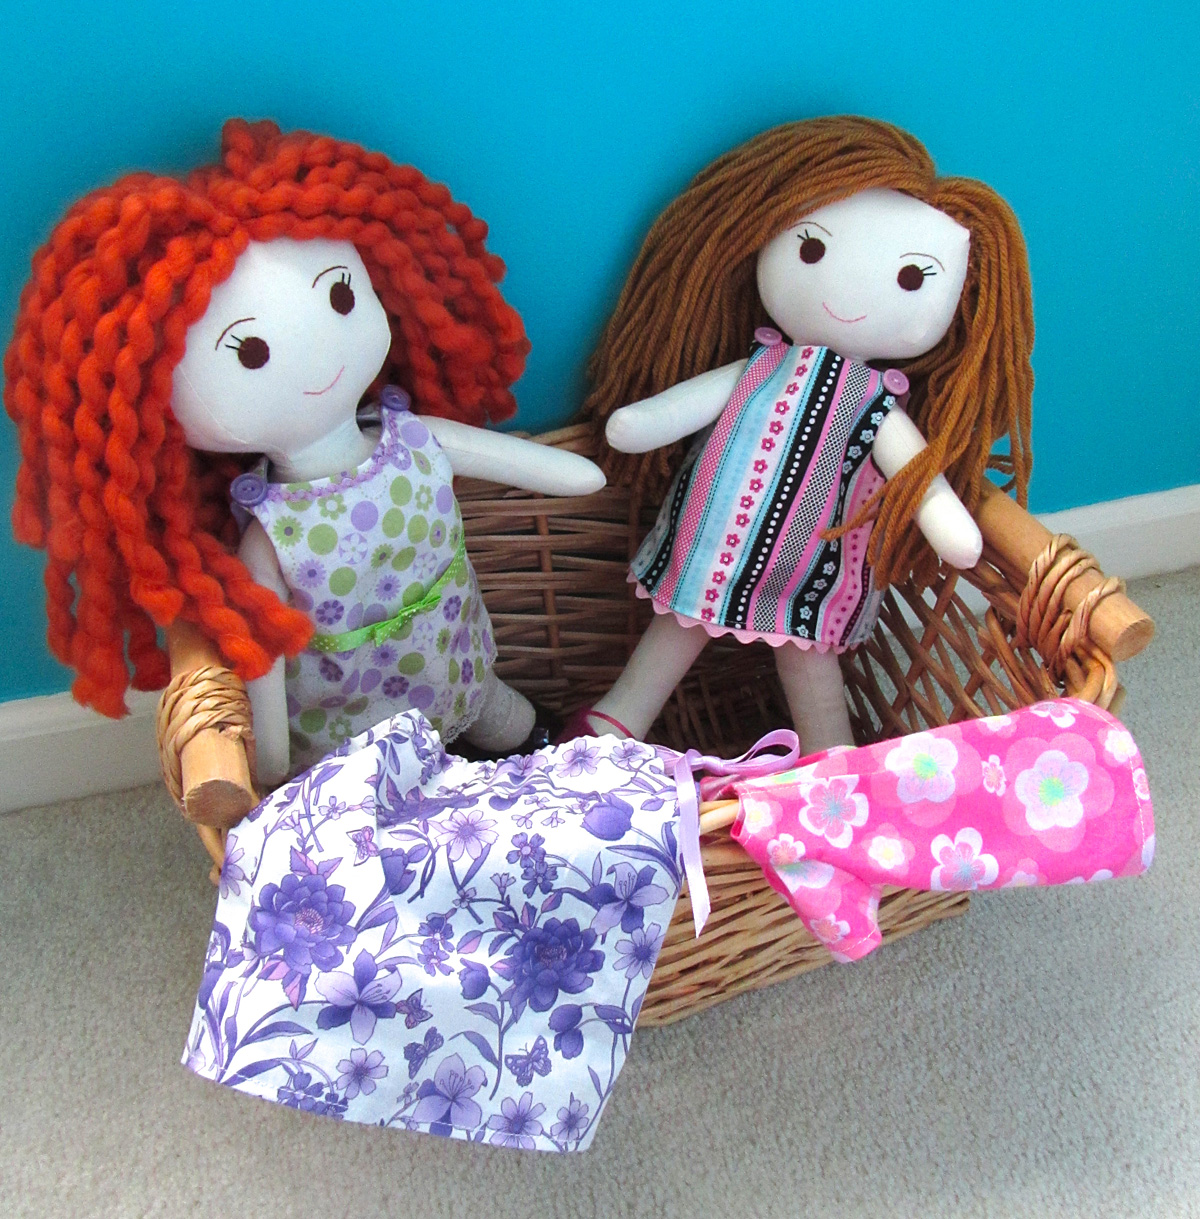
For A’s second dress, I made a standard pillowcase dress with a purple floral pattern and lavender satin ribbon.
Quick and pretty!
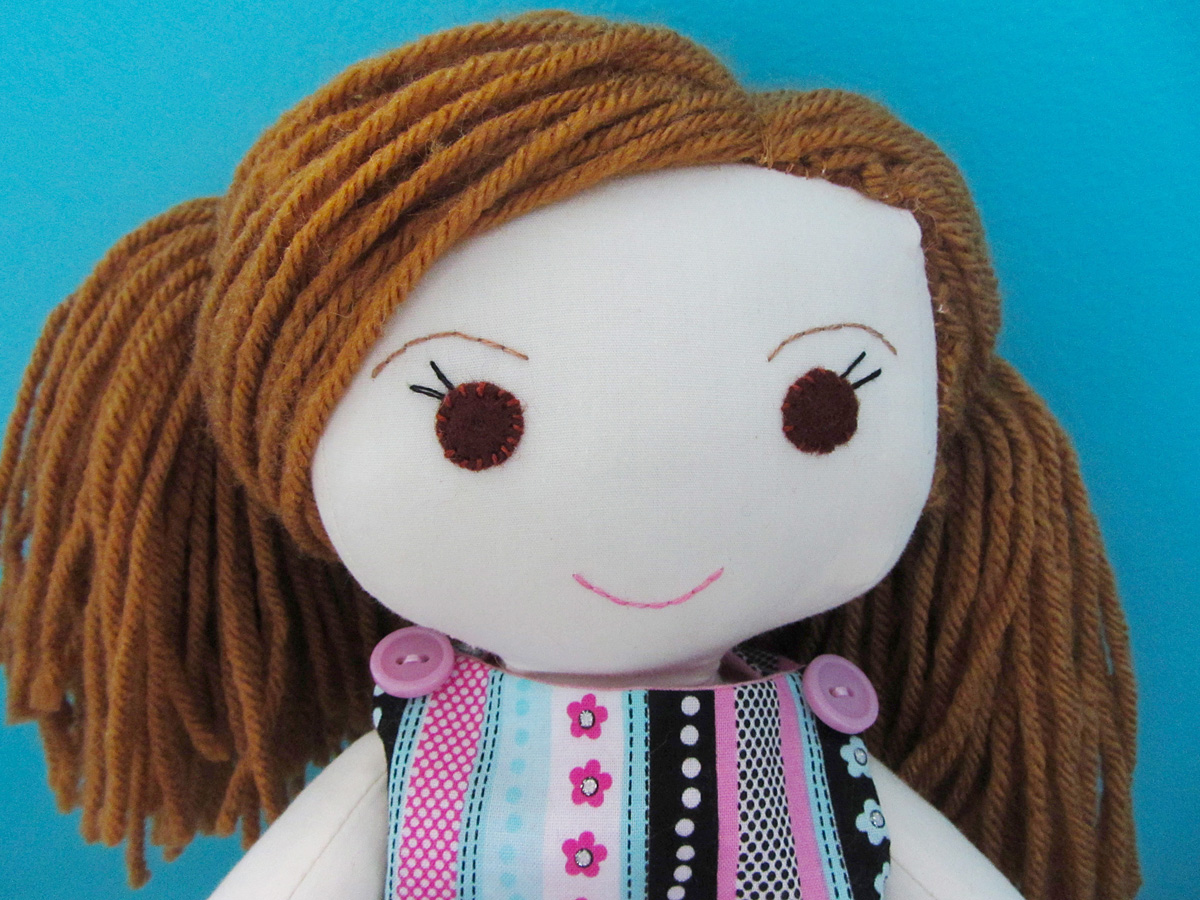
The Blond – S’s Doll
Honey blond hair! For S’s doll, I used Vanna’s Choice yarn in Honey. S often styles her hair with a side part or ponytails, and loves hair clips. I made her hair thick, focusing on both a side part that hangs well when loose, and divides all the way down (to allow for ponytails.)
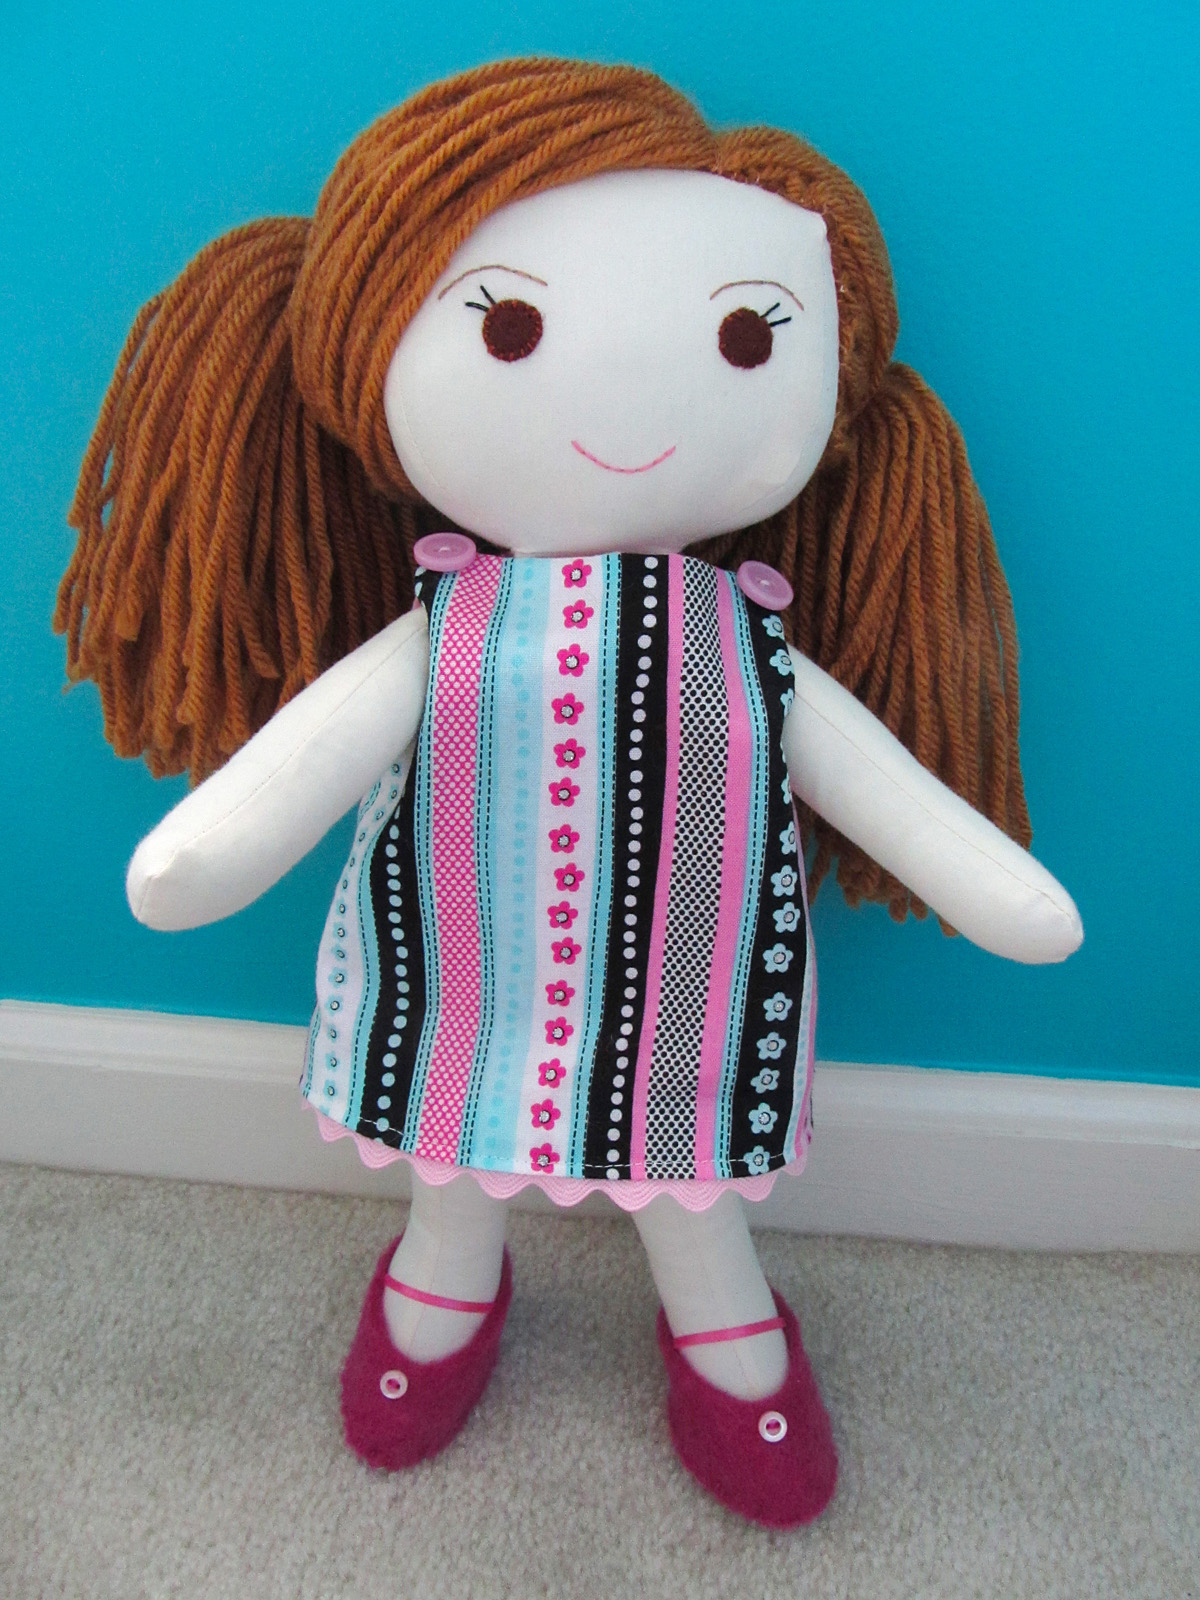
S’s main dress is a pink/black/blue striped pattern on the outside and pink on the inside. I added large pink ric rac to the bottom and vintage buttons at the shoulders.
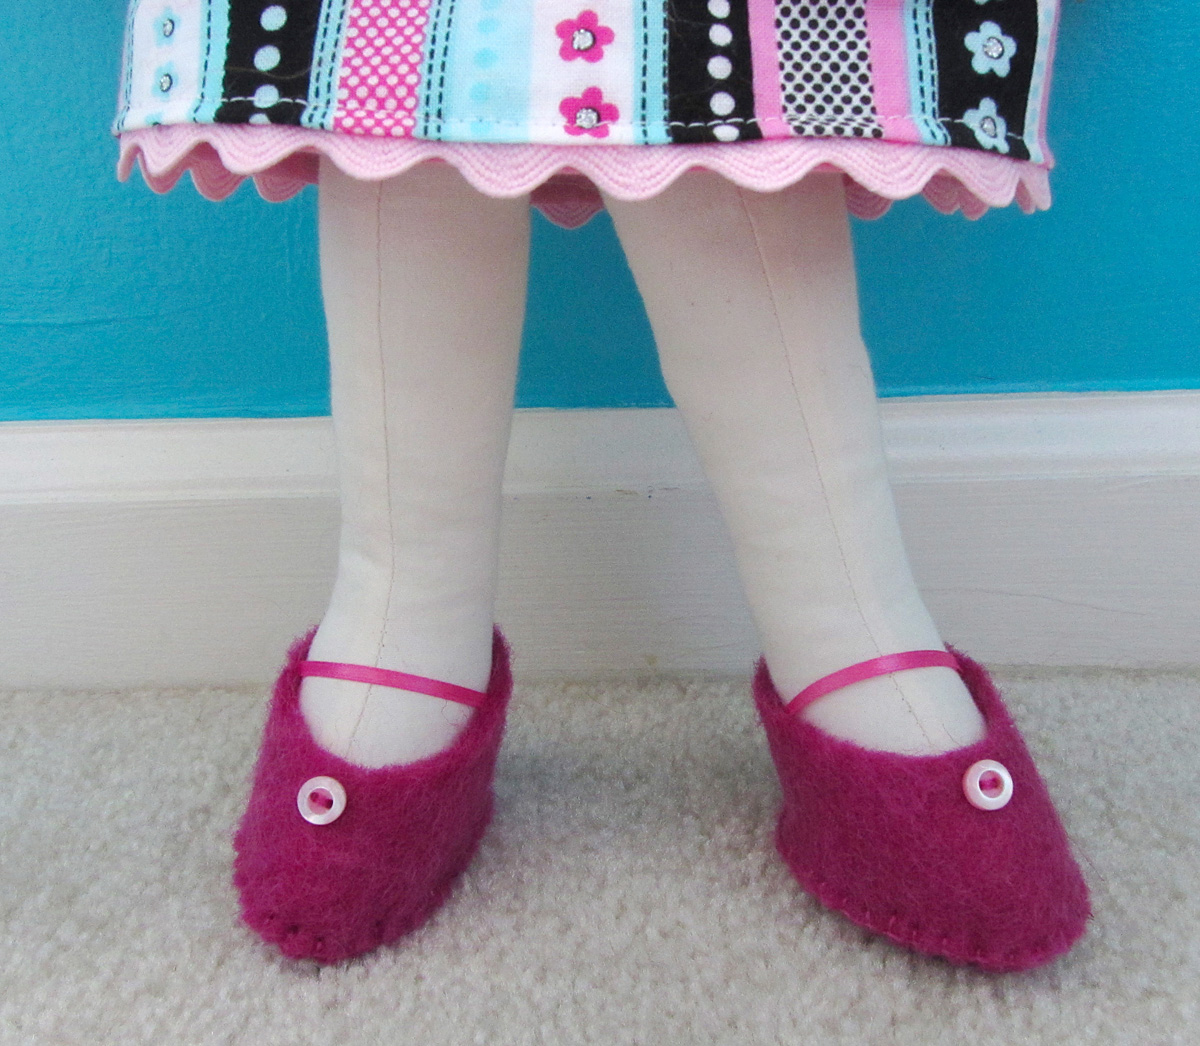
For her shoes, I used a magenta 100% wool felt, ribbon and vintage buttons.

For her second dress, I followed one of the dress patterns included with the doll pattern. I used a cute pink flower fabric.
The Doll’s Wigs
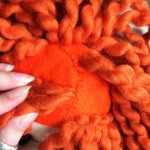
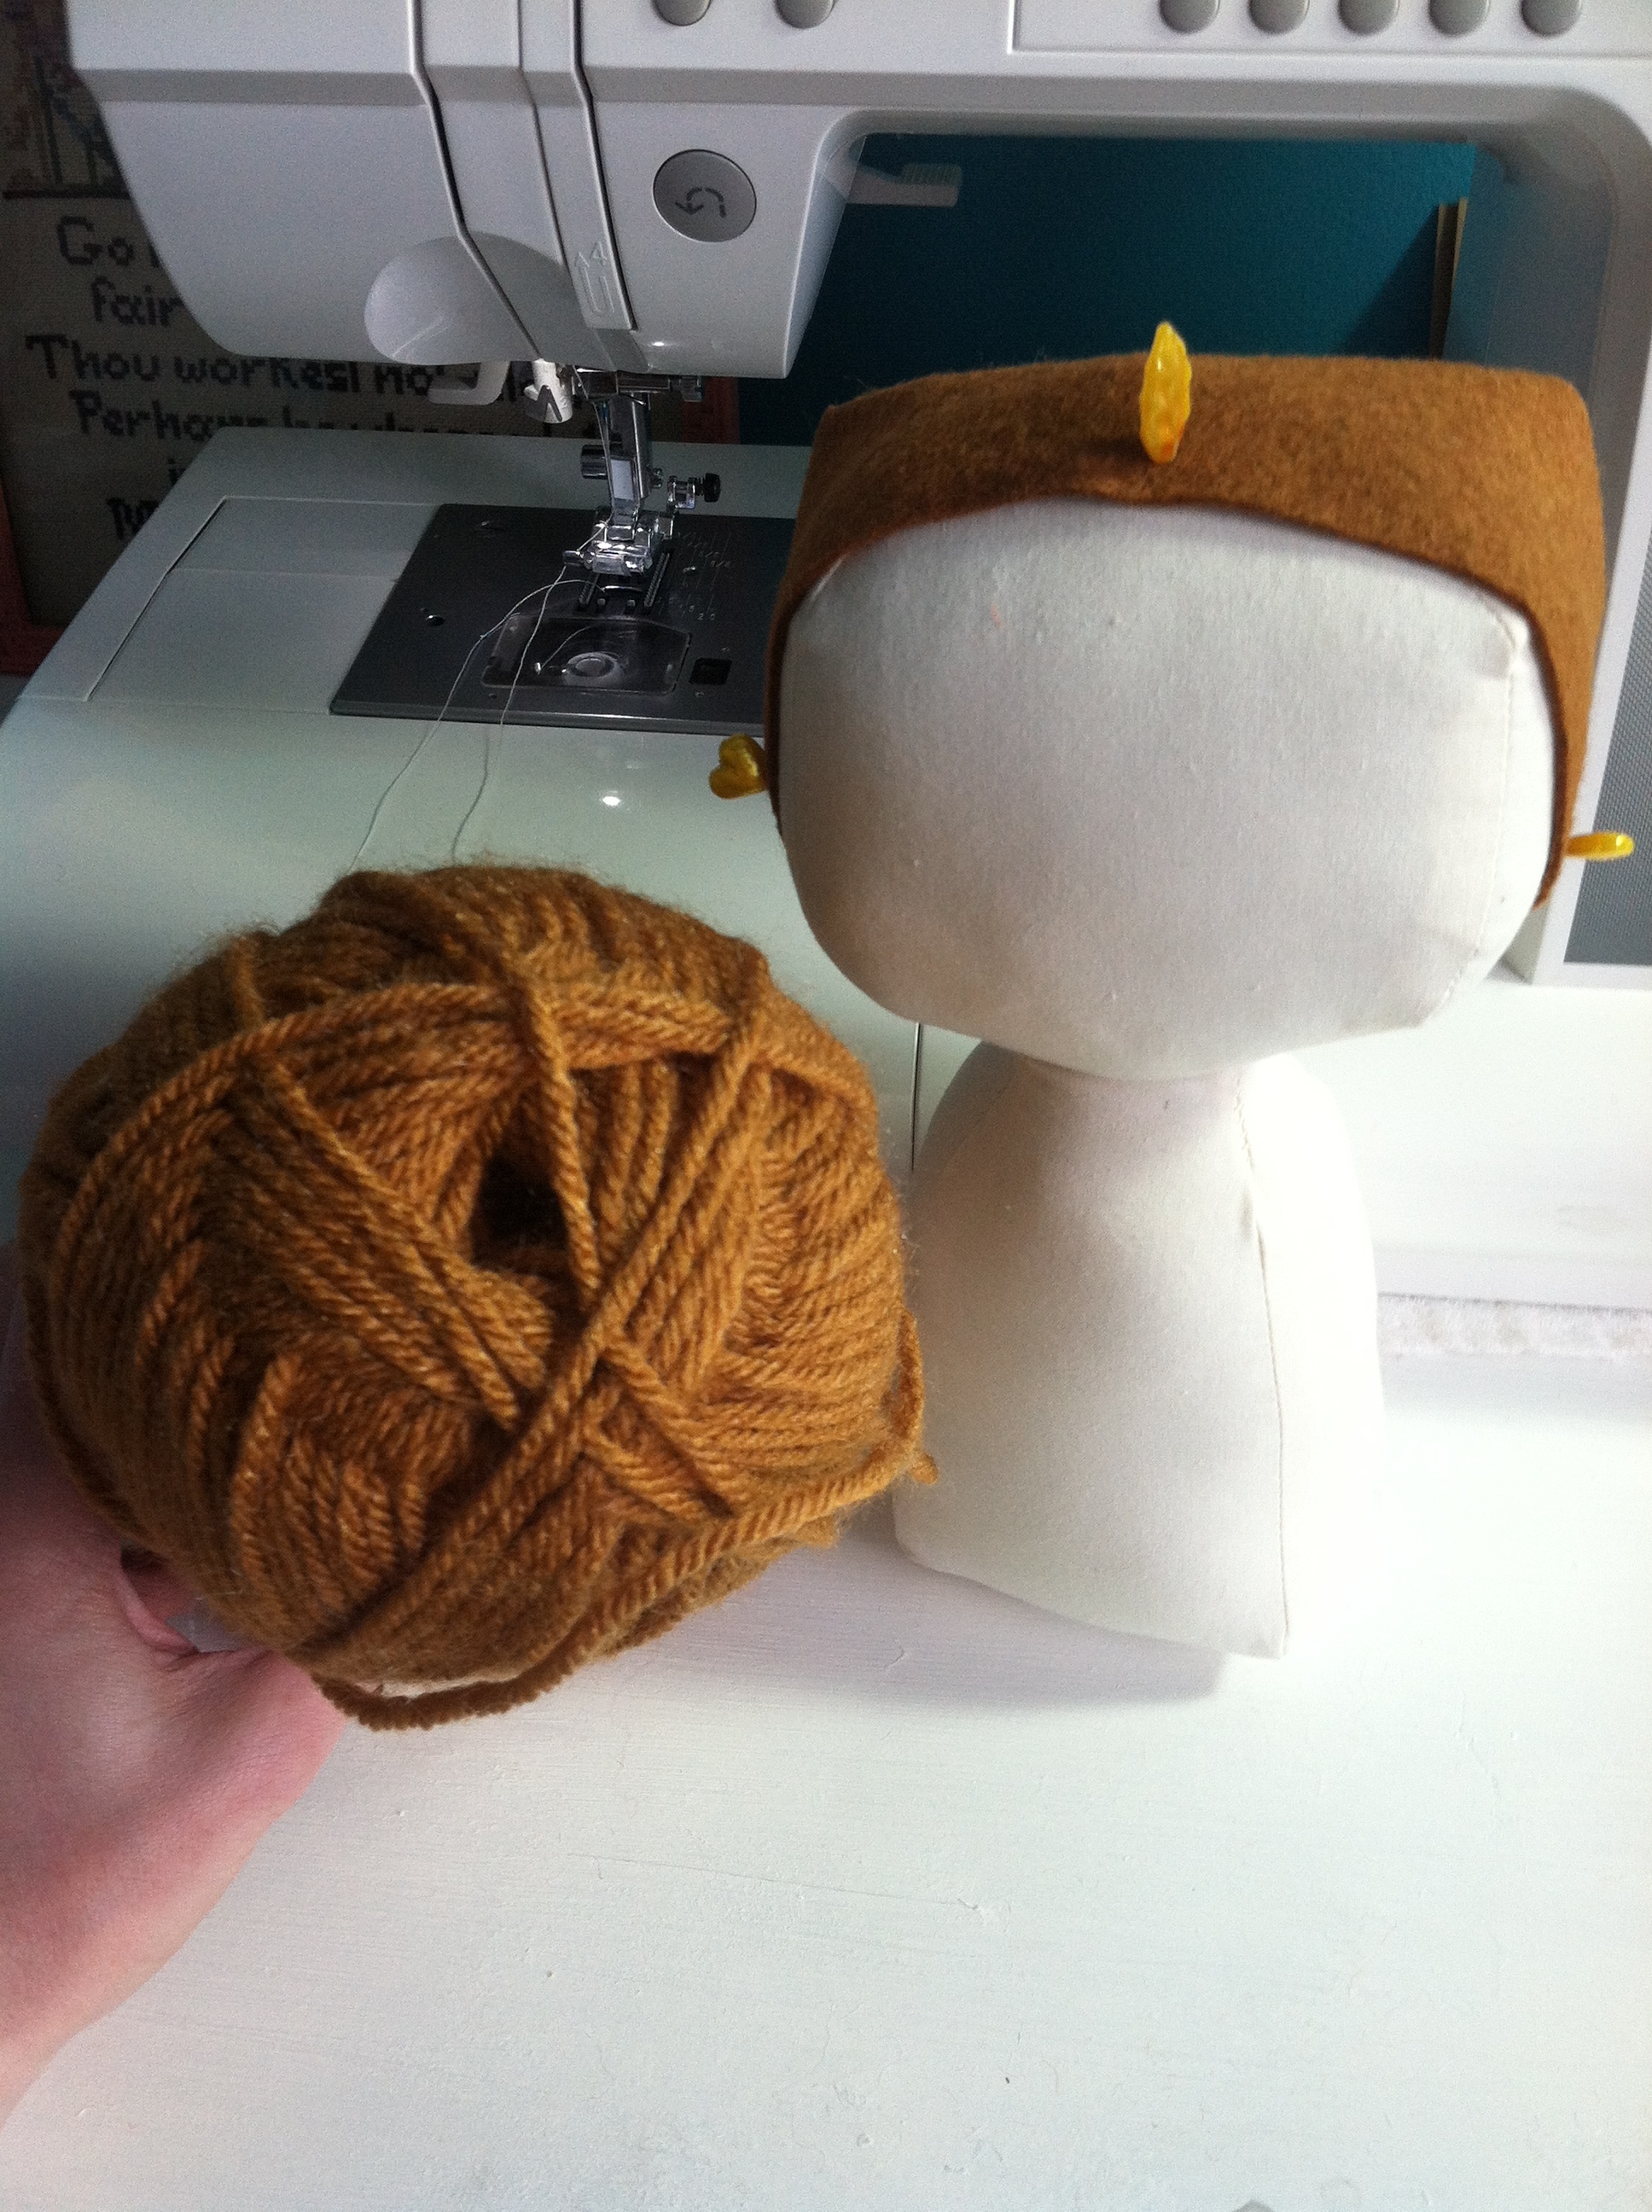
I knew I wanted to do the doll’s hair differently than how the pattern instructed. I really didn’t want their scalps to show through – especially on A’s doll where I couldn’t sew too many rows of hair or else it would be too thick. Being a felt lover, I decided to sew the yarn directly to some felt to make a wig, then sew it on to the doll.
-
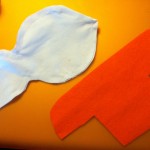
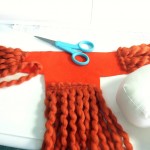
- Cut out felt shapes
-
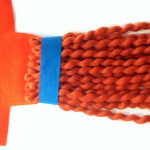
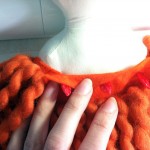
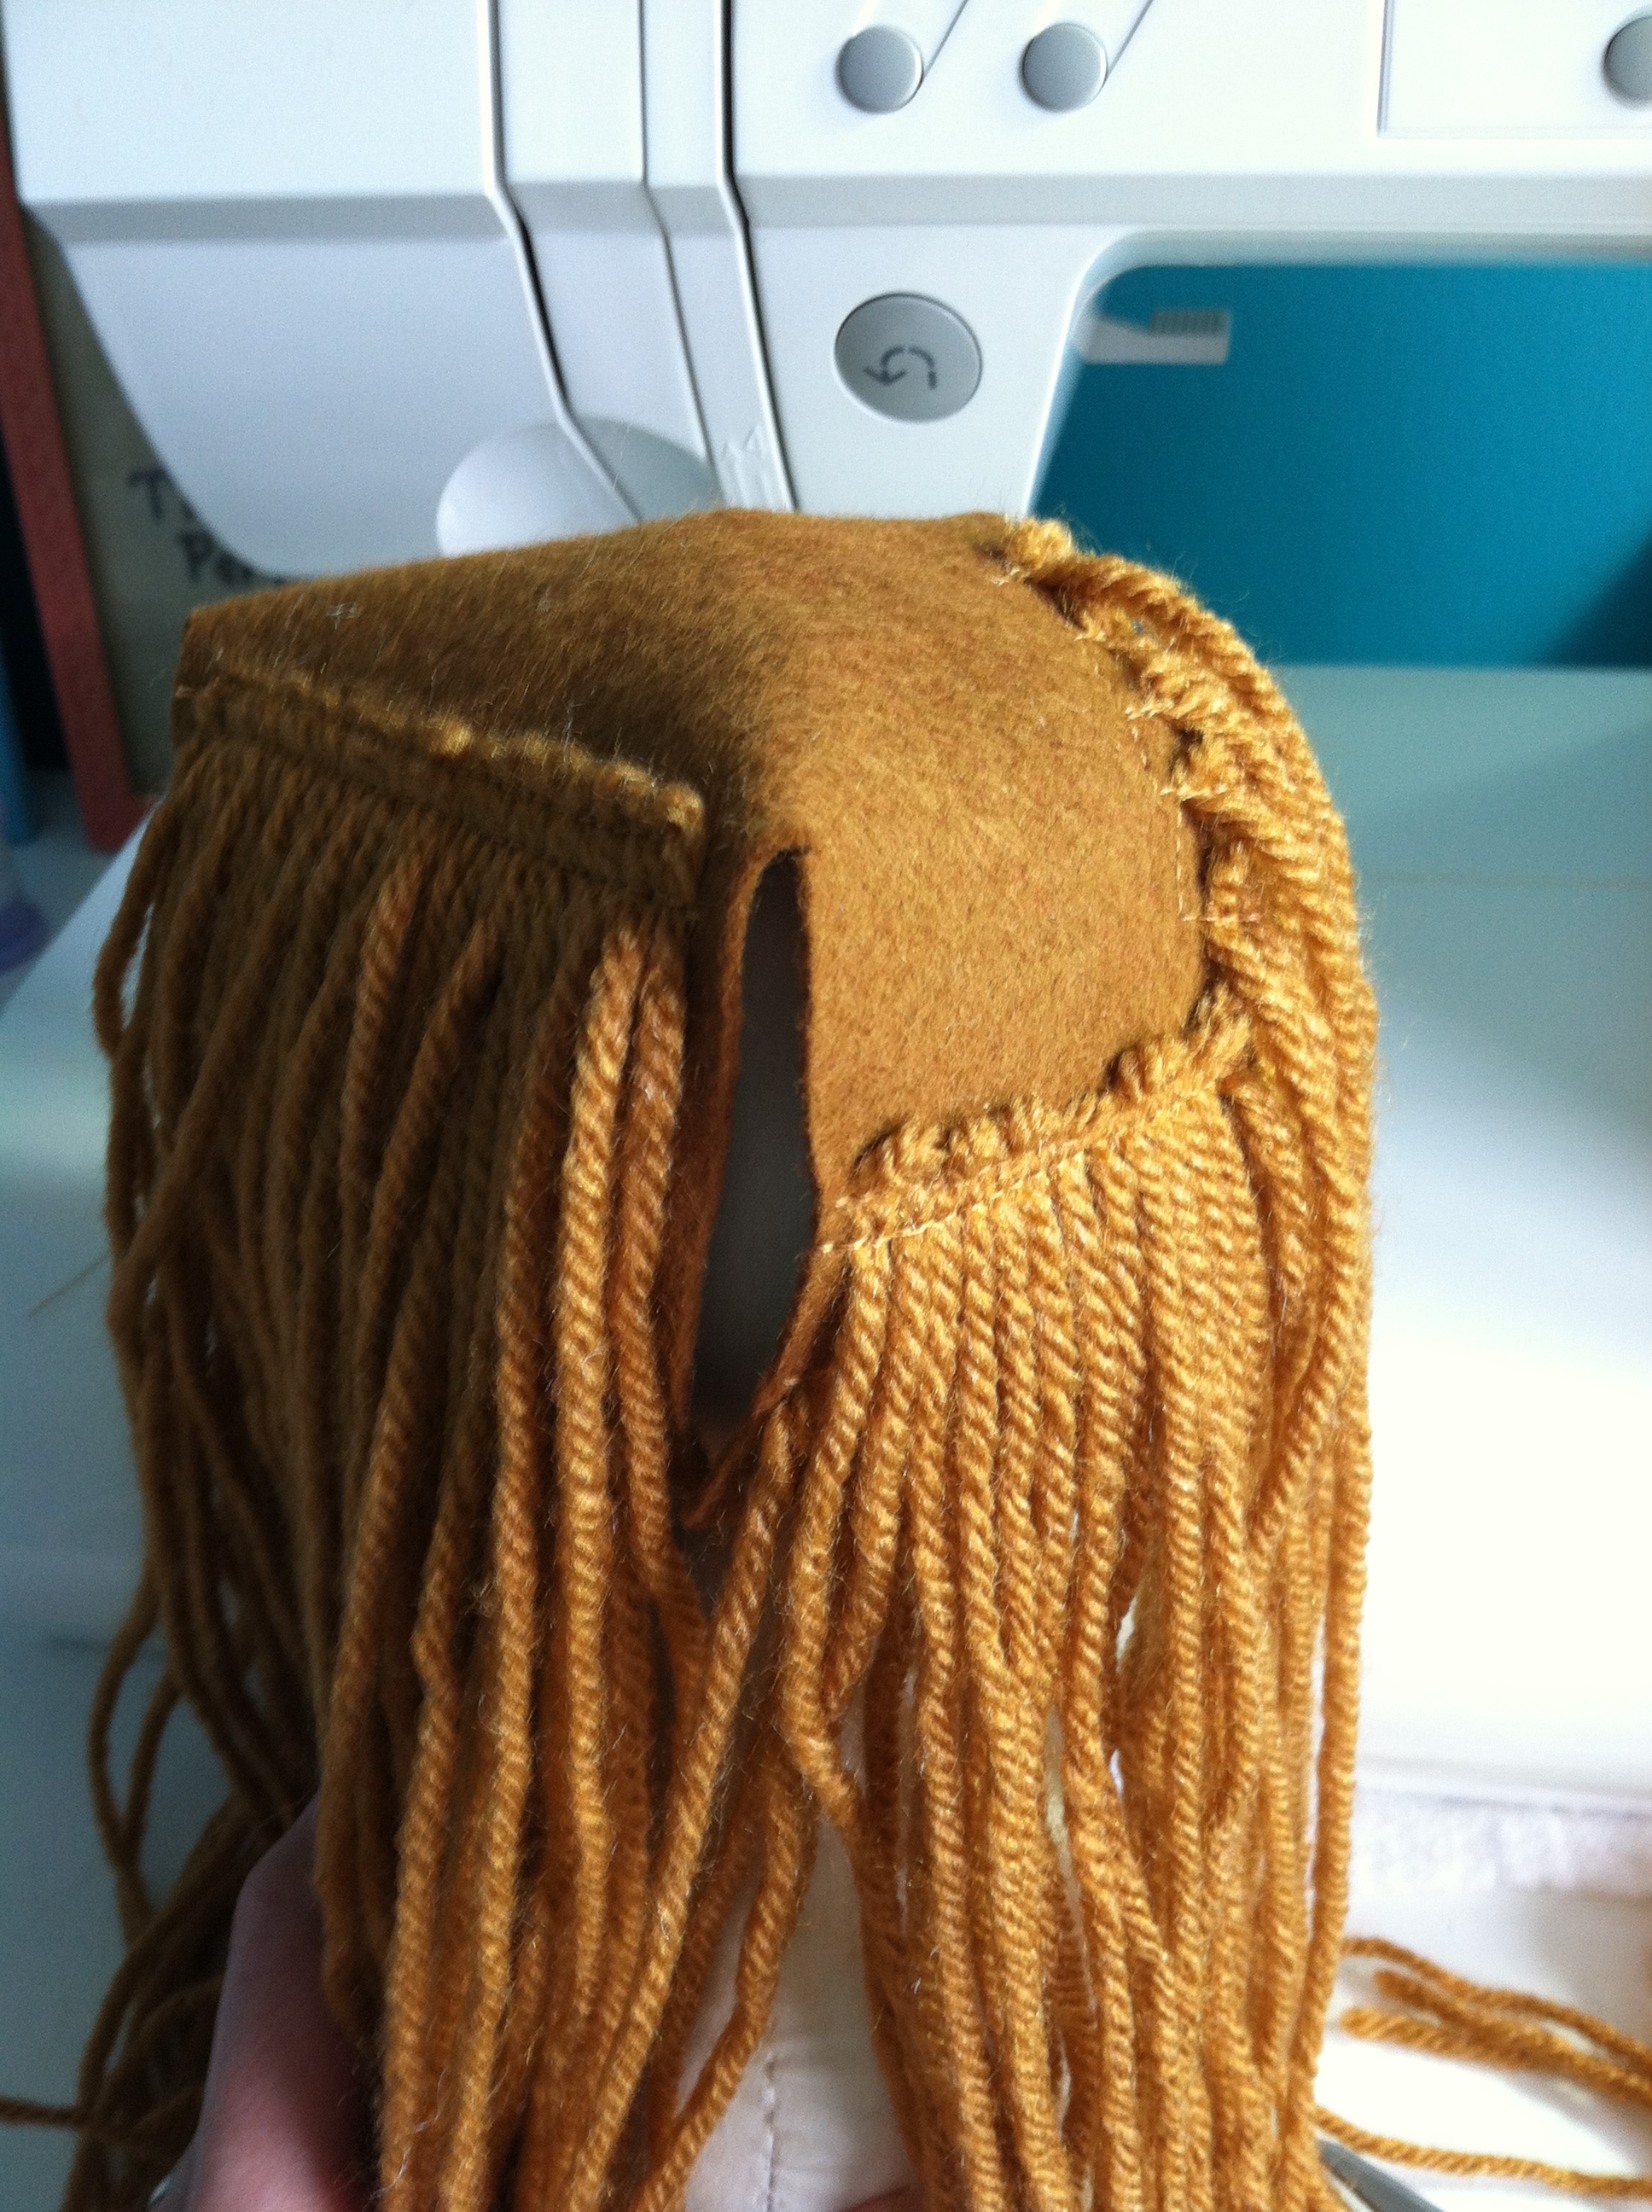
- Start sewing rows of folded yarn on. Tape can help keep them still.
-
- Work from the bottom up.
-
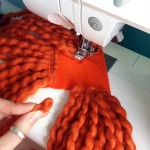
- I ended up sticking each yarn piece under the presserfoot as I went.
-
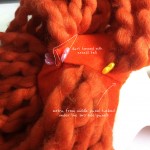
- Here what how my rows looked like. I added more by handsewing later.
-
- Sewthe bottoms of the side pieces on. (doll is shown upside-down and facing away.)
-
- Pin the center flap in place.
-

- Trim the extra.
-
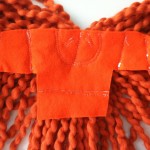
- Tuck the extra from the middle panel under the sides. Make a dart on each side so the felt is flush on the doll’s head.
-
- Sew the side seams of the middle flap.
-
- Fold the darts over and sew them down.
-

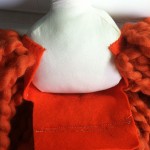
- Here is how the nect looks.
-
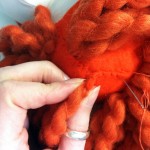
- I added a center part later for this doll, but did it before attaching on the blond doll. You sew the yarn down the middles of unfolded strips.
-

- For the bulky yarn, I hand sewed a strand right at the center top of her face for fullness.
Hopefully this gallery helps explain how I made my doll wigs. Here is the shape I cut in the felt, and what I did for the blond doll.

This (double) project was a lot of work, but so much fun!