
If you have a young child who is interested in math, the Montessori method of using beads to represent quantities is a great place to start. This is a part of the whole “concrete to abstract” formula Montessori uses. The Montessori bead materials allow a child to experience the difference between 1, 10, 100 and 1,000 with his own hands.

A work in progress…
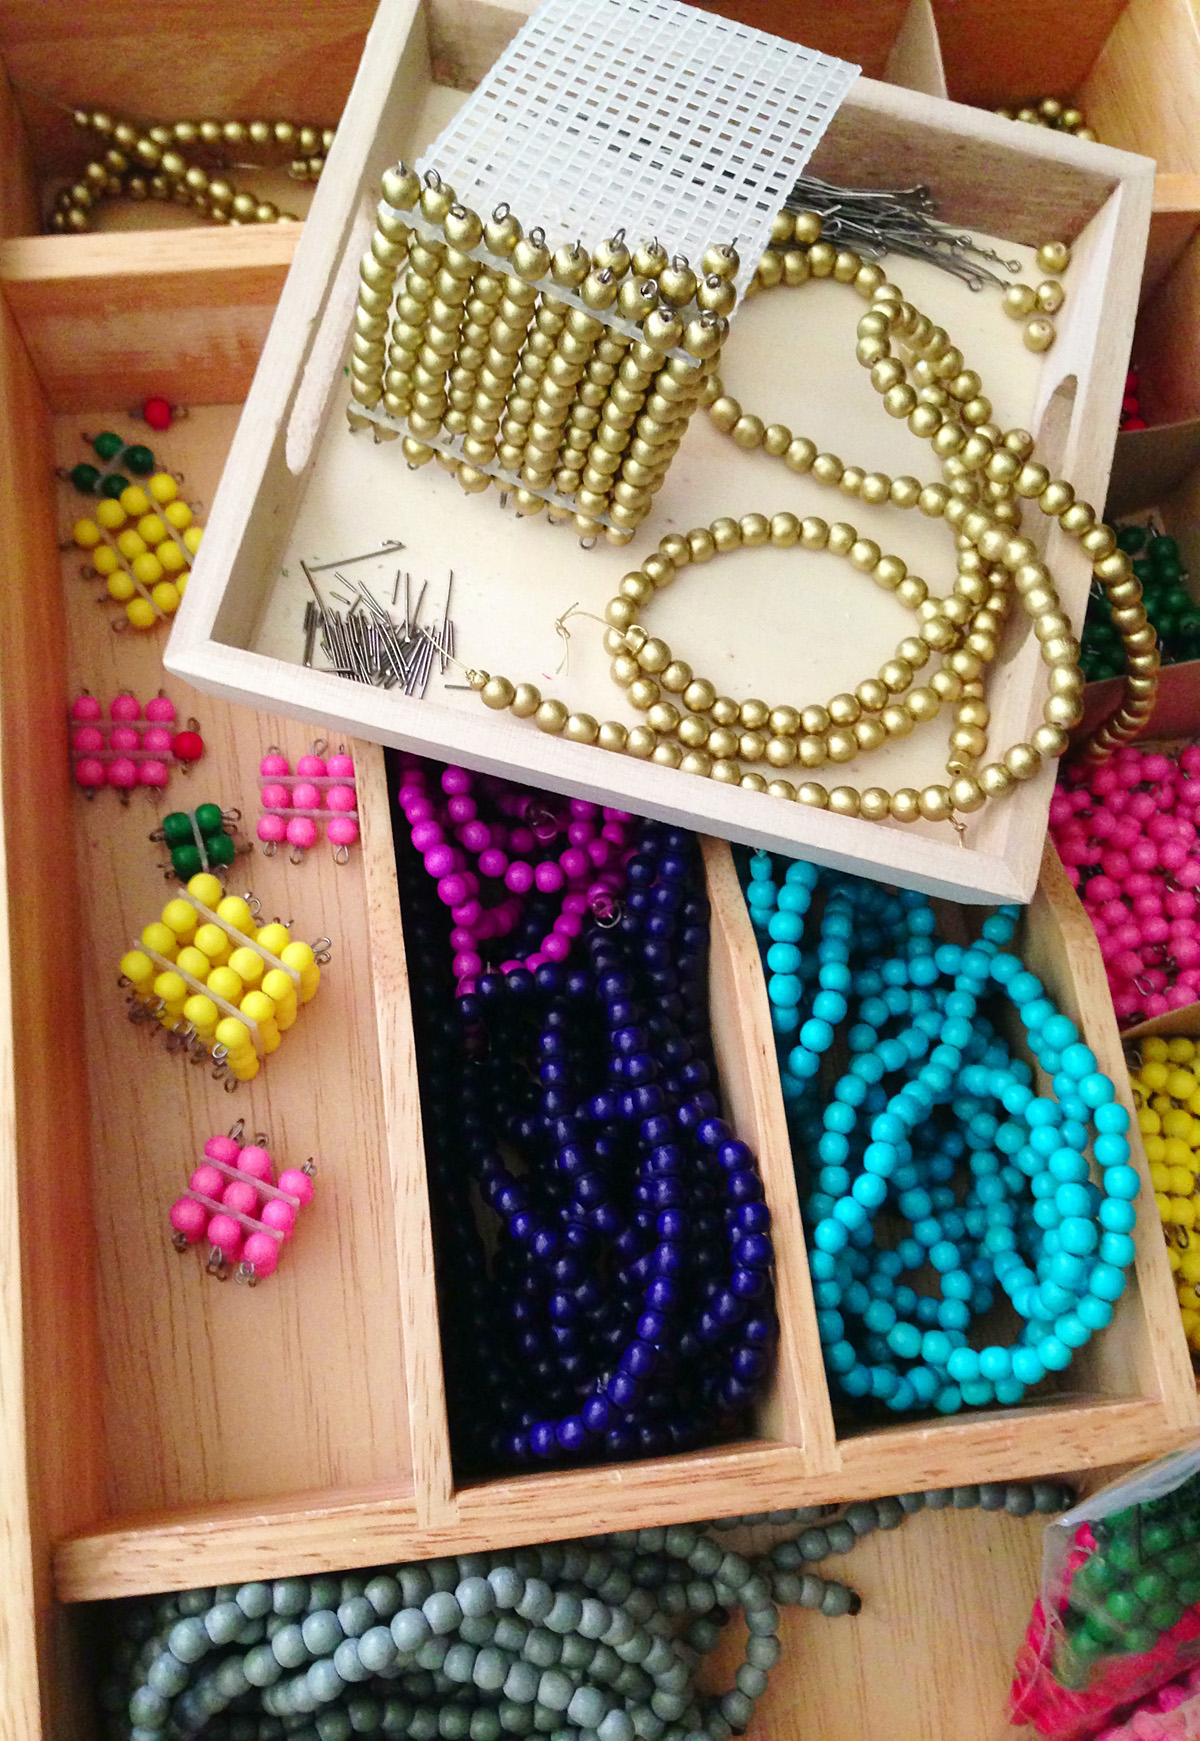
These Montessori beads have been a long-term project of mine. I have a lot done, but I still have more to go! My main goal for the moment was to create some base golden bead materials and a bead stair. The next priority is having enough made to do the subtraction snake game. (We’ve actually done some very simple versions of that already.) And I purchased enough beads to make the basic golden bead materials and a full decanomial set (55 of each color) so we can move on to multiplication. Beyond that, we’ll see…

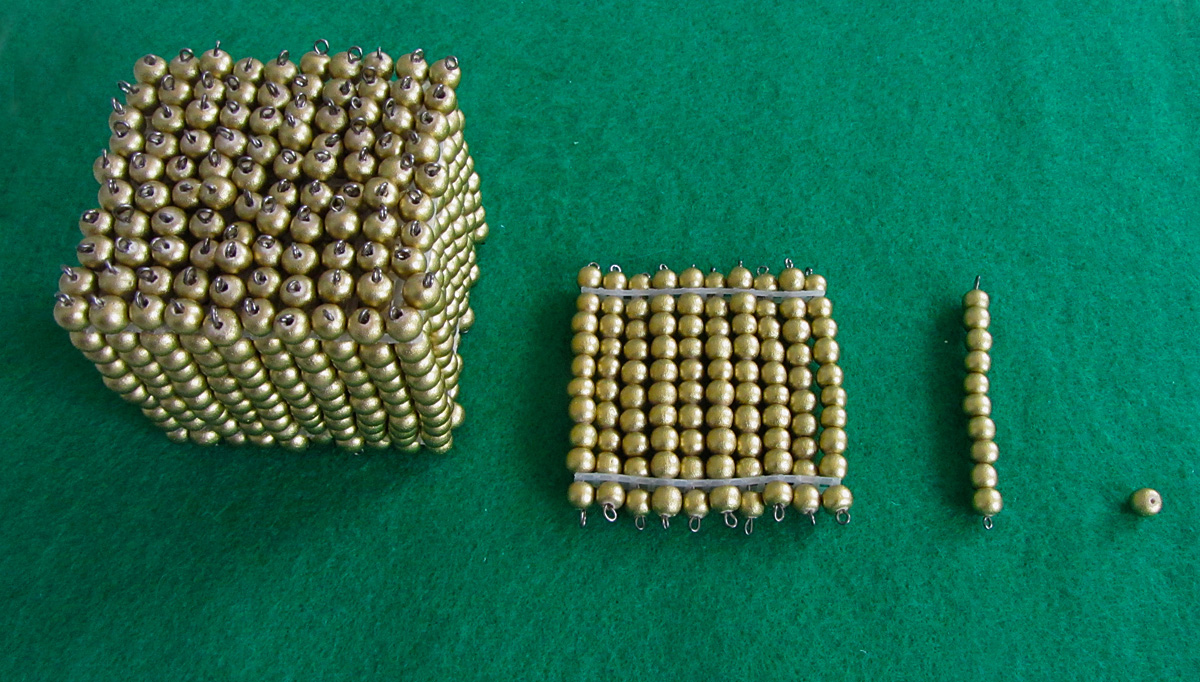
Our golden bead materials so far…
I used 6mm wooden beads from Fire Mountain Gems. That site gives you lower prices the more items you buy at once. Because the wood beads come in small packs of two 16″ strands, it added up to a lot of little items! I hesitate to say how many of each I got, as I’m not done yet and I’m not sure if I have the right amount yet. You can use their strand chart to help you figure out how many beads you get.
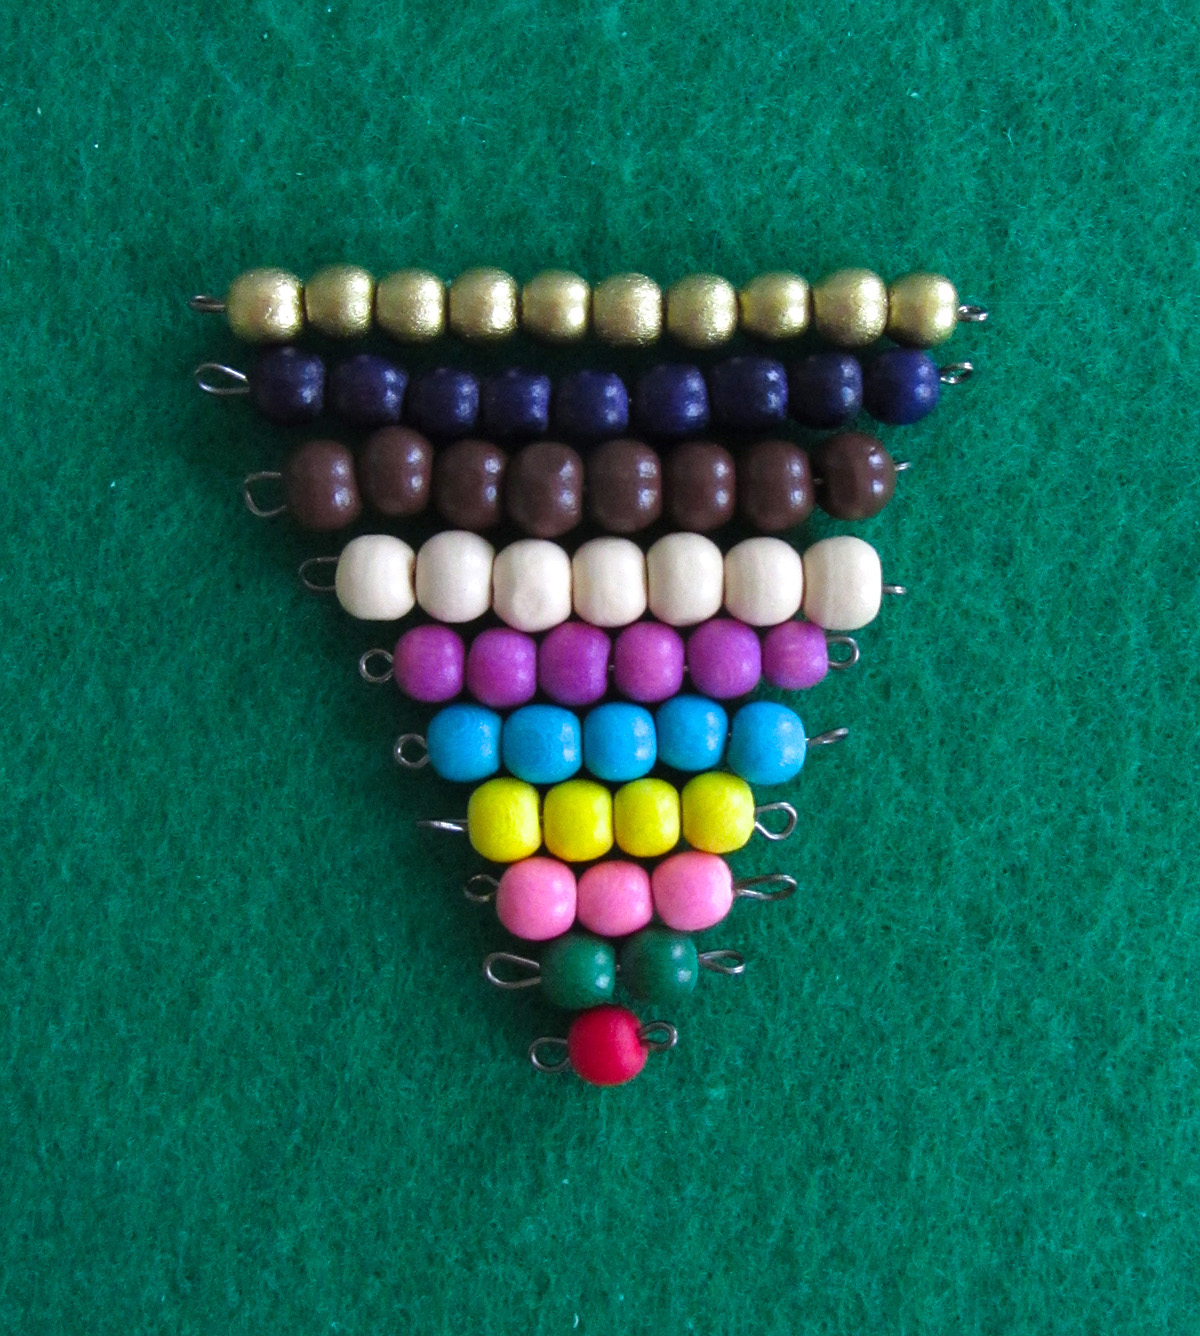
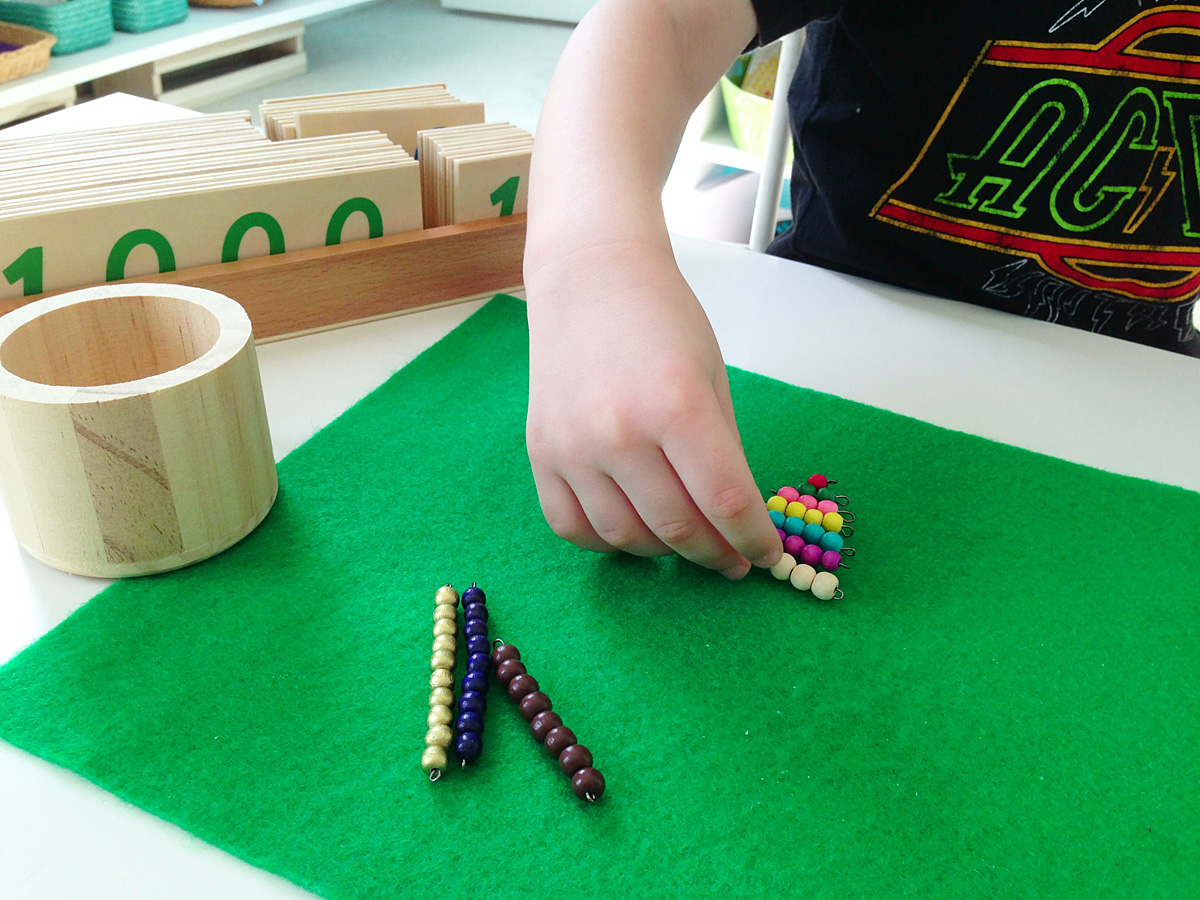
Our bead stair!
Materials:
- Bead, beads and more beads! Gold, dark blue, purple, turquoise, yellow, pink, green and red. I also ordered some grey to use for negative bead stairs eventually. My brown, black and white beads are from a big mixed bag. They are actually 6mm-7mm. But they were out of brown and white when I ordered, and I was able to get a huge bag for $5 due to my volume discount. I don’t really mind that they are a bit bigger, though some of them have huge holes.
- I ordered 3″ eye pins to save myself time. You could get wire if you can find a good price. I got 10 packs of 100 eye pins for $20. The 3″ ones are long enough to fit the 10 bead golden bead bars. For the bead bars with 6 or less beads, I was able to save the extra wire I clipped off and use it to make more short bars.
- I used plastic canvas to construct the bead squares and the 1000 bead cube. I’ve seen this technique in several places, but most notably Montessori at Home.
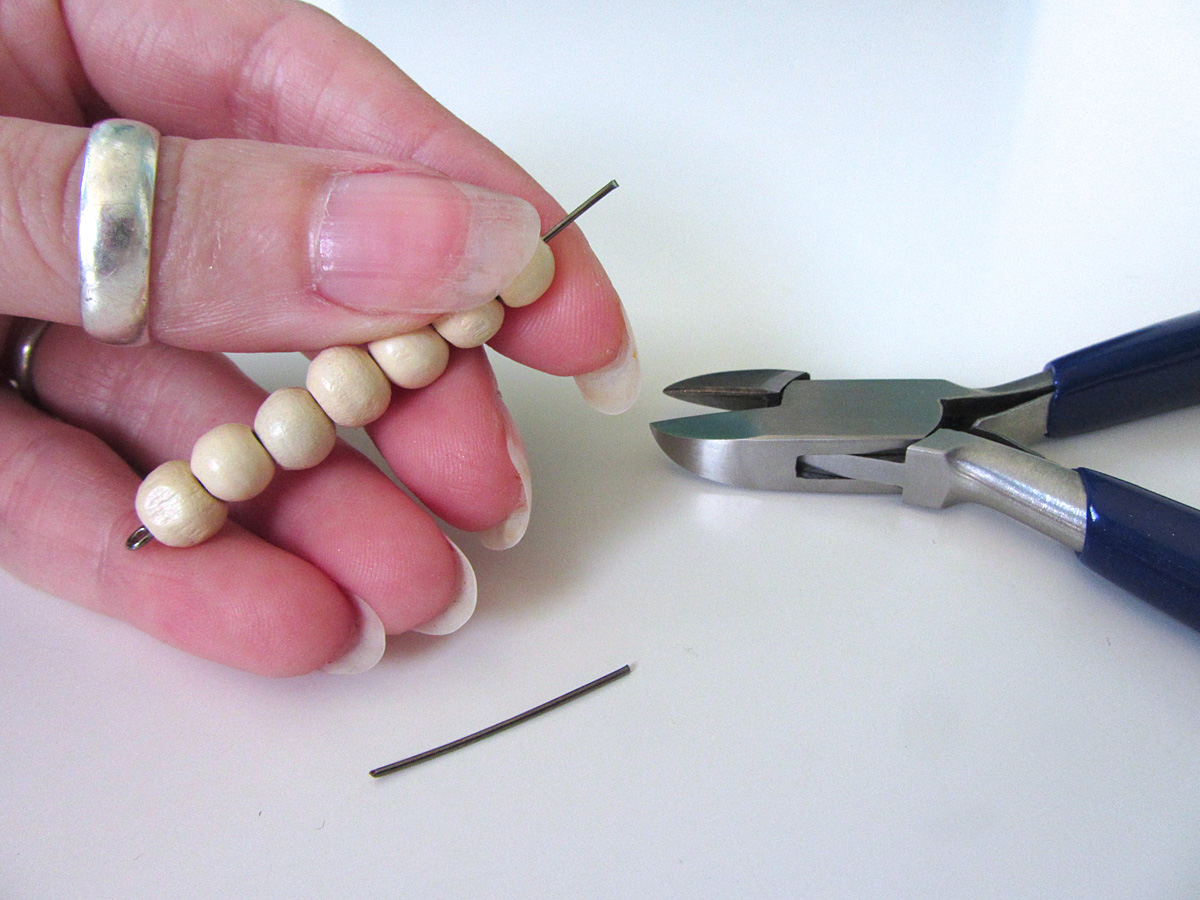
- My beading tools from jewelry making were a must! I used my wire cutters
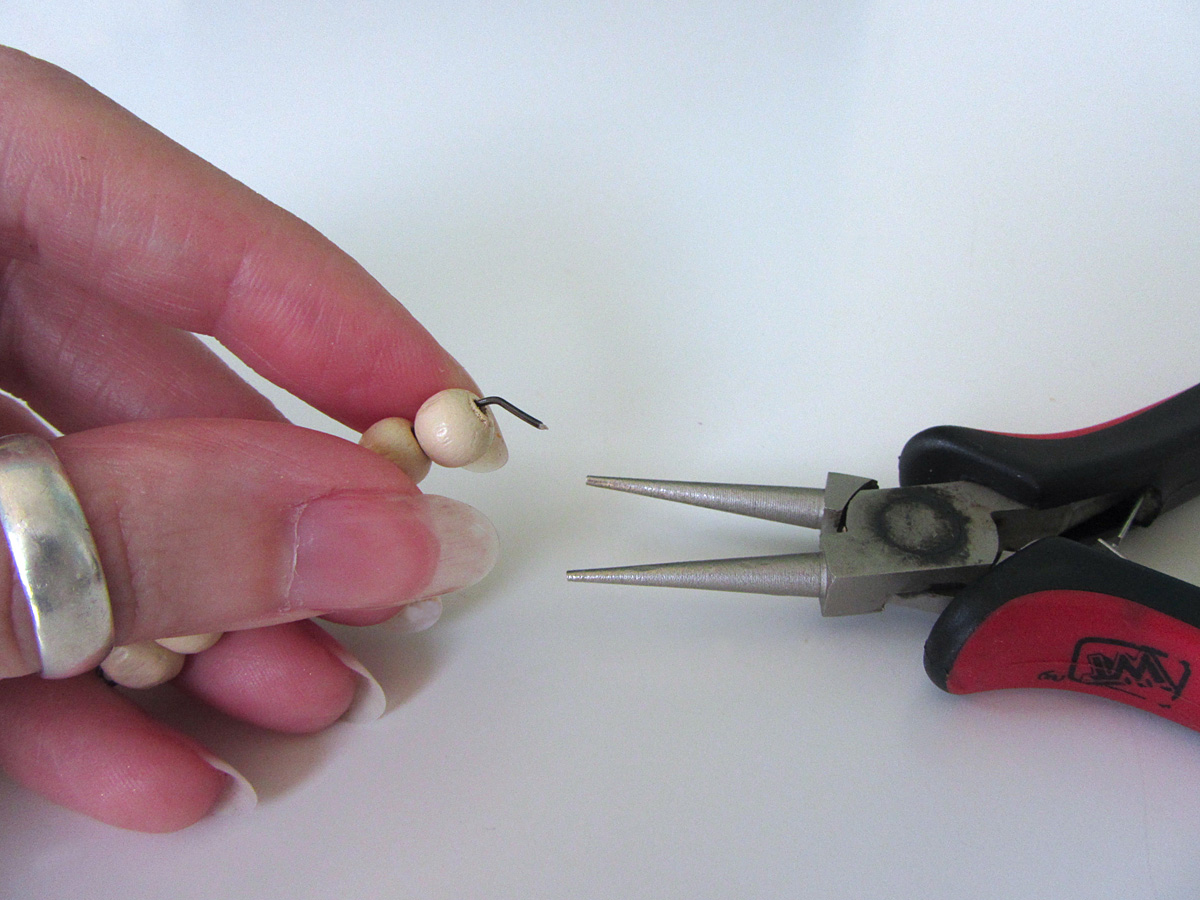
and my round nose pliers
.

I’m not really a fan of plastic beads, but I think it was ultimately how beautiful the painted golden beads were that drove me to use wood.
Making Bead Bars
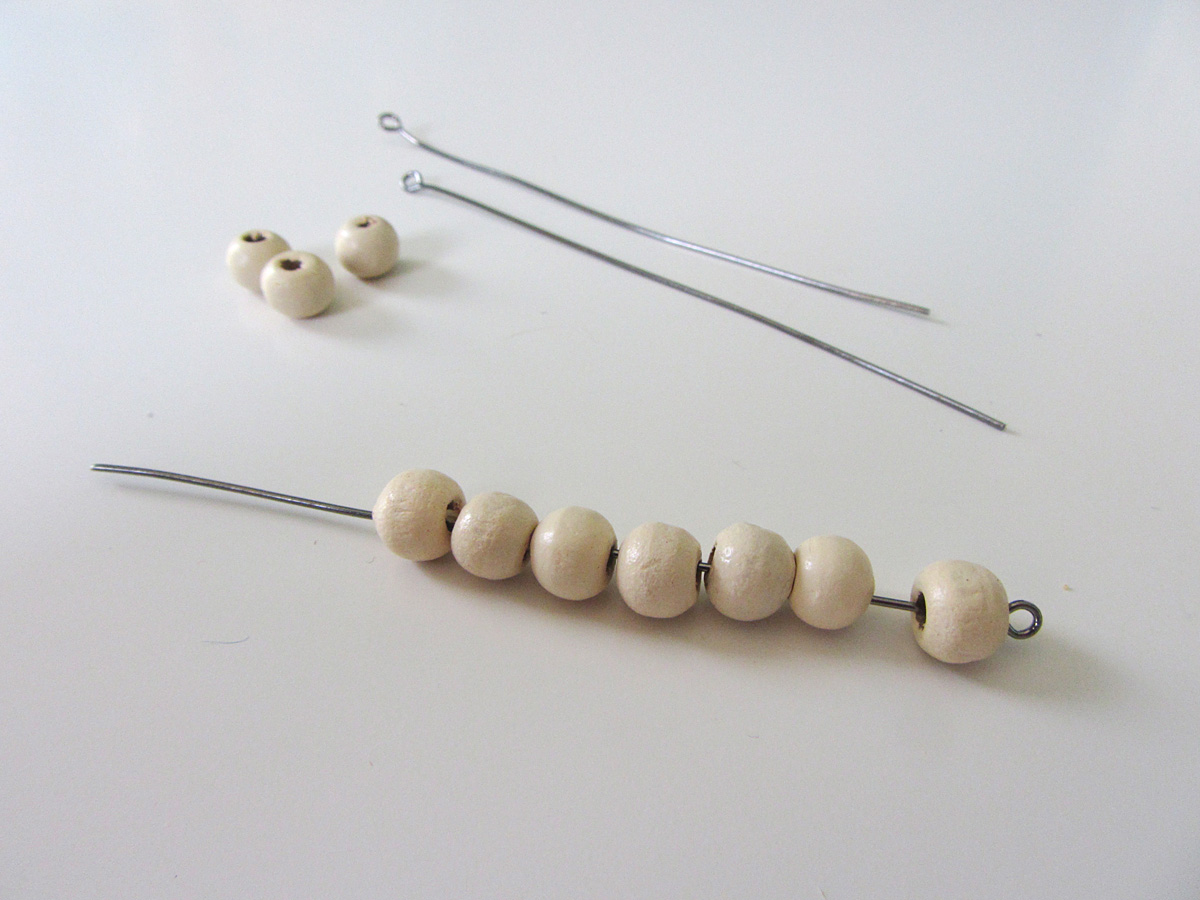
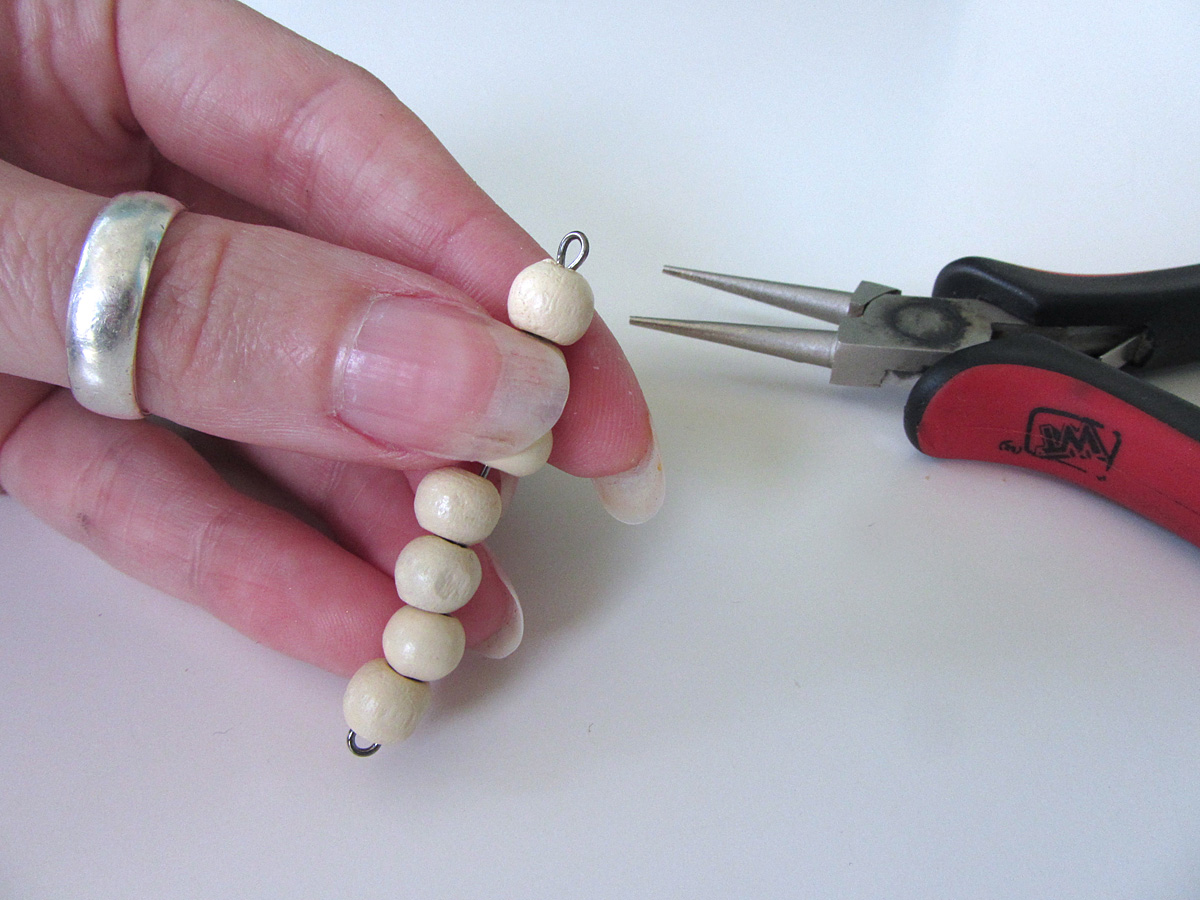
The basic steps to make the bead bars are very simple! Starting with an eye pin, load on the number of beads needed. Trim the wire so you have some extra to make a loop. My extra wire was about 9mm. I err on the long side and trim if my loop seems too big.
Make the end loop by first bending the wire at a right angle to the bead bar, then using the round nose pliers to create a loop. Close the bottom of the loop by squeezing it with the pliers, tucking the end into the hole of the top bead. If your bead holes are big, you’ll need bigger loops.
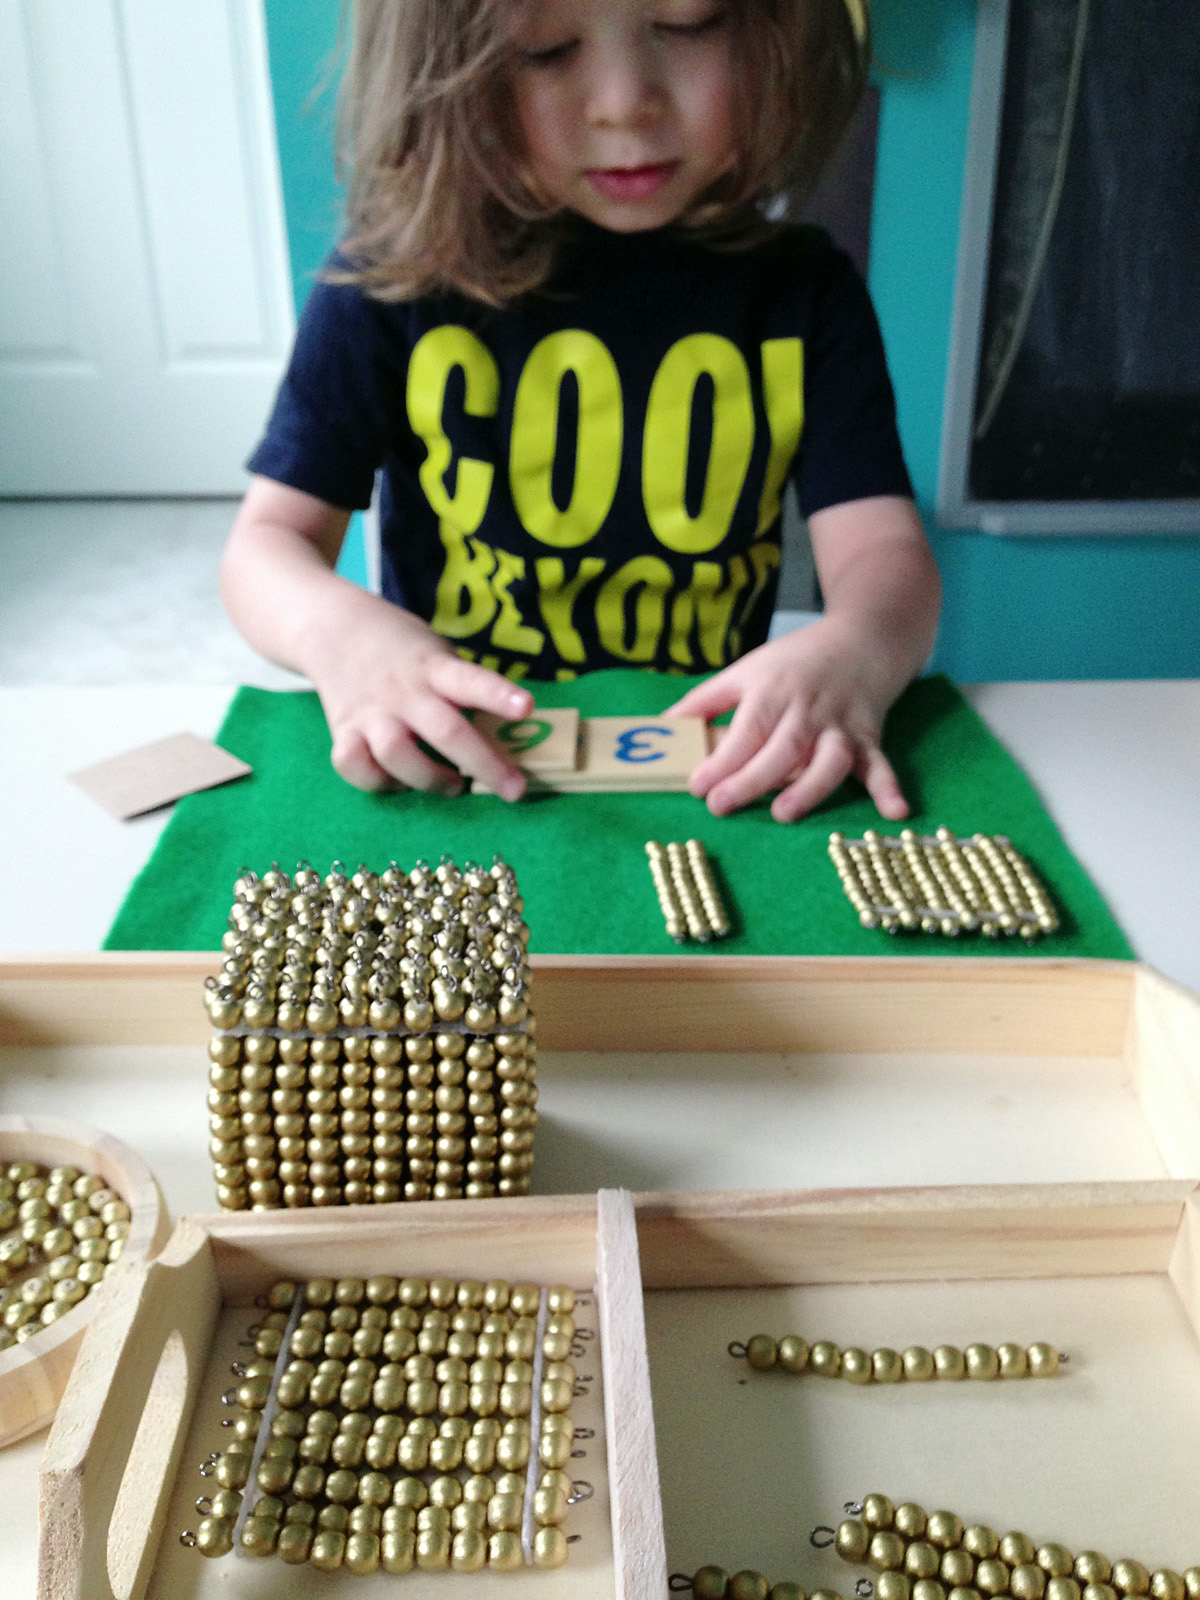
Bead Bars and Cubes
As I mentioned, I used the technique posted by Montessori at Home to make my hundred squares and my thousand cubes. I still have at least 7 more hundred squares to make!
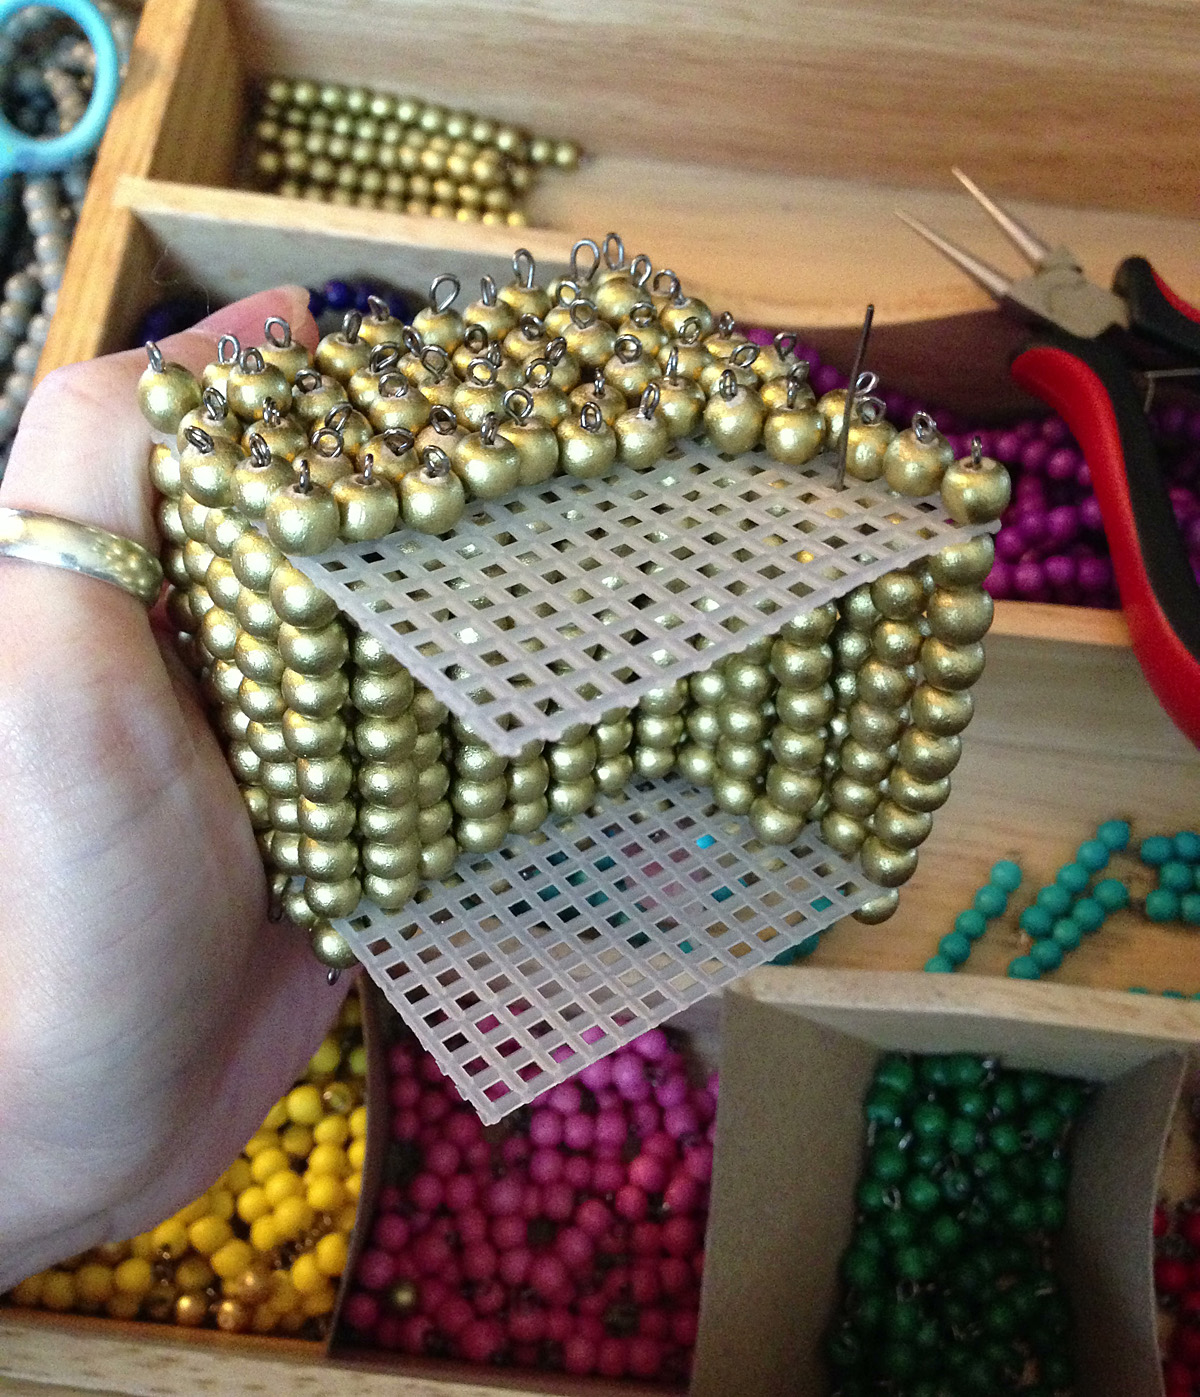
The thousand bead cube was quite the project! Probably because it involves 1,000 beads. Hah! Luckily, it is totally acceptable to have just on beaded thousand cube and then show your child how wooden thousand cubes are models of it. So a set of those and wooden hundred squares is on our wish list.

I had a lot of extra beads in the smaller colors, so I tried out making some of the bead cubes and squares. I’d need a lot more beads to do a full set of those, so I’ll have to see Jax’s interest level later on.
Using the Beads
There are online resources that can show you the proper way to introduce the bead materials. I really like Info Montessori. Jax is a creative learner, however, so I often let him lead our activities after I’ve presented the basics. At the moment we are focusing on counting quantities with the golden beads and practicing the the bead stair. He is dying to move on to the addition snake game, but I want him to have a better grasp on the basics first. We’ve done a few simple addition games, though!
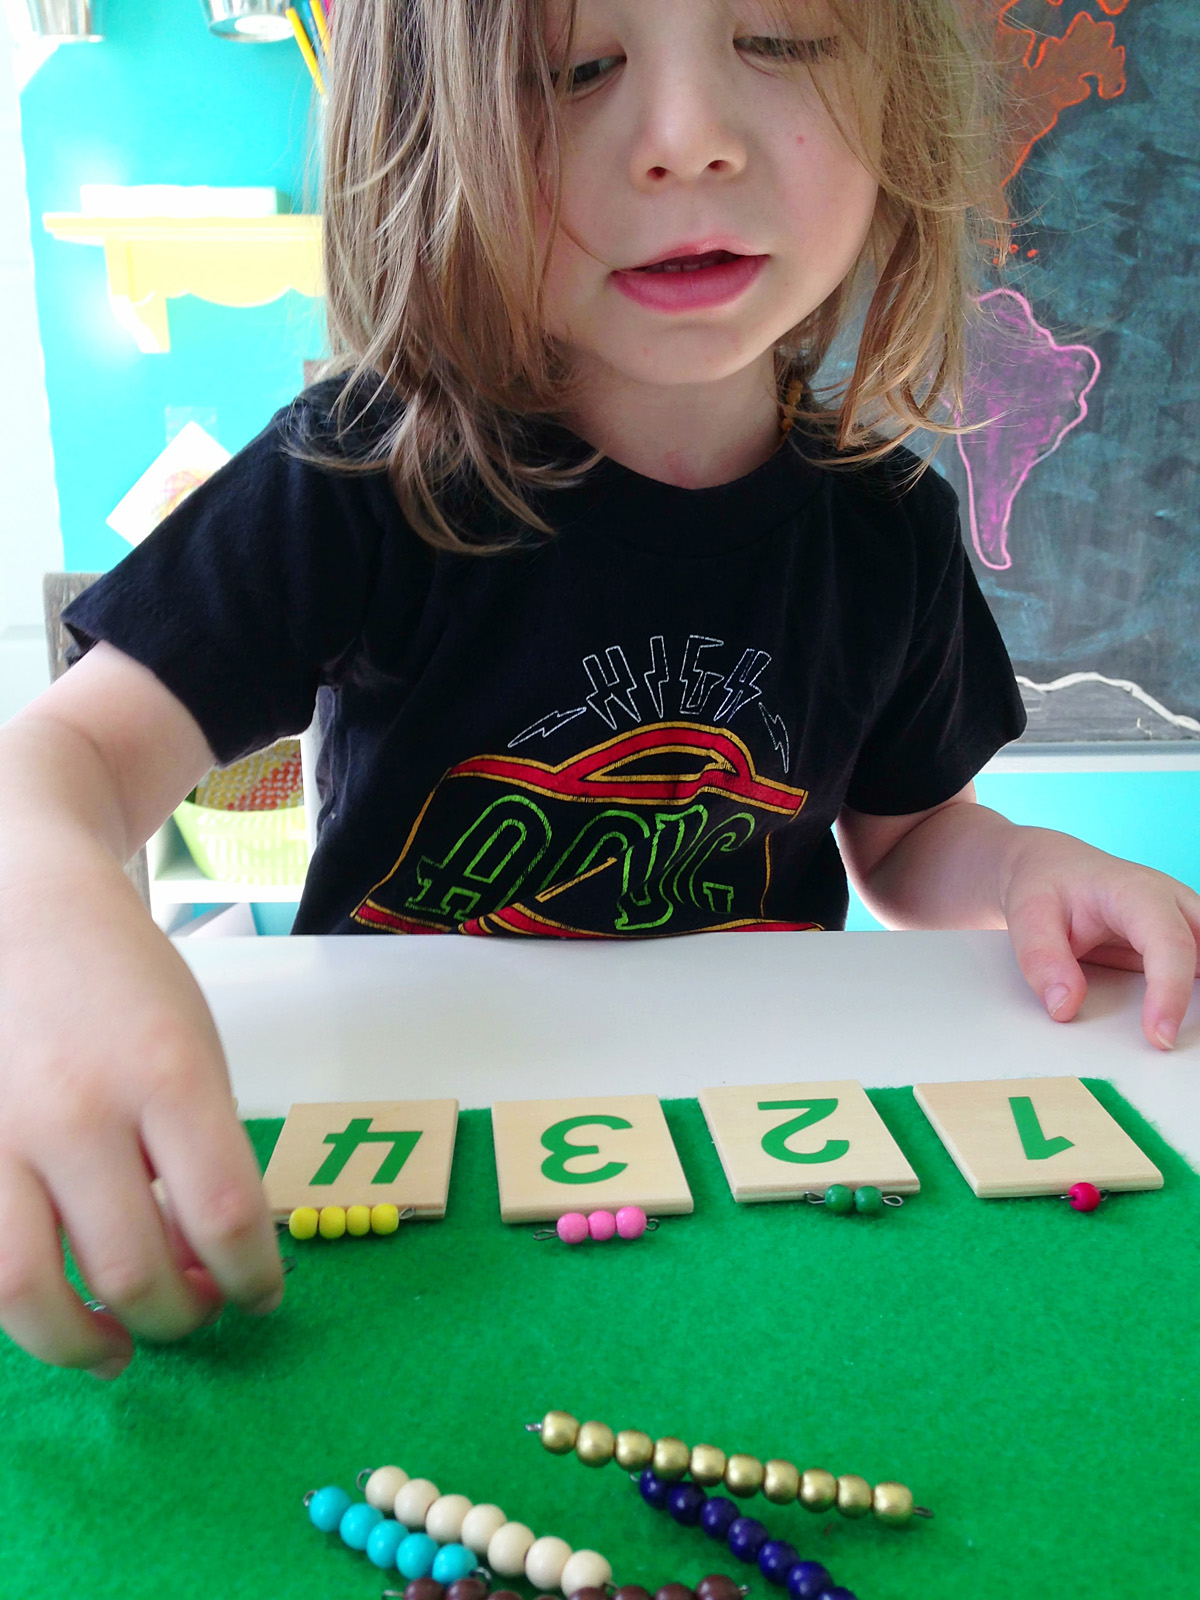
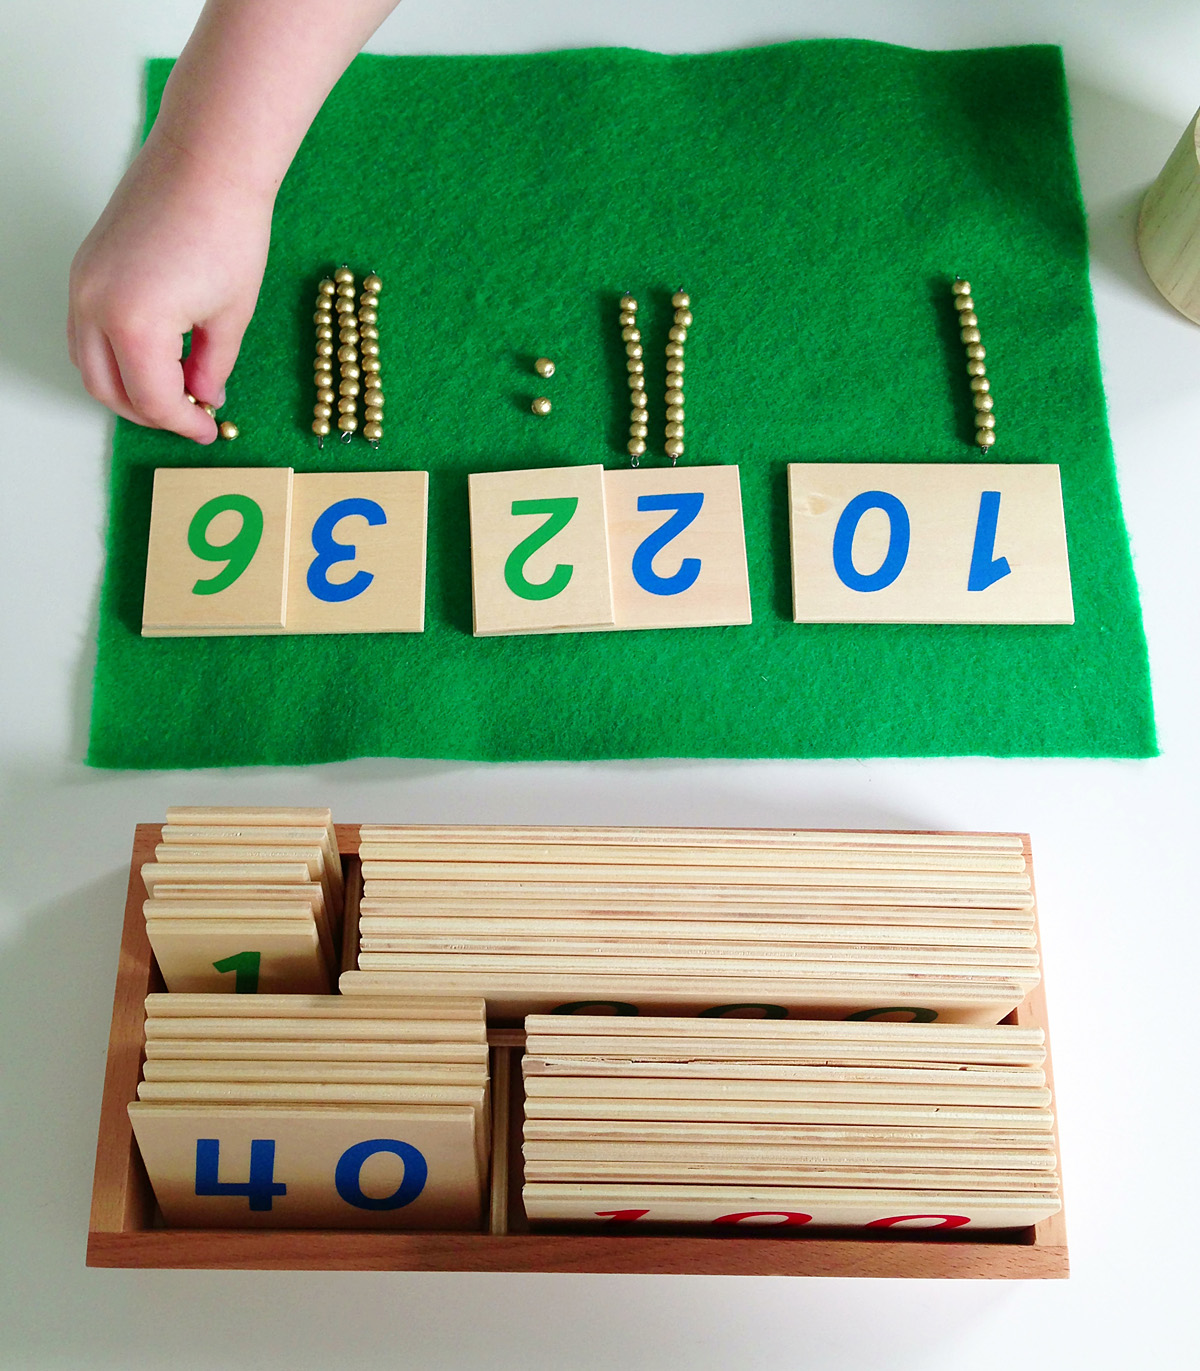
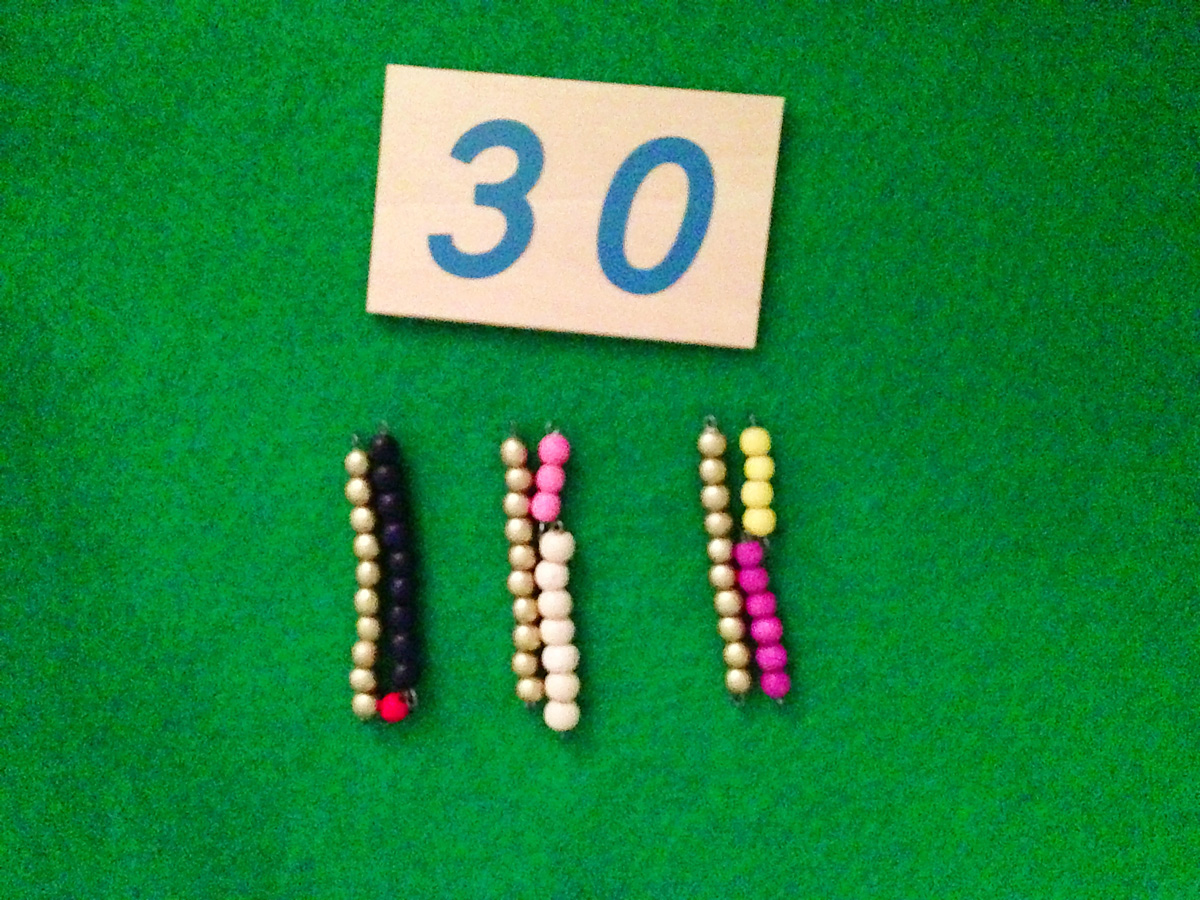
We use these small wooden number cards when we work with our bead materials.

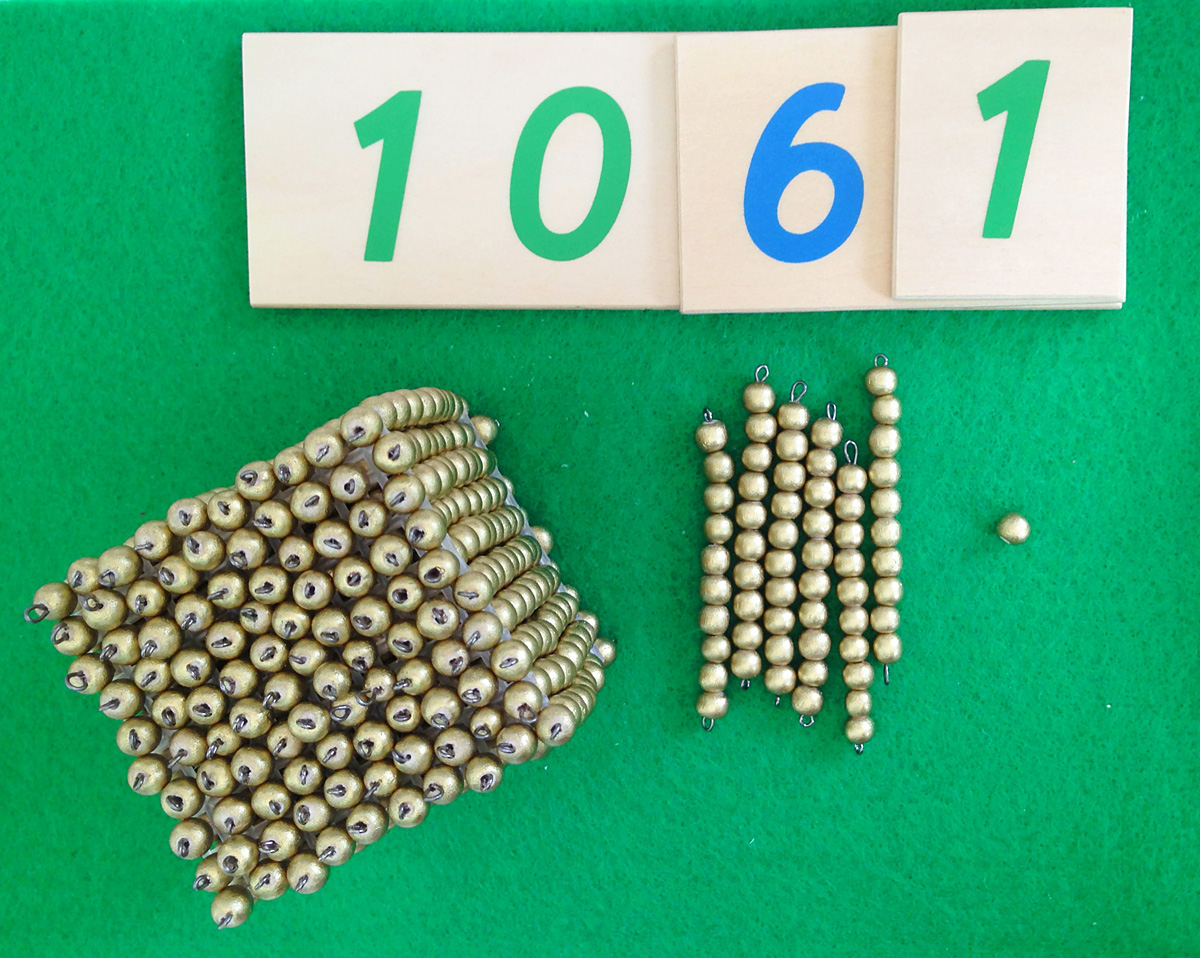
Jax is still working on the names of the larger quantities – he gets hundred and thousand confused sometimes. He’s getting quicker and recognizing how many beads are on a bar with practice. That is one reason why I encourage him to use the bead stair right now.

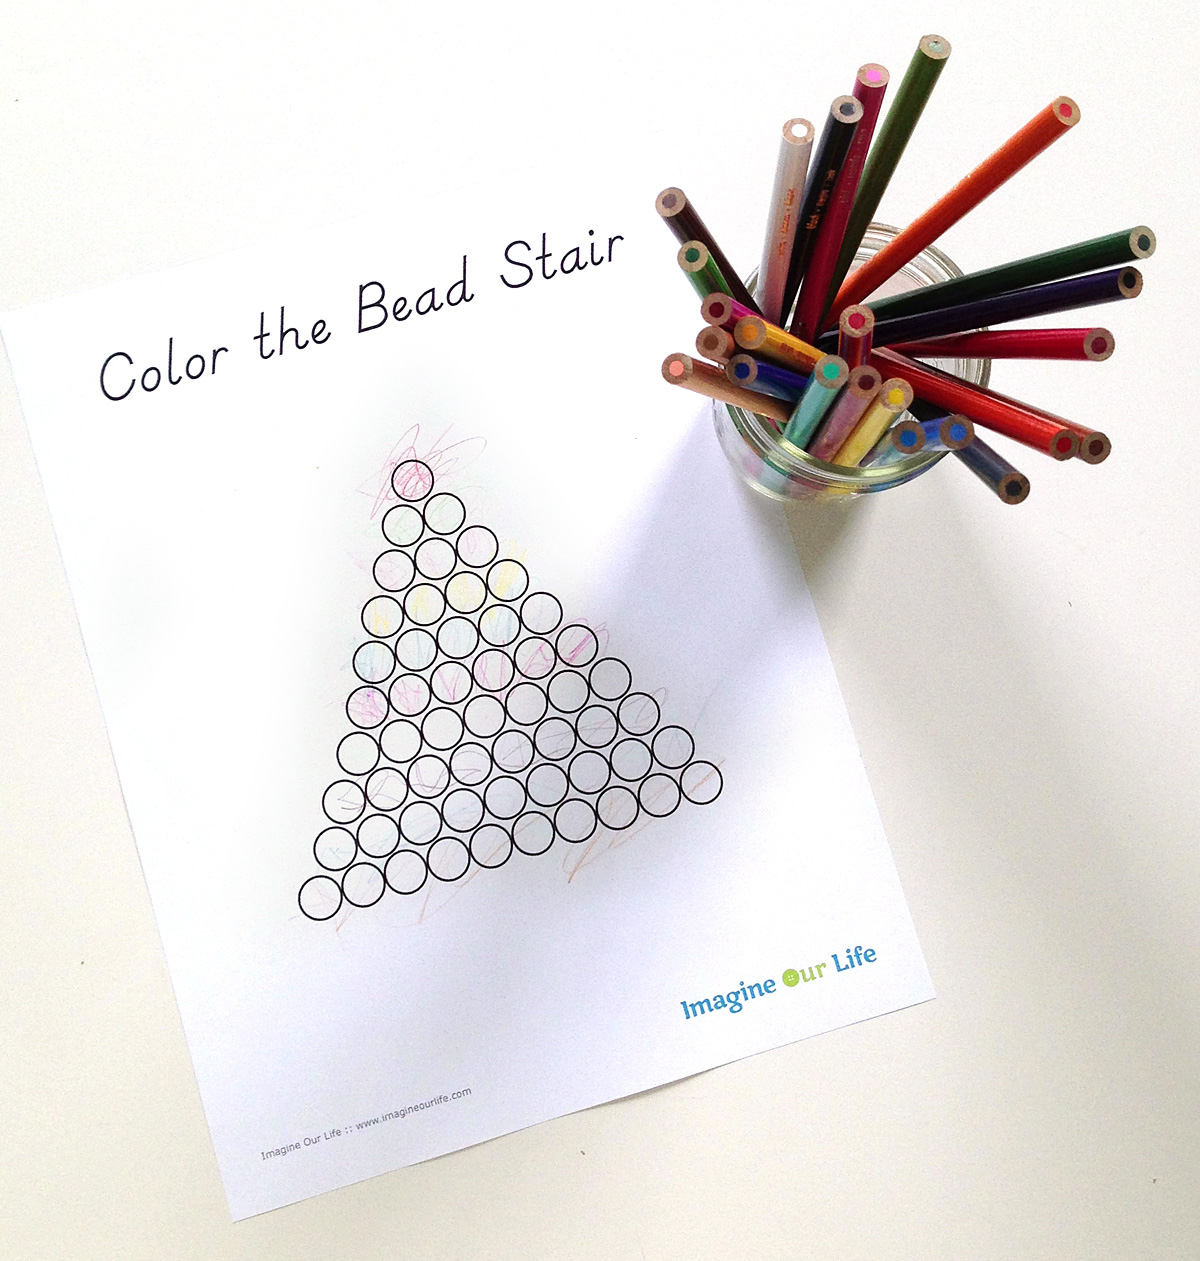
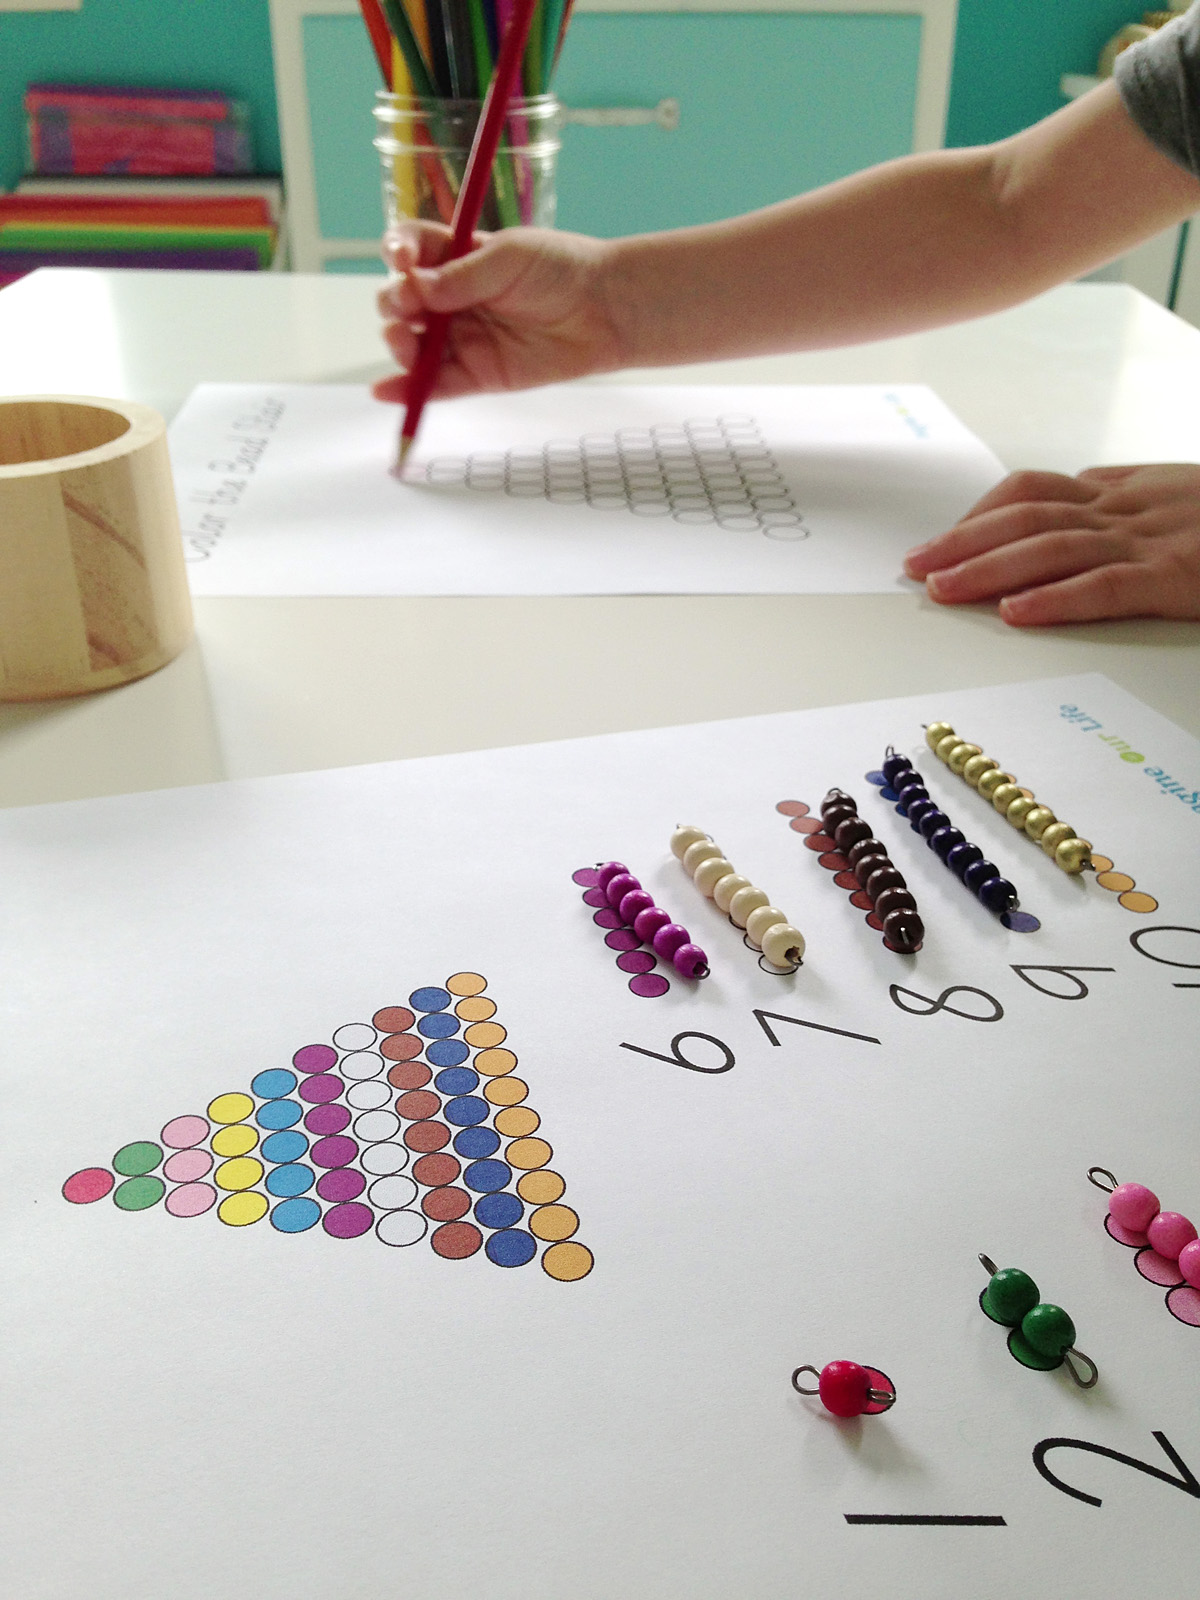
Free Bead Stair Printables
I made Jax some worksheets to use with his beads. One is a control sheet that shows the colors and numbers. The other is a coloring sheet for him to color in the Montessori bead colors. I made the graphics in Adobe Illustrator and the page layout in InDesign. I’m offering our printables free for your educational and personal use!


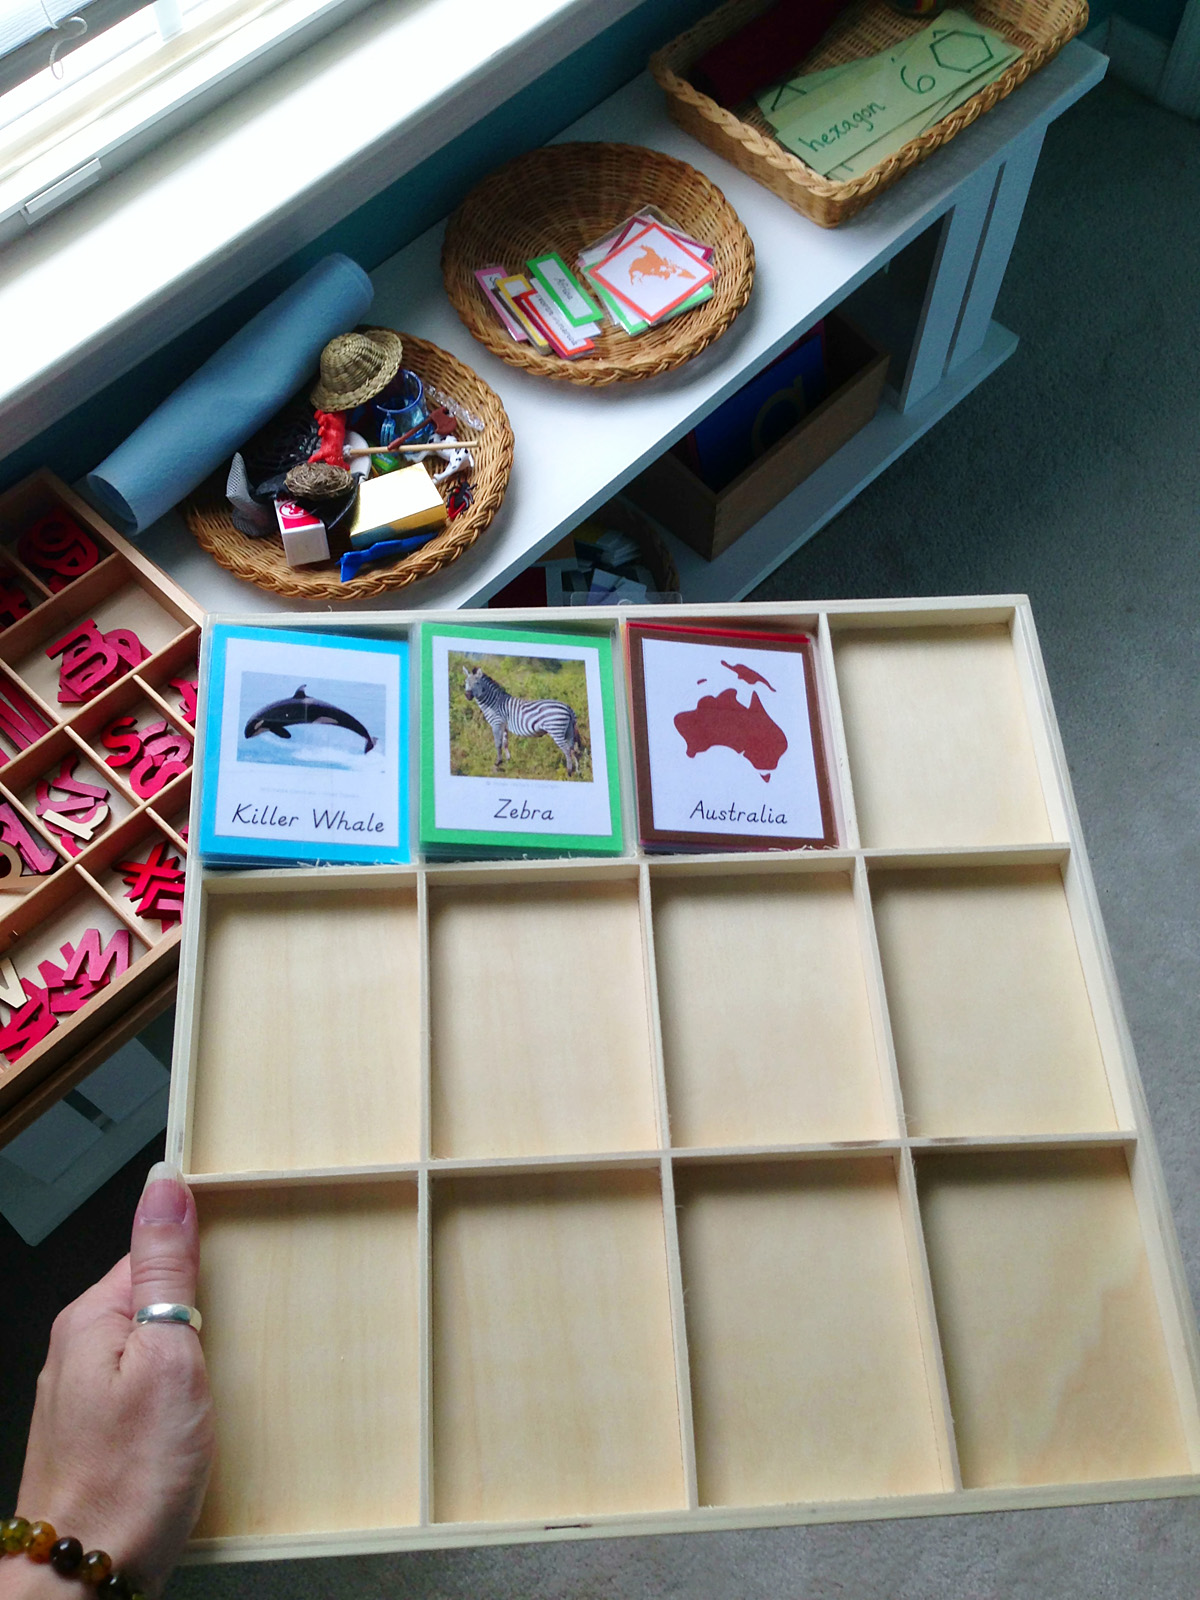
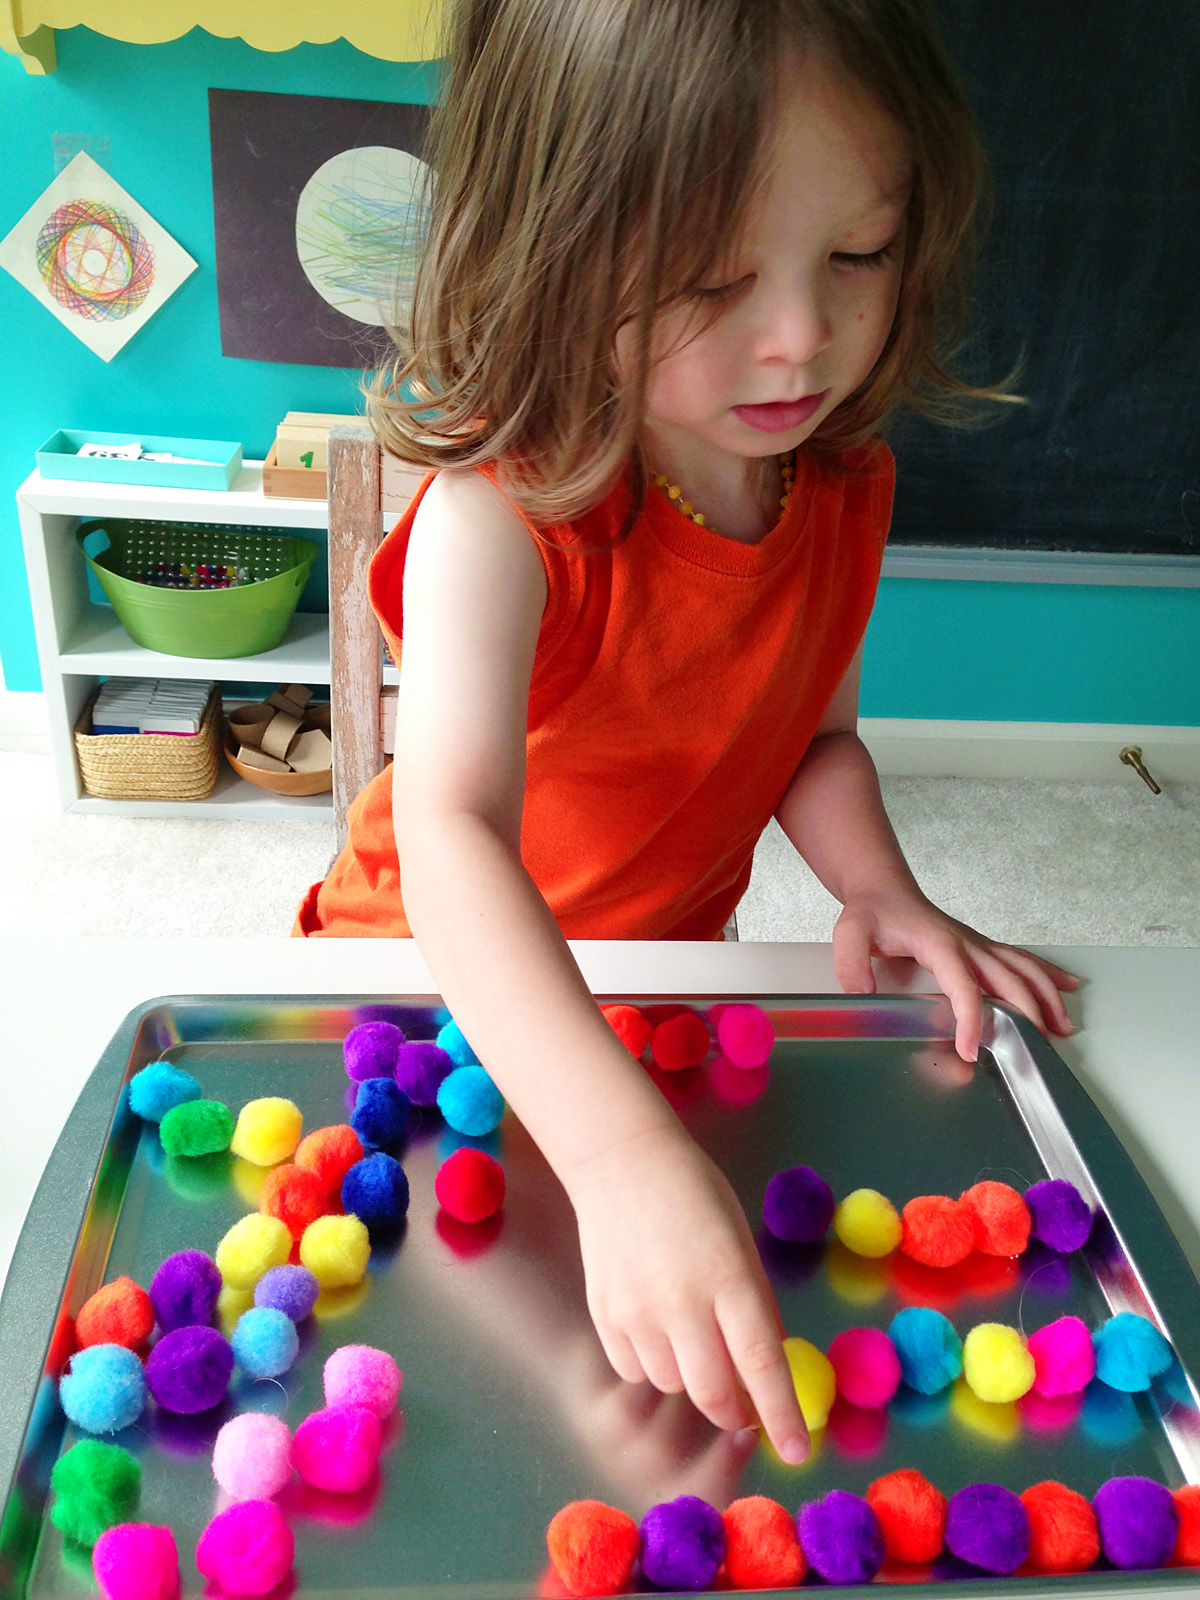
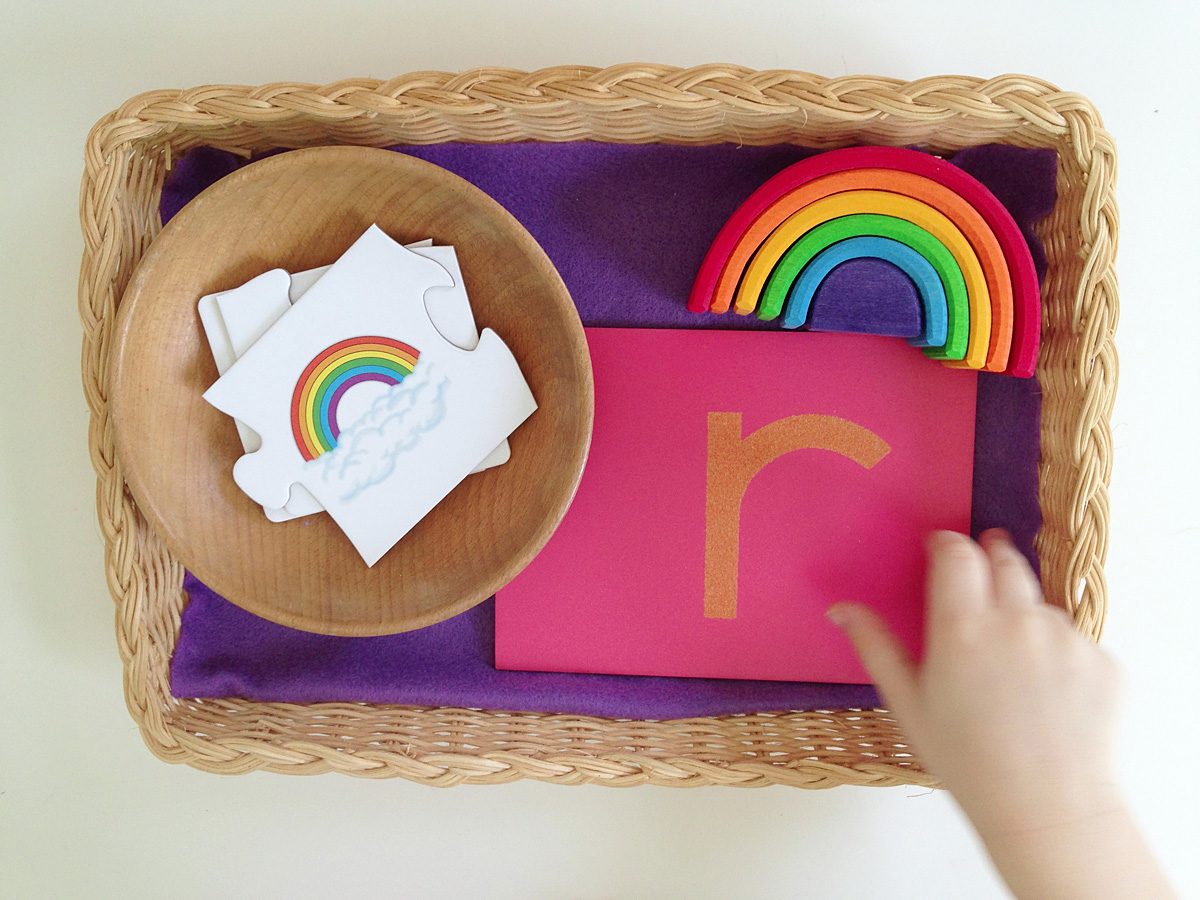
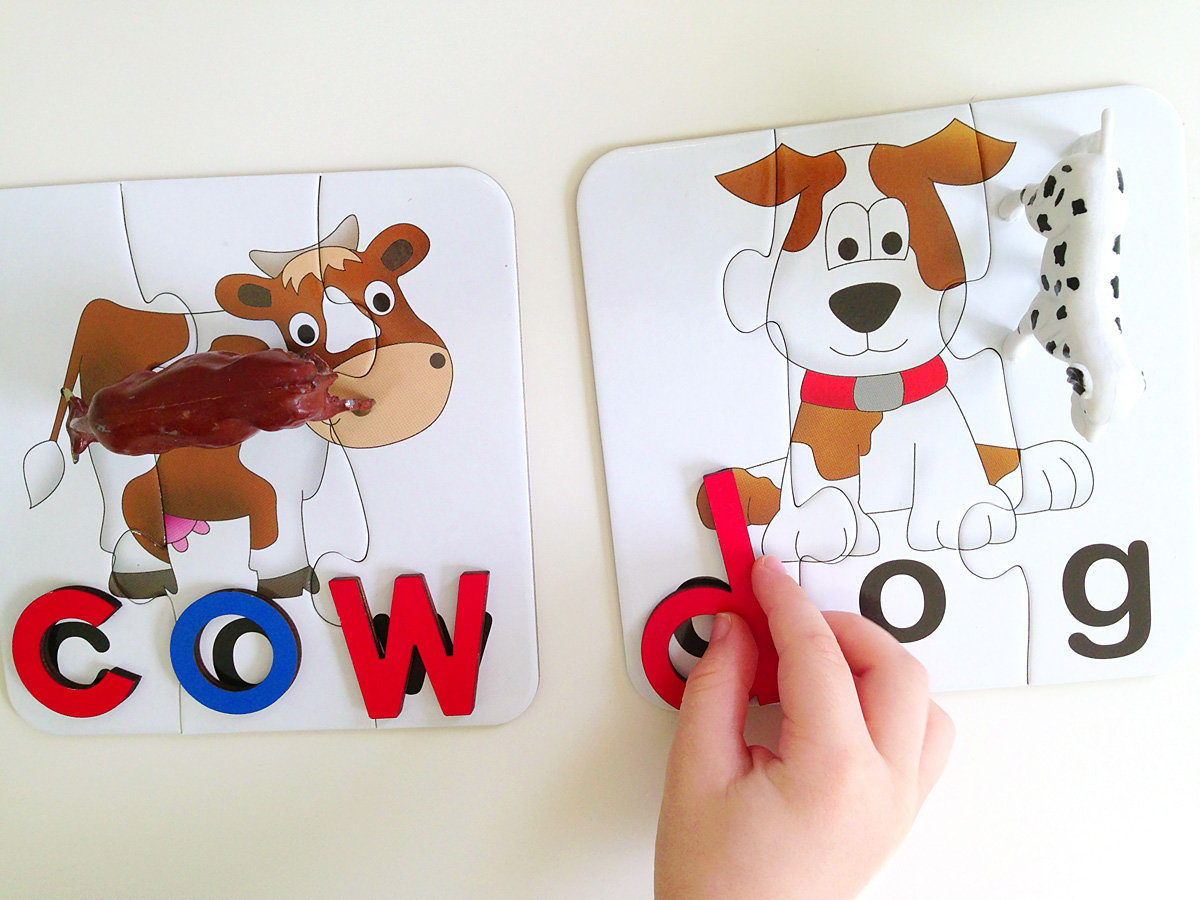
In Our Montessori School Room
I try to take quick snapshots with my phone while Jax and I do our school in the morning. The little school room off our bedroom (that was once Jax’s nursery) gets such beautiful light! If you follow me on Instagram, you’ll see many of our activities. Here is a round up of some of our recent ones!


As usual, I’m a bit late for Montessori Monday! But it is such a great way to find new Montessori resources online that I always make sure to read it! Check it out if you are interested in more great activities!
Looks like you will have one smart boy! I love all the activities you do with him:) my son would love all of them!!
Thank you for sharing. Truly how do you find the time to do all that you do? I’m amazed at how much you accomplish everyday. Do you have a specific routine? Do you sleep? Lol. Your like superwoman.
These are incredible! Thanks for sharing! I know what I’ll be working on this year…maps and beads!
you always amaze me with your projects, thank you!
Hi! I just found your blog trough Montessori Monday link party. I love all your great ideas and mostly the DIY beads materials. Long ago I had it on my DIY plans but later forgot about it since it’s really a hard task. I love how yours are turning out so beautiful. Have a great weekend and would look forward to check your blog for more ideas!
Bello! me encantó, hay que tener mucha paciencia para terminarlo pero es estupendo! creo que me pondré a trabajar.
Thanks for all! <3
This is FABULOUS! I absolutely love the work you do! I featured your bead stair printables as the Free Printable(s) of the Day at the Living Montessori Now Facebook page and on Pinterest.
Thank you, Deb!
LOVE this! You have figured out a way to make something us Montessori Mamas have keep trying to do for a long time! You are really good at this! I Have been browsing your posts and you are SO amazing with your projects! Love it! I will have to stop back soon! Happy Schooling!
Thanks!
Hi again! I was looking through your post again and I love the way your school looks! Have you posted a tour of it? If you have I need to find it! If not, I would love to see it if you have a moment to take pics! 🙂 Thanks for the inspiration! Pop by Discovery Moments if you have some time!
A schoolroom tour is definitely on my to-do list! But I need to do a little bit more work before I can get it posted. We just finished installing shelves in the closet and I’m slowing sorting through piles of supplies to get things organized. There is a little video on my Instagram for now…
I’ll add your site to my reading list!
Ohhhh….I cant wait to see it! I am in love with your chalk board and buckets! Especially how you made the Montessori map on it! Making a chalk board is on my to do list before school starts! Chalk boards are so much more fun then white boards right? 😉 Thanks for adding me to you reading list! I hope to chat with you more!
Stephanie, Thanks for the great idea! I’m VERY interested in the world map on what looks like the chalk board. How was that done? Thanks for any information. Blessings.
I drew the map freehand with pastels since we’ve been working on our continents. Time to change it up soon though…
Hi thanks for sharing, I love your ideas. What an amazing setup! Can I suggest if it is very time consuming making the 1000 bead blocks incorporating strings of 10 perhaps you could sew 100 beads to each outer side and fill the block with something of equivalent weight as 400 beads? It’s important to make them as realistic as possible, just offering a short cut if your hands are tired!
Well, the 1,000 cube is all done! but I definitely thought about doing something like that…
Thank you SO much for all the material you have been sharing and creating. I am just starting as a preschool teacher and I have three little ones and I am getting lots of ideas and inspiration from you. I used some of your ideas and sources but I have been crediting you and linking back to this blog. Thanks again!
Hi Stephanie! Thanks for the ideas and how-to! Do you know how much you ended up spending on supplies? This project is next on my list so I’m trying to figure out a budget. Thanks!
I just bought all the beads I think I need for the complete bead materials plus wire and tools from Fire Mountain Gems and Beads, and it totaled $225.89.
But this lady made them a lot cheaper: http://researchparent.com/montessori-golden-beads/
Hi, I just wanted to ask you where you bought the beads?
I bought a complete set of round wooden beads plus wire and tools from Fire Mountain Gems and Beads.
Hello,
Quick question: I am trying to follow your method. Using 6mm beads, what size plastic canvas did you use, and did you thread the wire into every hole or every other hole?
I think I need the squares in the plastic canvas to be further apart than what I have in order for this to work with the 6mm beads I ordered. (And I don’t want to have to go up to 8mm beads and every-other-hole, as I’ve seen some others suggest, because then my 3″ eye pins will be too small.) I already have all the other materials ready to go, so am hoping this problem can be fixed with a different size / square spacing of plastic canvas. Would greatly appreciate your thoughts!
Thanks,
Lucia
I think for me it came out to skipping about every third hole in the canvas. Not ideal, but it worked. It would certainly make your life easier if you could find the perfect size of plastic canvas. I was using what I already had.
Pingback: Montessori method: Igniting the flame | COLLECTIVE PSYCHE
You have some of the best diy montessori items I have seen. Thank-you for taking the time to blog about them. I with I could upload a picture of my bead stuff that I made using your plans for inspiration. (no blog)
nevermind, I did it on facebook.
Pingback: Do It Yourself Montessori Activities | Keep Calm It's Just Homeschool
These are absolutely gorgeous. My son goes to a Montessori preschool and I really wanted to have a set, so I made my own too. I think mine might have been a little cheaper, but yours are way more beautiful. I also did the hundred square a little differently, but I think yours is more like what is in my son’s Montessori classroom. Thank you for taking the time to share your method and your beautiful images.
I’m curious where you got the sectional box that is pictured with the colored bead bars.
Thanks for sharing!
Pingback: Daddy Homeschool | Appreciating Minds
I got mine from Fire Mountain Gems. I don’t remember what they were called, but they were in the round wooden bead section.
Have you finished your beads? How many did you win up needing? Thanks! -Ashley
Pingback: Mom's Scared of Math: Find Resources for the Fears
Pingback: Introduction to Decimal System - Planting Peas
Pingback: Introduction to Decimal System
Hello,
Awesome blog on the Bead stair, Bead Bars, etc. Can you tell me where you got your wooden storage boxes for these? I plan to make the beaded bars, as have been meaning to for a long time, and I COULD make the boxes, however, this is another project that would probably take a lot longer than I want. The beading bars though, I can make!
Thank you!
j.
Hello, I thought this website might be useful for your very interesting work: http://www.montessori.edu/homeschooling.html
I would like to thank you for your inspiration. I have been overwhelmed with figuring out how to afford my Montessori materials for my children at home and your “create them as you go approach” fit me very well. I didn’t see the value in buying set after set for the prices out there. I settled on glass beads for value and availability and I am working on our first bead stair but continuing as I go. Thank you for the tip of the right corner bend to snug them in tight. I came back to your blog to see how you approached that! I have even enlisted my husband for work to cut down a pink tower and set of brown stairs! Thanks again.
Since I’ve found your blog, I’ve spent many sleepless nights hand sewing all my felt creations and now I’m starting on this!
I have the same question as Jennifer Klemp does. Where did you get the wooden boxes to store the beads?
Hi, I was wondering how much you have spent so far. I really want to make these, a full set with chains and everything is $239 on kids advance. I want to compare price. Please let me know how much it cost you. Then I can make a decision to either buy or diy.
Thank you.
Do you have a trick to assembling the thousand cube? I am finding that after I put the 8 beads on for the middle, I have to bend the wire to put it through the plastic square and then it’s almost impossible to straighten it out again.
I am curious how you store your math beads since you made them? I have a full bead set and no idea how to store them
Pingback: 50+ Montessori Math Resources & Recommendations | Carrots Are Orange