Tag Archives: Homeschool

Giveaway: $100 Store Credit from SO Awesome

I have a fun surprise for you all… A giveaway!

$100 SO Awesome Store Credit Giveaway!

Marie-Claire is a momma of twin boys, a graphic designer, the owner of SO Awesome, and the creator of Children’s Wallet Cards. You’ll remember her from our post and giveaway last September. Her wallet cards have so many uses and fit well into your Montessori and homeschool supplies.

Montessori-Inspired Wallet Cards Review & Giveaway

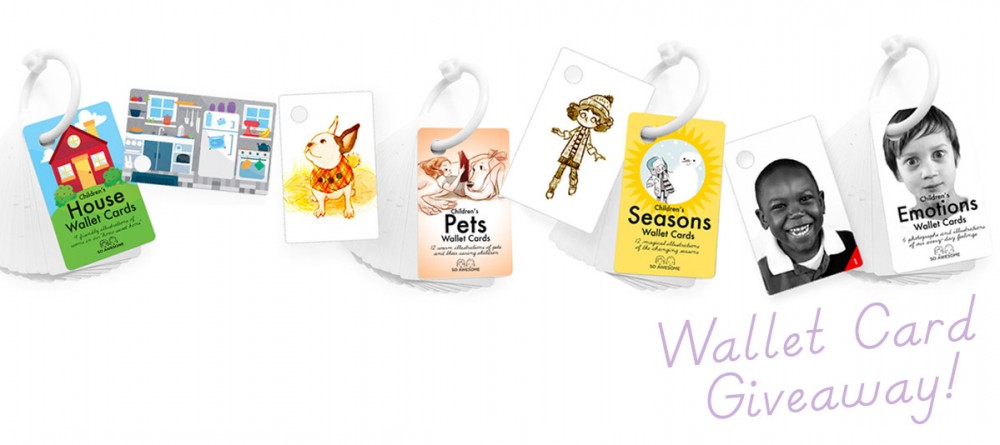
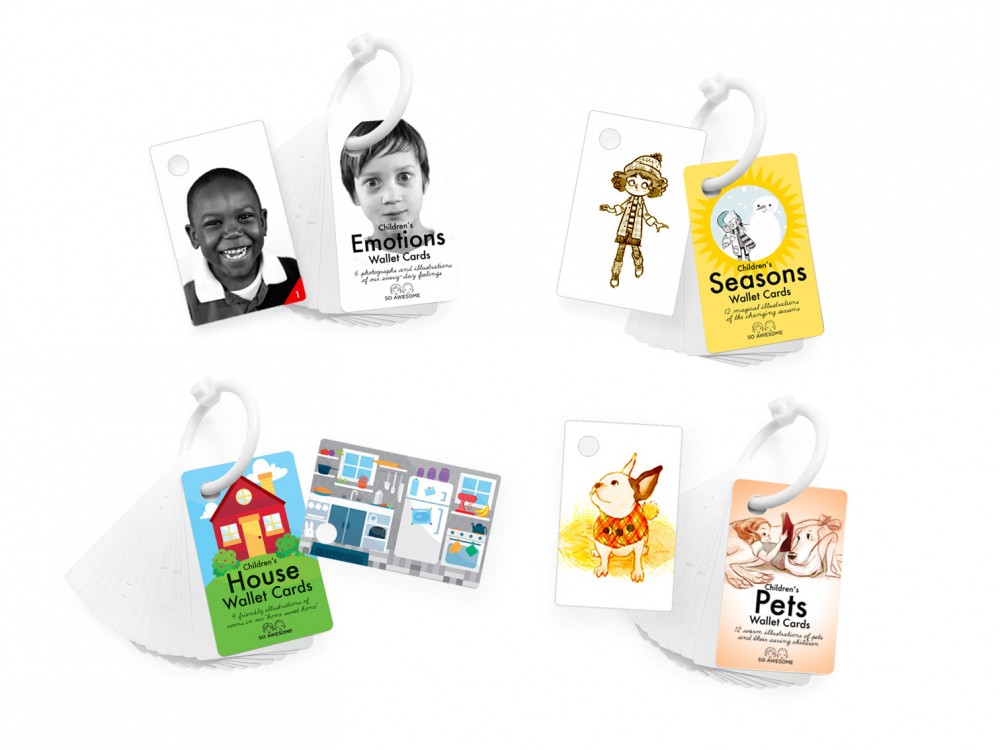
She’s at it again seeking micro-funding from moms and homeschoolers like you on Kickstarter. She has four new sets in development, Emotions, Seasons, House and Pets.

So Awesome Giveaway

Funding pledges start at just $1. Kickstarter is all-or-nothing funding for creative products, supporting new projects is quick and easy. The campaign is open until April 29, 11 am EST.

Montessori-Inspired Wallet Cards Review & Giveaway

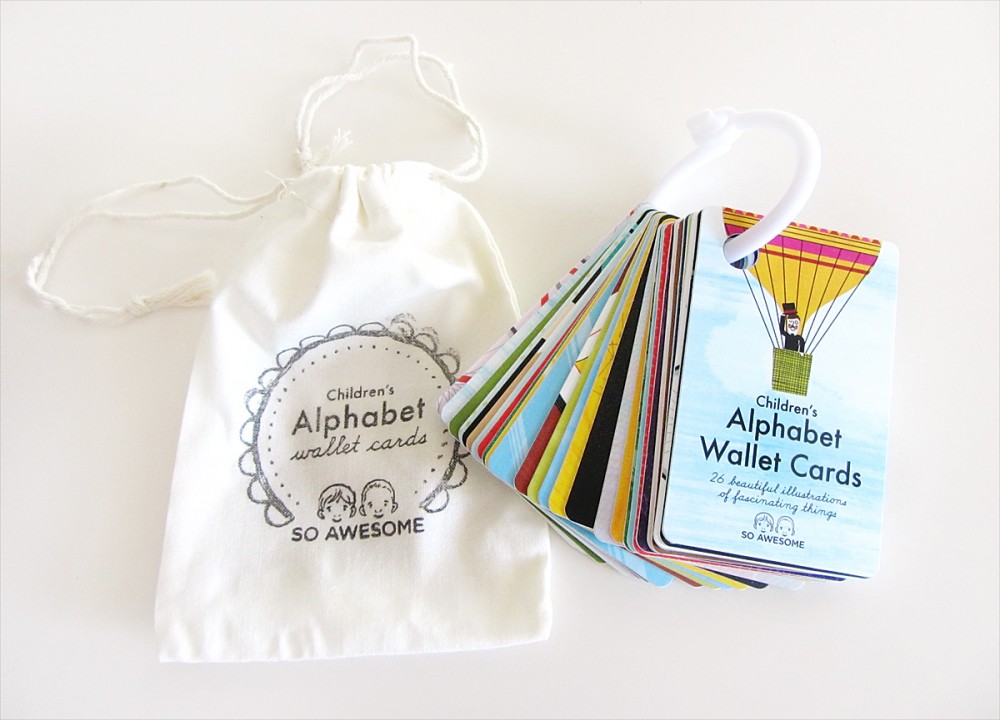
So Awesome’s alphabet deck from their previous Kickstarter campaign.

Giveaway

SO Awesome has generously offered a $100 store credit to the winner of this random giveaway. To enter, visit SO Awesome’s Kickstarter page, then leave a comment here letting us know what your favorite new deck is. Then use the Rafflecopter widget below to let us know you’ve commented (email address or Facebook required). There are bonus entries available to anyone who enters. The lucky winner will be randomly chosen on April 29, 2015.

a Rafflecopter giveaway


About SO Awesome

soawesome_logojpgSO Awesome offers gorgeous, educational, non-toxic, extremely durable card sets designed for how kids play and work. Montessori-inspired. Made in the USA. Their cards are perfect to engage children in carseats, strollers, shopping carts, and long airplane rides.

Graphic Designer and mother Marie-Claire Camp created the durable, non-toxic card sets for her twin boys. Using the crowdsource-funding site Kickstarter, Marie-Claire produced five sets of cards and an companion iOS app.

Visit SO Awesome on:
So Awesome WebsiteFacebookTwitterPinterestInstagram

Montessori-Inspired Wallet Cards Review & Giveaway

Thanks for entering, and good luck!


DIY Montessori 3-Part Cards

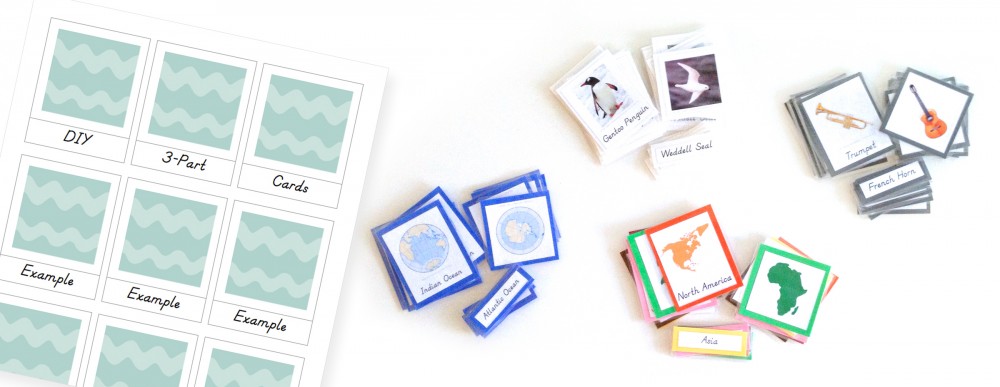
I get a lot of questions asking how I make my 3-part cards. I’m a graphic designer, so I use Adobe InDesign to do mine. It works well for me, but I’ve had a lot of requests for something more universal for those of you who have your own ideas for 3-part cards.

DIY 3-Part Cards

I recently sat down and worked out a layout in Microsoft Word that is very similar to mine. The main difference is there is no spot for an image credit. Being a graphic designer, I am very big on not using photos without permission. For my free printables, I first look to my own personal photo library, then search on Wikipedia Commons. I always put the required attribution tag under photo I use publicly.

What You Need:

DIY 3-Part Cards

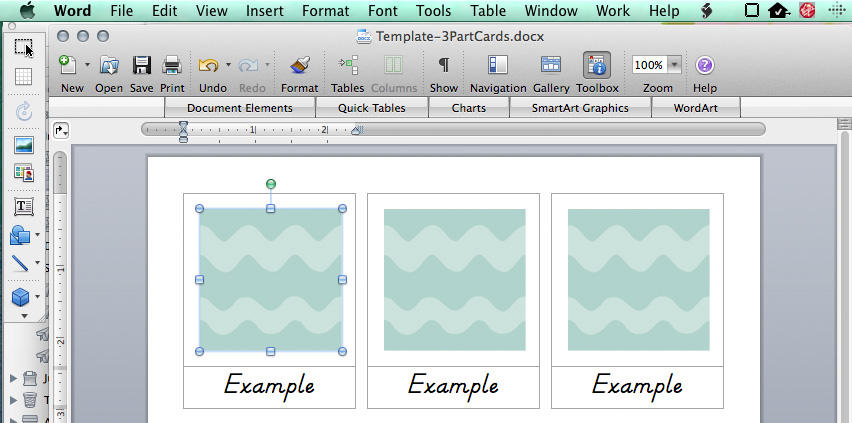
Start by selecting the box you’d like to add a photo to.

DIY 3-Part Cards

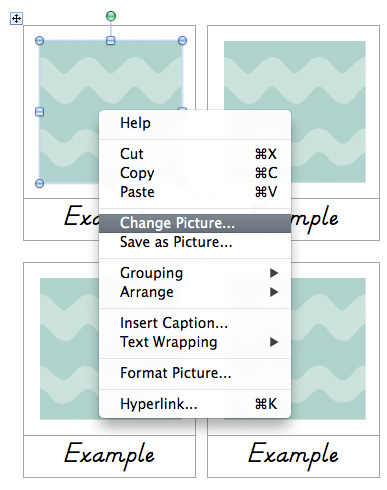
Right-click and choose “Change Picture…” I am on a Mac, so your view may be a bit different.

DIY 3-Part Cards

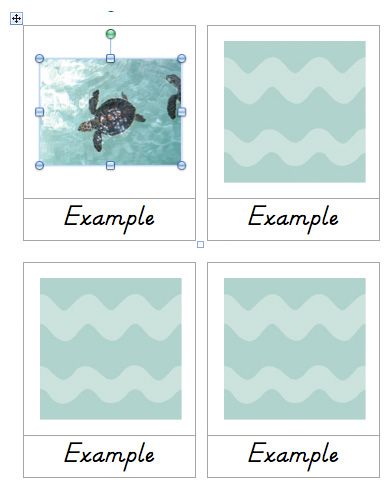
Choose your photo and insert it. If it wasn’t a nice square photo, no worries! We can crop it! I like to make mine square when I can, but sometimes I have to leave them as-is to avoid cropping something important.

DIY 3-Part Cards

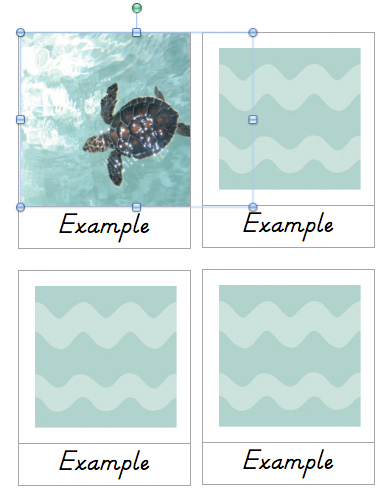
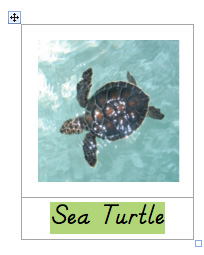
Drag a corner of the picture to make it larger. Don’t worry about it getting too big. You want the main area to be a good size for you final square. (In this case, it is the sea turtle.)

DIY 3-Part Cards     DIY 3-Part Cards

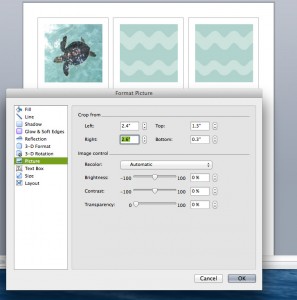
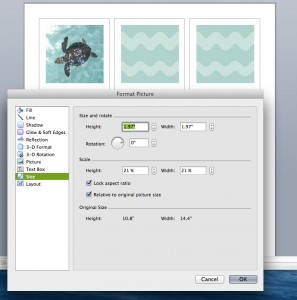
DIY 3-Part CardsNext you’ll want to open the “Format Picture” window. You can get to it from the menu bar (“Formatting” menu), right-clicking or via the “Formatting Palette” that appears when an image is selected. You will want to go to “Crop” and use the arrows to gradually crop the photo down to a square that you are happy with. Pop over to the “Size” tab to make sure the width and height are the same. If you are going for the size of square I always use, you can set the width to 1.97″ once you have it cropped to a square.

After that, you are ready to change the text. You can also change the font. Do this for each card.

This file is for the cards you cut into two pieces each: pictures only and labels only. In most cases you’ll also want the full labeled card. I recommend you set up your whole sheet as instructed above and then either copy/paste it to a second page or save it as a second file. With that second page or file, you’ll take out the dividing line.

DIY 3-Part Cards     DIY 3-Part Cards

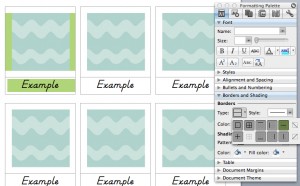
Select the two rows that make up a card’s table. In the Formatting Palette, choose borders. You’ll want to turn off the box with the middle horizontal line (highlighted green here). The line will still be there on your file after you turn it off, but it will be lighter. The light gray line is just to show you where the table is. Remove the line for each card to have a set of full cards.

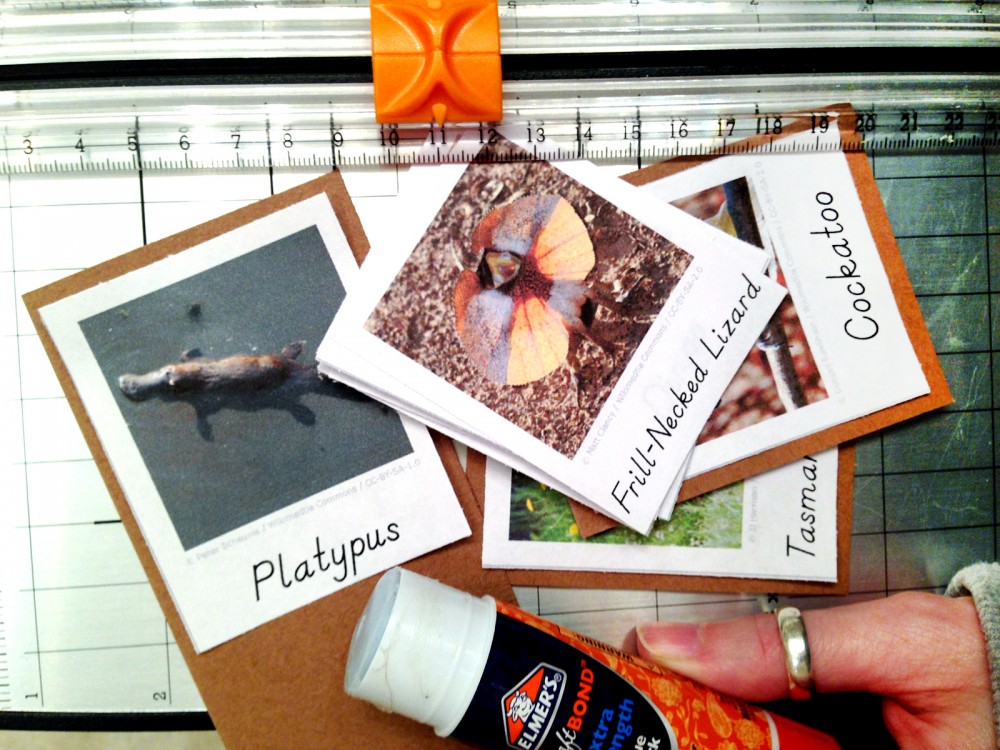
Once you have your cards printed and cut, use a dab of glue to attach them to card stock. Trim the card stock to have about a 3mm border. I like to match the color of the card stock to the theme of the cards. For my continent cards, I used the color that represents the continent in Montessori. Then I’d make cards for each continent’s animals and use that same continent color for the card stock. Sometimes my choice is arbitrary. I chose gray for music. Whenever I make a new set of cards for music studies, I mount them on gray card stock.

This next step is really what makes the 3-part cards look beautiful and last for ages. Lamination! This is my favorite laminator. I bought it is June of 2013 and it is still going strong. I bought these laminating pouches. I have about a quarter left int he pack after all that time.

My hint for laminating: when laying your cards out on the laminator sheet/pouch, put a dab of glue stick on the back of them. That way, they won’t slide around when you are feeding it through the machine.

DIY 3-Part Cards

Once they are out of the machine, trim them down (I leave about 2mm of clear plastic border). All done!

Here are some links to some of my previous free 3-part cards:

DIY 3-Part Cards

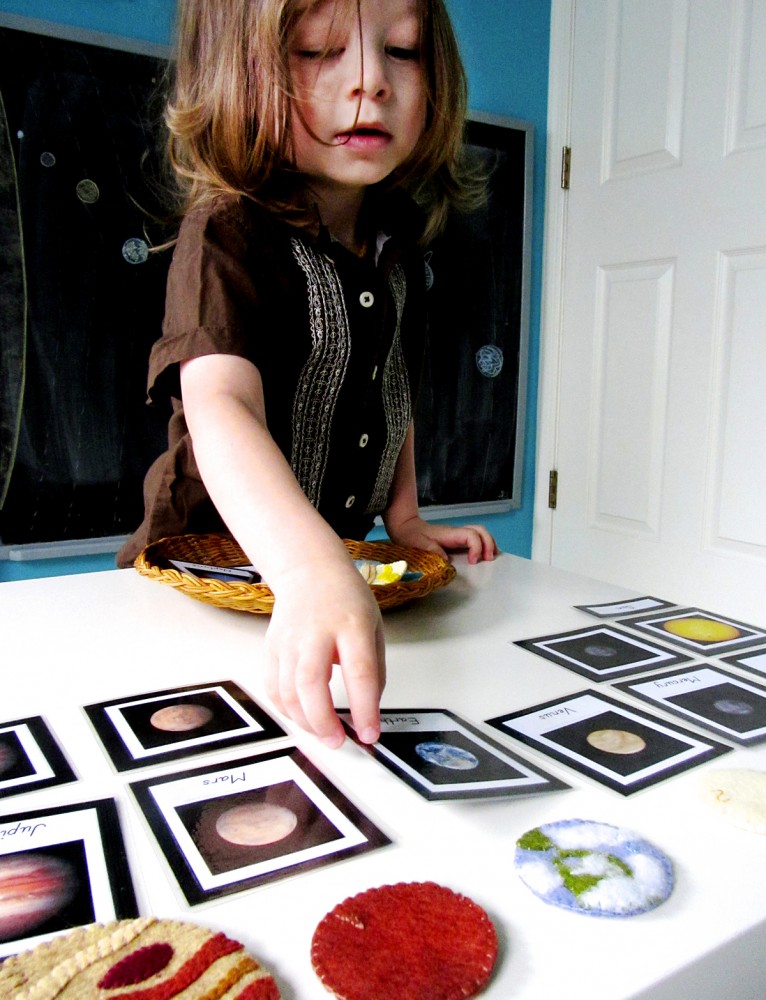
Solar System 3-Part Cards

Find more Montessori-inspired ideas at Living Montessori Now’s Montessori Monday!

Montessori Monday

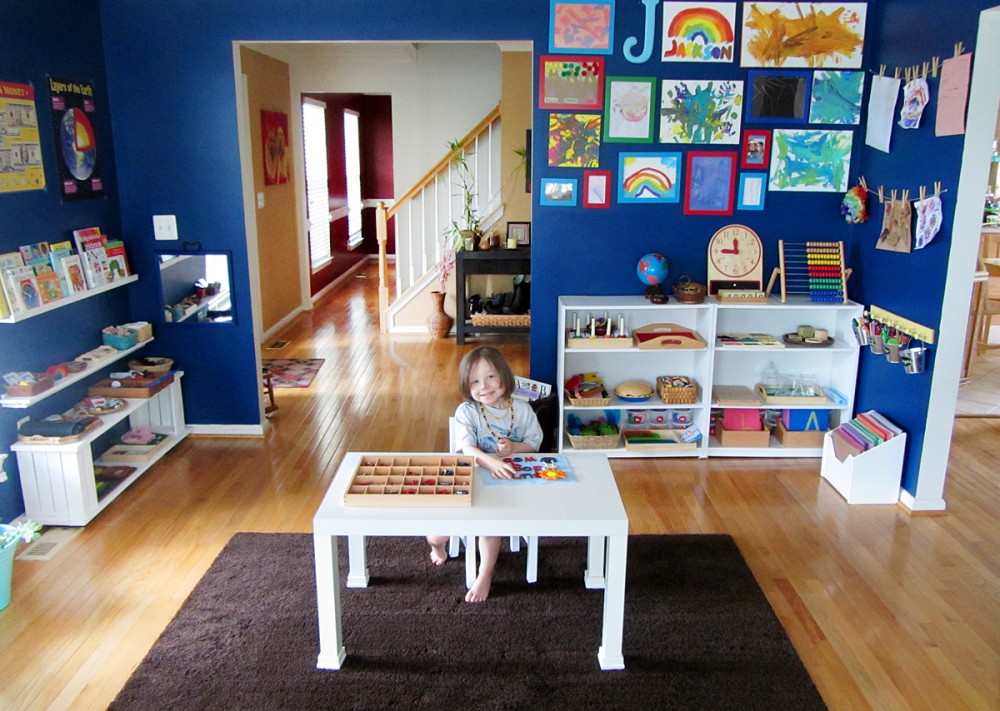
Our Montessori Classroom

I’ve been doing a lot of DIY and redecorating lately. Jax has begun sleeping in his big boy room at last and has earned a new mural. At the same time, I’d starting thinking a lot about our homeschool space. It was bright and beautiful, but as Jax (and our school supply collection) has grown, it has begun to feel cramped. We were also running into problems with the school room being upstairs off the master bedroom (his old nursery.) I needed to be downstairs to do my freelance work, and Jax has wanted increasingly more time for school work.

Our Montessori Classroom

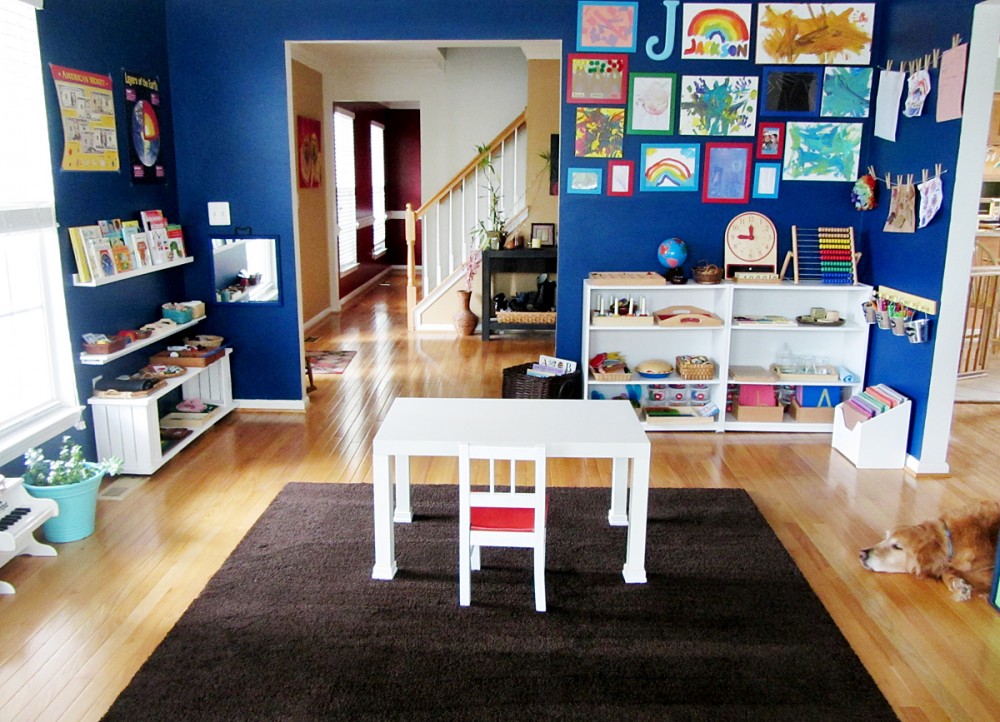
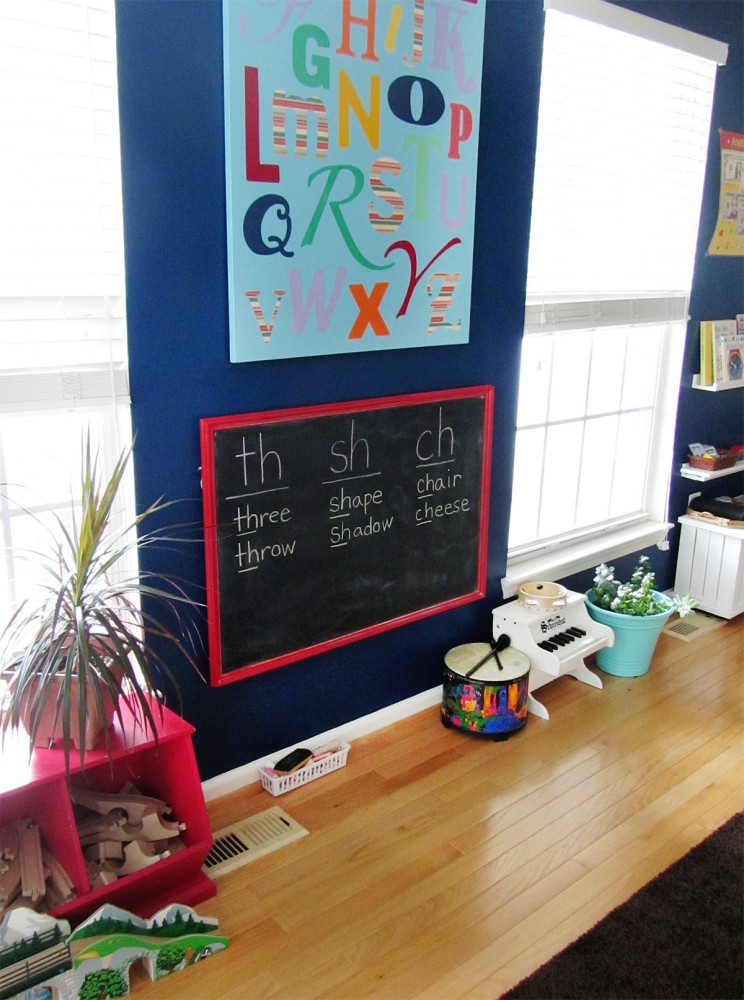
The best solution? Moving the schoolroom down to half of the playroom! The playroom is the front room of our main living area. I suppose it is intended to be a formal living room. We have no need for two living rooms – the “den” area off the kitchen is plenty! By moving just a few things out of the playroom and adding storage, I knew the school room would work great there.

We have also been busy dealing with medial issues. Poor Jax had the bad luck of contracting Lyme Disease from his very first tick bite. We caught it super early and will have a near 100% chance of a full recovery with his month of antibiotics. It has been a rough time, with Jax having a bad reaction to Amoxicillin and having to switch to a new (more disgusting) medicine. We are in the home stretch, and so grateful for all your kind words and suggestions!

Would you like a little tour of our new learning space?

If you follow me on Instagram, you may have often seen pictures of the old room. I really love that room, but it was so small that half of the floor would end up covered by supplies. We can finally stretch out and breathe!

Our Montessori Classroom

I started by moving Jax’s hand-me-down playgym outside so the room felt more open. I also took his old plastic table out of the room. The thrifted Ikea coffee table we’d been doing schoolwork on was working really well, with one exception – it was getting too short! After a trip to the hardware store for some square wooden medallions, I quickly made it taller. We had a little chair from the thrift shop that had a lot of water damage and was close to falling apart. I tightened it up, glued some broken bits and gave it a paint job.

Our Montessori Classroom

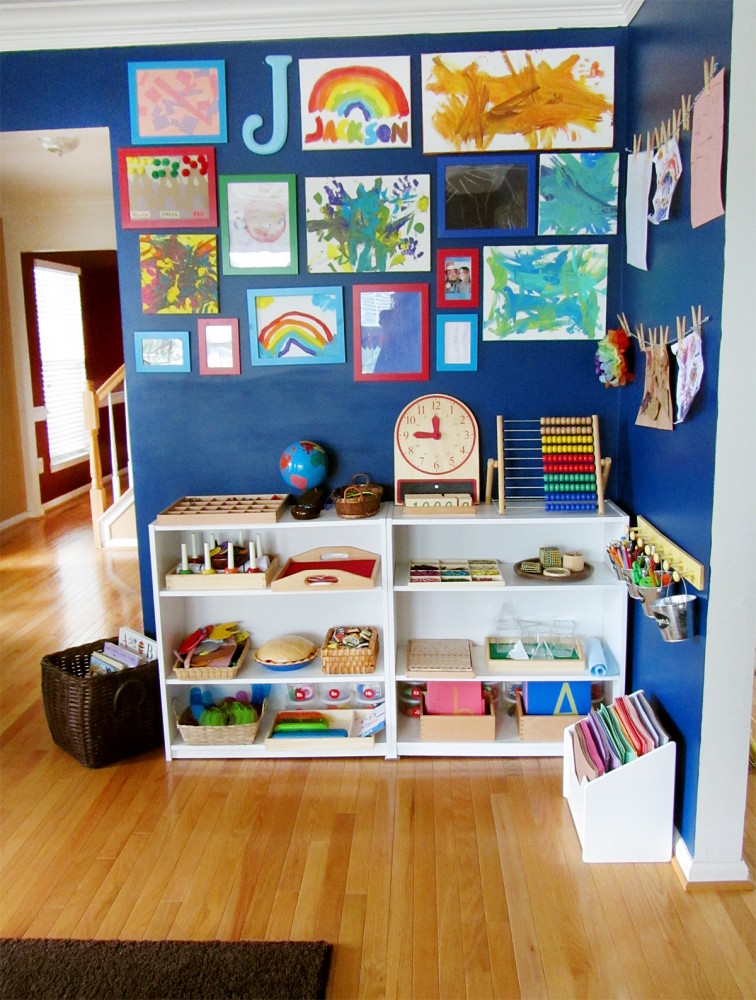
From Walmart, we purchased two $17.99 white shelves. They are certainly not the best quality, but they are surprisingly nice for $18 each. One had a warped side board, but some tweaking and shim under one edge has them sitting flush together.

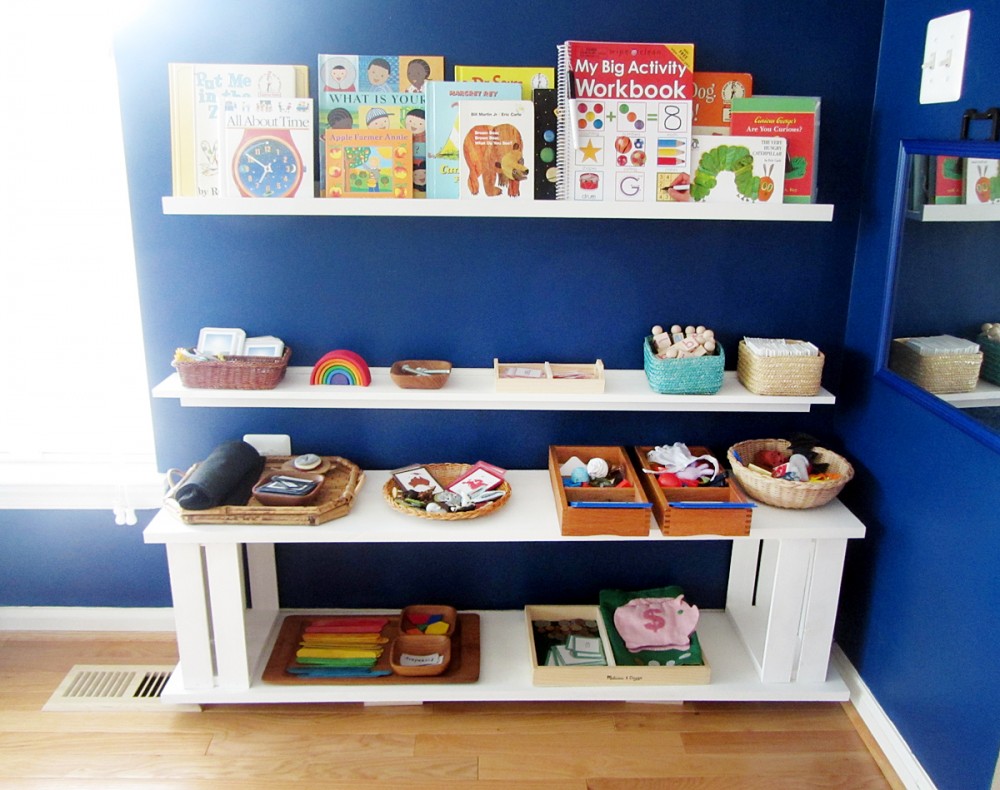
On the side wall, we already had two Ikea picture shelves that were were using to hold books. I placed the DIY shelves (painted boards on wood crates) from the old school room underneath. Then I painted a narrower scrap board and used it to widen the bottom book rack into a thin shelf. This makes a perfect shelf for smaller baskets and activities. I put the extra books in a basket.

Our Montessori Classroom

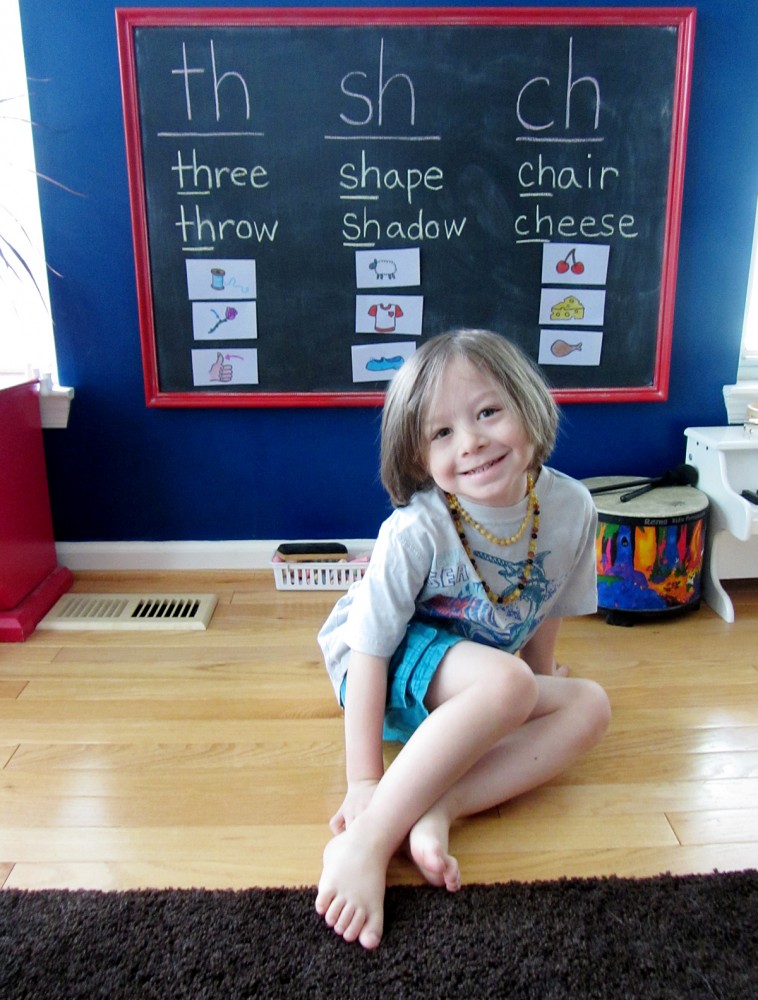
I needed to move our DIY chalkboard to have room for the new shelves, so that went between the windows on the side wall. I’m not in love with that area yet, but it is bright and functional.

On Our Homeschool Shelves

I don’t have any big study units going on right now, but let me show you around what is on our shelves.

Our Montessori Classroom

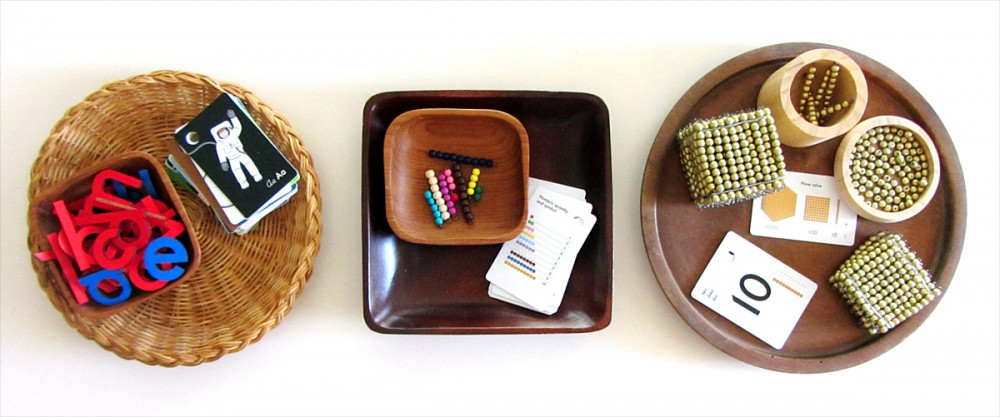
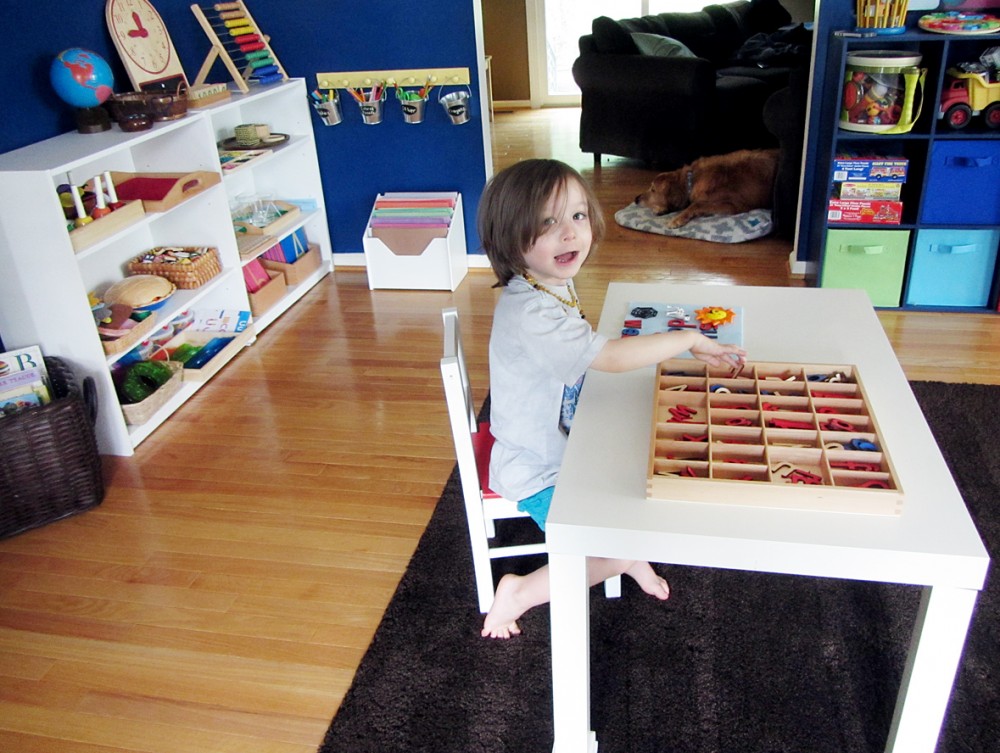
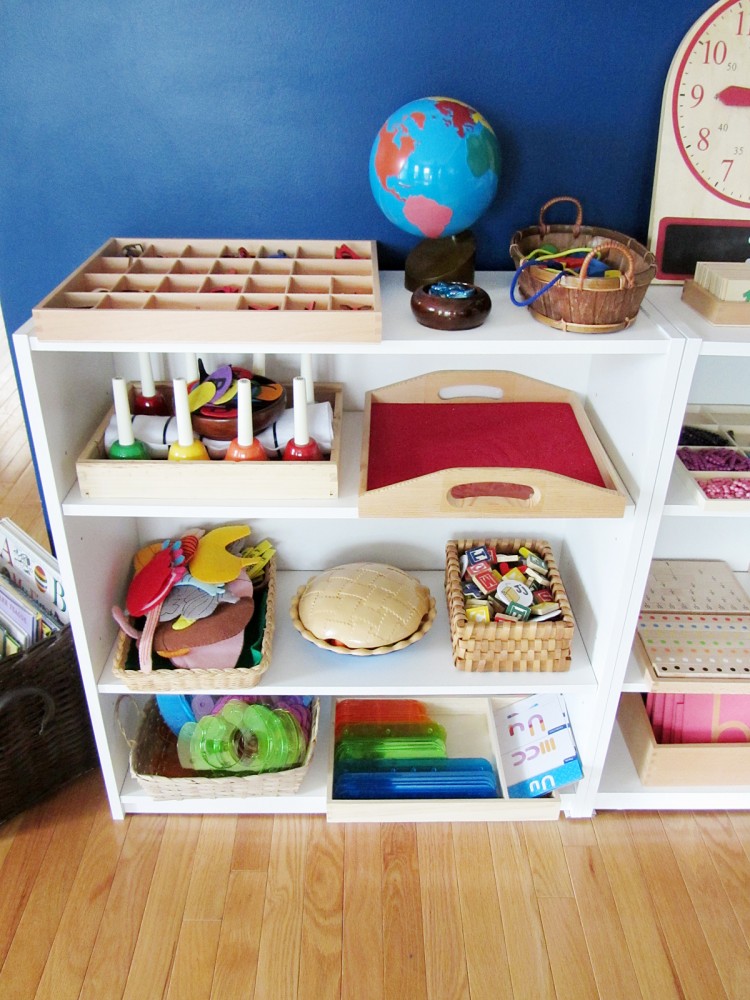
Starting with the left side of the shelves, we have Jax’s small movable alphabet, montessori globe, wooden shape lacing (Target Dollar Spot), and some glass bead spacers (Dollar Tree). Below that, we have our handbells and felt notes and a wooden tray (craft store) filled with sand. One the middle shelf, we have all the body organs and labels for Jax’s human body chart, his sorting fruit pie and a basket of magnets (a placeholder for now). On the bottom shelf, we have our letter construction set, spread out for now.

Our Montessori Classroom

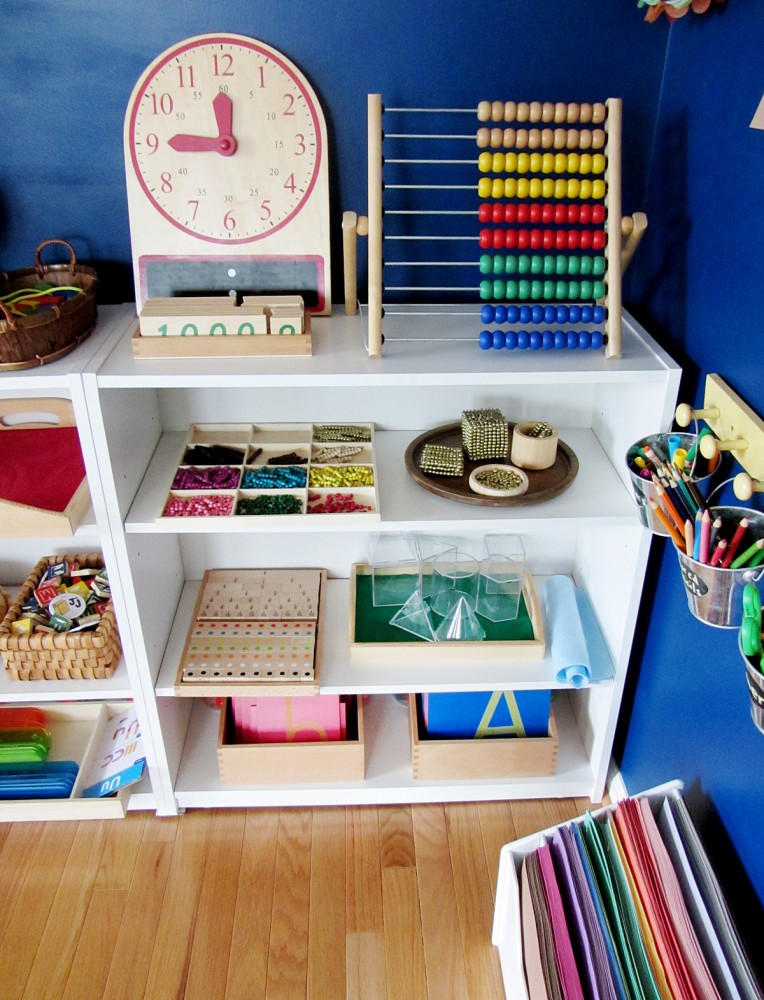
One the right shelf, I have a thrifted wooden clock board, a thrifted Ikea abacus and our small wooden number cards. Below that, I have all our DIY math beads (still in progress). On the middle shelf, I have Jax’s math block set, geometric shapes and some felt sheets to use as work mats. On the back of the bottom shelf I have our letter sounds tubs. In front, there are our lowercase and uppercase sandpaper letters.

Our Montessori Classroom

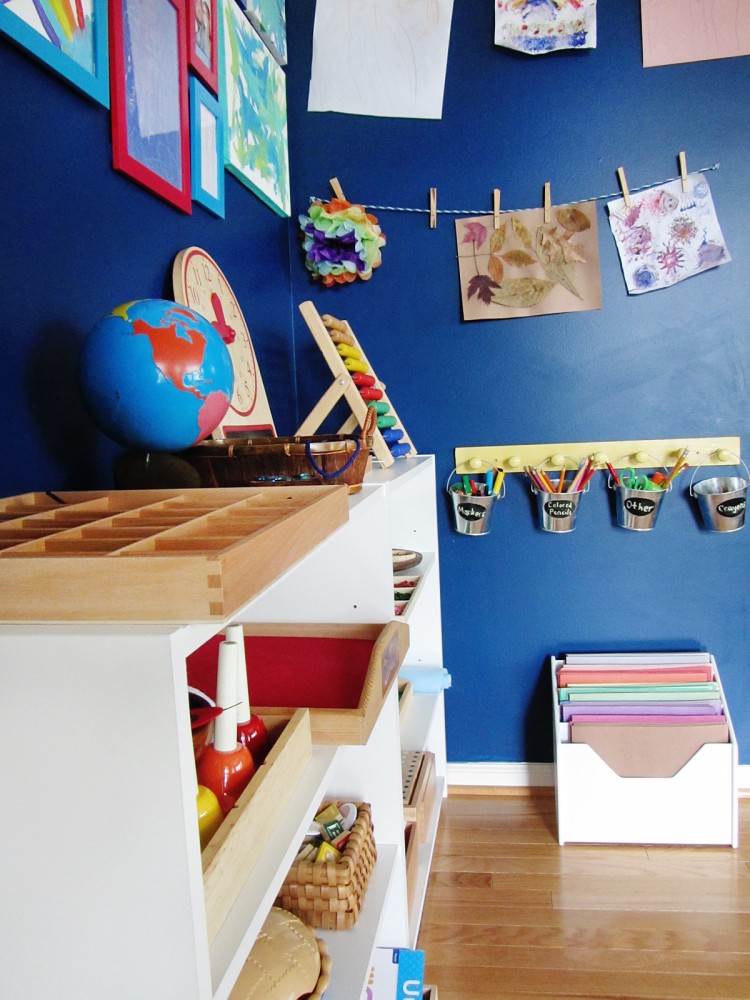
To the side, I have our hanging picture line,. I also hung a thrifted peg hanger with chalkboard tin buckets full of art supplies (Target Dollar Spot). On the floor, I have a thrifted paper holder (Container Store brand) with construction paper (also thrifted!)

Our Montessori Classroom

On the side wall, I have books on the top shelf. Below that, I have our weather materials, a wooden rainbow, some CVC matching cards, our word spinners and our DIY color tablets. On the top large shelf, I have our solar system works (to coordinate with out Air & Space museum trip), some of our continent animals, two starting sounds matching trays (using sandpaper letters and starting sound objects) and a basket of CVC objects. On the bottom shelf, I have some colored craft sticks with shapes (thrifted) to make and label, as well as our piggy bank activity.

Our Montessori Classroom

To the left of those shelves, I have Jax’s chalkboard, some musical instruments and classroom plants. I don’t have a chalk holder figured out yet, but no rush!

What do you think of our new classroom? Do you have any suggestions for us? Jax adores it, and loves having access to all the item’s I’d had stored in the closet. It is so nice to spread out!

Our Montessori Classroom

For more homeschool ideas, visit Montessori Monday at Living Montessori Now.

Montessori Monday

Felt Weather Station Pattern & Free 3-Part Cards

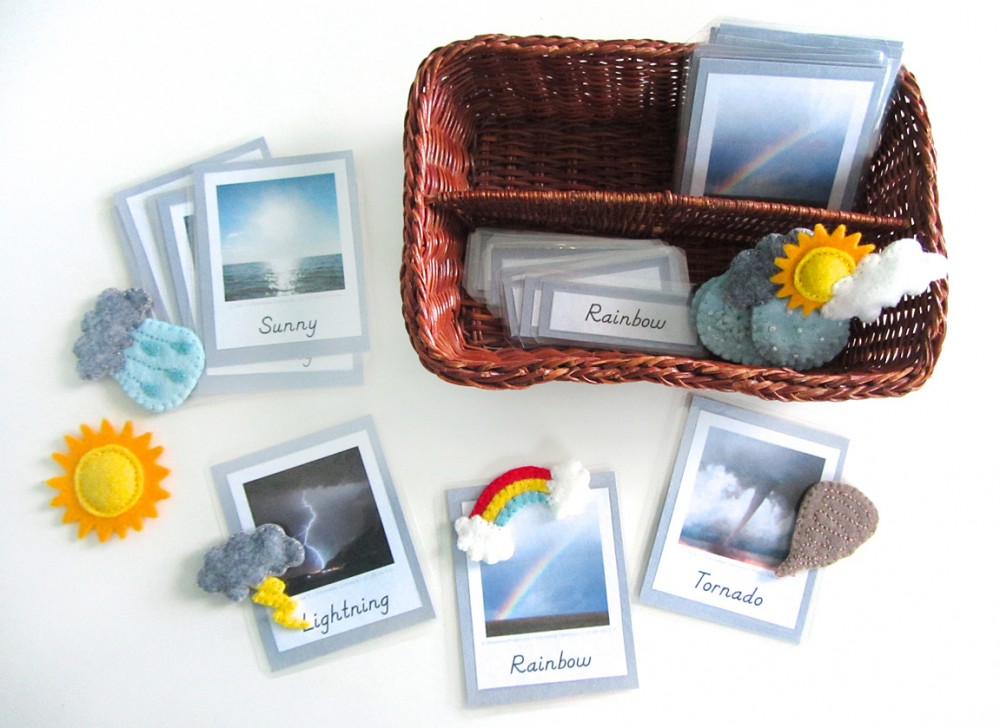
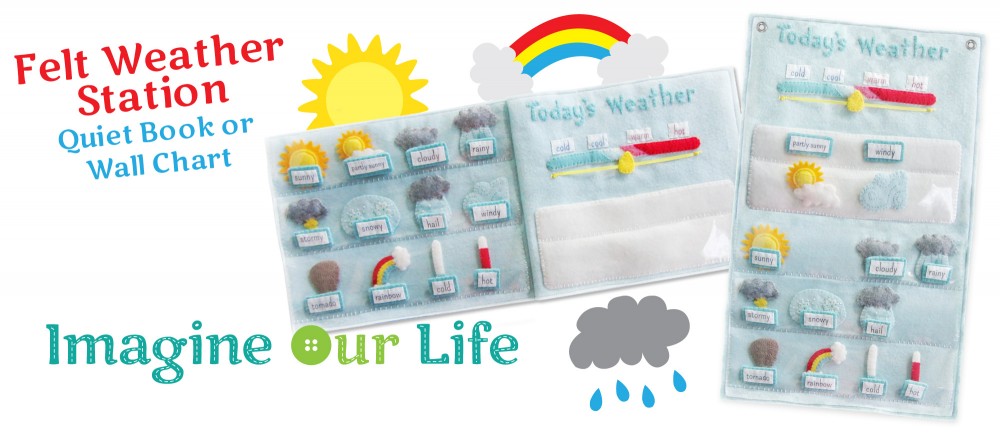
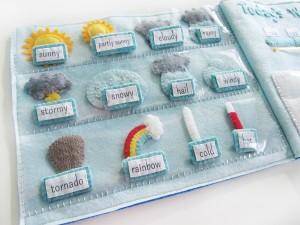
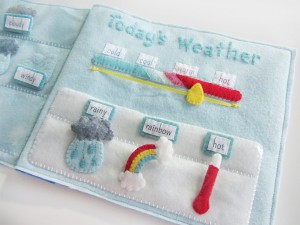
Felt Weather StationLearning about the weather is always fun for kids. It is easy to relate what you learn to what is going on outside the window.

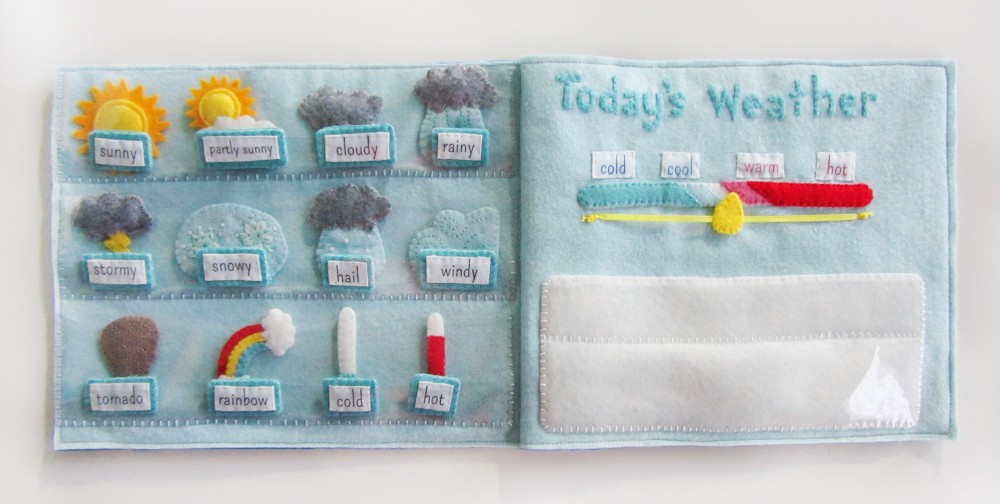
I knew I wanted to create something for Jax to let him explore and learn about different weather conditions. I decided to go with a felt set that can both be used to learn new weather words and to post the daily weather.

bg-left bg-right

This pattern is my very first pay pattern. I hope you find the pricing reasonable! I am really hoping to turn my crafting into a career that lets me both be creative and have time to be the best mama I can be. I will still be offering free patterns. At this point, I expect 50% will be free. I’d love to hear your thoughts!

You can purchase this pattern for $6 in my Etsy shop, Imagine Our Life. If you would like to sell the finished product, you can purchase commercial licensed version for $20. This is a one time fee, and you’d be able to sell as many weather charts as you’d like after purchasing it.

Felt Weather Station Pattern

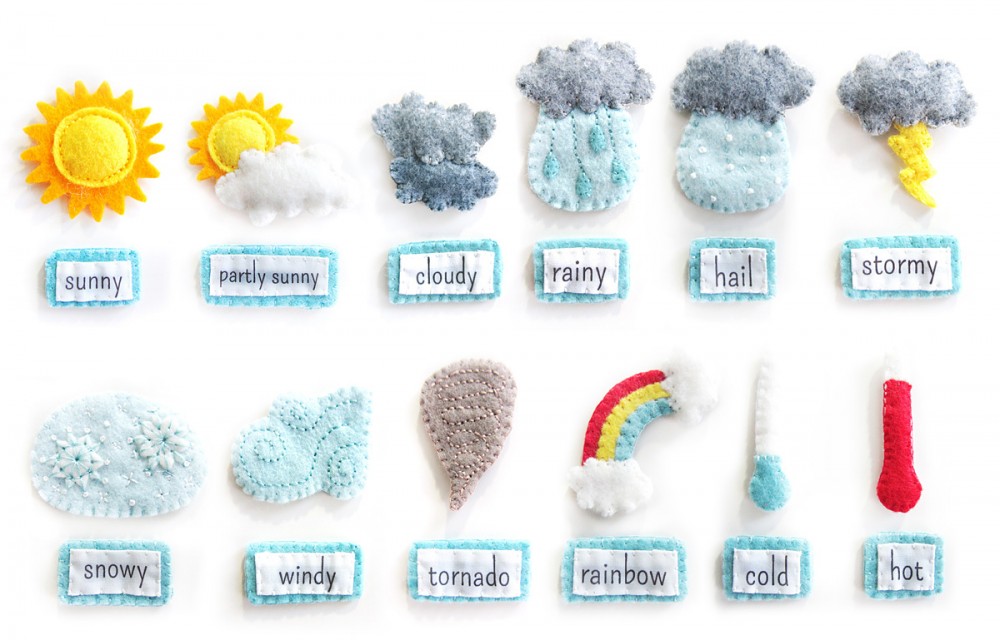
This pattern included instruction to sew both a felt weather wall chart and a quietbook version. The wall chart is perfect for classrooms, while the quietbook is a fun way to make learning portable. There are 12 adorable weather condition pieces, along with matching labels printed on photo fabric. (You can also print the labels on card stock and laminate them.) There is a slider that can be set to the current temperature. A special pocket allows children to post the current weather conditions.

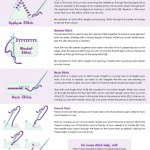
I worked hard to really make the pattern and instructions look beautiful. I’ve included a full tutorial and a brand new stitch guide! As an added bonus, there is a $5 American Felt & Craft coupon to help you purchase beautiful felt!

Felt Weather Station Pattern

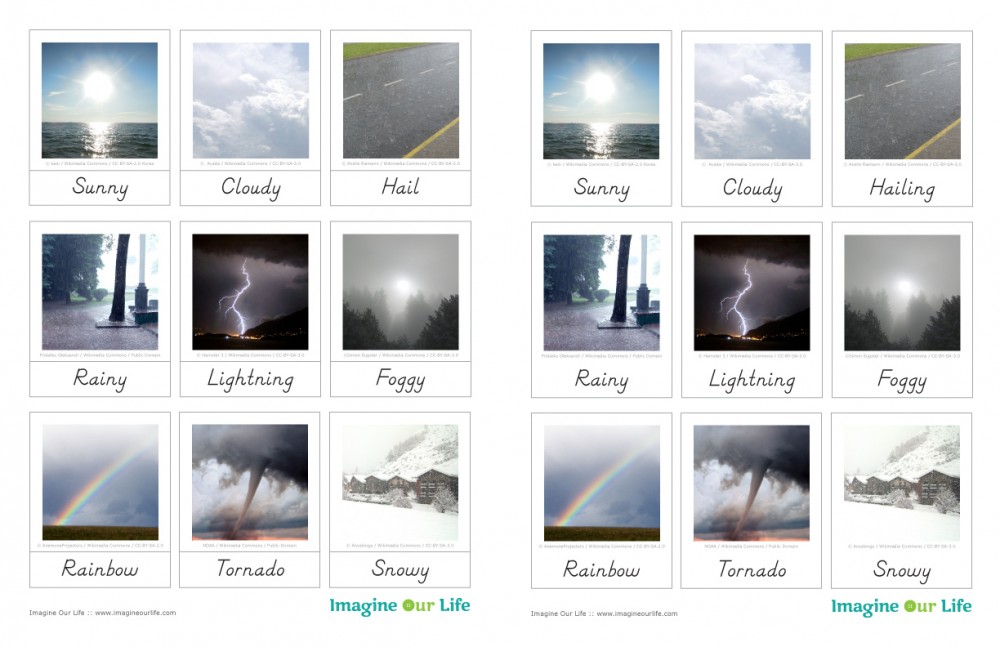
As a free add-on to this felt set, I am providing my matching 3-part cards free for educational use! Click here to download the pdf. The cards include many of the same weather conditions as the felt set, giving you an additional way to teach the new vocabulary.

3-Part Cards - Weather

Montessori MondayTo assemble, print out the cards and cut them out. Glue them to card stock backs, then laminate and trim. I use this laminator. To make laminating a bit easier, you can try adding a dab of glue stick to the cards when you position then in the lamination sleeves. It keeps them from wiggling and overlapping.

If you liked this free homeschool printable and want more homeschool ideas, visit Montessori Monday at Living Montessori Now.


Felt Weather Station Pattern

I hope you enjoy this pattern! I can’t tell how much your support means to me. Big thank yous to all of you who are a part of our Facebook page. You have given me so much inspiration! Please feel free to comment here or on Facebook if you have suggestions for new projects. I’ll also be posting sneak peeks at this week’s free pattern on my Instagram. Come follow along!

Felt Weather Station Pattern

Winter Games Homeschool Printables

Winter Games Homeschool Printables

The winter Olympics are always a favorite in our house. This year we can’t wait to share them with Jax! And, now that we are homeschooling, it’s such a wonderful opportunity to learn.

When I began preparing works based on the Sochi Olympics, I quickly realized I needed to make some printables. Montessori 3-part cards are such a wonderful resources to learn new nomenclature. I prepared a large pack of printables for him – and also for you!

If you follow us on Facebook, you probably already saw our winter Olympics pack. I wanted to get it out to everyone right away as I knew I wouldn’t get a chance to post it on the blog for a few days.

Winter Games Homeschool Printables

What’s Included

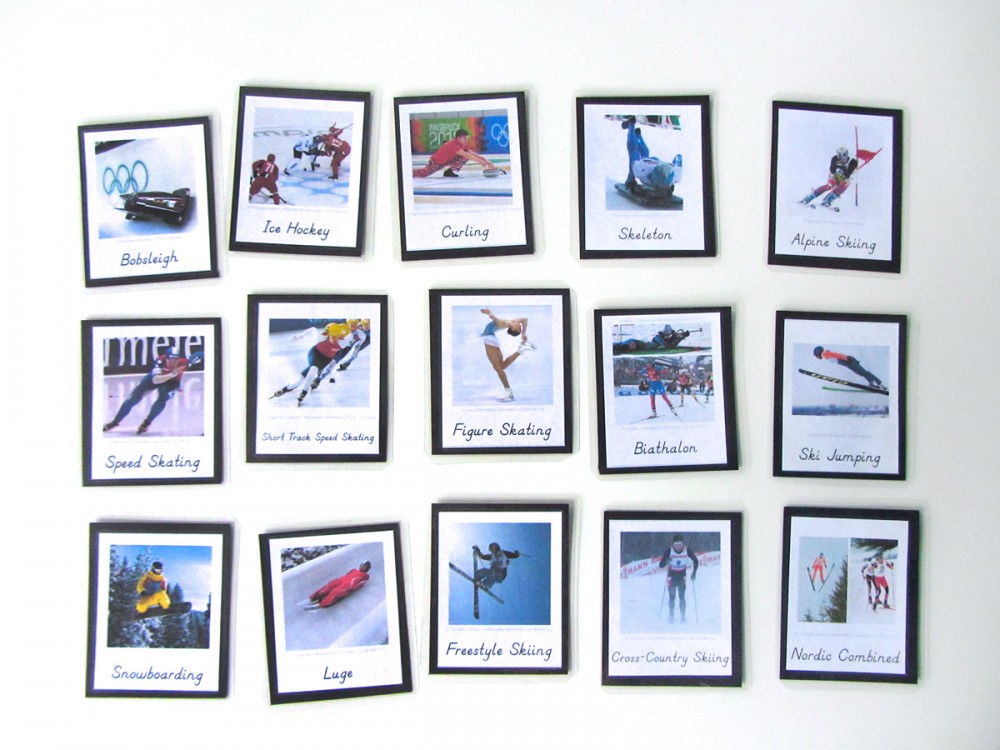
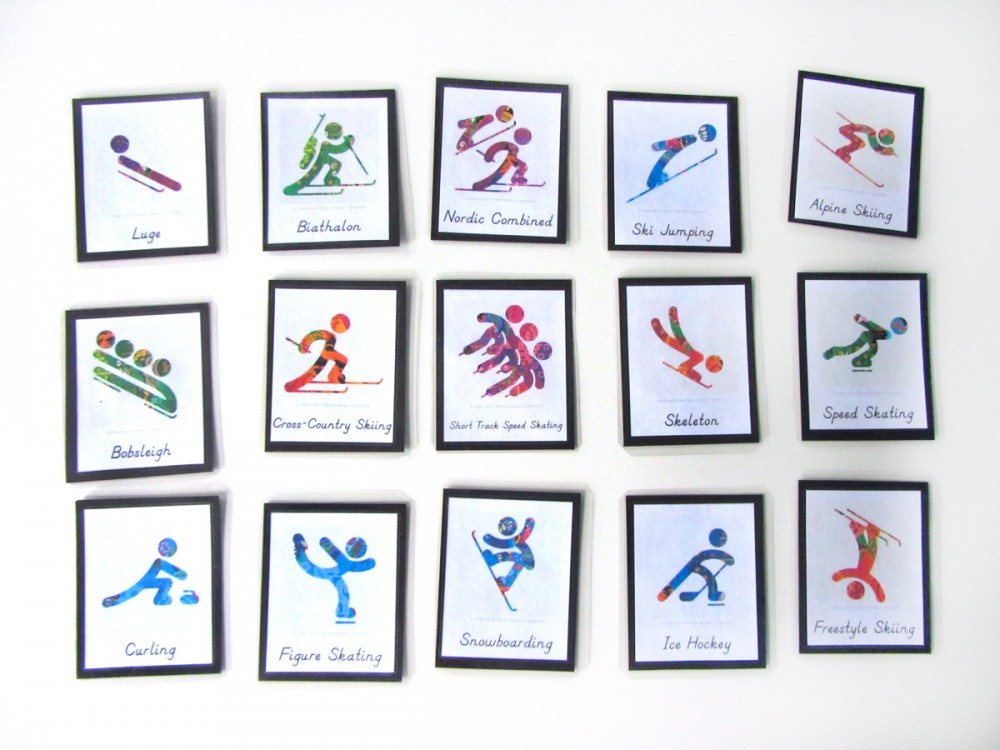
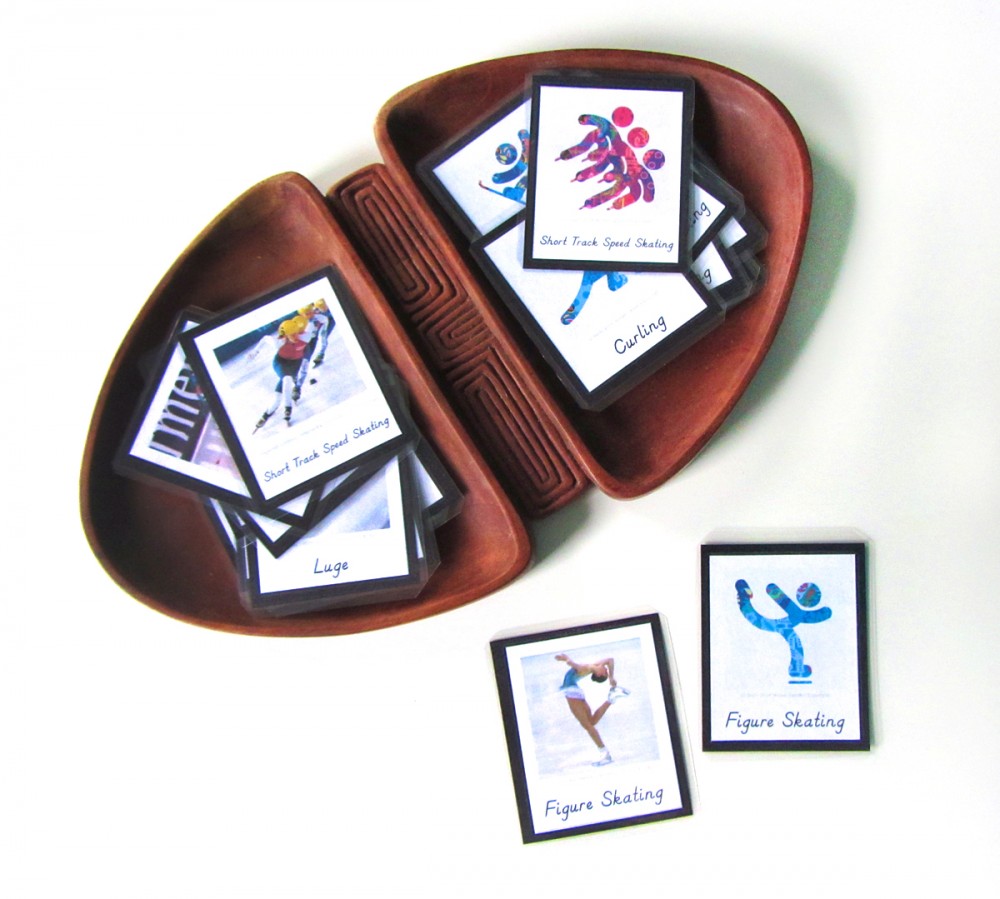
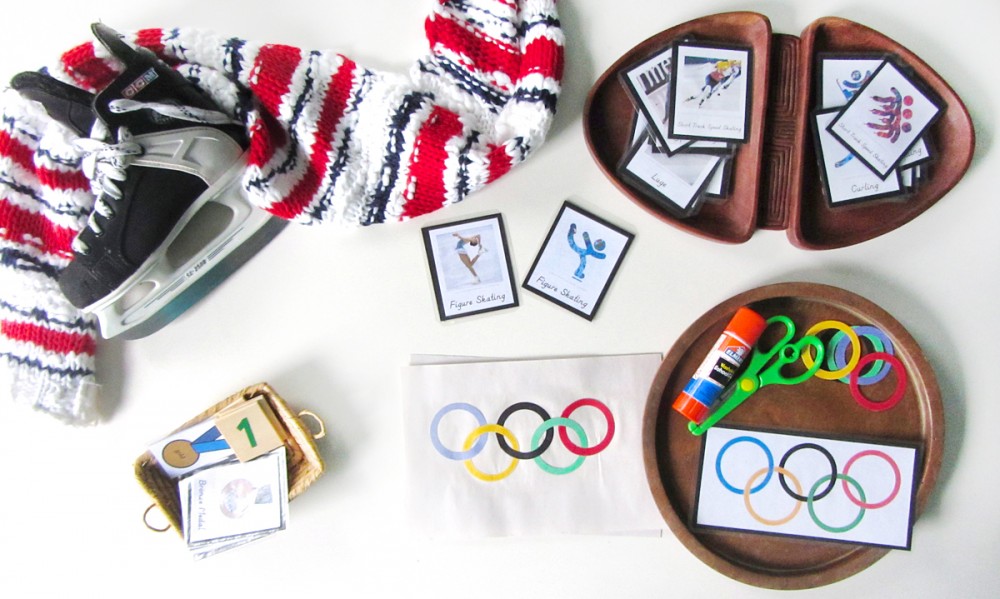
I created 3-part cards for all the base sport categories featured in the winter Olympics. I made both a photographic version and a version featuring the beautiful Russian pictograms created for the games.

Winter Games Homeschool Printables

A fun activity to do with both set is matching the pictogram to the correct photo. You can do this with the labeled card at first, them move to the unlabelled version. For now, I am just using the labelled cards with Jax.

Winter Games Homeschool Printables

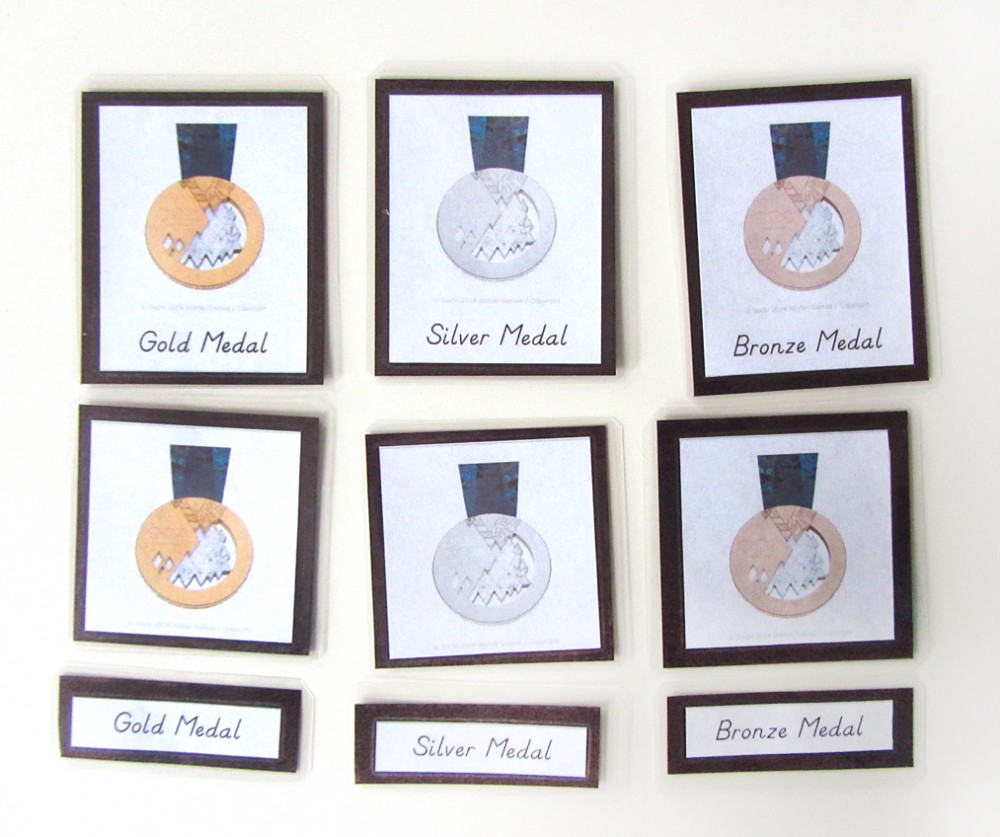
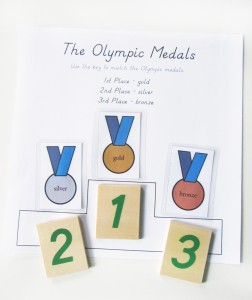
Another feature of the Olympics that I wanted to feature was the medals. Jax will be hearing “gold medal” a lot and won’t necessarily understand that means 1st place. I wanted to teach him the three medals and which place they represent.

Winter Games Homeschool Printables

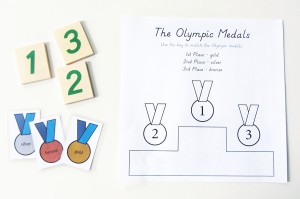
I created a little set of 3-part cards with the actual medal designs being used this year in Sochi. I also put together a little matching game with a key Jax can follow to match the correct medal to each place on the podium. He can add some of his wooden number cards to reinforce the activity.

Winter Games Homeschool Printables  Winter Games Homeschool Printables

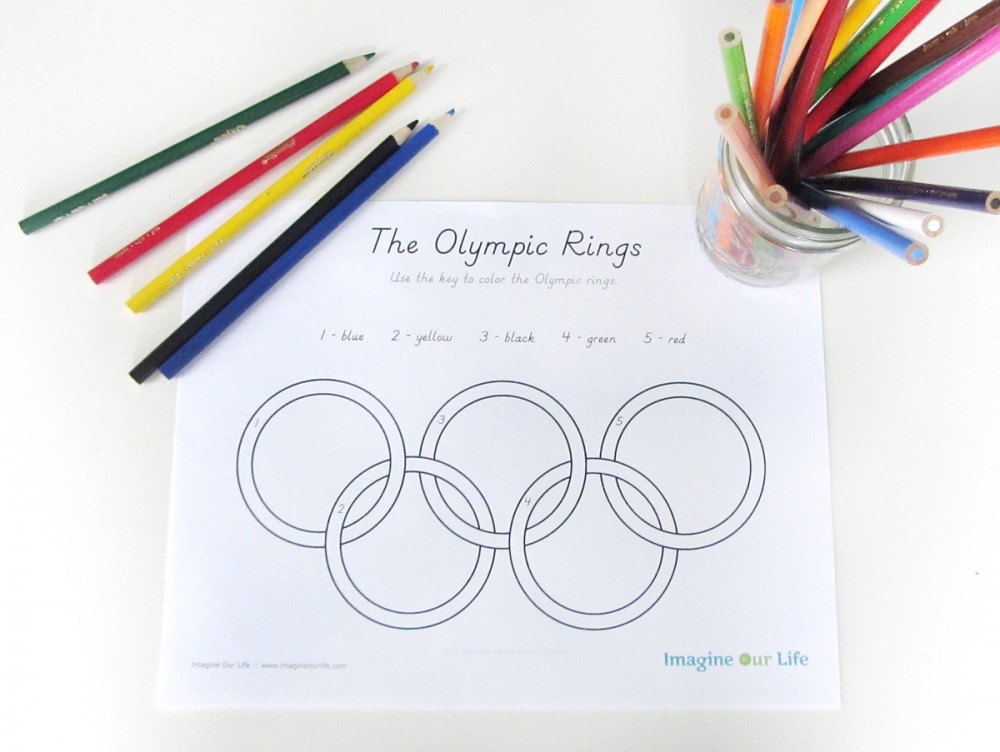
The last printable I included was the Olympic rings. The logo was originally designed to feature all the colors in the flags of the countries competing. There are many more countries in today’s Olympics, but they all have at least one of the ring colors on their flags.

Winter Games Homeschool Printables

I made a color by number sheet so Jax can color his own Olympic rings. And to give him some self-correction of error, I included a color version of the rings that I printed and laminated.

Winter Games Homeschool Printables

Olympic Rings Craft

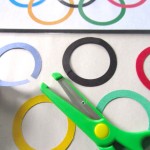
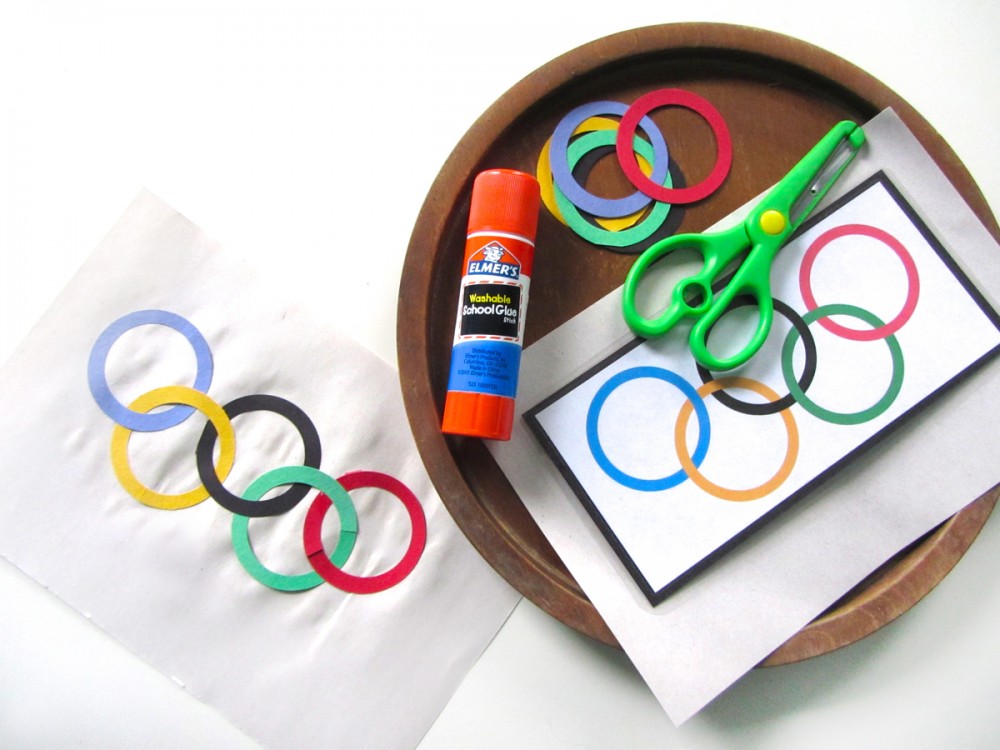
I’ve prepared a quick paper craft for Jax to do. This can be done with or without cutting. Your child can simply place the precut rings in their correct places and glue them down, or you can have them make a cut in each ring and interlock them.

To create the rings, I used two of my circle punches. I punched a 1.5″ hole in the paper, then centered that in my 2″ punch and cut out the ring. Two inch rings match the color printable perfectly.

I hope you enjoy these free winter Olympics printables! Do you have any fun ideas for this learning unit? Leave a comment for me or tag me on your Instagram photos @iolstephanie.

Winter Games Homeschool Printables

Please visit the Montessori Monday linkup on Living Montessori Now for more great homeschool ideas!

Montessori Monday

Animals of Australia for the Montessori Wall Map & Quietbook with Printables

Animals of Australia for the Montessori Wall Map & Quietbook with Printables

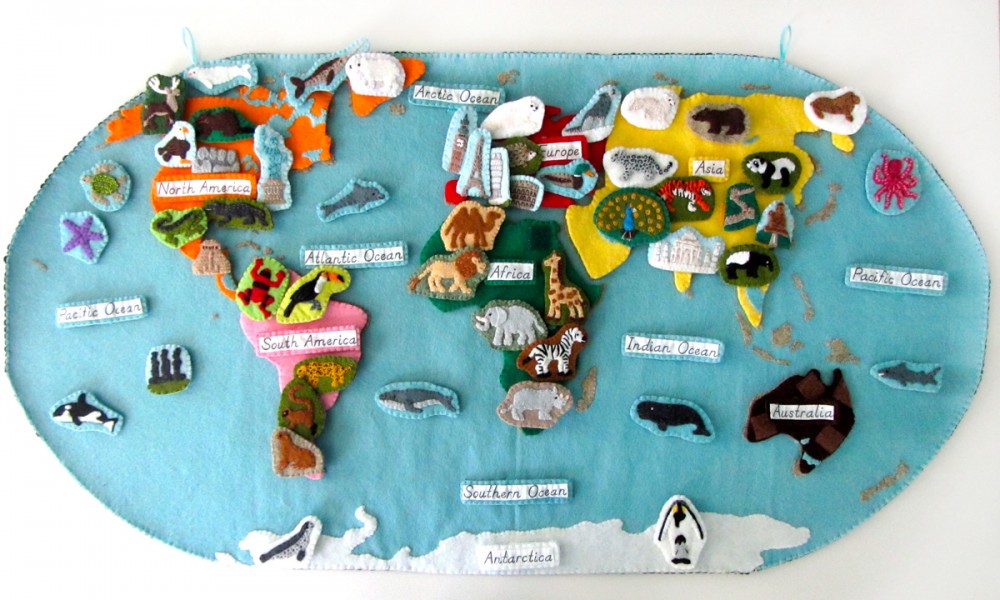
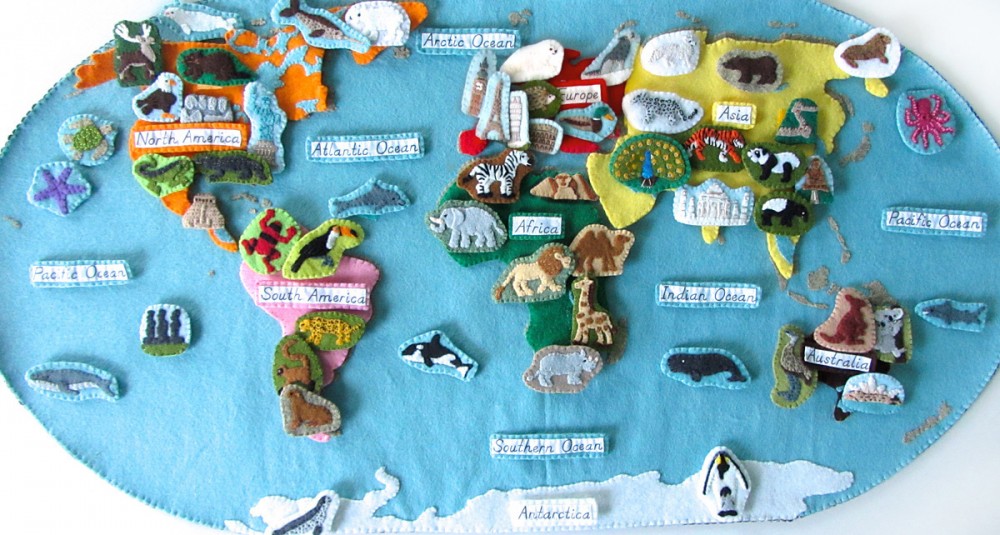
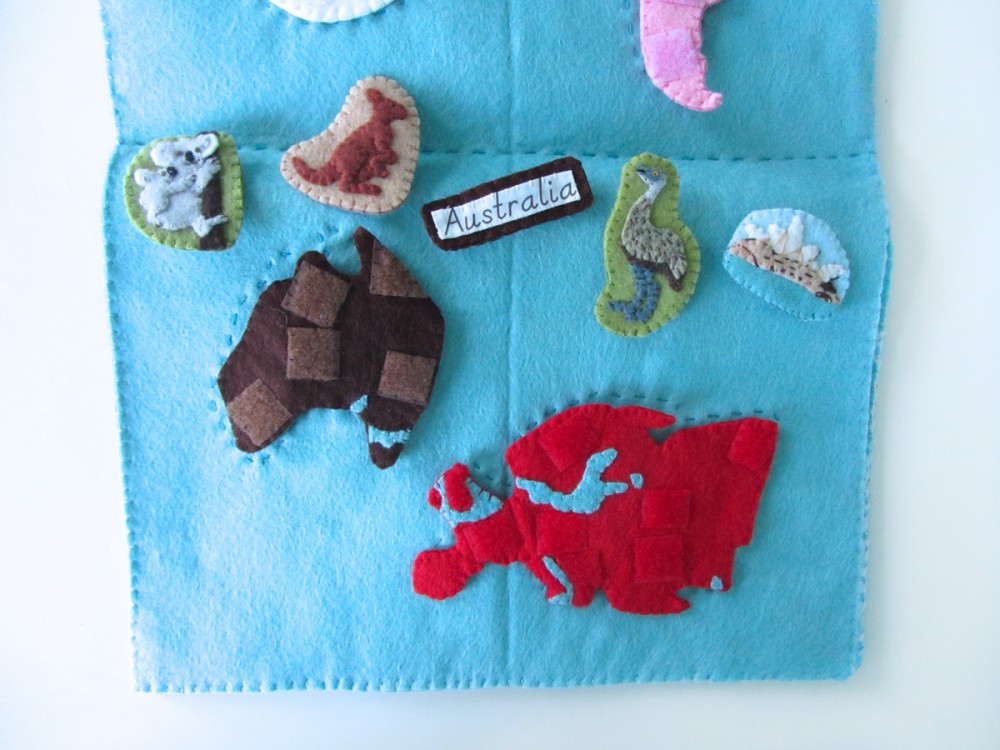
At last, the final sewing installment the Montessori wall map! It’s hard to believe I’ve finished sewing the whole world (just about)! The next and final post in this series will feature the world landmark printables. If you haven’t been following our Montessori wall map and quiet book yet, you can read all about it here. This post is for the continent of Australia.

Animals of Australia for the Montessori Wall Map & Quietbook with Printables

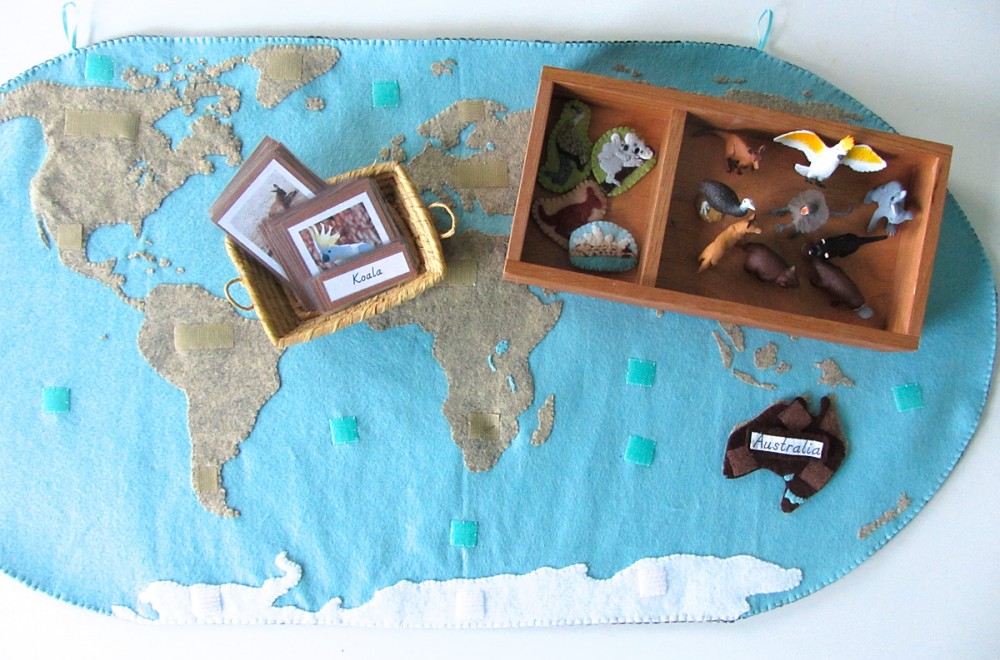
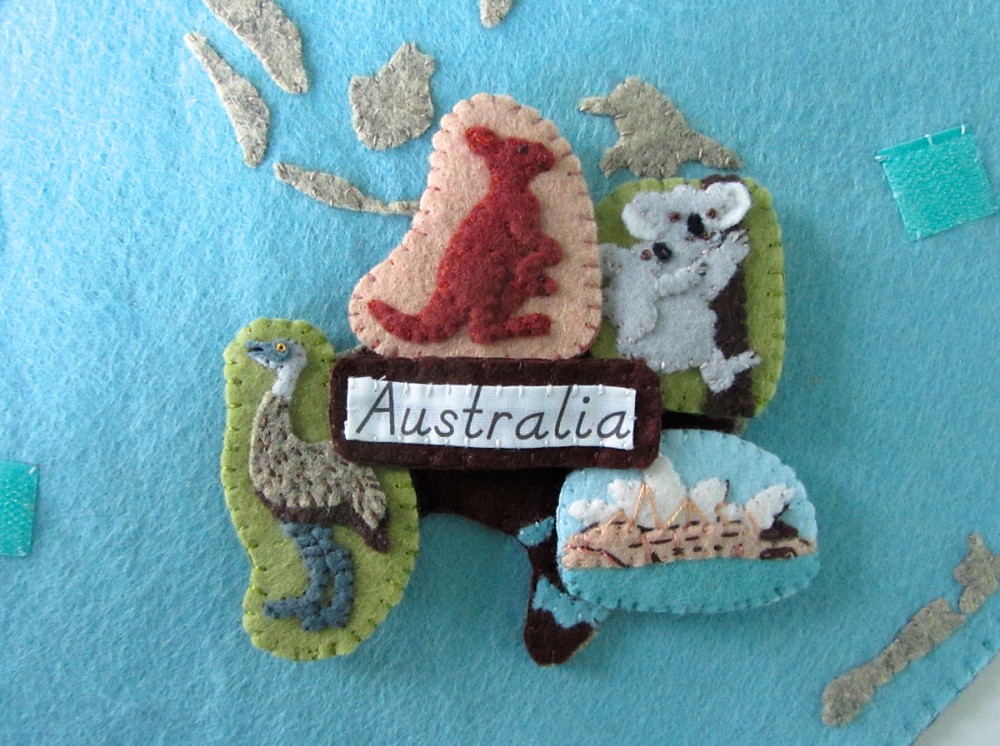
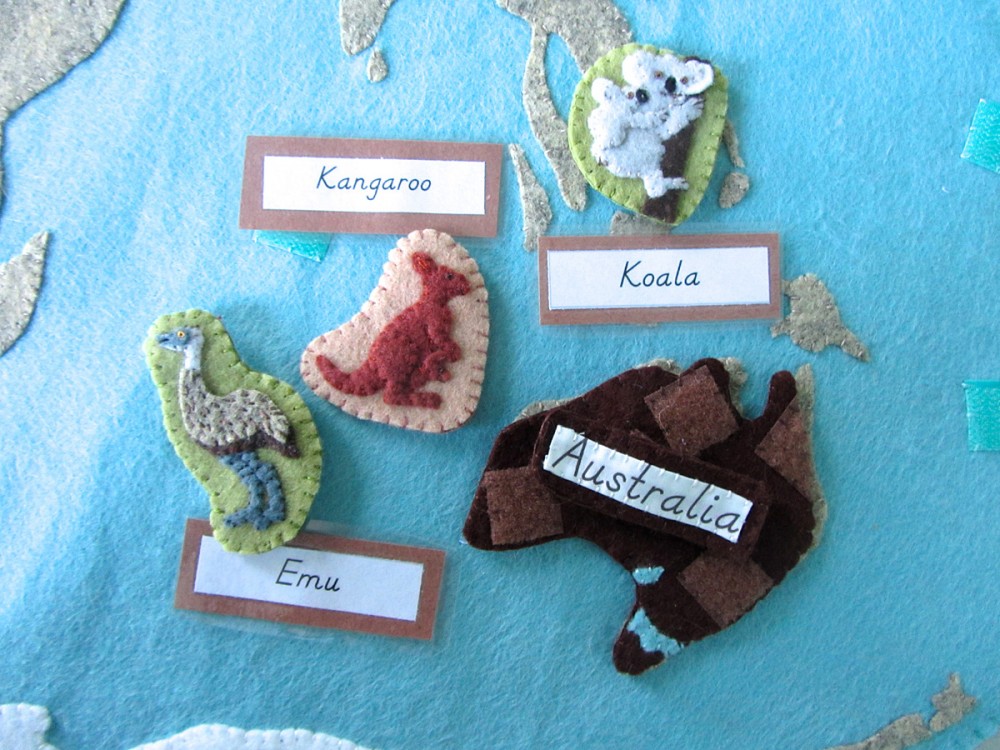
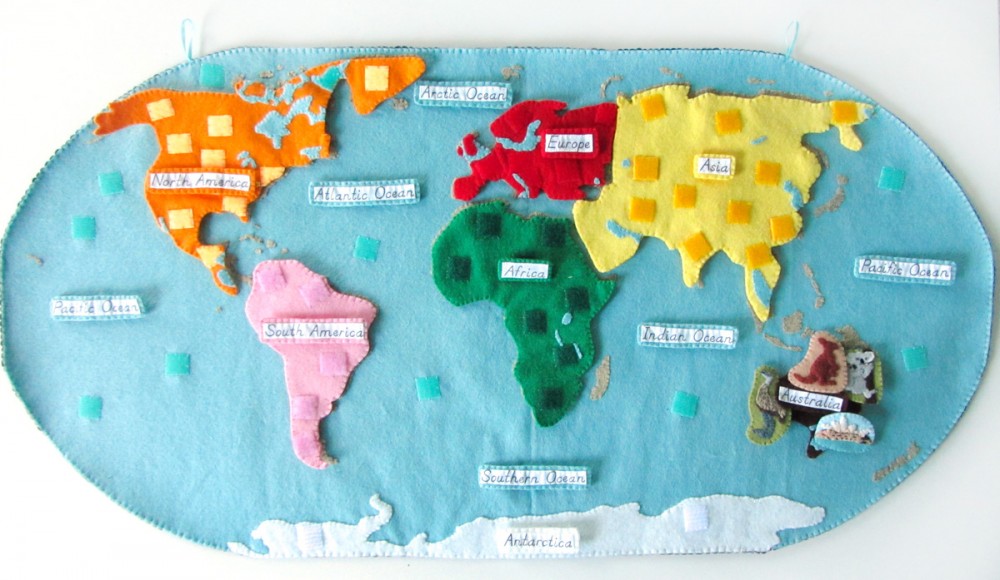
Every continent (and the oceans) will have landmarks and animals. Australia has so many wonderful animals, but is too small on the scale of this map to fit more than 4 pieces I ended up choosing 3 animals (thanks to your votes on Facebook!) and one landmark for this continent. The landmark, the Sydney Opera House, is the only landmark I chose in this project that doesn’t have a matching Safari LTD figurine. It was so iconic that I couldn’t not make it, though. I included: The Sydney Opera House, and Emu, a Koala and a kangaroo.

Overview and Map PatternsAfricaAntarcticaAsia • Australia EuropeNorth AmericaOceansSouth America

Our finished map!

Our finished map!

This project is totally free for you to use (though commercial use requires a license.) If you’d like to support my designs, one way is to make a purchase off of Jax’s Amazon wishlist – he turns 4 on February 5th! I use his list to bookmark school and craft items until I am able to get them. For more ways to contribute to this site, visit my support page.

Animals of Australia for the Montessori Wall Map & Quietbook with Printables

Materials I Used

The Pattern (see the first post for the main patterns) Felt from American Felt & Craftpastry [golden taupe], chocolate [deep brown], fresh linen [off white], monkey [red brown], honeydew [light green], sparrow [light blue], ice [aqua blue], rocky point [heather taupe], elephant [charcoal], graywhite and black. Hook & Loop – I used white snag-free Velcro on the backs of all these pieces and brown hook & loop (loop only) on the front of the Australia puzzle piece. My brown hook & loop was from here. Felt glue to tack down the pieces before sewing, printer fabric for the continent label, embroidery floss in colors to match the felt and micro tip scissors.

Animals of Australia for the Montessori Wall Map & Quietbook with Printables

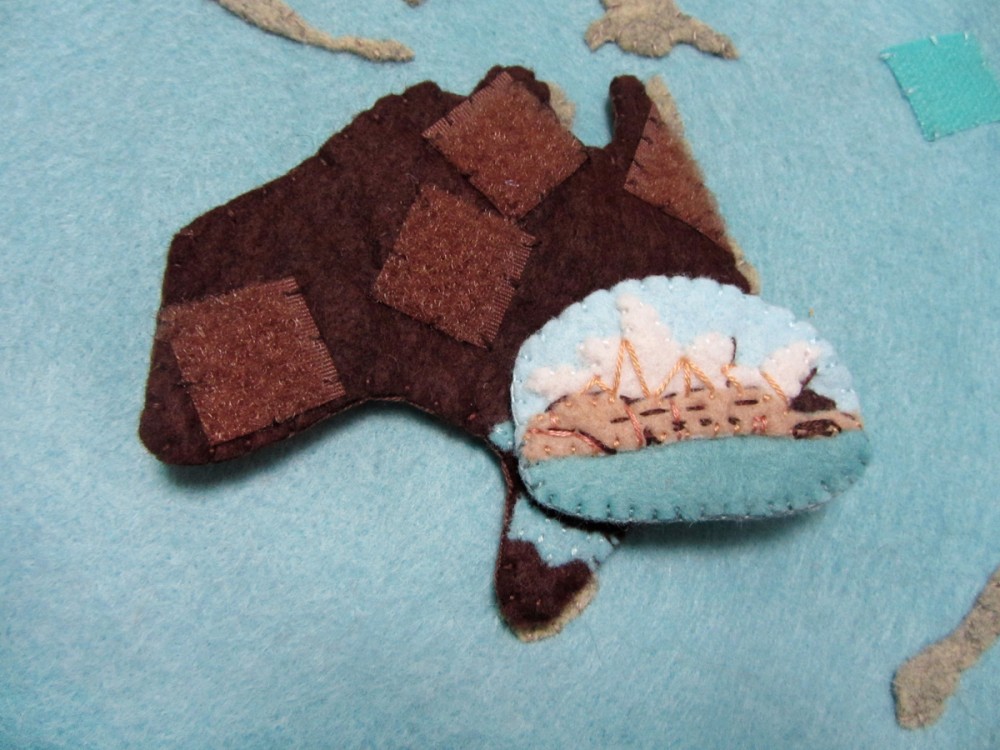
For the Australia quiet book page, I sewed a running stitch (dashed) outline around the Australia pattern piece and sewed down snag-free Velcro to line up with the Velcro on the back of the Australia piece.

Australia: (Felt used: chocolate brown) For the Australian continent puzzle piece, I sewed down pieces of brown loop Velcro. On the back, I sewed strips of white snag-free Velcro to correspond with the Velcro in the quietbook and the wall map. I finished it by sewing the two sides together around the edge with a blanket stitch.

Animals of Australia for the Montessori Wall Map & Quietbook with Printables

Label: (Felt used: chocolate brown) For the continent label, I folded under the edges (just a tiny bit to hide the rough edges) and creased it with my nails. The printer fabric held the folds nicely without ironing. Then I stitched the label to some brown felt and trimmed it down to be a border. I cut a matching felt rectangle for the back, sewed snag-free Velcro to it and then sewed both sides together.

Animals of Australia for the Montessori Wall Map & Quietbook with Printables

For all of the animals, I started by gluing the pieces down to a scrap of background felt with a very light amount of felt glue. I glue multiple animals at a time to give them time to dry. I sewed them down, trimmed the background and cut a matching backing piece. I sewed snag-free Velcro to the back and sewed both sides together with a blanket stitch.

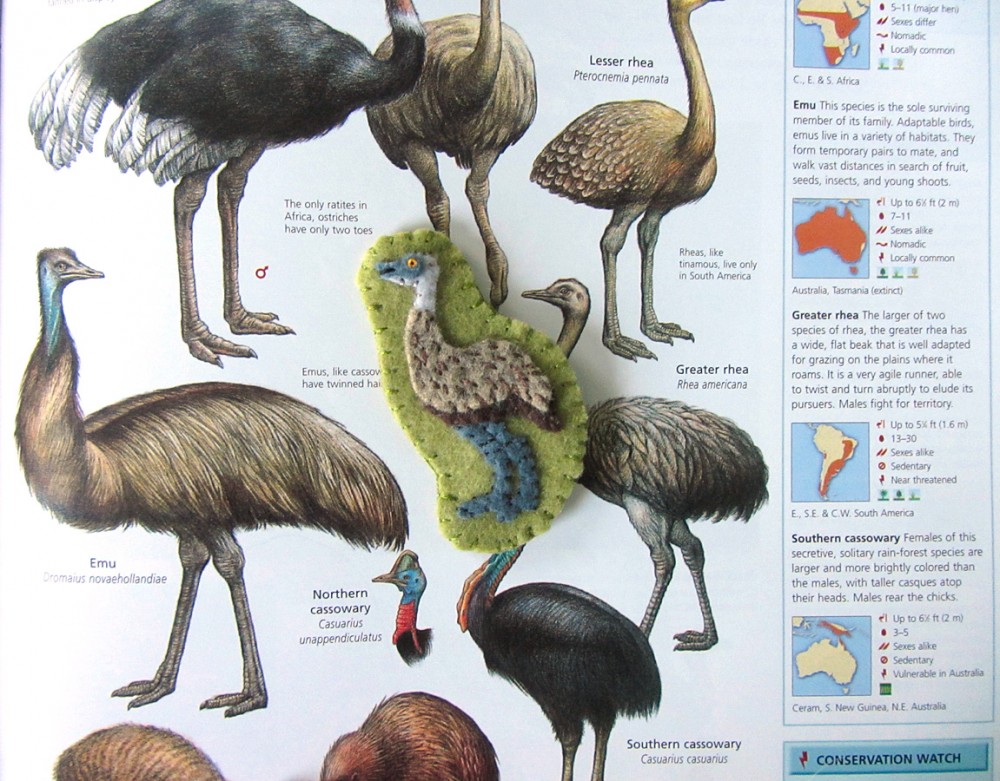
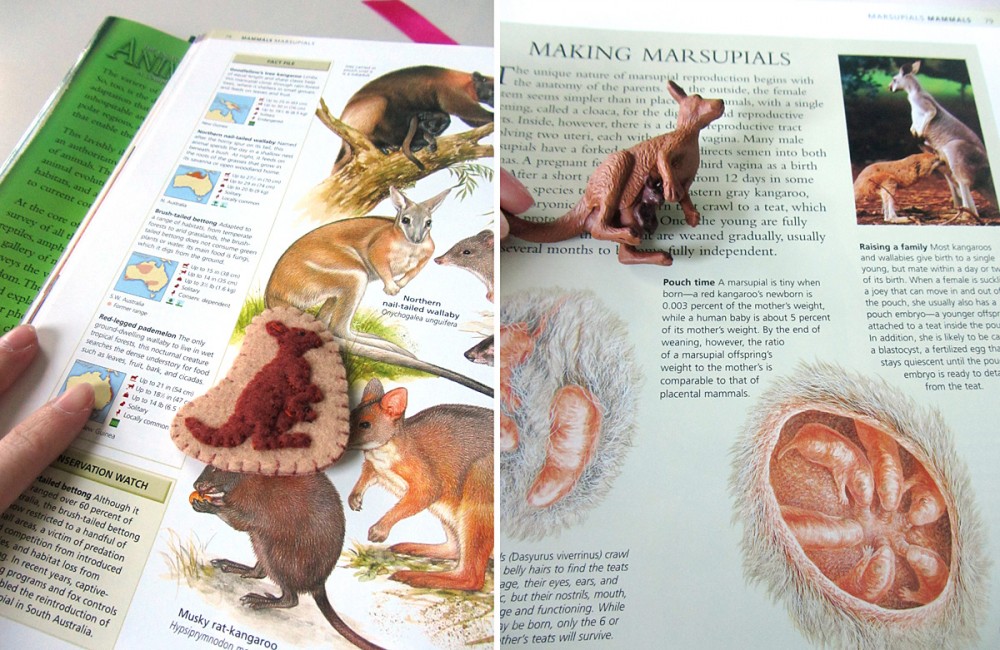
We love this animal encyclopaedia!

We love this animal encyclopaedia!

Emu: (Felt used: rocky point heather beige and chocolate dark brown for the body, grey light grey and elephant charcoal gray for the head and legs and honeydew light green for the background) For the emu, I tacked everything into place with felt glue. I then sewed all the pieces down around their edges. I made little dashed stitches with brown floss to make his feather texture. His eye is a gold French knot with a tiny black stitch in the center. His mouth is a black line.

Animals of Australia for the Montessori Wall Map & Quietbook with Printables

Kangaroo: (Felt used: monkey red-brown for the body and pastry beige for the background) I started by tacking everything down with felt glue. The joey’s head and kangaroo leg go on top of the body. I stitched everything down around the edges, the back stitched the line of the kangaroo’s elbow. There is a straight stitch in her ear and the pouch. Both eyes are black French knots.

Animals of Australia for the Montessori Wall Map & Quietbook with Printables

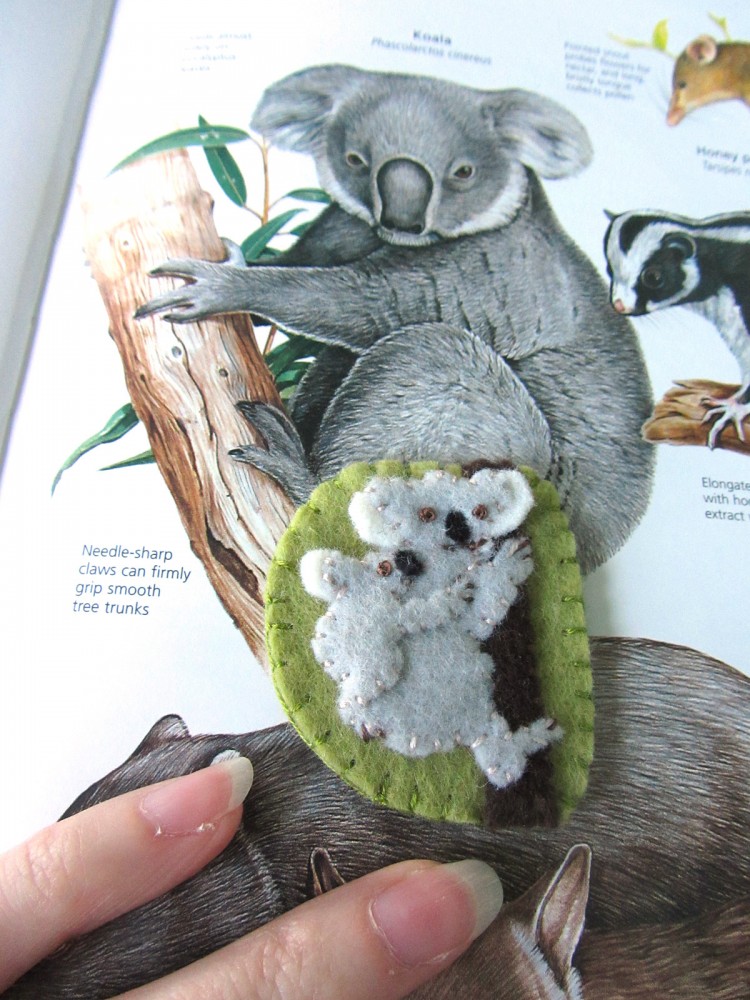
Koala: (Felt used: gray for the bodies, white for the ears, black for the noses, chocolate dark brown for the tree and honeydew light green for the background) I started by tacking everything down with felt glue. Then I stitched everything down around the edges (except the white of the ears). The eyes are brown French knots. Their nails are brown straight stitches. I back stitched the mama koala’s mouth.

Animals of Australia for the Montessori Wall Map & Quietbook with Printables

Sewing the Landmarks

For all the landmarks in this project, I started by sewing the front piece. Then I cut out a backing felt to match the final shape and added some snag-free Velcro to it. I finished sewed around the whole edge, switching colors where needed. For all of the detail work, see the photos for a sample of where to stitch.

Animals of Australia for the Montessori Wall Map & Quietbook with Printables

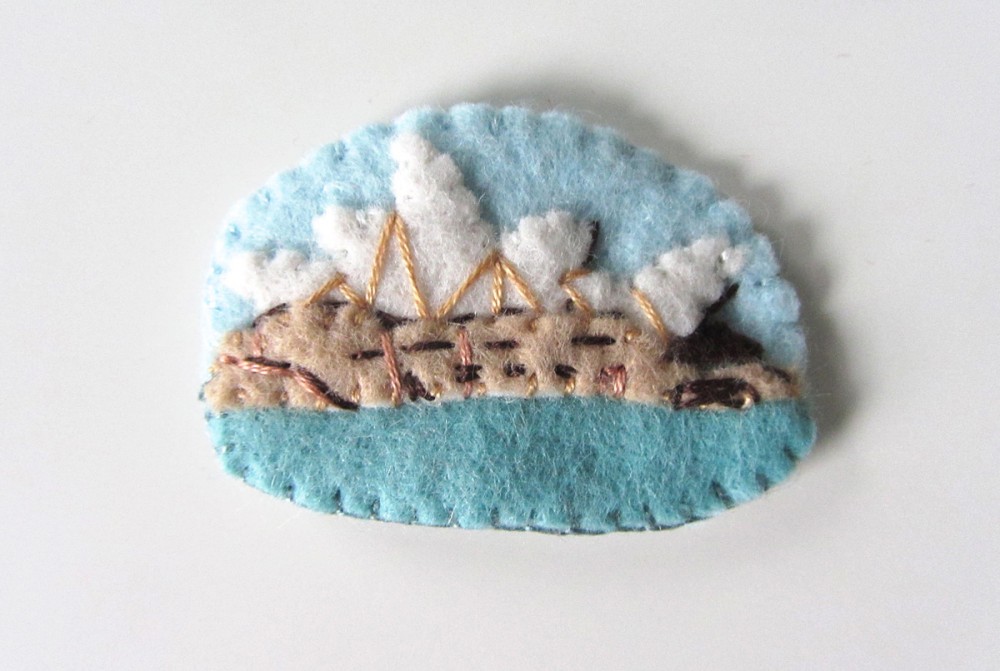
Sydney Opera House: (Felt used: pastry beige and white for the building, ice for the water and sparrow blue for the background) I glued down the building pieces and stitched down the edges. Using three shades of brown floss, I made many straight stitches to add details of the building. I looked at photos online for reference. See my close up for exactly what I did.

Animals of Australia for the Montessori Wall Map & Quietbook with Printables

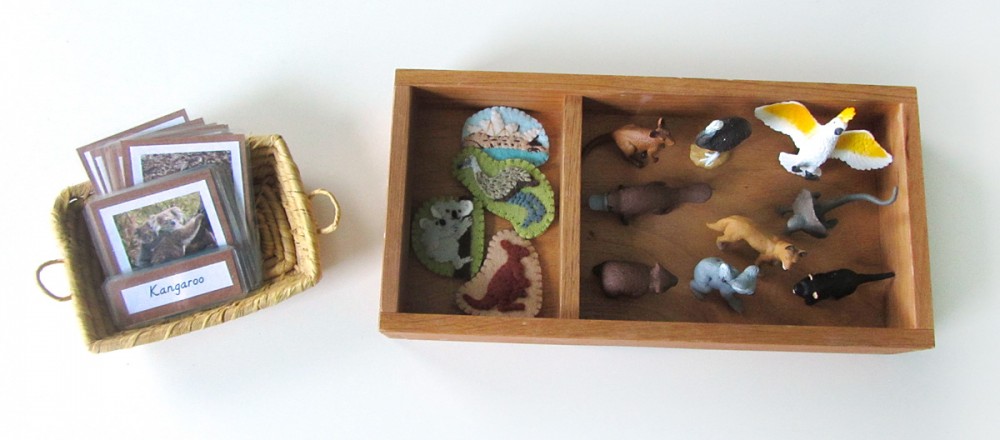
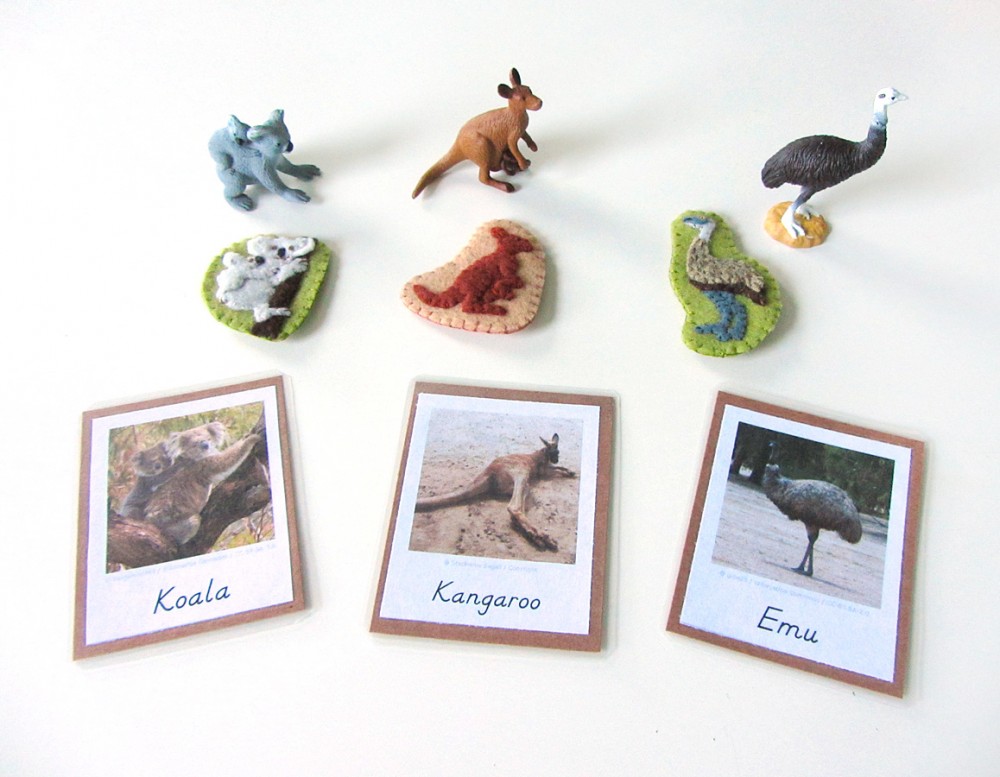
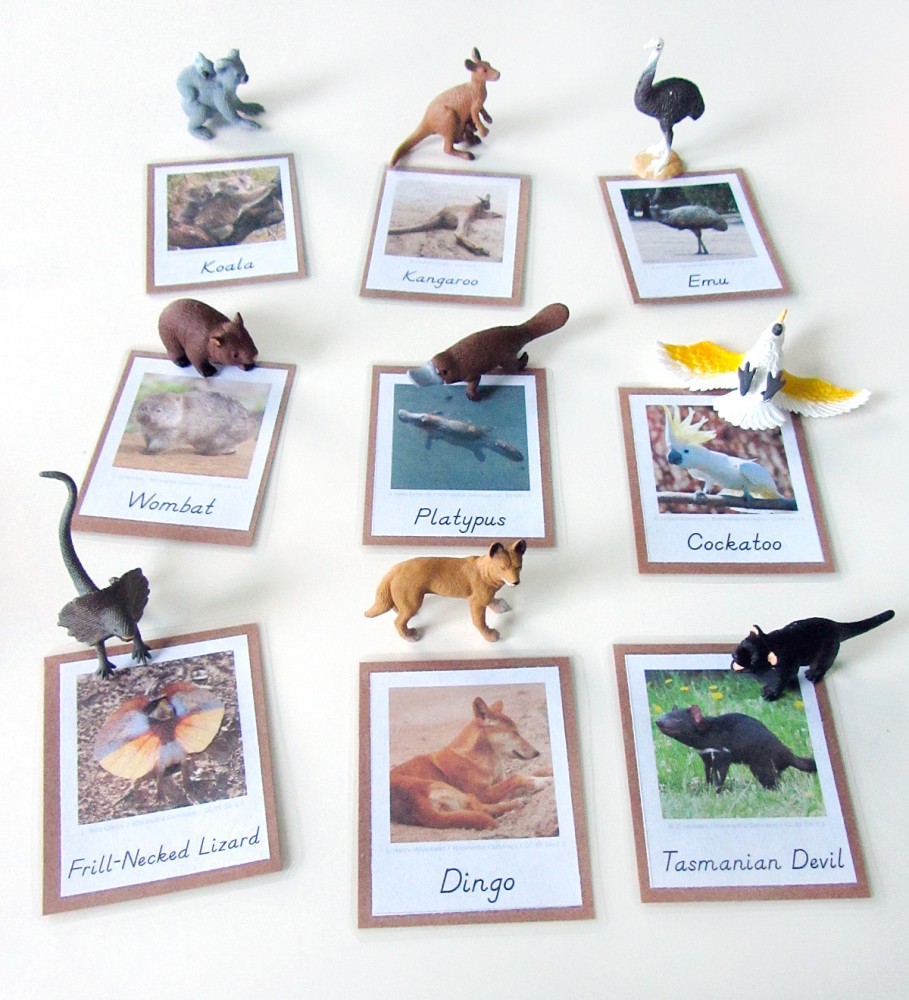
These animals are from Safari LTD’s Down Under TOOB

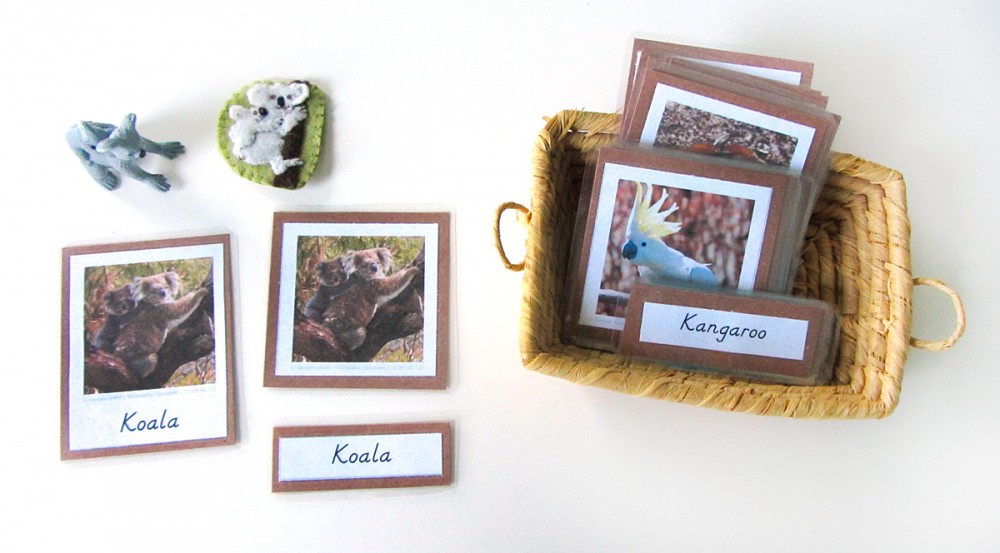
Montessori Australian Animals 3-Part Cards

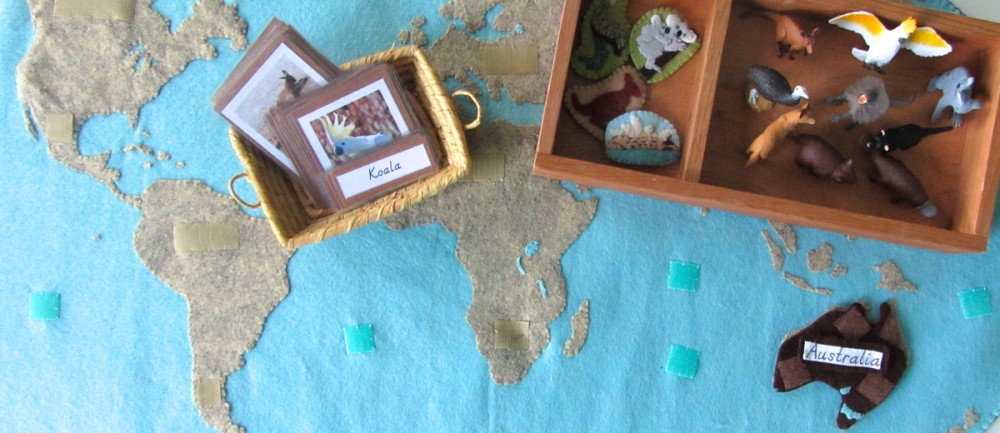
The series of 3-Part cards I am making for this project is something that Jax will be using for many years in homeschool. I have been focusing on the animals in these posts, but the next post will feature all the landmarks we sewed. Eventually, we will expand our collection of cards even more to include cultures, more landmarks, and so much more. Three part cards are extremely flexible learning tools.

Animals of Australia for the Montessori Wall Map & Quietbook with Printables

Click here to download my free pdf file to make your own animals of Australia cards. To make mine, I cut them out, glued them to brown construction paper (to match Australia’s Montessori color) then laminated them. I use this laminator and I’ve been very happy with it. It makes everything so shiny and strong! My photos come out slightly faded from the printer (I use normal paper) but turn gorgeous after lamination. (Quick tip: Add a dab of glue stick on the back of your pieces before you place them in the lamination pouch to keep them from sliding around as you feed it through the machine.)

Animals of Australia for the Montessori Wall Map & Quietbook with Printables

I know many of you are sewing along (or plan to after the holidays!) If you are, stop by my Instagram @iolstephanie and leave a comment on one of my photos (I can’t see your photo if it you are private, but I can request to follow you temporarily if you leave a comment on mine about it) or share photos on Facebook. You can also email me. I love seeing what others make from my patterns!

Animals of Australia for the Montessori Wall Map & Quietbook with Printables

I know many of you are sewing along, or will be soon. If you are, stop by my Instagram @iolstephanie and leave a comment on one of my photos (I can’t see your photo if it you are private, but I can request to follow you temporarily if you leave a comment on mine about it) or share photos on Facebook. You can also email me. I love seeing what others make from my patterns!

Montessori Monday is a fabulous resource of Montessori and homeschool ideas! Please visit for more great projects…

Montessori Monday

Animals of Europe for the Montessori Wall Map & Quietbook with Printables

Animals of Europe for the Montessori Wall Map & Quietbook with Printables

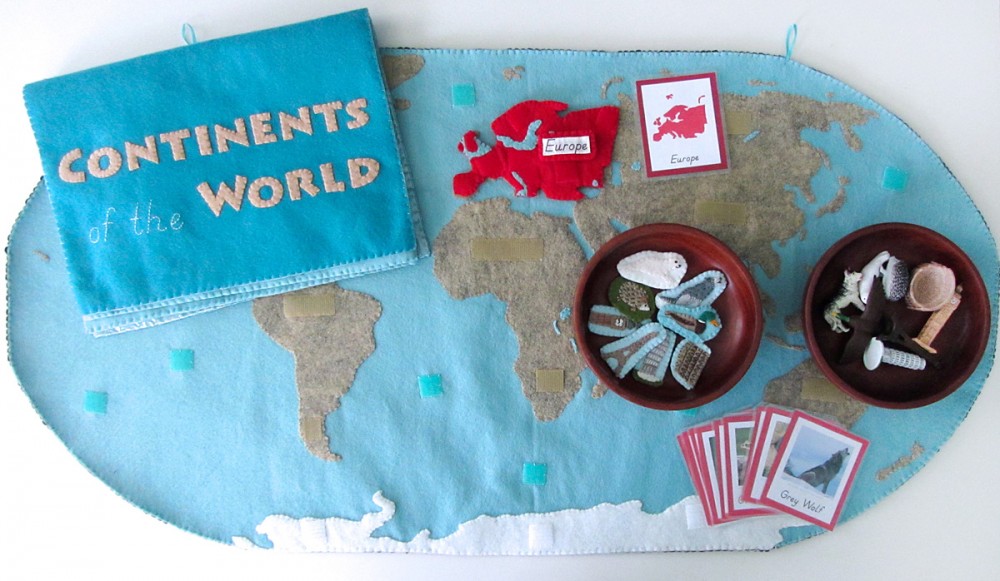
Are you ready for the next installment of the Montessori wall map? This has been the most epic sewing project ever… If you haven’t been introduced to our Montessori wall map and quiet book yet, you can read all about it here. This post is for the continent of Europe.
Animals of Europe for the Montessori Wall Map & Quietbook with Printables

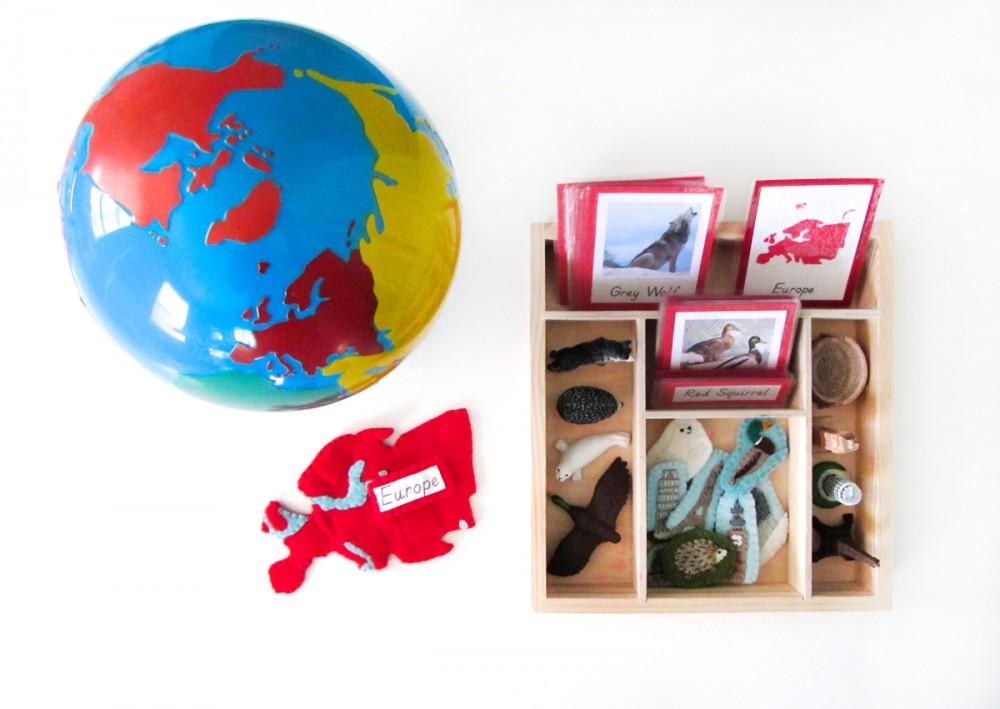
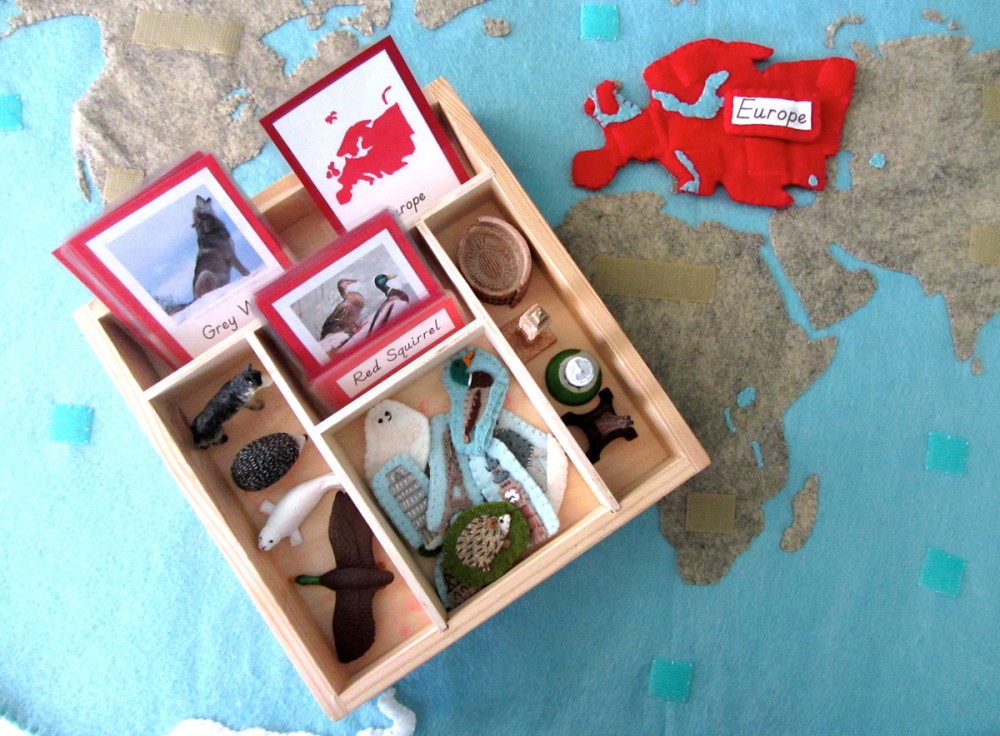
Our Europe 3-Part Card Tray

Every continent (and the oceans) will have landmarks and animals. Europe has so many amazing landmarks! I ended up choosing an even mix of animals and landmarks for this project.

Overview and Map PatternsAfricaAntarcticaAsia • Europe
North AmericaOceansSouth America

Animals of Europe for the Montessori Wall Map & Quietbook with Printables

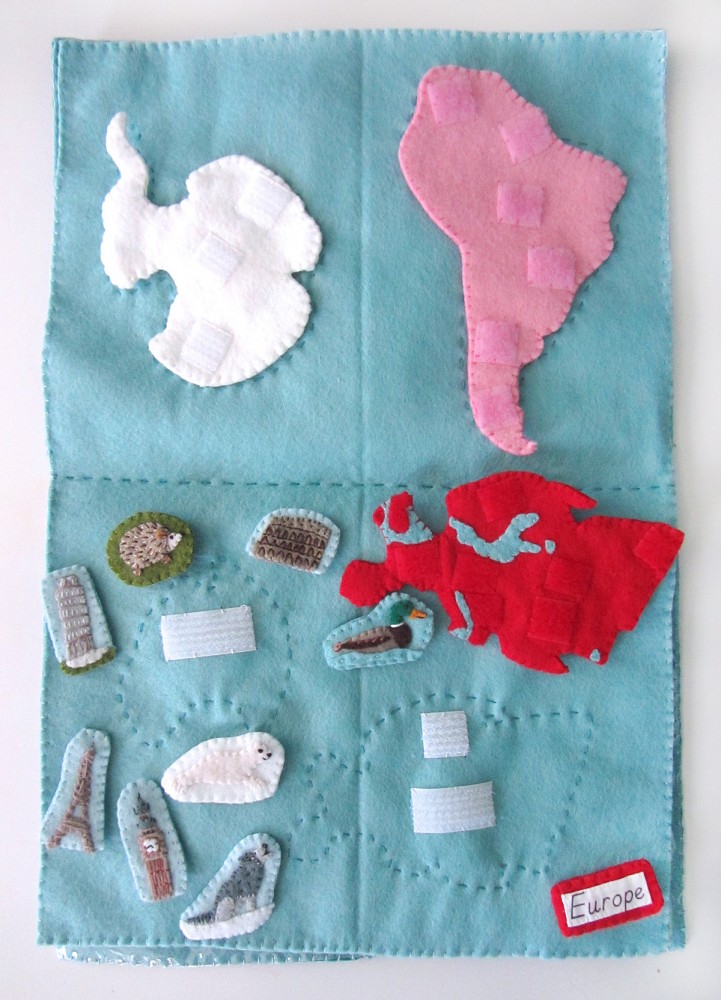
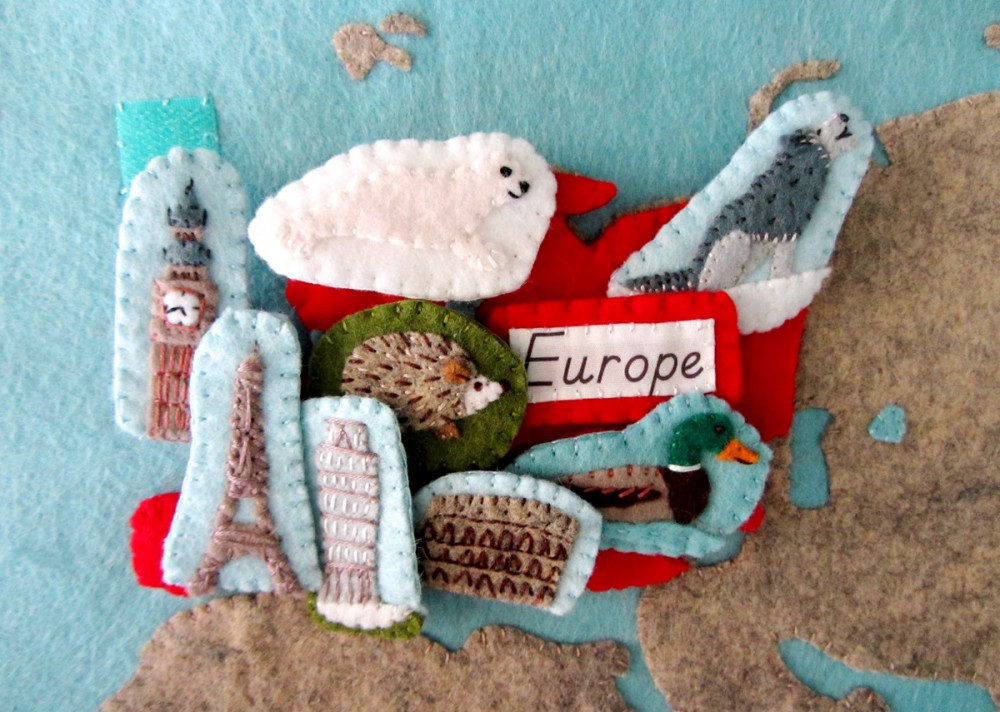
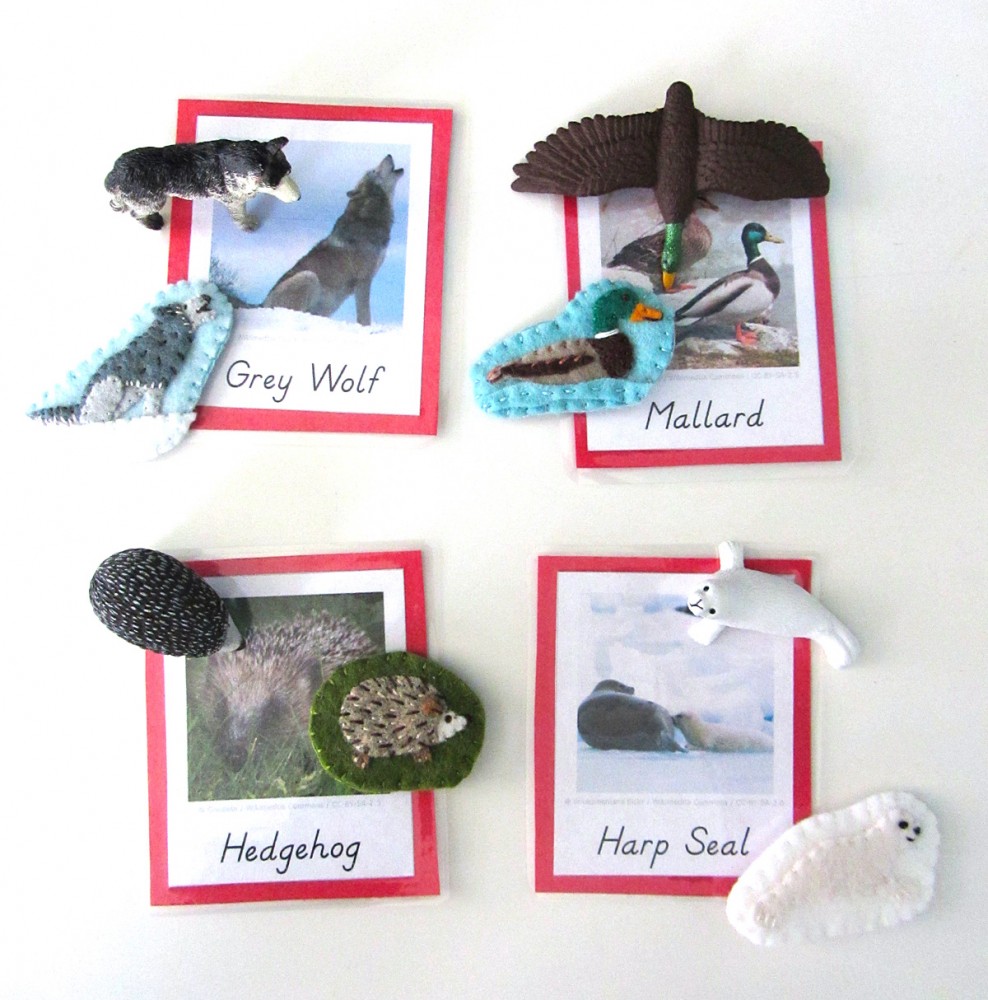
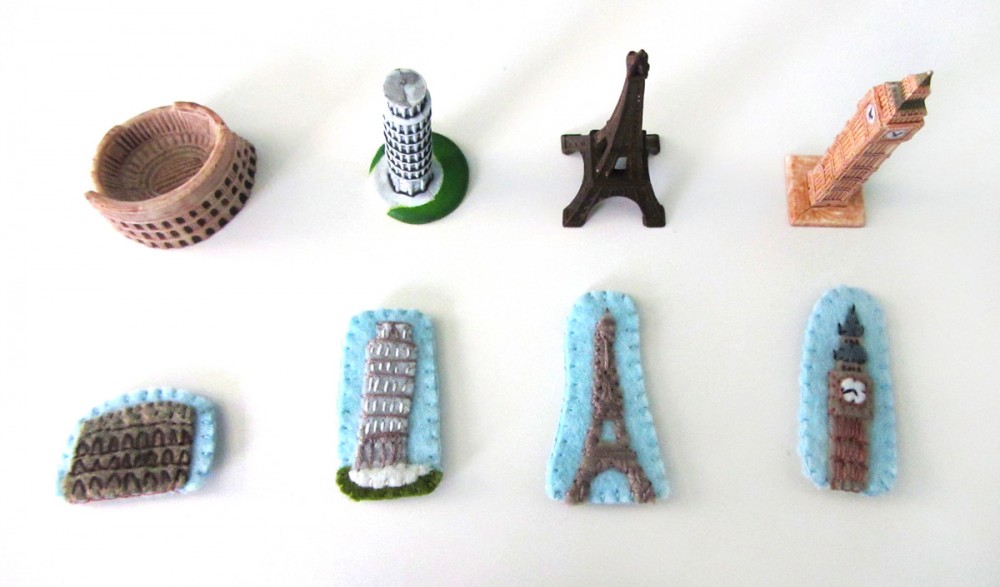
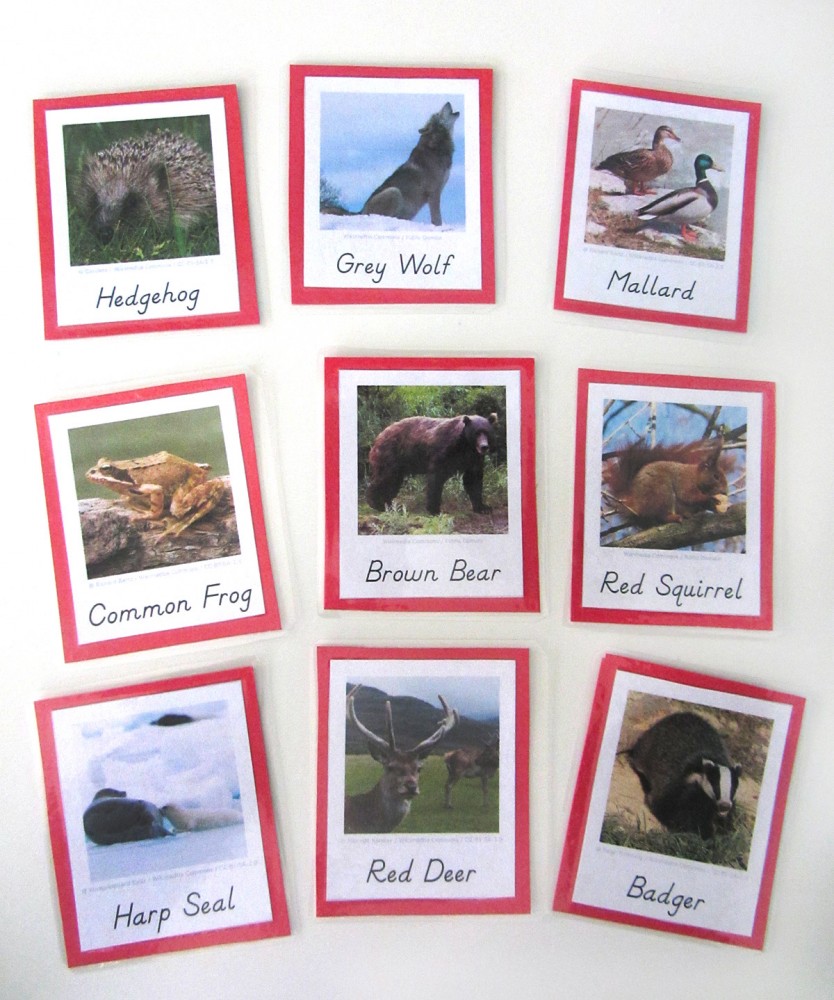
Those of you who follow along on Facebook or Instagram have been seeing what I’ve been creating for Europe. Things are definitely a tight squeeze when you put everything on the map at once. There is just so much awesome in a small area! I made: the Eiffel Tower, Big Ben, the Tower of Pisa, the Colosseum, a harp seal, a mallard, a hedgehog, and a grey wolf. My choices were influenced by which figurines were available from SafariLTD’s TOOBs.
Animals of Europe for the Montessori Wall Map & Quietbook with Printables
This project is totally free for you to use (though commercial use requires a license.) If you’d like to support my designs, one way is to make a purchase off of Jax’s Amazon wishlist. I use his list to bookmark school and craft items until I am able to get them. For more ways to contribute to this site, visit my support page.

Materials I Used

The Pattern (see the first post for the main patterns)

Felt from American Felt & Craftbig apple [red], cilantro [olive green], pastry [golden taupe], gold nugget [gold], chocolate [deep brown], fresh linen [off white], chai [taupe], doe [brown], jade [green], sparrow [light blue], ice [aqua blue], stone [heather taupe], elephant [charcoal], graywhite and black.

Hook & Loop – I used white snag-free Velcro on the backs of all these pieces and red hook & loop (loop only) on the front of the Europe puzzle piece. My red hook & loop was from here.

Felt glue to tack down the pieces before sewing, printer fabric for the continent label, embroidery floss in colors to match the felt and micro tip scissors.

Animals of Europe for the Montessori Wall Map & Quietbook with Printables

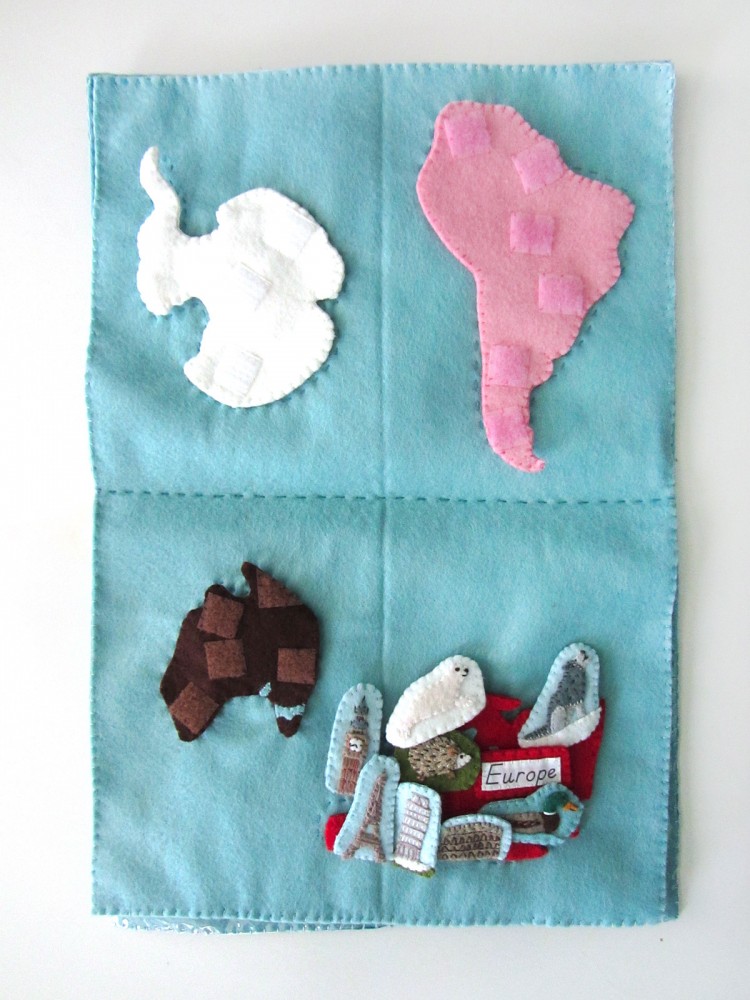
For the Europe quiet book page, I sewed a running stitch (dashed) outline around the Europe pattern piece and sewed down snag-free Velcro to line up with the Velcro on the back of the Europe piece.

Europe: (Felt used: big apple red) For the Europe continent puzzle piece, I sewed down pieces of red loop Velcro. On the back, I sewed strips of white snag-free Velcro to correspond with the Velcro in the quietbook and the wall map. I finished it by sewing the two sides together around the edge with a blanket stitch.
Animals of Europe for the Montessori Wall Map & Quietbook with Printables

Label: (Felt used: big apple red) For the continent label, I folded under the edges (just a tiny bit to hide the rough edges) and creased it with my nails. The printer fabric held the folds nicely without ironing. Then I stitched the label to some red felt and trimmed it down to be a border. I cut a matching felt rectangle for the back, sewed snag-free Velcro to it and then sewed both sides together.
Animals of Europe for the Montessori Wall Map & Quietbook with Printables

For all of the animals, I started by gluing the pieces down to a scrap of background felt with a very light amount of felt glue. I glue multiple animals at a time to give them time to dry. I sewed them down, trimmed the background and cut a matching backing piece. I sewed snag-free Velcro to the back and sewed both sides together with a blanket stitch.
Animals of Europe for the Montessori Wall Map & Quietbook with Printables

Harp Seal: (Felt used: fresh linen off-white for the baby seal, white for the background) The harp seal is super simple! I tacked down his body with glue and sewed around the edges. I made a small stitch for a mouth and satin stitched a nose. His eye is a black French knot.

Animals of Europe for the Montessori Wall Map & Quietbook with Printables

We love this animal encyclopaedia!

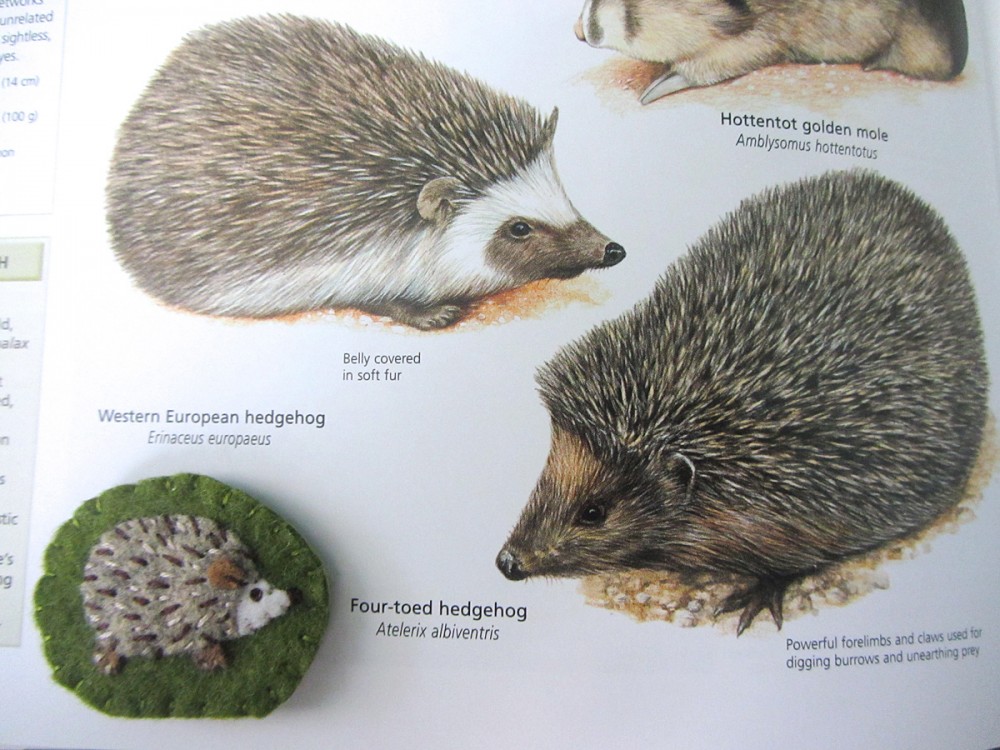
Hedgehog: (Felt used: stone heather taupe for the body, doe brown for the ear and legs, fresh linen off-white for the face and cilantro olive green for the background) I first glued down all her parts in the proper order, adding the ear last. I stitched all the way around the edges and made a stitch at the base of her ear. Using brown, I made a French knot eye and satin stitched nose. On her back, I used dark brown and cream to make stitches to show the texture of the spines.
Animals of Europe for the Montessori Wall Map & Quietbook with Printables

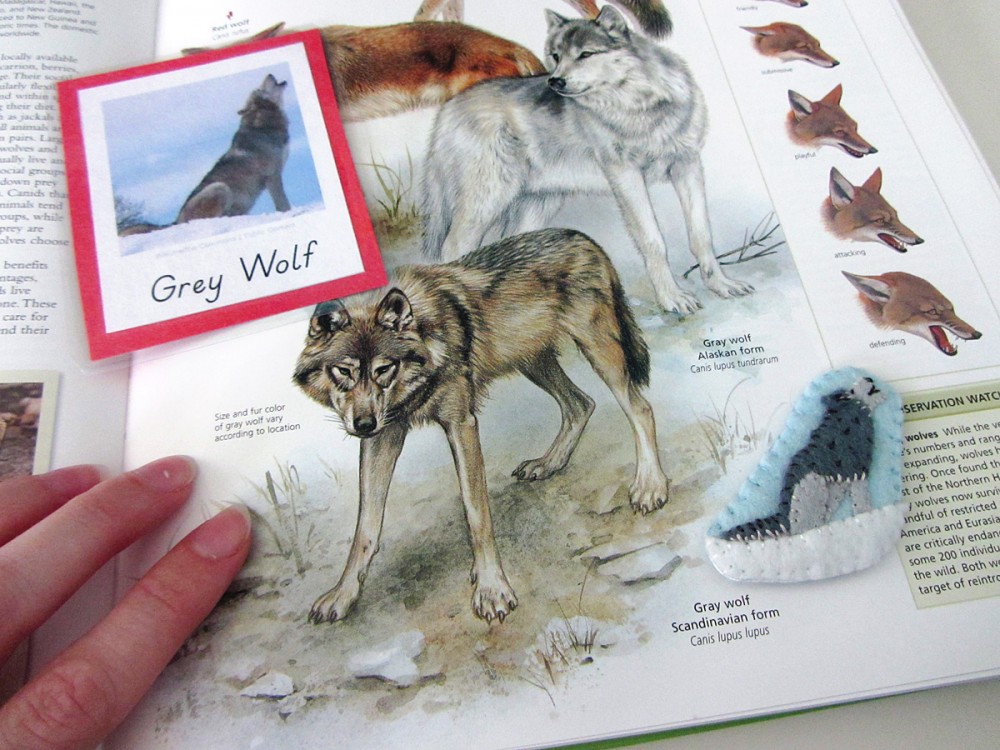
Grey Wolf: (Felt used: gray and elephant charcoal for the body and white for the snow and sparrow light blue background) I started by gluing down the front leg piece and the face (using the back/chest pieces to find the positioning. I then glued down the back/chest, followed by the hind leg and the ear. I cut a curvy piece of white and glued it down over where his feet would be to make the ground. Once it was dry, I trimmed around the wolf and stitched everything down. While stitching down the darker gray piece, I made my stitches longer and a little “sloppy” to make his fur look shaggy. Along the underside of his tail, the edge of his face and under his chest, I made light gray stitches the same way. His eye is a little stitch to make it look closed, his nose is satin stitch and his mouth is just lined with two straight stitches.
Animals of Europe for the Montessori Wall Map & Quietbook with Printables

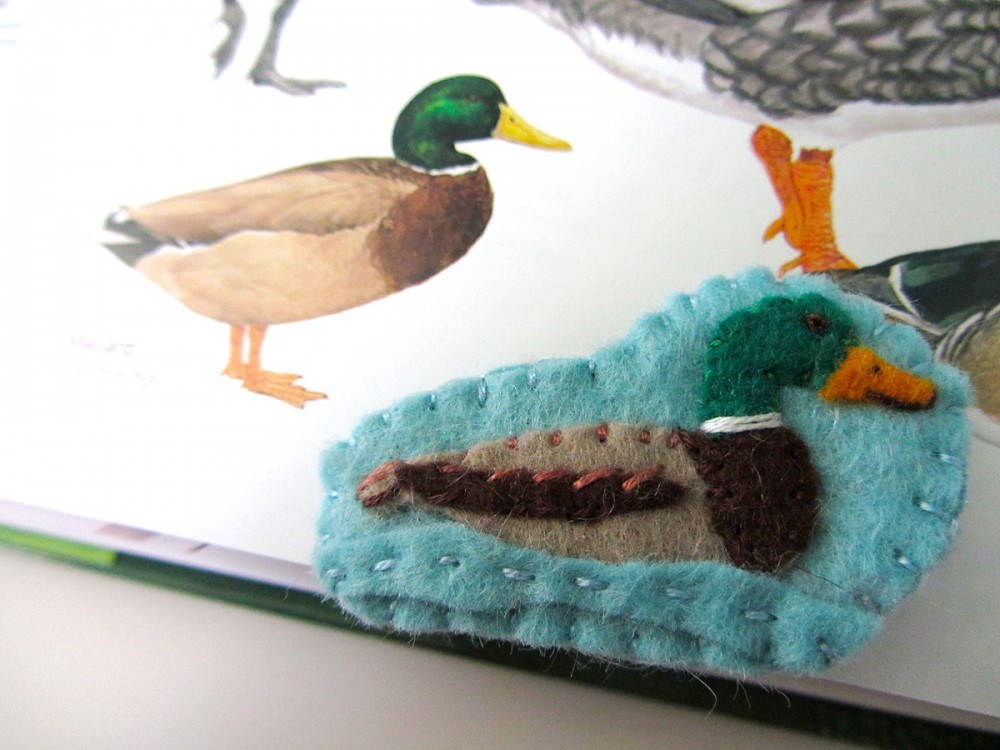
Mallard: (Felt used: gold nugget gold for the beak, jade green for the head, chai taupe for the body, chocolate deep brown for the chest and wing and ice aqua blue for the water and background) I glued down the body and head pieces, then glued the chest and wing on top. I cut a thin, wavy blue strip for water and glued it down over the bottom edge of the mallard. I stitched down all the mallard’s edges, then using dashed stitches, I stitched through the center of the water wave. At her neck, I made two long stitches in white. The eye is a French knot in brown, with a tiny stitch for a nostril and two long stitches to make the beak opening.

Sewing the Landmarks

For all the landmarks, I started by sewing the front piece. Then I cut out a backing felt to match the final shape and added some snag-free Velcro to it. I finished sewed around the whole edge, switching colors where needed. For all of the detail work, see the photos for a sample of where to stitch.
Animals of Europe for the Montessori Wall Map & Quietbook with Printables

Colosseum: (Felt used:stone heather taupe for the building and sparrow blue for the background) I glued down the building and stitched down the edges. With brown floss, I stitched 3 rows with back stitch. On the lower three levels, I stitched arches using a lazy daisy stitch that is open at the bottom. On the top level, I made tiny vertical stitches for windows.

Tower of Pisa: (Felt used: gray for the building,  white  for the ground ,cilantro olive green for the ground and sparrow blue for the background) I cut out a small green piece for the ground, then glued it down with the white ground on top. I glued the building on top. Using a medium gray floss, I made long stitches across the building to make each level. On the bottom level, I used it to make vertical stitches for columns. On the top level, I made an arch with an open lazy daisy stitch. I switched to white floss and made the rest of the columns.

Eiffel Tower: (Felt used: chai taupe for the structure and sparrow blue for the background) The Eiffel Tower is tacked down in place with glue, then I stitched around all the edges. I made criss-crossed stitches all over it similar to the beams it has. In some spots I made long horizontal or vertical stitches to make the real tower.
Animals of Europe for the Montessori Wall Map & Quietbook with Printables

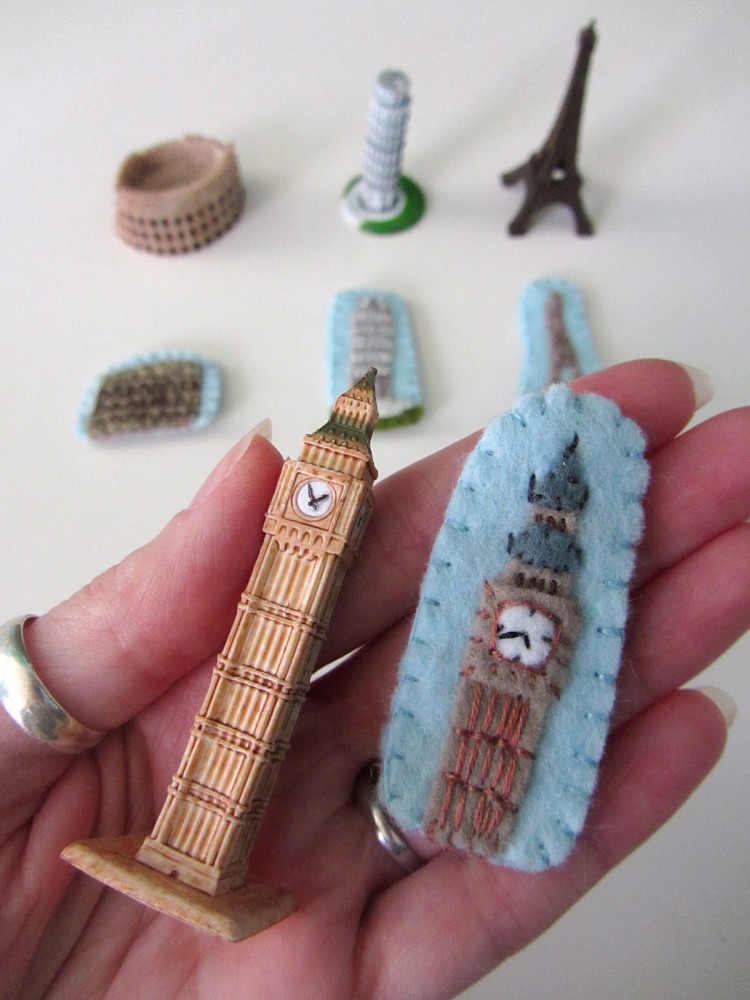
The beautiful landmark replicas seen here were provided by SafariLTD. I am working with them to make this project the best it can be.

Eiffel Tower: (Felt used: pastry golden taupe for the building, white for the clock face, elephant charcoal for the roofs and sparrow blue for the background) For Big Ben, I glued everything in place then stitched down the roofs and the sides of the clock square piece. On the tower, I made rows of back stitching with long, vertical stitches in between. I stitched black clock hands on, then stitched a square around it in the taupe floss. Using dark brown, I made little windows above the clock. Using gray, I made the points coming off of the roofs.
Animals of Europe for the Montessori Wall Map & Quietbook with Printables

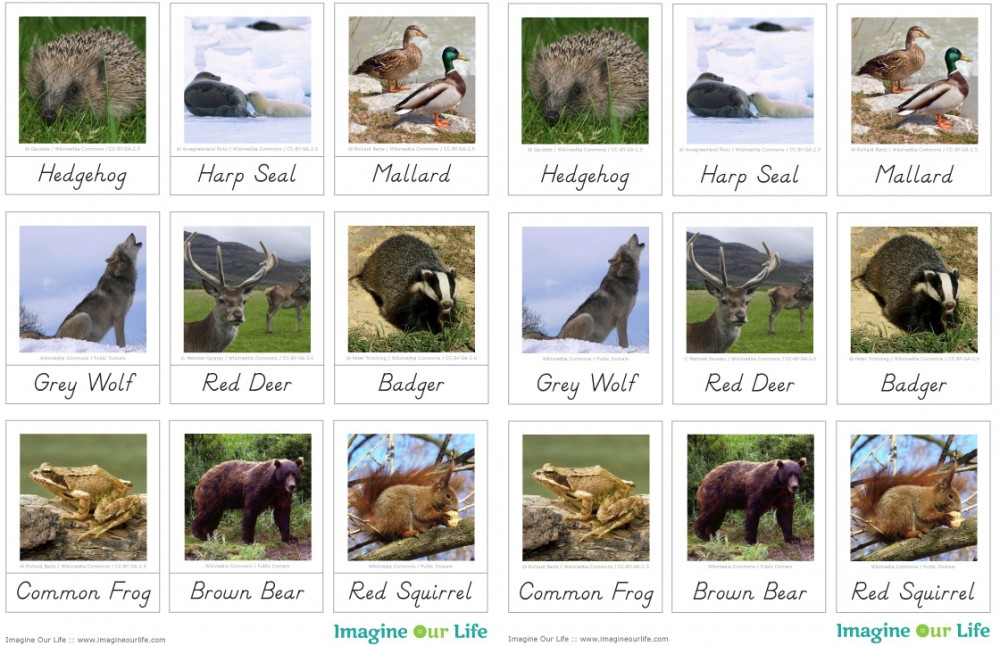
Montessori European Animals 3-Part Cards

The series of 3-Part cards I am making for this project is something that Jax will be using for many years in homeschool. I have been focusing on the animals in these posts, but at the end of the project I will make a set featuring all the landmarks we sewed. Eventually, we will expand our collection of cards even more to include cultures, more landmarks, and so much more. Three part cards are extremely flexible learning tools.
 Animals of Europe for the Montessori Wall Map & Quietbook with Printables

Click here to download my free pdf file to make your own animals of Europe cards. To make mine, I cut them out, glued them to red construction paper (to match Europe’s Montessori color) then laminated them. I use this laminator and I’ve been very happy with it. It makes everything so shiny and strong! My photos come out slightly faded from the printer (I use normal paper) but turn gorgeous after lamination. (Quick tip: Add a dab of glue stick on the back of your pieces before you place them in the lamination pouch to keep them from sliding around as you feed it through the machine.)
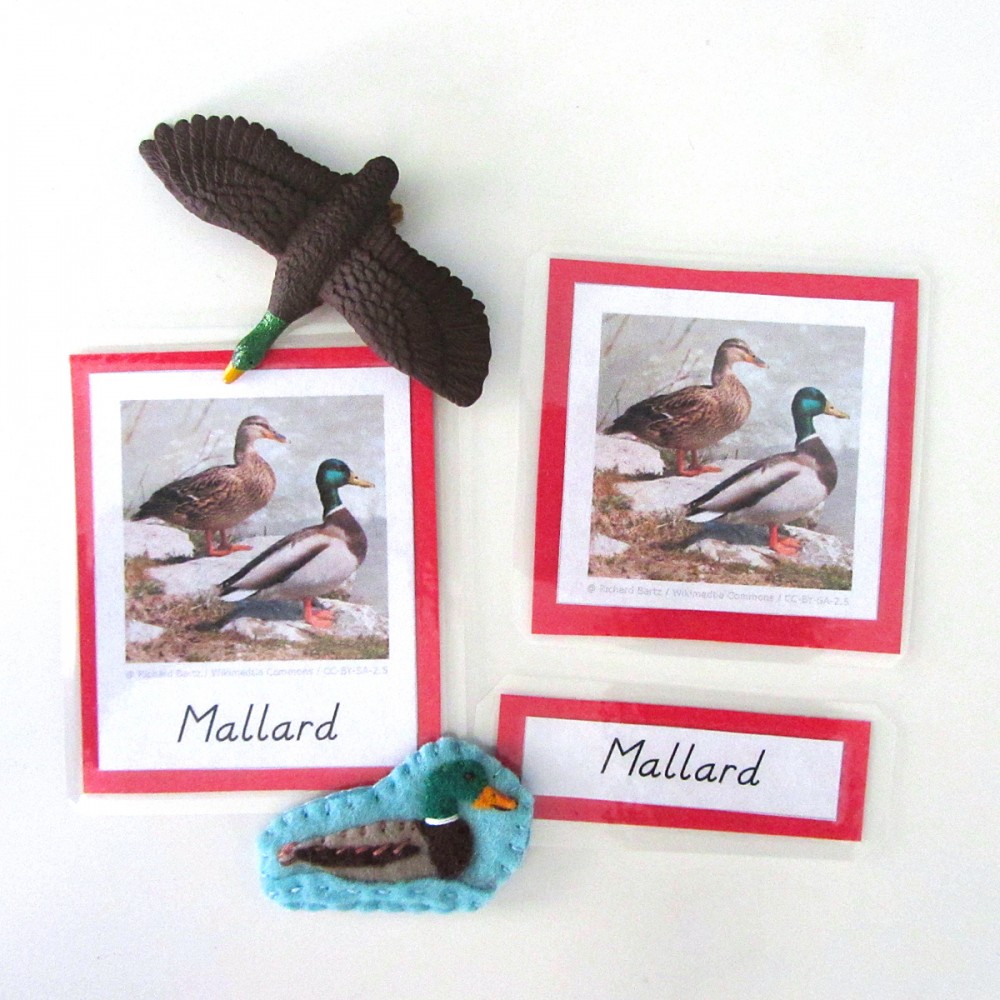
Animals of Europe for the Montessori Wall Map & Quietbook with Printables

Our main way of using the cards for now is to pull out our SafariLTD’s TOOB figurines and  match them to the pictures. We like to watch short videos about an animal, then study some pictures and draw our own. The TOOBs we used for these animal cards are: River TOOB (mallard), Arctic Toob (harp seal, wolf – which is actually a husky!) and Pets TOOB (hedgehog).

SafariLTD kindly provided the World Landmark TOOB and the Around the World TOOB for this continent. We are working with them to make this project the best is can be!
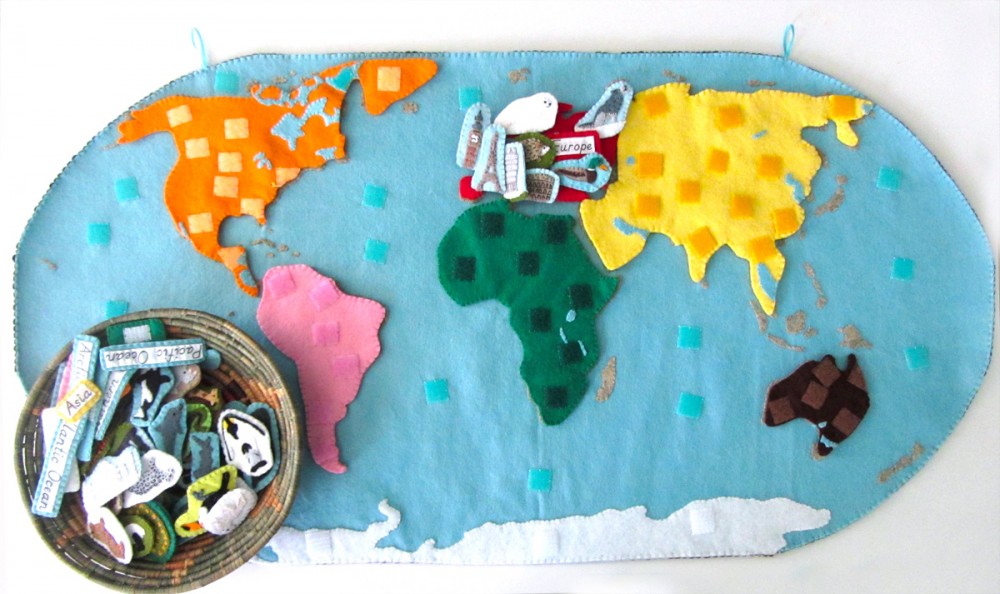
Animals of Europe for the Montessori Wall Map & Quietbook with Printables

I know many of you are sewing along (or plan to after the holidays!) If you are, stop by my Instagram @iolstephanie and leave a comment on one of my photos (I can’t see your photo if it you are private, but I can request to follow you temporarily if you leave a comment on mine about it) or share photos on Facebook. You can also email me. I love seeing what others make from my patterns!
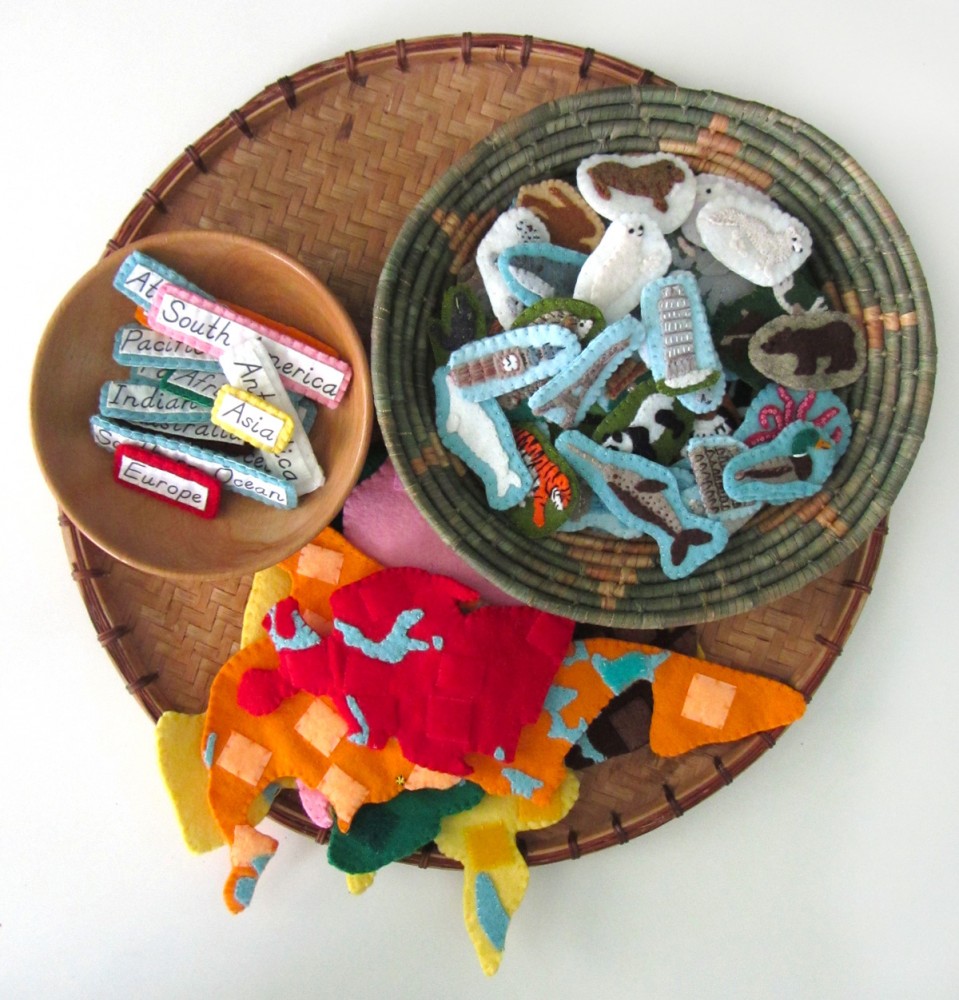
Animals of Europe for the Montessori Wall Map & Quietbook with Printables

Please be sure to visit the other ideas featured on Montessori Monday. There are many great links!

Montessori Monday

Fruit and Vegetable Word Puzzles

Fruit and Vegetable Word Puzzles

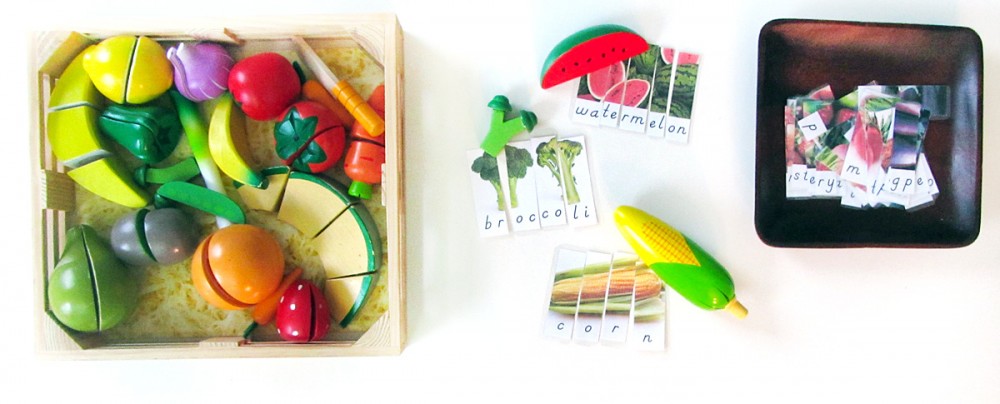
I love making homeschool materials for Jax with bright, colorful photos. I normally make Montessori-style 3-part cards: One card with a photo and a label, one card with just a photo and one with just the label.

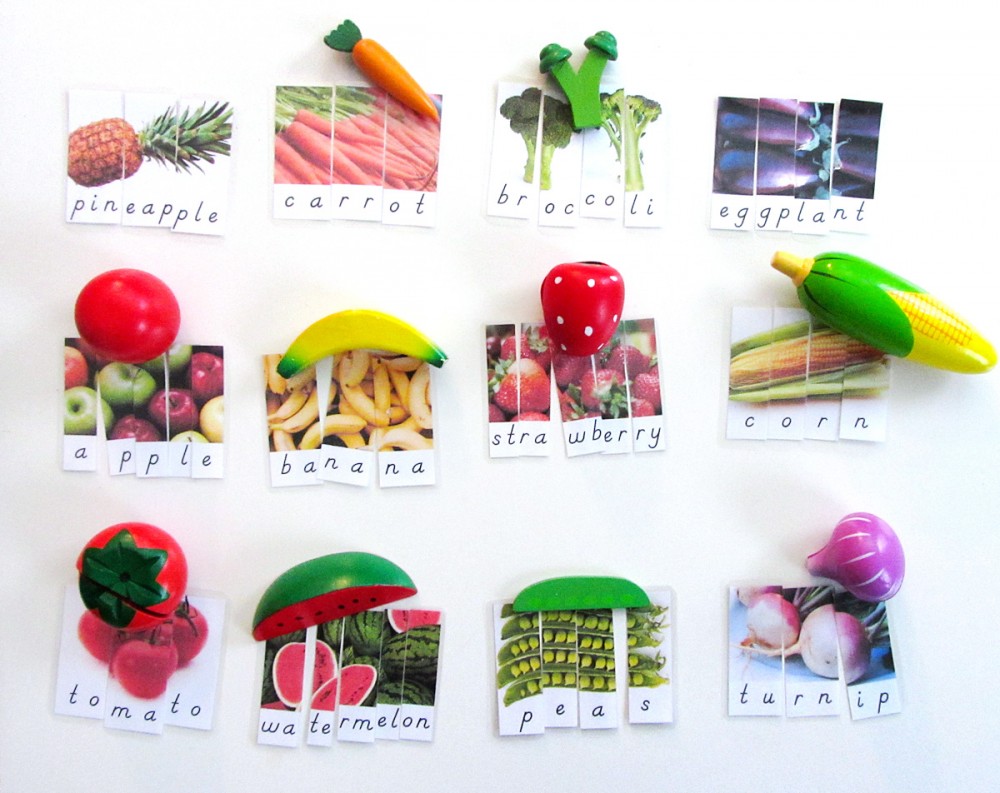
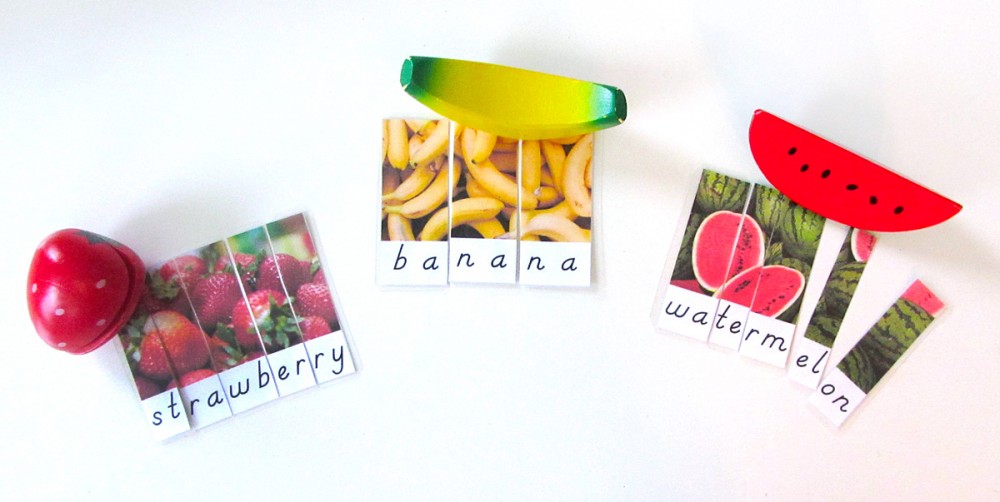
Lately Jax hasn’t been quite as drawn to them, so I decided to change things up. I’m starting a mini fruits and vegetables unit, so I put together these beautiful photo and word puzzles.

Fruit and Vegetable Word Puzzles

Fruit & Veggie Word Puzzles

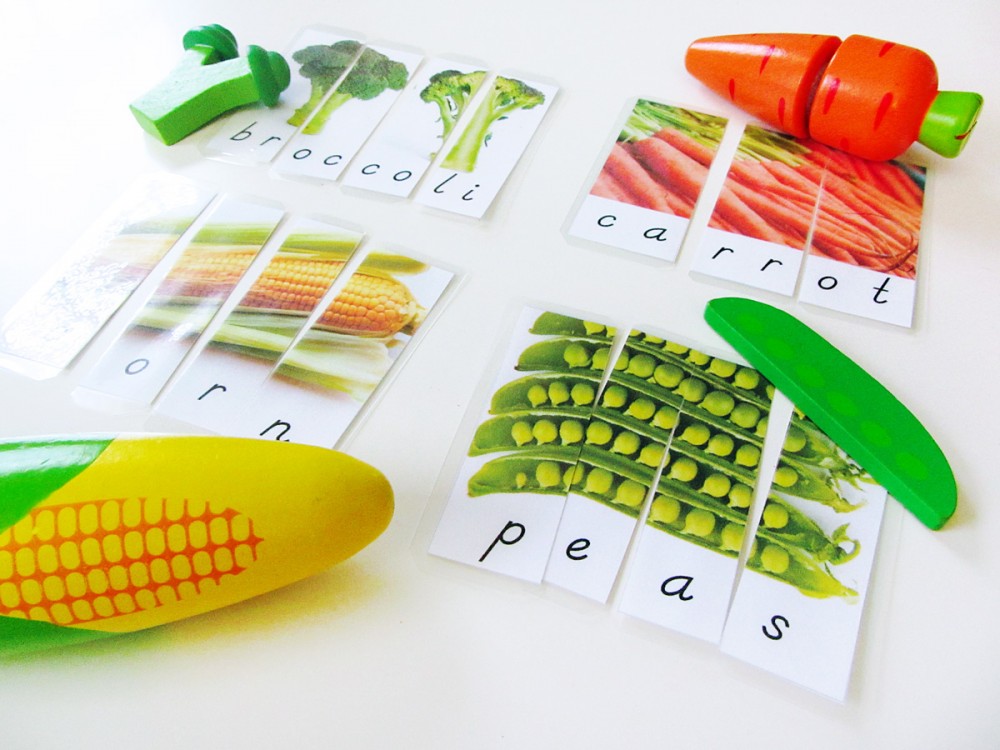
To create the puzzles, I printed them on normal paper. You could use card stock for added strength. I cut out each puzzle, but left the pieces together before running them through the laminator. (I have this one, and I love it!)

Here’s a quick tip for when you have a lot of little pieces to laminate: a little dot of glue stick on the back of each item will keep everything straight as you run them through the machine. This has saved me a lot of reprints! It’s just the worst when things slide around and overlap.

Once laminated, I cut each puzzle into individual pieces. I normally cut things prior to laminating in order to have a clear edge around all sides. But I wanted the puzzles to fit together without gaps.

Fruit and Vegetable Word Puzzles

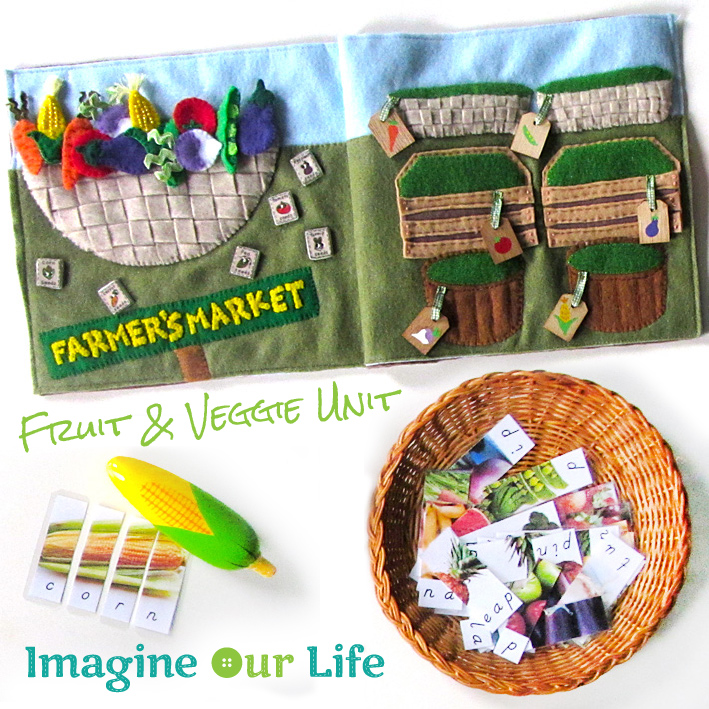
I am presenting three puzzles at a time, starting with them separated. Later on I can change them out or even mix a couple puzzles together for him to sort.

I’ve included some control versions of each puzzle without the cut lines and extra letter spacing.

Do you want to make your own? You can get the fruit and veggie word puzzle printable here.
Fruit and Vegetable Word Puzzles

Fruit and Vegetable Word Puzzles

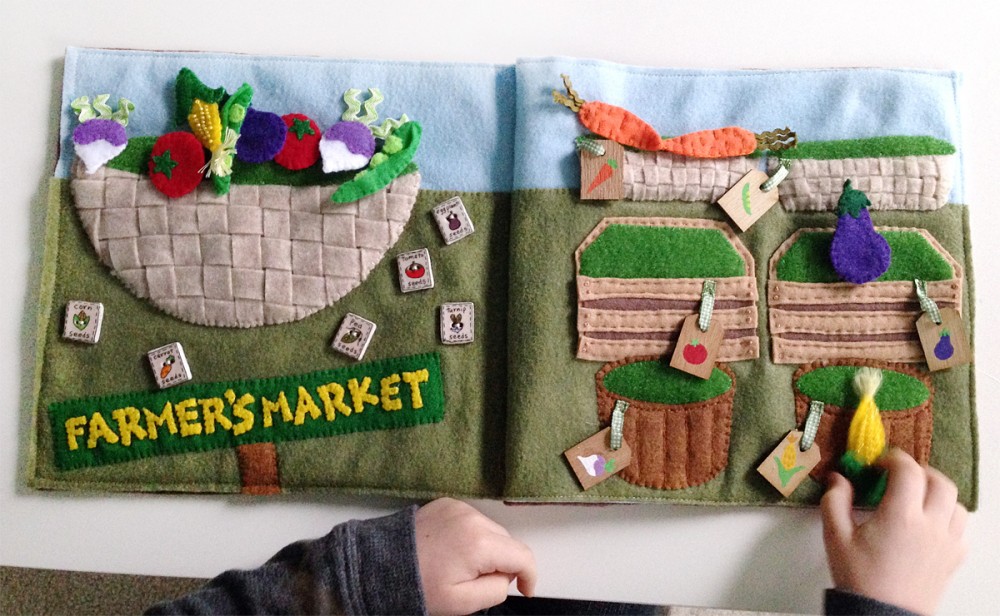
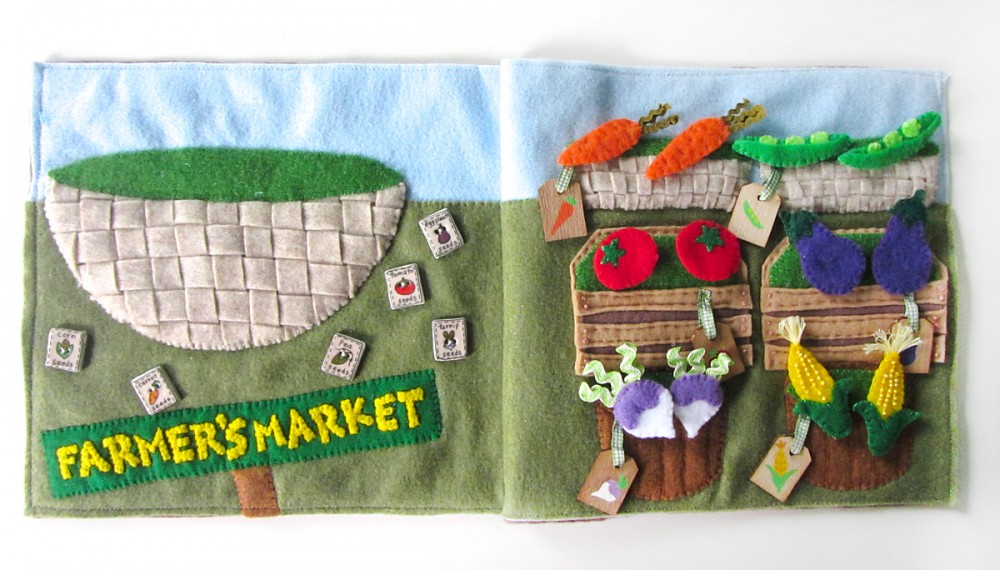
Farmer’s Market Matching

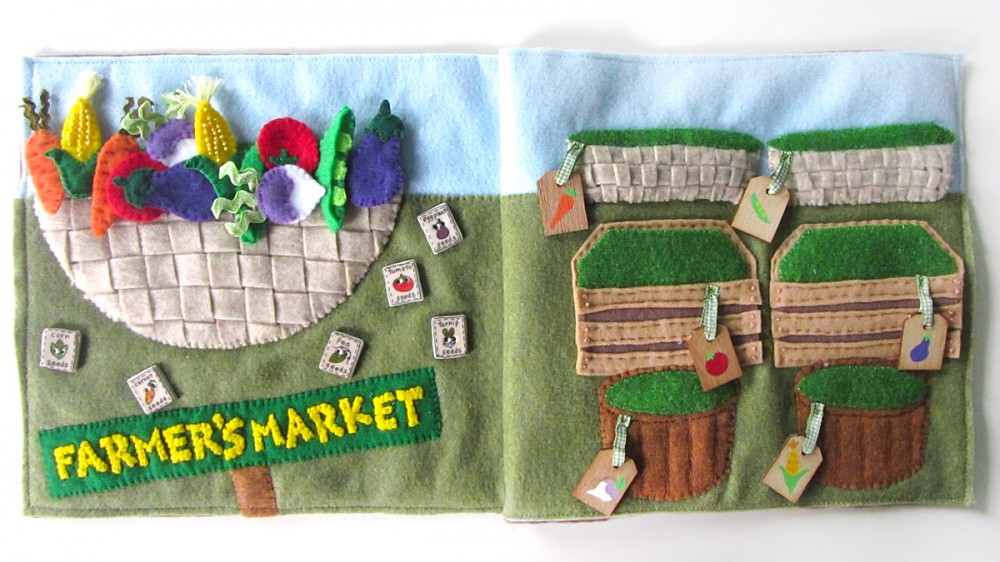
This farmer’s market matching activity is a quiet book page I made for Jax about a year ago. I love pulling quiet book pages out of the school closet when they match our current theme.
Fruit and Vegetable Word Puzzles

This page features a big basket of veggies (and fruit, if you want to get technical!) that need to be sorted into their proper bins and barrels in the farmer’s market. There are hand painted tags that Jax looks at to figure out which goes where. I made sure to include word puzzles in our printable that match the veggies in this activity, so they tie together.
Fruit and Vegetable Word Puzzles

If you’d like the free pattern to make your own farmer’s market quiet book page, you can find everything you need here.
Fruit and Vegetable Word Puzzles

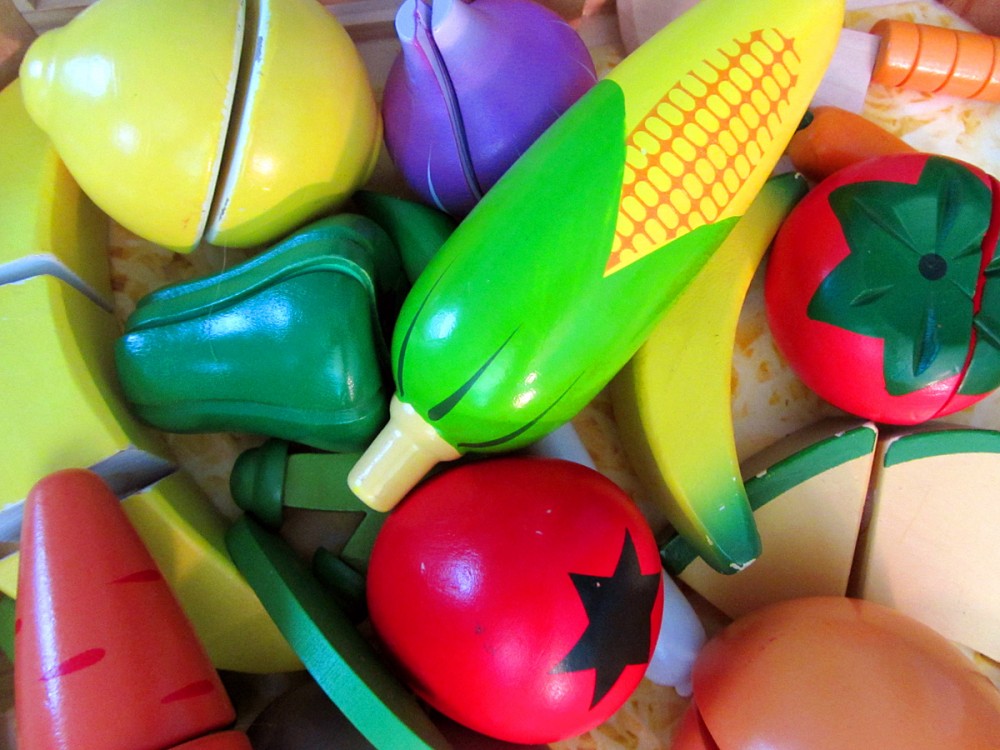
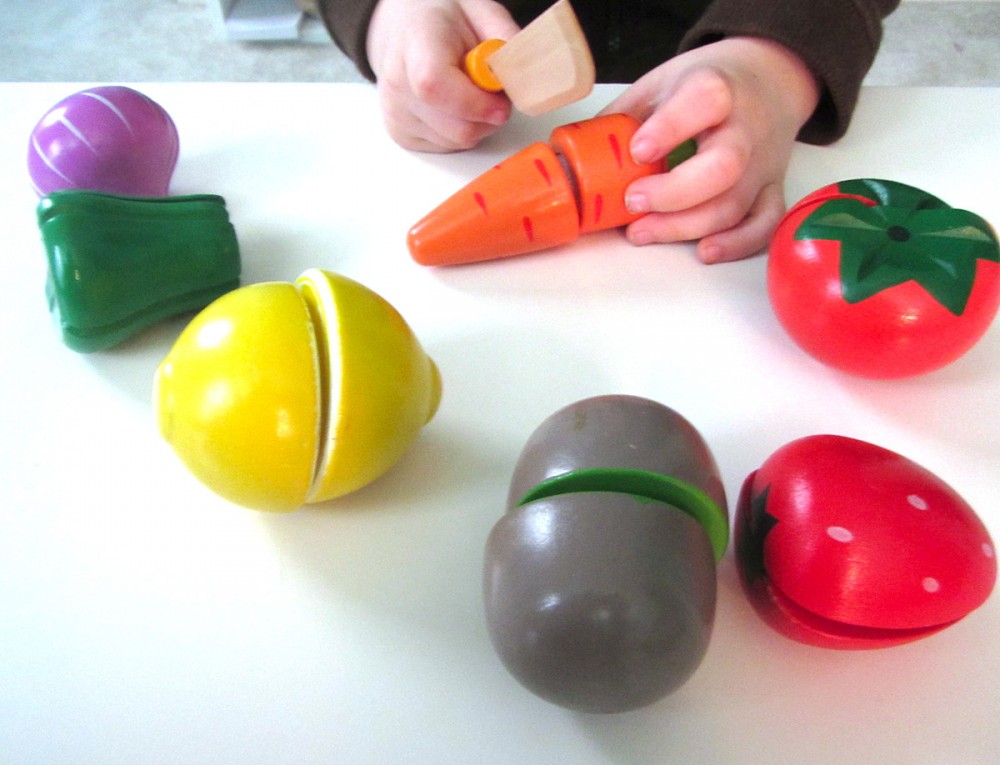
Fruit & Veggie Chopping

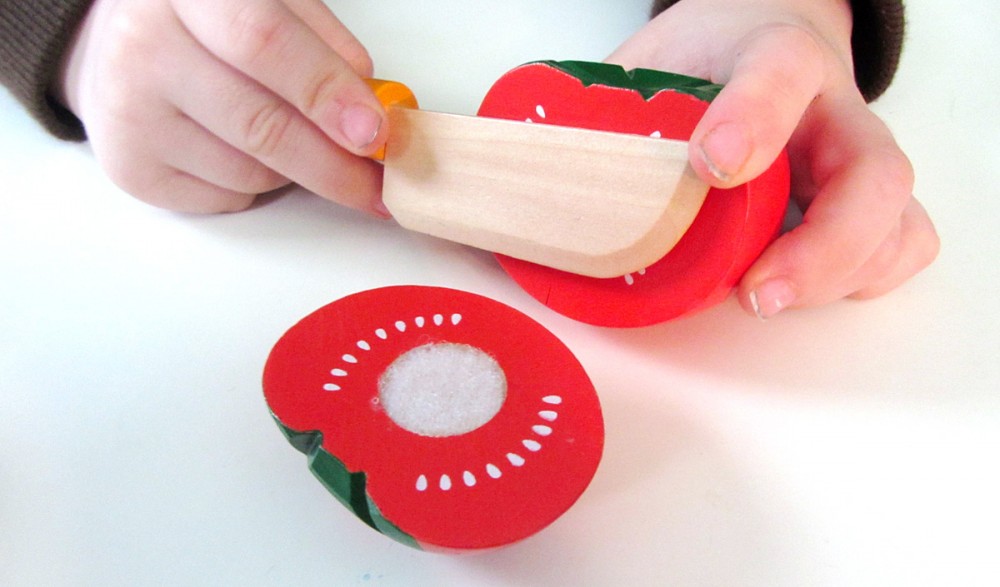
I’ve started letting Jax help chop his apples and cucumbers at lunchtime. This is a big part of Montessori for 3-year-olds. They really focus on Practical Life activities. Activities like chopping help with fine motor skills needed to grip a pencil and write. In addition to chopping real food at meal times, Jax has some fruit and veggie chopping toy sets.
Fruit and Vegetable Word Puzzles

We have the Melissa & Doug Deluxe Wooden Cutting Fruit Crate and the Hape Playfully Delicious Garden Vegetables Play Set. I really love the look of the Hape set. Can you believe I found that at the grocery store for $3.50?! I also used food from some of our other play sets to match our puzzles. Out broccoli came from this Deluxe Cookware Set. The peas are from the Melissa & Doug Stir Fry Slicing Set. That one is another chopping set.

Fruit and Vegetable Word Puzzles

Other Activities

We’ll be bringing out our fruit patterns and sorting pie. That pie is always a huge hit!

I really love a lot of the activities from this Farm unit by Stay At Home Educator, including the fruit sorting math and seed collage. Fantastic Fun and Learning has a lot of vegetable unit links. And check out the ideas and beautiful photos at Katherine Marie’s.

We have this really cute book that we read in preparation for a trip to an apple orchard. We’ve been making (and planning!) a lot of apple recipes, including apple pie and this apple cake.

Here is a Pinterest-ready photo for you!

Fruit and Vegetable Word Puzzles

It’s Montessori Monday! Be sure to check out all the other great homeschool ideas linked up throughout the week!

Montessori Monday

Preschool Handbells: New-Sew Felt Musical Notes and Printables

Preschool Handbells: New-Sew Felt Musical Notes and Printables

Jax loves music. He LOVES it. If any song comes on, whether he’s heard it before or not, he is singing along. I’ve been collecting musical instruments for him, mainly from the thrift store. He loves to ask me to put music on for him while he “plays” along on his guitar or drums.

Arts are important in our family. I grew up in music and art. I have a Bachelors in Art Studio. My husband played in bands growing up and deejay-ed for years. We definitely want Jax to have strong roots in the arts from an early age.

Preschool Handbells: New-Sew Felt Musical Notes and Printables

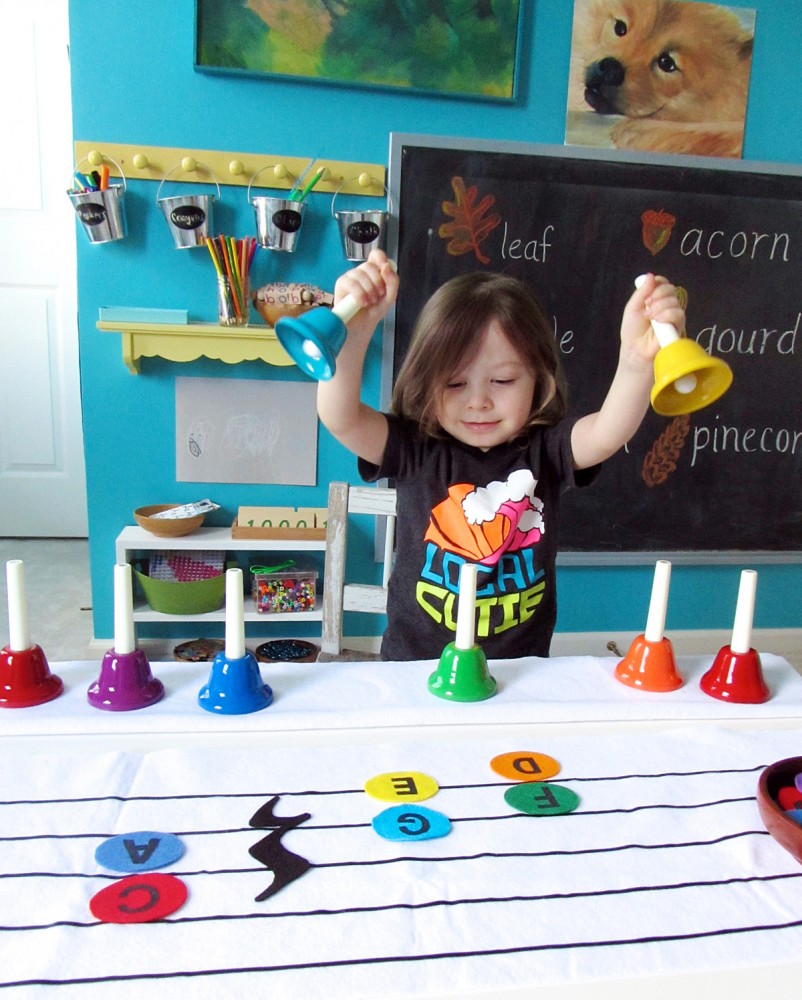
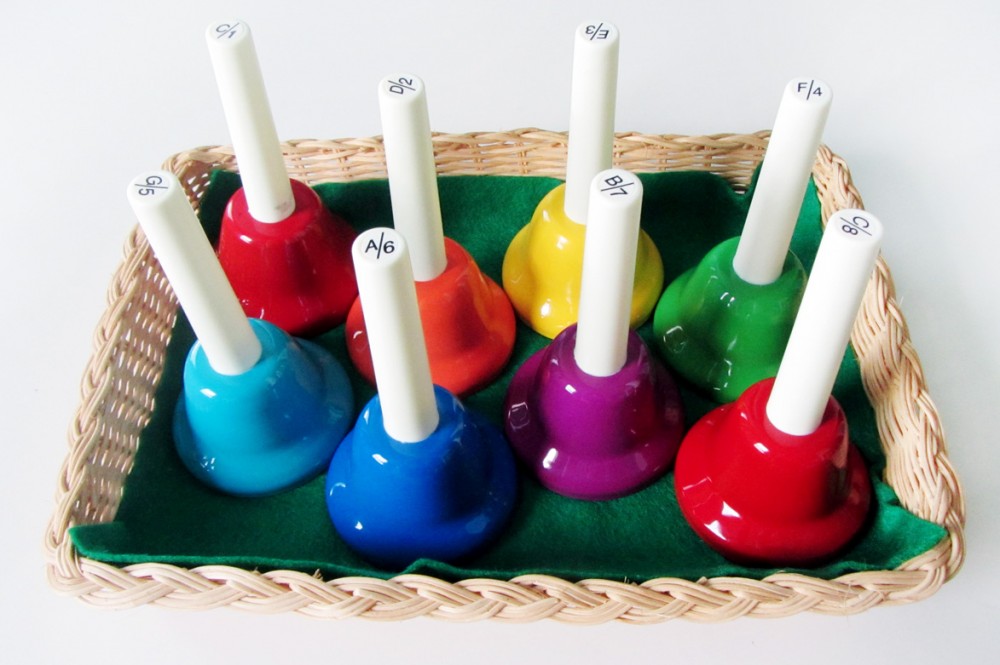
Since Jax is only 3.5 years old, I needed to think of both his manual dexterity and his emotional maturity right now when planning our music homeschool unit. I needed something that he could use easily so that the frustration of not being able to make a note correctly was not a concern. I chose handbells. They are available in color-coded educational sets aimed to help children learn which bell plays which note. Music + Rainbows? Jax’s idea of heaven!

There are other choices that still let you start with color-coded notes (just make sure you are happy with the colors the instrument uses!) like a xylophone or Boomwhackers.

Preschool Handbells: New-Sew Felt Musical Notes and Printables

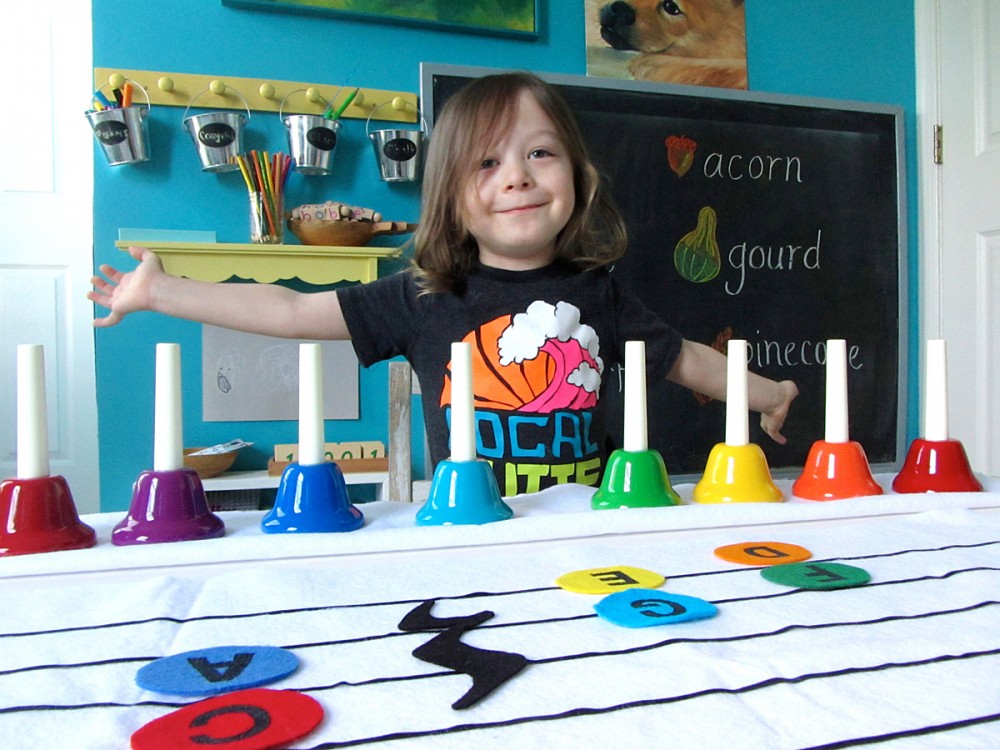
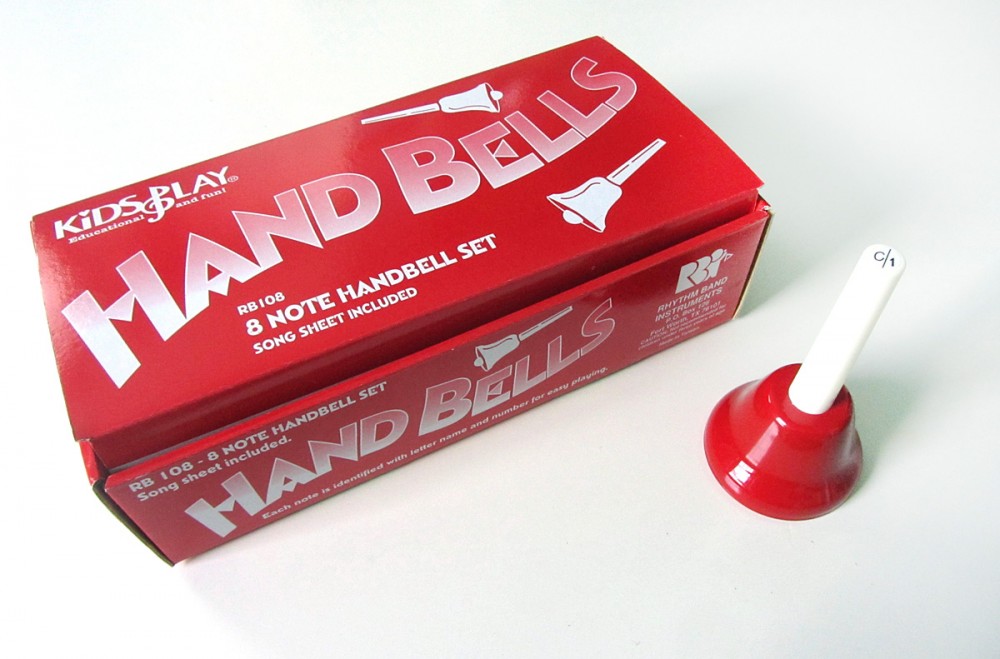
Thanks to my aunt, who values how dear music is to our family, Jax got his started handbell set. I chose the Kids Play Rhythm Band 8 Note Handbell Set because add-on sets were available should we need them in the future. They also use fairly standard colors.

Preschool Handbells: New-Sew Felt Musical Notes and Printables

Introducing Handbells

Preschool Handbells: New-Sew Felt Musical Notes and PrintablesWe started our music unit with some 3-part cards introducing musical instruments. Jax already recognized most of them, so it was mainly a review.

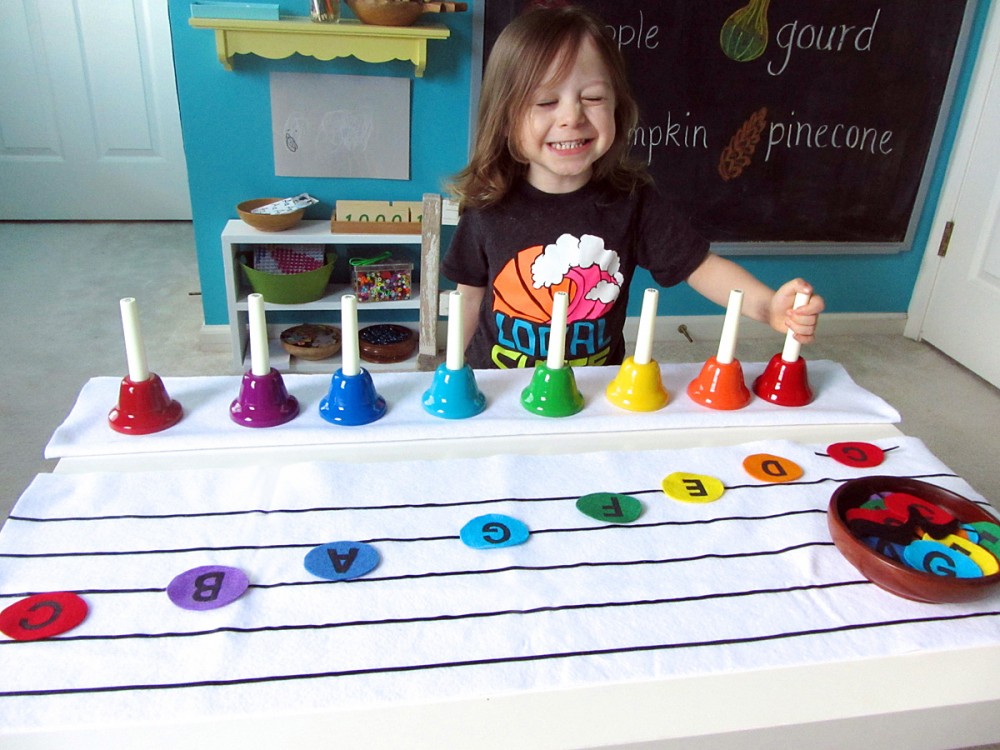
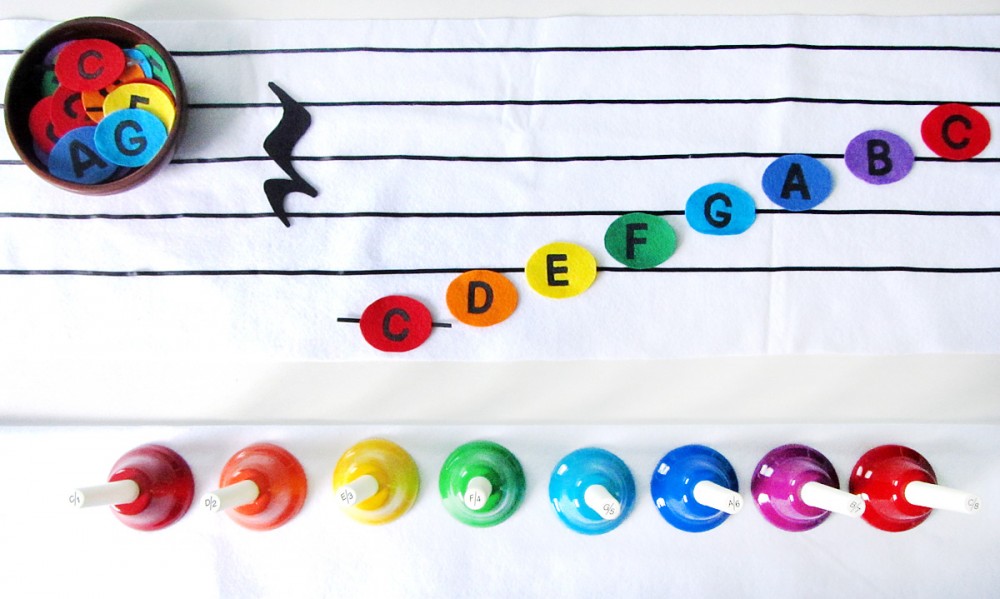
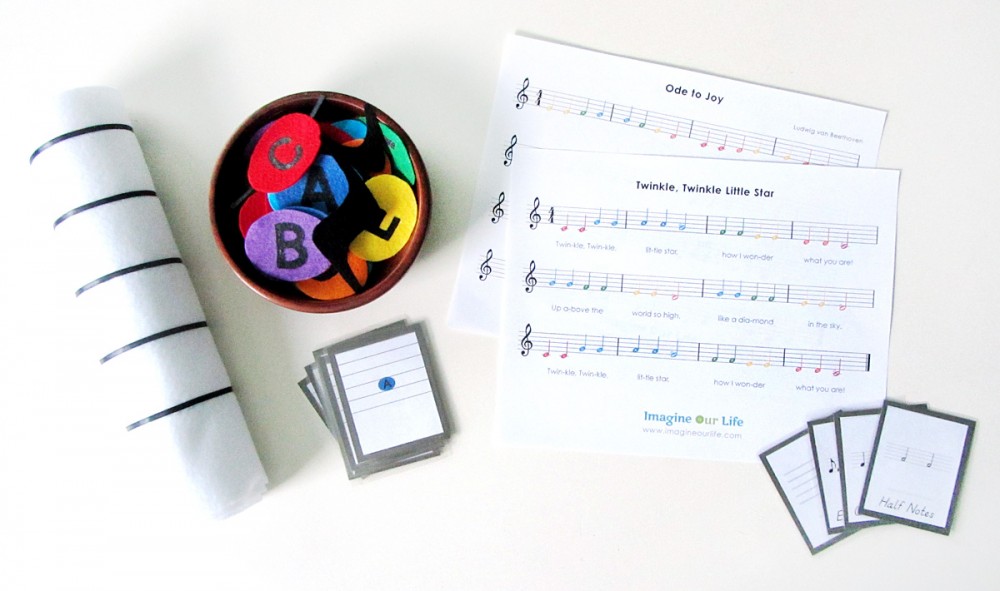
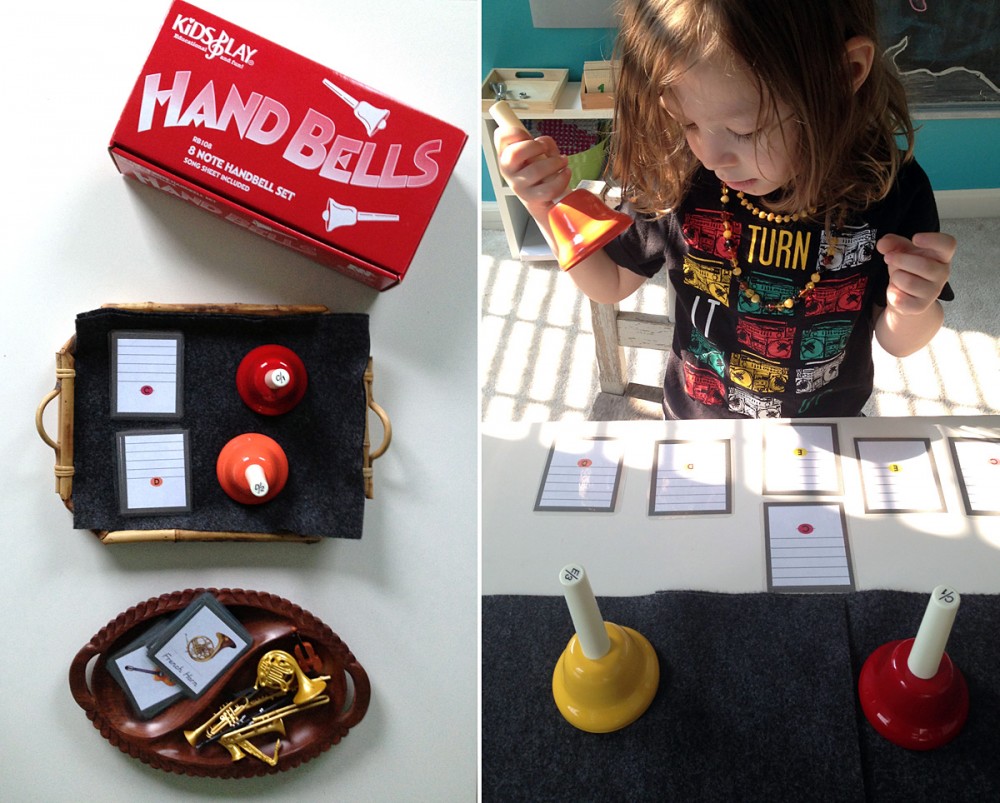
When our bells arrived, I started by presenting two bells on a tray with a mat and matching cards showing where each bell’s note is on the music staff. I showed him how the bells’ colors and letters match the cards, then we practiced sounding the bells and switching between the two notes. We moved on to playing the note on the card I held up. He had no problems, so I let him have a third bell. With all three matching note cards, we made patterns to play.

We continued on this way, earning a new bell about once a week. It took us about 2 months to work up to the full set of 8 bells. (He actually earned the last one the day we took photos.) I always include a rolled up felt mat on the handbell tray. Jax knows we have to unroll it and place it on the table for the bells. When playing the handbells, setting them on the mat dampens (cuts off) the ring. We started with two sheets of felt, but now use a long strip the width of our table.

Exploring with Handbells

There are a lot of ways your child can explore music and sound with handbells. Some of the things we’ve done are:

Preschool Handbells: New-Sew Felt Musical Notes and Printables

• I showed him that he could play two bells at once. We noted that it doesn’t sound good to play two bells that are next to each other at the same time. The discordance was obvious to him, but he hasn’t quite connected yet that skipping a bell when playing two at once sounds better. This is something I encourage him to explore.

Preschool Handbells: New-Sew Felt Musical Notes and Printables

• We play find the bell – I ask him for a certain color/number/letter note and he plays it. When I ask for the lower C bell, I call it “middle C” (named for its position on a piano. The higher C is our newest bell, and I will be calling it “treble C”. You can also hold up the musical note cards and have them play the right bell.

Preschool Handbells: New-Sew Felt Musical Notes and Printables

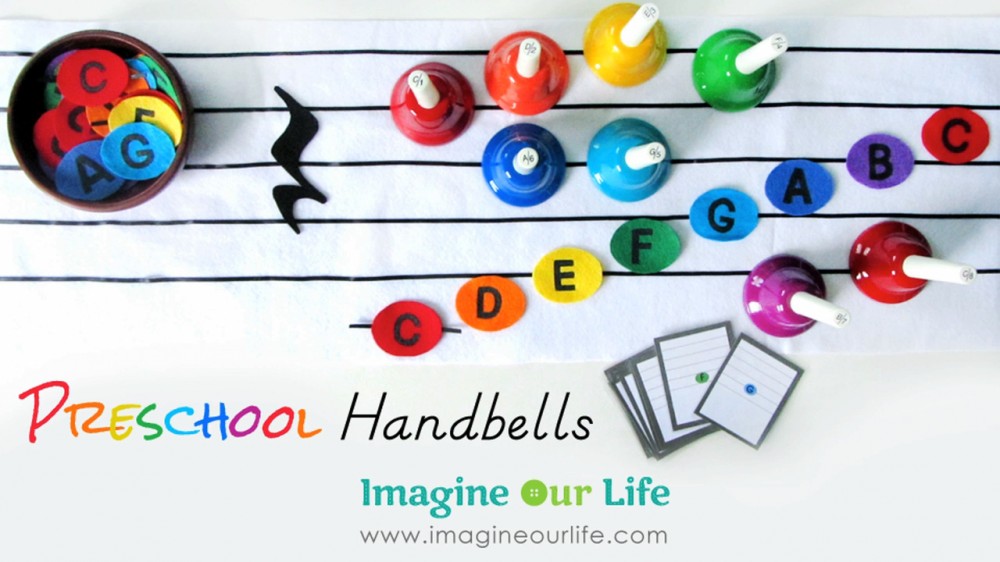
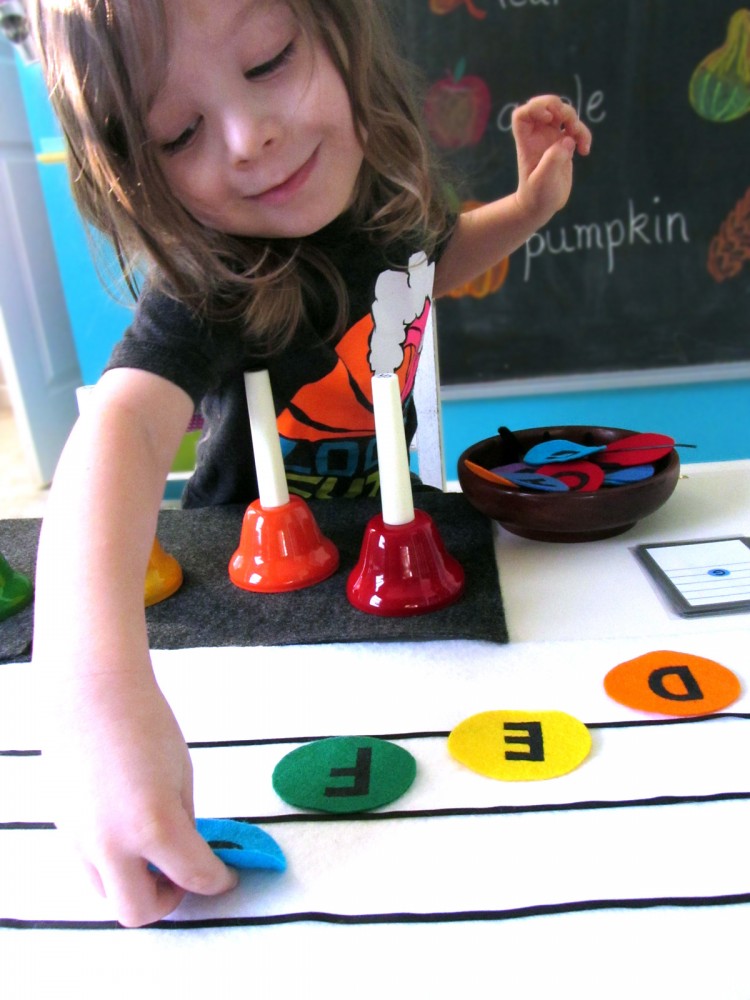
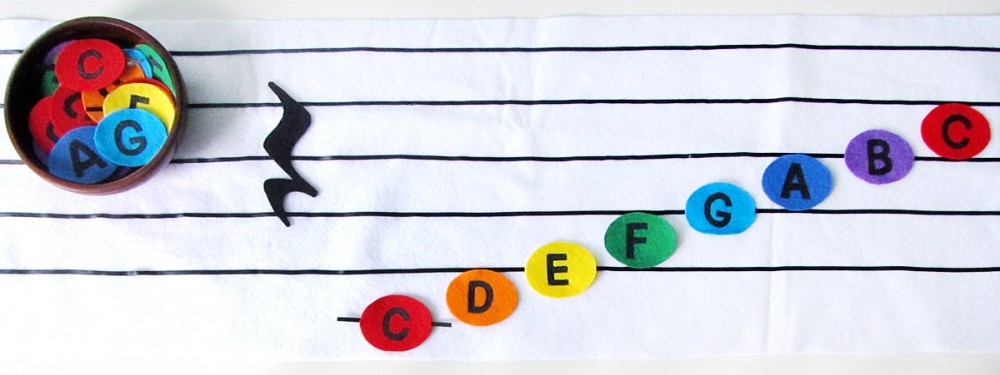
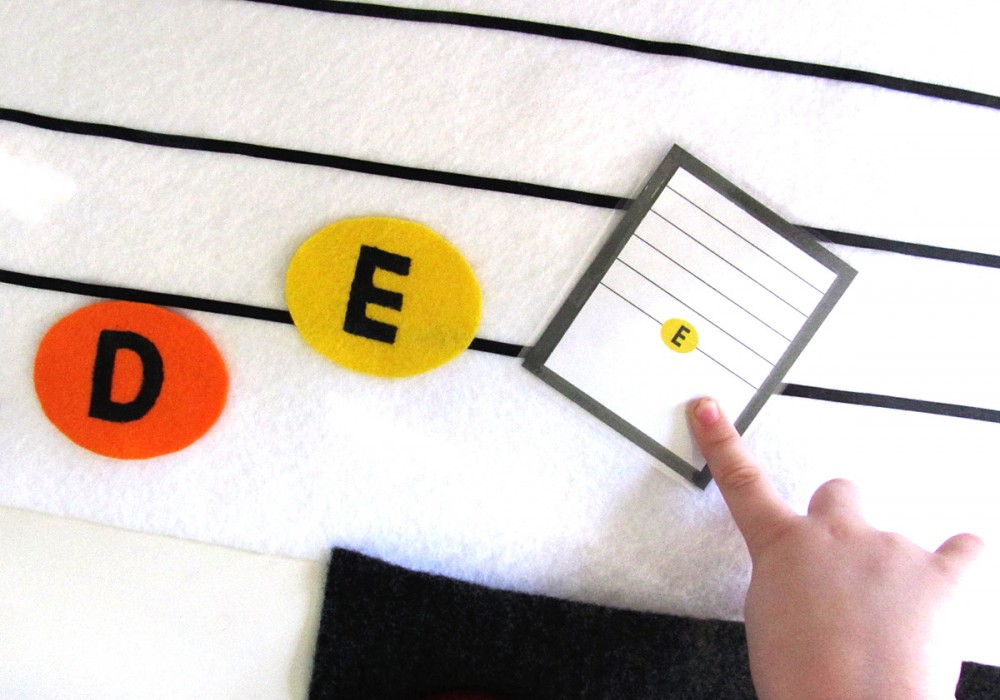
• Composing music can be done by preschoolers! Taking a cue from Montessori’s moveable alphabet, you can have the notes ready for your child to place on the music staff. Using control cards to help them place them on the correct line, they can arrange some notes and play their composition. My music notes are made of felt and involved no sewing for once!

Preschool Handbells: New-Sew Felt Musical Notes and Printables

Preschool Handbells: New-Sew Felt Musical Notes and PrintablesNew-Sew Felt Music Staff

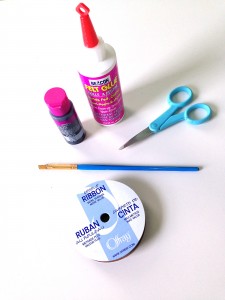
Materials:

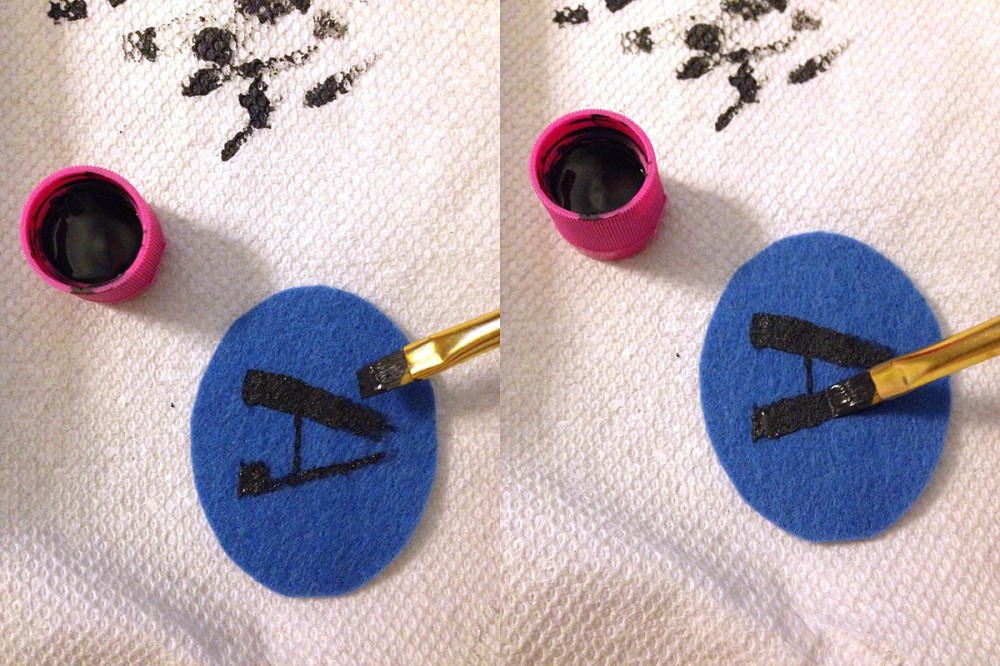
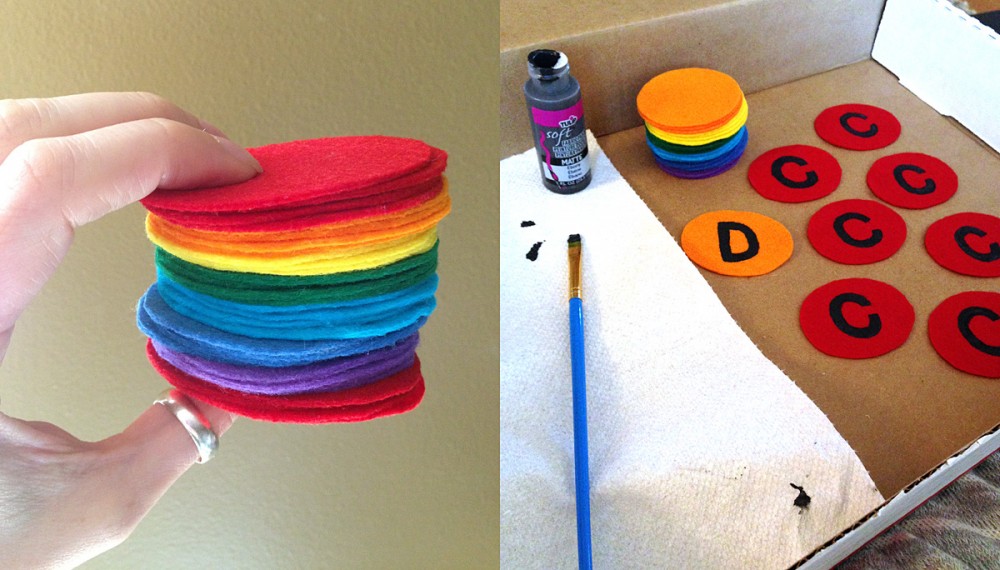
Start by cutting out your ovals. You need 8 red and 4 each of orange, yellow, green, aqua, indigo and violet. Using the narrow part of your paintbrush, sketch your letter onto the oval with fabric paint. By starting thin, you can adjust the size of your final letter: if you drew it too small, paint the final thick lines towards the outside of your sketch. If you drew it too big, paint the final lines towards the inside. I used the full width of my size 8 flat brush to make the final painted letters. This kept the lines a consistent width.

Preschool Handbells: New-Sew Felt Musical Notes and Printables

Take 4 of your red C’s and cut strips of black ribbon an inch wider than the oval. Coat the entire top of the ribbons trip with felt glue (including the raw edges to keep them from fraying.) Center the oval on top, press it down and allow it to dry. This adds ledger lines to the middle C’s that go below the staff.

Preschool Handbells: New-Sew Felt Musical Notes and Printables

Cut out as many rests as you’d like. I have two quarter rests for now. I’ve included the rectangle needed to make half and whole rests.

To make the staff, cut a 12″ strip out of your 36″ wide felt. You can adjust the width to suit your needs. 36″ is the width of our school table. You could even use the full 36″ x 36″ felt piece and make 3 rows of staff lines if you have room to lay or hang something that large. Using the spacing guide, glue 5 strips of ribbon down to the felt and allow it to dry before use. make sure you allow enough room at the bottom for middle C’s ledger line to be properly spaced.

Preschool Handbells: New-Sew Felt Musical Notes and Printables

For now I am presenting the notes in a bowl with matching control cards and the rolled up staff chart. I think we will do some games in the future with matching and sorting the notes to each other and to the control cards.

Preschool Handbells: New-Sew Felt Musical Notes and Printables

Preschool Handbells Music Unit Printables

I have a lot of printables for this unit – many I haven’t even started using yet. Before I use them, each printable will get laminated. I also like to mount my 3-part cards to colored paper or card stock prior to laminating.

Preschool Handbells: New-Sew Felt Musical Notes and Printables

Colored Music Note Control Cards

These cards show the position of each of the notes used in the 8 note handbell set. They are color coded to match the bells. Later I will make a new set that do not have color. Grab the free printable here. (This file was updated on 01/16/14 to fix the wrongly-positioned B. You can also get a page with just the fixed B cards here.)

Music Symbol 3-Part Cards

This is a set of Montessori-style 3-part cards that cover basic music symbols. So far I’ve only given him a few of the cards to start getting used to seeing. You can download the free printable here.

Preschool Handbells: New-Sew Felt Musical Notes and Printables

Twinkle, Twinkle & Ode to Joy

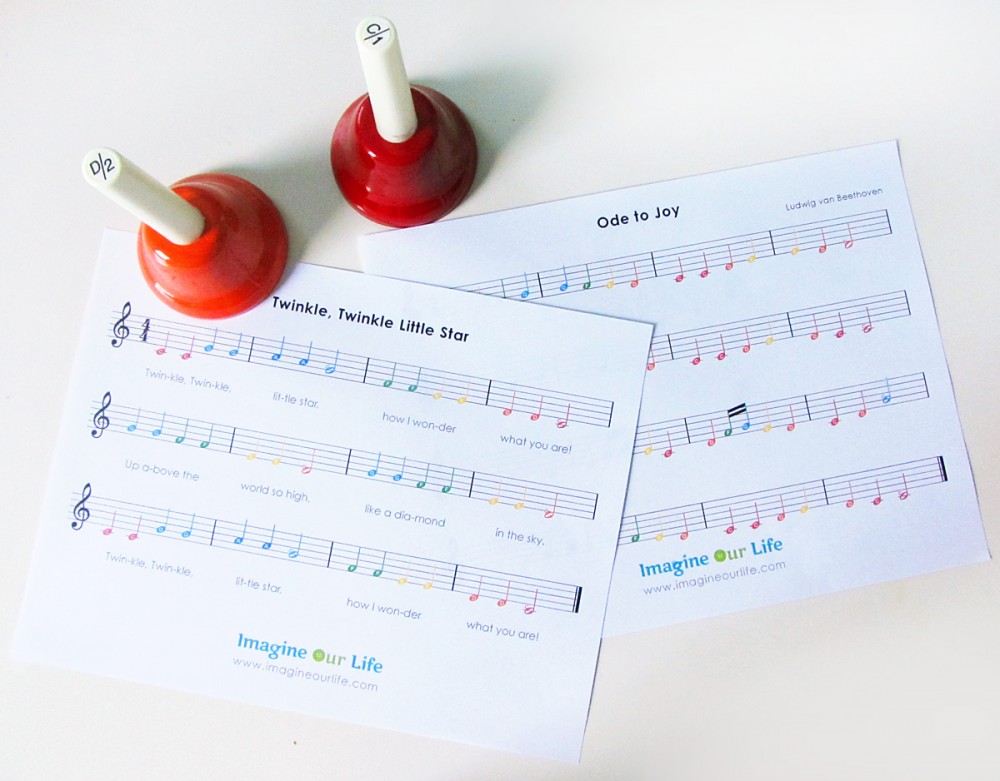
I wrote up the music to two fairly easy songs that can be played with the first 6 notes in the handbell set. For now, I play them for him and we use them as reference to set up his felt staff so Jax can play small excerpts. You can grab the song sheets here.

Preschool Handbells: New-Sew Felt Musical Notes and Printables

We are having so much fun with our music unit! Have you done any music homeschool lessons with your preschooler? I’m excited to see where Jax goes with music as he grows older.

Here is a Pinterest ready picture for you!

Preschool Handbells: New-Sew Felt Musical Notes and Printables

Visit Montessori Monday on Living Montessori Now for more great homeschool ideas!

Montessori Monday

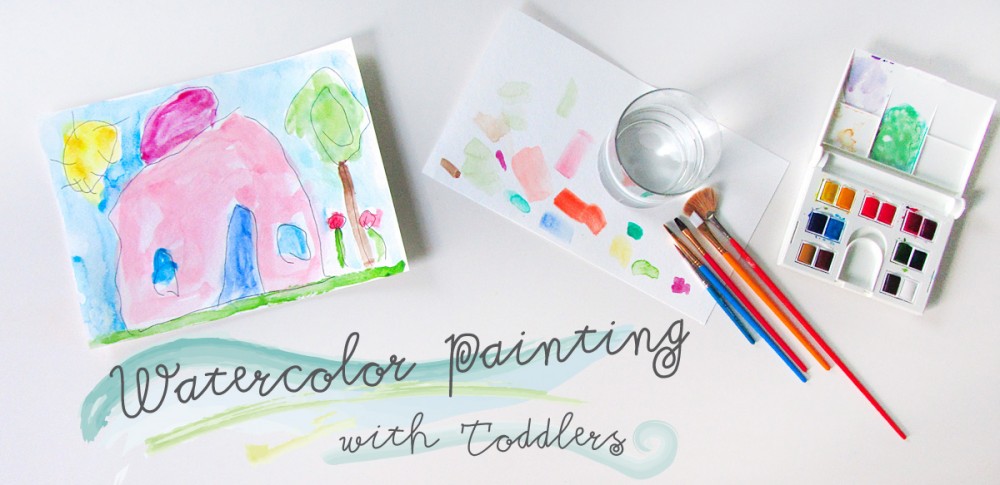
Watercolor Painting with Toddlers

Watercolor Painting with Toddlers

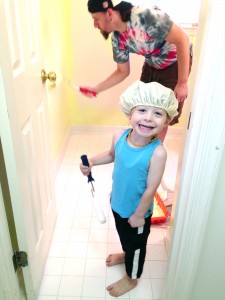
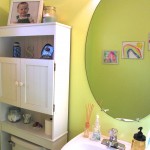
This past weekend was a 3-day holiday weekend here in the U.S. thanks to Labor Day. My husband announced we would be painting our powder room. I love color in my house, so I he didn’t have to ask twice. But of course I never DIY something halfway, so I was immediately brainstorming ways to involve Jax in the decorating.

Watercolor Painting with Toddlers  IMG_2918

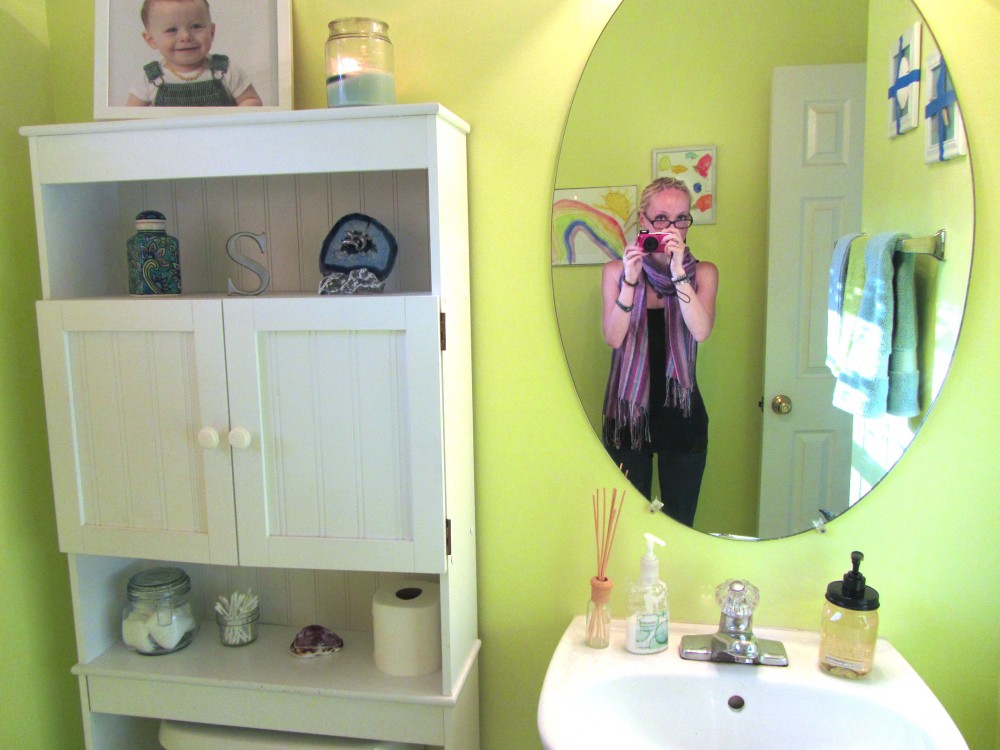
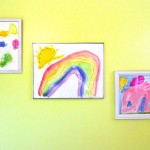
Once we chose a lovely spring green called Pear by Behr, I was inspired to try watercolor painting with my toddler! The bright citrus color just begged for some sweet watercolor paintings to be hung on it! Don’t be afraid to try watercolors. It is great medium for young kids!

Watercolor Painting with Toddlers

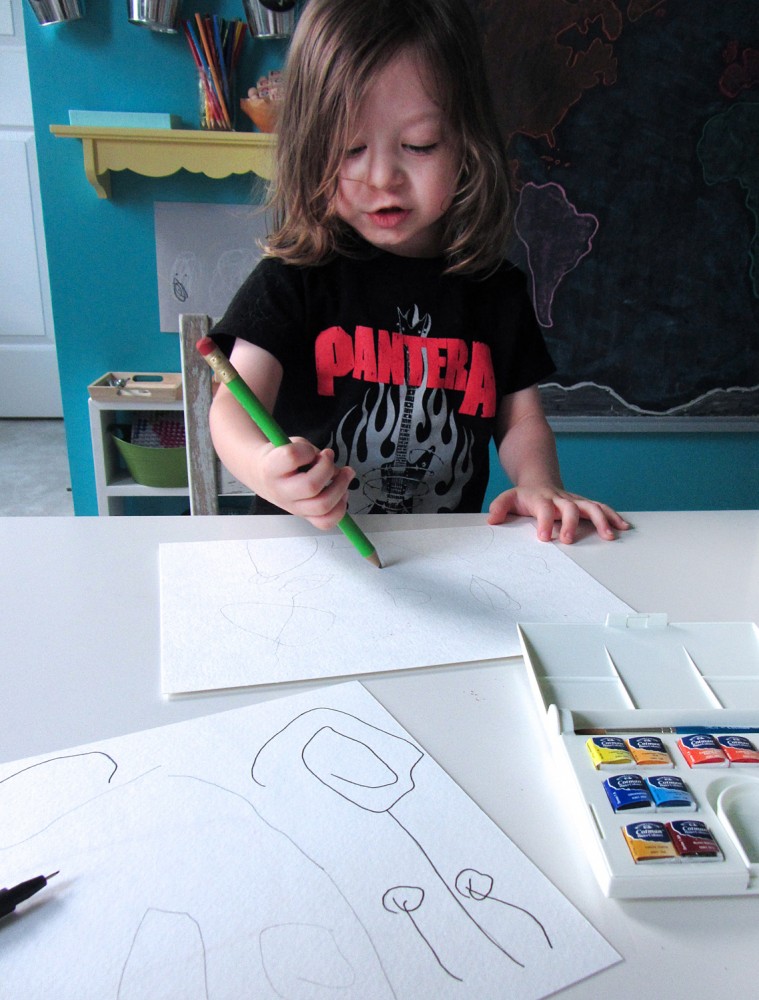
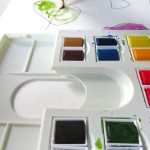
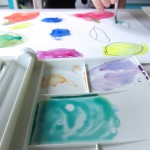
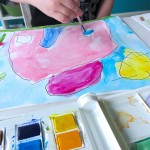
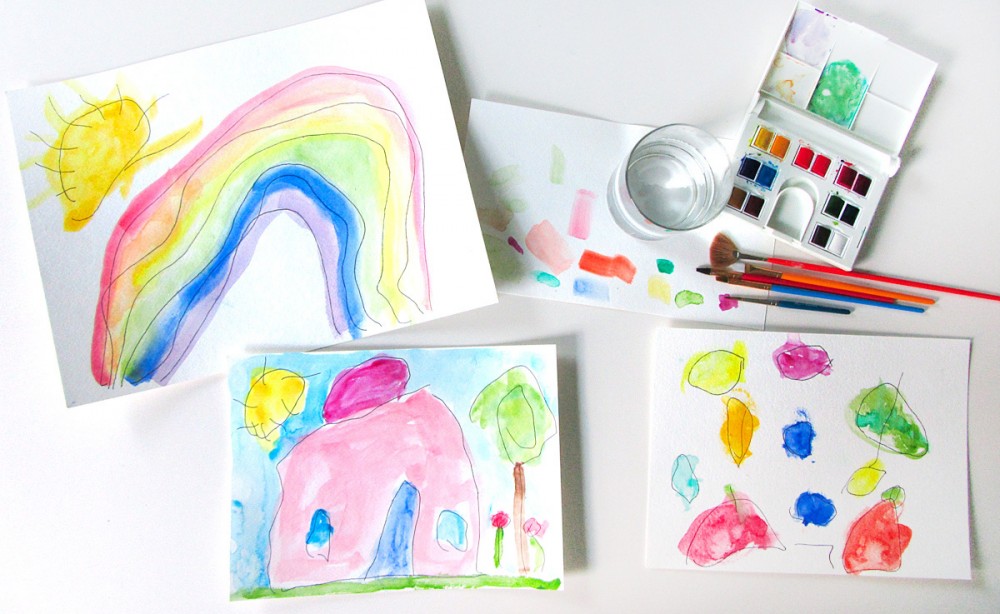
The materials you need are: watercolor paper, watercolor paints, a pencil and eraser and an art pen. I have a fine art degree, so I bought nicer watercolor paints that I could add to my fine art supplies as well as use with Jax. Mine is the Cotman Watercolor Compact Set. I have this 11″ X 15″ Watercolor Paper Pad that was 40% off at the craft store for back-to-school. I used a Faber-Castell Pitt Artists’ Pen, also from the craft store (with a 50% off coupon.) I also used a bunch of old thrift and dollar store picture frames and a can of white spray paint.

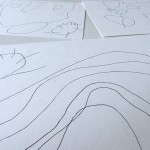
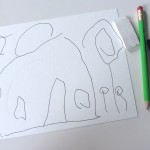
Start by having your little one draw pictures on the watercolor paper with a pencil. Remind them they don’t need to color anything in at that point. We are just making the outlines. I LOVE that Jax loves to draw actual pictures now instead of just rainbows and scribbles. (He still loves drawing rainbows, though!)

Watercolor Painting with Toddlers

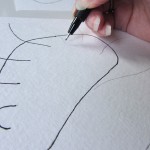
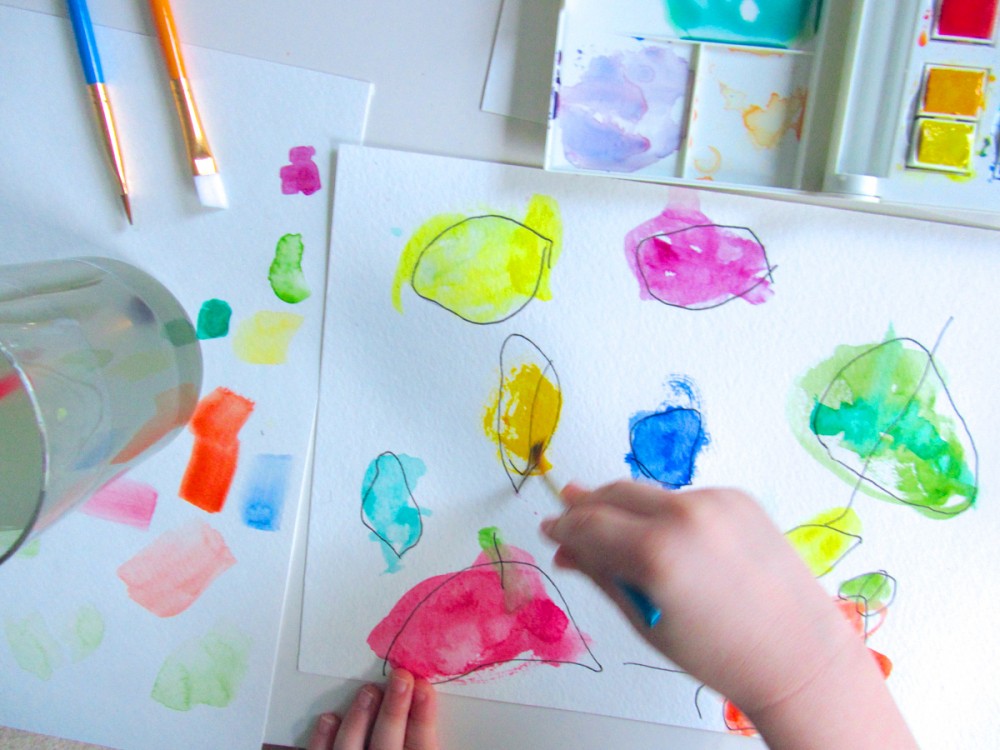
While they are drawing their second picture, trace their pencil lines with the waterproof artist’s pen. Jax got ahead of me to I send him to the school shelves to choose an activity to do until I finished tracing. When you are finished tracing and the ink is dry, erase the pencil lines.

And then comes the fun part! Painting!

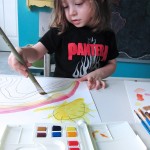
Painting his rainbow.

Painting his rainbow.

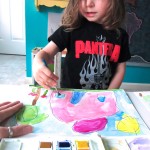
I started out loading and cleaning Jax’s brushes for him. I showed him how he could get extra water on his brush to spread the paint more if it starts to get dry. We explored the different marks each brush made.

I let him do some careful paint loading, and also let him help mix colors in the tray. When he painted his house scene, he asked that we “work together” on the sky, so I helped fill it in. I think he was worried he’d mess it up.

Watercolor Painting with Toddlers

Jax really enjoyed painting!

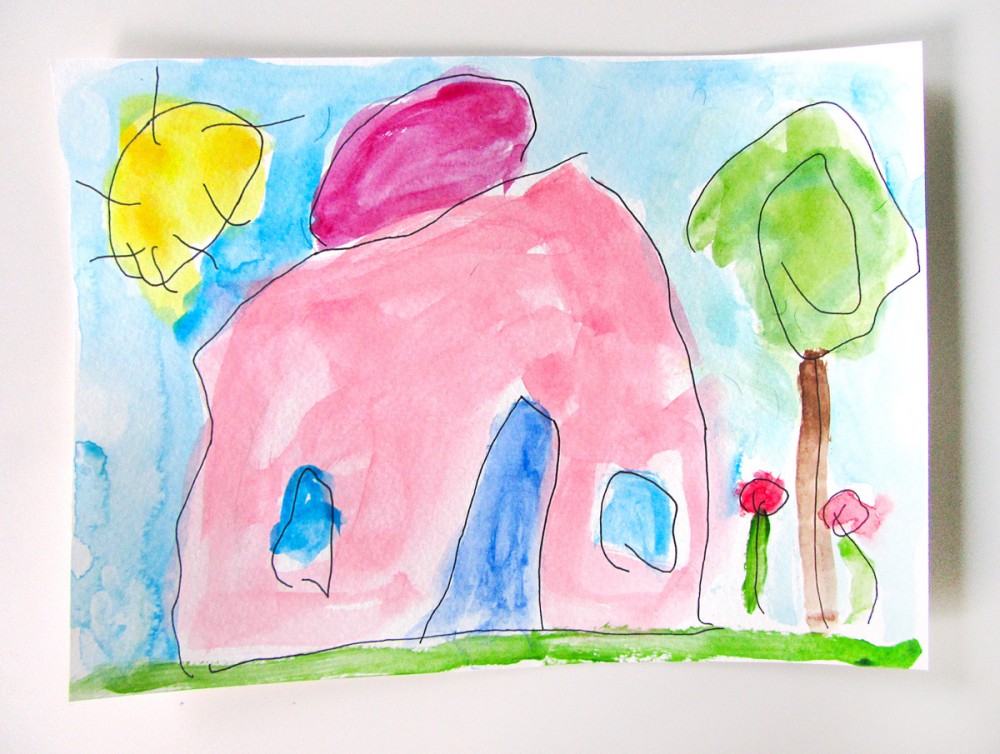
"House"

“House”

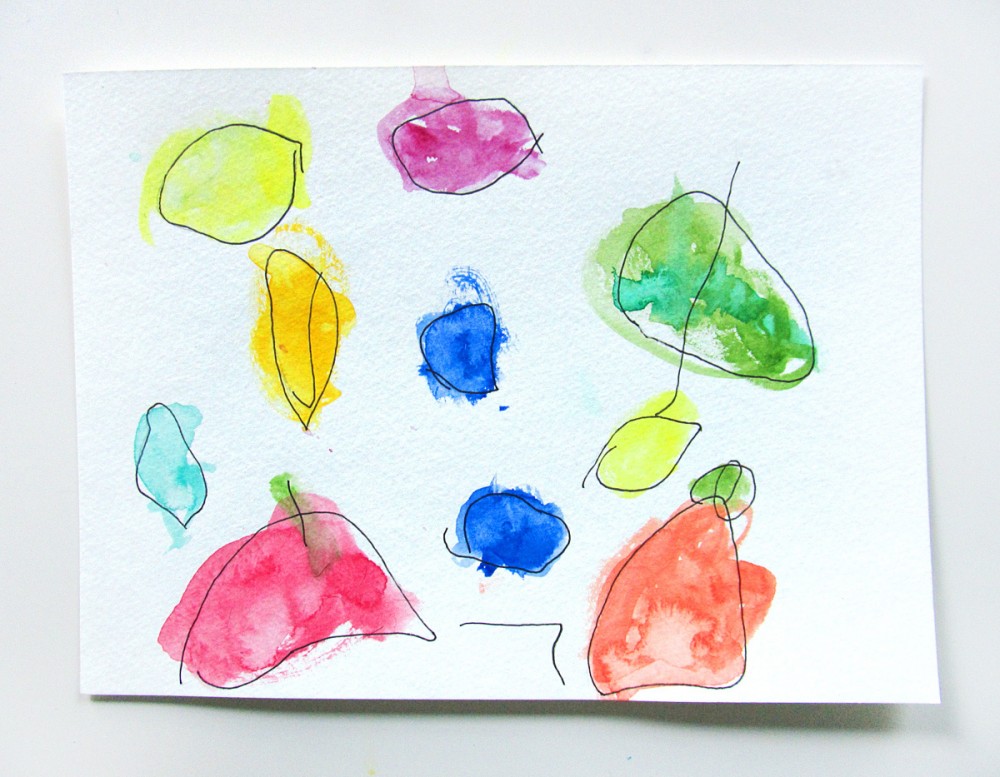
"Fruits & Veggies"

“Fruits & Veggies”

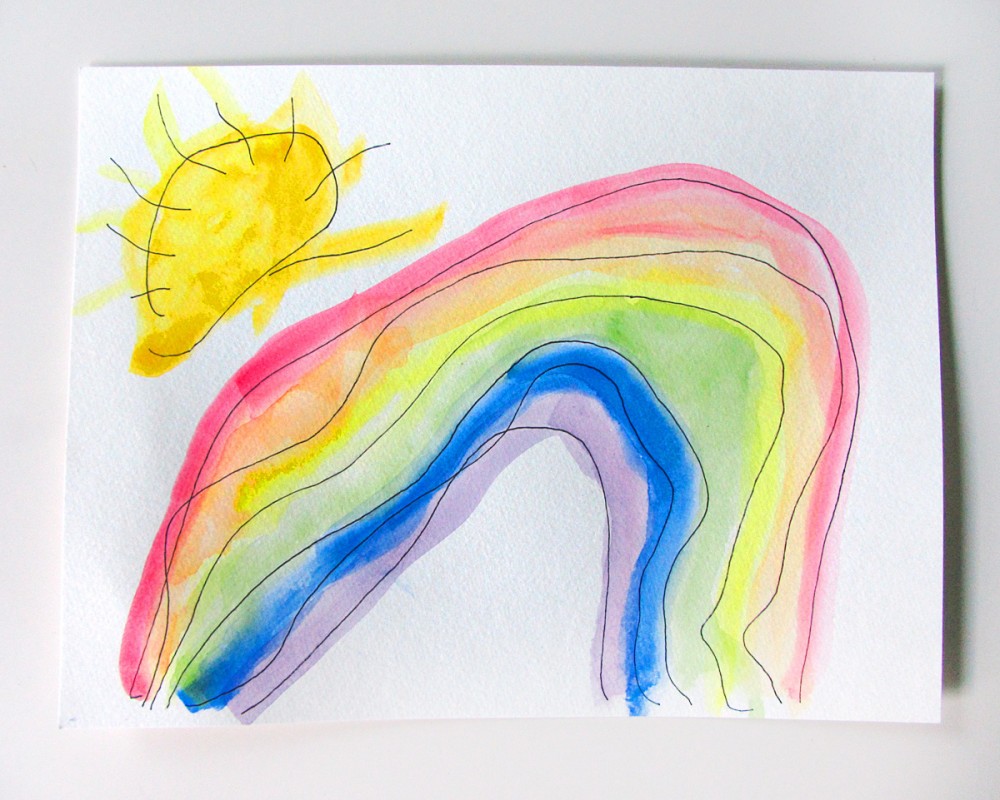
"Rainbow"

“Rainbow”

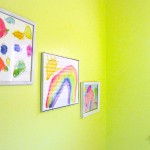
He was so proud to see them hanging up in the finished powder room.

Have you tried watercolor paints with your toddler? When Jax was even younger, I painted outside with him on canvas with acrylics.

Watercolor Painting with Toddlers

Watercolor Painting with Toddlers

How can you not smile when you see art like this?

Animals of South America for the Montessori Wall Map & Quietbook with Printables

Animals of South America for the Montessori Wall Map & Quietbook with Printables

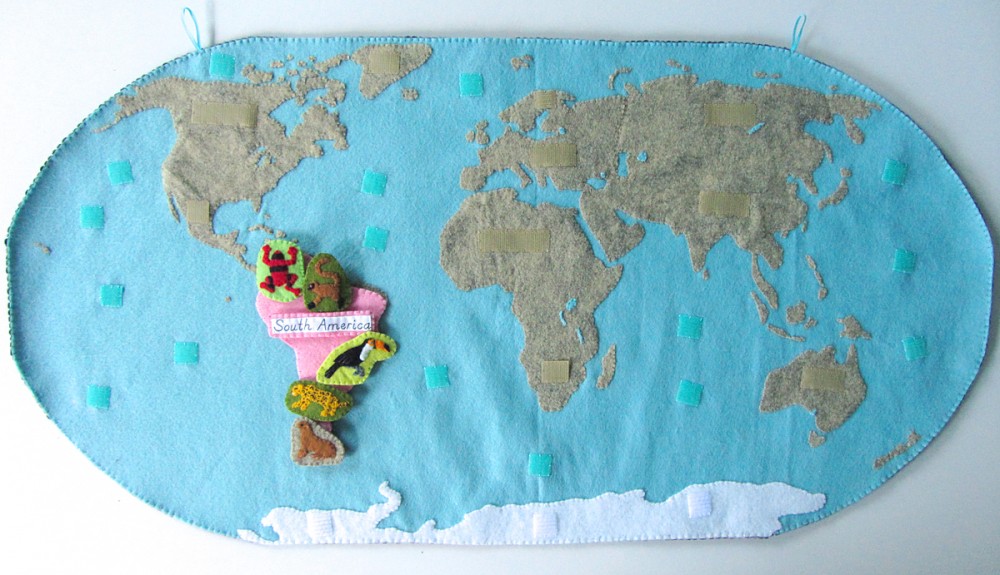
If you haven’t been introduced to our Montessori wall map and quiet book yet, you can read all about it here. This post is for the continent of South America! Every continent (and the oceans) will have landmarks and animals. Some, like Europe, have more landmarks than animals. South America has all animals, as it has so many great ones to choose from!

Overview and Map PatternsAfricaAntarcticaAsiaEurope North AmericaOceans • South America

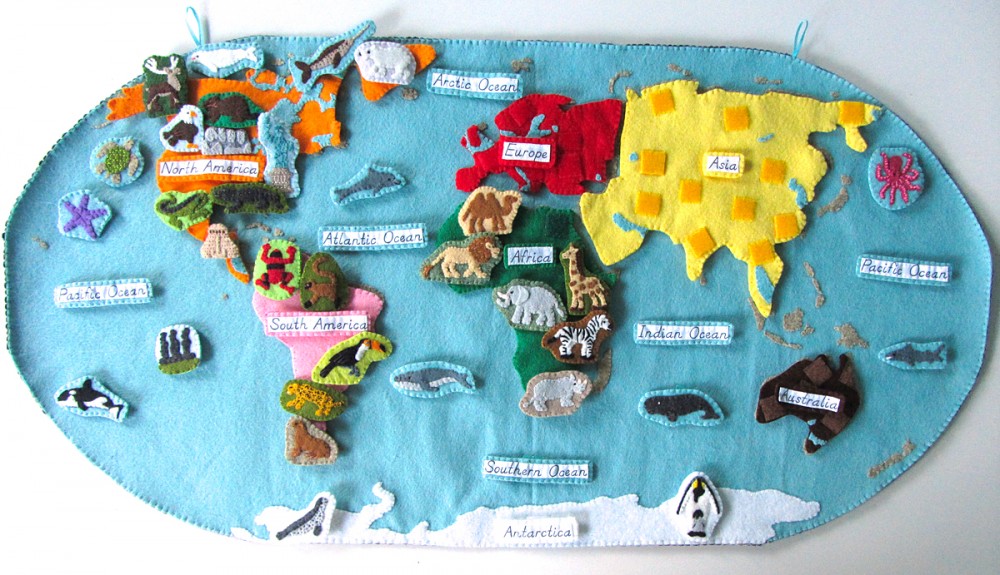
All our pieces so far!

All our pieces so far!

A quick note: Do you have a website that fits in with our readers’ interests: sewing, felt, homeschool or Montessori? I am trying out a new sponsor banner system and I have my 125×125 spots open for free swaps! There are currently 3 spots left, so please visit the Sponsor page to read more! Check it out to the left! Thank you for the help!

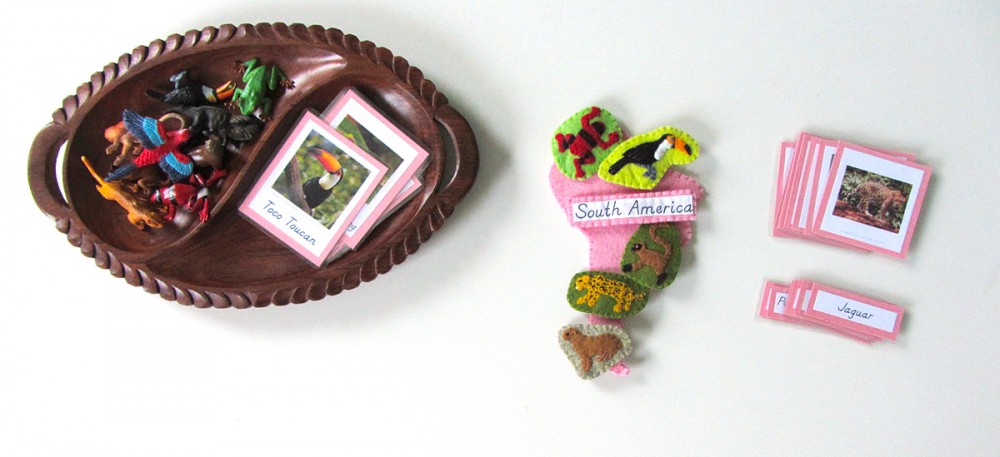
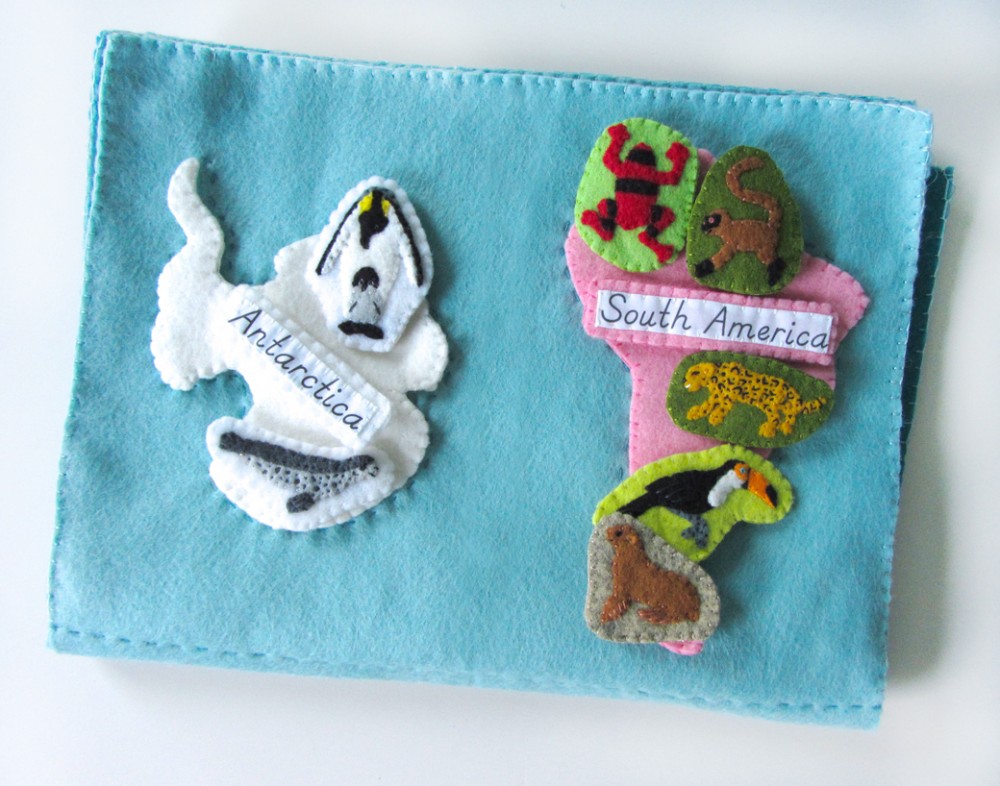
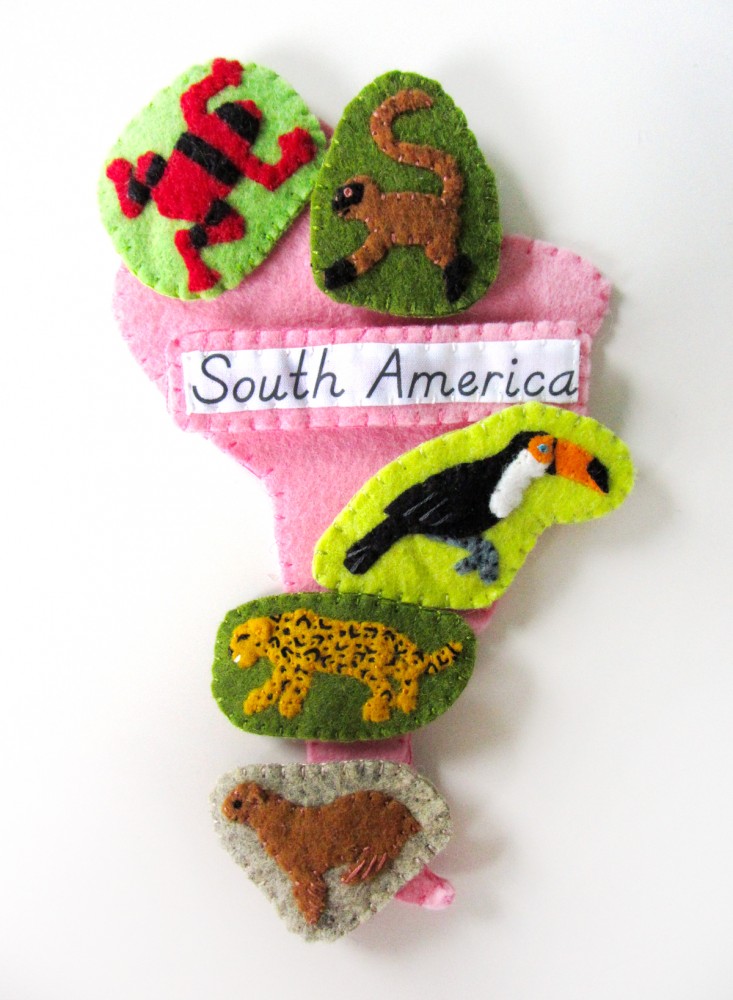
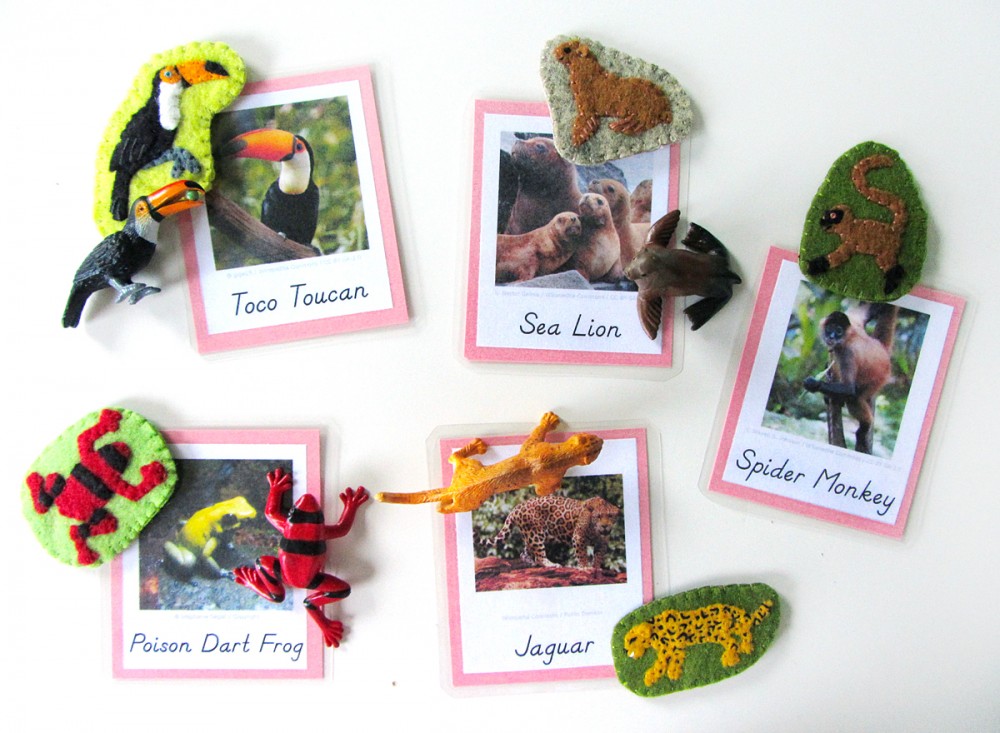
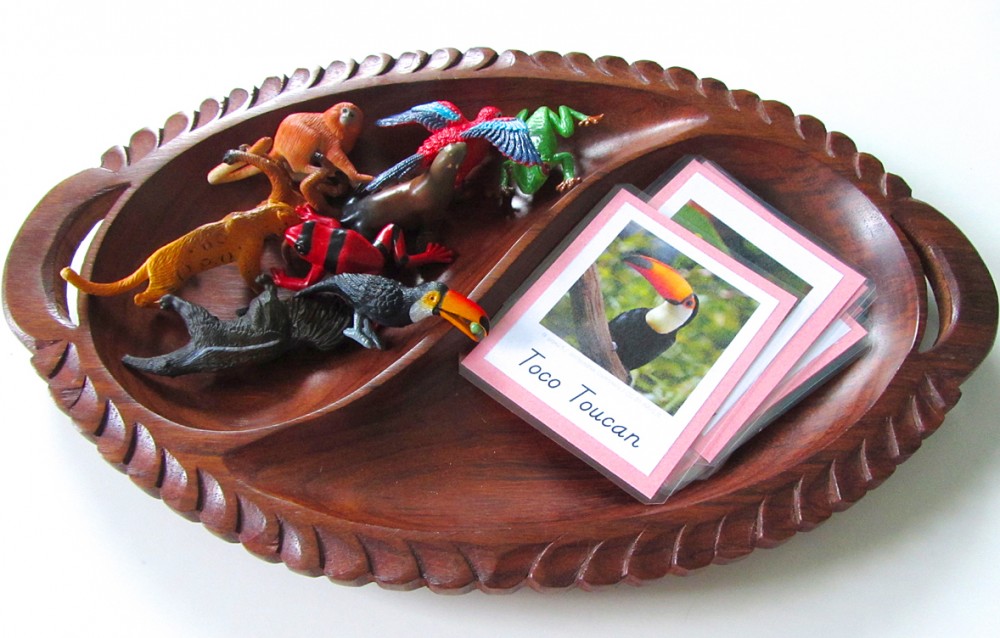
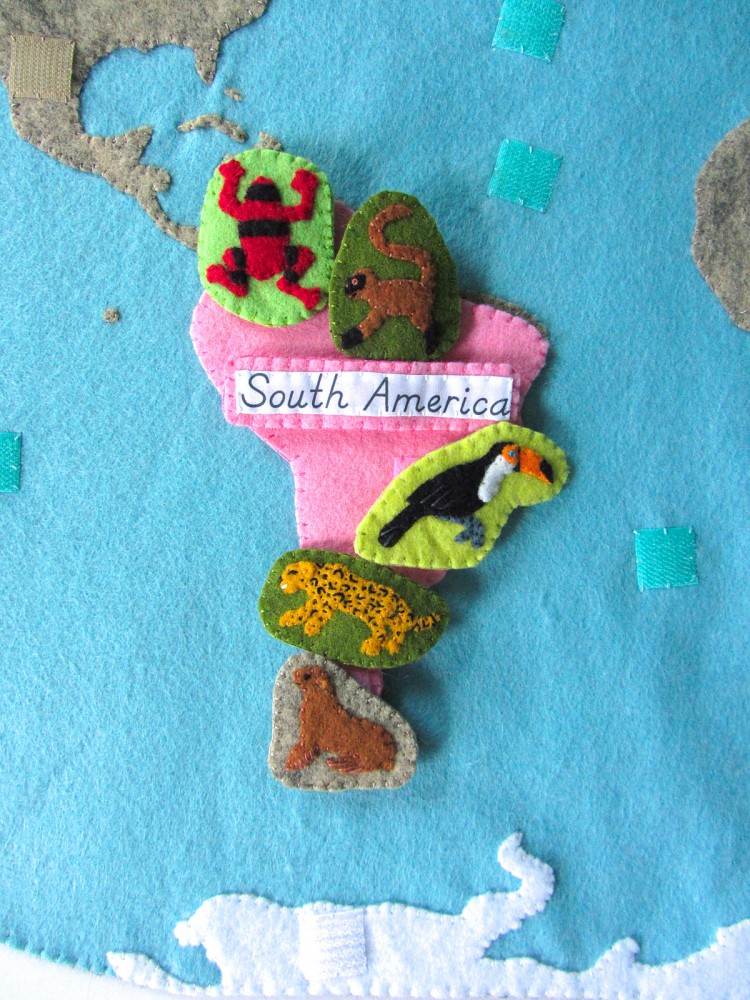
Those of you who follow along on Facebook or Instagram have been seeing all the fun South American animals I’ve sewn. I love that there were some brighter colors, thanks to the rainforest animals! I made: a poison dart frog, a toco toucan, a spider monkey, a jaguar and a sea lion.

Animals of South America for the Montessori Wall Map & Quietbook with Printables

I want to say a quick thank you to Libby A. for the surprise off of Jax’s Amazon wishlist! I use his list to bookmark school and craft items until I am able to get them. I’d added some trims I need for Jax’s robot Halloween costume (which will be featured here!) and they arrived in the mail to us this week! Thank you!! For more ways to contribute to this site, visit my support page.

Animals of South America for the Montessori Wall Map & Quietbook with Printables

Materials I Used

The Pattern (see the first post for the main patterns) Felt from American Felt & Craftbig apple [red], orange juice [orange], gold nugget [gold], limeade [lime green], cilantro [olive green], stone [taupe]  doe [brown] elephant [med gray], white and black. Hook & Loop – I used white snag-free Velcro on the backs of all these pieces and pink hook & loop (loop only) on the front of the South America puzzle piece. My pink hook & loop was store brand at Joann’s but you can find all colors here. Felt glue to tack down the pieces before sewing, printer fabric for the continent label, embroidery floss in colors to match the felt and micro tip scissors.

South America shares a page in the quietbook with Antarctica.

South America shares a page in the quietbook with Antarctica.

Sewing the Pieces

South America: (Felt used: bubble gum pink) For the South America continent puzzle piece, I sewed down pieces of pink loop Velcro. On the back, I sewed a strip of white snag-free Velcro to correspond with the Velcro in the quietbook. I finished it by sewing the two sides together around the edge with a blanket stitch. Label: (Felt used: bubble gum pink) For the continent label, I folded under the edges (just a tiny bit to hide the rough edges) and creased it with my nails. The printer fabric held the folds nicely without ironing. Then I stitched the label to some white felt and trimmed it down to be a border. I cut a matching felt rectangle for the back, sewed snag-free Velcro to it and then sewed both sides together.

Animals of South America for the Montessori Wall Map & Quietbook with Printables

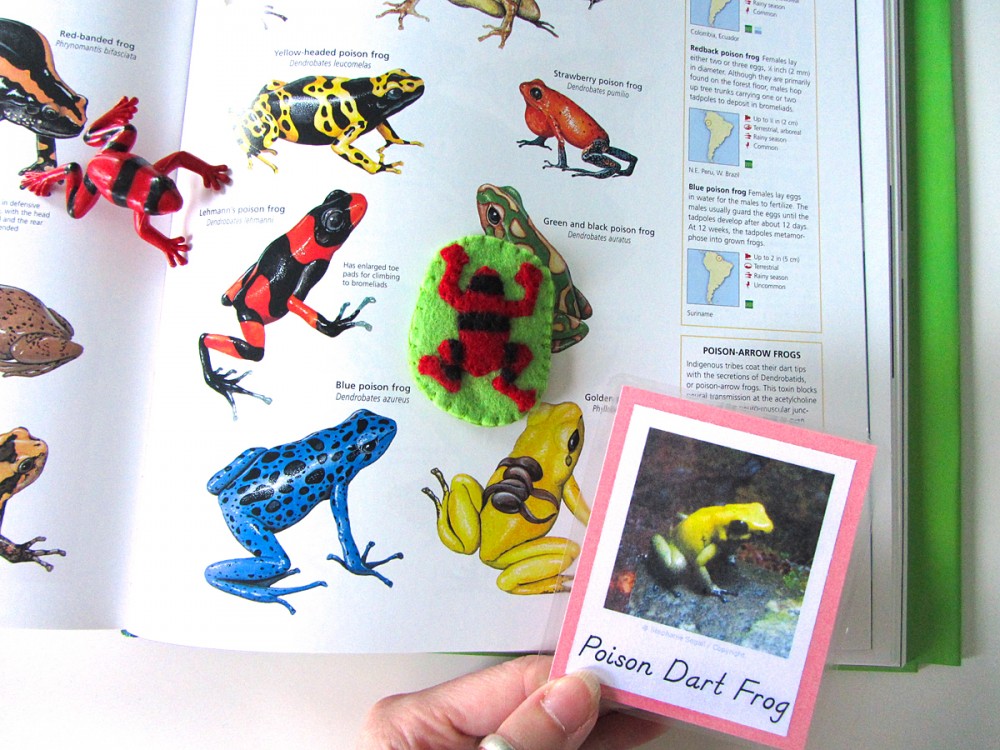
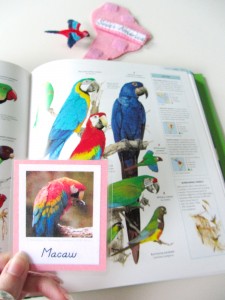
For all of the animals, I started by gluing the pieces down to a scrap of background felt with a very light amount of felt glue. I glue multiple animals at a time to give them time to dry. I sewed them down, trimmed the background and cut a matching backing piece. I sewed snag-free Velcro to the back and sewed both sides together with a blanket stitch. Poison Dart Frog: (Felt used: big apple red for the body, black for body details and limeade lime green for the background) I started by gluing down the red body, then gluing the strips on top. I sewed around all the edges. I matched my frog to the one in the Safari Ltd Rainforest Toob, which our animal encyclopedia says is Lehman’s Poison Dart Frog. You could make yours any color, especially if you have the Frogs and Turtles Toob. (My 3-part card is not a red Lehman’s. I never use photos without permission and I was unable to find a photo I could use of one. But the photo I took of a Golden Poison Dart Frog at the aquarium makes for a fun lesson where we can match them to our book.)

Animals of South America for the Montessori Wall Map & Quietbook with Printables

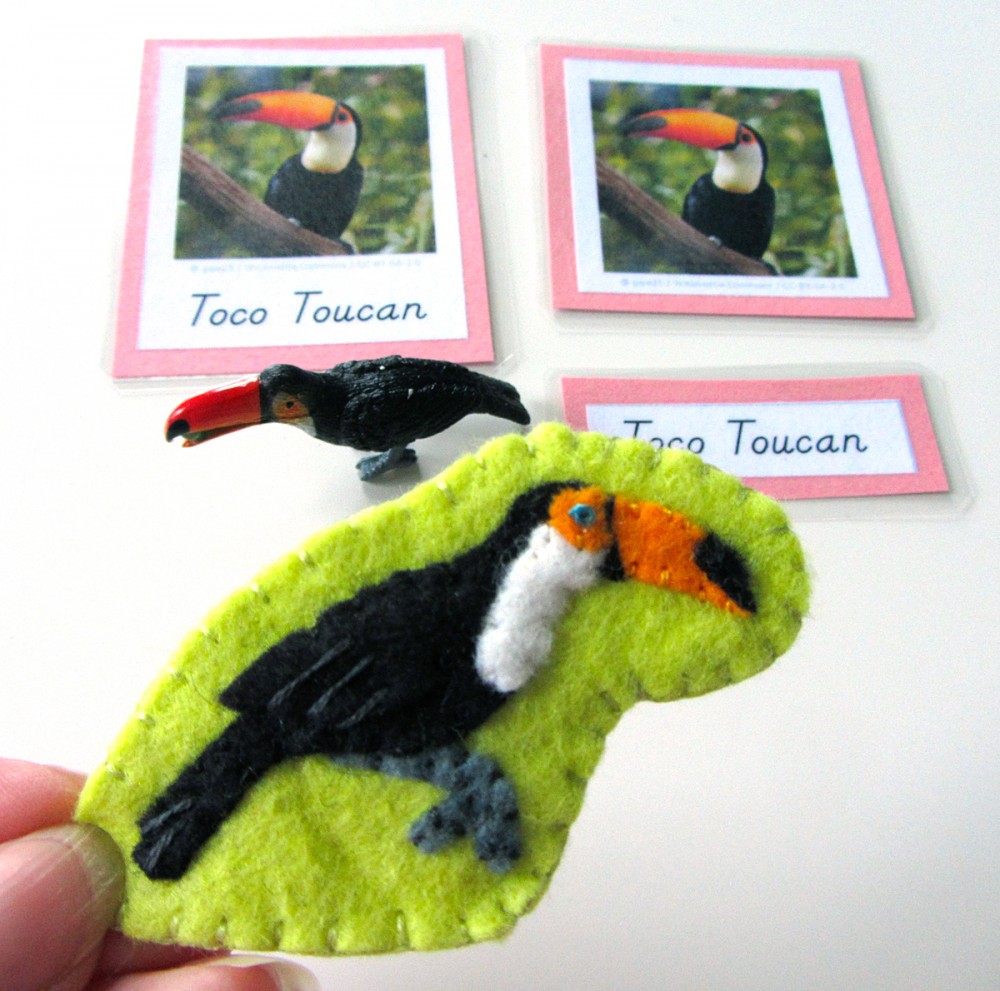
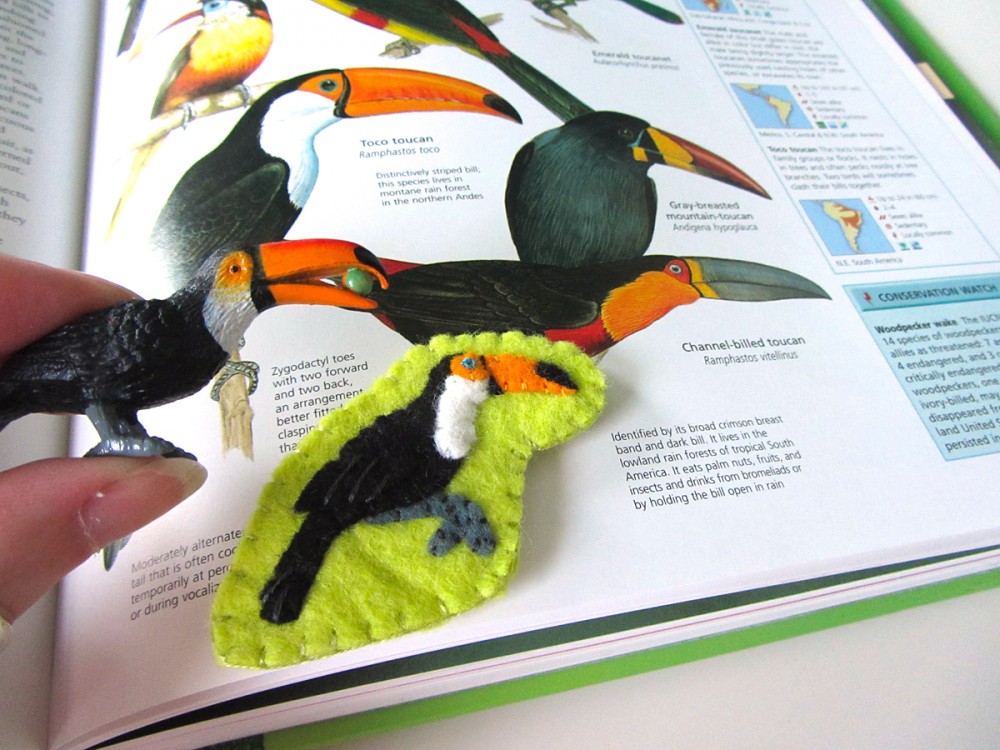
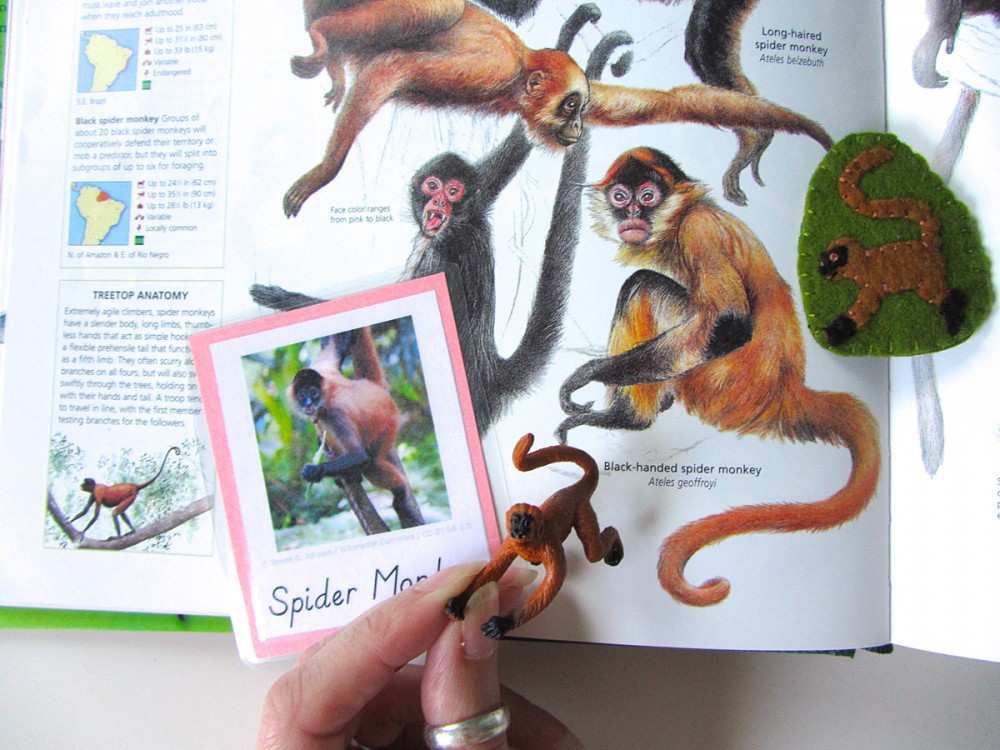
Spider Monkey: (Felt used: doe brown for the body, black for body details and cilantro olive green for the background) I glued the brown body of the spider monkey down first, then his hands, feet and face. I sewed all around the edges. I gave him French knot eyes, a little brown stitch for his nose, and a long black stitch to make an open mouth. Toco Toucan: (Felt used: black for body, orange juice for the beak,  limeade for the background and white) I first glued down her orange beak and gray leg, then her black body and wing. I glued the white chest on top and then the orange eye area. On top of the beak, I added the black felt piece. I sewed around all the edges then I gave her a bright blue French knot eye. (Their eyes are not really blue – that is a ring of blue skin around their black eye.) On her wing and tail, I made long straight stitches to show the feathers.

Animals of South America for the Montessori Wall Map & Quietbook with Printables

Jaguar: (Felt used:gold nugget gold for the body and cilantro olive green for the background) I glued the golden body of the jaguar with his far legs layered underneath. I glued one side of his ear down, then added a stitch to hold it once it was dry. I gave him a French knot eye with little black stitches on either side to make a cat-eye shape. I used white to make a mouth and black to make a small nose. For the spots, I made the larger ones using a similar technique to the lazy daisy stitch (a loop of thread that is pinned down by a small stitch at the peak) but used arch shapes instead of closed loops. The smaller stitches are just tiny stitches – some with a few close together to make medium spots.Animals of South America for the Montessori Wall Map & Quietbook with Printables Sea Lion: (Felt used: doe brown for the body and stone taupe for the background) I glued the brown body of the sea lion, then sewed around the edges. I made long stitches on his flippers to show the webbing. I glued one side of his ear down, then added a stitch to hold it once it was dry. I gave him a French knot eye and a little black mouth.

Animals of South America for the Montessori Wall Map & Quietbook with Printables

Montessori South American Animals 3-Part Cards

Currently jax is focusing on his world continent 3-part cards, but we’ve done a small session with each of the animal card sets as I’ve made them. He sees me making them and insists! We will study the animals with more depth when we focus on a particular continent.

Animals of South America for the Montessori Wall Map & Quietbook with Printables

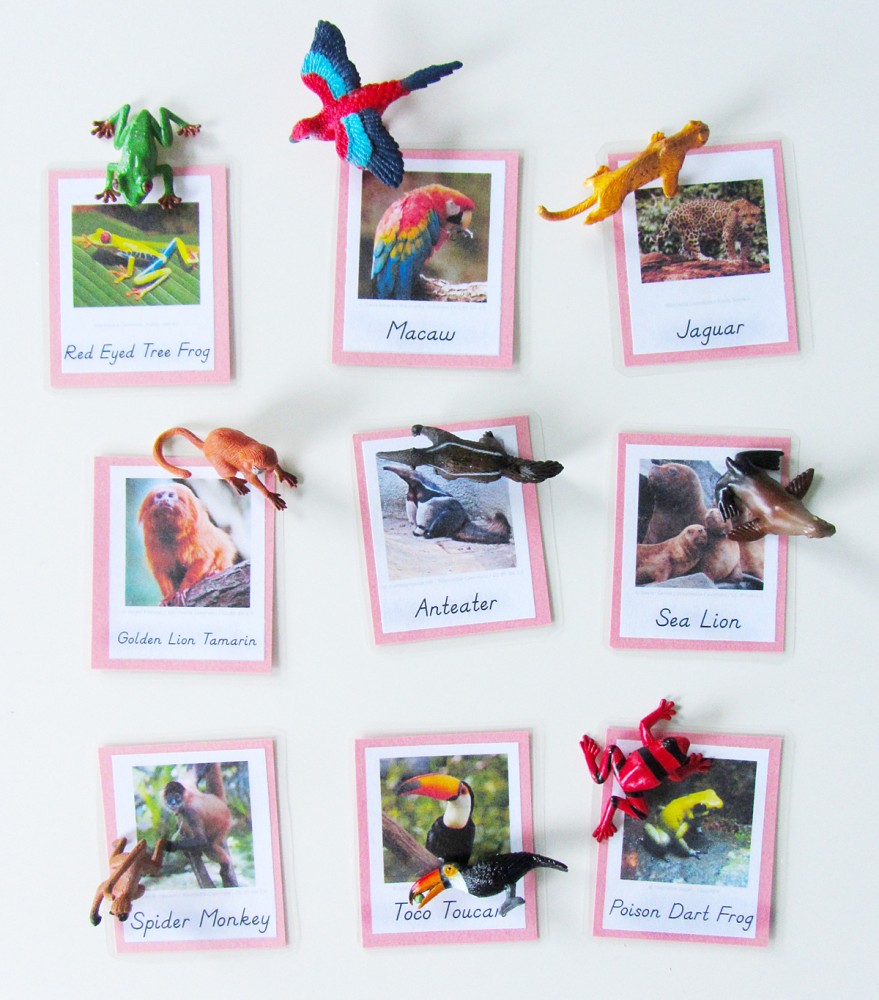
For now, we pull out our SafariLTD’s TOOB figurines and use our 3-part cards to match them whenever he shows interest. We like to watch short videos about an animal, then study some pictures and draw our own.

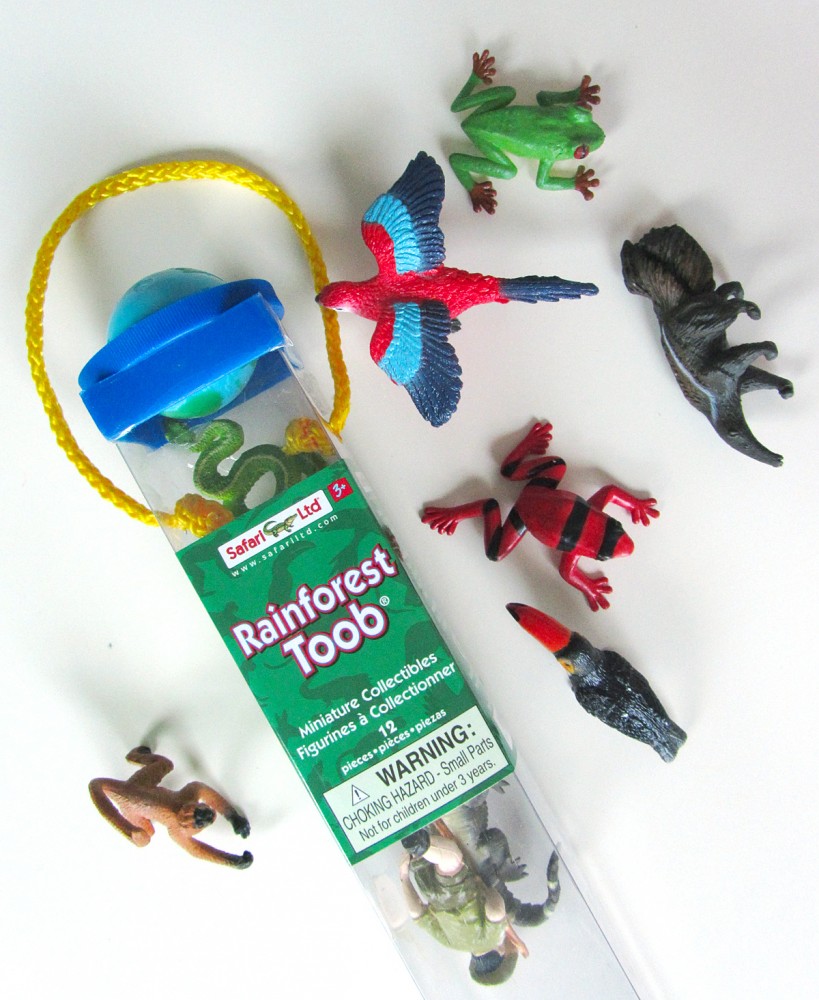
I used the Rainforest Toob for these cards. The sea lion is from the Ocean TOOB.

I used the Rainforest Toob for these cards. The sea lion is from the Ocean TOOB.

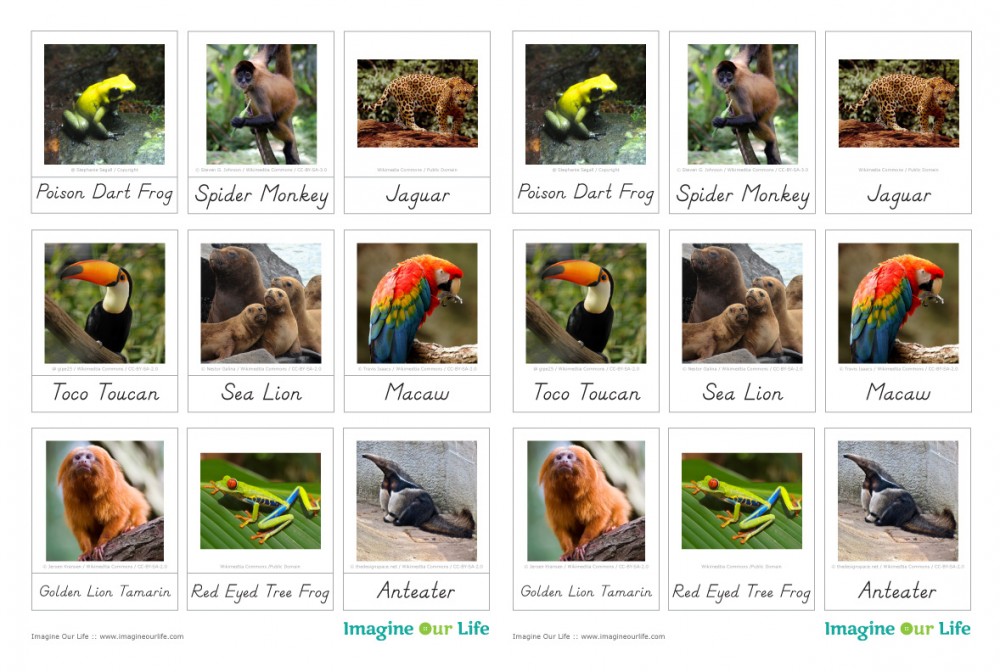
Click here to download my free pdf file to make your own. To make mine, I cut them out, glued them to pink construction paper (to match South America’s Montessori color) then laminated them. I love my new laminator! It makes everything so shiny and strong! I’ve been giving it a workout!

Animals of South America for the Montessori Wall Map & Quietbook with Printables

Exploring South America’s Animals

I’m still so happy I found my The Encyclopedia of Animals: A Complete Visual Guide when our basement flooded! (Though I’m less happy that my dining room table is covered in 2′ high piles of books.)

Animals of South America for the Montessori Wall Map & Quietbook with Printables

It has a lot of beautiful photos and useful facts about many different animals. Jax and I will be using it to match up with our 3-part cards and read more about the animals. We also use my iPad and YouTube to watch short video clips.

Animals of South America for the Montessori Wall Map & Quietbook with Printables

Here we used the encyclopedia to identify which kind of spider monkey we had.

Animals of South America for the Montessori Wall Map & Quietbook with Printables  Animals of South America for the Montessori Wall Map & Quietbook with Printables

I know many of you are sewing along (or about to!) If you are, stop by my Instagram @iolstephanie and leave a comment on one of my photos (I can’t see your photo if it you are private, but I can request to follow you temporarily if you leave a comment on mine about it) or share photos on Facebook. You can also email me. I love seeing others’ take on my patterns!

Animals of South America for the Montessori Wall Map & Quietbook with Printables

It’s not even slightly Montessori Monday still, but I hope you’ll check out the other great links!

Montessori Monday

Safari Ltd. Musical Instruments Giveaway & Free Montessori Printables

Safari Ltd. Musical Instruments Giveaway & Free Montessori Printables

The giveaway is now closed. Thanks for playing!

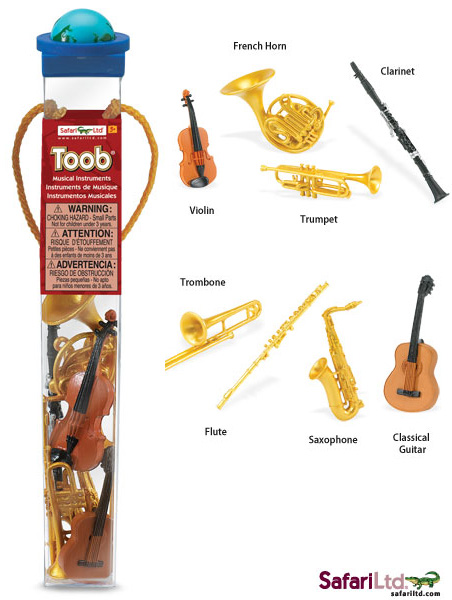
Jax and I will be starting a music unit in homeschool this fall, so when I came across this Musical Instruments TOOB by Safari LTD I had to get them!

Our family has always had a great love of music. My brother and I were both “band geeks” throughout our school years. (Though I find nothing geeky about music!) I played the oboe, and still have mine. I was also in the marching band, playing cymbals in the drum line. I married a DJ and we’ve surrounded Jax with music since before he was born. He adores dancing and singing. Anything we can put in a song he learns faster. I hope that providing him with a solid base of knowledge in music fundamentals now will help cultivate a lifelong love.

Safari Ltd. Musical Instruments Giveaway & Free Montessori Printables

Disclosure: I purchased this Safari Ltd TOOB on my own, but Safari Ltd kindly is providing the winner of this giveaway with a Musical Instruments TOOB. All opinions expressed are my own.

Musical instruments are beautiful to look at! They definitely capture a child’s attention. And combined with learning about the sounds that they make, you have a learning opportunity that is all fun!

Safari Ltd. Musical Instruments Giveaway & Free Montessori Printables

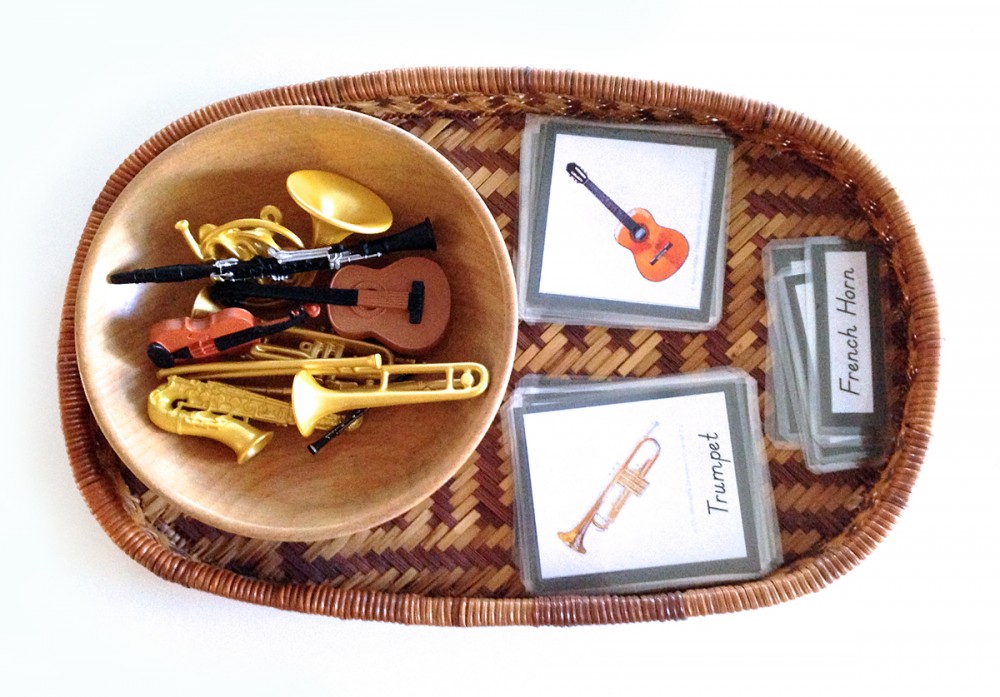
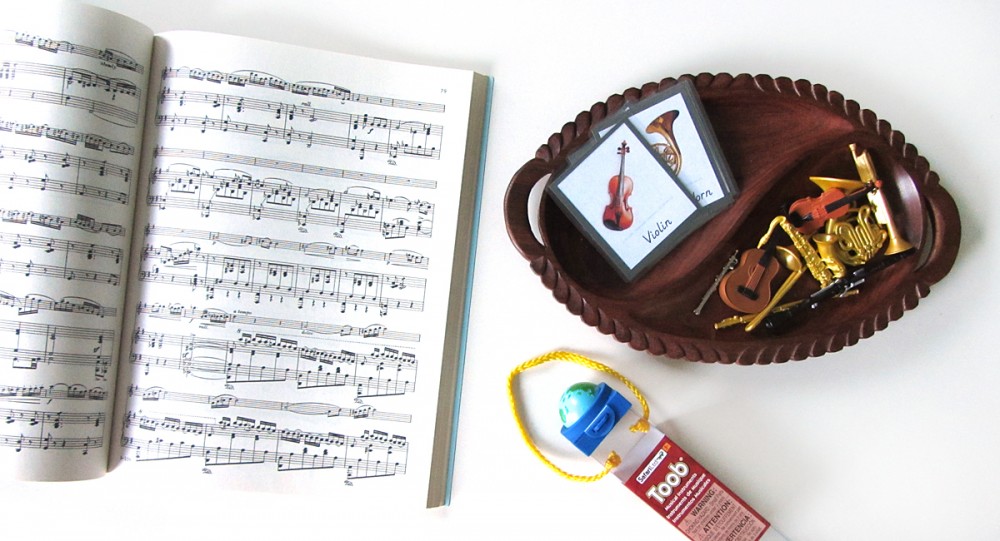
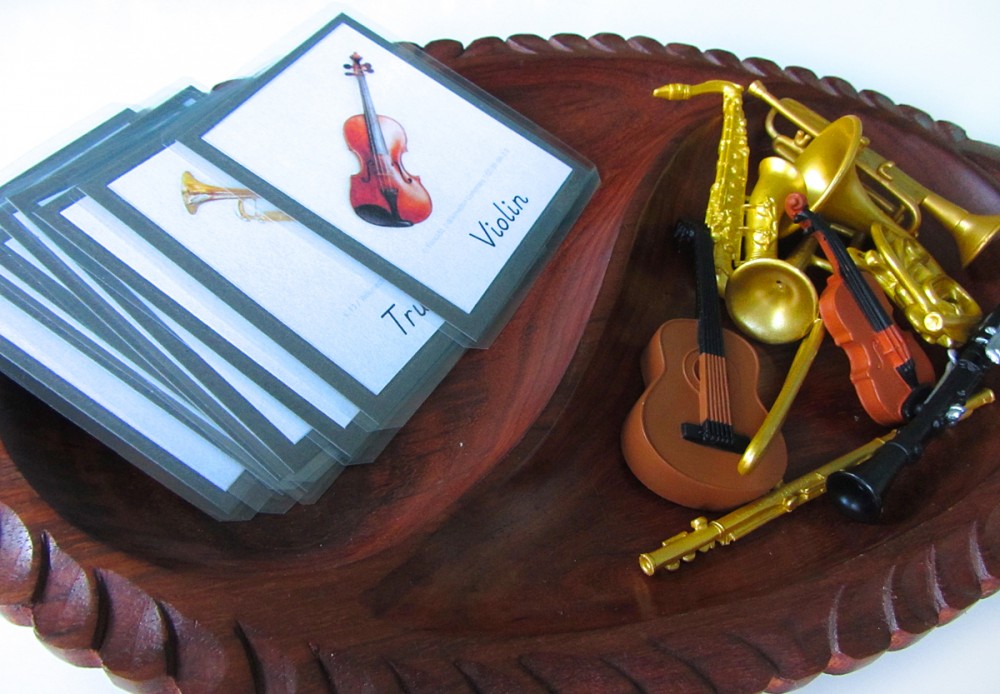
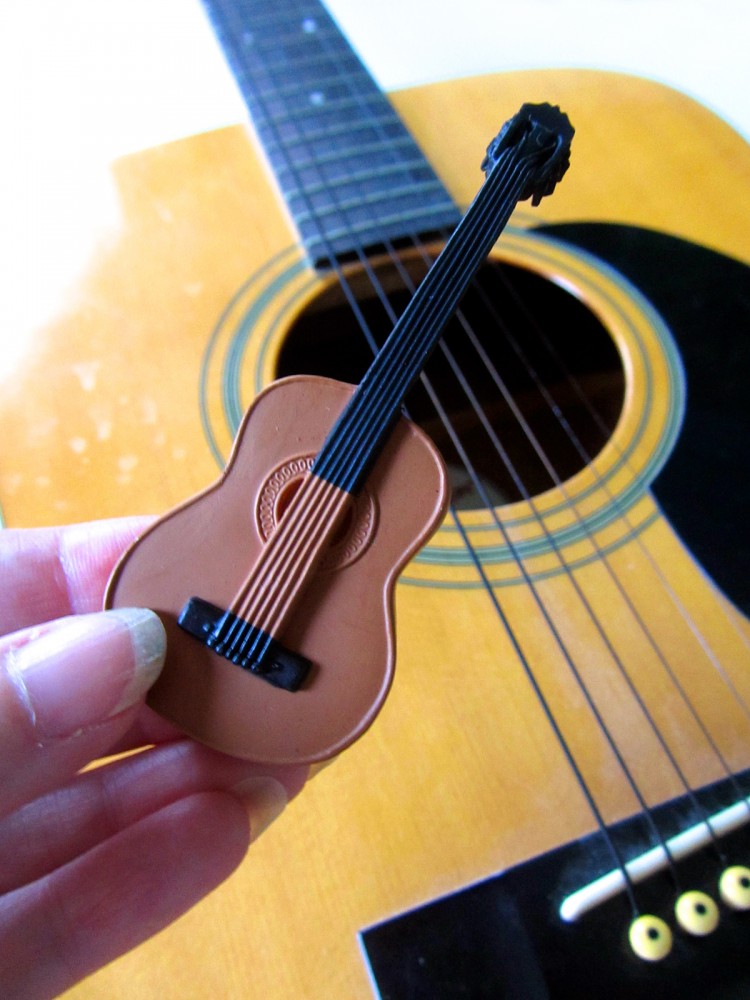
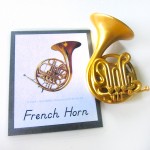
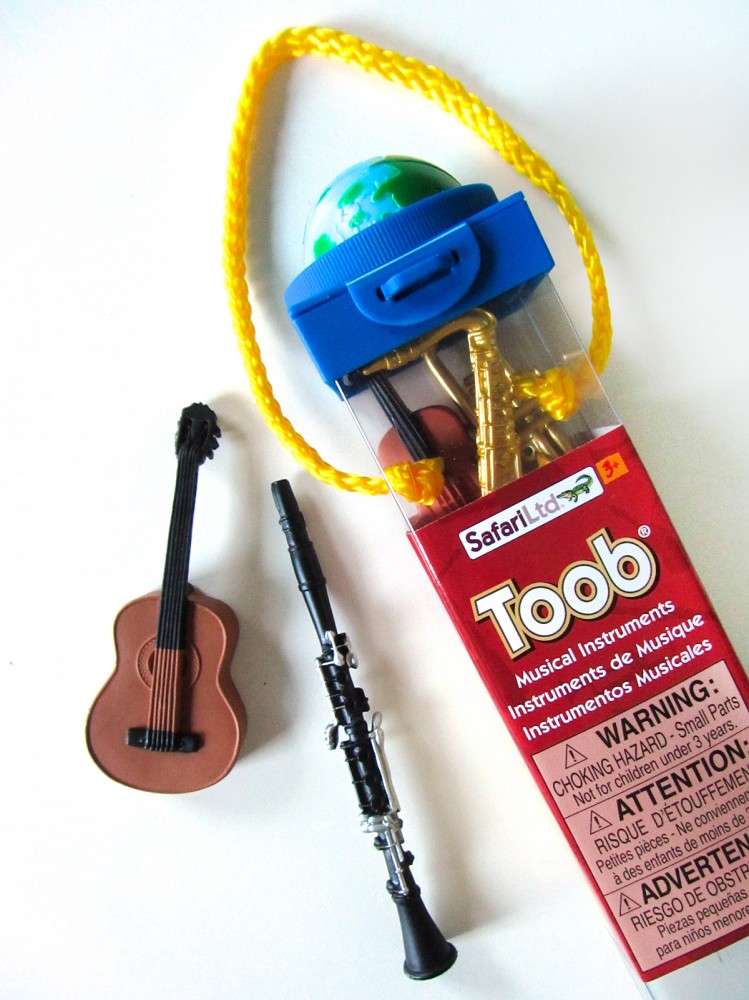
The Safari Ltd Musical Instruments TOOB contains: Trombone, Flute, Saxophone, Classical Guitar, French Horn, Clarinet, and Trumpet. Strike up the band!

Safari Ltd. Musical Instruments Giveaway & Free Montessori Printables

Safari Ltd TOOBS are collections of individually hand painted miniature replicas featuring vibrant colors, fine, professional sculpting, and accurate detail. They are available in dozens of themes, and each set comes in a reusable acetate tube that snaps open and closed for easy storage. The tube also has a spinning globe on its cap. TOOBS are perfect for educational projects, traveling, collecting, and imaginative play.

Safari Ltd® is a family-owned, educational toy company whose mission is to teach children the importance of nature and its conservation through the joy of play. With more than 1,000  hand-painted products ranging from mythical creatures to famous landmarks, learning meets fun with Safari Ltd.

Safari Ltd

Montessori Musical Instruments 3-Part Cards

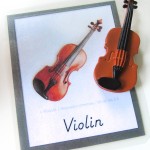
In the Montessori method, 3-part cards are an essential tool that can follow your child through multiple levels of development. They can be used in any subject to aid in adding vocabulary, learning to sort/classify, reading practice and so much more. Three-part cards are made up of two photos – one with a label, one without – as well as a separate label. Younger children start with the labeled card to help them learn the vocabulary. One of the best ways to use them is with small objects that match the photos. Older kids can work with the unlabeled card, matching the correct words or writing their own.

Safari Ltd. Musical Instruments Giveaway & Free Montessori Printables

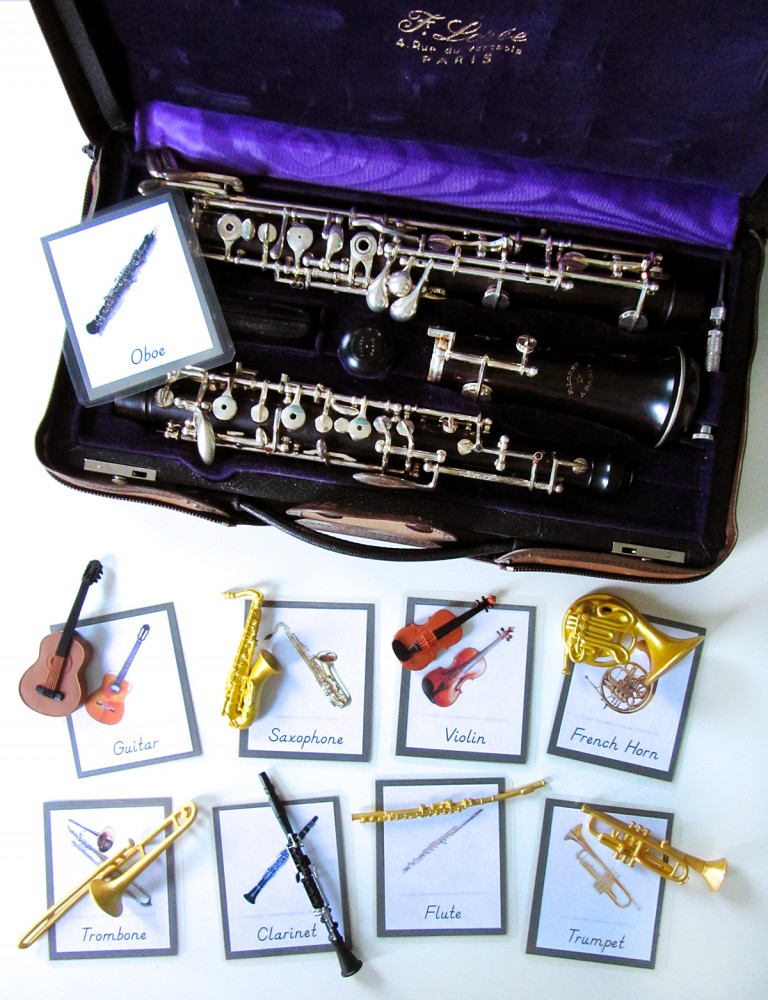
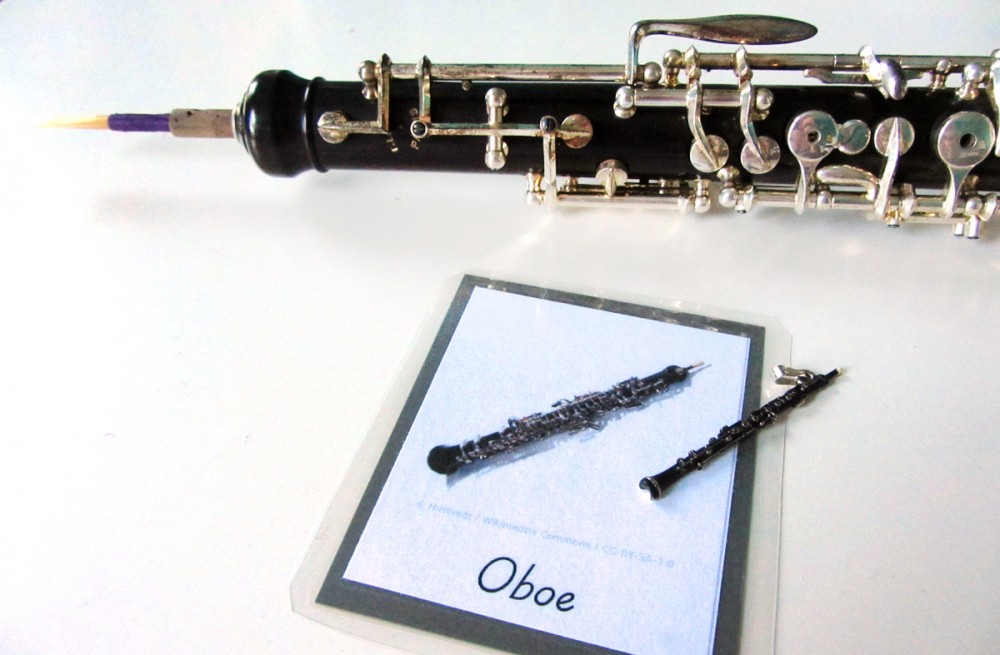
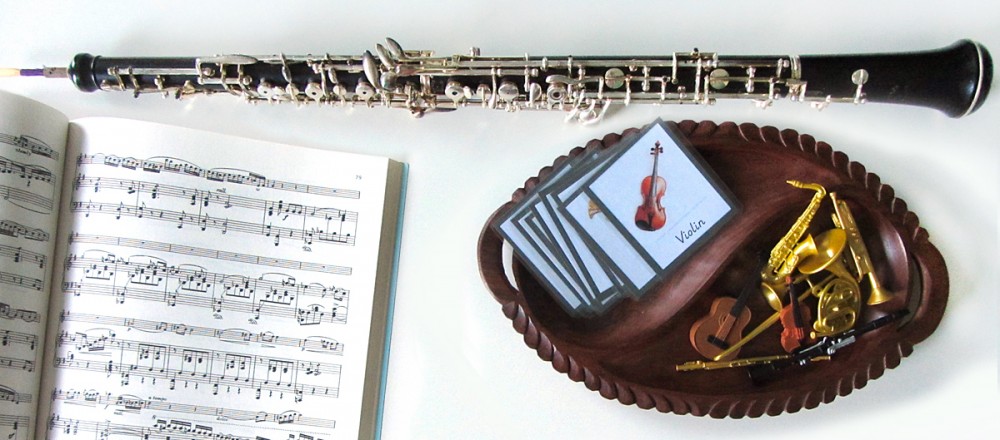
I have created a set of free musical instrument 3-part cards to correspond with Safari Ltd’s Musical Instruments TOOB. Because I had room for one more card on my printout, I included an oboe. I used an oboe necklace charm (and my real oboe!) for matching. You could set that card aside when doing object matching.

Safari Ltd. Musical Instruments Giveaway & Free Montessori Printables

Click here to download my free pdf file to create your own. To make mine, I cut them out, glued them to charcoal gray card stock (this is simply a color I chose to assign to all my future music collateral) then laminated them. It makes them shiny and strong. I really love my laminator – as everyone told me I would!

Safari Ltd. Musical Instruments Giveaway & Free Montessori Printables

Musical Instruments and Their Sounds

Here is a collection of video links you can play to listen to each instrument’s sound and learn more about them: Trombone, Flute, Saxophone, Classical Guitar, French Horn, Clarinet, and Trumpet. (And Oboe!)

Safari Ltd. Musical Instruments Giveaway & Free Montessori Printables  Safari Ltd. Musical Instruments Giveaway & Free Montessori Printables  Safari Ltd. Musical Instruments Giveaway & Free Montessori Printables

Bookmark this page to come back to when you are studying instruments with your child.

Safari Ltd. Musical Instruments Giveaway & Free Montessori Printables

Musical Instruments TOOB Giveaway

1 lucky winner from the US will win the Safari Ltd Musical Instrument TOOB (ARV $12). If you a a follower of Safari Ltd on Facebook, Twitter, Pinterest, YouTube or Google+, they will throw in a bonus prize!

Who is Eligible:

This giveaway is open to anyone 18 and older living in the US. Safari Ltd. will pay for shipping the prize to you.

To be eligible, leave a mandatory blog comment below telling me why you’d like to win the Safari Ltd Musical Instruments TOOB. After you’ve commented, be sure to click “enter” on the Rafflecopter form to open up the additional entry options. Enter as many ways as you’d like, once you’ve completed the mandatory blog comment. If you are already a follower of Safari Ltd or Imagine Our Life, you can still enter via that option by verifying your username!

If you need help with Rafflecopter here is a link for a quick tutorial video. At times, the Rafflecopter form can take a minute to load on the page.

The giveaway closes 12:00 am EST on Tuesday, September 3.

winnerCongrats to our random winner, Mae P.!

Good luck!

Here is a Pinterest-ready image for you! Find me on Pinterest @imagineourlife. Find Safari Ltd on Pinterest @safariltd.

Safari Ltd. Musical Instruments Giveaway & Free Montessori Printables

This post is linked up to Montessori Mondays. Please pay it a visit for lots of great Montessori and homeschool ideas!

Montessori Monday Family-Friendly Giveaway Linky