I get a lot of questions asking how I make my 3-part cards. I’m a graphic designer, so I use Adobe InDesign to do mine. It works well for me, but I’ve had a lot of requests for something more universal for those of you who have your own ideas for 3-part cards.
I recently sat down and worked out a layout in Microsoft Word that is very similar to mine. The main difference is there is no spot for an image credit. Being a graphic designer, I am very big on not using photos without permission. For my free printables, I first look to my own personal photo library, then search on Wikipedia Commons. I always put the required attribution tag under photo I use publicly.
What You Need:
- The Microsoft Word template
- Digital Images
- D’nealian Font (or your font choice)
- Scissors or paper trimmer
- Printer paper and colored cardstock
- Glue stick
- Laminator
- Lamination Pouches
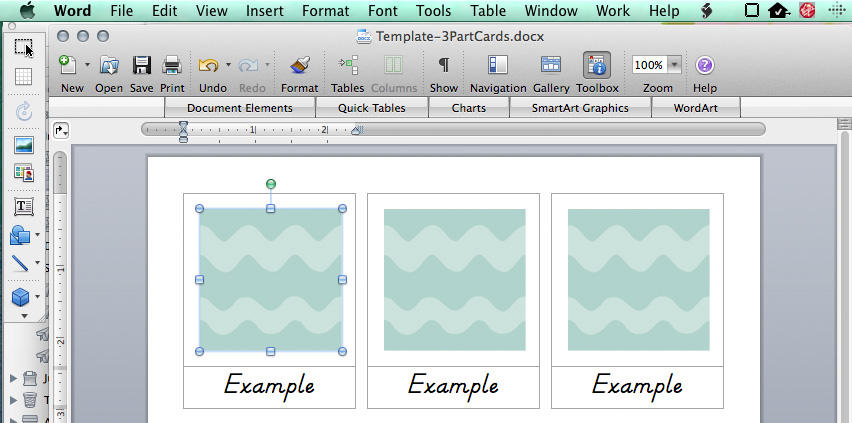
Start by selecting the box you’d like to add a photo to.

Right-click and choose “Change Picture…” I am on a Mac, so your view may be a bit different.
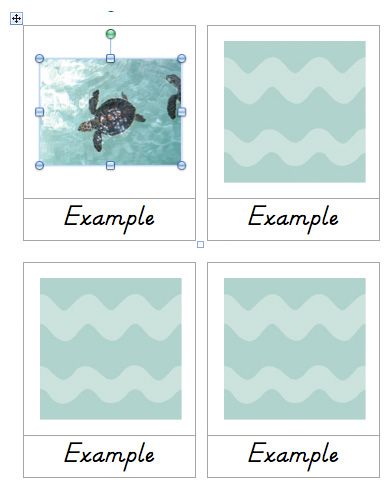
Choose your photo and insert it. If it wasn’t a nice square photo, no worries! We can crop it! I like to make mine square when I can, but sometimes I have to leave them as-is to avoid cropping something important.
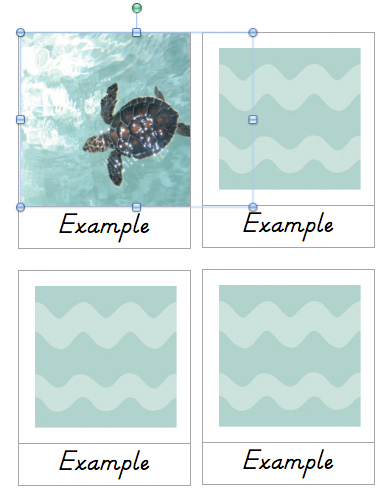
Drag a corner of the picture to make it larger. Don’t worry about it getting too big. You want the main area to be a good size for you final square. (In this case, it is the sea turtle.)
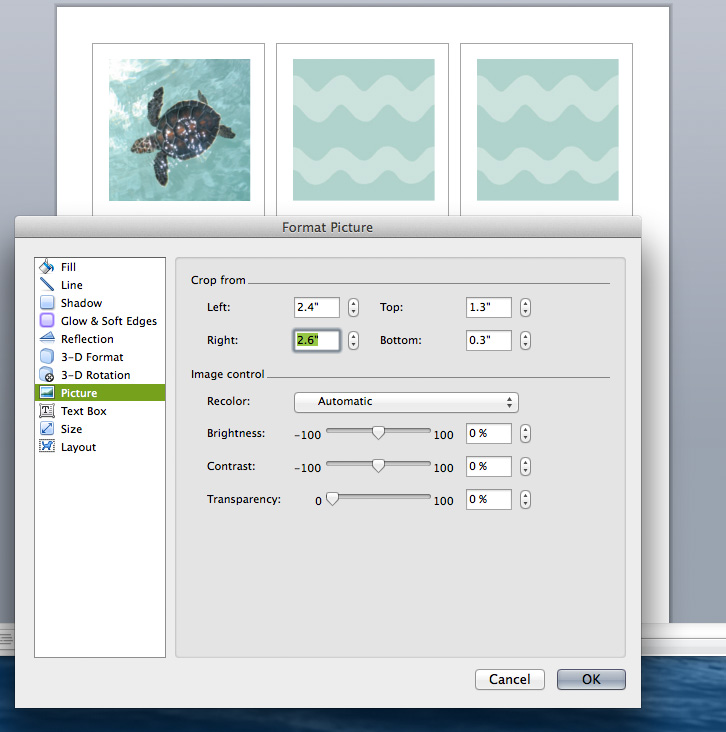
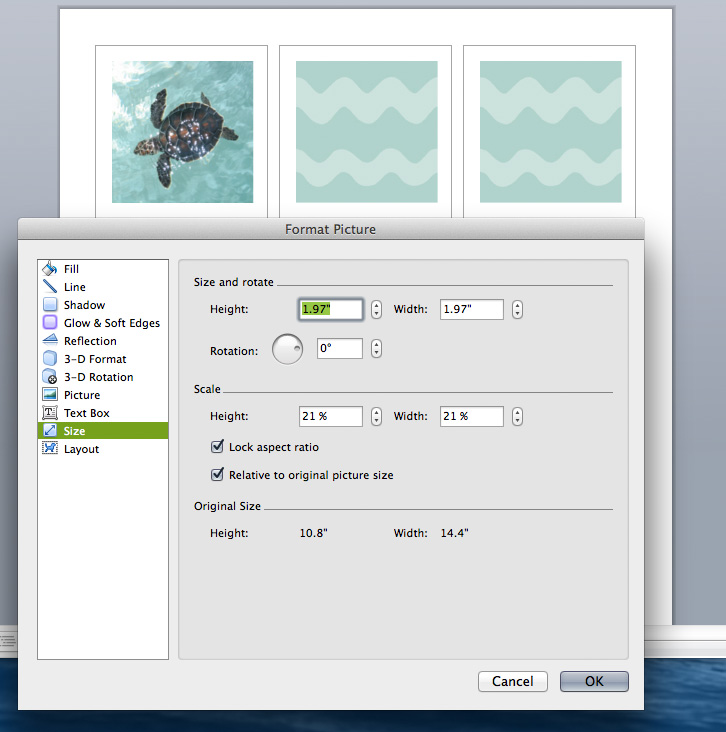
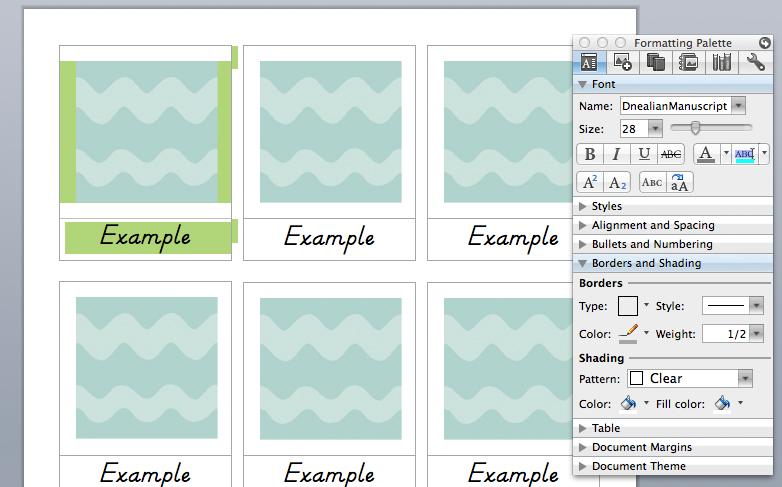
 Next you’ll want to open the “Format Picture” window. You can get to it from the menu bar (“Formatting” menu), right-clicking or via the “Formatting Palette” that appears when an image is selected. You will want to go to “Crop” and use the arrows to gradually crop the photo down to a square that you are happy with. Pop over to the “Size” tab to make sure the width and height are the same. If you are going for the size of square I always use, you can set the width to 1.97″ once you have it cropped to a square.
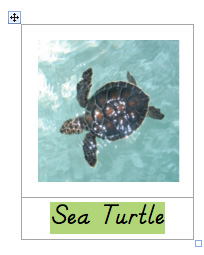
After that, you are ready to change the text. You can also change the font. Do this for each card.
This file is for the cards you cut into two pieces each: pictures only and labels only. In most cases you’ll also want the full labeled card. I recommend you set up your whole sheet as instructed above and then either copy/paste it to a second page or save it as a second file. With that second page or file, you’ll take out the dividing line.
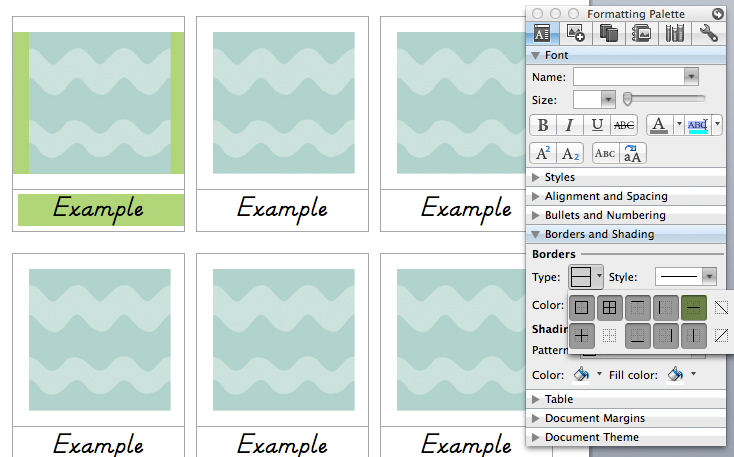
Select the two rows that make up a card’s table. In the Formatting Palette, choose borders. You’ll want to turn off the box with the middle horizontal line (highlighted green here). The line will still be there on your file after you turn it off, but it will be lighter. The light gray line is just to show you where the table is. Remove the line for each card to have a set of full cards.
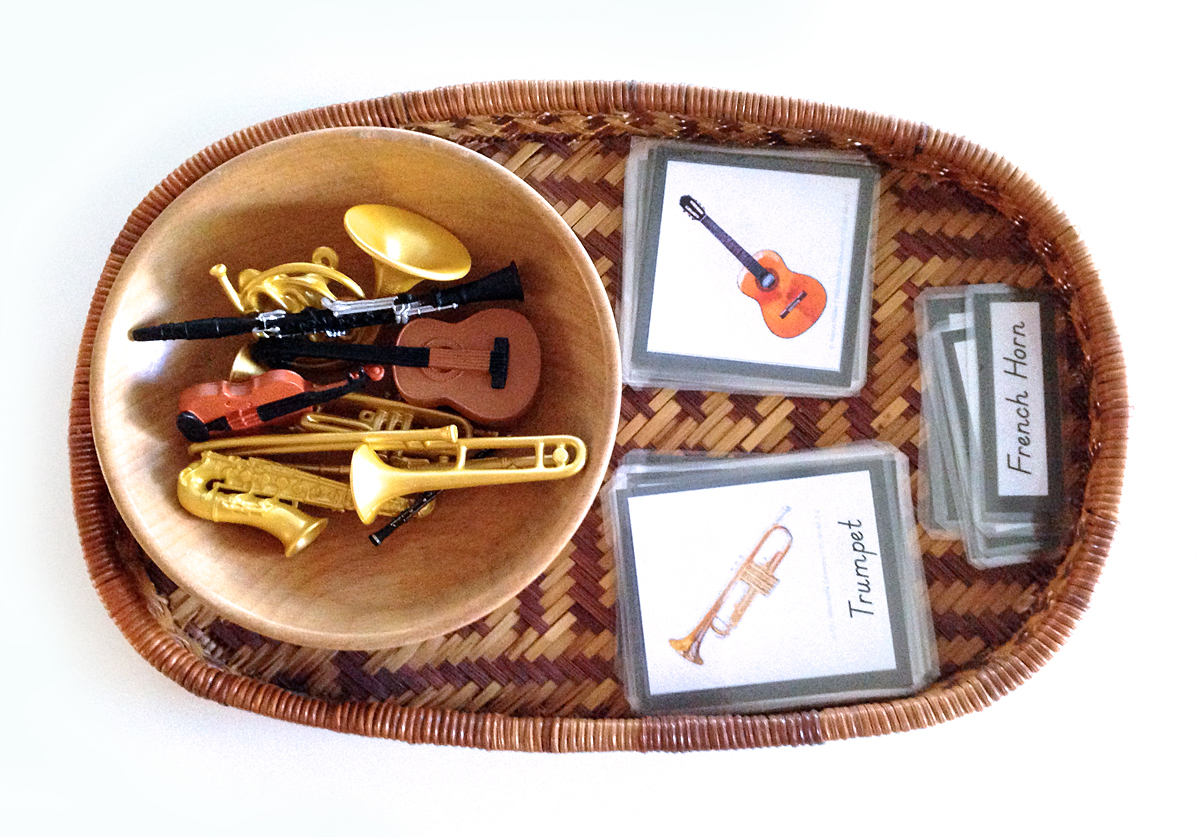
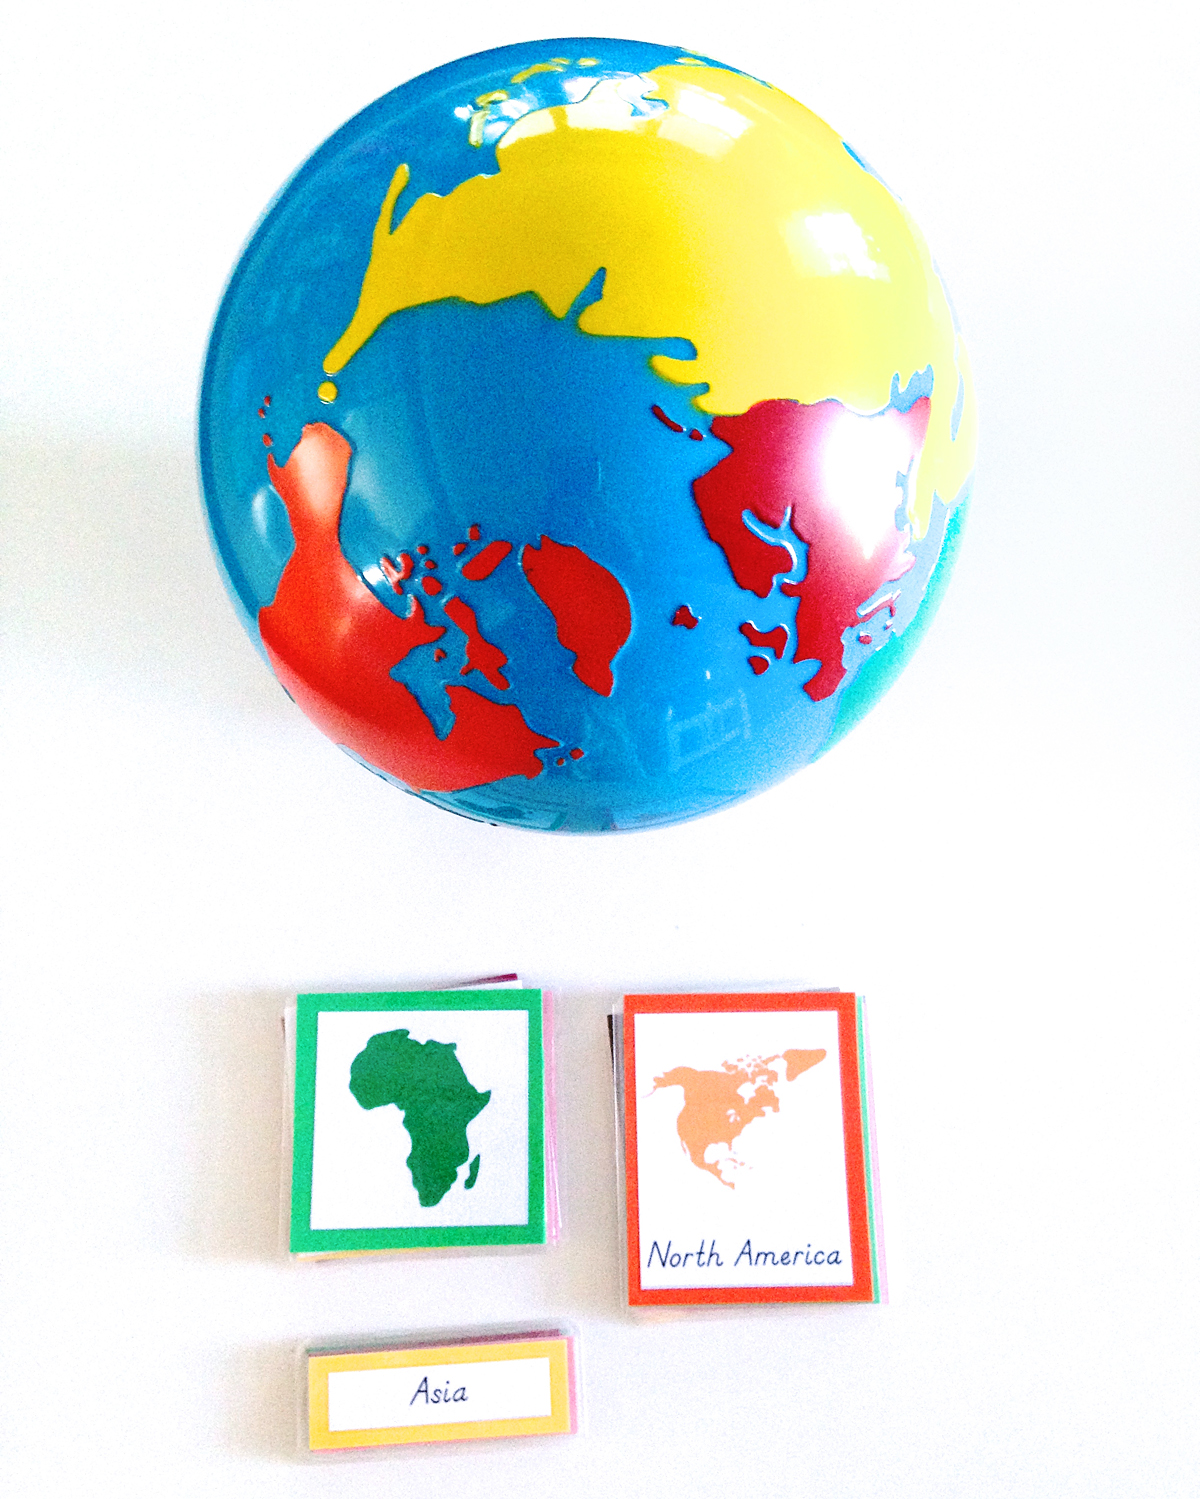
Once you have your cards printed and cut, use a dab of glue to attach them to card stock. Trim the card stock to have about a 3mm border. I like to match the color of the card stock to the theme of the cards. For my continent cards, I used the color that represents the continent in Montessori. Then I’d make cards for each continent’s animals and use that same continent color for the card stock. Sometimes my choice is arbitrary. I chose gray for music. Whenever I make a new set of cards for music studies, I mount them on gray card stock.

This next step is really what makes the 3-part cards look beautiful and last for ages. Lamination! This is my favorite laminator. I bought it is June of 2013 and it is still going strong. I bought these laminating pouches
. I have about a quarter left int he pack after all that time.
My hint for laminating: when laying your cards out on the laminator sheet/pouch, put a dab of glue stick on the back of them. That way, they won’t slide around when you are feeding it through the machine.
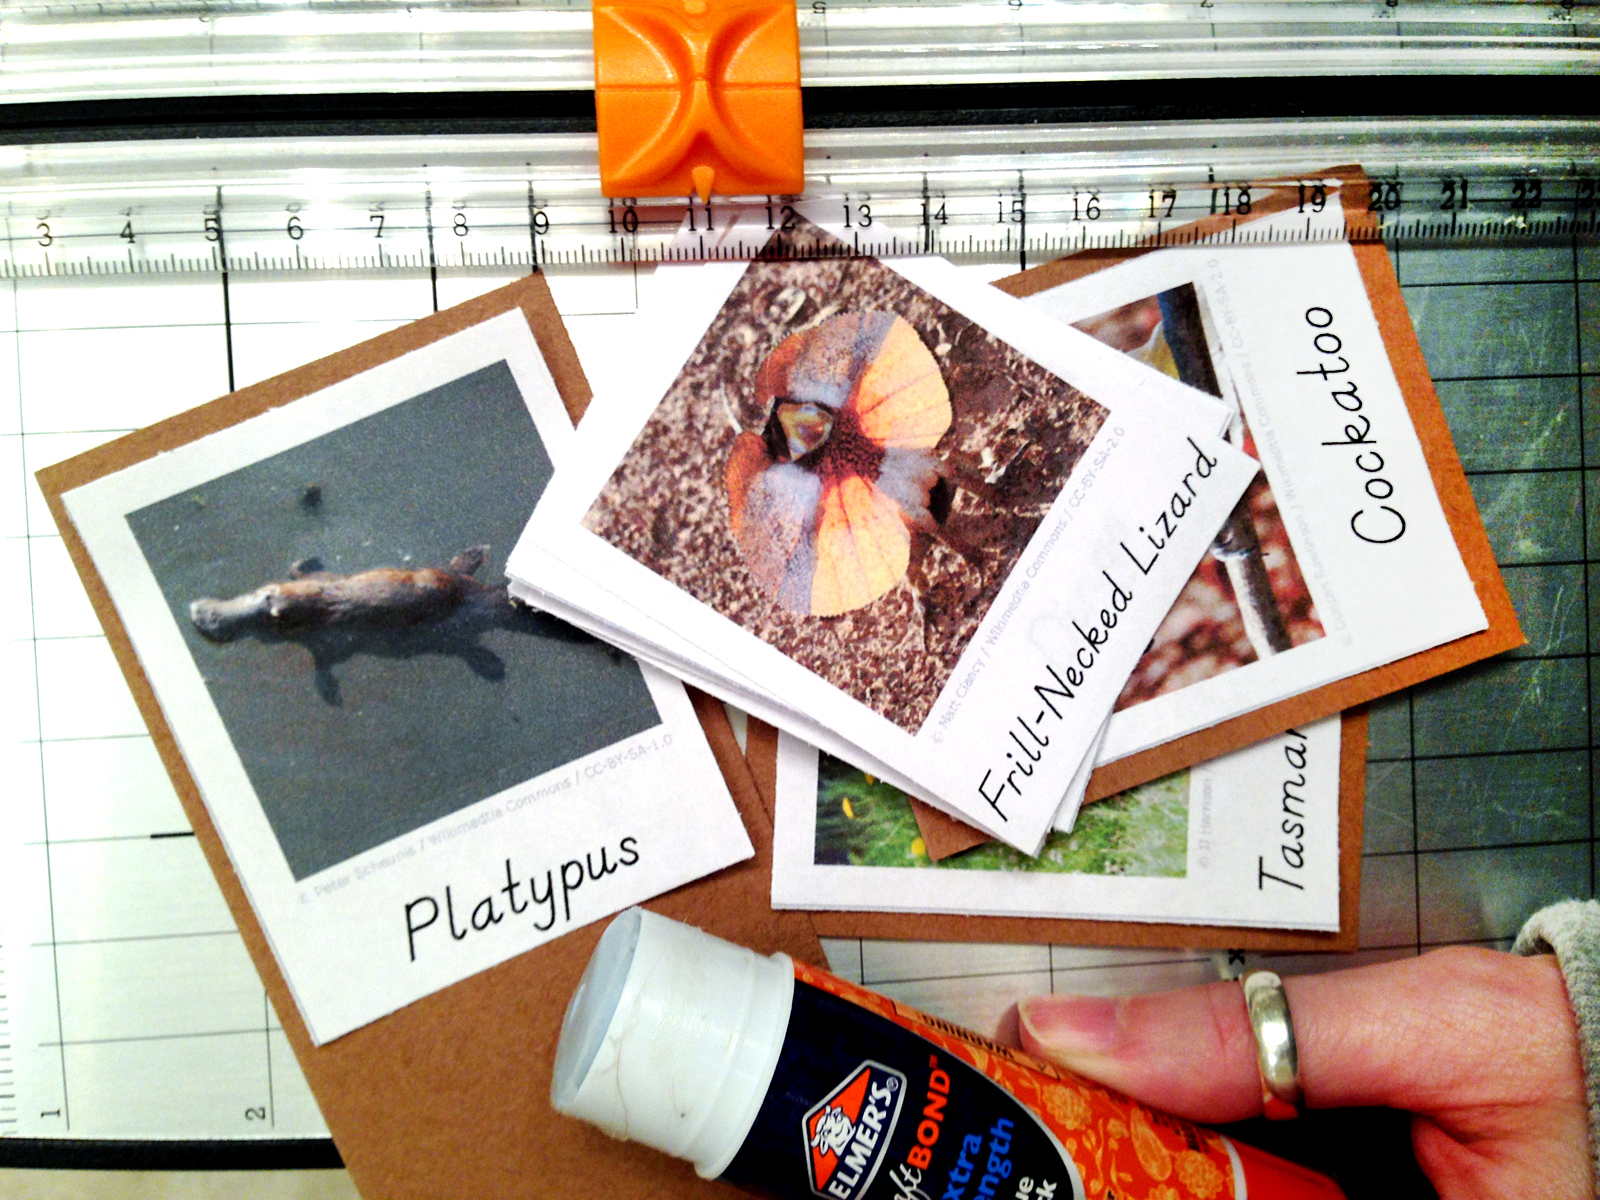
Once they are out of the machine, trim them down (I leave about 2mm of clear plastic border). All done!
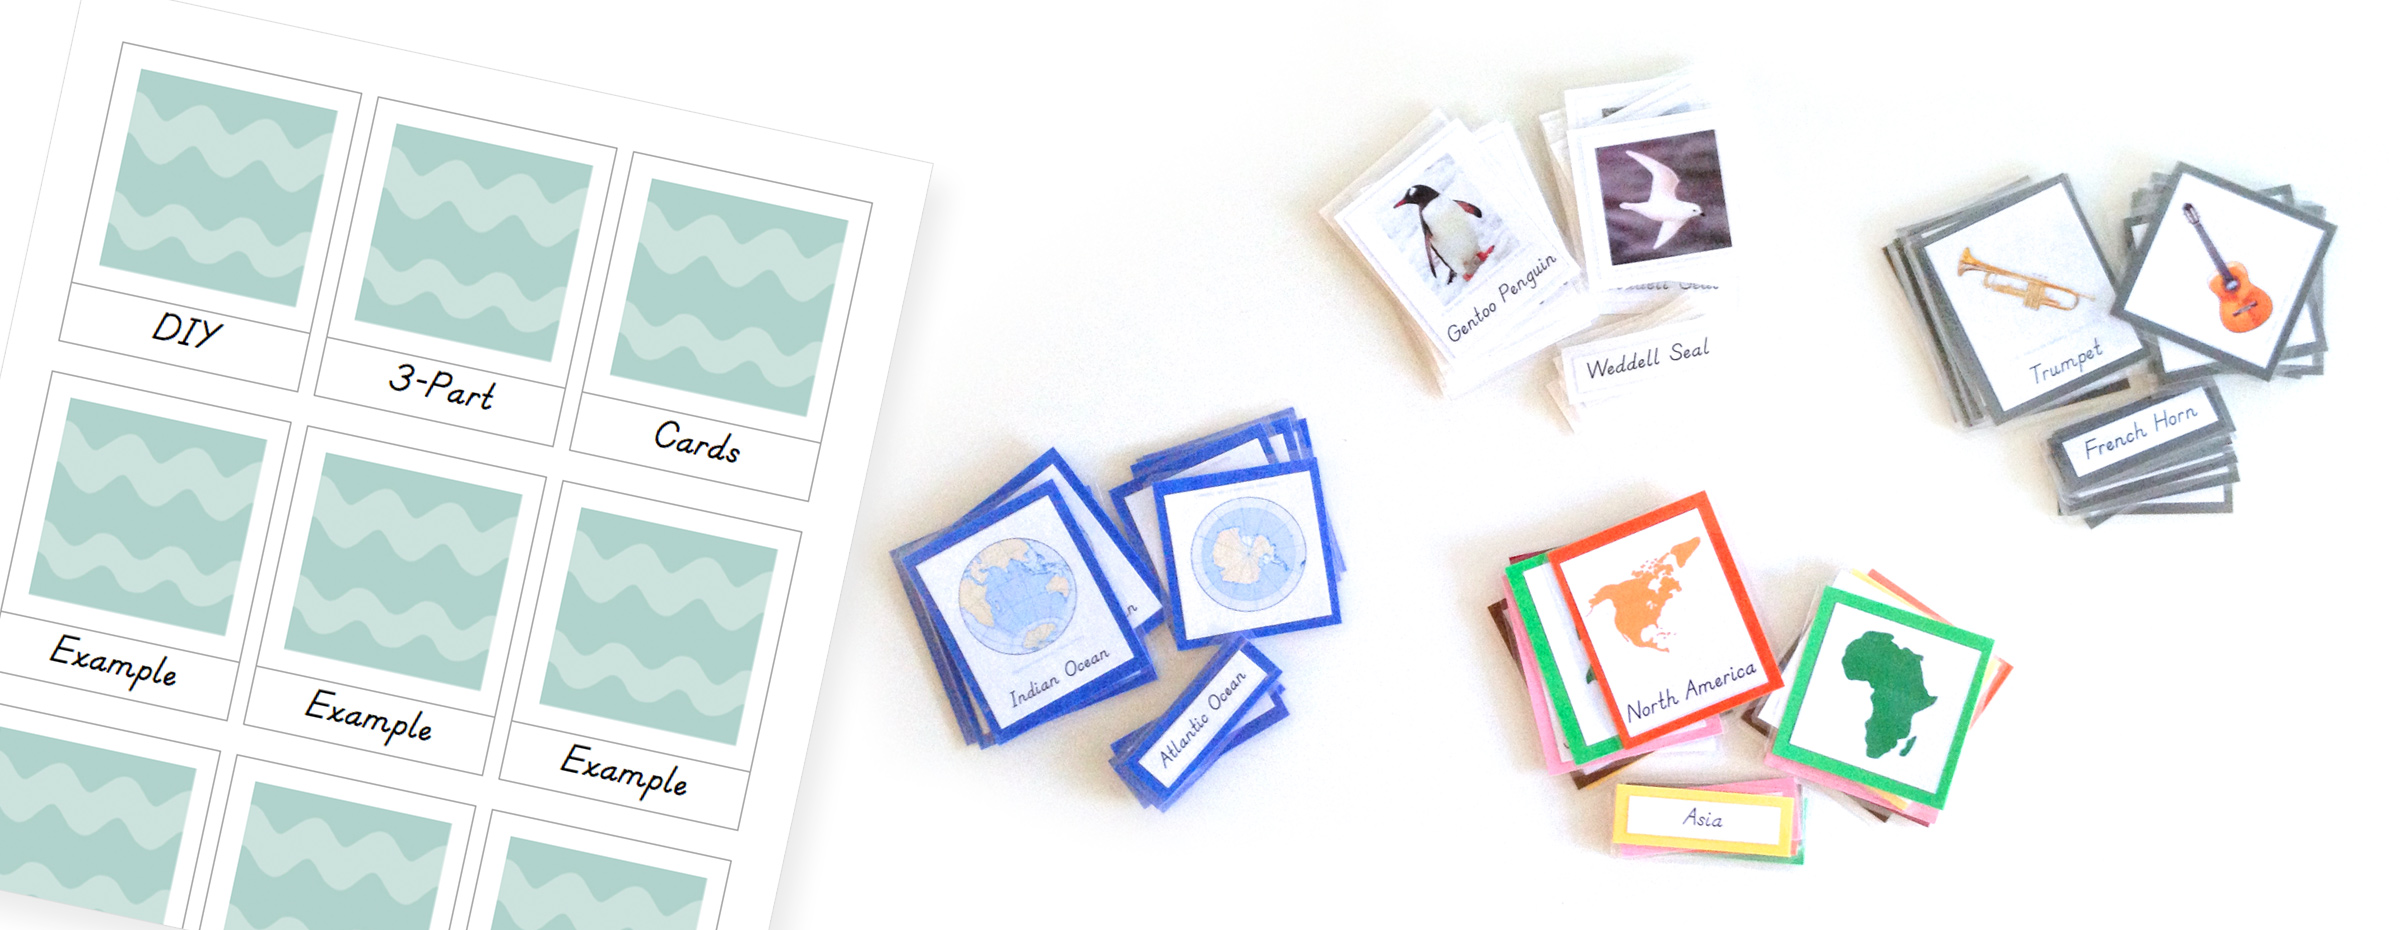
Here are some links to some of my previous free 3-part cards:
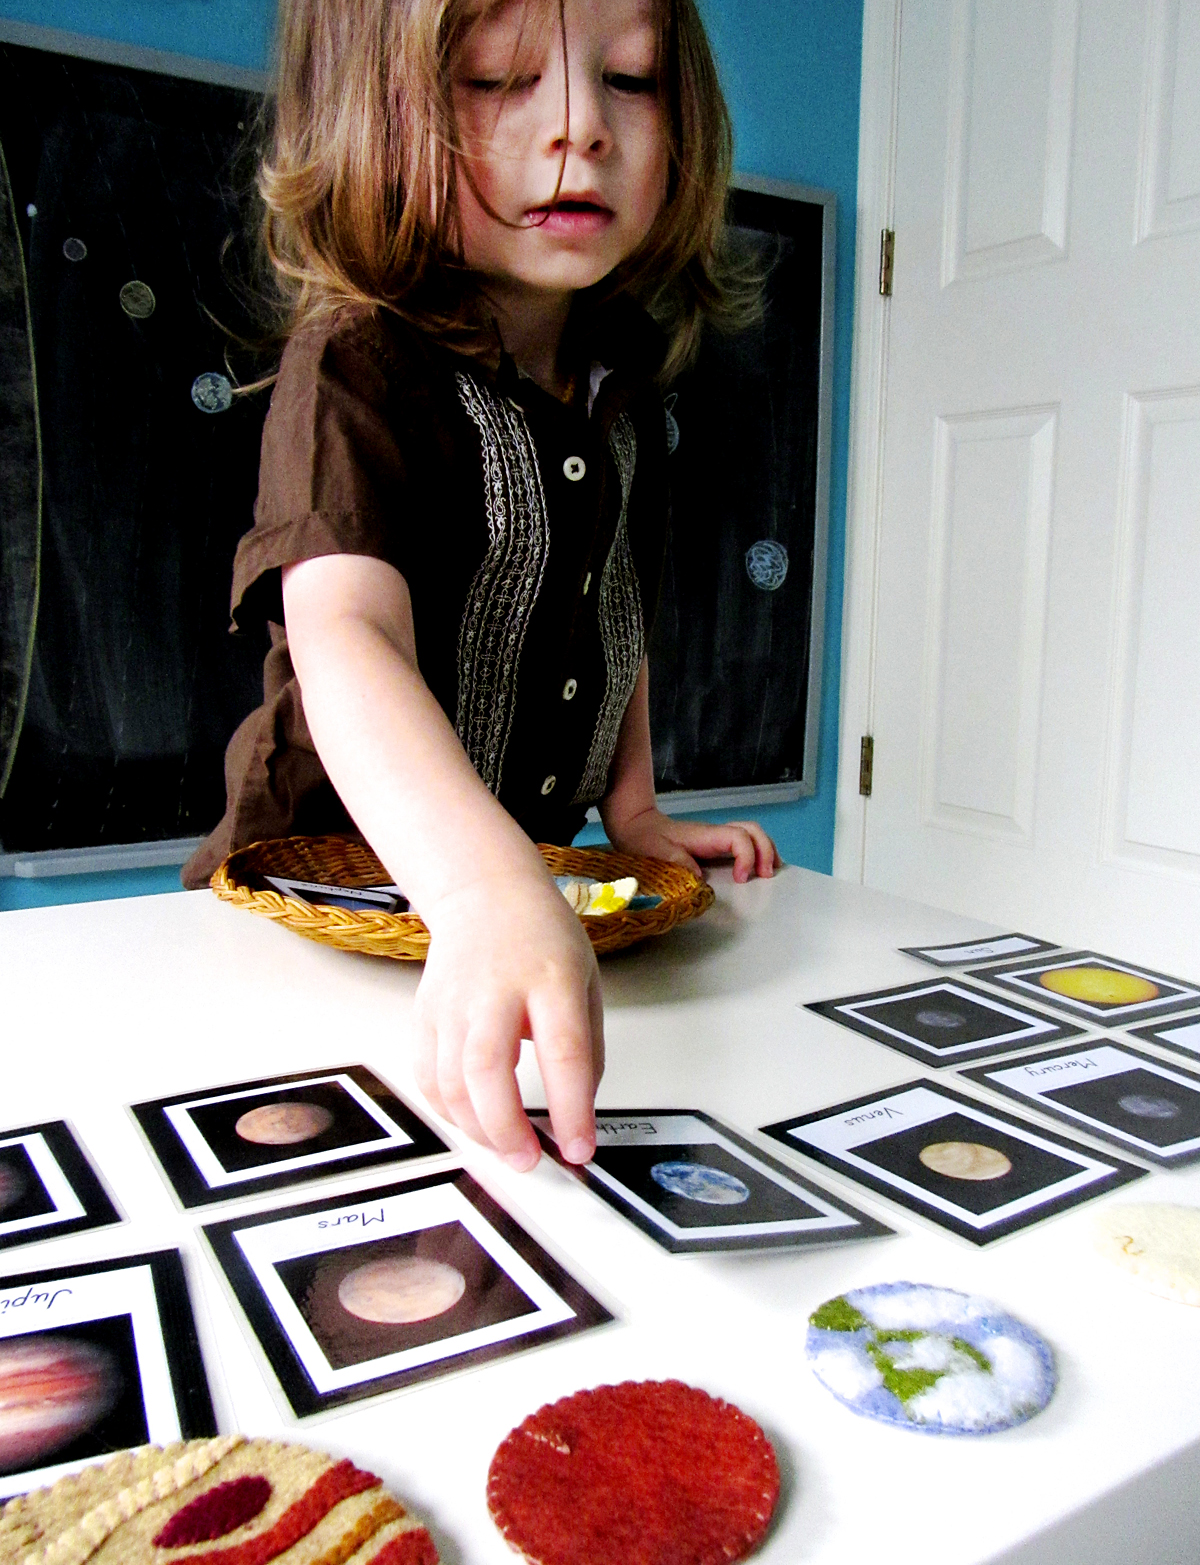
Solar System 3-Part Cards
- Animals of Africa 3-Part Cards
- Animals of Antarctica 3-Part Cards
- Animals of Asia 3-Part Cards
- Animals of Australia 3-Part Cards
- Animals of Europe 3-Part Cards
- Animals of North America 3-Part Cards
- Animals of the Ocean 3-Part Cards
- Animals of South America 3-Part Cards
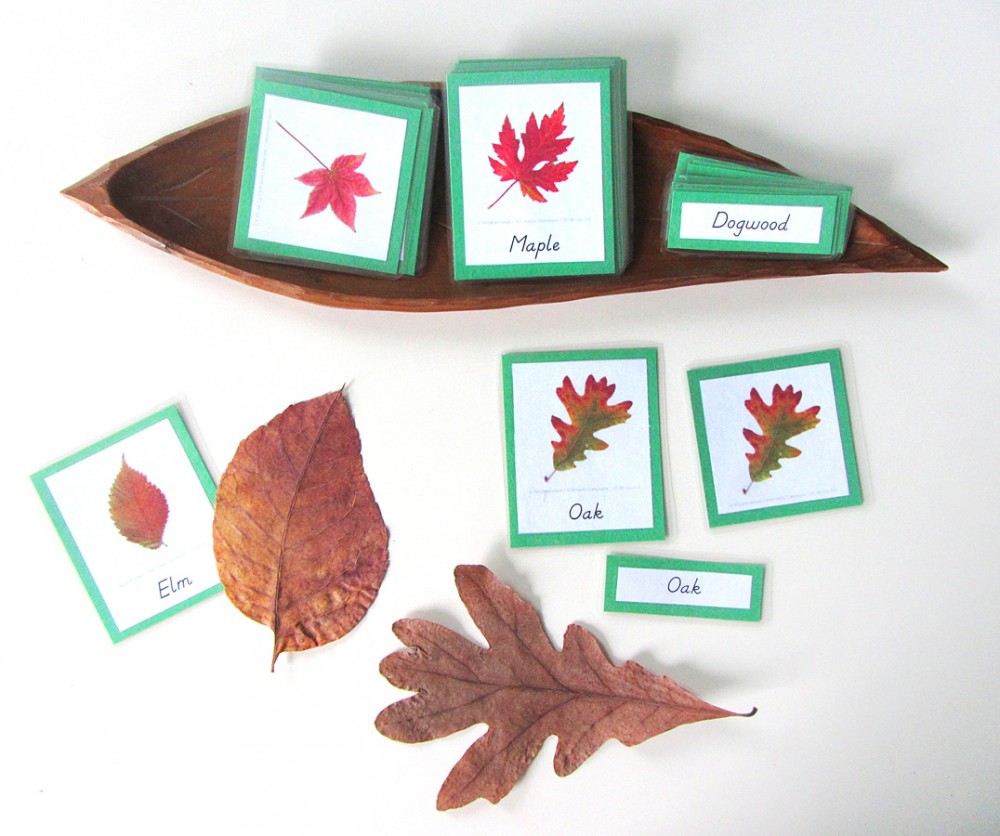
- Autumn Leaves 3-Part Cards
- Continent 3-Part Cards
- Money 3-Part Cards
- Music 3-Part Cards
- Musical Instrument 3-Part Cards
- Recycling 3-Part Cards
- Sea Creature 3-Part Cards
- Solar System 3-Part Cards
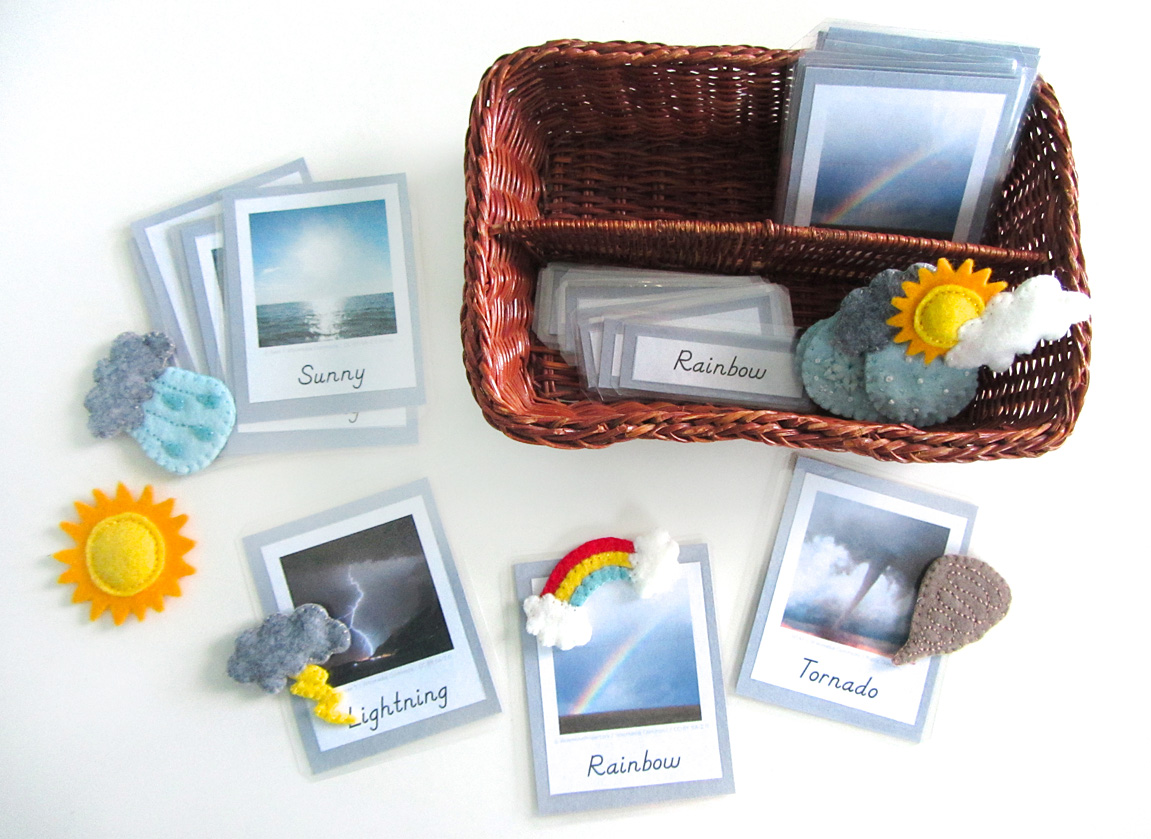
- Weather 3-Part Cards
- Winter Olympics 3-Part Cards
Find more Montessori-inspired ideas at Living Montessori Now’s Montessori Monday!

Thanks for this post! This will be very helpful!
Stephanie your 3-part cards are fantastic. Thank you for sharing!!
I cannot open the 3-part word document. Could the link be broken? I’ve tried on 3 different devices.
It downloads and opens on my computer. Do you have a new enough copy of Microsoft Word to open docx files?
You are creating amazing things and it’s really nice of you to share with us all of it. You’re blog is one of the most inspiring for me 🙂
Stephanie, this is such an amazing gift to all of your readers!! I so agree about giving proper attribution to images, thank you for bringing attention to something that I often see overlooked. I use the gluestick tip, too — I wish someone had told me about it YEARS ago, lol.
I’m sorry you’re having trouble with it! Email me and I can send it directly. Word is not the best for it – I actually use Adobe InDesign.
We have good days and bad days. I freelance so I do have flexibility in my schedule. At one point I needed to have mother’s helpers/nannies come in so I can get work done, but at this point he just wants me in the same room talking to him while I work.
As for school, he only just turned 5 so we’ve been doing a combination of Montessori and unschooling which lets us go with the flow.
Hi Stephanie, I really love your 3 part cards and the cleanliness of it all! We use regular ball and stick print for our homeschool so I’m going to start creating some printables for my kid as well and share it on my blog. Do you mind if I follow your style of attribution?
Being a graphic designer, I am very pro-attribution! I can’t bring myself to use others’ materials because I don’t know if the images were use with permission.
Hello! I went to download the cards to be able to make my own, and it isn’t working :/
I made some a number of months ago, but it looks like they got erased from the computer when my husband had to re-do a bunch of stuff.
Is there a way for me to get the template again?
Thanks!
Hi Stephanie,
I love all our creations. I’m working on the world map right now and was looking through posts trying to find the landmark 3 part cards you talk about in the Animals of Australia post. I was wondering if I missed them or if maybe they haven’t been posted about yet.
Thank you for all the wonderful felt projects that you have made!
Dear Stepahnie, thanks for sharing your tips.
Very much appreciated! Such a lovely design you have and I would love to try, but I have a question. I am on Mac and using Pages, where it looks like croping, centering the images doesn’t work with Pages. Do you think I am doing sth wrong or it really might not be working with Pages.
Many thanks!
Thank you very, very, very much for the printable!!! It’s been very useful, specially being from Spain and not finding anything similar in Spanish!! I’ll check your webpage up often from now on, it’s a great help!!!
A thankful mother
Pingback: How We Use 3-Part Cards – THE SILVAN REVERIE
Pingback: Geography Resources for Kids!
My additional tip would be to buy laminating pouches the size of the cards you want to make. I have this thing about having cards that all are the same size. No idea why. So I have 2 sizes I like and just make the backing card to fit. Also saves on a lot of cutting time after laminating.
Where do I find the 3 part cards for the landmarks for the continents project?
Thank you so much for generously sharing these 3-part cards and making Montessori education more accessible and affordable for everybody! Very grateful!! 🙂
Thank you so much for sharing your beautiful activities and cards for us to teach our little ones. I’m so inspired and excited to teach my 3yo!