A quick note:
Don’t forget to enter out blog-iversary giveaway for a chance to win a kit to sew
your very own Farmer’s Market quiet book page! You have until Wednesday.
I am super excited to have this page all done. It’s one of the pages I’ve known I wanted to do since I was first introduced to quiet books. I waited to start planning it because I really wanted to go all out. I’m glad I have so much experience now, because it turned out just how I envisioned!

For those of you who belong to our Facebook page, you’ve been seeing a lot of sneak peeks and progress photos while I’ve made this page. I plan to continue that since it is much easier to update there ten make a ton of small progress blog posts. Make sure you join if you don’t want to miss out! (On another side note, I’ve had people ask how they can support this site and my free patterns. You can check out a little page about it here.)

everything put away for storage
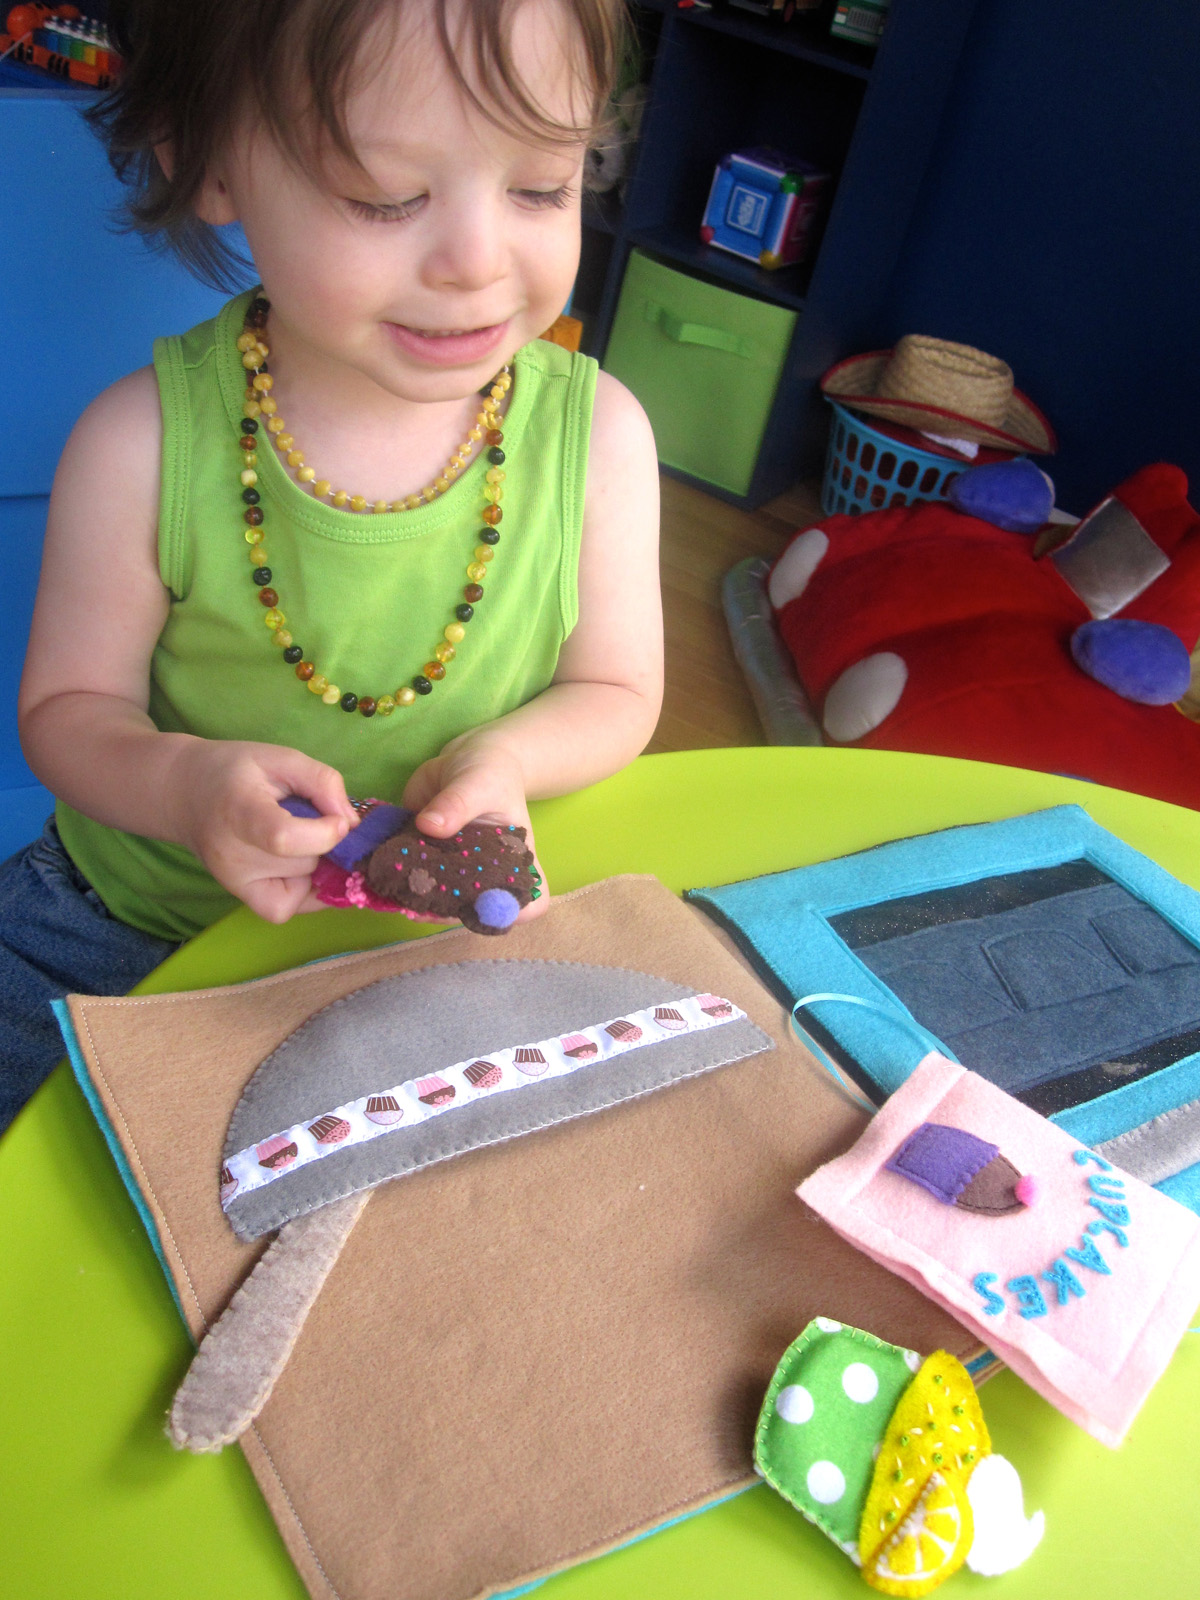
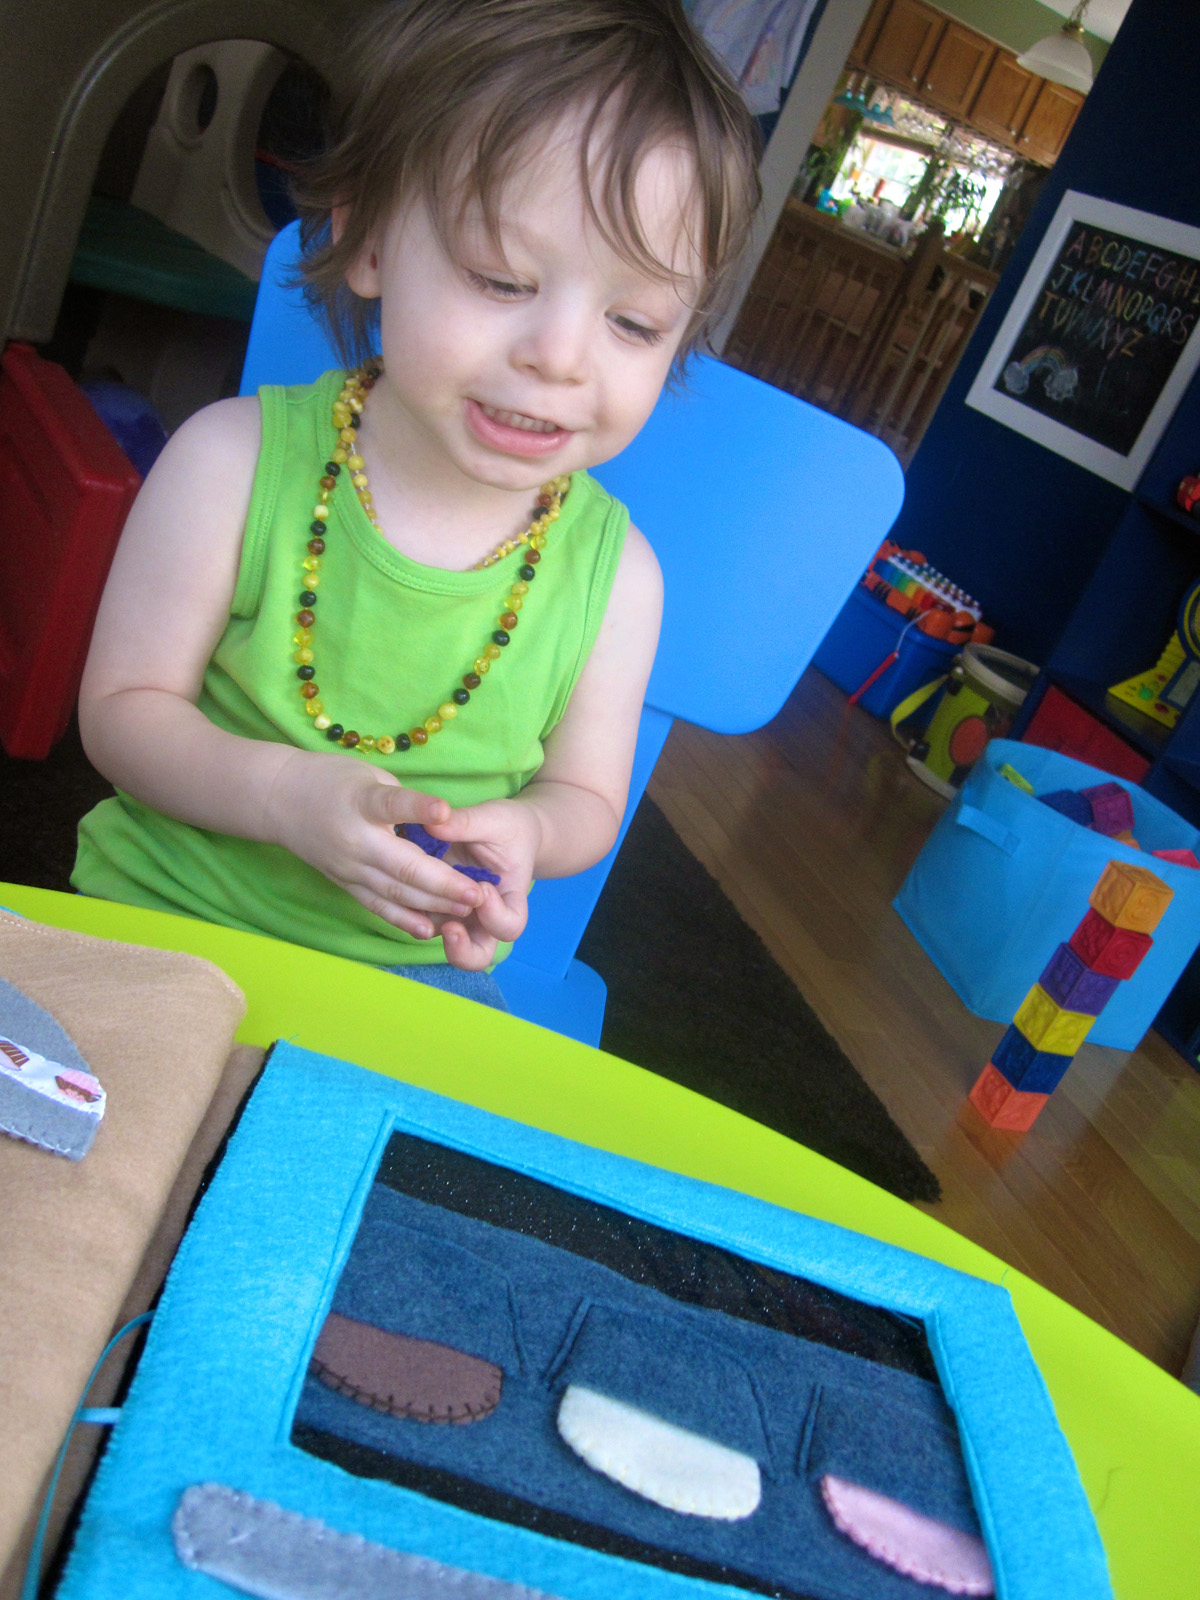
This page is another pretend play page featuring cooking (like out Let’s Cook Breakfast page.) The left side features an oven with a cupcake pan, the right side has a mixing bowl and recipe book. The recipe book holds cupcake making ingredients, and the mixing bowl stores cupcake parts and a spoon. There are three cupcakes: chocolate, strawberry and lemon, and they all come apart into three pieces. This is very good practice for manual dexterity. Jax can put the cupcakes in the cupcake tray, but he is still learning how to fit the frosting on top of the cupcake (it goes on like a hat.)

What I used: the pattern, 2 sheets of tan background felt, a 9” x 9” black glitter oven background felt, two 9” x 9” aqua oven door pieces with window holes, felt (in gray, dark gray, white, pink, hot pink, red, yellow, aqua, lavender, purple, cream, cocoa, brown, dark brown, natural and tan), clear vinyl to fit oven window and recipe pocket, two magnetic purse snaps, a scrap of Velcro, two small pompoms, thin aqua ribbon, green ribbon for strawberry stem, decorative ribbon for mixing bowl (mine is this, but from the craft store) and embroidery floss to match.


Oven: I used my sewing machine for the whole oven to speed it up. I started with the cupcake pan’s tray, sewing the 3 cups on like pockets. Then I sewed the tray down to the oven back (I used glittery black – $0.99 for one sheet at the store, but plain black would work too.) I sewed 3 layers of the oven handle together to make it sturdy, and stitched it to the top of the front piece of the oven door. I took two scrap squares of felt (2 pieces thick each) and installed the male half of a magnetic purse snap in each. I sewed these on to the inside piece of the oven door at the top corners. I sandwiched the clear vinyl in the window I cut out of the two door pieces, then sewed all around both it and the door itself. I went around the outside of the door a second time with a zig-zag stitch. I sewed the black oven inside piece down to the left side of my tan background and zig-zag stitched the oven door to the bottom. I installed the other halves of the purse snaps through both the black and tan layers of felt once I saw where the snaps lined up. I sewed the page backing to the whole page, making sure not to sew the oven door closed, then set it aside until the right-hand page was complete.

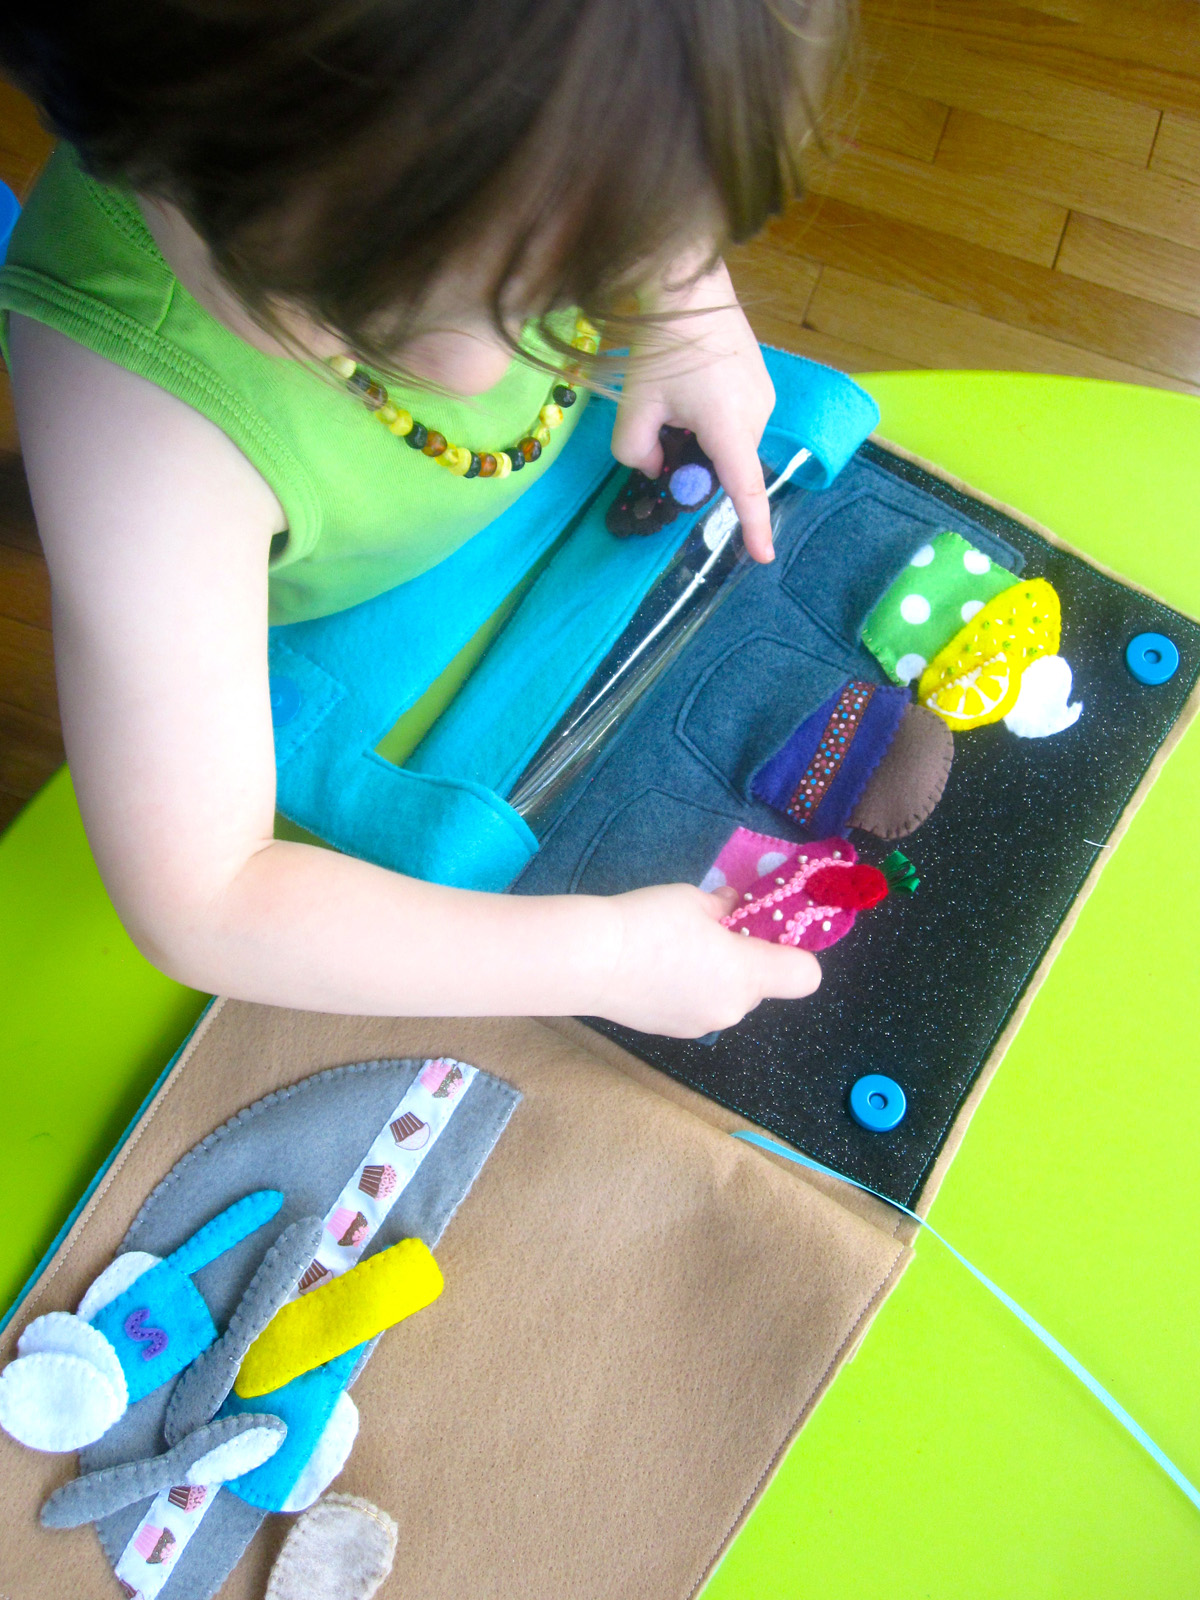
Mixing Bowl & Spoon: I sewed some decorative ribbon to the bowl (just because I wanted a reason to use it!) front and sewed the front to the back along the top. I then sewed the bowl to the bottom right of the tan background all around the bottom. I sewed the whole page to it’s backing, then sewed the two facing pages together with a length of aqua ribbon caught in the seam. (This will be used later for the recipe book.) I Sewed the pages together like this.
For the spoon, I cut three layers of felt to make it sturdy. I then trimmed the oval part of the top layer about 2mm smaller than the other layers. I sewed them together all around the edged with a blanket stitch, lining up all the edges exactly. This caused the bowl of the spoon to curve like a real one would.

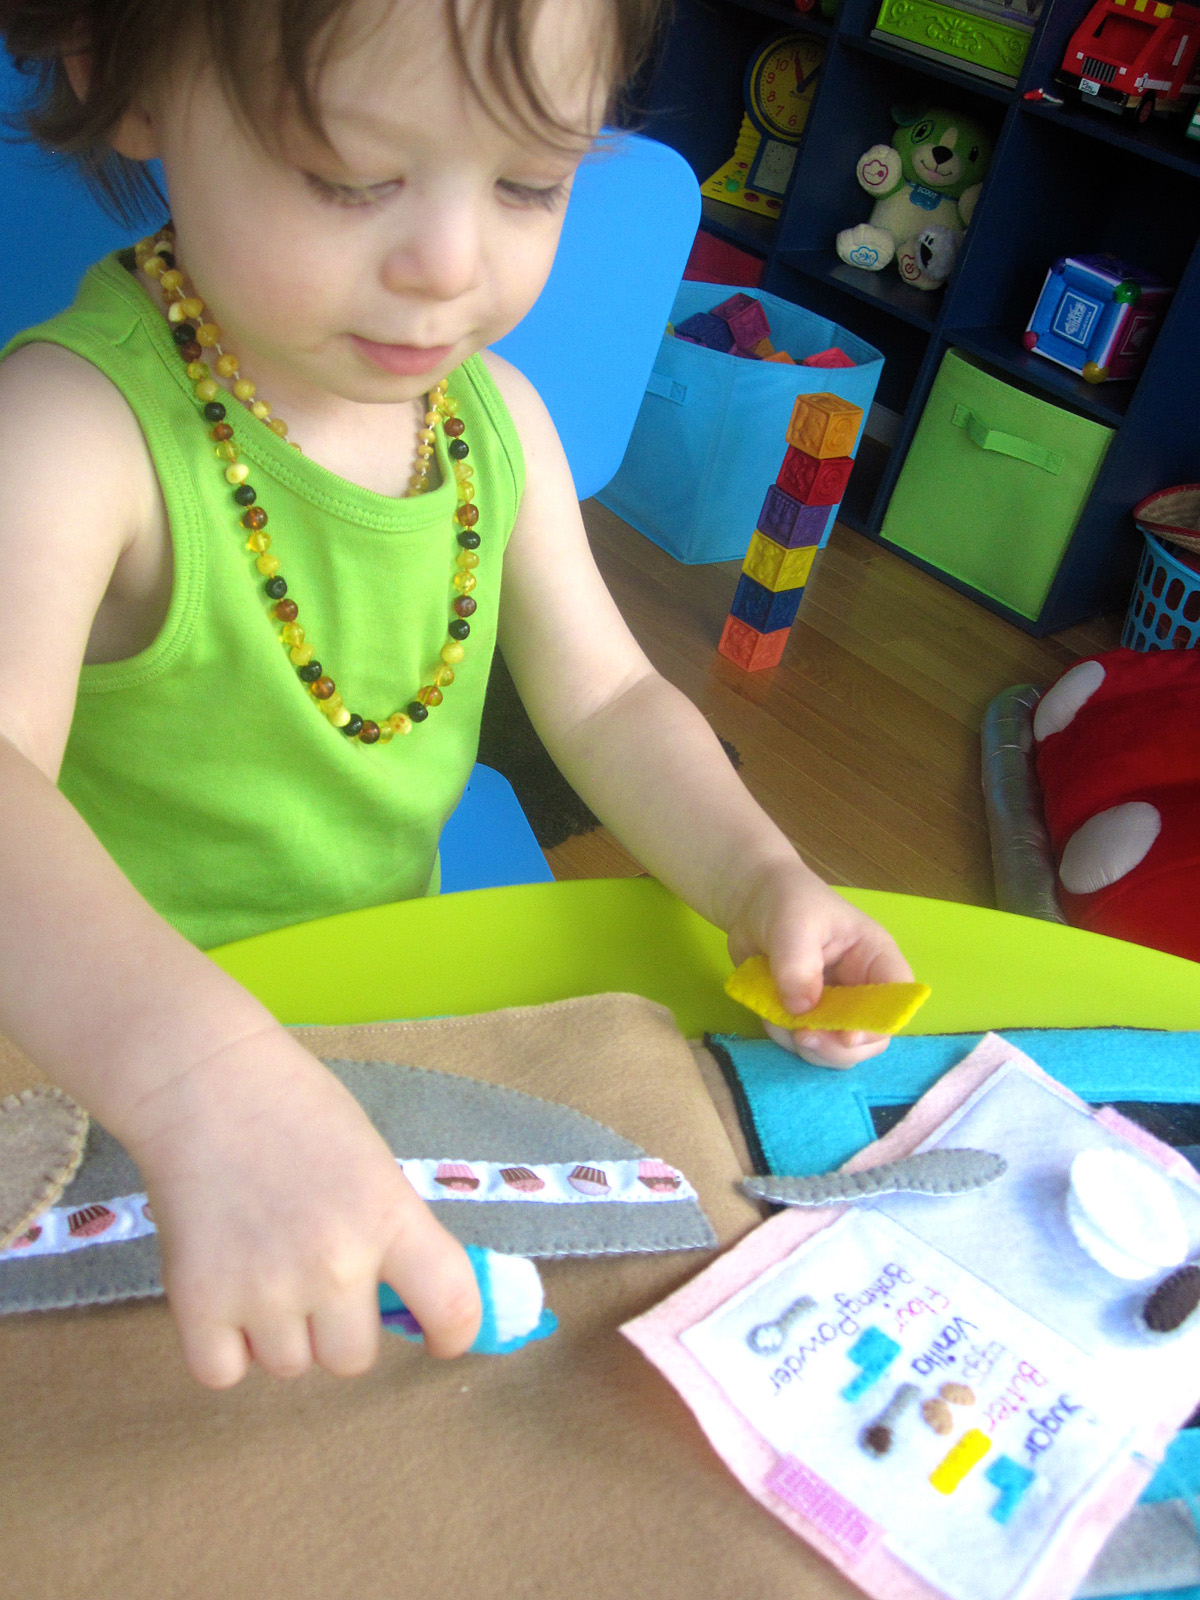
Recipe Book: I started out by stitching the recipe to the right side of the white felt “page”. I did mine totally by hand, but I later made up a pattern for you. The text is done in back stitch. The little felt pictures are sewn down in my usual applique technique of tiny perpendicular stitches around the edges. I sewed the white sugar, flour and backing powder with gray felt to make it show up more. I decorated the cover by back stitching the felt letters on, sewing down the cupcake and adding a pompom. I ran my needle straight through the pompom to sew it on.
I pinned the white page down to the inside of the cover and laid some clear vinyl over the left-hand side and the other end of the aqua ribbon sandwiched in like a bookmark. I sewed the page down, and made two vertical lines of stitched up the middle to make a book spine and close the right side of the clear pocket. I finished the recipe book by added a little Velcro to close it. I happened to have pink in my stash from years ago.

Cupcakes & Liners: The actual cupcakes are simply blanket stitched together all around the edges. For the cupcake liners, I trimmed the tops with my pinking shears to give that zig-zag look, then sewed the fronts to the backs along the sides and bottoms to make little pouches. I also added polka dot ribbon to my chocolate cupcake’s purple liner because I didn’t have the right polka dot felt. You can use whatever felt you’d like for your liners. Be creative!

Lemon: I sewed the four lemon segments to the cream colored rind, the sewed the rind to one of the yellow semi-circles. I sewed the two semi-circles together into the lemon wedge, then sewed it to the front of the lemon glaze. I also outlined mine with an orange-y thread to make it stand out more. I decorated both the front and back lemon glaze pieces with lime green French knots and cream colored stitches to look like sprinkles. I sewed the front and back together, leaving the bottom open so it can go over top of the cupcake and liner like a little hat. I then layered the two whipped cream pieces around it and sewed them together as well.
Strawberry: I had a little roll of pretty pink trim (mini ric-rac would work well too) I got for $0.50 at the fabric store. I stitched it down in two rows of waves on both the font and back of the strawberry icing. I made white French knots to add sprinkles. I sewed tiny brown stitches to the front of the strawberry to be the seeds, then sewed it down to the front of the icing through both layers of the strawberry. When I got to the top where the strawberry hung off of the strawberry, I sandwiched in some loops of green ribbon to make the top of the strawberry and finished the edge with a blanket stitch. I then sewed the front and back of the icing together, leaving the bottom open so it can go over top of the cupcake and liner like a little hat.
Chocolate: The chocolate is made the same way as the other two cupcake tops. I sewed down two shades of chocolate chips and added French knot sprinkles in colors to match my ribbon. I sewed a pom-pom to the top of the front. I then sewed the front and back of the icing together, leaving the bottom open so it can go over top of the cupcake and liner like a little hat.

Baking Ingredients: The baking ingredients are all pretty similar in construction. They are sewn together with a blanket stitch around the outside. Where noted, I use 3 layers of felt for stiffness.

Measuring Cups: I back stitched the letters onto the front of the cups. I sewed little stitches on the white flour/sugar parts to giving it texture. When I stitched the handles, I stuck an extra strip of felt to stiffen it.
Butter & Eggs: These are all just sewed together around the edges.
Vanilla & Baking Powder: I sewed the vanilla/baking powder down tot he front of the spoon, then sewed around the edges of 3 layers of felt for strength.

And that’s it! All the ingredients go into the pocket in the recipe book. I had Jax pull them out and put them into the bowl in the order the recipe asked for. He loved it!
He keeps trying to put the completed cupcakes (liners and all) into the oven pockets. If you want yours to fit into the tray with the liners, you’ll have to make larger pockets. He loves the three flavors I made. I may end up make more in the future. The pattern makes it easy to add on.
I hope you enjoy this pattern! Please send me photos or post on the Facebook page if you make it!
oh my goodness, this is so cute. Thanks for posting everything so clear, I read through it and understand it. I cannot wait to make it. Love it!!
Absolutely adorable!!!
You are amazing Stephanie. I LOVED making several of the pages you have offered. We have twin grandsons (aged 2) and they love the first two I made. I’m working on the airport now but now I want to do the cup cakes. You sure are a talented young lady. Thanks for your ideas and patterns.
I LOVE this page and so does my daughter, I will be making almost every page that you have posted, I already have a few down but once I get them all done I will send you a link to all the pictures but as for this pages I will be starting on it tomorrow 🙂 GREAT JOB!!! I have been excited about it since you started making it! I looks wonderful and I know my daughter will love it!
Love the cupcakes! Where do you get the polka dot felt?
I found it at Joann’s Fabric store in the craft aisle.
Amazing! Where did you find your magnetic clasps? I’ve checked my local JoAnn’s with no luck. PS – Love that the pattern pdf is in color this time too!
I found mine in a large Joann’s in the craft section. There was a purse-making aisle with purse handles, D-rings and lots of magnetic snaps. I actually just bough a couple packs of green magnetic snaps they had for $0.25 each in the sale bin.
How are you sketching on the iPad is it an app?
Pingback: Cupcakes Anyone? | Crazy Craftings :)
Thank you for the reminder to win the Cup Cake pages. I have done it already for our twin 2 year old grandsons and it turned out beautifully. I really had fun doing it. I’m working on the Camping Page with the wool felt (it is terrific and worth the extra money) now and enjoying it too.
Thanks
Rhonda
Pingback: Family History Quiet Book: Cupcakes | Continually Creative
Hi! Your blog is amazing, I’ve made a few of your pages and my little ones LOVE them! Did you sew the vinyl for the recipe book on the sewing machine or by hand? (If you used the machine how do you keep the vinyl from shifting??) Thanks!!
Thank you for posting this! I know this post is old, but I made this for my daughter a few years ago and she loves it! Thank you again!!
Pingback: 6 Quiet Book Pages For Little Girls – Felting