Are you ready to cook breakfast?
I’m so happy to be back to sewing after my little break! And I think this page came out adorable…
Jax loves pretend play cooking and playing with his kitchen, so it made sense to do a breakfast page after someone asked for a frying pan on the Facebook page. (Sorry it took so long!)
 This pattern uses some duplicate items from the Starbucks Breakfast page. The patterns are included here, but please see that post for instructions on the banana, egg and bacon.
For this page, I used: background felt in red and red polka dot, felt (in pink, red, burgundy, orange, yellow, cream, white, tan, brown, gray, dark gray, black and glitter black), clear vinyl, batting/stuffing, 1 grommet/eyelet, 5 snaps and a button.
|
|
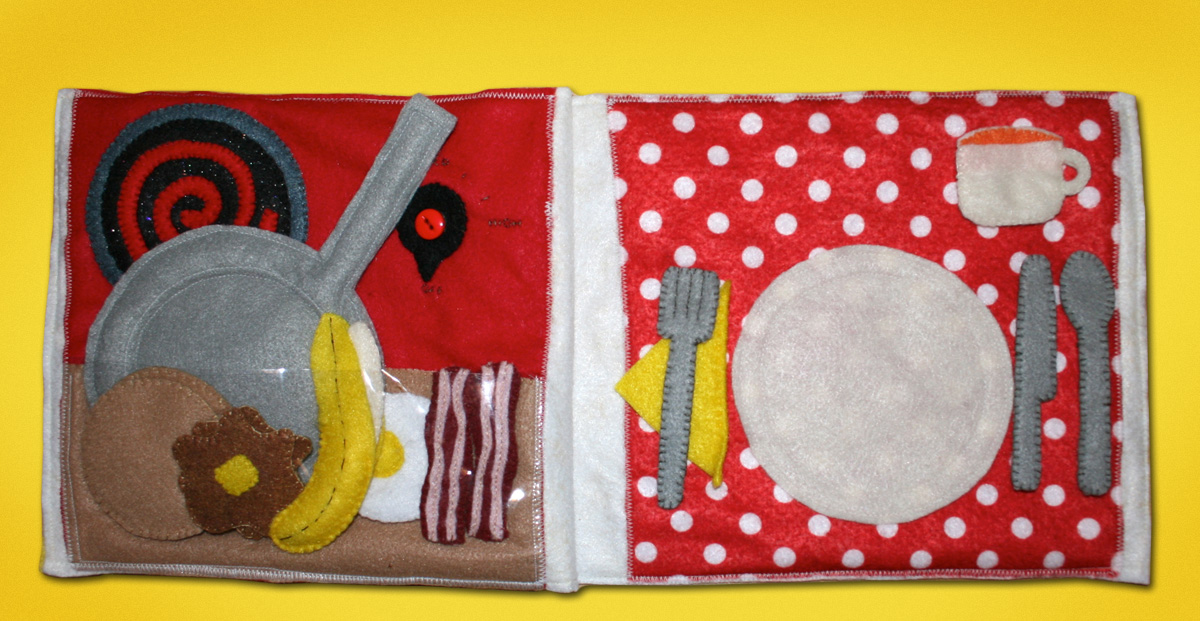

To create the stove page, I started with a 9″ x 9″ red felt square. I covered a little less than the bottom half with a tan felt to make the counter. Because I wanted a way to store the food without using lots of Velcro that damages the felt, I sewed a clear vinyl pocket over the counter.

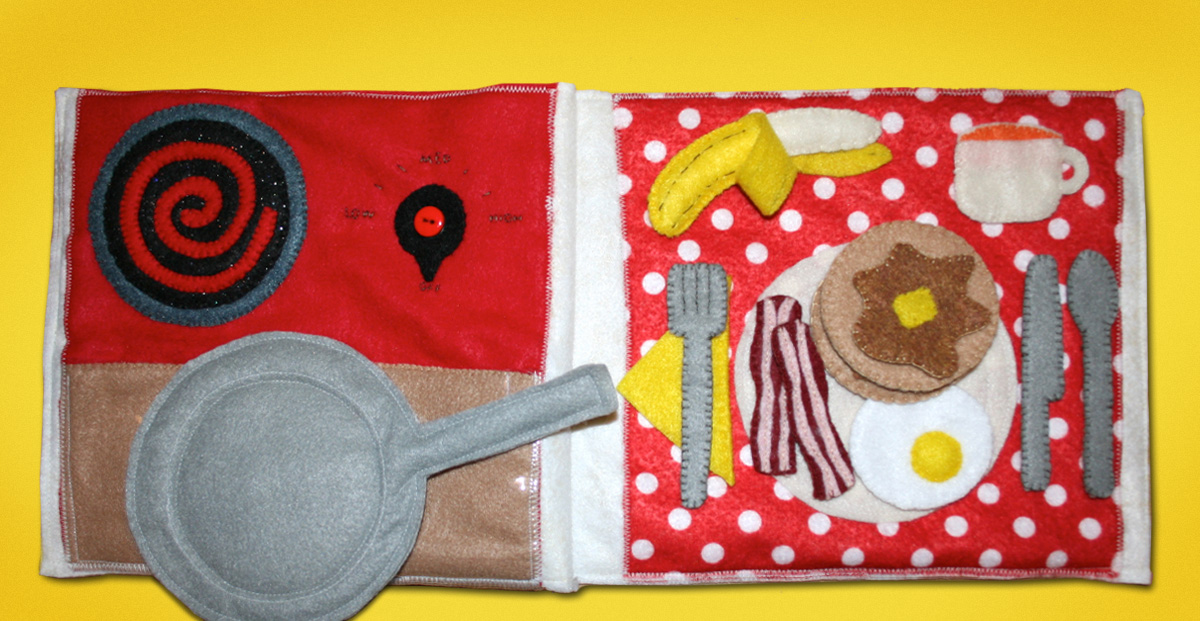
To make the knob, I sewed the two halves together, then installed a large eyelet in the center. I put it in place on the page and sewed a button to the page through the eyelet. This lets the knob spin around. I placed pins at all the points I wanted to add stitching, and I used them to keep my lettering straight. I free form stitched it all, but you could write it out first with a pattern pen. I did: LOW | | MED | | HIGH OFF.
 The burner was simple – it just took a lot of stitching! The red spiral gets sewn to the black glitter circle (you could use plain black). Then the black circle gets sewn to the dark gray circle. The whole thing gets sewn down to the page.
To make the frying pan, I first stitched the inner circle from the pattern onto the top piece using the sewing machine (to save time.) I then layered some batting between the two sides and sewed them together around the outside. I’d considered adding a light cardboard or plastic canvas layer for stability, but I decided I wanted it to squish into my huge quiet book and not be bulky. When it was all sewn together, I sewed a second circle just inside the first to make the pan dip in a bit at the center.

 To make the table page, I started with a 9″ x 9″ square of polka dot felt. I sewed the plate down using my sewing machine (I used off-white for my plate and cup) then sewed a second circle inside the first.
To make the napkin, I used a square of yellow felt. Use whatever you have on hand that coordinates! I went with yellow thanks to a Facebook suggestion. I folded the square then hand stitched a running stitch just beside the fold to keep it folded. The fork, knife and spoon are all made by sewing the two sides together. The fork also has three rows of stitching to make the tines.
The cup was made by sewing the orange juice down to the top of the back of the cup, just below the top so you see a little lip. You could make your orange juice go the full length of the cup (or even come out!). I hadn’t originally intended to leave the cup open like a pocket, but that is what I did. I sewed the front to the back around the lower three sides, catching the handle in the stitching.
The napkin, fork, knife, spoon and cup all have snaps sewn to them and the table to hold them in place.
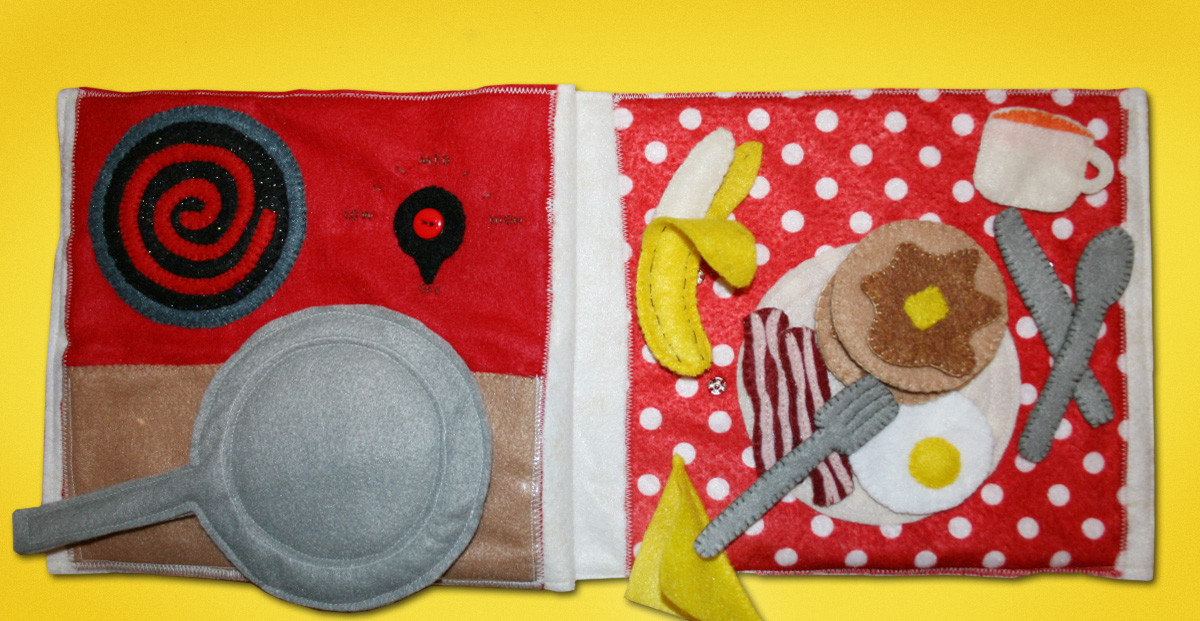
The pancakes are made by simply sewing the two sides together. I made two. For the syrup, I sewed butter squares to the top pieces and then sewed the tops to the bottoms. For instructions for sewing the banana, bacon and eggs, see the Starbucks Breakfast page.

What do you think? Jax loves this page! He hasn’t figured out how to turn the knob yet, but he likes stacking everything onto the frying pan then putting it all away in the counter pocket. He calls the juice “tea” – maybe I should have made it brown! He sees mama drinking tea a lot.
    |
If you sew this page, feel free to share your photos here or on the Facebook page!
This is great!! Thanks so much! I have a question though, you don’t use velcro because it ruins the felt, have you tried using sew-on velcro? When I started my book I bought the velcro circles with the sticky backs (BAD IDEA! Definitely a felt ruiner) but so far I haven’t had any issues since it’s sewed onto the pieces.
I stopped using Velcro because the hook side sticks to the felt and causes it to get fuzzy when you pull it off. Jax doesn’t know to only stick the Velcro to the backing and not the felt page. But when I do use it, I only use the sew-on kind.
So what you’re saying is, You don’t always use Velcro…but when you do, you use the sew on kind.
When I use Velcro, I now use the “snag-free” sew-on Velcro. It does not damage or fuzz felt. Hope that helps!
“Stay crafting…my friends…”
if i’m not mistaken, that was a dos equis commercial joke. ha ha…i gotchya!
Pingback: Latest on my kids Quiet Book | AfricanKiwi
Pingback: How to Make a Quiet Book | Canning Jars Blog
Where did you fine the red and white poke a dot felt? Your are amazing!!!! Thanks soosooo much for sharing your patterens .. Blessings
I got mine at AC Moore craft store.
Pingback: five on friday (12/4) | Michael and Tara
Did you sew the fork, knife, and spoon down?
YOUR AWESOME STEPHANIE. THANK YOU FOR SHARING. I AM MAKING QUIET BOOKS FOR THE CHURCH KIDS AND THESE ARE SUPER AND REALLY PRINTABLE. THANK YOU THANK YOU THANK YOU