
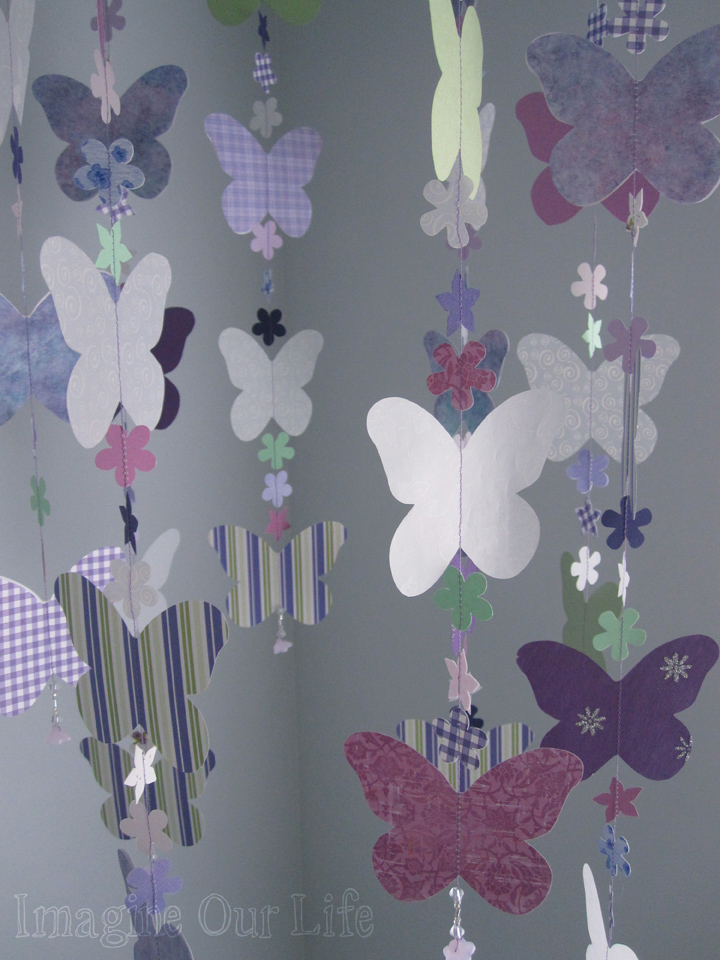
At first I thought I was completely insane and over-ambitious to decide to make a huge paper butterfly mobile. Turns out, it wasn’t bad at all! After late night inspiration struck, I was able to whip this up in no time (*not* counting the time to cut out the butterflies!)
This technique is great for paper garlands as well. I’ll be doing a tutorial for one soon.
You’ll need:
- Card stock and/or vellum. I used both.
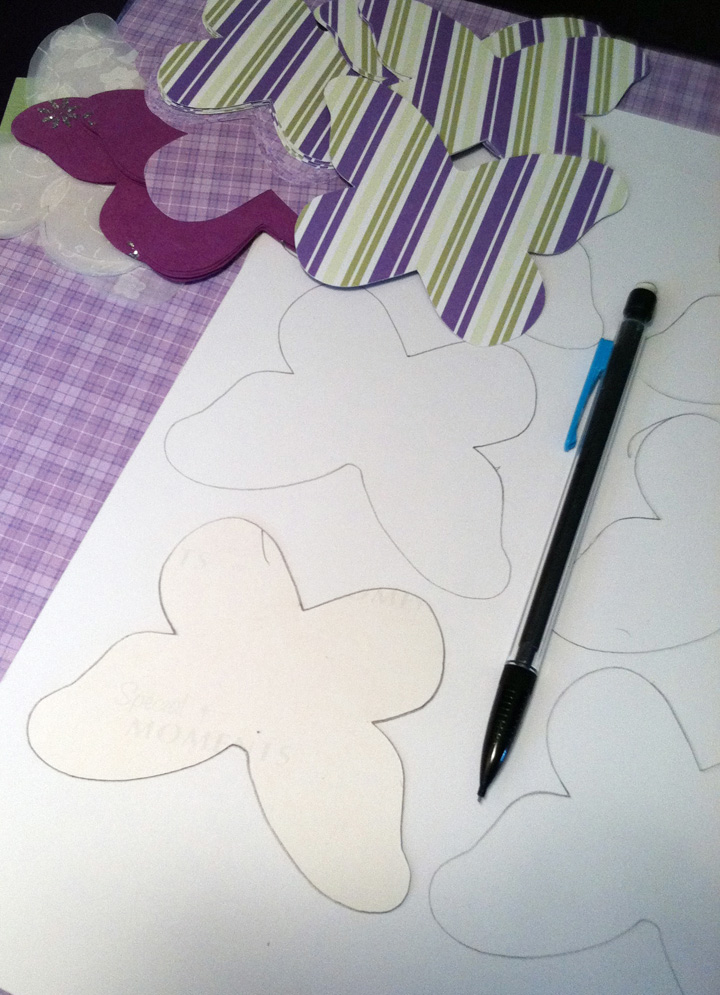
- Butterfly template. I printed mine on card stock so it was easy to trace.
- Paper punch(es) for little flowers. I used the McGills Petite Petals Punch
- Sewing machine, thread and beading needle.
- Assorted beads, including some drop beads. I used pink flowers.
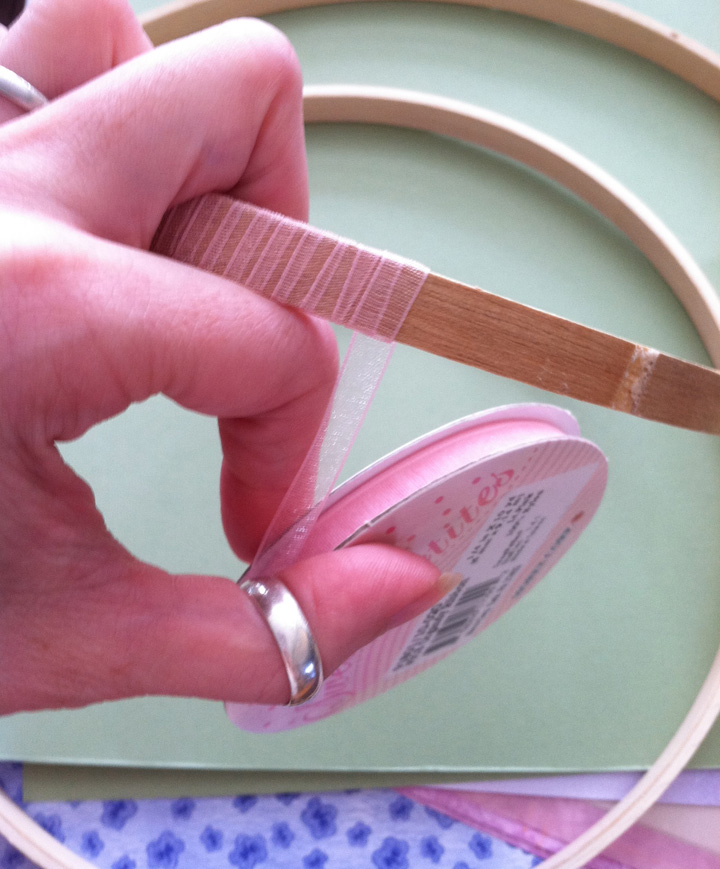
- The inner ring of a sewing hoop.
- Ribbon and glue to cover the hoop.
- String or ribbon to make the hanger. I used crochet cotton.
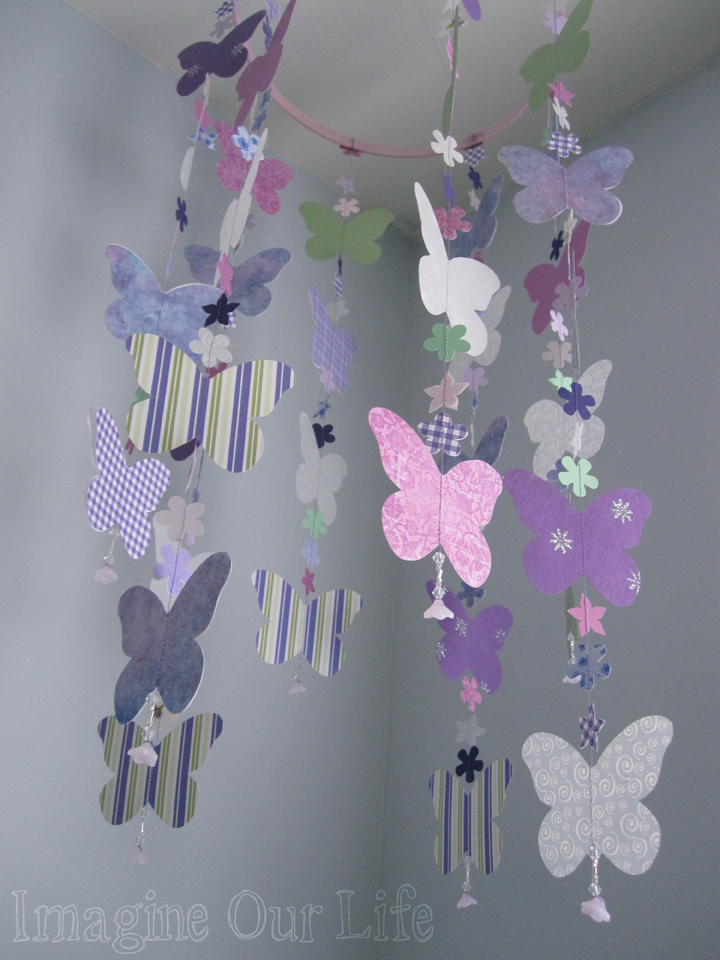
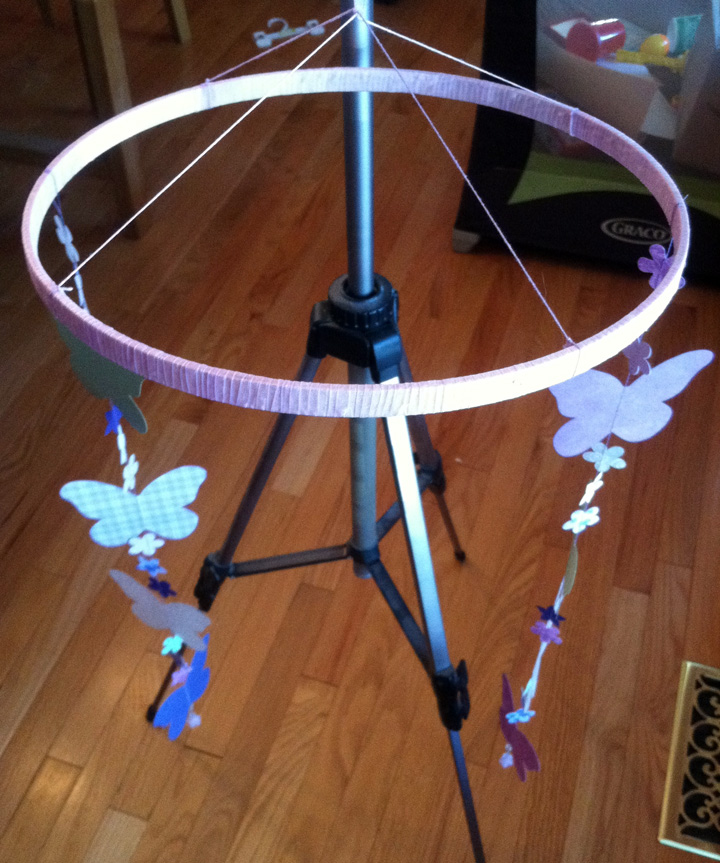
I started by wrapping the inner ring of a wooden embroidery hoop with ribbon and gluing down the end (I “clamped” it with tape overnight while it dried.) I cut two lengths of crochet cotton that were longer than the diameter of my hoop. I tied one so it split the hoop in half, then tied the other perpendicular to that so it split the hoop in quarters. I then grabbed the centers of both strings and tied a ribbon to the center so the mobile could hang from the slack in the strings.
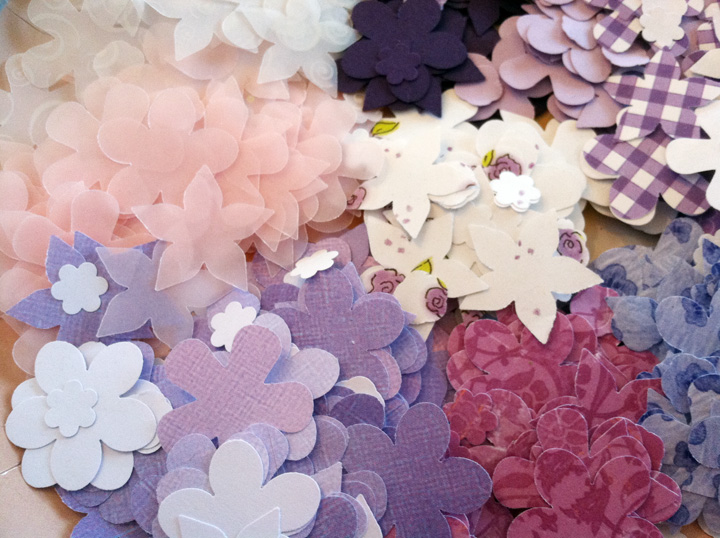
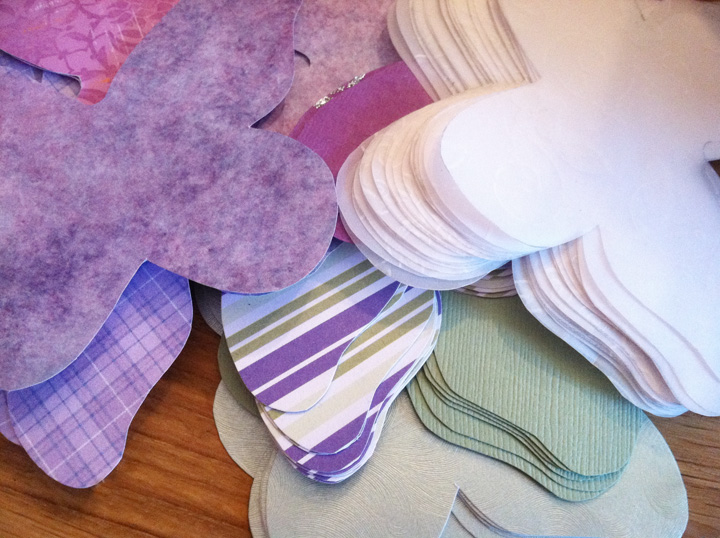
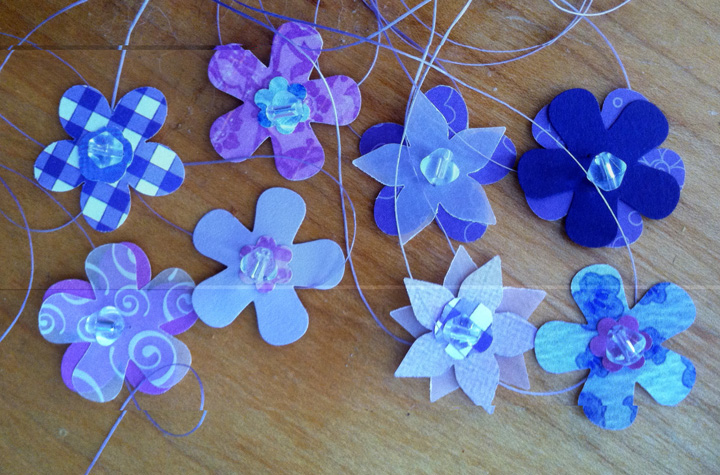
The time consuming part was cutting and punching the paper. You need to cut out at least 36 butterflies for the layout I used, more if you used single-sided paper and use two pieces back-to-back. I did some of both. I punched a zillion flowers since I wasn’t sure how I was going to use them. Luckily, my punch cut out 3 at a time! I used some solid paper, some vellum (solid and patterned) and some patterned paper. They were all from the scrapbooking aisle of the craft store.
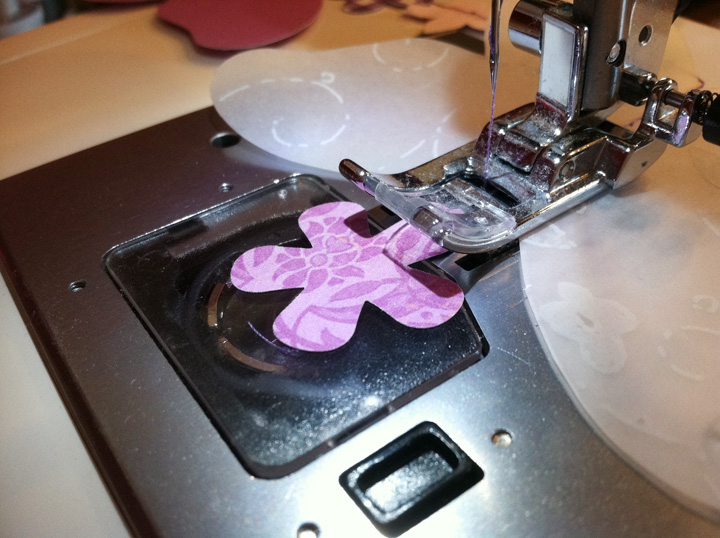
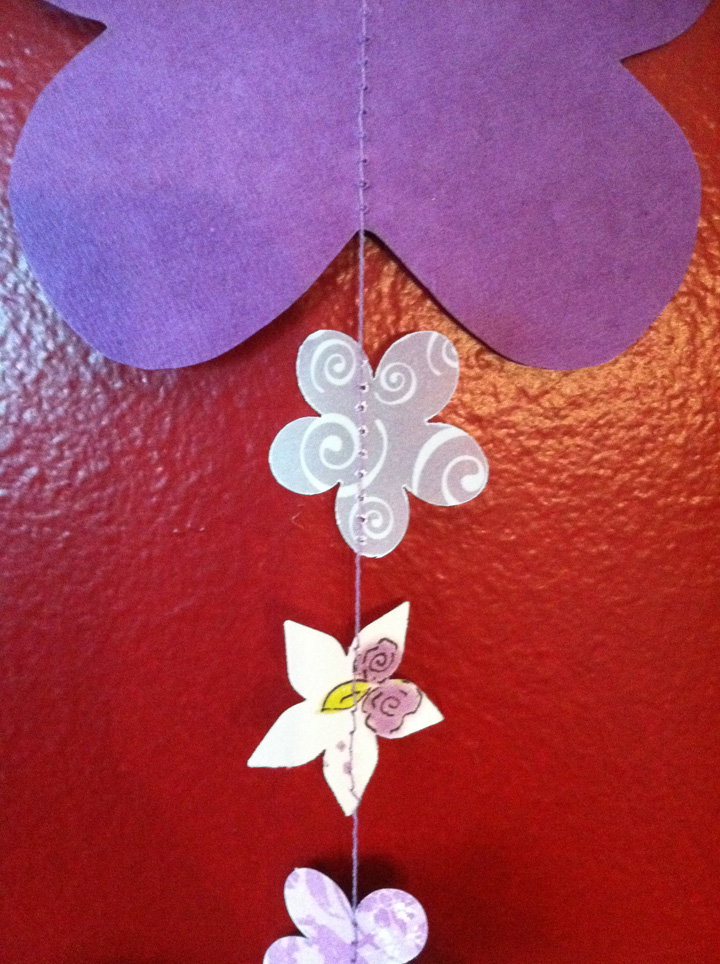
Sewing the strands of the mobile is so easy! I sewed mine from the bottom up. Leave about 10″ of spare thread before starting (you’ll need that for adding beads later) then start sewing as you feed the bottom of a butterfly into the machine. When you get to the top of the butterfly, position a flower the distance you want it from the butterfly and push it under the foot as you continue sewing. My patter was 3 flowers between each butterfly and I ended with 3 flowers on top. I did four strands with 4 butterflies and 4 strands with 5. When you end your strand, back stitch a bit, then leave another 10″ tail so you can tie the strand to the hoop.
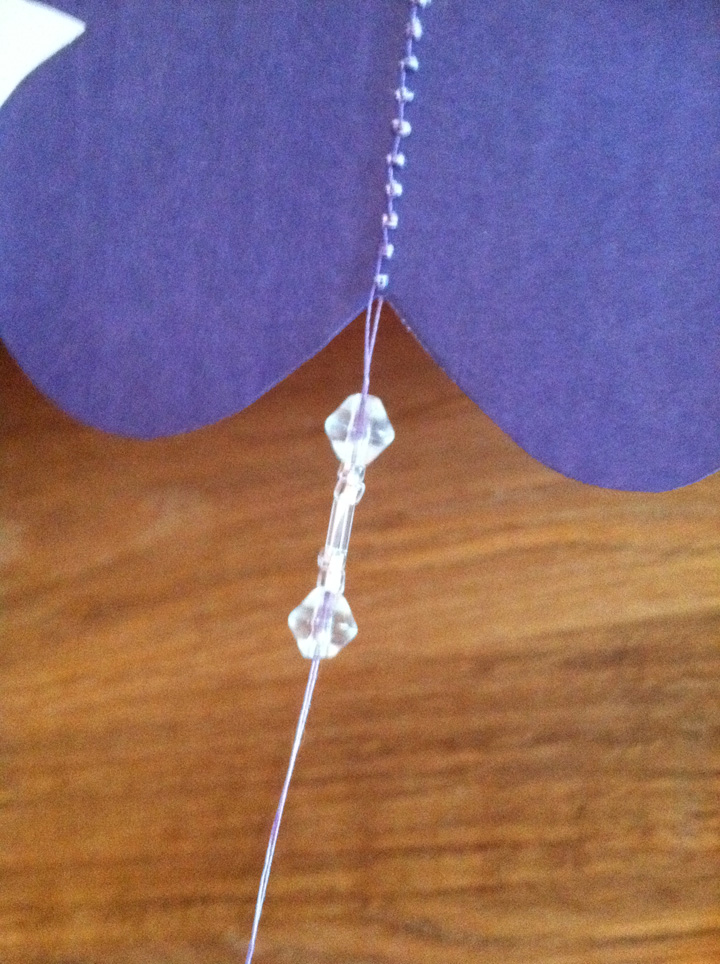
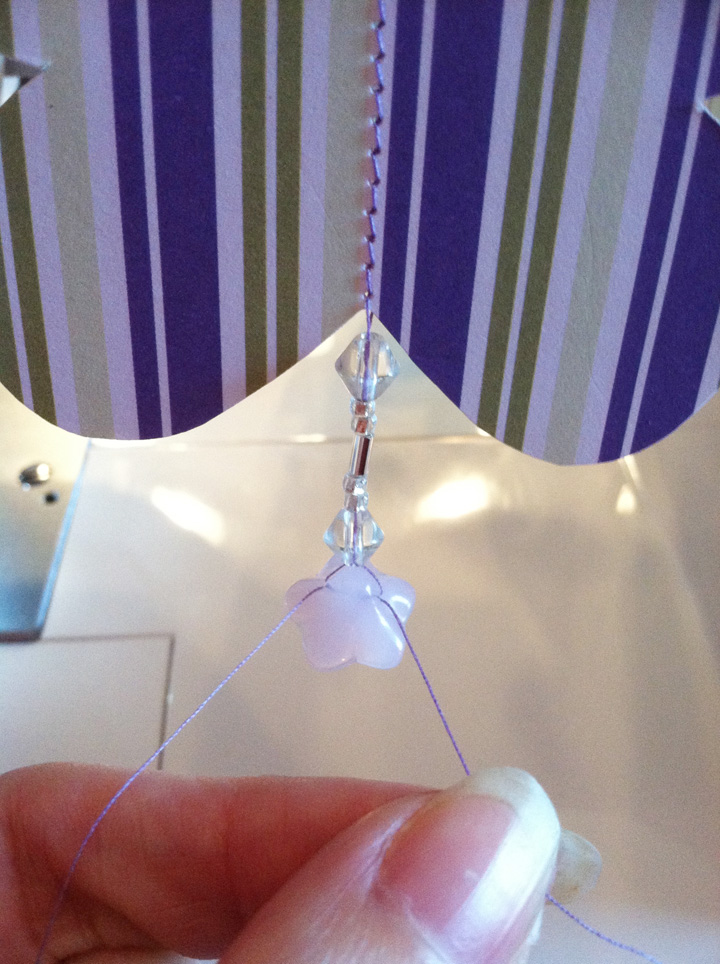
Once you’ve sewn your strand, you need to weigh it down with beads. I made a little pattern I liked and ended with a drop bead. To put the drop bead on, I threaded one strand of my thread through the hole one way and the other strand the other way. then I made a knot above the bead and clipped the tails. You could add some Fray Check to the knots for security. (I used Fray Check on the strings that tie the braids in my hair closed!)
Tie your strands of butterflies and flowers to the hoop. I tied 4 of them right to where my hanger threads were attached, then the other 4 in between. To make it easy, I hung mine from the adjustment arm of a camera tripod.

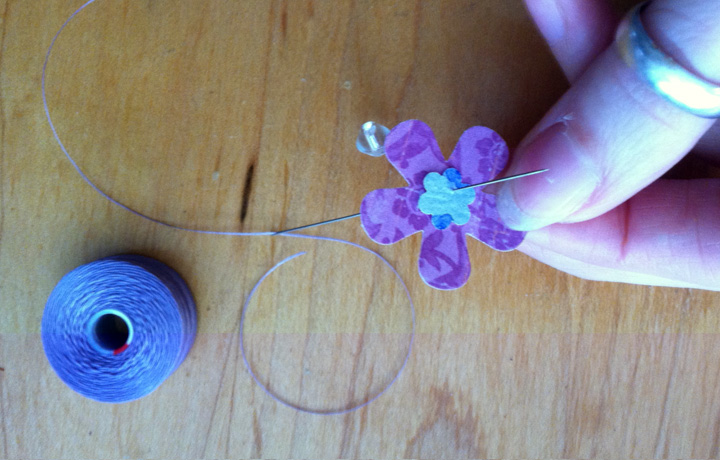
To pretty-up where the strands are tied on, I made some little flower embellishments. You could easily hot glue some purchased silk flowers or butterflies too. I took a length of thread and a beading needle and ran the thread halfway through the center of some flowers. I added a bead then went back down through the center of the flowers with the other half of the thread. I used the two tails to tie each beaded flower over the knots of the butterfly strands.
Then you are done! Hang it by it’s ribbon and enjoy! (Mine is just taped up for a photo. You’ll want a nice hook.)

I absolutley LOVE this mobile. My daughters bedroom theme is butterflies, and I’m going to attempt making this!! Wish me luck!! 🙂
It’s really simple – you’ll do fine! It is just tedious cutting out all those butterflies!
I’d love to see photos of it in different colors than I chose!
Hi, Can you share what tension and stitch length you used. I can’t seem to get it right. Thanks!