I can hardly believe that my little Jackson will be turning 3 on February 5th! It feels like yesterday we were bringing him home. He is finally able to understand our party planning and birthdays in general. When I ask what to add to his wishlist, he tells me, “a teddy bear, a car, chomping teeth and a lollipop.” Chomping teeth?? Where does he get these ideas?
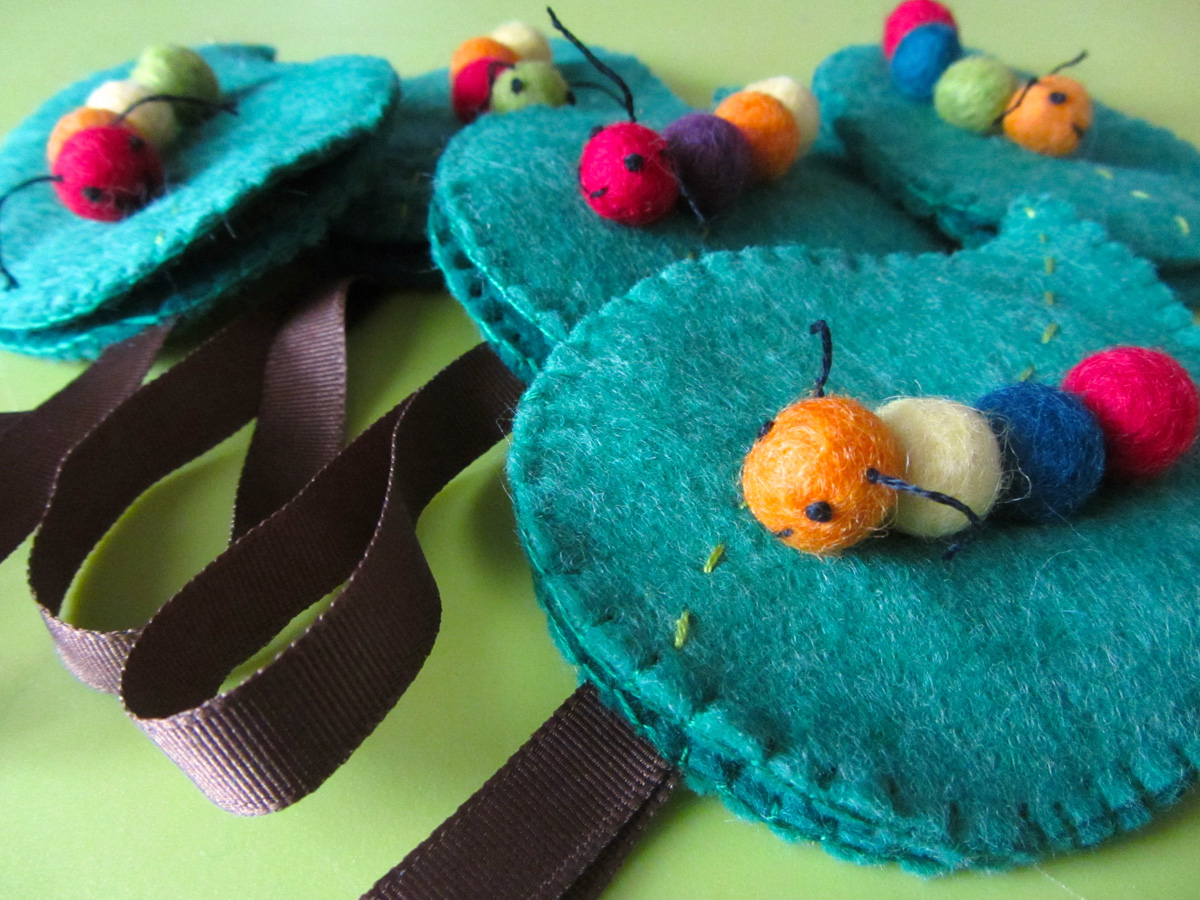
Over the Christmas holidays, I suggested many party themes to him, and we ended up on bugs. I made an inspiration board with Photoshop, and even planned out his cupcakes. (He is SO excited for those!) Since Jax is not in school yet, he doesn’t have many friends his own age to invite. He loves his grown up friends, and I wanted to have a handmade favor for them beyond the treat bags full of candy. And so I designed these little felt caterpillar coin purses!
This project would work really great with a Very Hungry Caterpillar party as well! Check out the felt board set I made for a friend’s son here.
What I Used:
- Green felt from American Felt and Craft (For 12 pouches, I used 6 sheets. I used both jungle vine and jade.)
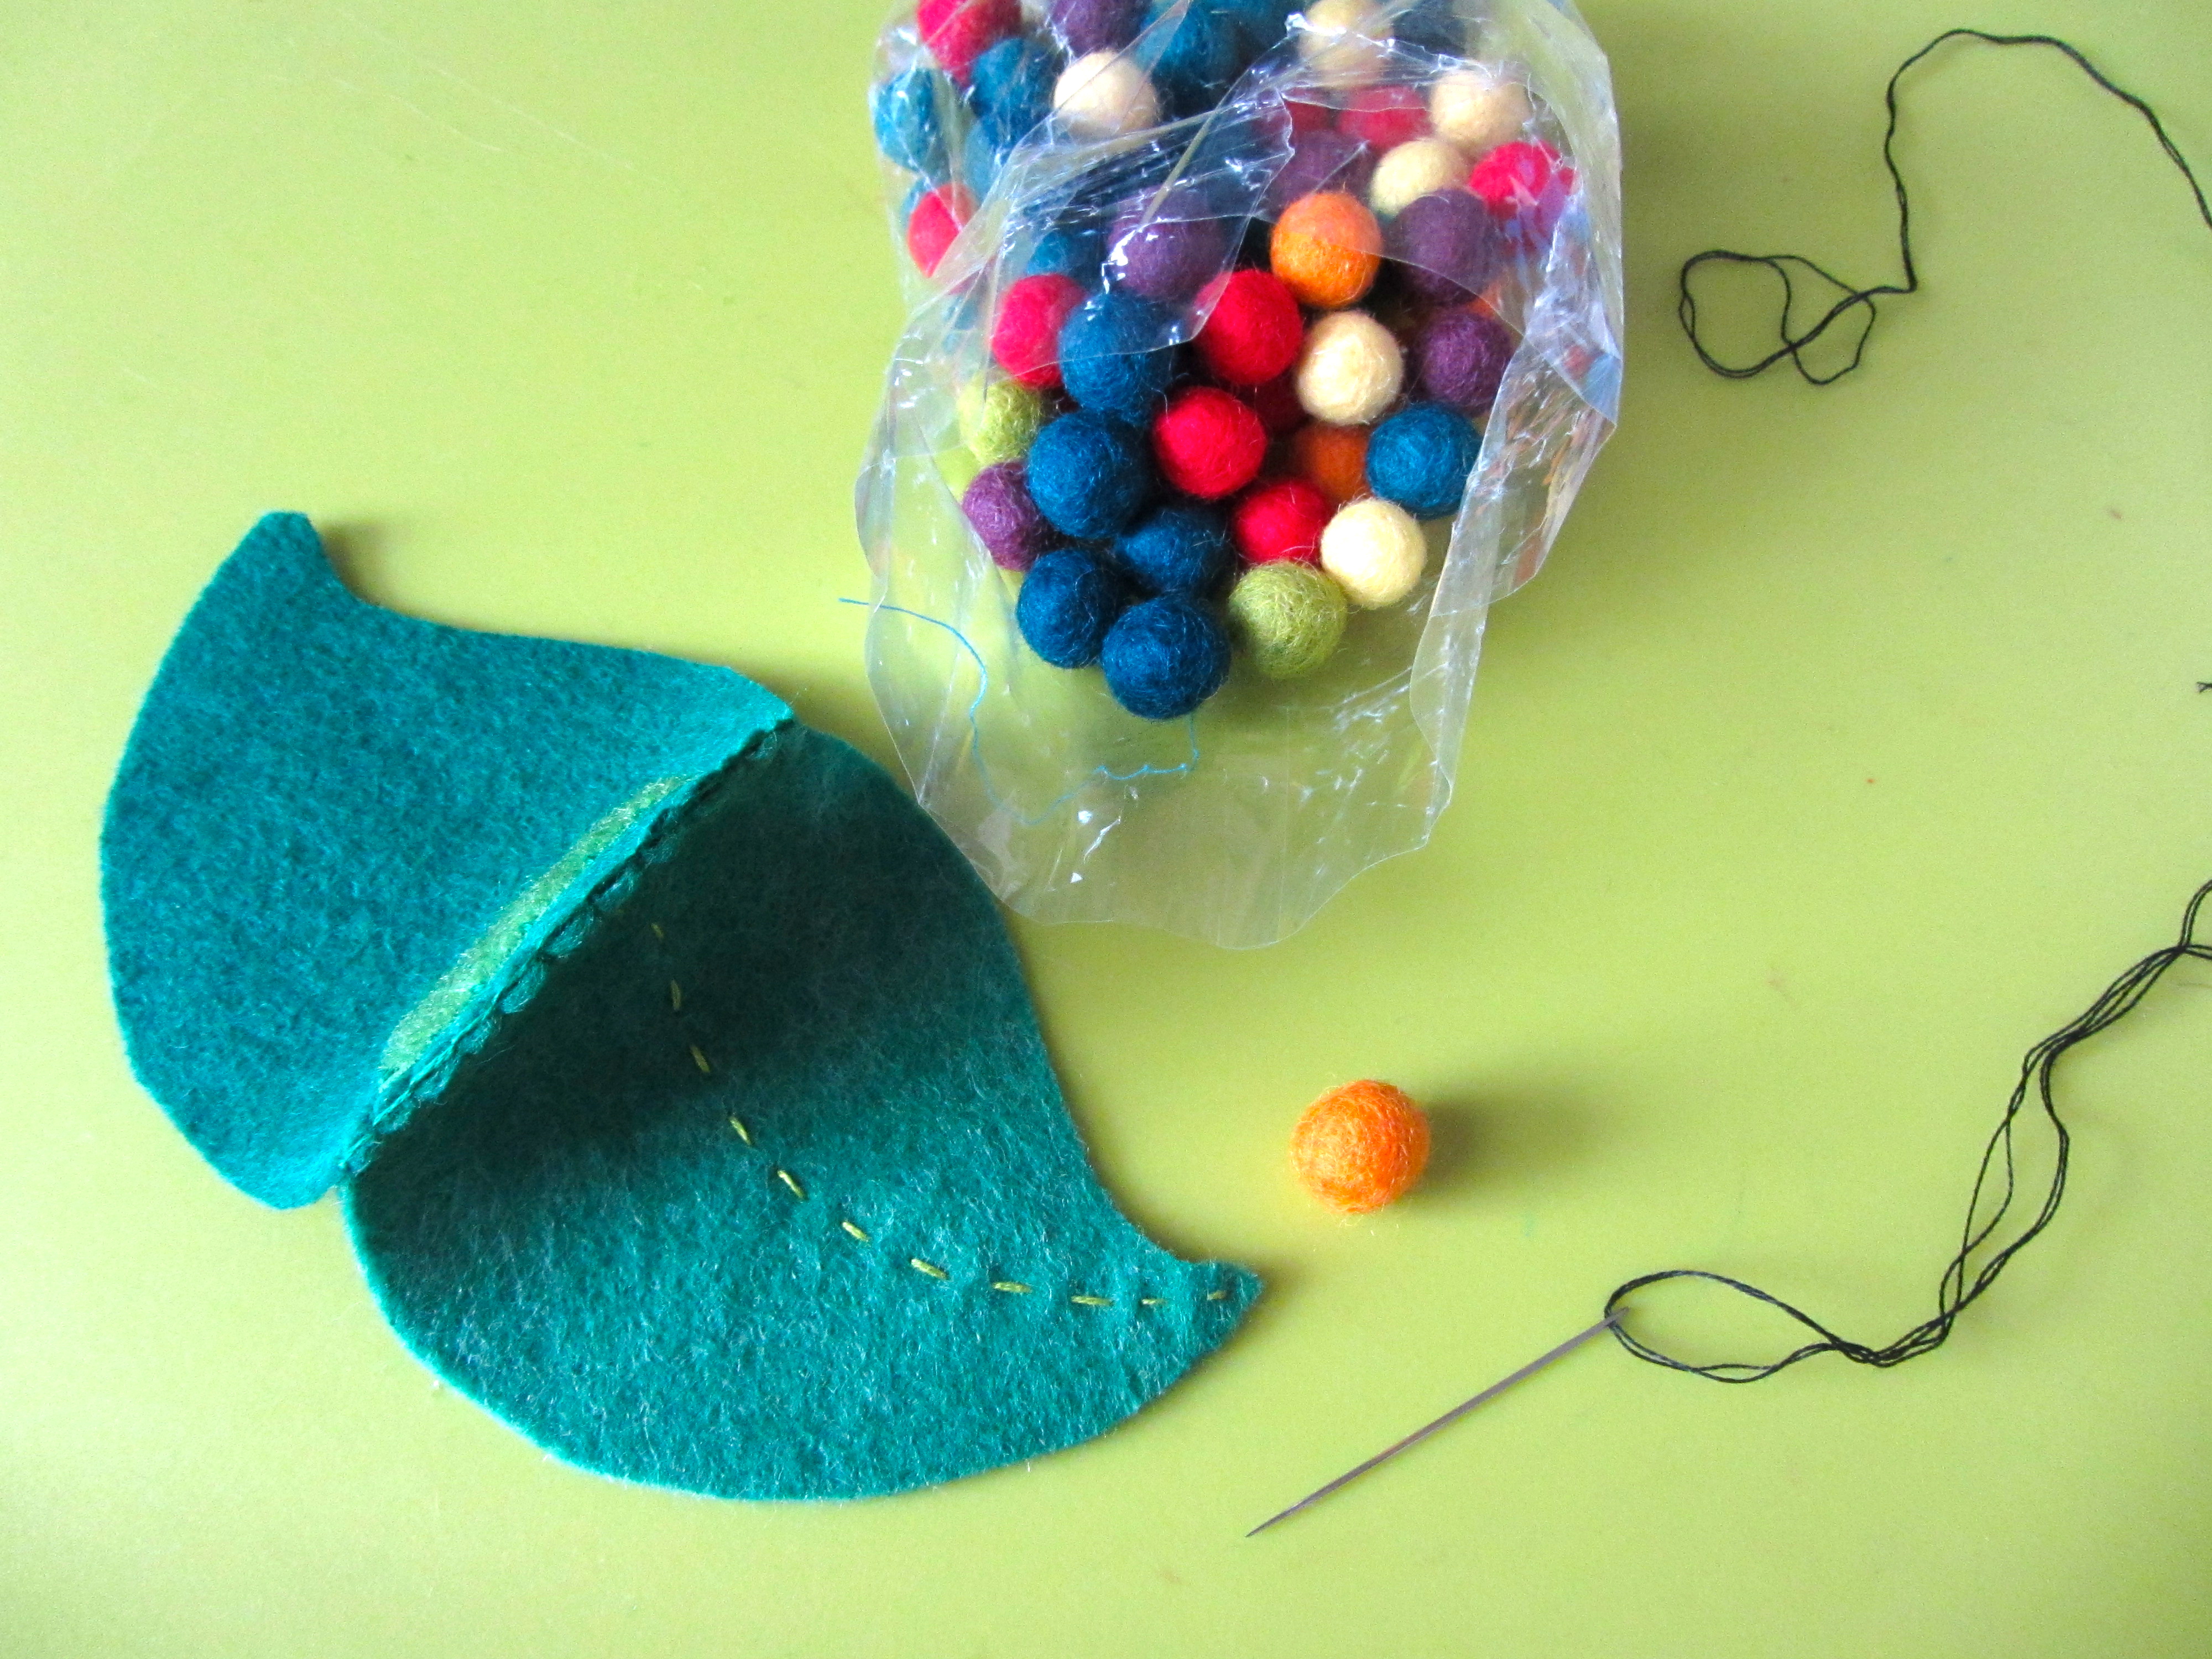
- 1cm felted wool balls (I got mine from US Etsy shop TaDaaStudioFelt. There is a European seller of that size ball here. I didn’t want to risk slow international delivery.)
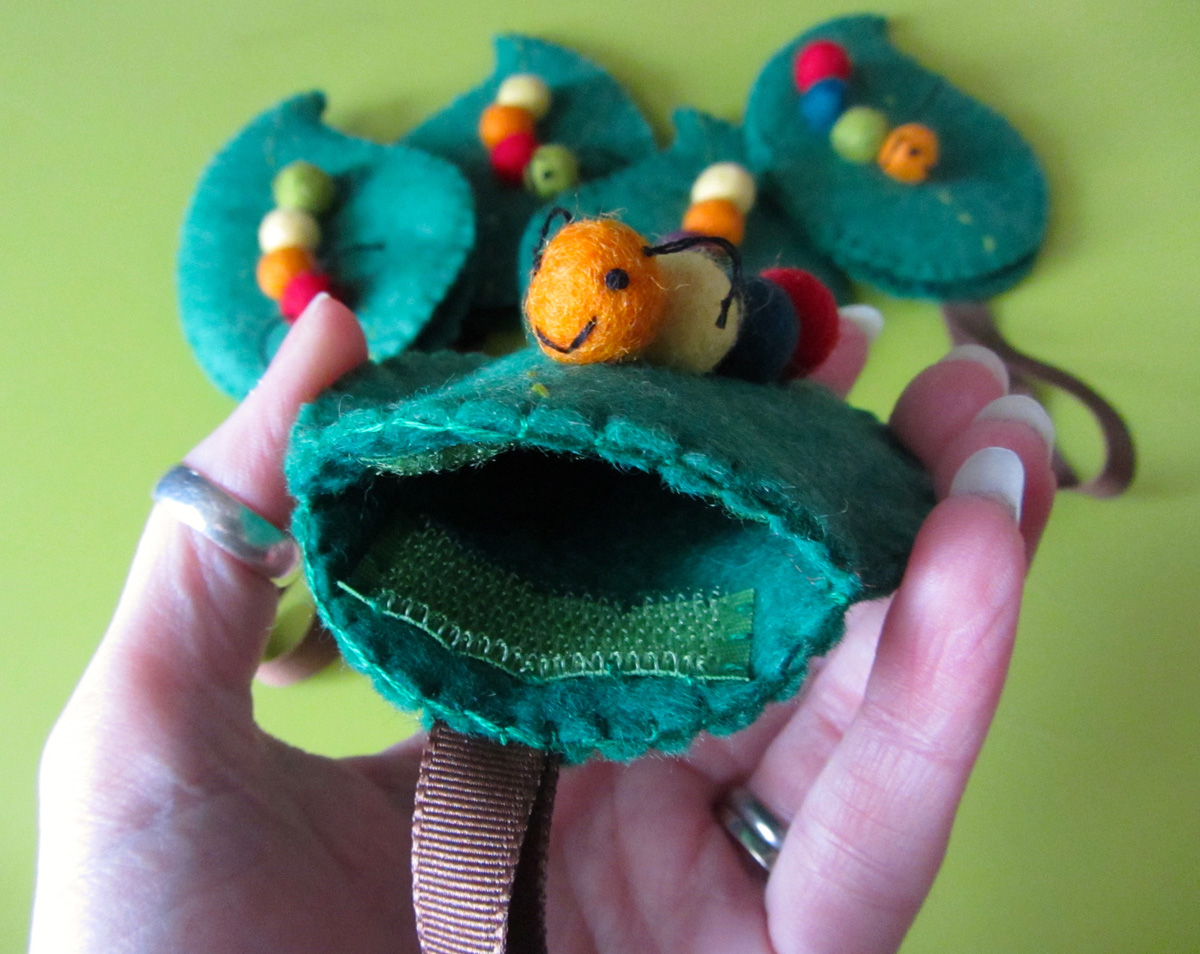
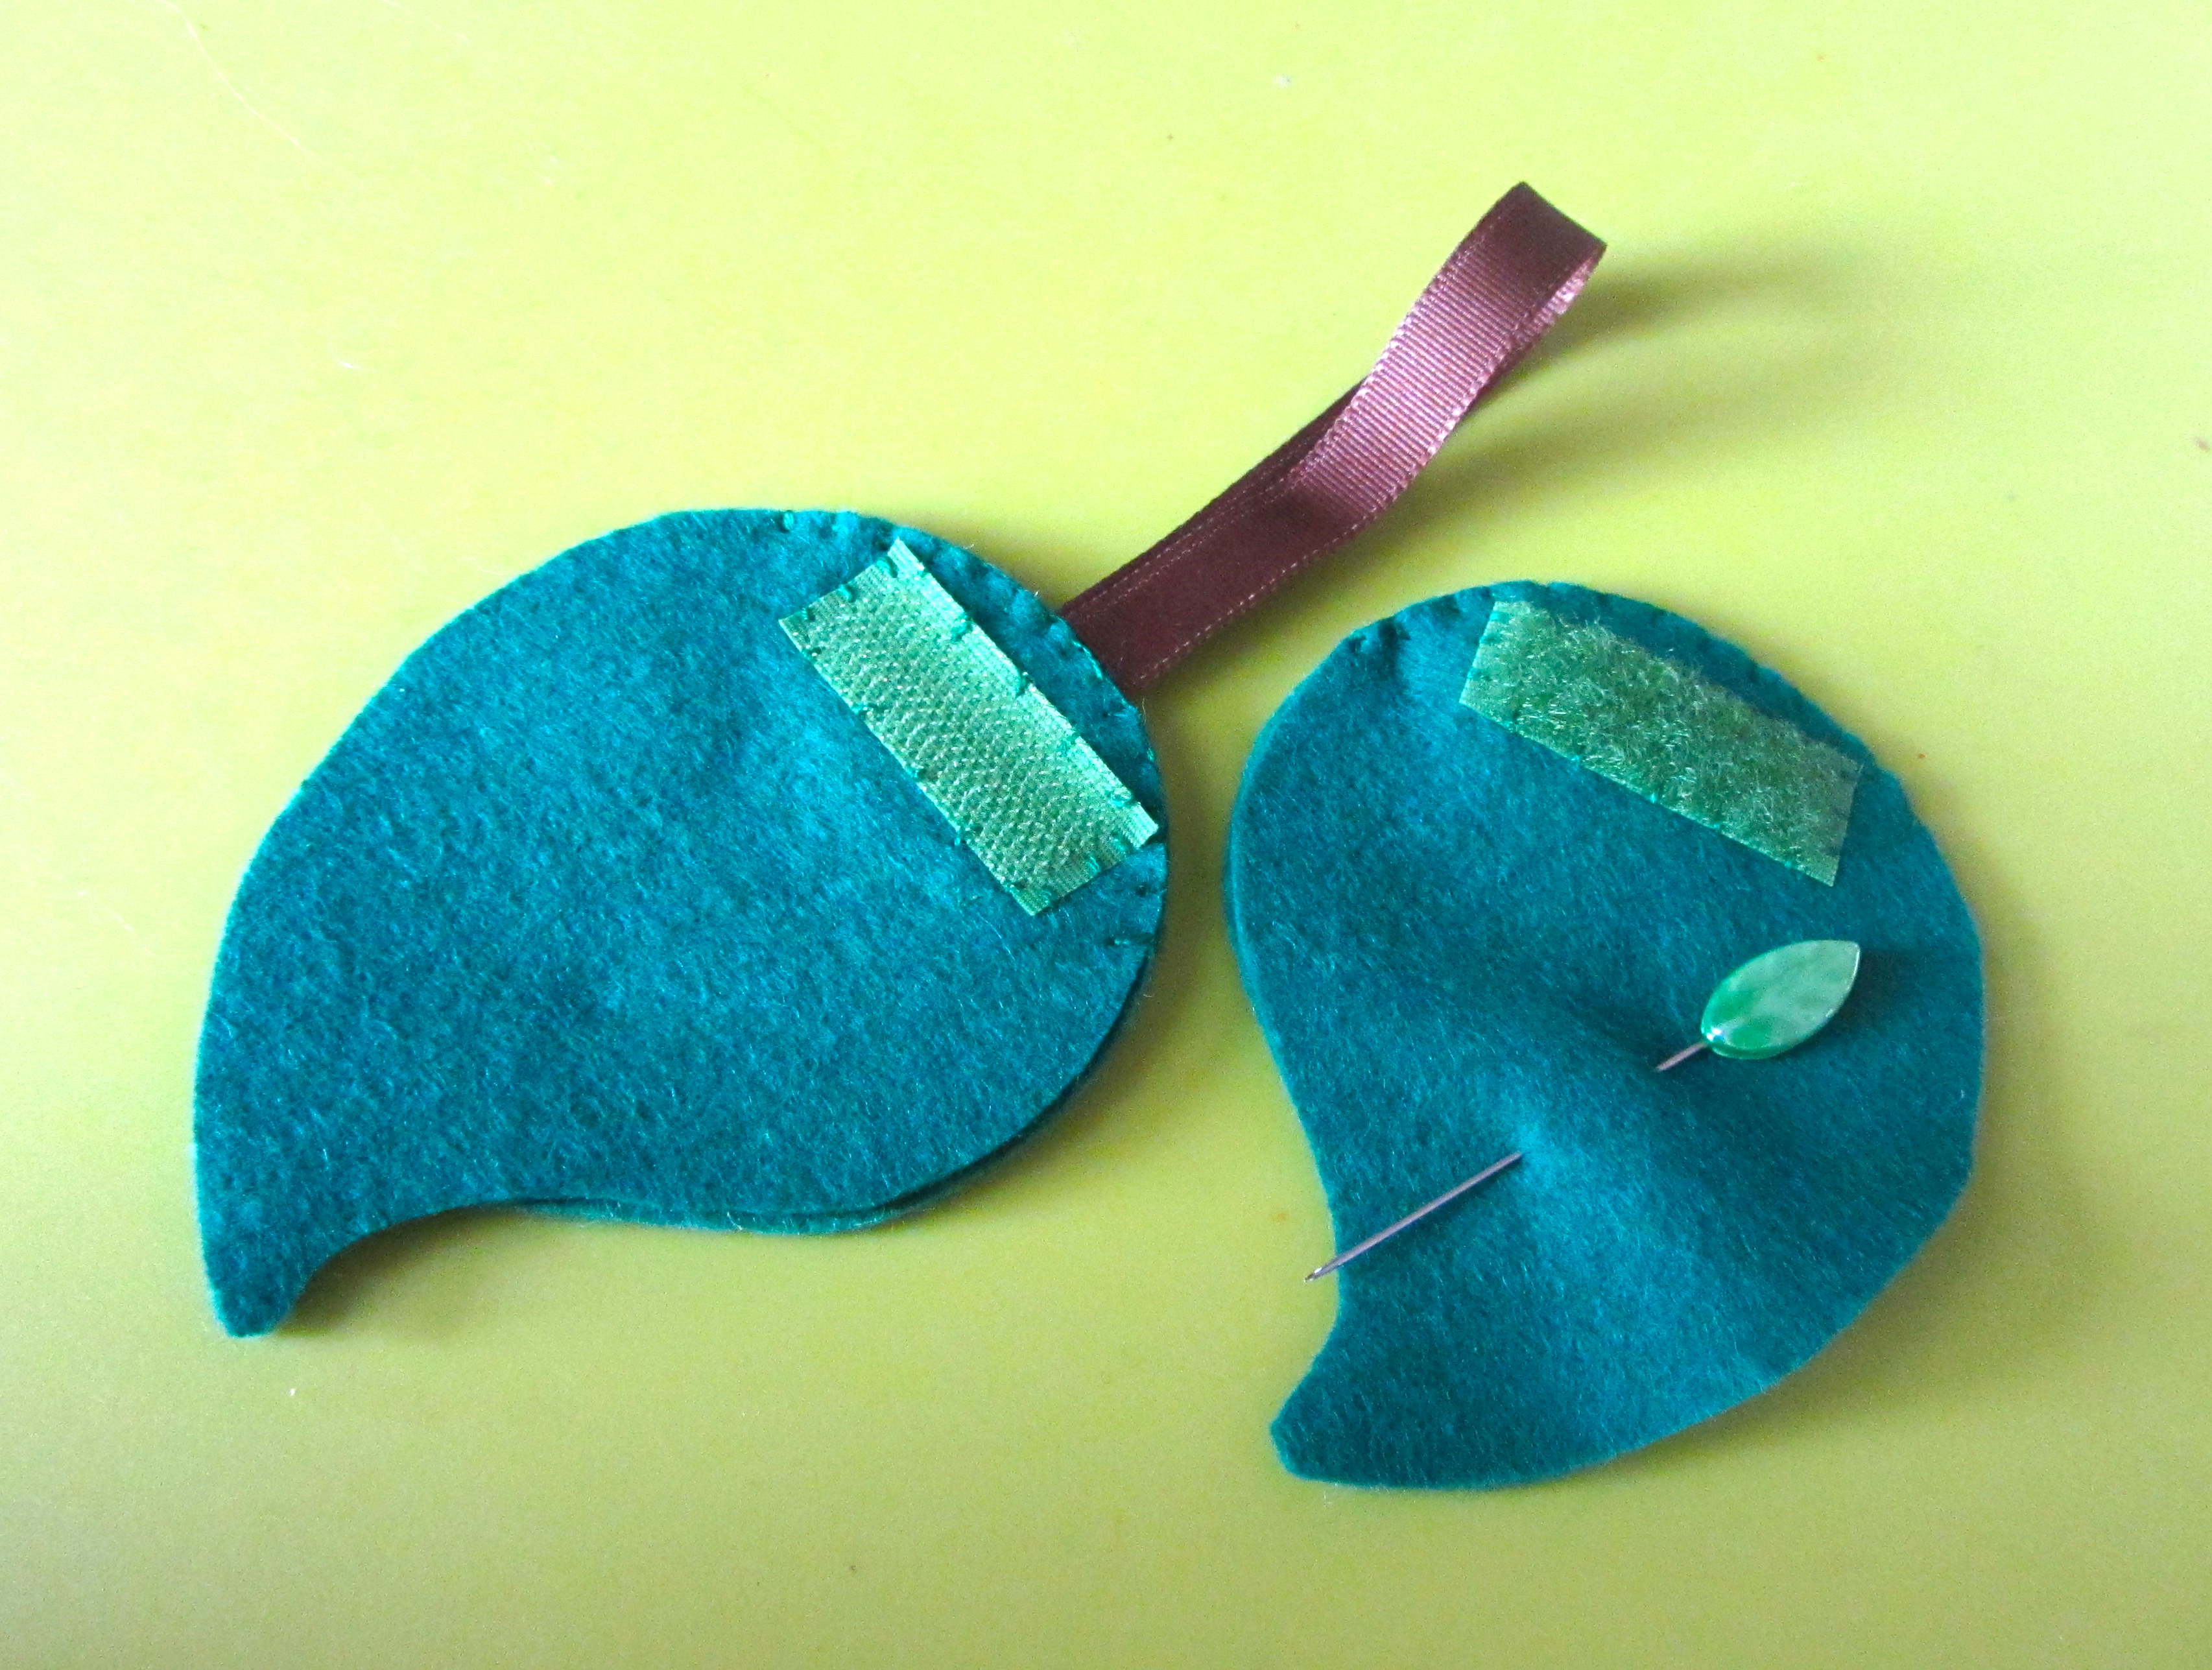
- Green hook & loop tape
(Sew-on. Sold at Joann’s Fabrics.)
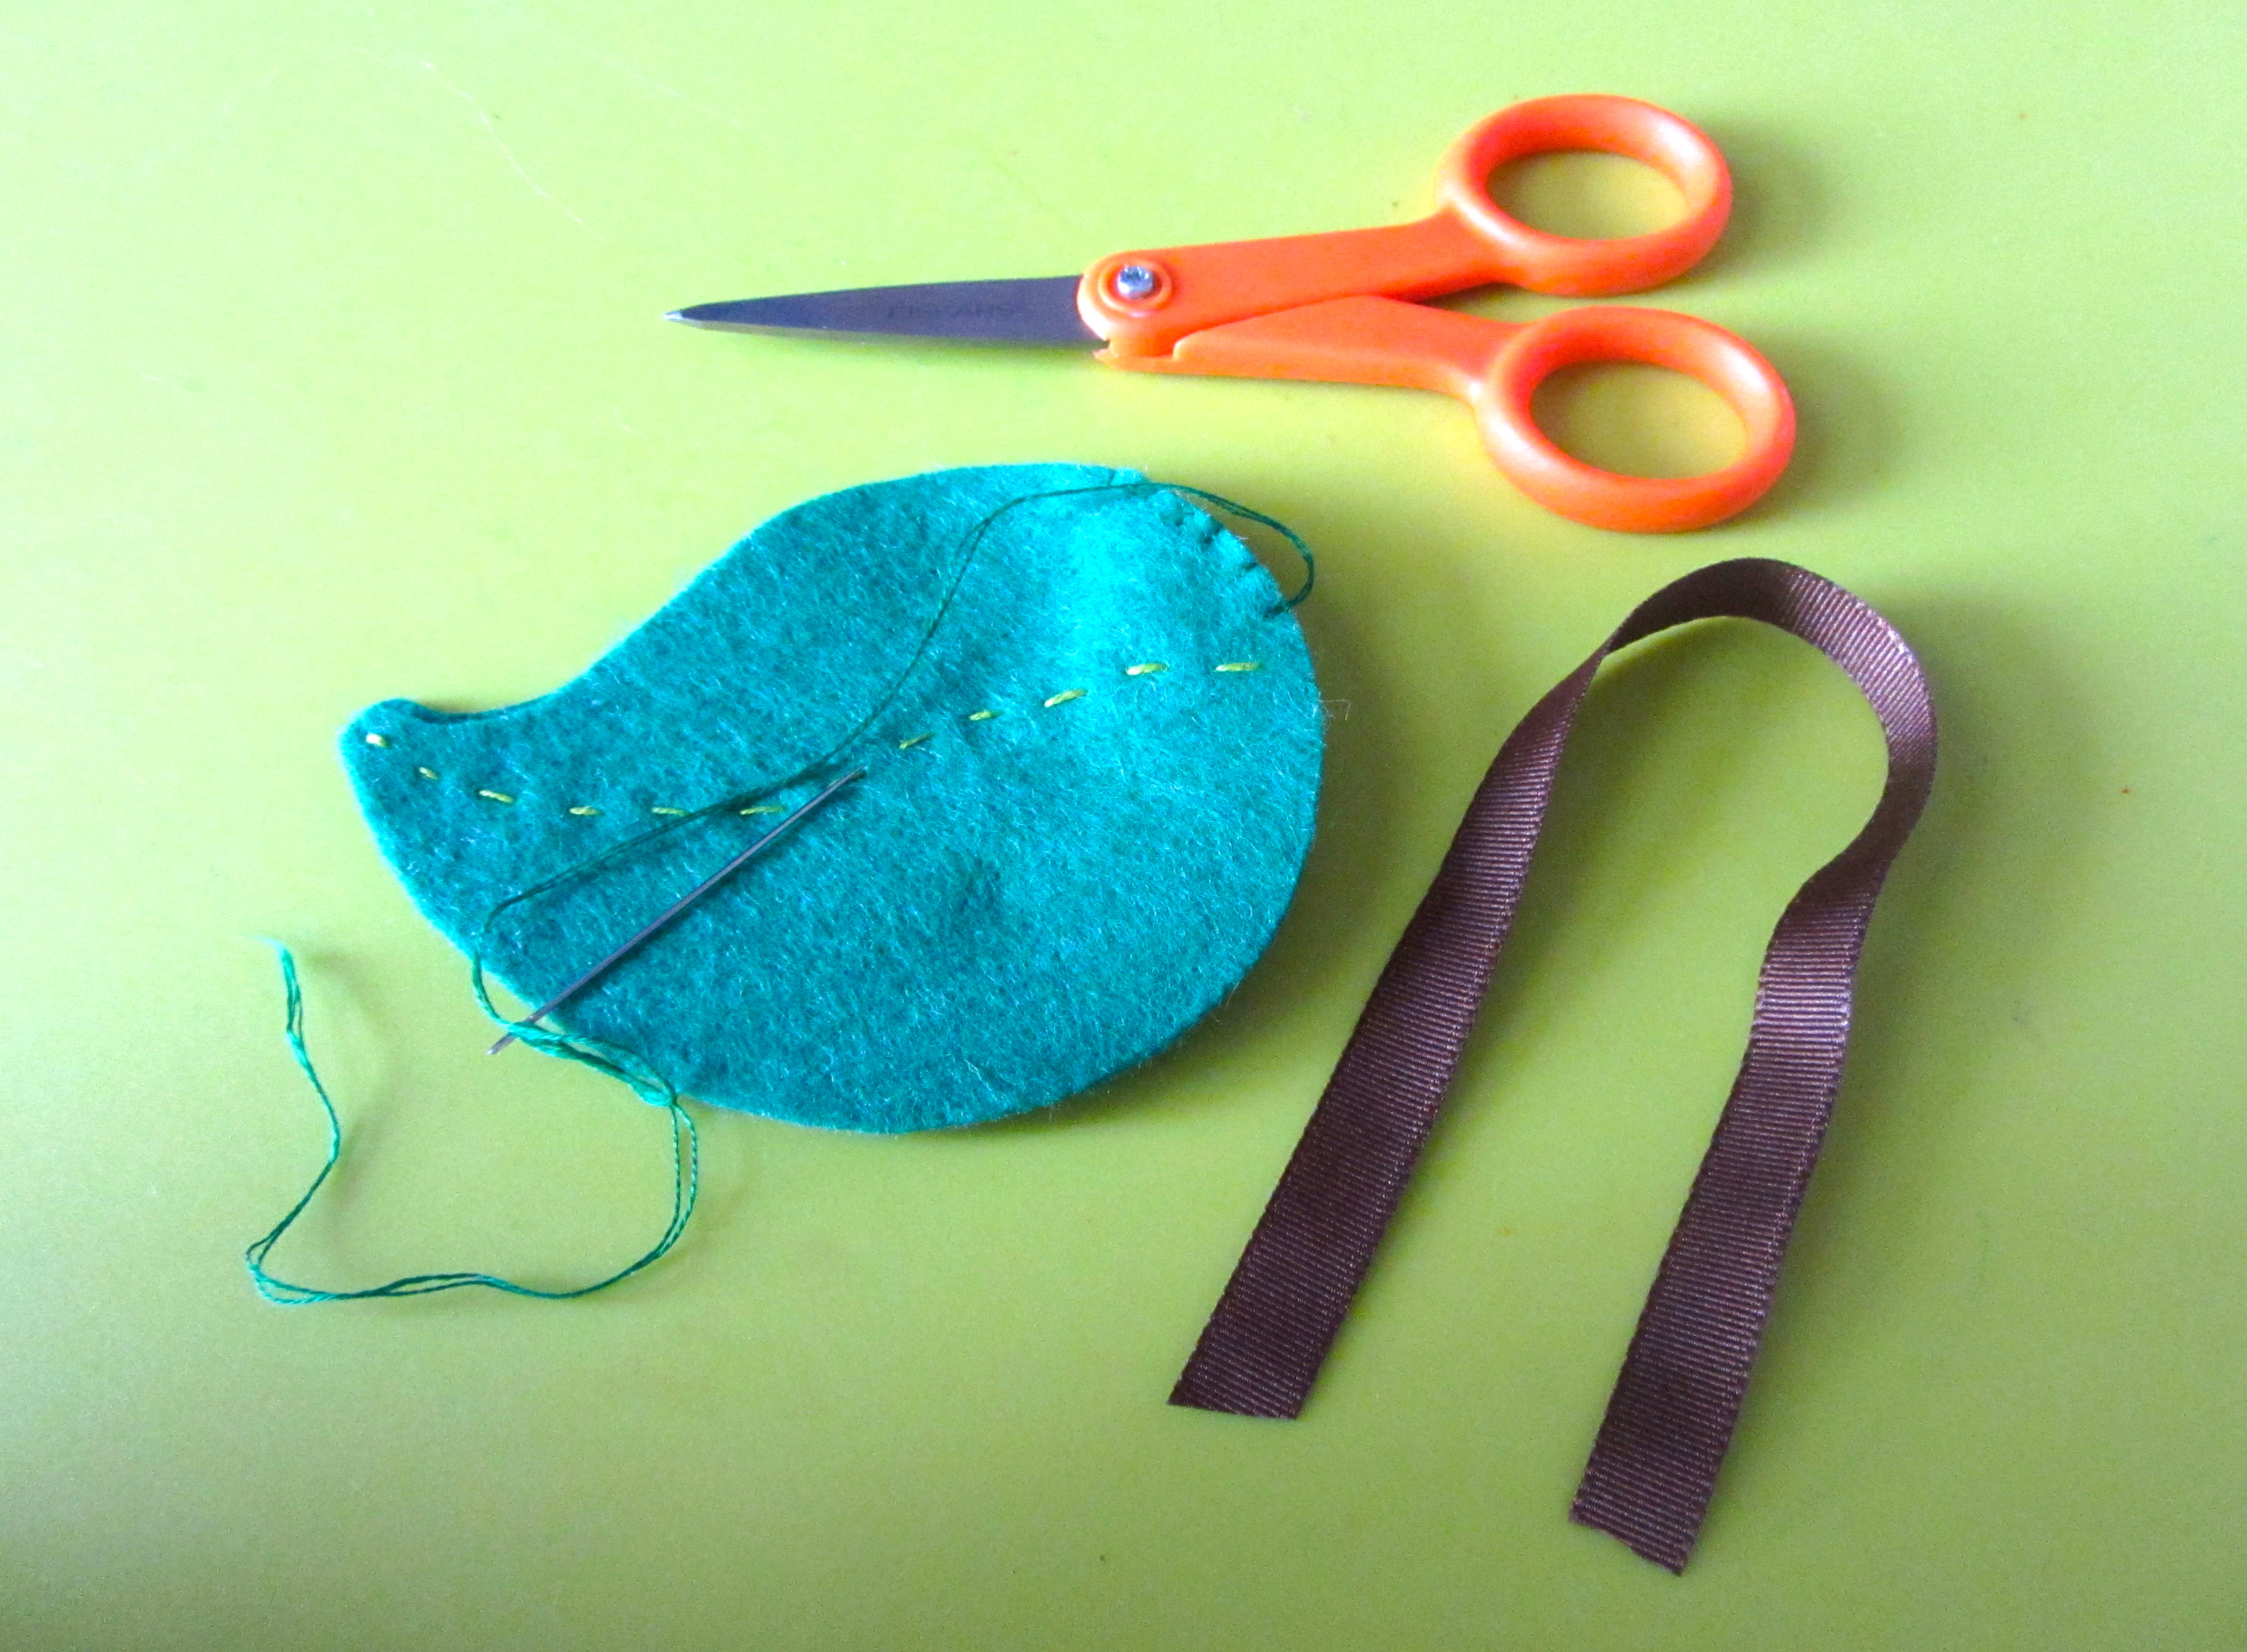
- Brown ribbon (.5″ wide grosgrain from AC Moore Crafts.)
- Leaf Pattern
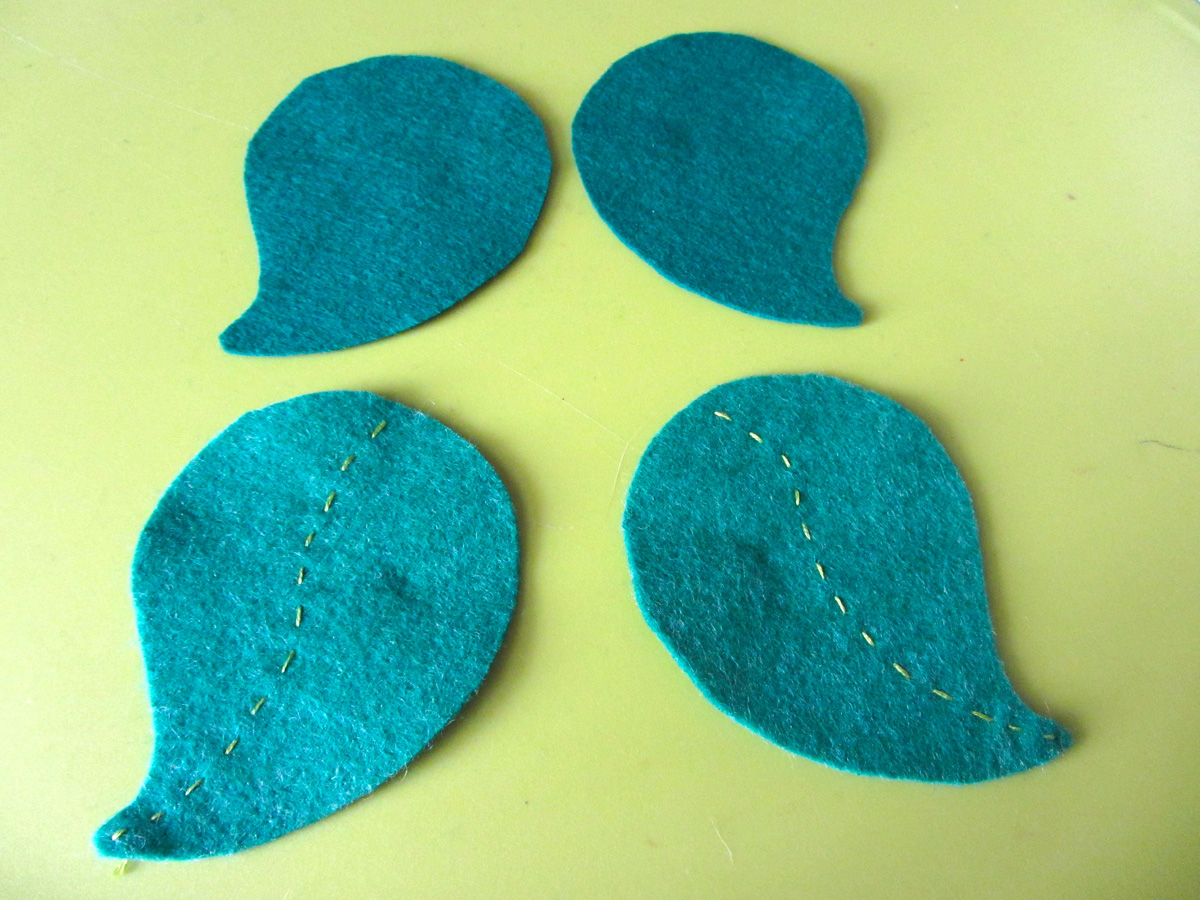
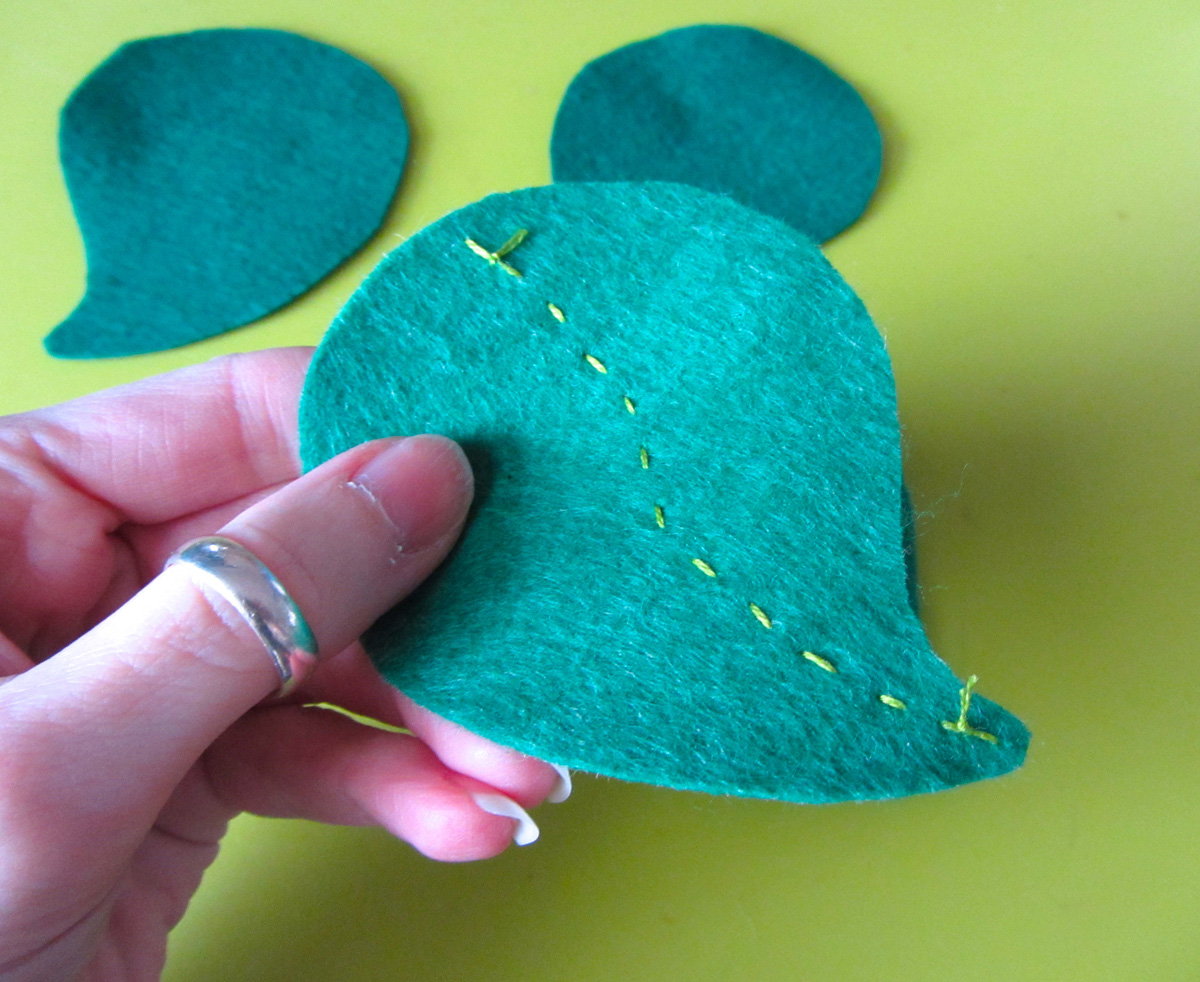
I started by cutting out my leaf shapes – 2 for the outside and two for the inside. I stitched the center vein of the leaf on the two outer pieces using a running stitch. The second photo above is a backside view.
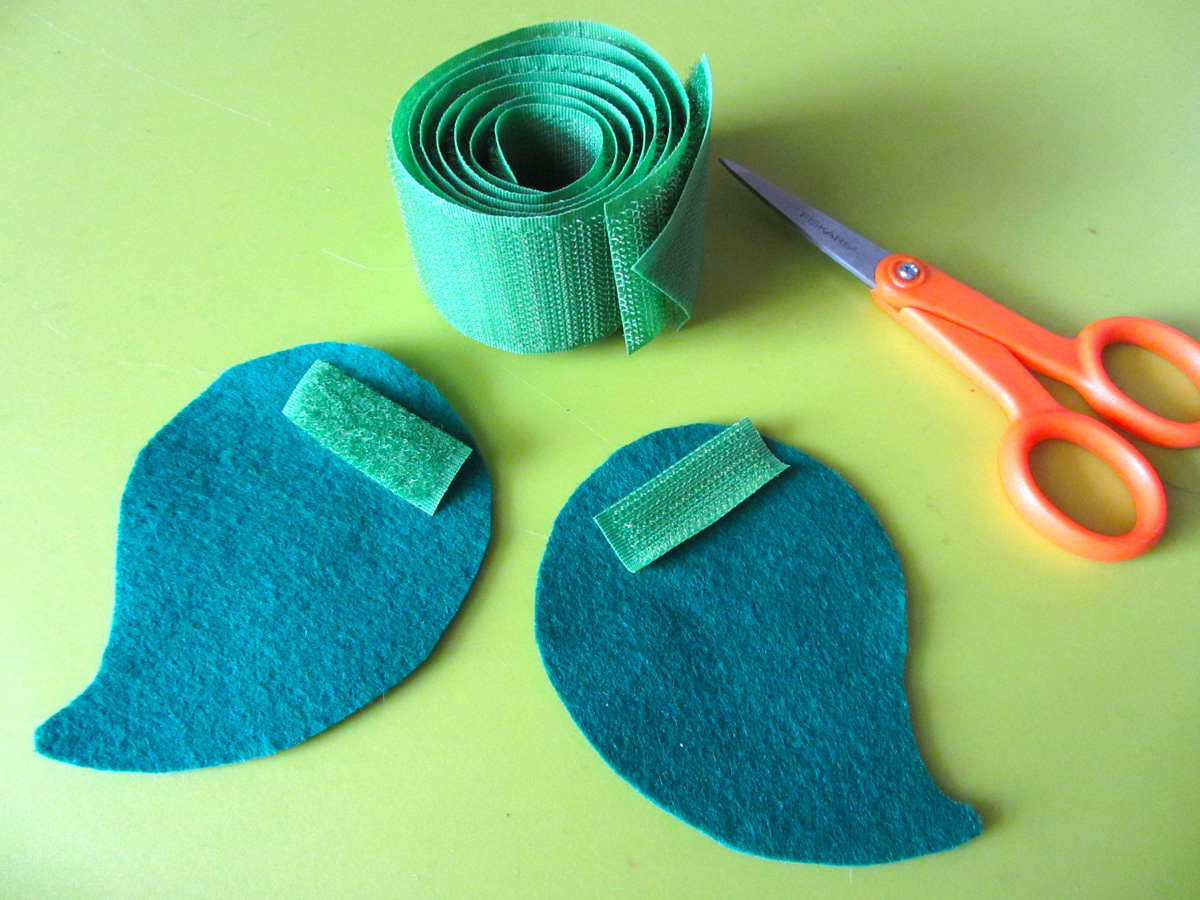
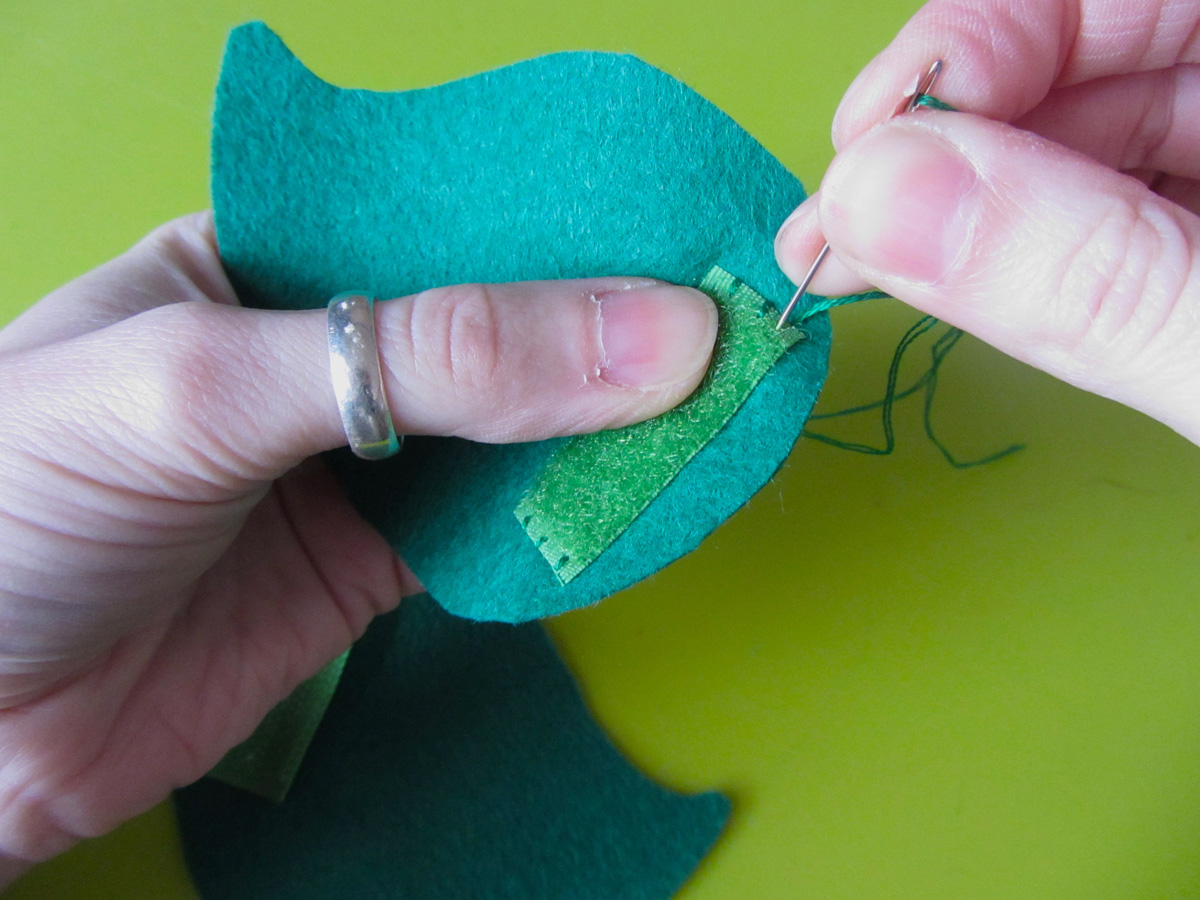
I then cut strips of hook & loop tape and sewed them onto the inner leaf pieces. My hook & loop was nice and wide, so it made nice, thin strips.
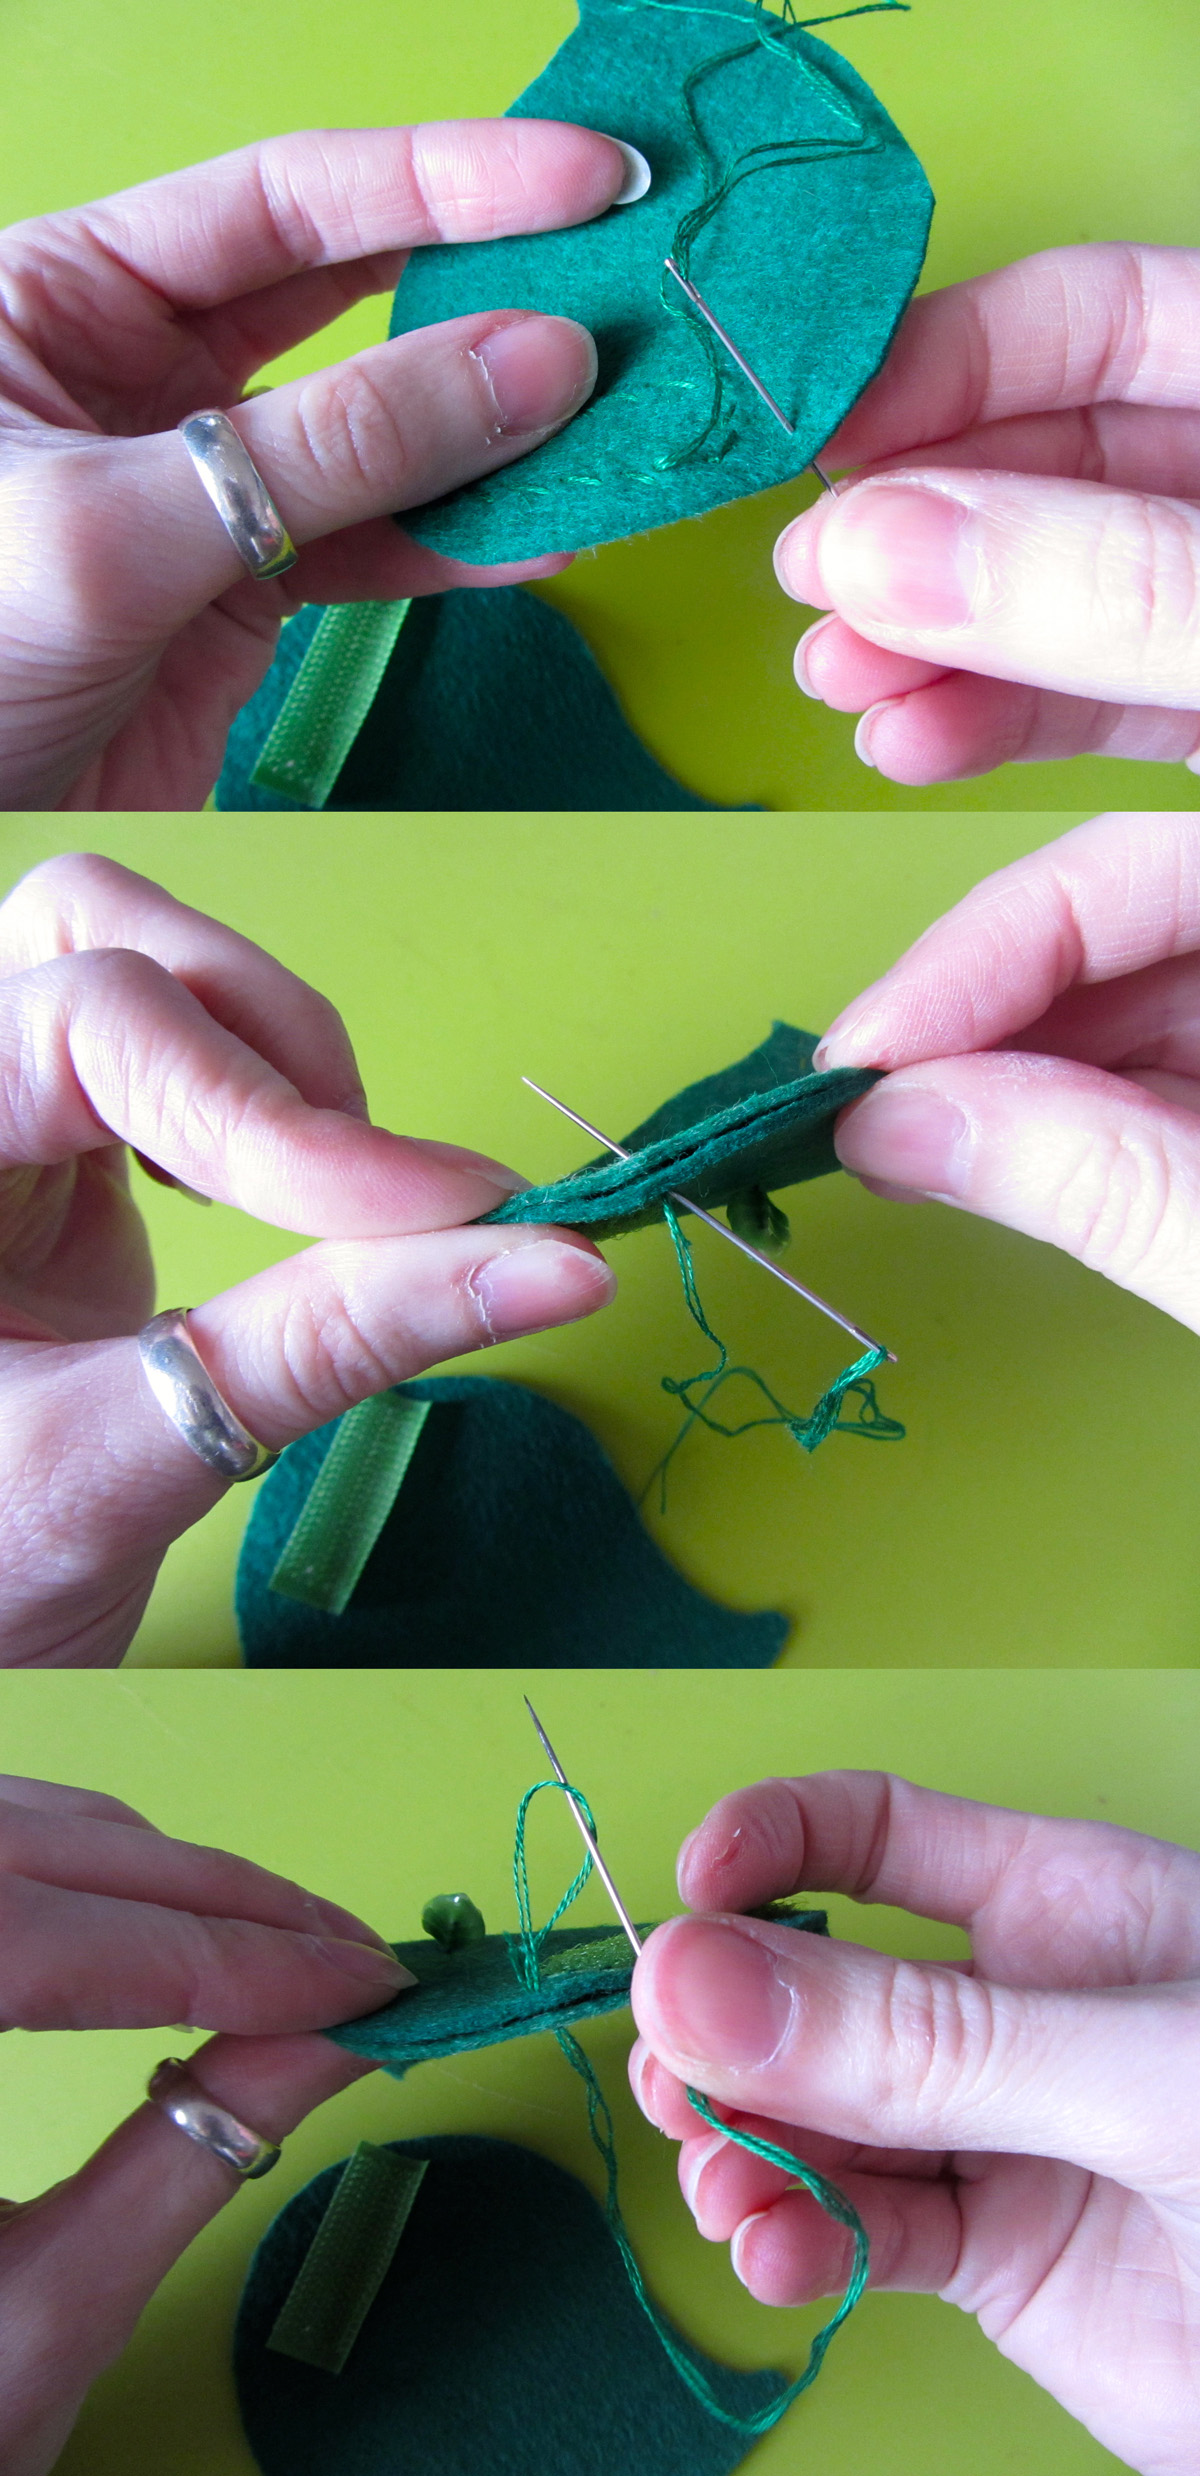
I still had a lot of thread on my needle after sewing on the hook & loop, so I ran the needle through the felt to get it in position to sew the inner and out leaf pieces together along the top purse opening. I ran the needle from the back of inner leaf piece through both layers, then back the other way in the exact same spot. Before pulling it tight, I ran my needle through the loop to start my blanket stitch.
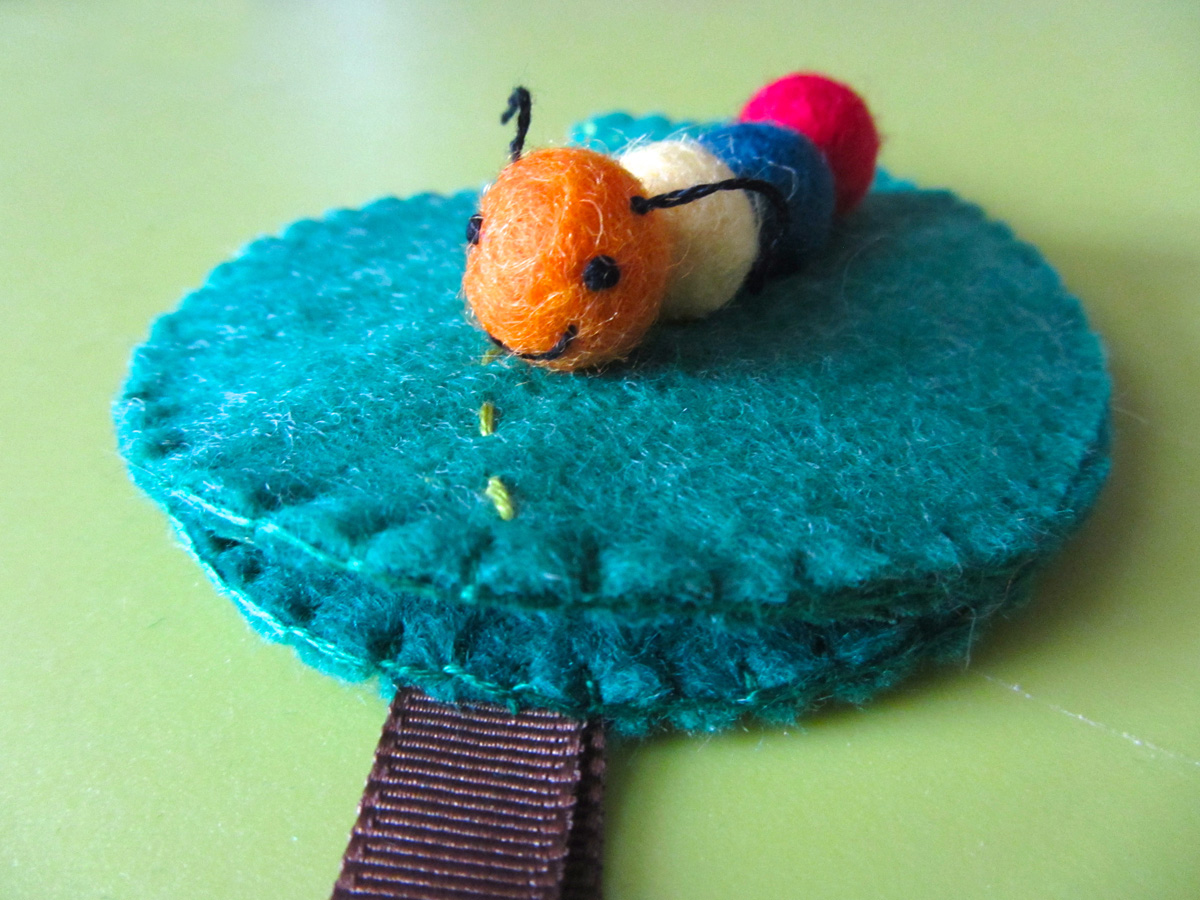
I sewed the inner and outer leaf pieces together along the tops, catching a loop of ribbon for a handle in between the layers on one side. I made sure the stitching lined up on both sides.
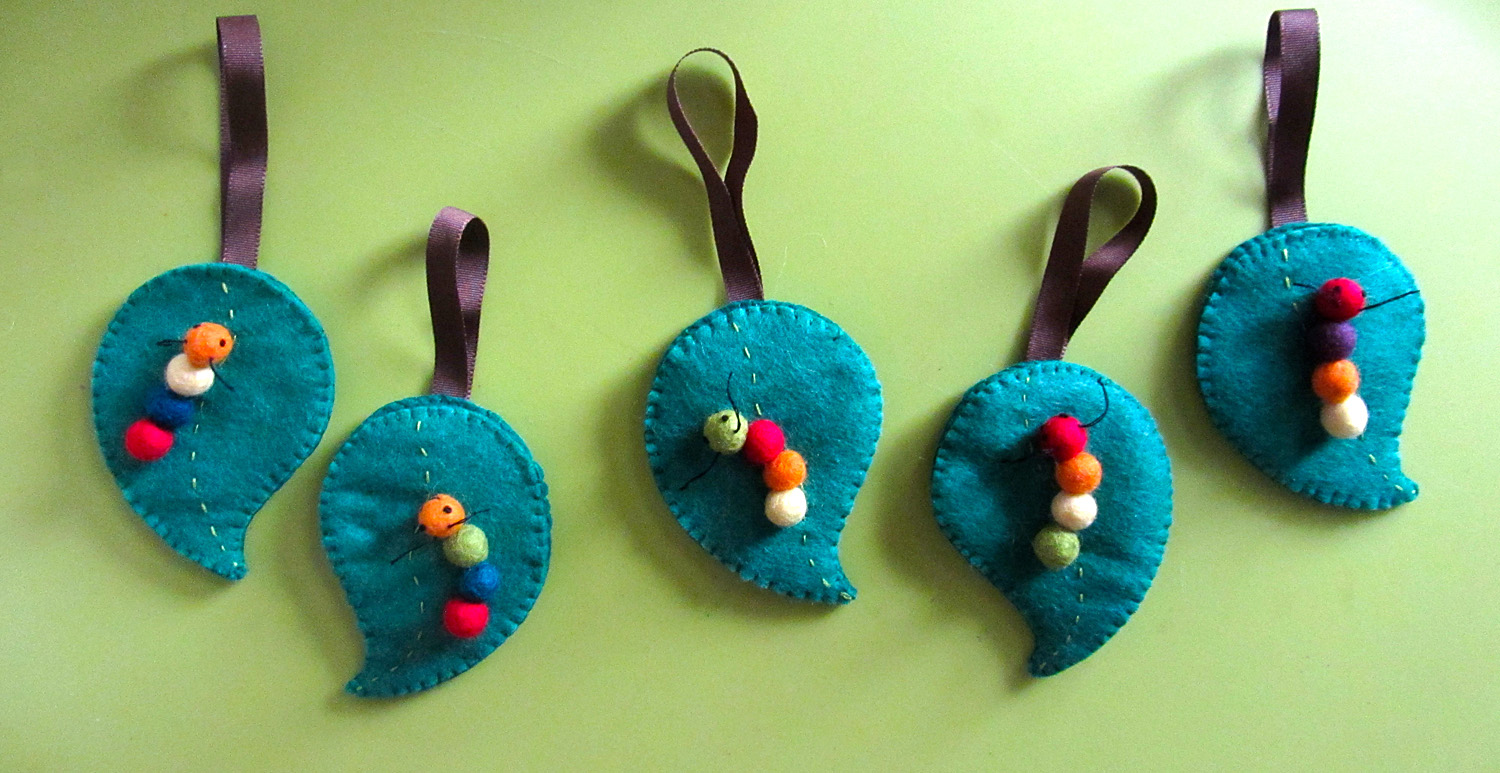
I sewed the caterpillar next – attaching him to the outer layer of the the side of the purse without the handle.
To start sewing his features, I attached my thread to the bottom of the head (using this thread technique.) I then ran my needle up to one eye and made a French knot, coming out at the bottom of his head. I repeated that for the other side.
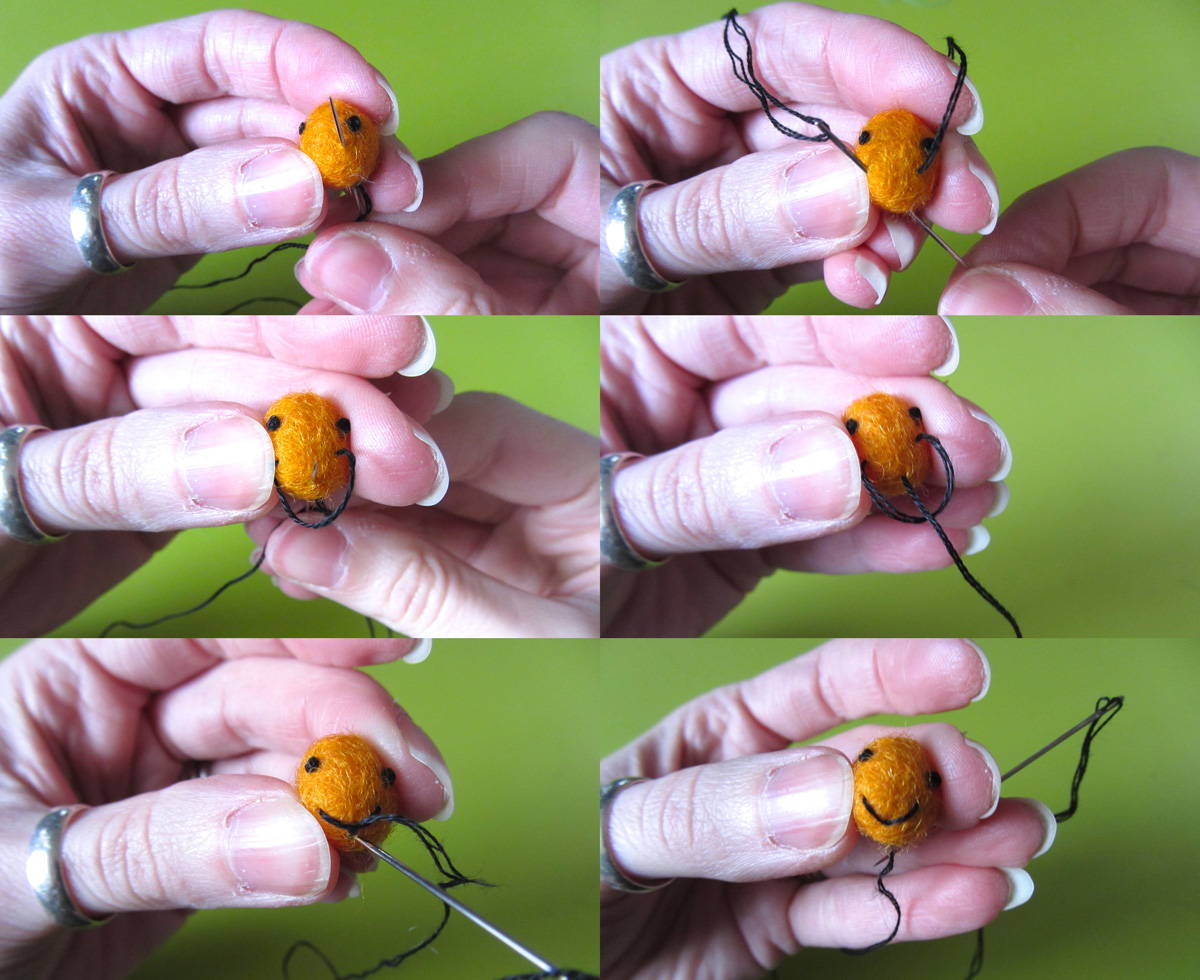 To make his mouth, I came up at one corner and down at the other, coming out at the bottom of his head. Before pulling the thread tight, I came up at the the bottom center of where I wanted the curve of his smile to be. I went through the loop of thread and made a tiny stitch to lock the smile in place. I ended up at the bottom of his head, ready to attach him to the leaf.
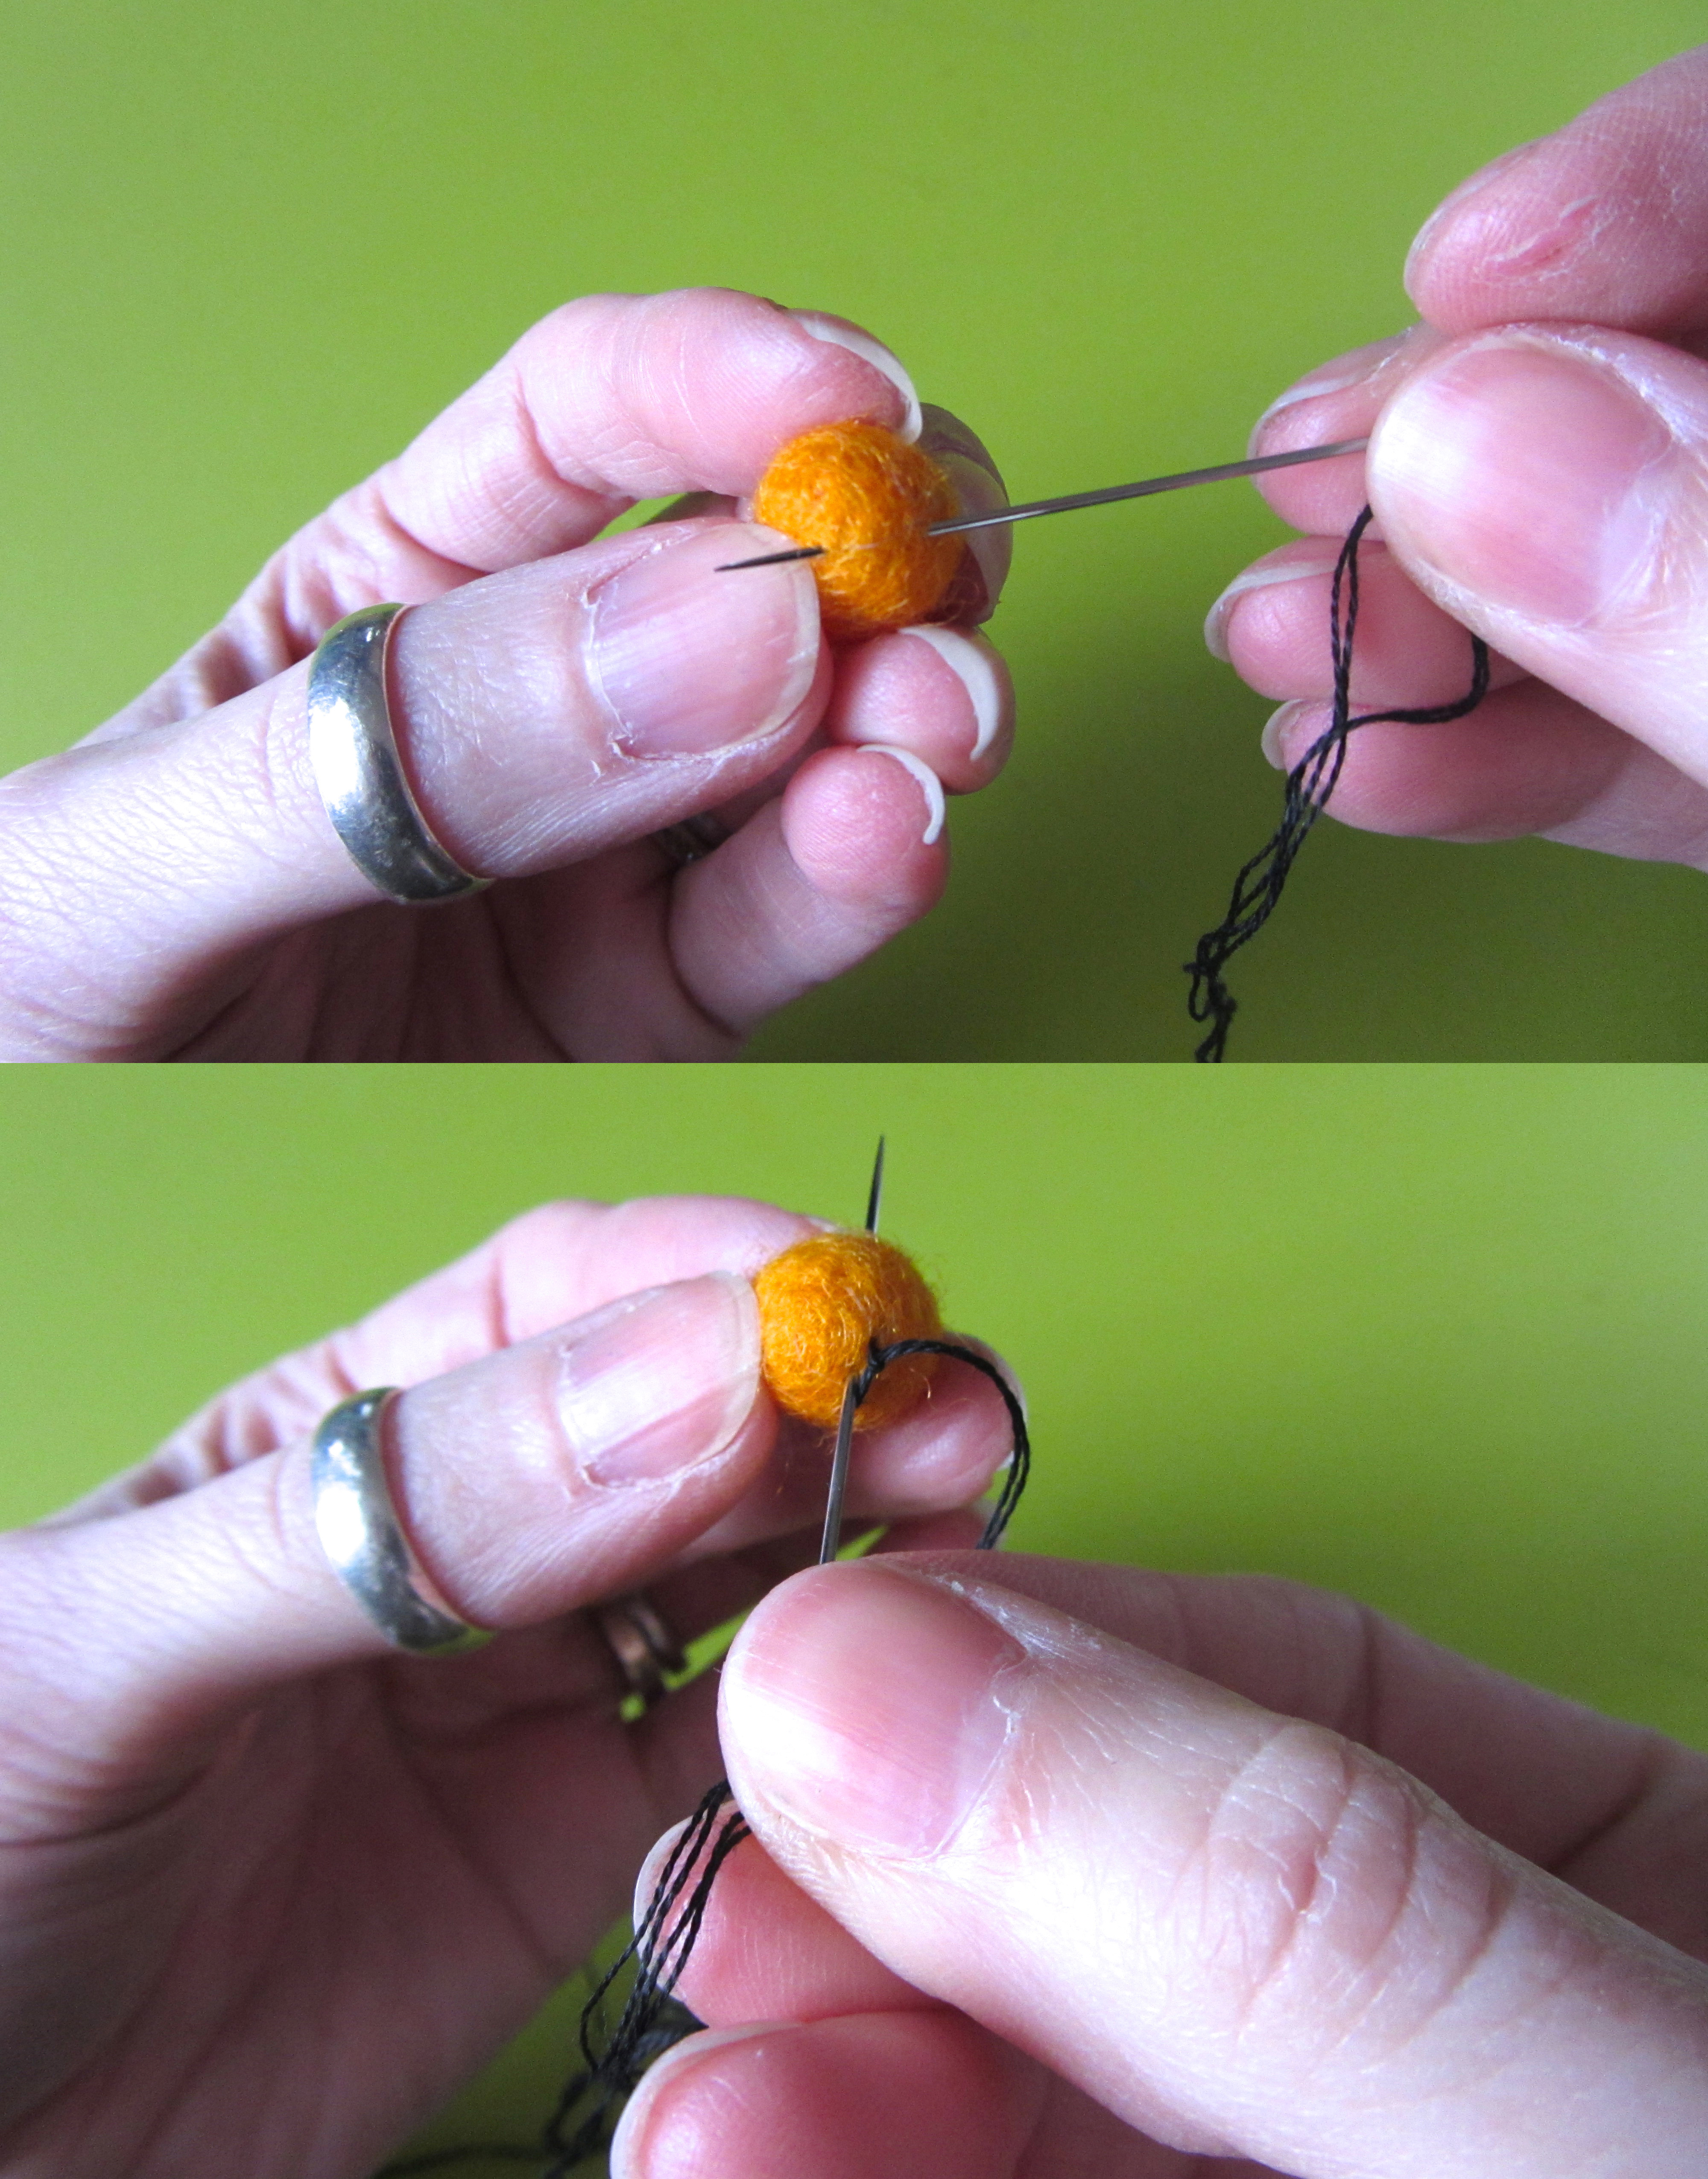
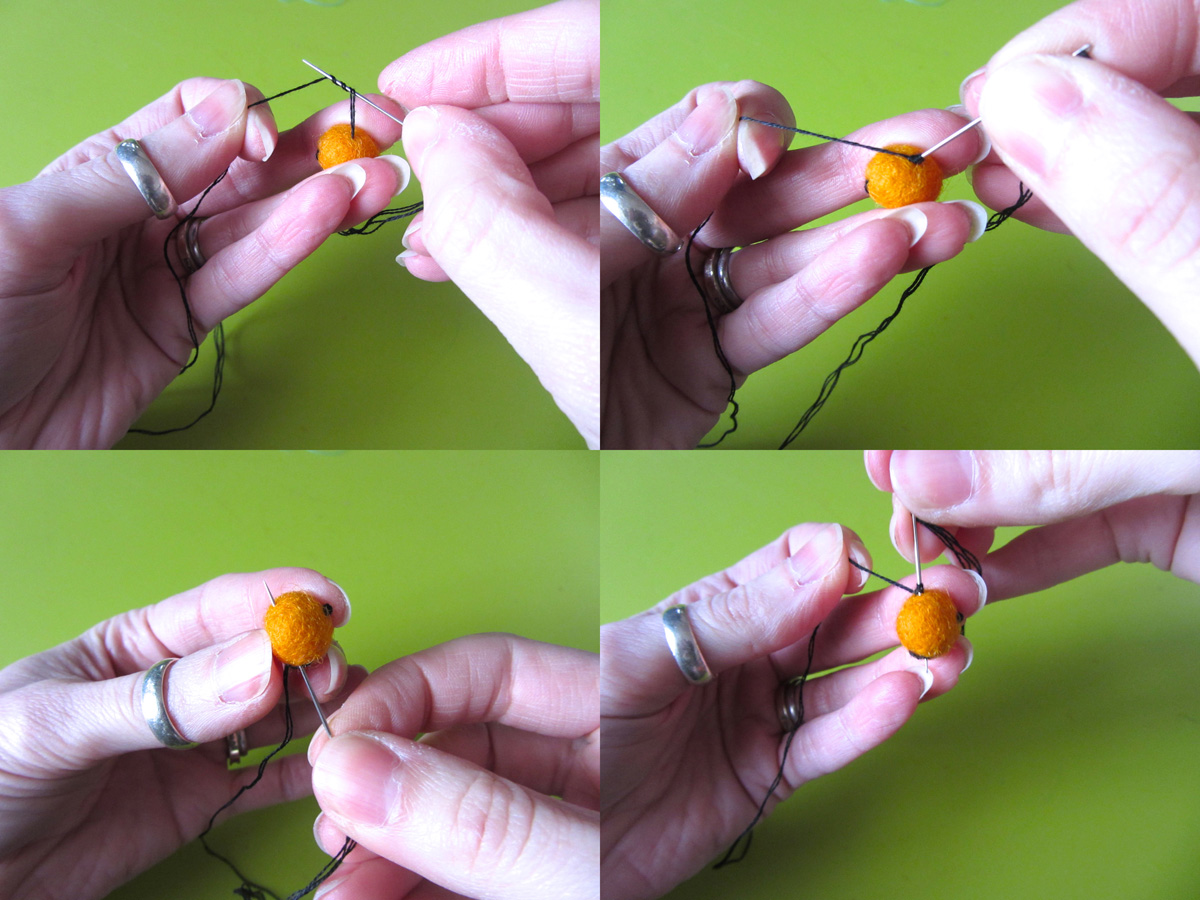
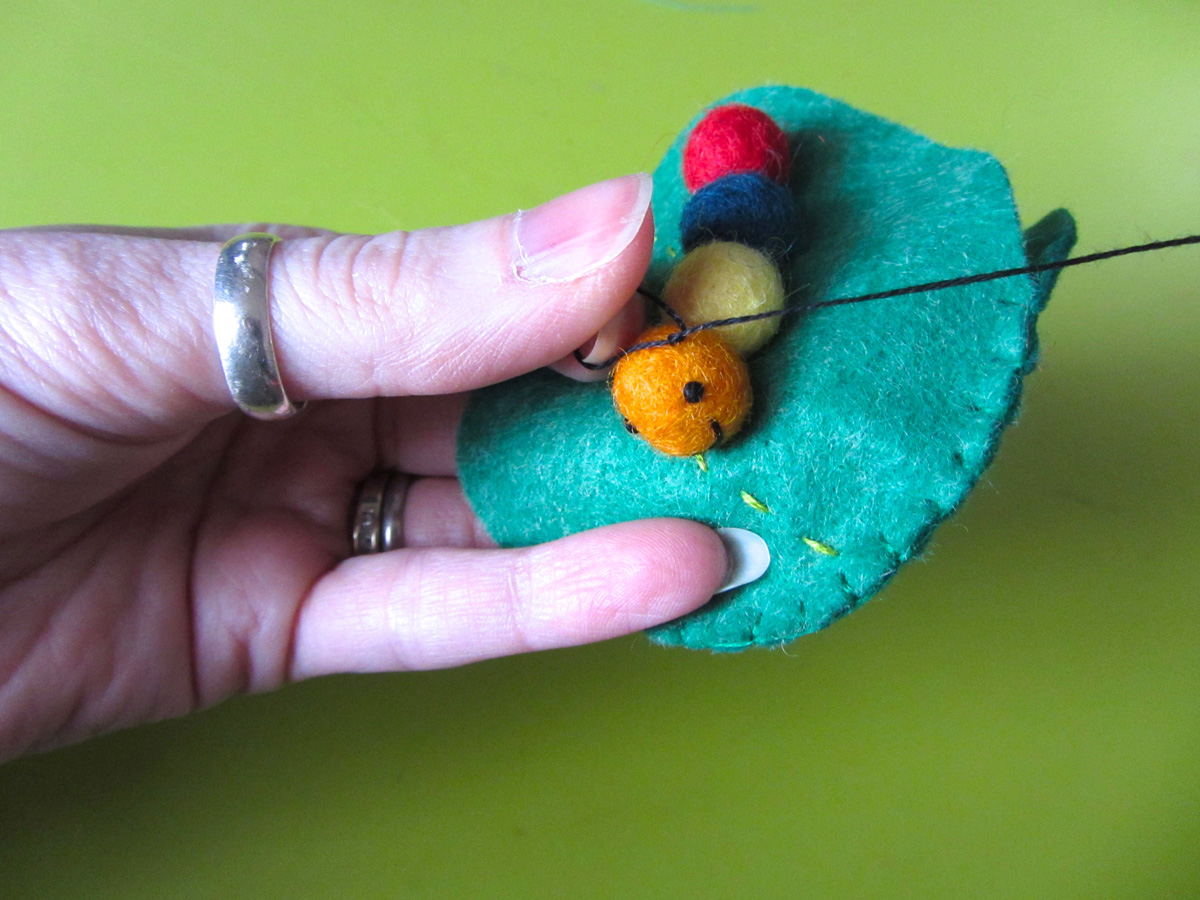
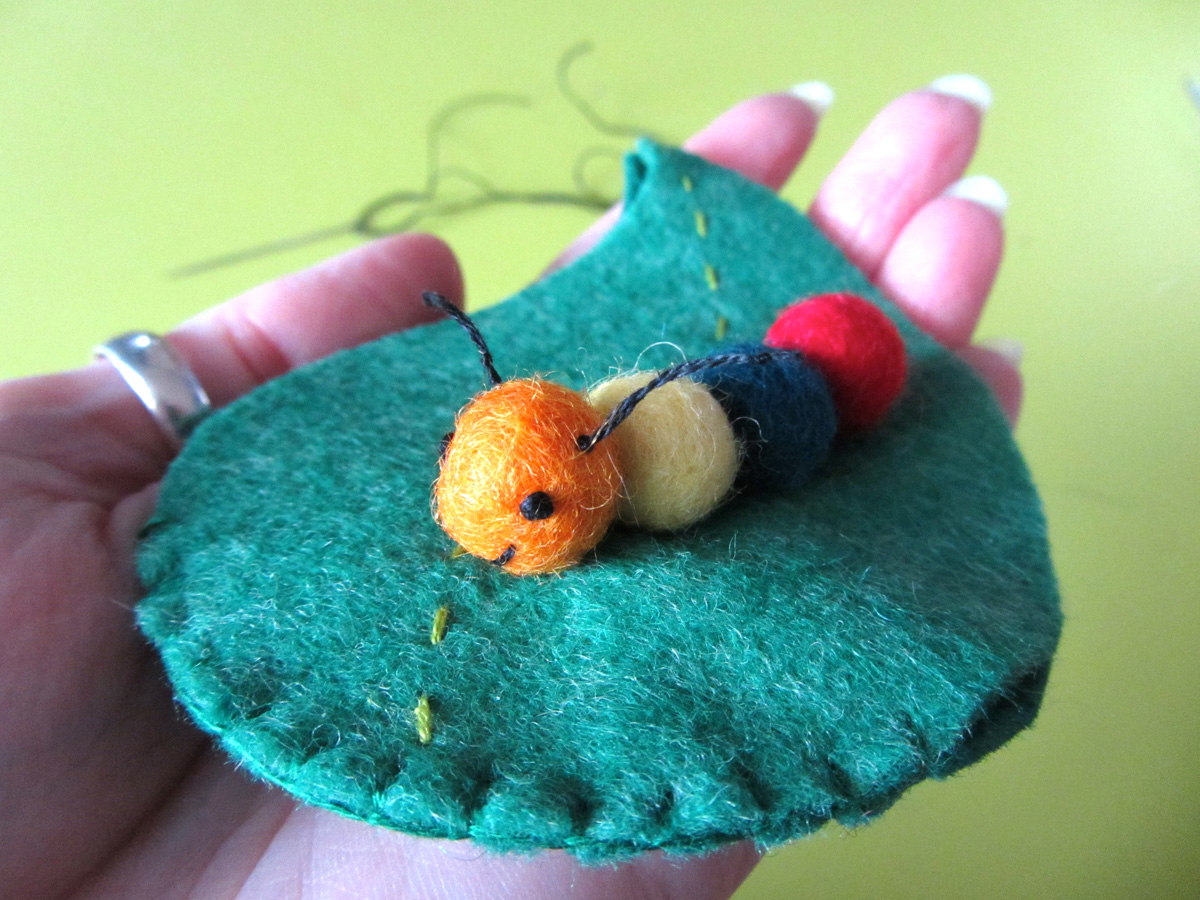
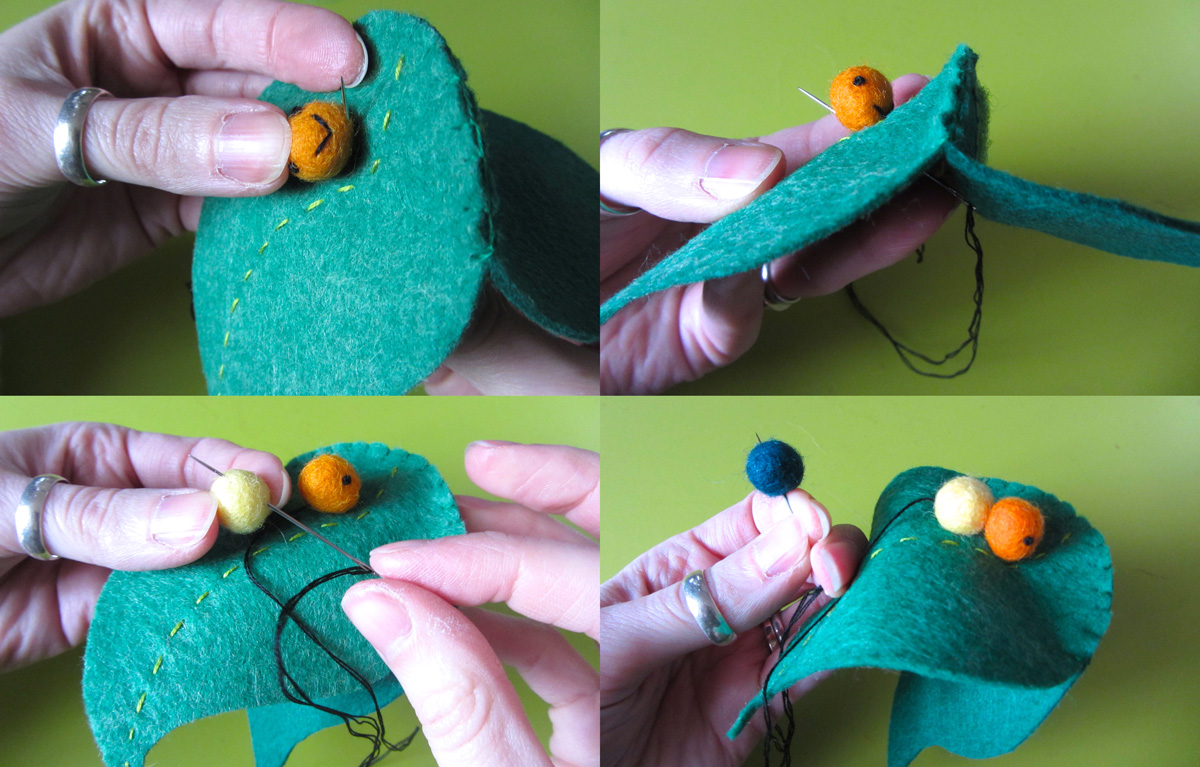 I attached the head to the leaf with several strong stitches through the base, sewing him to only the outer layer of the leaf. I came up diagonally through the base of his head and out the center back. Running my needle through about 1/3 of another felt ball, I sewed it down behind his head with several strong stitch. I continued this way for a total of 4 balls.
I then reinforced them by stitching up, through and down two balls at a time. So on this example, I sewed red and blue, blue and green, then green and orange.

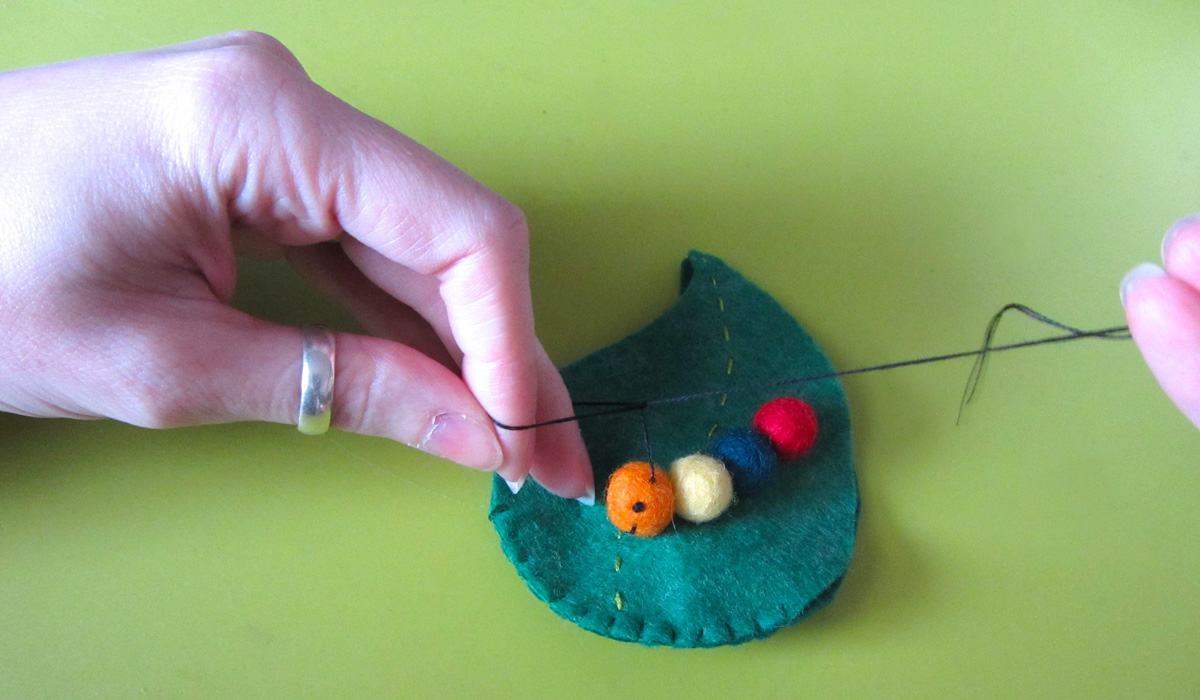
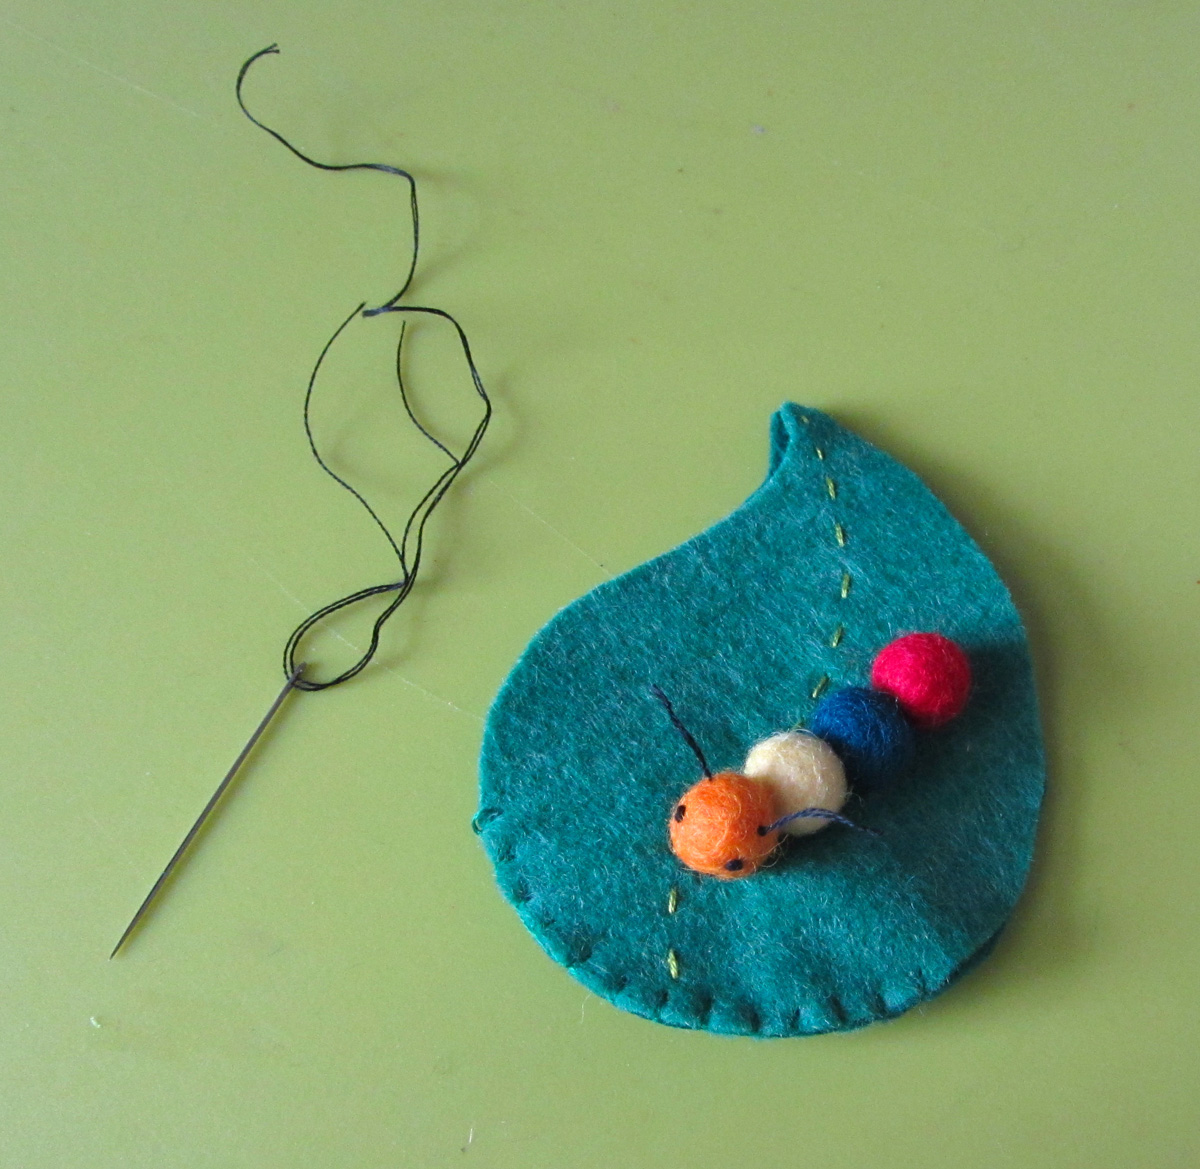
I ended up under his head again, and came straight up through it to where I wanted the first antennae. I tied a knot in the thread flush against his head, then tied another knot where I wanted the end of the antennae to be. I trimmed the extra and restarted a thread under his head to repeat it for the other side.

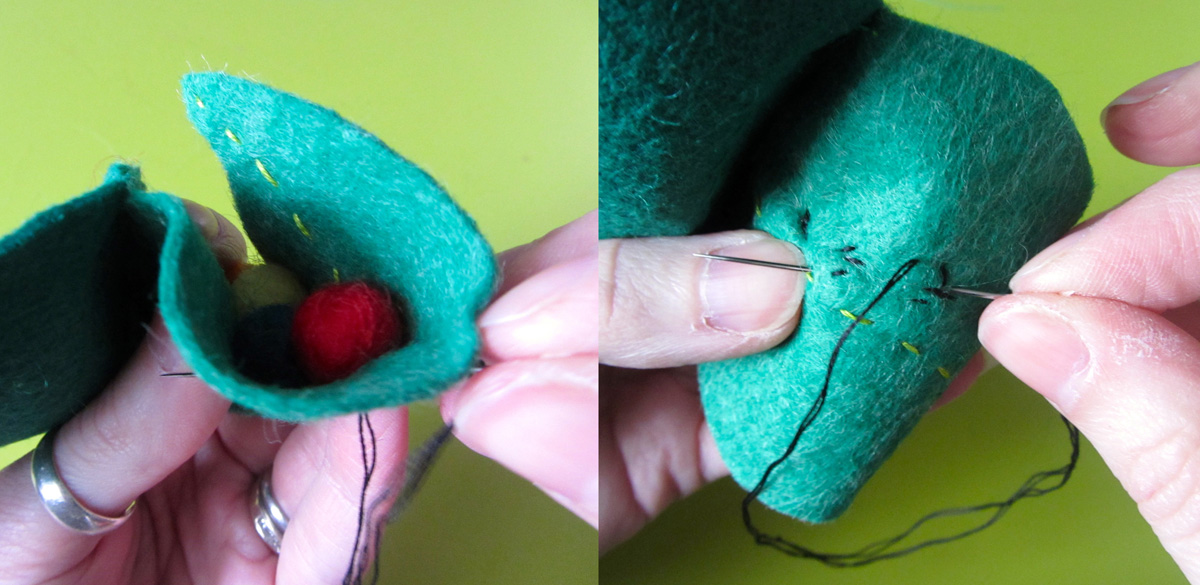
I then pinned the two sides of the purse together. Starting where the top blanket stitching ended, I sewed around the ends to the other side.
 All done!
These are coming out so cute, and only taking about 30 minutes each to sew (with Jax distractions!) once all the pieces were pre-cut. I’ve been letting Jax chose the colors for the felt balls – he loves helping out!
I have 5 of these cuties sewn so far, with 7 to go before his party in early February. I better get stitching this weekend!
I’d love to see your finished project if you make one of these coin purses! Stop by our Facebook page and post a photo.
Pingback: Happy Buggy Birthday, Jax!