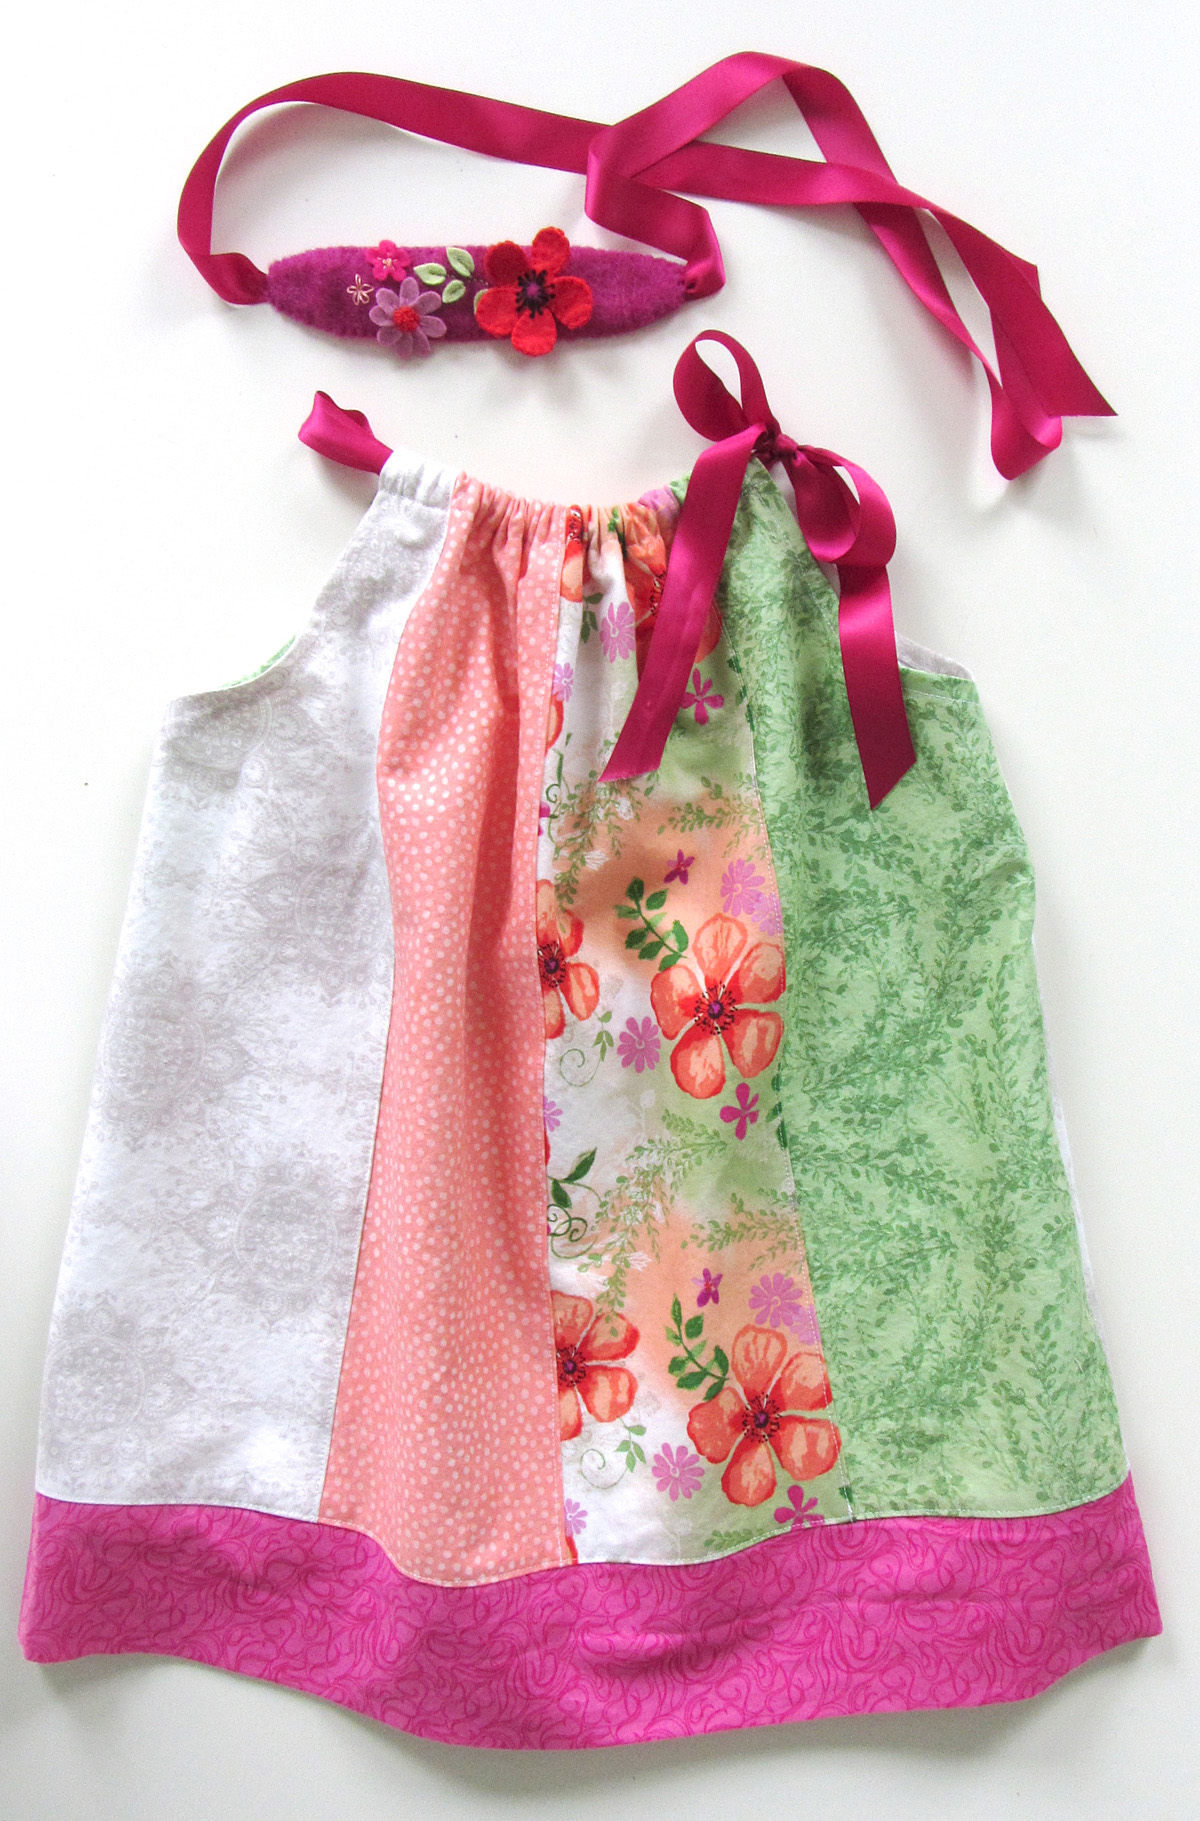
Jax has a birthday party to go to tomorrow for a sweet 3 year old girl. A girl! You know I couldn’t resist the urge to sew something girlie for her! (We did get her a fun present as well – one of Jax’s current favorite school toys.)
The first thing I made for little E was a fat quarter pillowcase dress. I fell in love with a poppy print bundle of fat quarters when I went in search of something pink. I swapped one of the fabrics for a hot pink, since the fabrics I chose were more peach and coral. The dress was very easy and quick to make! I went with the lined version and used some white cotton leftover from Jax’s quilt. But I needed something to go with it. And of course it needed to be felt!
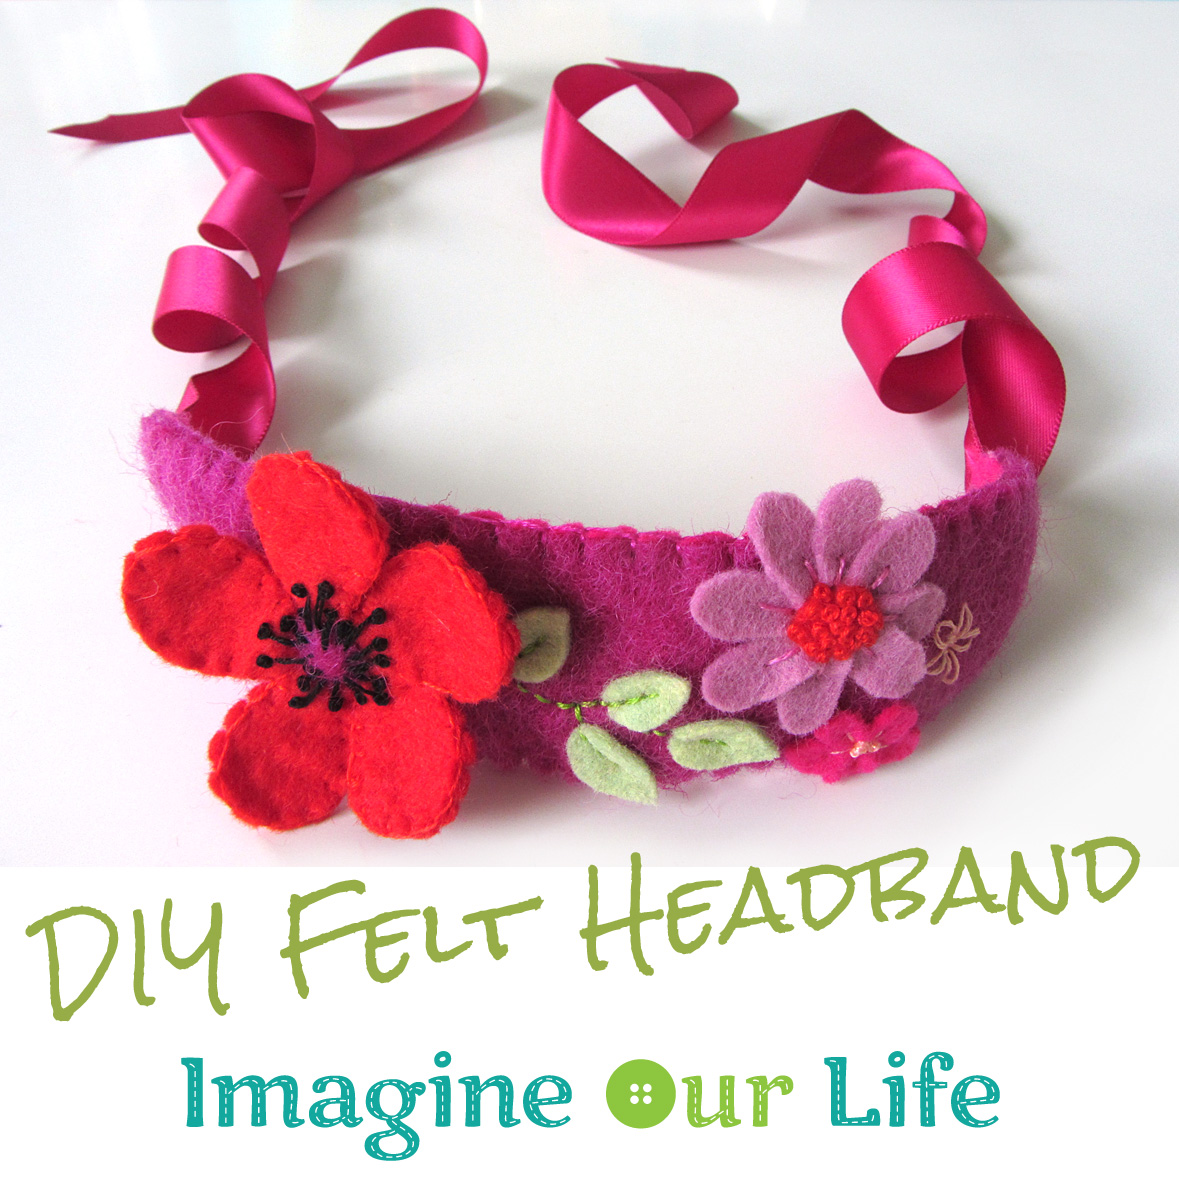
And so, I present the Felt Poppy Headband!
You could easily make a felt flowered headband to suit your own tastes. Change up the colors and flowers! You can take a look at my Bumble Bee Lacing Maze pattern for more felt flower ideas.
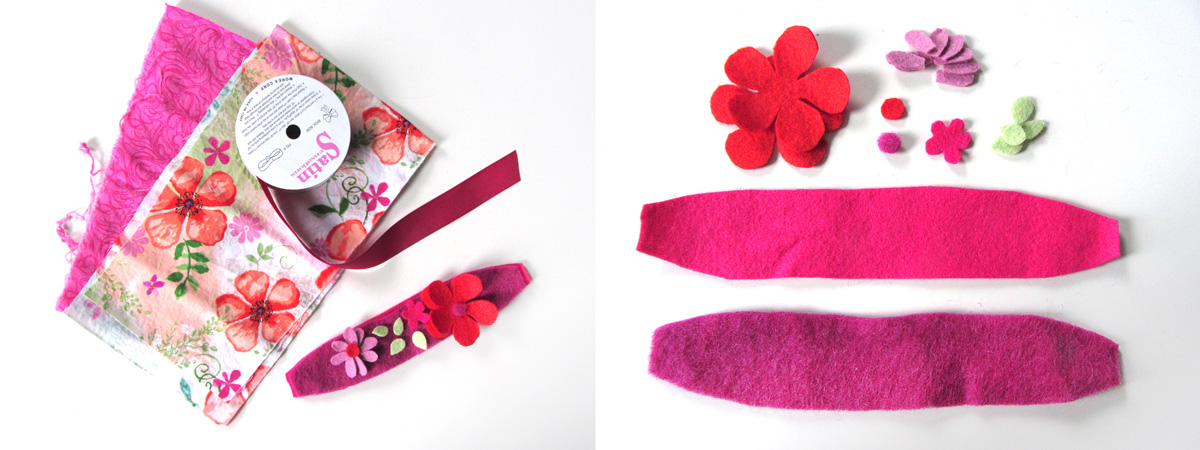
Materials
- The pattern
- Wool blend felt from American Felt & Craft (in hot pink, honeydew, tomato soup and sweet pea)
- Wool felt for the top layer. I got mine at the craft store, but this is just like it.
- Embroidery floss. I use two strands.
- Satin ribbon – two 22″ lengths.
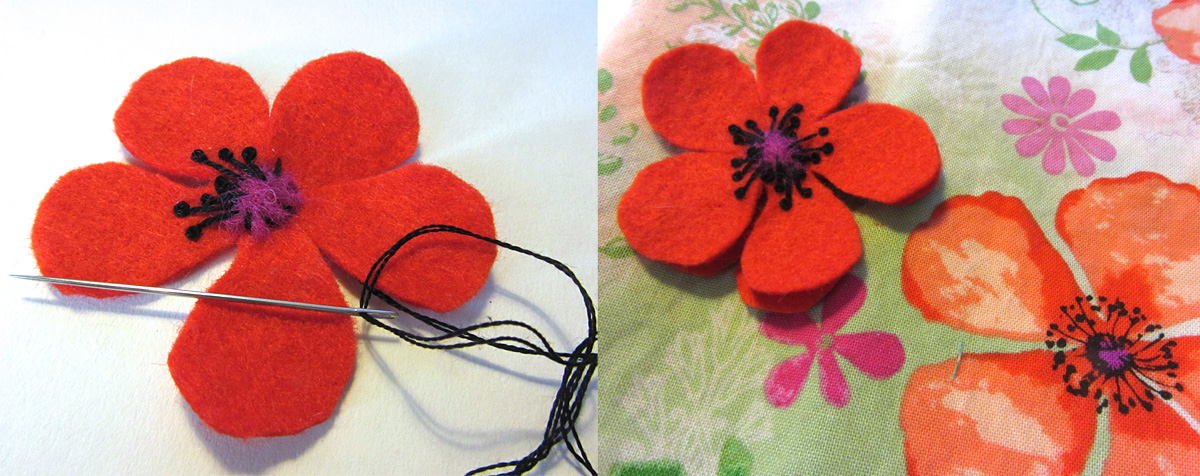
I started by stitching the details on the top piece of the poppy. I stitched the center of the poppy on using black floss, then went around the circle making long stitched of various lengths, topped with French knots.
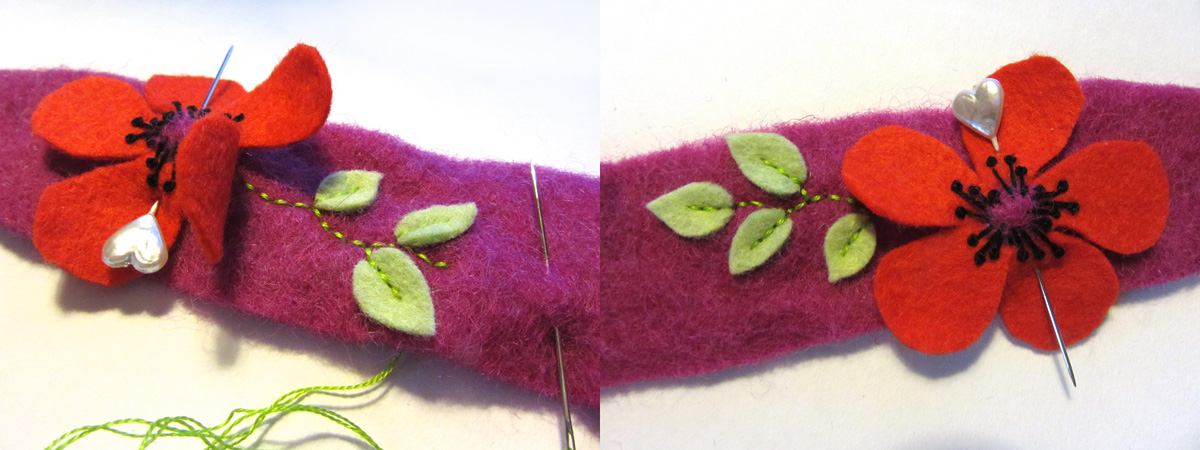
I set my poppy aside to make the leaves and stem next. I pinned it in place for the photos to show the placement. I made the stem with back stitch, attaching the leaves with a few stitches up the centers,
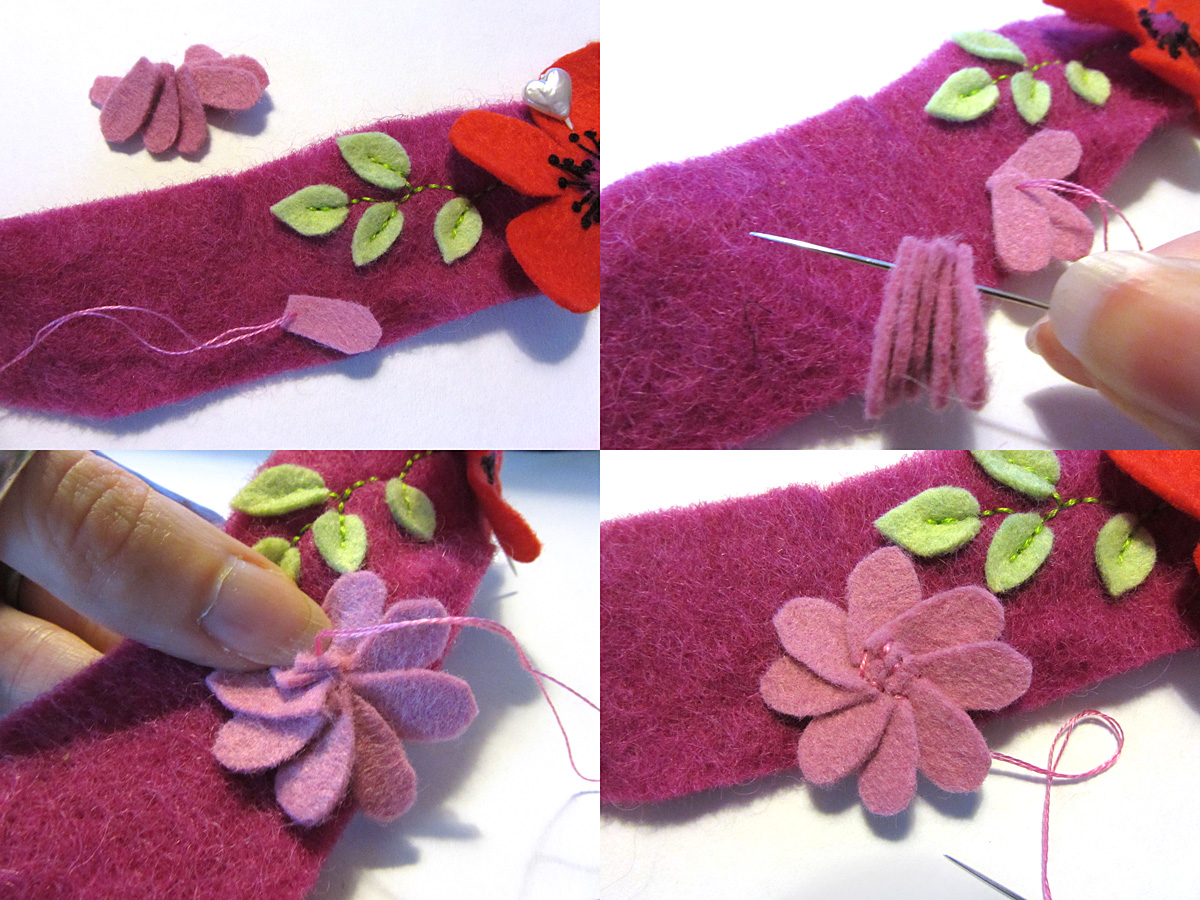
For the lilac flower, I made a stitch to anchor my thread to the headband, then ran my needle through the ends of all the petals, then fanned them out into a big swirl. I made a bunch of stitches in the center to secure them down. (I added the long stitches in the center of each petal later, but you should do that now.)
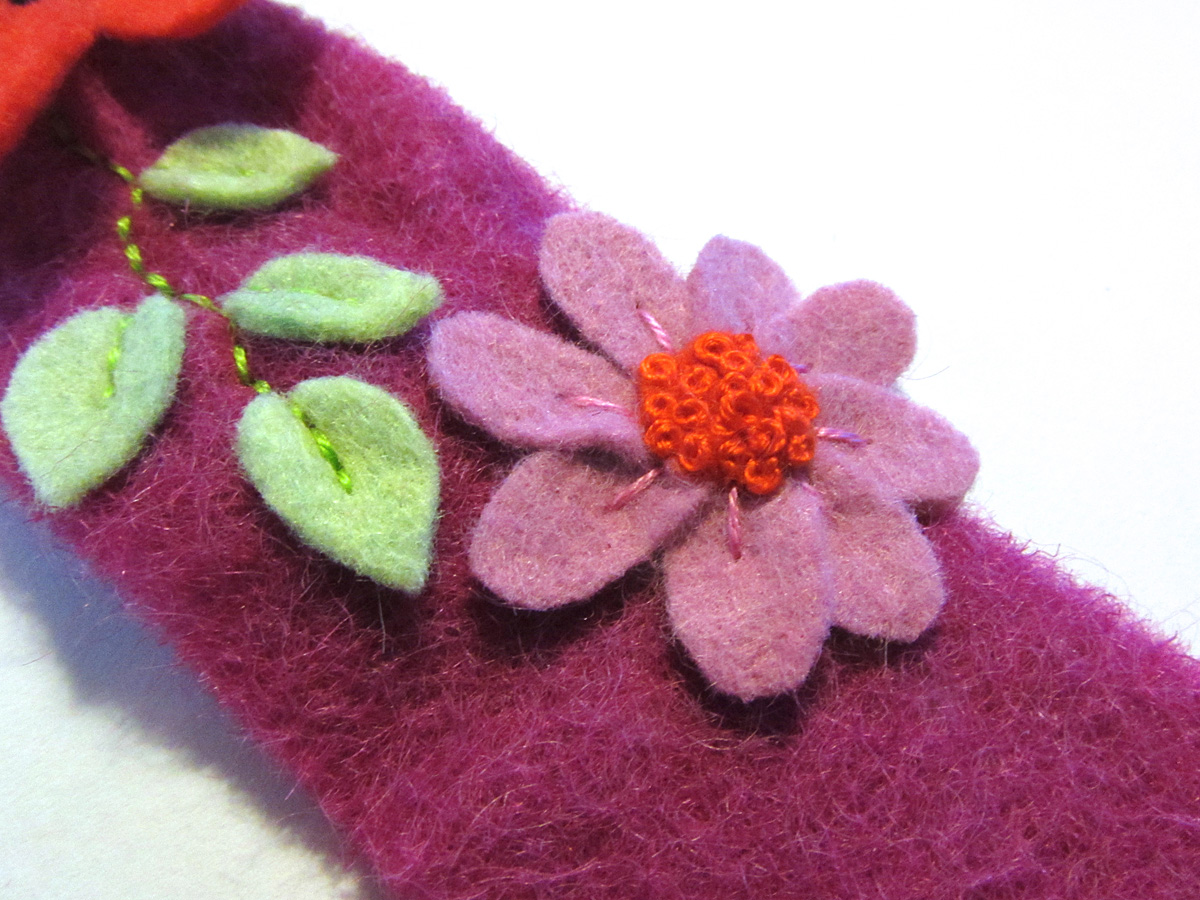
I stitched the center onto the flower, then filled it in with French knots.
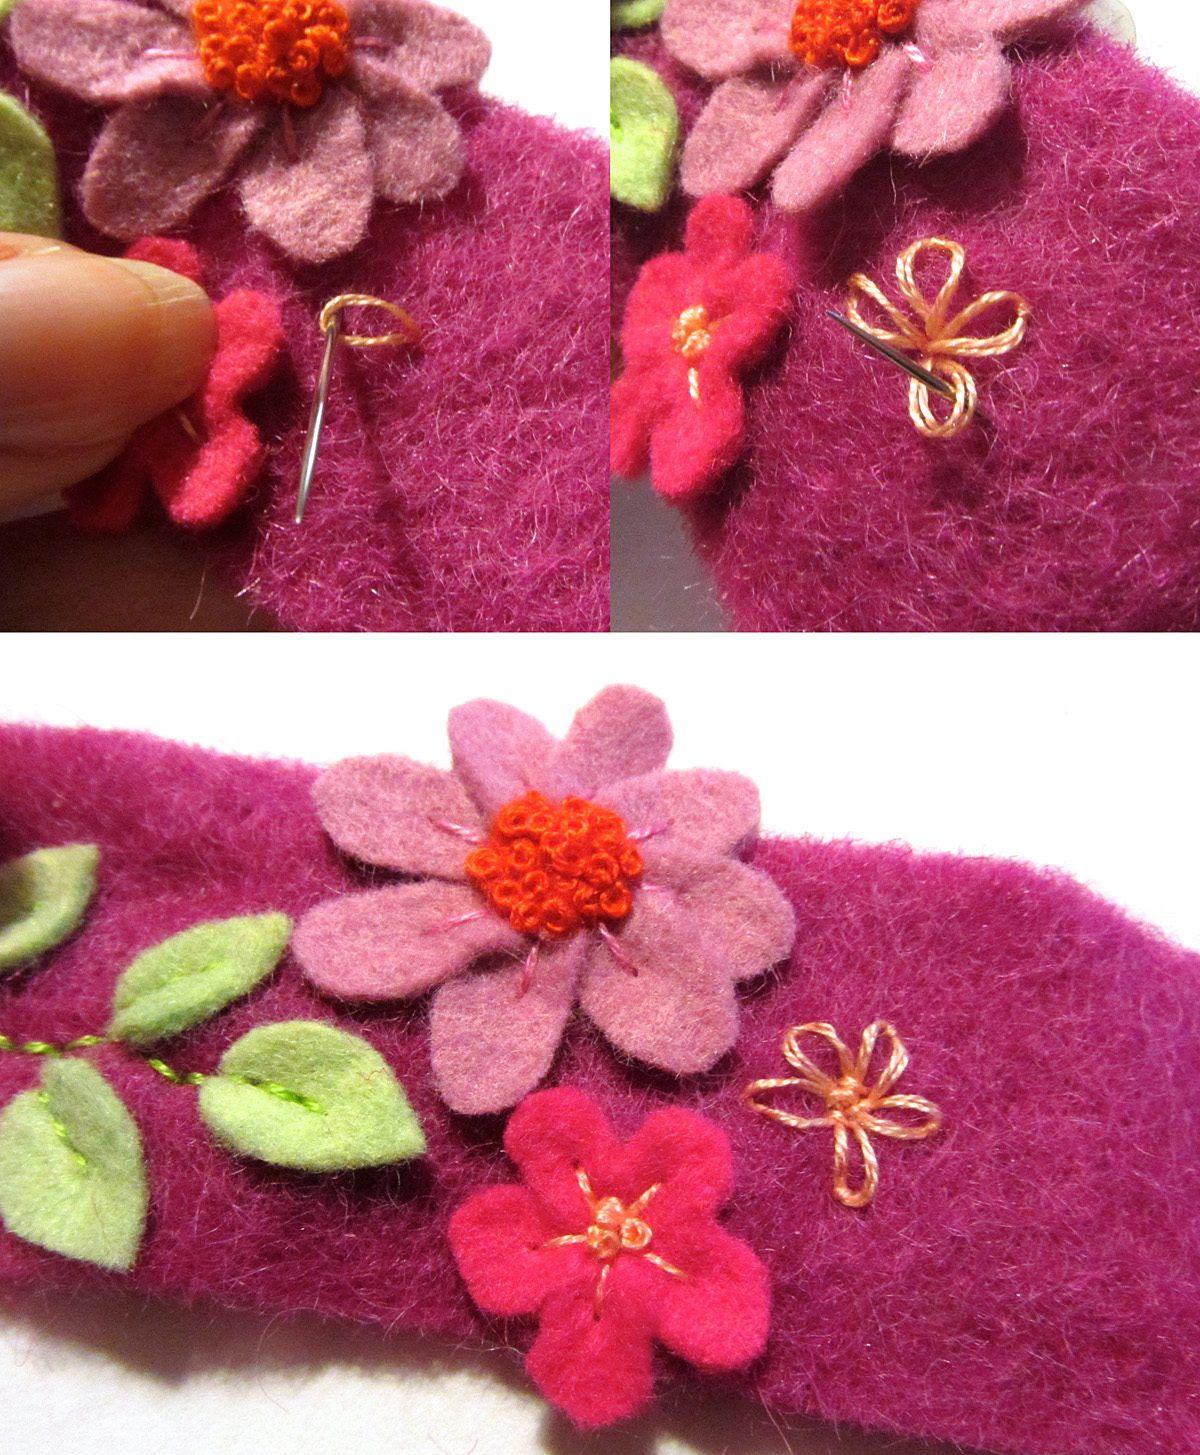
The last design element I added was a lazy daisy stitch. (See diagram 2.) I added some stitches in a circle in the center of my daisy to give it extra hold.

I went back to finish my poppy next. I blanket stitched the back of the flower on, pulling a little too tight so that the petals curled up. When I was finished sewing the back on, I ran the needle out the center back and made a bunch of stitches to hold secure the flower onto the headband top.
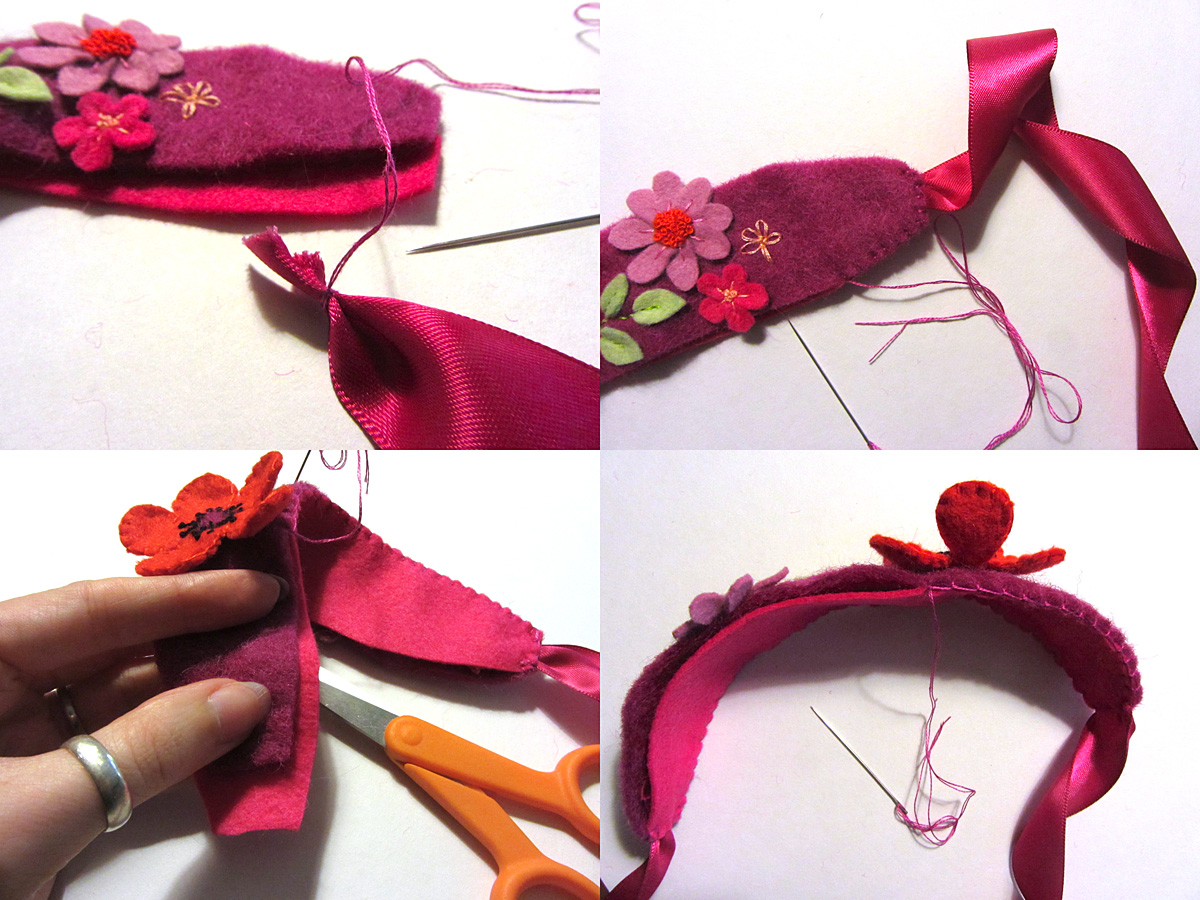
The next step is to assemble the headband. I pleated the end of one of the ribbon lengths and made a few stitches in it to hold the folds. I layered it in between the two layers of the headband and started blanket stitching around the edge.
When I was about 2/3 down one side, I paused to trim the backing to match, as the wool felt shrunk a bit with all the stitching. At the other end, I repeated the steps for adding the ribbon.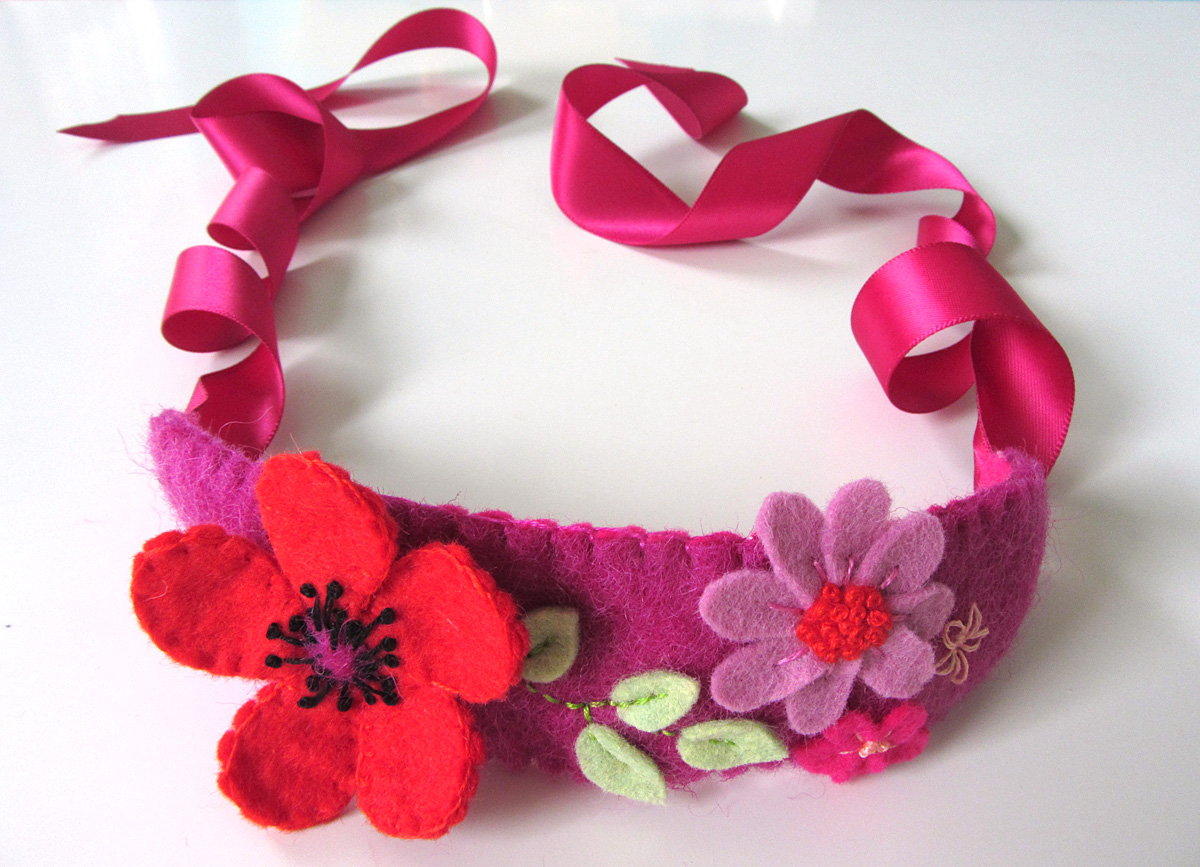
All done! I think it came out beautiful.
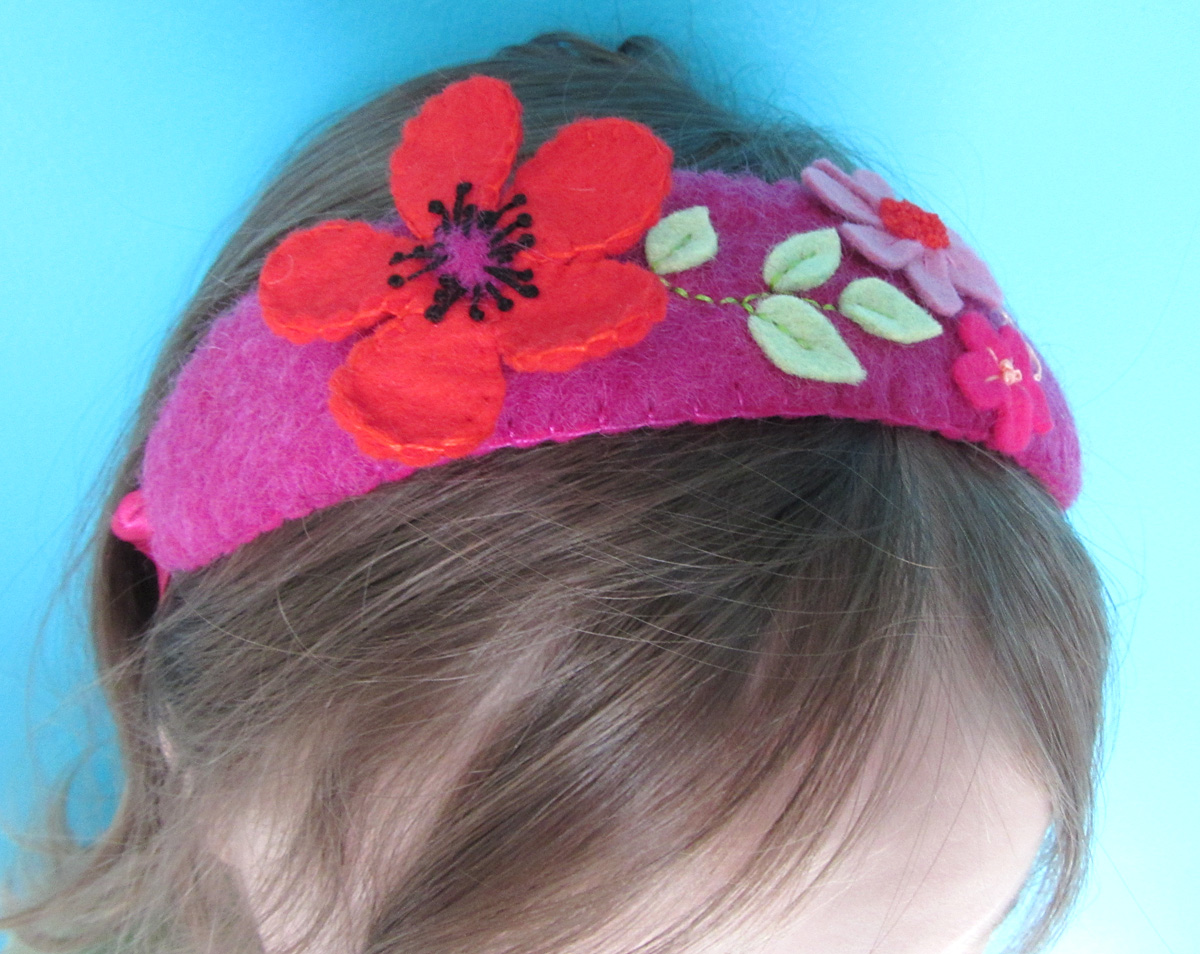
Yes, this is Jackson… I didn’t have any other models handy!
This headband is fully adjustable, as it is meant to be tied in a bow at the nape of your neck. You could also tie it to one side to make the bow more of a feature. I think it looks so pretty with the pillowcase dress because the ribbons bring the two together.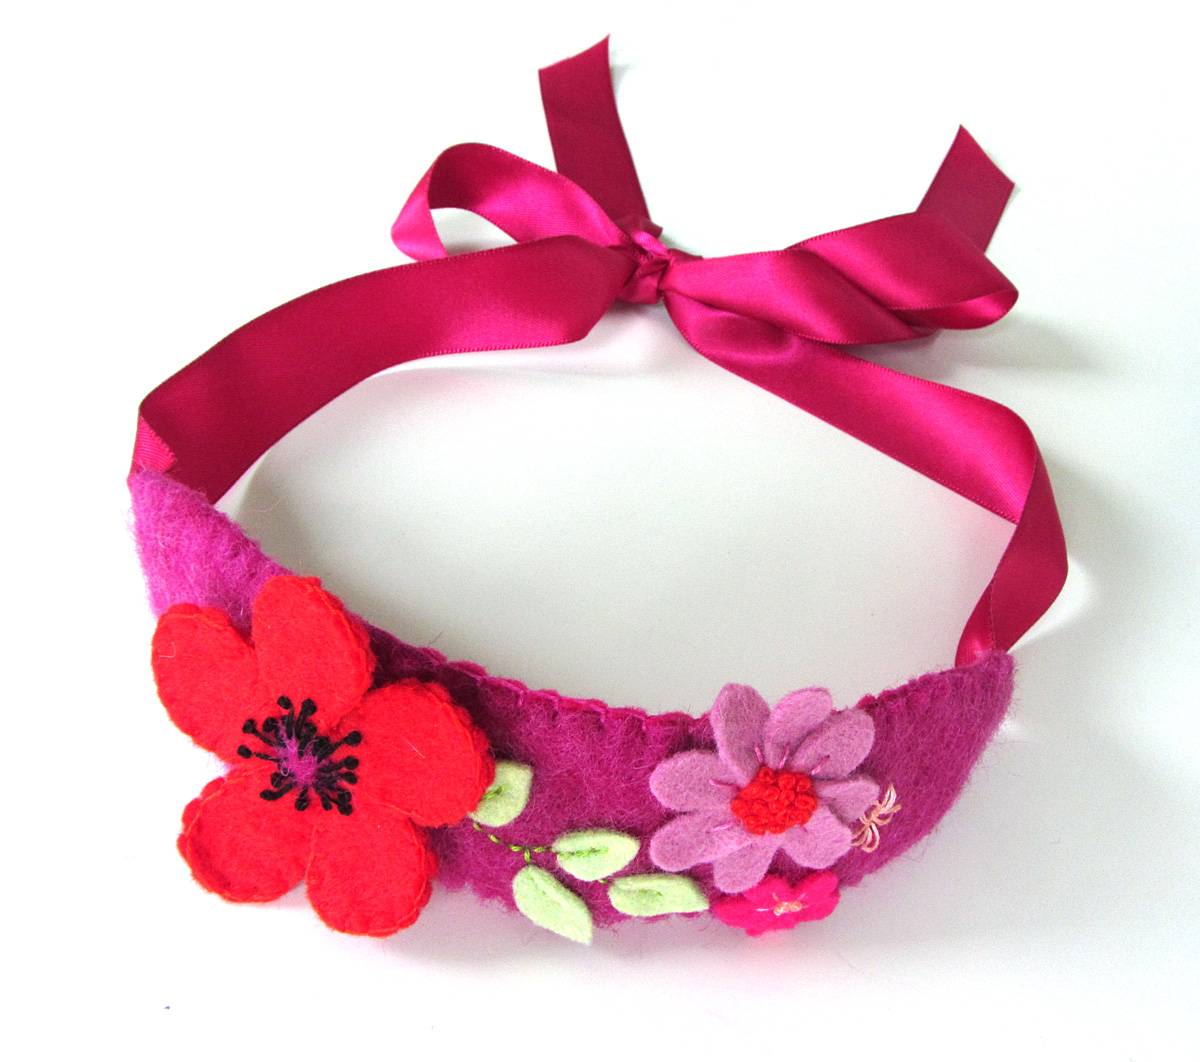
I’m sure an adult could wear this same headband, but you could also increase the length of the base to make a larger one. I plan to make one (or many!) for myself. What a great scrap-buster!

Thank you to all of you who voted for this tutorial on our Facebook page!

You’ll be seeing a tutorial for this soon!
But to those of you who voted for the other choice – DIY sewing labels – I’ll be posting those for you next week. So everybody wins!

Happy sewing!
It’s so adorable! Thanks for sharing. 🙂