
My large sewing project this holiday season was one that was chosen by my readers in our Facebook page: a felt Christmas tree play set! I hope you’ve been sewing along with me as I’ve shared the toddler-friendly tree pattern and tutorial and the first, two sets with you. But it’s not too late to join in! These mini ornaments bring a whole lot of holiday cheer and work up fast.

I will be designing 24 ornaments, and giving Jax one to unwrap every day leading up to Christmas. I’ll be sharing the ornaments in batches of 6. I am planning two more sets next week to finish the project. Numbers 13-18 are: a drum, a truck with a tree, a dove, an ice skate, a snow globe and a wreath.
To see all the posts in this series, click here.

What I Used:
- The Pattern
- Felt scraps from American Felt and Craft (from my scrap bag – choose any colors you like)
- Sequins (I used Confetti, Moss, Classic Red and Crystal)
- Felt Glue
(great for holding tiny bits in place when pins are too big!)
- Mini Pompom (I used white)
- Baker’s Twine (I’m on year two using this cone
- Red Ribbon
- Crystal Glitter

For all of the ornaments: I cut pieces of baker’s twine, doubled it over and tied a knot in the ends. When stitching the tops of the ornaments together, I made sure the knot of the twine loop was inside. I also made sure to stitch through the knot to secure the loop.

13. Drum
My husband is a drummer, so we already have a few little drums for Jax. All that aside, this little drum came out much cuter than I expected! I started by gluing down the red and green bands to each side of the drum, the stitched them down. I also added red and green sequins. I stitched the drum heads on, then made rows of gold French knots along their edges. On the front of the drum, I back stitched two drum mallets and used red sequins for the heads. I stitched around the edge of the drum, catching a loop of twine at the top corner.

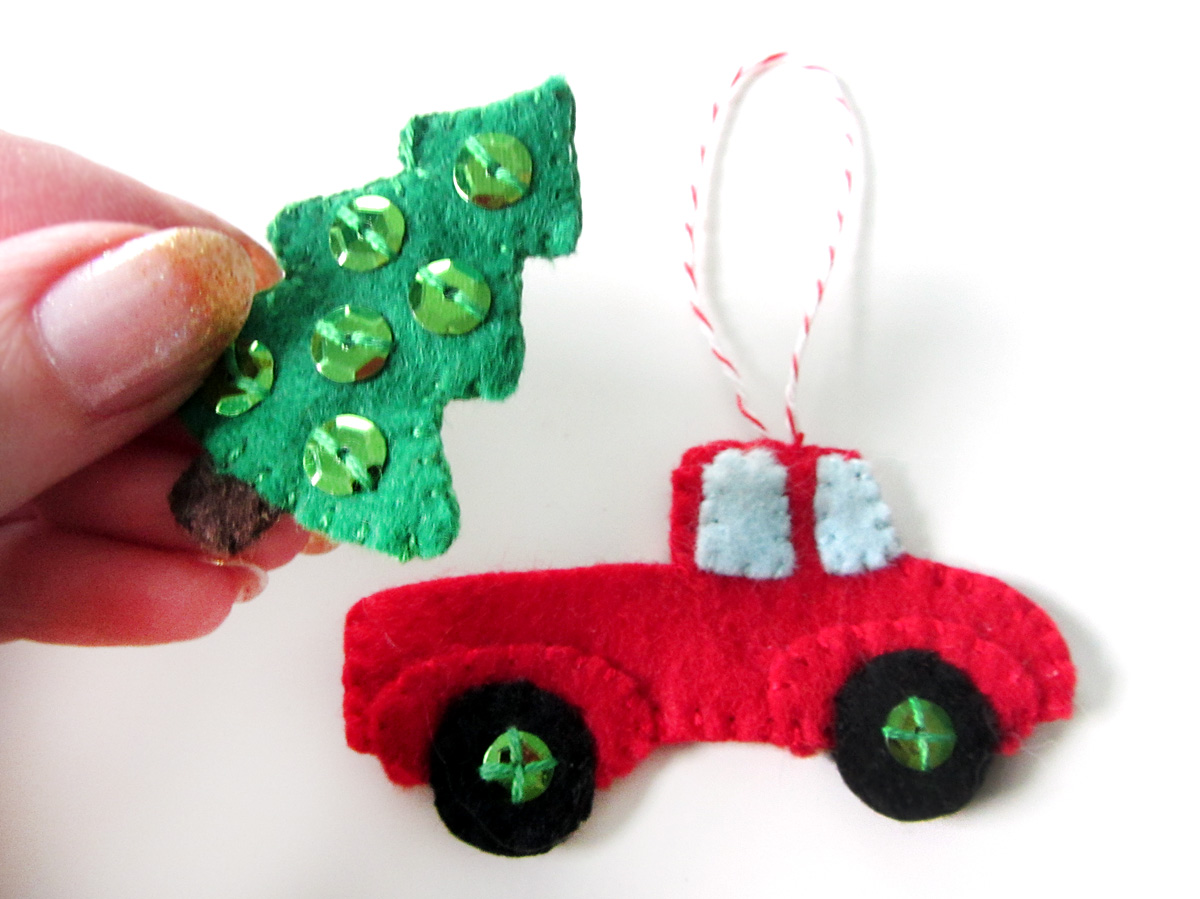
14. Truck with a Tree
We haven’t gotten our Christmas tree yet, but I’m really anxious to! I was inspired by all the cars and trucks taking home their trees, so I designed this truck. It had to be red- Jackson’s favorite color!
To sew the truck, decorate each side the same. Tack down the parts, then sew around the fenders and windows. Stitch green sequins into the cents of each tire. Put the two sides of the truck together, and sew each pair of tires together, going through all the layers on the upper halves. Sew the truck sides together, leaving the truck bed an open pocket and catching a loop of twine in the top of the cab.
For the little tree, I stitched green sequins onto each side. I then tacked the two sides of the truck together and stitched them around the edges. I layered them between the two tree sides, and stitched it all together. The tree can stick into the truck pocket, or come out!

15. Dove
I am in love with this little dove! To begin, I stitched the outer piece of each wing with stripes of back stitch. At the end of each line, I stitched a crystal sequin. I left the bottoms of the sequins hanging free. I did the same rows of stitches and sequins on the tail of each body piece. I sewed each decorated wing piece to a plain one, then stitched them on along their fronts. I stitched sequin cheeks onto the dove’s face on each side, and added brown satin stitched eyes. I stitched the two sides of the dove together all the way around, catching a loop of twine in her back and the two beak pieces (sewn together) in her face.
To make the olive branch, I rolled the branch felt lengthwise and blanket stitched up its length. I then worked my way back down, stitching leaves on in a staggered pattern. I coated each leaf with felt glue and let them dry to make the sturdier. If you have a younger (or rougher) child, you may need to skip the delicate olive branch. Once the branch was dry, I stitched it to the under side of her beak.

16. Ice Skate
For this little ice skate, I glued together the two sides of the gray blade using a thicker layer of glue than I’d normally use. I didn’t want stitches taking away from the crisp look of the blade, so I made sure they were thoroughly glued together. I then tacked the tan sole pieces onto either side of the blade and stitched them on along the sides and bottom. I decorated each of the sides of the boot with a crystal sequin and some stitches and French knots. Then I layered the two sides around the sole and blade and stitched them on along the sides and bottom, catching a loop of twine in the upper back corner. I left the top open, like a real skate. I used white floss to stitch zig zags along where the shoelace would be, and stitched on a looped bow. I finished it off with a mini white pompom.

17. Snow Globe
I have to give credit to American Felt and Craft for the idea of a snow globe ornament. This is my (mini) version!
I started by prepping the two sides of the red base with some stitched on sequins. I then glued the snow and trees to each of the blue globe backgrounds and letting them dry. I stitched each of the trees down, but didn’t stitch the snow as only a bit of the edge was exposed. I thin layered the two pieces back-to-back and sandwiched them between two circles of clear vinyl. Starting at the snow line, I stitched up and around through all the layers, catching a loop of twine at the top. I used a blanket stitch and pulled it firmly. I went all the way around the blue edge and stopped at the other side of the snow line.
I turned the snow globe upside-down, and carefully poured a little crystal glitter in to each side (about a 1/4 teaspoon – whatever fits but doesn’t obscure the view too much). The glitter won’t really move around, so having see-through glitter is key. Keeping it upside down, I sewed that bottom edge closed. I then sewed on the red base.

18. Wreath
The wreath is quick and easy, but very pretty. On the front, I took a little bow I’d tied in ribbon and stitched it down using tiny stitches around the knot. I then stitched colorful sequins around the ring on both sides. I stitched the fronts and backs together, making sure to catch a loop of twine at the top.

Which one is your favorite of this set? What would you like to see next? I have to design 24, and your idea may be one! Stop by Facebook or Twitter, or comment here with your ideas. I have a couple planned that were reader suggestions!
If you are making a set, I’d love to see your finished ornaments! Tag me on Instagram @iolstephanie (if you are private, I’ll have to request to follow you), mention me on Twitter @iolstephanie or post a picture on our Facebook wall. I love what I’ve seen so far!
I have to say a quick happy birthday to my fabulous big (and only) brother! He is so wonderful, and a big reason why I’d love a sibling for Jax (the husband disagrees.) He has been a big help on all of my more technical projects and is very creative himself. Check out his puppetry!
Happy birthday big bro!! Love you! <3
I had initially thought I wouldn’t make this, but the train ornament in the last set changed my mind. I can’t decide which is my favorite: the train or the truck with the tree in the back. I am also impressed with the way you wrapped the ornaments in the origami boxes for Jax to open each day.
Your works are amazing and I appreciate that you share them.
What gorgeous little decorations! I can’t wait to get stitching. Thanks so much for sharing the patterns and tutes!
Pingback: Trucks and balls – MeeMee's Wabi Sabi Etsy Shop
What kind of felt did you use? I have some wool felt and also polyester. Some is stiffer and not that fluffy and some is really soft but hard to cut small detail shapes because it’s fluffy and kind of runs at the edges if that makes sense. Thanks!