Tag Archives: Christmas Tree Playset

Mini Advent Ornaments Set Four

Mini Advent Ornaments Set Four

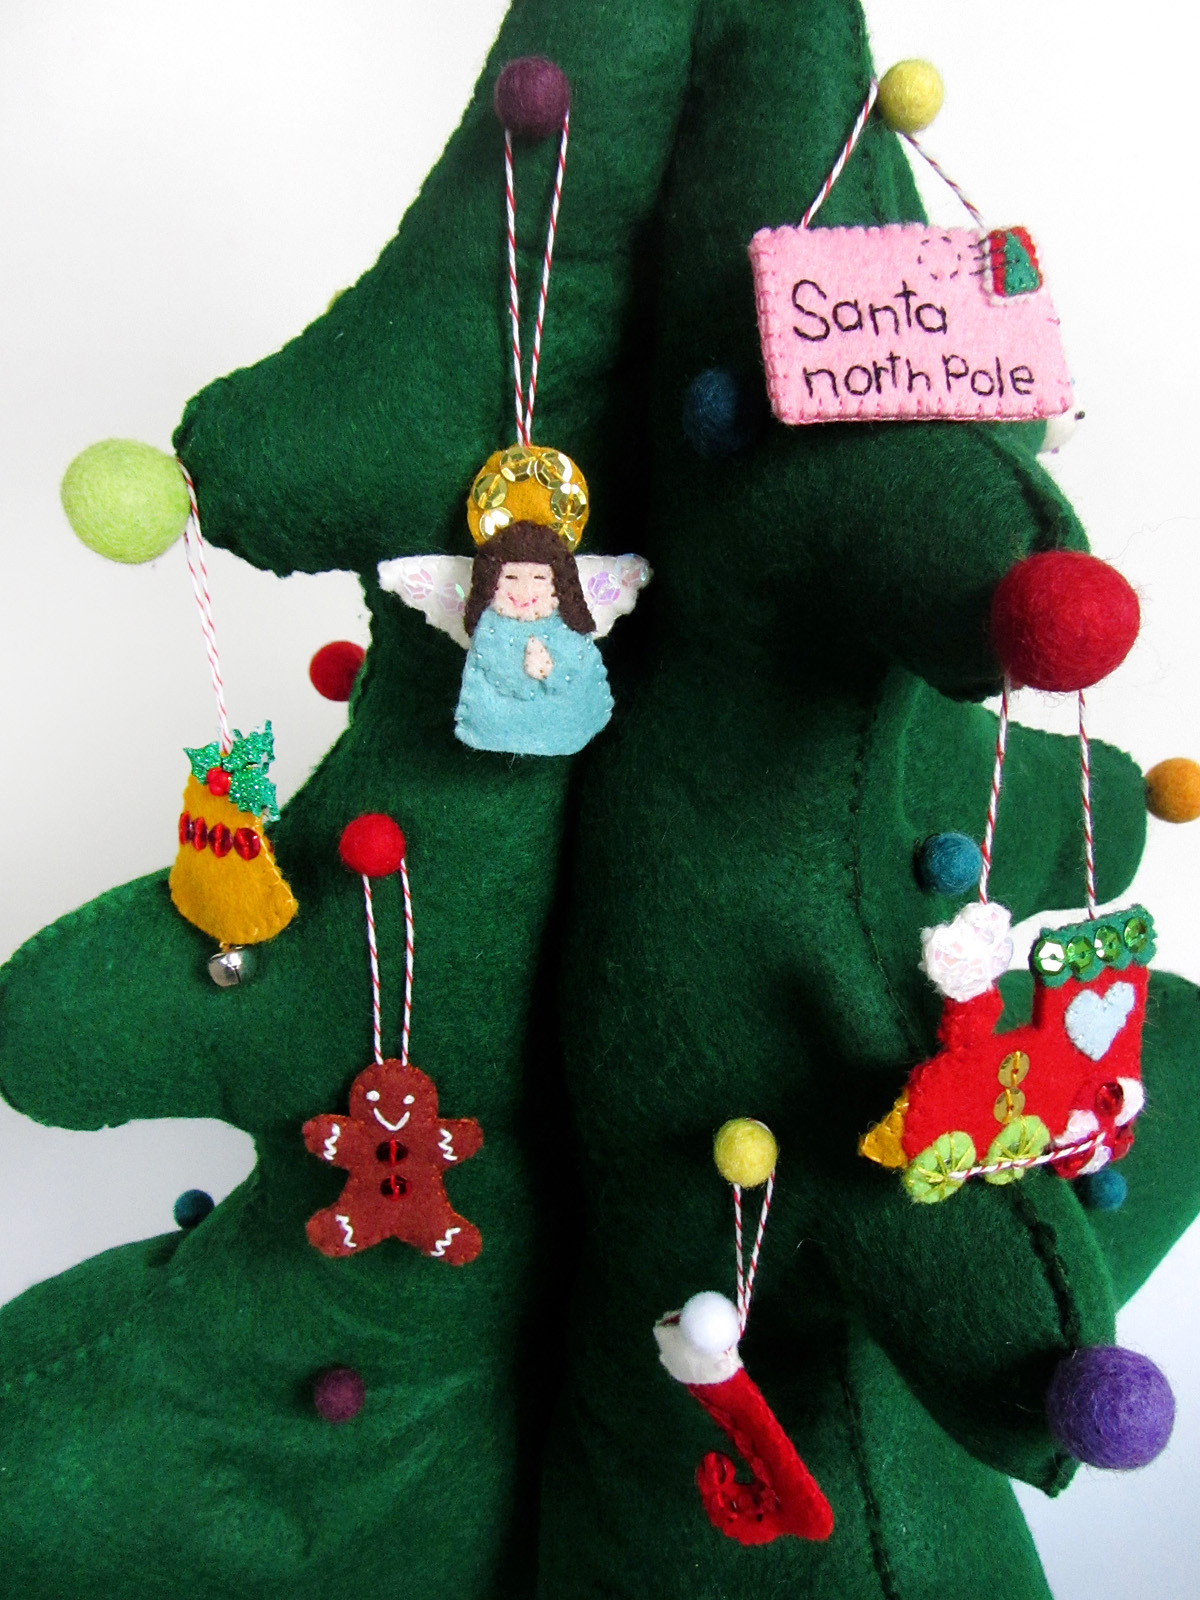
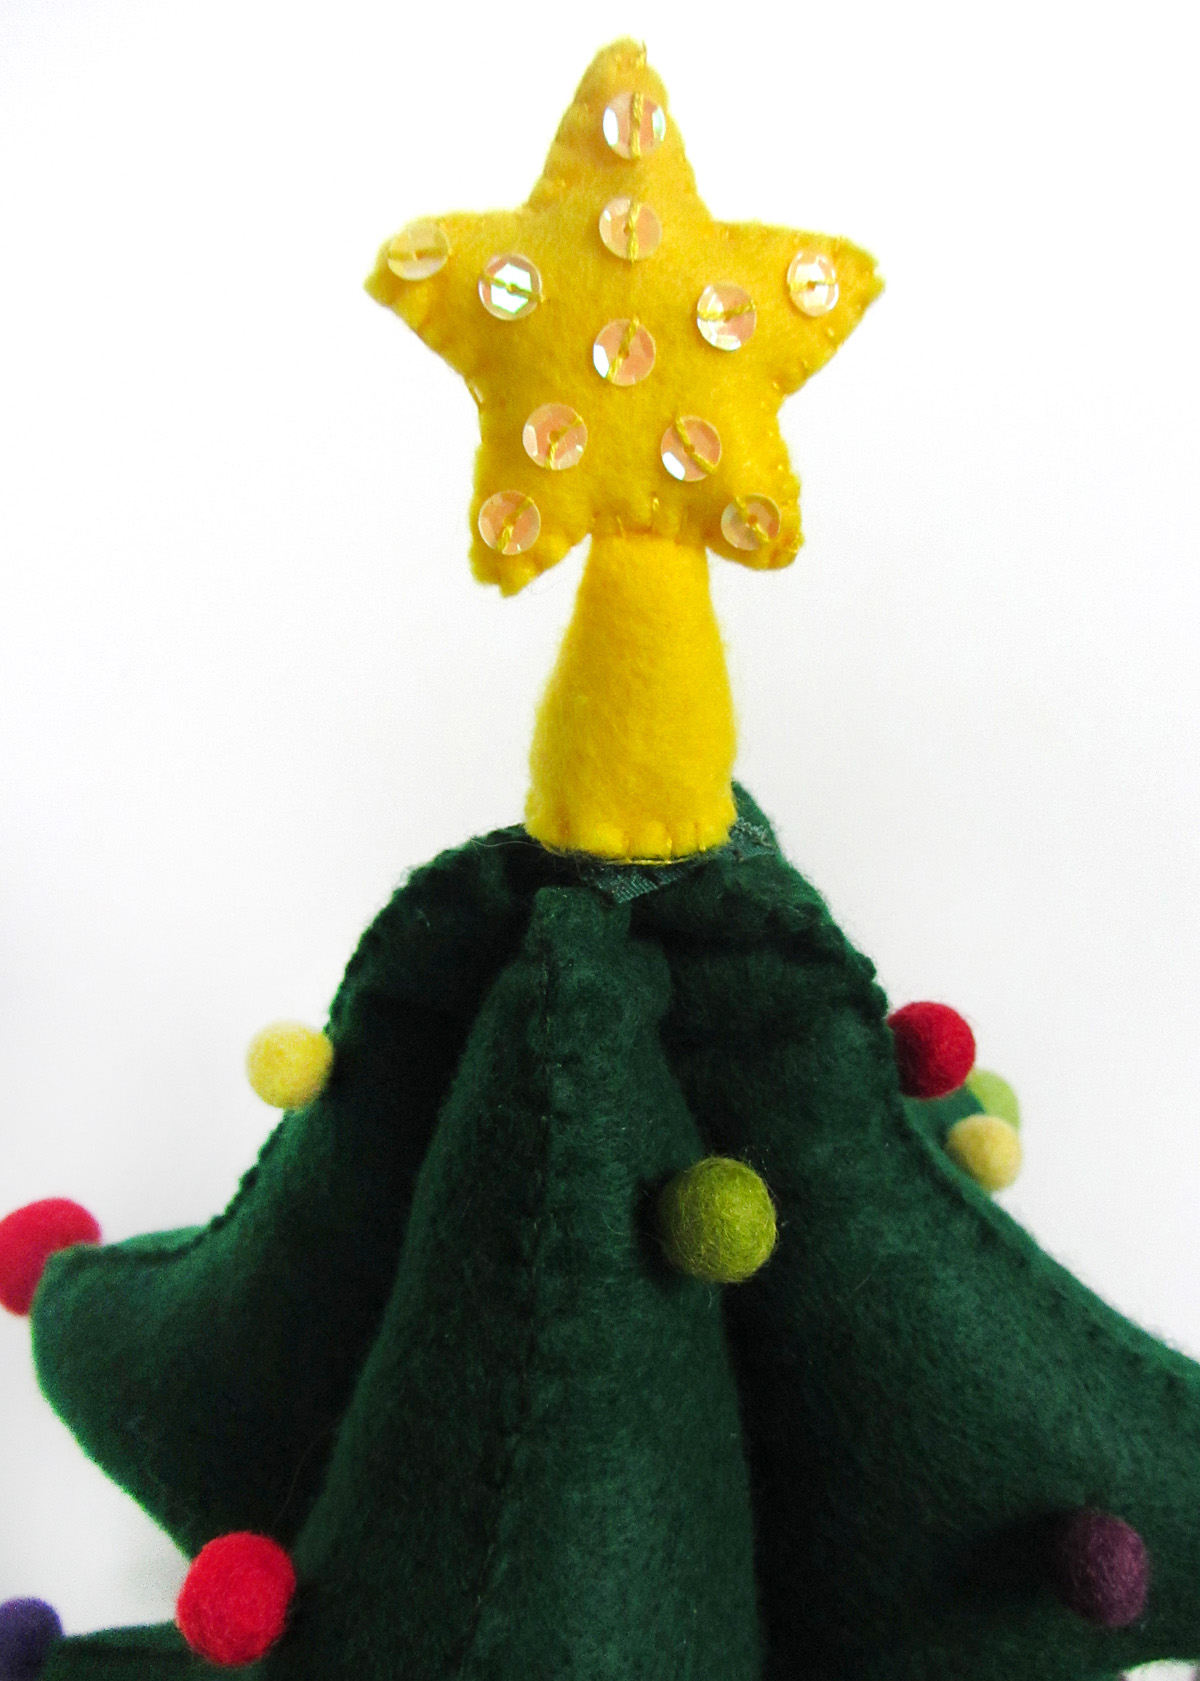
I can finally mark a major sewing project off my list holiday season! It was one that was chosen by my readers in our Facebook page: a felt Christmas tree play set! I hope you’ve been sewing along with me as I’ve shared the toddler-friendly tree pattern and tutorial and the first, three sets with you. But it’s not too late to join in! These mini ornaments bring a whole lot of holiday cheer and work up fast. Choose a few to stick in someone’s stocking or tie to a present as a gift tag!

Mini Advent Ornaments Set Four

I designed 24 ornaments, and I’ve been giving Jax one to unwrap every day leading up to Christmas. I shared the ornaments in batches of 6. Ornaments 19-24 are: a fireplace, a lamb, a rocking horse, Santa, gifts and a reindeer.

To see all the posts in this series, click here.

Mini Advent Ornaments Set Four

What I Used:

Mini Advent Ornaments Set Four

For all of the ornaments: I cut pieces of baker’s twine, doubled it over and tied a knot in the ends. When stitching the tops of the ornaments together, I made sure the knot of the twine loop was inside. I also made sure to stitch through the knot to secure the loop.

Mini Advent Ornaments Set Four

19. Fireplace

Fore the fireplace, I tacked down with glue the logs and flames to the black fireplace area, then stitched everything down. I stitched the black area to the bottom center of the front of the bricks, then stitched the front mantle on along its bottom. I glued down three stockings, then sewed them down with a sequin on the toe of each. I did a long stitch at the top of each for a cuff, and a single loop of a lazy daisy stitch at the top corner. On the back, I stitched the back mantle on along the bottom, then stitched the front and back together, catching a loop of twine at the top.

Mini Advent Ornaments Set Four

20. Lamb

Oh, this sweet little lamb! She is quite simple, but you can believe me that all those crystal sequins are a labor of love. I started by gluing the heads onto each body piece, then sewing sequins onto the whole thing. (I provided a basic body shape in the pattern, but I found it worked best to trim the body into wooly bumps freehand.) I took the legs and folded them in half, gluing them down then stitching all around. I stitched the body of the sheep together with the twine loop at the top and the legs at the bottom. I stitched the two sides of her face together. I glued the hat brims onto the hat sides, then layered them around her head and sewed them together and onto her head.

Mini Advent Ornaments Set Four

21. Rocking Horse

I started this cute rocking horse by gluing the saddle on, then sewing it. I added two green sequins on each side, then bordered it with French knots. I gave him black French knot eyes. I sewed the two sides of the main and tail together then glued them in between the two finished sides of the horse, as they are too small to pin. I stitched all around the horse catching a twine loop at the top, skipping the ears, but making a little brown stitch in the center of each. Using gold floss, I made an anchor stitch under his chin then looped the floss around his muzzle, then made a French knot on each side. I then loosely looped the floss behind his neck and made an anchor stitch to keep it from pulling out.

Mini Advent Ornaments Set Four

22. Santa

Ho, ho, ho! I had to do Santa! I started him by gluing his beard and mustache onto his face. I stitched them down, then added some crystal sequins to his beard. I made two straight pink stitches for his mouth, a peach stitch for his nose and two blue French knot eyes. I stitched the beard to his red back piece around the outside, the stitched his face and corners of his ‘stash onto one of the hair pieces. Then I sewed the back hair piece to the front. I glued the hat brims on and stitched crystal sequins to the front one while sewing them down. I layered the two hat sides onto his head and sewed them together and onto him. I added a white pompom to the tip of his hat.

Mini Advent Ornaments Set Four

23. Gifts

These three little gifts could be made in any colors. I went with a classic Christmas palette. I stitched each of the two larger gifts separately, then stitched them together, only going through one layer of felt to hide the stitches. The corner of the red gift got the loop of twine. For the two bows, I decorated each loop with a sequin, sewed the two sides together, then stitched them on with some crossed stitches only in the center. On the gold gift, I glued down a strip of red felt as a ribbon and trimmed it to fit. I sewed a trio of sequins on to decorate it. I put the back and front together and started sewing them together with blanket stitch at the bottom, then laying it on the other two gifts and sewing through bother the gold gift and the top layer of felt of the other two while sewing the last three sides. I finished it with a plastic holly embellishment that I stitched on with red thread around the berries.

Mini Advent Ornaments Set Four

24. Reindeer

I started the reindeer by gluing the two layers of each antler together and setting them aside. I made sure to glue them edge-to-edge as I wasn’t sewing them together. I decorated the front of his face with a red sequin nose and brown sequin eyes. I glued then sewed the inner ears to the front ears, then sewed the front ears to their backs. I sewed the face pieces together with the antlers and a loop of twine at the top. I stitched the ears to the front top of the head. On the top of one antler, I made a line of back stitch running down, across and up to the top of the other. I stitched colored sequins along the way, using only one stitched in each so the dangle like holiday lights.

Mini Advent Ornaments Set Four

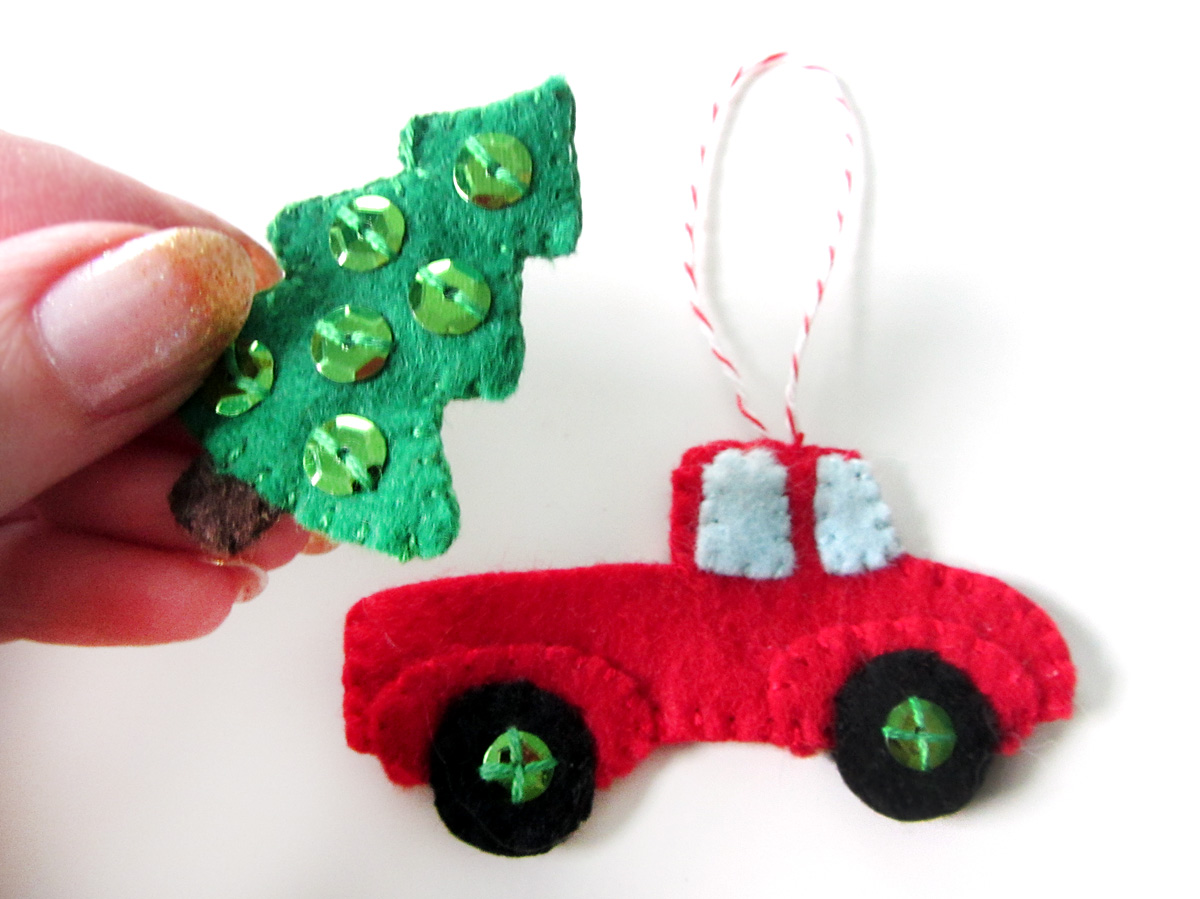
And now all the ornaments are complete! Which have been your favorites? It is so hard for me to choose, but I’ve really liked the tree truck, the dove and the hot cocoa cup. This project and its patterns are completely free for you to use for personal use. If you’d like to purchase a commercial license, visit my Etsy shop and contact me if you don’t see a current listing for it.

Mini Advent Ornaments Set Four

If you are making a set, I’d love to see your finished ornaments! Tag me on Instagram @iolstephanie (if you are private, I’ll have to request to follow you), mention me on Twitter @iolstephanie or post a picture on our Facebook wall. I love what I’ve seen so far! If you’d like to support my free site in other ways, visit my support page. If you’d like to get my posts the moment they go live in your email inbox, sign up here.

Mini Advent Ornaments Set Four

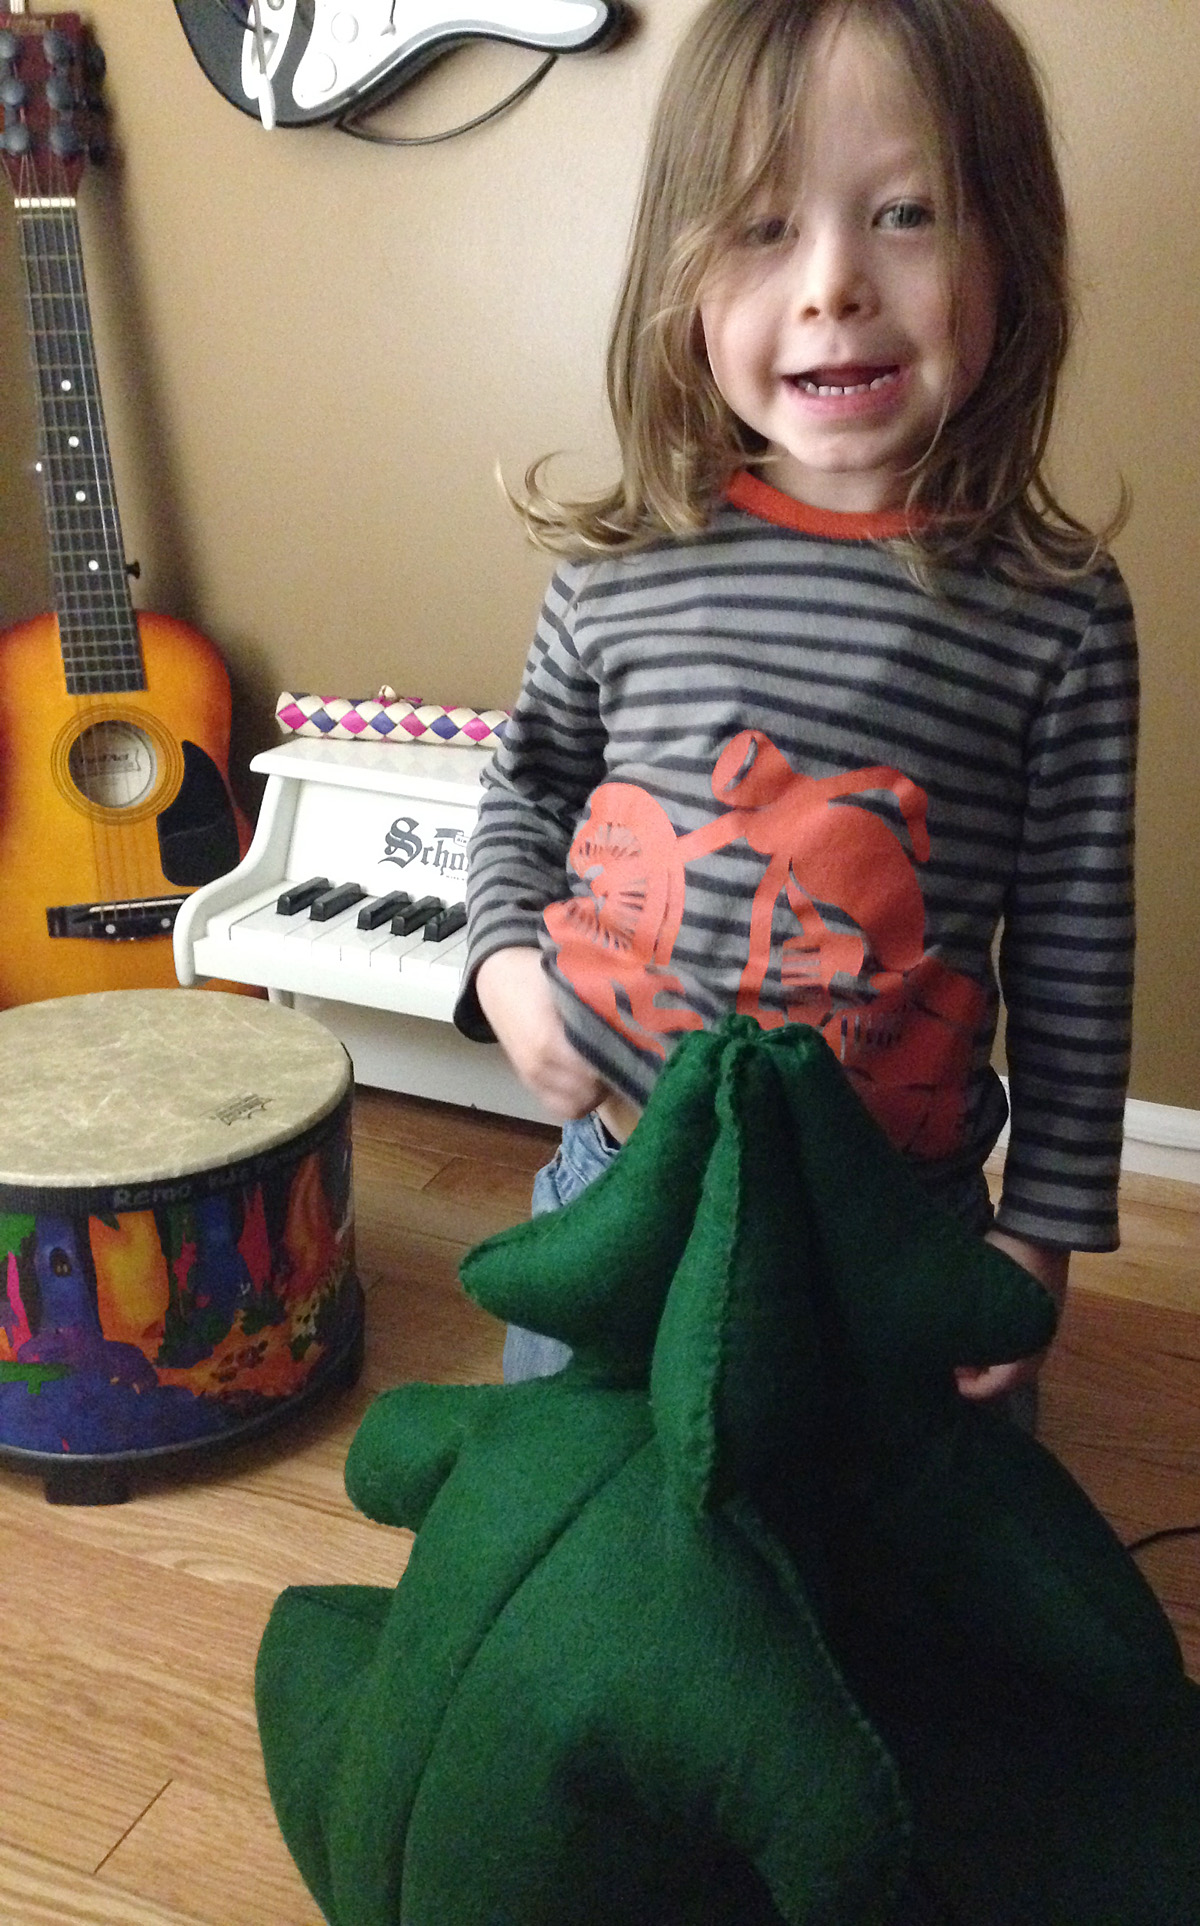
I’ve been giving Jax his ornaments in little origami boxes (mine use 6″ papers) with printed numbers on top. I have them all in in a Christmas basket and he finds the right one each night. I started out adding candy treats in there as well, but he lost interest so I stopped. He’s really gotten into opening them and asks me all day long if it is time yet.

http://greeneyed.com/2010/12/page/3/

Happy holidays!


Mini Advent Ornaments Set Three

Mini Advent Ornaments Set Three

My large sewing project this holiday season was one that was chosen by my readers in our Facebook page: a felt Christmas tree play set! I hope you’ve been sewing along with me as I’ve shared the toddler-friendly tree pattern and tutorial and the first, two sets with you. But it’s not too late to join in! These mini ornaments bring a whole lot of holiday cheer and work up fast.

Mini Advent Ornaments Set Three

I will be designing 24 ornaments, and giving Jax one to unwrap every day leading up to Christmas. I’ll be sharing the ornaments in batches of 6. I am planning two more sets next week to finish the project. Numbers 13-18 are: a drum, a truck with a tree, a dove, an ice skate, a snow globe and a wreath.

To see all the posts in this series, click here.

Mini Advent Ornaments Set Three

What I Used:

Mini Advent Ornaments Set Three

For all of the ornaments: I cut pieces of baker’s twine, doubled it over and tied a knot in the ends. When stitching the tops of the ornaments together, I made sure the knot of the twine loop was inside. I also made sure to stitch through the knot to secure the loop.

Mini Advent Ornaments Set Three

13. Drum

My husband is a drummer, so we already have a few little drums for Jax. All that aside, this little drum came out much cuter than I expected! I started by gluing down the red and green bands to each side of the drum, the stitched them down. I also added red and green sequins. I stitched the drum heads on, then made rows of gold French knots along their edges. On the front of the drum, I back stitched two drum mallets and used red sequins for the heads. I stitched around the edge of the drum, catching a loop of twine at the top corner.

Mini Advent Ornaments Set Three  Mini Advent Ornaments Set Three

14. Truck with a Tree

We haven’t gotten our Christmas tree yet, but I’m really anxious to! I was inspired by all the cars and trucks taking home their trees, so I designed this truck. It had to be red- Jackson’s favorite color!

To sew the truck, decorate each side the same. Tack down the parts, then sew around the fenders and windows. Stitch green sequins into the cents of each tire. Put the two sides of the truck together, and sew each pair of tires together, going through all the layers on the upper halves. Sew the truck sides together, leaving the truck bed an open pocket and catching a loop of twine in the top of the cab.

For the little tree, I stitched green sequins onto each side. I then tacked the two sides of the truck together and stitched them around the edges. I layered them between the two tree sides, and stitched it all together. The tree can stick into the truck pocket, or come out!

Mini Advent Ornaments Set Three

15. Dove

I am in love with this little dove! To begin, I stitched the outer piece of each wing with stripes of back stitch. At the end of each line, I stitched a crystal sequin. I left the bottoms of the sequins hanging free. I did the same rows of stitches and sequins on the tail of each body piece. I sewed each decorated wing piece to a plain one, then stitched them on along their fronts. I stitched sequin cheeks onto the dove’s face on each side, and added brown satin stitched eyes. I stitched the two sides of the dove together all the way around, catching a loop of twine in her back and the two beak pieces (sewn together) in her face.

To make the olive branch, I rolled the branch felt lengthwise and blanket stitched up its length. I then worked my way back down, stitching leaves on in a staggered pattern. I coated each leaf with felt glue and let them dry to make the sturdier. If you have a younger (or rougher) child, you may need to skip the delicate olive branch. Once the branch was dry, I stitched it to the under side of her beak.

Mini Advent Ornaments Set Three

16. Ice Skate

For this little ice skate, I glued together the two sides of the gray blade using a thicker layer of glue than I’d normally use. I didn’t want stitches taking away from the crisp look of the blade, so I made sure they were thoroughly glued together. I then tacked the tan sole pieces onto either side of the blade and stitched them on along the sides and bottom. I decorated each of the sides of the boot with a crystal sequin and some stitches and French knots. Then I layered the two sides around the sole and blade and stitched them on along the sides and bottom, catching a loop of twine in the upper back corner. I left the top open, like a real skate. I used white floss to stitch zig zags along where the shoelace would be, and stitched on a looped bow. I finished it off with a mini white pompom.

Mini Advent Ornaments Set Three

17. Snow Globe

I have to give credit to American Felt and Craft for the idea of a snow globe ornament. This is my (mini) version!

I started by prepping the two sides of the red base with some stitched on sequins. I then glued the snow and trees to each of the blue globe backgrounds and letting them dry. I stitched each of the trees down, but didn’t stitch the snow as only a bit of the edge was exposed. I thin layered the two pieces back-to-back and sandwiched them between two circles of clear vinyl. Starting at the snow line, I stitched up and around through all the layers, catching a loop of twine at the top. I used a blanket stitch and pulled it firmly. I went all the way around the blue edge and stopped at the other side of the snow line.

I turned the snow globe upside-down, and carefully poured a little crystal glitter in to each side (about a 1/4 teaspoon – whatever fits but doesn’t obscure the view too much). The glitter won’t really move around, so having see-through glitter is key. Keeping it upside down, I sewed that bottom edge closed. I then sewed on the red base.

Mini Advent Ornaments Set Three

18. Wreath

The wreath is quick and easy, but very pretty. On the front, I took a little bow I’d tied in ribbon and stitched it down using tiny stitches around the knot. I then stitched colorful sequins around the ring on both sides. I stitched the fronts and backs together, making sure to catch a loop of twine at the top.

 Mini Advent Ornaments Set Three

Which one is your favorite of this set? What would you like to see next? I have to design 24, and your idea may be one! Stop by Facebook or Twitter, or comment here with your ideas. I have a couple planned that were reader suggestions!

If you are making a set, I’d love to see your finished ornaments! Tag me on Instagram @iolstephanie (if you are private, I’ll have to request to follow you), mention me on Twitter @iolstephanie or post a picture on our Facebook wall. I love what I’ve seen so far!

I have to say a quick happy birthday to my fabulous big (and only) brother! He is so wonderful, and a big reason why I’d love a sibling for Jax (the husband disagrees.) He has been a big help on all of my more technical projects and is very creative himself. Check out his puppetry!

Happy birthday big bro!! Love you! <3


Mini Advent Ornaments Set Two

Mini Advent Ornaments Set Two

My large sewing project this holiday season was one that was chosen by my readers in our Facebook page: a felt Christmas tree play set! I’ve already share the toddler-friendly tree pattern and tutorial and the first set of ornaments with you, but now it’s time to decorate even more!

Mini Advent Ornaments Set Two

I will be designing 24 ornaments, and giving Jax one to unwrap every day leading up to Christmas. I’ll be sharing the ornaments in batches of 6. I am planning two more sets next week to finish the project. Numbers 7-12 are: an angel, a gingerbread man, a train, a letter to Santa, a bell and a stocking.

To see all the posts in this series, click here.

Mini Advent Ornaments Set Two

What I Used:

  • The Pattern
  • Felt scraps from American Felt and Craft (from my scrap bag – choose any colors you like)
  • Sequins (I used Classic Red, Moss, Gold and Crystal)
  • Felt Glue (great for holding tiny bits in place when pins are too big!)
  • Mini Pompom (I used white)
  • Baker’s Twine (I’m on year two using this cone)
  • Jingle Bell
  • Holly Embellishments (These, but try to get them at the craft store cheaper)

Mini Advent Ornaments Set Two

For all of the ornaments: I cut pieces of baker’s twine, doubled it over and tied a knot in the ends. When stitching the tops of the ornaments together, I made sure the knot of the twine loop was inside. I also made sure to stitch through the knot to secure the loop.

Mini Advent Ornaments Set Two

7. Angel

This little angel is so very special to me. I recently lost a loved one very suddenly. She adored angels. This one is for her.

I started by adding the sequins. On the back of the wings, I sewed a line of crystal sequins all the way across. On the front of the wings, I stitched 3 on each end. I stitched the two sides together around the outside. For the back of the halo, I stitched on a ring of 6 gold sequins. On the front of the halo, I stitched a ring of 5 (none where the head overlaps.) I put the two sides together with the back hair piece layered in place between, added a loop of twine and sewed the halo around the outside.

I then tacked down the face, arms, hands and front hair to the front gown piece. I stitched down the arms, hands and chin, then made a back stitch mouth and eyes. I tacked the halo/back hair piece to the back of the gown, then laid the wings in place. I back stitched a vertical line down the center of the wings to attach them. I stitched up the sides of the gown, and stitched the hair on, sewed the front and back together at the sides.

Mini Advent Ornaments Set Two

8. Gingerbread Man

The gingerbread man works up quickly! Using 4 strands of white floss (instead of my normal 2) I back stitched in a zig zag at his ankles and wrists on both sides. On the front, I gave him two red sequin buttons, a smile (made like a lazy daisy stitch) and two French knot eyes. I stitched the two sides together with a loop of twine at the top.

Mini Advent Ornaments Set Two

9. Train

The little red train is the same on both sides. I started by stitching crystal sequins to both sides of the steam, then sewing both sides together. I stitched the two bumper sides together. I glued the red swirls to the big white wheels then stitched them down and added red and crystal sequins. I stitched the wheels in place on the train bodies at their tops.

I used felt glue to tack down the roof pieces, windows and green wheels. I stitched the windows down and added rows of green sequins along the roof pieces. on the green wheels, I stitched a green sequin to the center of each using a starburst of long stitched to look like spokes. I decorated each train body with two gold sequins. I laid the two train sides together with the bumper and steam in place, as well as a piece of twine at the top (knotted at each end) then sewed them together around the outside.

Using a large-eyed needle, I threaded a piece of baker’s twine and knotted the end. I stuck the needle between a gap in the two sides of one of the candy wheels and came up through the center. I made a loop in the center of the middle green wheel, then went down through the center of the front green wheel. My needle came out of the center of the front green wheel on the other side, and I repeated everything in reverse. I ended it by bringing the needle out of one of the gaps in the last candy wheel, tying a knot as close as I could, cutting the twine and tucking the knot into the wheel.

Mini Advent Ornaments Set Two

10. Bell

The little gold bell is a fun addition to the tree play set, as it really jingles! On each side, I sewed a row of red sequins. I stitched each side together with a loop of twine at the top, pausing at the bottom to sew a jingle bell in place. I stitched holly embellishments on each side using red thread around the berries.

Mini Advent Ornaments Set Two11. Letter to Santa

This little letter has a long way to go! I started by freehand stitching the words “Santa north pole” using back stitch. I tried to make it look like little kid handwriting. I cut a piece of white felt a little larger than the red stamp and used my micro-tip scissors to pink the edges. (You could use pinking shears, but I thought mine were too larger for the scale of the stamp.) I glued the three pieces of the stamp together, then sewed them to the letter front all around the red rectangle. I also sewed the green tree down, but left the white pinked edge loose. Using gray floss, I stitched a dashed circle and three back stitched lines to make the postmark.

For the back of the envelope, I tacked the tip of the fold down with glue, then stitched the red heart on top. I added three red sequins. I stitched the front and back of the envelope together with a length of twine (with knots at each end) in the top.

Mini Advent Ornaments Set Two

12. Stocking

The little elf stocking actually opens! I started by stitching a line of red sequins on each of the stocking sides. I then sewed the two sides together, leaving the top open. I tacked the white cuffs in place with glue, catching a loop of twine in one side, then sewed up the sides and around the top. I added a tiny white pompom to the side with the twine loop.

 Mini Advent Ornaments Set Two

Which one is your favorite of this set? What would you like to see next? I have to design 24, and your idea may be one! Stop by Facebook or Twitter, or comment here with your ideas.

If you are making a set, I’d love to see your finished ornaments! Tag me on Instagram @iolstephanie (if you are private, I’ll have to request to follow you), mention me on Twitter @iolstephanie or post a picture on our Facebook wall.

Mini Advent Ornaments Set One

Mini Advent Ornaments Set One

My large sewing project this holiday season was one that was chosen by my readers in our Facebook page: a felt Christmas tree play set! I’ve already share the toddler-friendly tree pattern and tutorial with you, but now it’s time to decorate!

Mini Advent Ornaments Set One

I will be designing 24 ornaments, and giving Jax one to unwrap every day leading up to Christmas. I’ll be sharing the ornaments in batches of 6. I am planning 2 sets this week and two sets next week. The first 6 are ready for you: a snowman, a candy cane, a cottage, a mitten, a cupcake and a mug of hot cocoa.

To see all the posts in this series, click here.

Mini Advent Ornaments Set One

What I Used:

  • The Pattern
  • Felt scraps from American Felt and Craft (from my scrap bag – choose any colors you like)
  • Sequins (I used Confetti and Crystal)
  • Felt Glue (great for holding tiny bits in place when pins are too big!)
  • Mini Pompoms (I needed white and a green)
  • Baker’s Twine (I’m on year two using this cone)
  • Holly Embellishments (These, but try to get them at the craft store cheaper)

Mini Advent Ornaments Set One

For all of the ornaments: I cut pieces of baker’s twine, doubled it over and tied a knot in the ends. When stitching the tops of the ornaments together, I made sure the knot of the twine loop was inside. I also made sure to stitch through the knot to secure the loop.

Mini Advent Ornaments Set One

1. Snowman

This little snowman makes me smile! The way he is holding his tiny stick arms reminds me of how Jax stands and wiggles when he is really excited about something but trying not to show it. To making him, I started by embellishing the front body piece. I stitched the carrot nose on, then used French knots to make eyes, mouth and buttons. His arms are just long stitches with some little ones at the ends for fingers. I then sewed green sequins onto the brim of both sides of this hat while they were layered on their corresponding body piece. I stitched all the way around both sides of the ornament, adding the twine loop at the top. I finished him by stitching a tiny green pompom to the tip of his stocking hat.

Mini Advent Ornaments Set One

2. Candy Cane

I had to make a candy cane for Jax’s little tree! They are such a Christmas classic. To make the candy cane, I lightly glued the white stripes onto the two red canes. I stitched down the white parts, then sewed both sides together, adding a twine loop at the top. On both sides of the candy cane, I stitched on holly embellishments. These aren’t buttons, so I used red thread and attached them near the berries.

Mini Advent Ornaments Set One

3. Cottage

The Christmas cottage is very simple but very sweet! I used sequins to make colorful strings of lights. I started by embellishing the front of the house. I stitched on the red door, then sewed a green sequin on as a wreath. Above the wreath, I stitched two loops (lazy daisy stitch) and a French Knot to made a bow. I then took the two snowy roof pieces, laid them on their corresponding house pieces and stitched the lights on each. I did this with back stitch in a swagged line, with one stitch into the top of each sequin light to allow them to dangle. I stitched around both sides of the cottage, catching the twine loop in the top.

Mini Advent Ornaments Set One

4. Mitten

This little mitten turned out so dainty and cozy! I decorated each side with the same stitched pattern of a starburst in back stitch and a few French Knots. There is a crystal sequin at the center of each starburst. I stitched the white cuffs onto each side, then sewed the sides together with a twine loop at the top corner. I added a little white pompom to finish it.

Mini Advent Ornaments Set One

5. Cupcake

This little holiday cupcake could be decorated any way you’d like! I went with pink, as Jax loves strawberry *anything*. I stitched the frosting pieces to the liners, then embellished both sides with red and green French knots. I sewed the two sides together with a loop of twine at the top, then stitched holly embellishments onto each side.

Mini Advent Ornaments Set One

6. Hot Cocoa

I love this little mug of hot cocoa! you might recognize it from the camping quiet book page. I did make a few changes, though. I started by sewing a red heart onto the front, then adding three red sequins. I glued the brown cocoa to the inner side of the mug back, then sewed the front and back together, I didn’t sew around the top, so I attached the twine loop at the top of the handle. No cocoa is complete without marshmallows, so mine were added via stitched-on mini pompoms.

Mini Advent Ornaments Set One

Which one is your favorite? What would you like to see next? I have to design 24, and your idea may be one! Stop by Facebook or Twitter, or comment here with your ideas. I’d love to see your finished ornaments! Tag me on Instagram @iolstephanie (if you are private, I’ll have to request to follow you.)

Mini Advent Ornaments Set One

Stay tuned for mini ornaments 7 – 12 later this week. I’ll be posting sneak peeks on Facebook and Instagram.


Christmas Tree for Toddlers

Holiday crafting goes into full swing for me in November. I definitely have more ideas than time. I decided a good way to choose my large holiday project for to let YOU decide! Thanks to all of you wonderful Facebook fans, I hosted a vote.

Christmas Tree for Toddlers

The winning project? A felt Christmas tree play set that is toddler safe. Kids love Christmas trees – who doesn’t? This project will give your little one their very own tree that they can’t break.

Christmas Tree for Toddlers

This is a 20″ high stuffed felt tree with sweet little “lights” that are really felted wool balls from my stash. The balls will do double-duty later: they will create places to hang mini ornaments! I will be posting a series of 24 mini ornaments that you can either give to your child all at once, or use in an advent calendar.

To see all the posts in this series, click here.

Christmas Tree for Toddlers

What I used:

  • The Pattern
  • 36″ x 36″ square of dark green craft felt for the sides (from the craft store for $4)
  • 20″ x 20″ square of green felt for the base
  • Yellow felt for the star
    (I recommend the same green or a red. I used what I already had!)
  • Polyfil stuffing. Lots! I used a 32 oz. of this.)
  • 20mm felted balls (an assortment of 12)
  • 10mm felted balls (an assortment of 24)
  • 1″ of green hook & loop
    (Mine is from the fabric store. There is a lighter green here.)
  • Yellow sequins

Sewing the Tree

Christmas Tree for Toddlers

I started by cutting out the pattern and taping it together. Using my layout guide, I cut out 8 of the side pieces. I didn’t worry about cutting on the “right” side of the felt (felt is sometimes scratchier on one side.) Luckily this felt felt pretty similar on both sides. If you want to cut yours out all on one side, note that my layout has one flipped.

I hand stitched the tree using a blanket stitch. You could definitely save time and sew the straight edged on a machine with a zigzag stitch. You could possibly machine stitch all the sides, but you’d need to add seam allowance.

Christmas Tree for Toddlers

I made 4 pairs of tree sides, each with two pieces laid on top of each other, then stitched each pair together along the straight edges. I then started sewing the pairs together into an accordion shaped along the wavy edges. I then sewed the two end pieces together so the tree became tree-shaped with an open bottom. I stuffed as I sewed, just because it made handling it easier. I adjusted the stuffing later.

Christmas Tree for Toddlers

I laid out a 20″ square of felt for the base. I didn’t have any more dark green, so I used lighter green. I think it would look lovely with either more dark green, or a pretty holiday red. Using the corner template (taped together), I cut out the base shape.

Christmas Tree for Toddlers

Christmas Tree for ToddlersUsing a blanket stitch, I sewed on the base, leaving half of one point open to allow me to finish stuffing it. In my photo, the lighter green helps to show how the base is attached. When the tree is finished, the base does curve down and is visible. I don’t mind the look of the two greens (and that felt was free from a friend!) but you might prefer something else.

The next part is the hardest to explain, and gives you a bit of a workout. With the base sewn on (but leave that hole still!) and the tree lightly stuffed, you can see that it doesn’t have that finished tree shape. To make that, I made stitches along the straight seams that went through the center of the tree, pulling those seams in.

Christmas Tree for Toddlers

Think of the way you sew a button onto a cushion so that both sides sink in. I did that along both axis of the tree (it looks like a + from above), making stitches all the way through every 1.5″ until I was about 2/3 down from the top. You might have an easier time with a long needle and stronger thread, like in that cushion tutorial. I just used my arm strength to squish the tree as skinny as possible then pushed my longest needle through.

Christmas Tree for Toddlers

See the photo of Jax above. In it, I’d started stitching the center in, and had finished the topmost third. I did several inches at a time, pausing to perfect the stuffing. I had the stuffing the firmest at the top, softer towards the bottom. Play with it until you are happy.

Christmas Tree for Toddlers

Once I’d finished shaping and stuffing the tree, I sewed the base opening closed. Then I took a small piece of green hook & loop tape and sewed it to the top of the tree. There was a tiny hole at the top that I stitched closed first. The hook & loop tape will hold the star on the tree.

Christmas Tree for Toddlers

The next step was to sew on the felt balls. I sewed one large ball onto the tip of each tree tier (12 total). I sewed 3 small balls onto each of the 8 side panels (24 total). You can do as many or as few as you’d like. Keep in mind that if you make mini ornaments, they will be hanging from these balls. I plan to do 24 mini ornaments (and will be sharing the patterns with you!)

Christmas Tree for Toddlers

Sewing the Star

I started by taking the pie wedge piece and rolling it into a cone that would fit my circle base. I stitched down the length of the cone to hold it closed, stuffed it with polyfill, and stitched the base on, added the other half of the hook and loop tape as I went around.

Christmas Tree for Toddlers

I took the two sides of the star itself and decorated them with sequins: one in the center and 2 in each point. I then sewed them together around the edge, pausing halfway to stuff it and insert the base cone in the bottom.

Christmas Tree for Toddlers

Your little tree should be complete! Jax told me he loved it, which is the best complement ever! I know he will be very excited to unwrap a new ornament each night to hang on his own little tree. I hope you’ll sew along with me as I complete all 24 mini ornaments. I have the first 6 underway. For sneak peeks, join my Facebook page or follow me on Instagram @iolstephanie.