
Time has been flying by with lots of projects on my plate. I can’t believe it is nearly Christmas! But I finally have the last two polar family felt ornament patterns ready for you to enjoy.

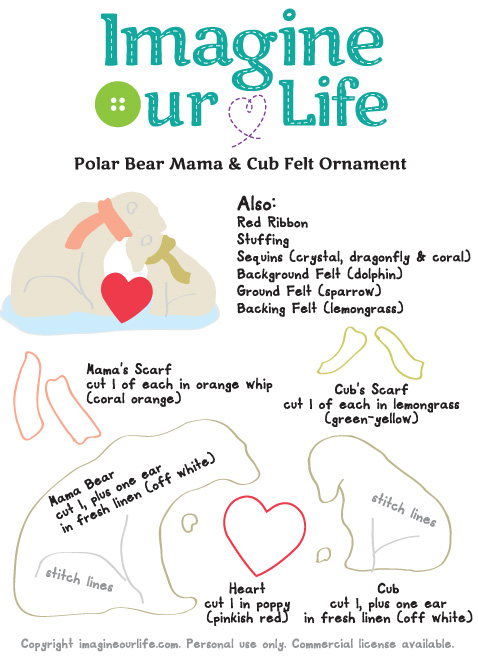
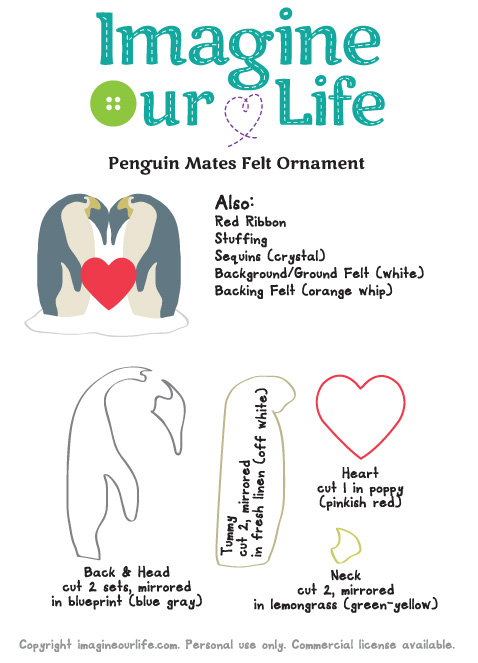
This year’s theme is Polar Families, inspired by some of the animals Jax and I have been studying in homeschool with our world continent project. There will be four designs: a penguin daddy and chick, a narwhal family, a pair of penguin mates and a polar bear mama and cub. The latter two are featured here.

What I Used
I am listing all the supplies I’ll use for the 4 ornaments, noting the ones not needed for these two.

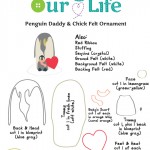
- The Patterns: Narwhal Family & Penguin Daddy & Chick
- Felt (in white, fresh linen, poppy, orange whip, lemongrass, blueprint, dolphin and sparrow)
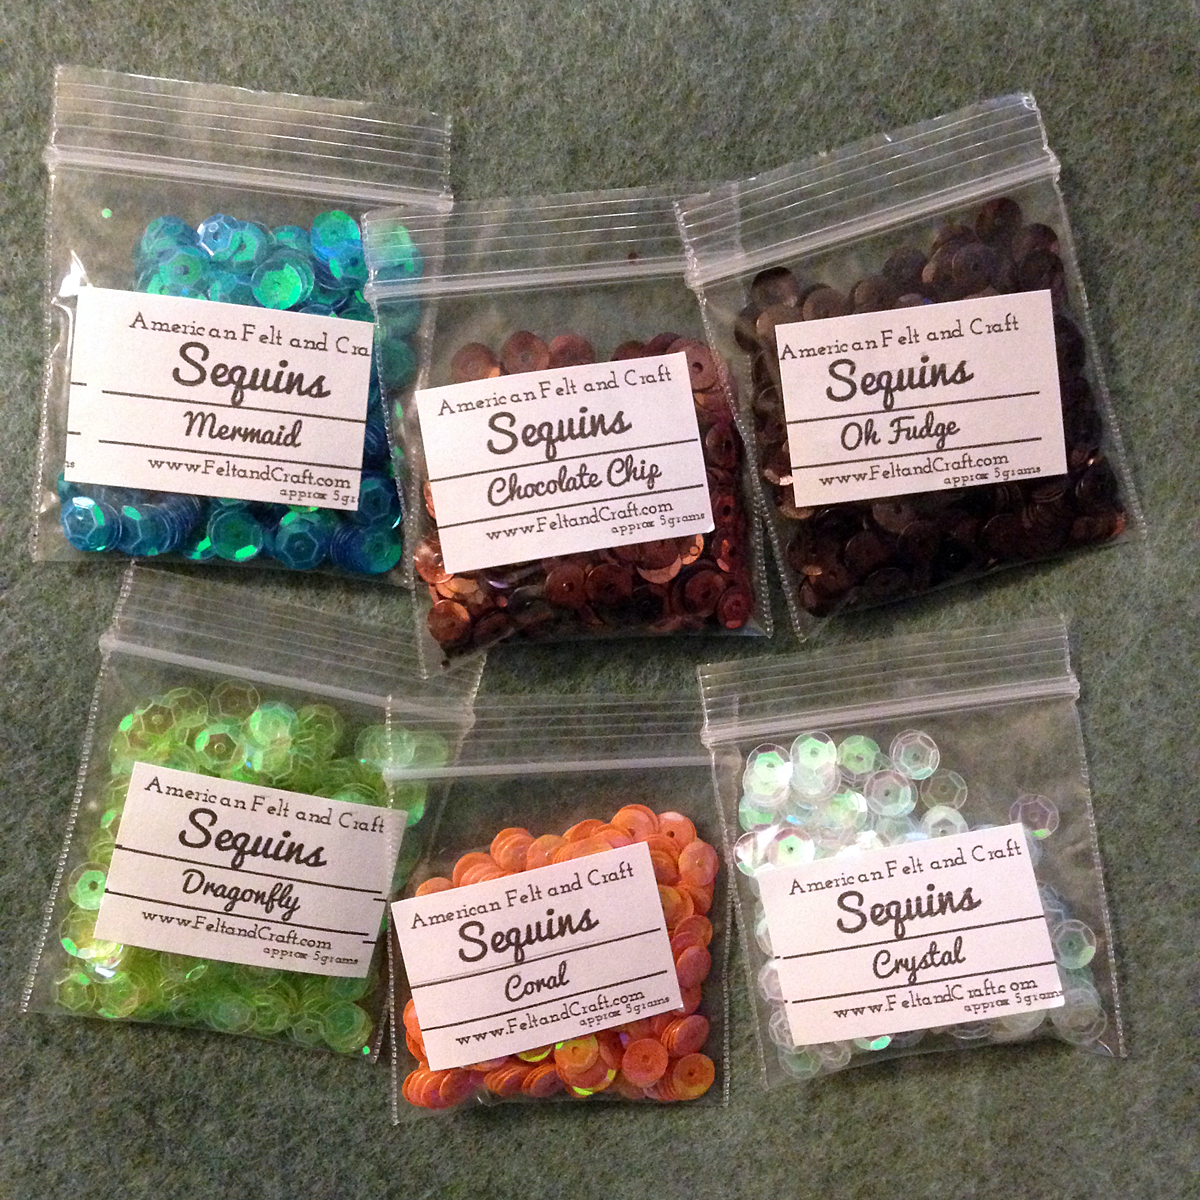
- Sequins (in crystal, coral, mermaid and dragonfly)
- Red Ribbon
- Stuffing or Batting
- Felt Glue
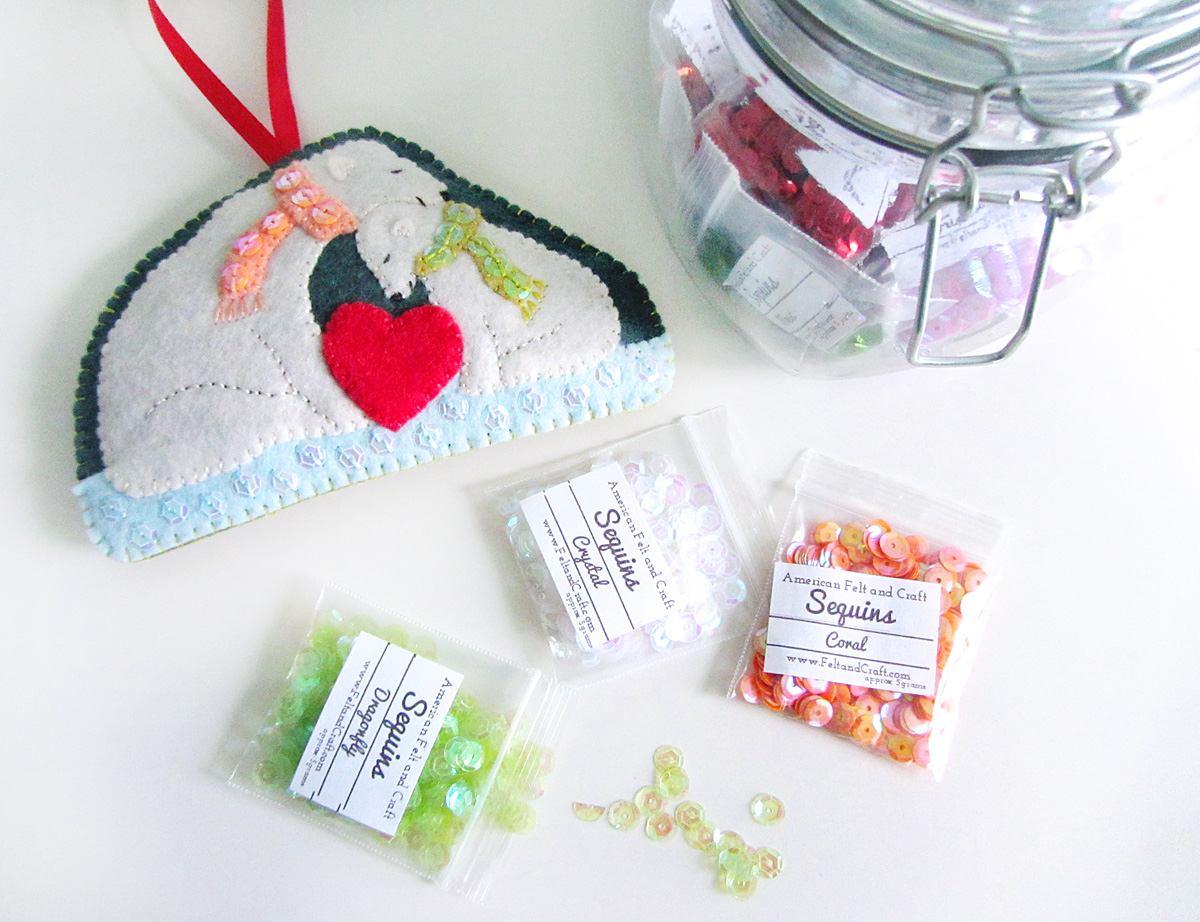

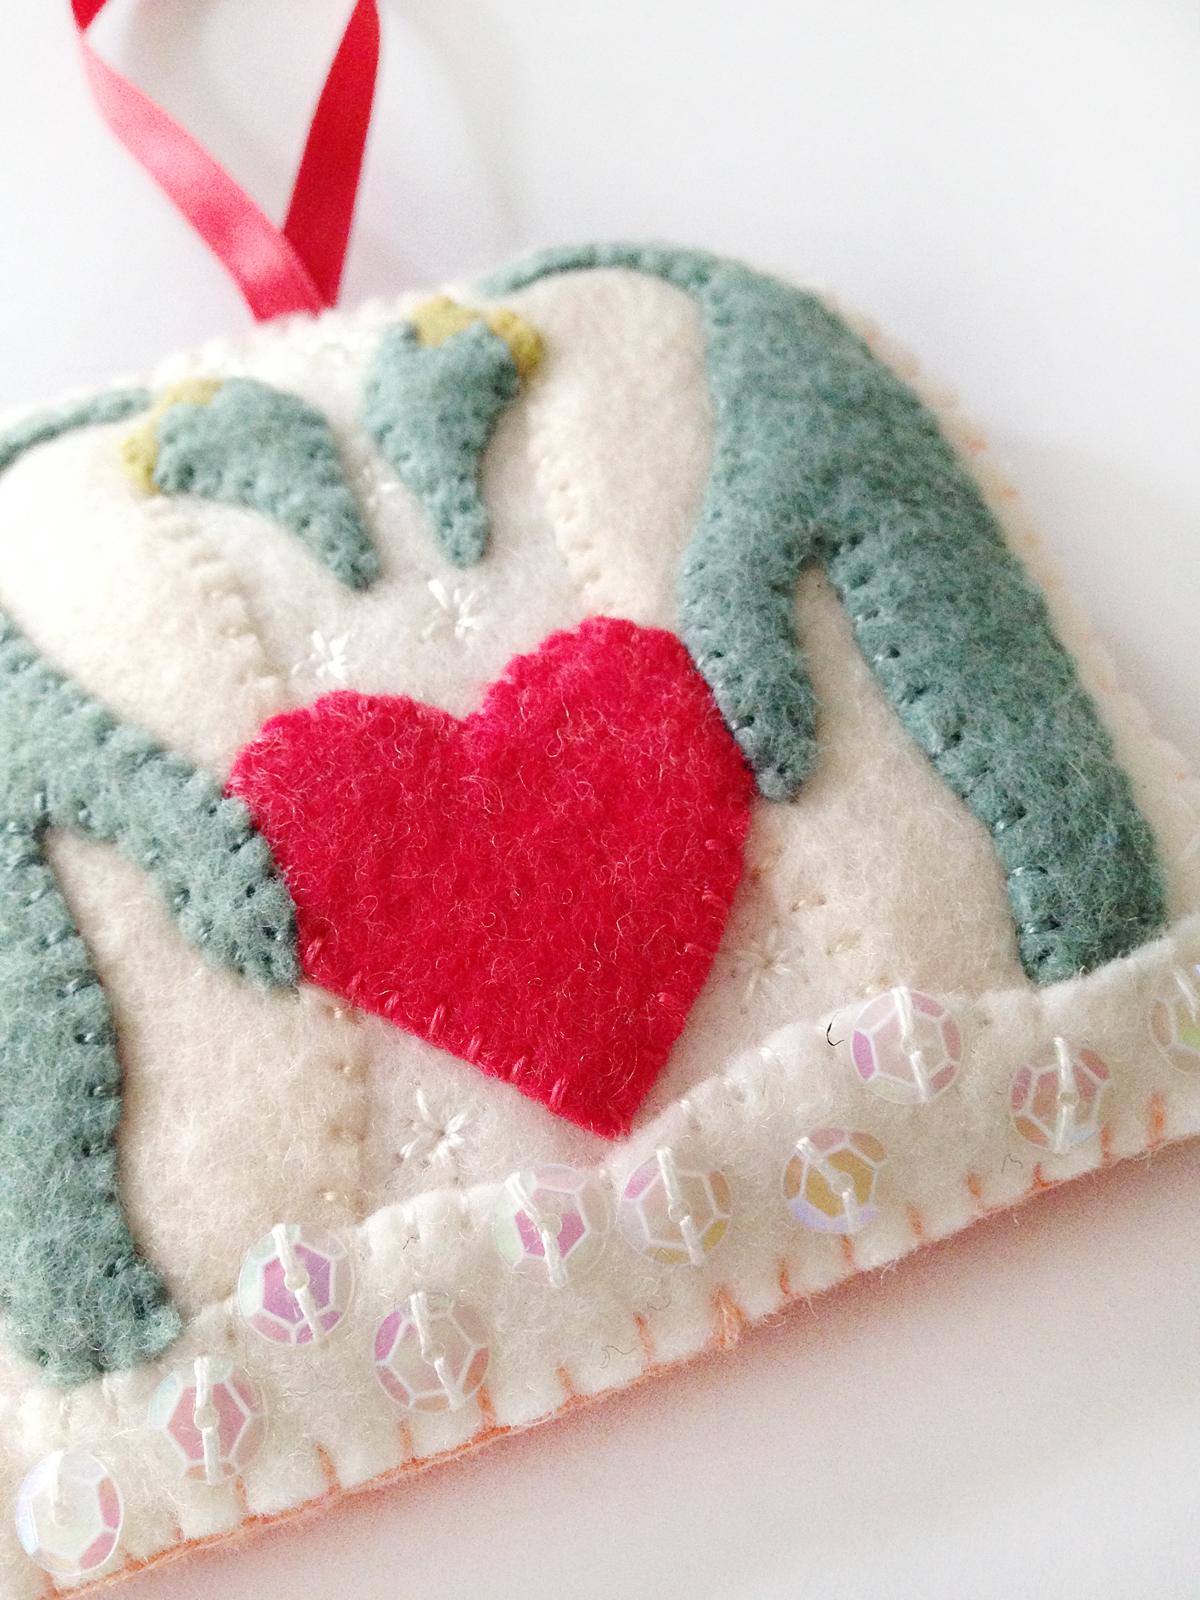
Penguin Daddy & Chick
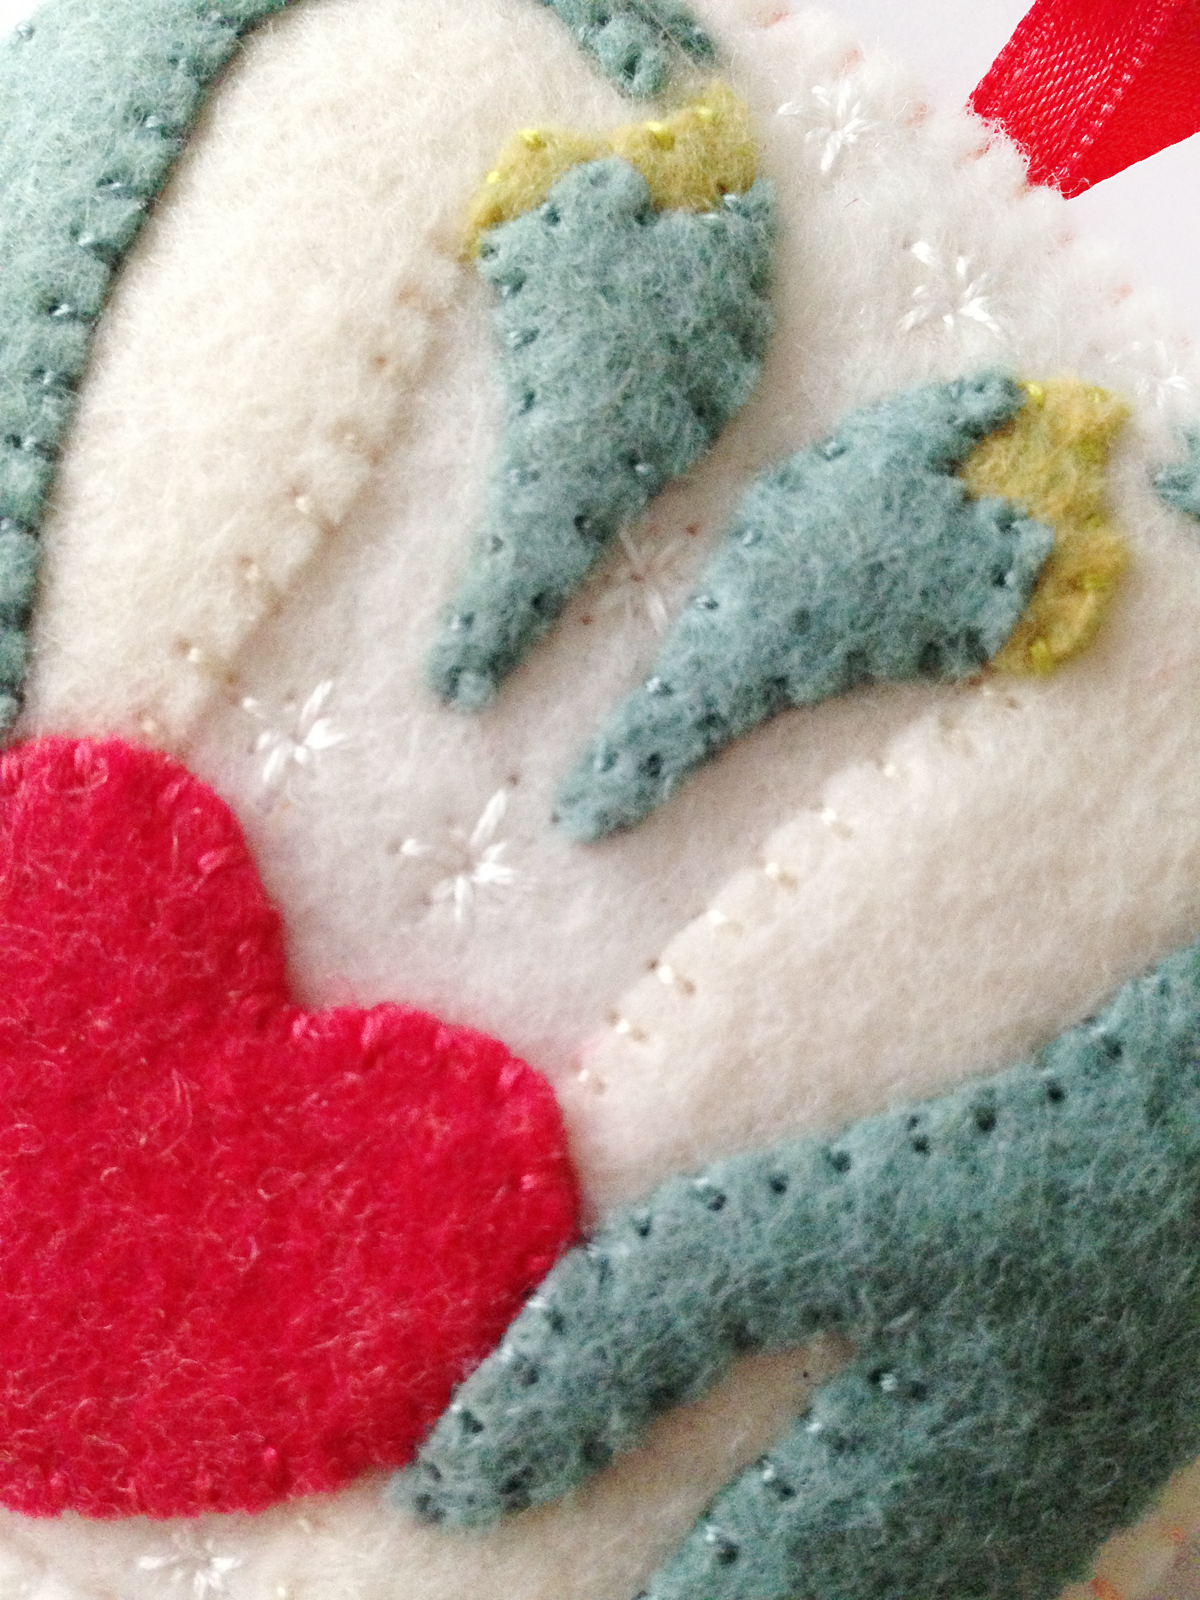
I cut a rounded strip of white felt for the snowy ground and tacked it down across the bottom of the white background felt with felt glue. After I cut out all my pieces, I tacked them into place as well. Then I trimmed down the background felt so there was just a small edge around the penguins.

For the penguins, the heart and the top of the snowy ground, I stitched all the edges down with matching floss. (I use 2 strands.) I stitched crystal sequins randomly onto the snowy ground using 2 stitches each. I also added them to the heart. At the end of the scarf, I made upside-down V stitches as tassels. I made French knot eyes on the chick.
On the white background, I stitched snowflakes: a plus sign shape of four stitches, all stitched towards the center, then four more longer stitches on the diagonal in between.

I cut a length of red ribbon and a piece of orange whip (coral orange) felt to fit as the ornament’s backing. I stitched all the way around, adding stuffing halfway and catching the ribbon loop in the top. I used a blanket stitch.

Narwhal Family
I love narwhals! They live up in the Arctic ocean, so I was happy to include them in this polar series. Narwhals are brownish grey, and they turn speckled white with age. I stuck with my color scheme, as they look blue gray under the ocean water. I had intended to use two shades of brown sequins for the adults’ speckles, but I ultimately decided to skip them. I found them distracting. [ You can see what they look like here and decide for yourself. ]

There aren’t a lot of narwhal pictures out there. I was very inspired by this drawing. Narwhals don’t typically stay in family groups, but I wanted to show all of their forms in this ornament.
I started by tacking everything down to a dolphin teal-gray background with a light layer of felt glue, including a pointed strip I cut out of lemongrass to be the male adult’s tusk. I cut the tusk into two pieces and layered part behind the heart and part in front so that it looks like the heart is pierced. I stitched around all the edges, and added sequins to two of the hearts. The eyes are French knots with little stitches in one corner of each. The tusk was done with diagonal stitches running across it.

After sewing everything down, I cut around the outside of the ornament to trim it down, then sewed crystal and mermaid sequins on as bubbles. Add as many or as few as you’d like. I overlapped and grouped mine.
I cut a length of red ribbon and a piece of blueprint (blue-gray) felt to fit as the ornament’s backing. I stitched all the way around, adding stuffing halfway and catching the ribbon loop in the top. I used a blanket stitch.

Are you an Etsy or craft fair seller? Would you like to sell these ornaments, or any other item sewn from an Imagine Our Life pattern? Visit my Etsy shop and contact me for custom commercial licenses. All authorized sellers get featured on the website.

If you make one of these ornaments, I’d love to see it! Stop by our Facebook page, or mention me @iolstephanie on Instagram or Twitter. (If you are private on Instagram, I’ll have to request to follow you to see it.) Happy Holidays!


