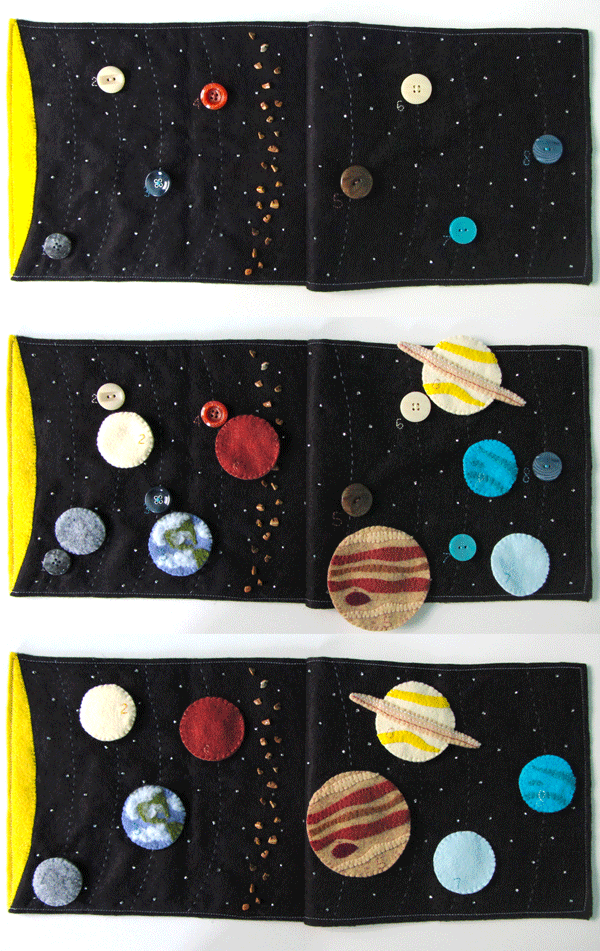
I’ve had this page started for quite a while, but other projects needed to be completed for me to stay on schedule with my sewing. I know a lot of you were waiting on this one – thanks for being patient!
My inspiration for this page came when I was contacted by Lots of Buttons and offered a $10 code to try their service. As soon as I saw some of their buttons I thought of planets! It took a lot of searching to find buttons that would work for each planet and were all about the same size. I was disappointed to find out may favorite button was sold out after placing my order, but their customer service was very helpful and offered a substitute. I ended up not using the replacement button, as it was a lot muddier looking in person, but I was very happy with the others.
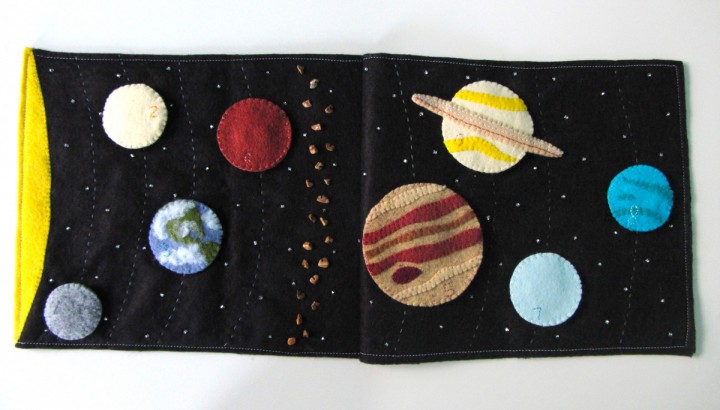
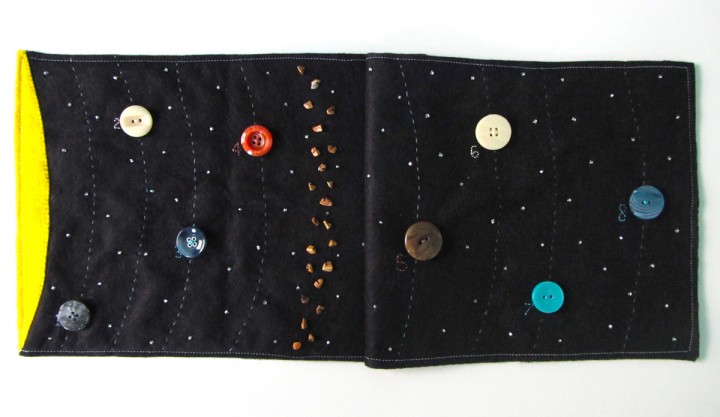
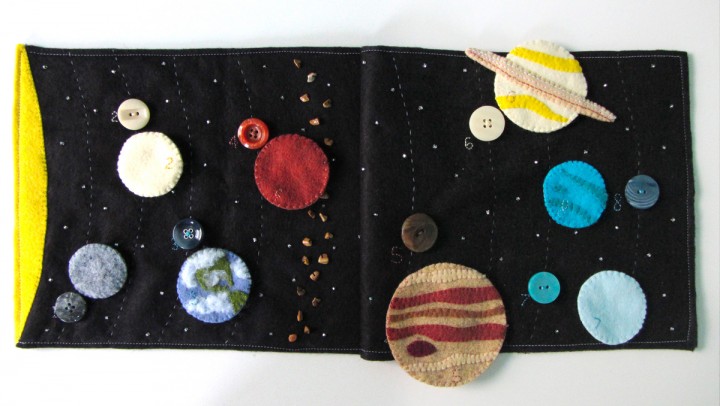
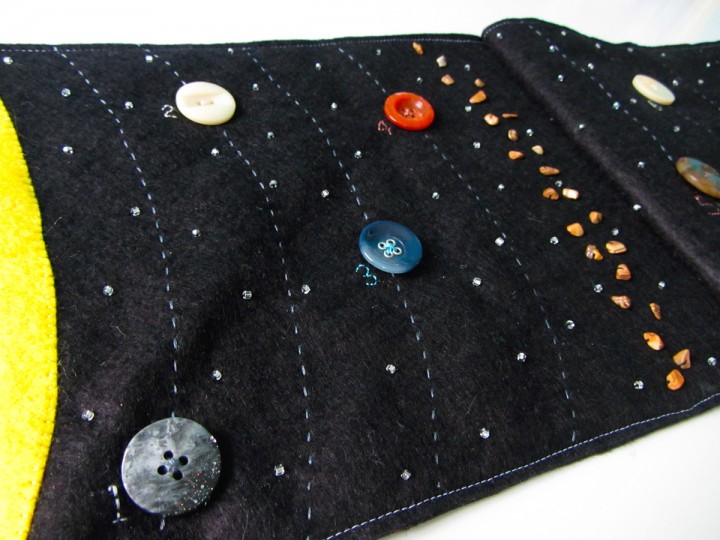
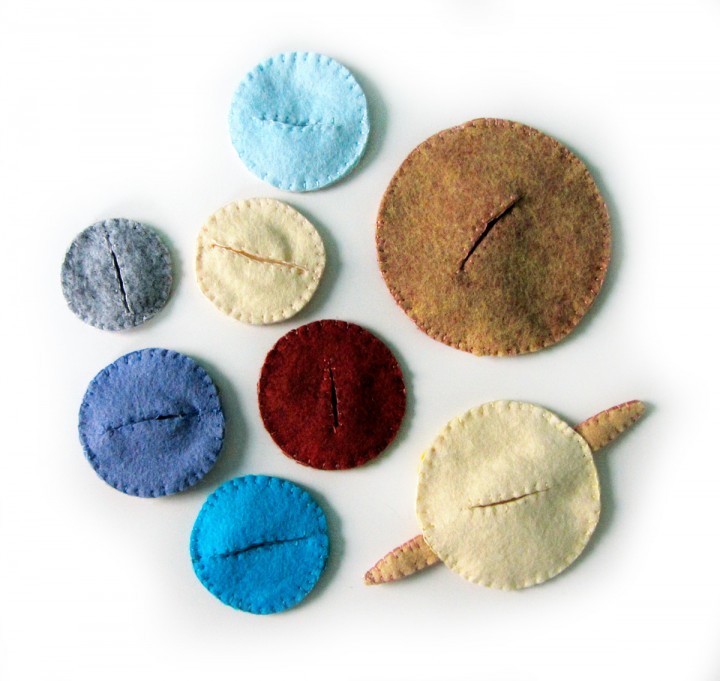
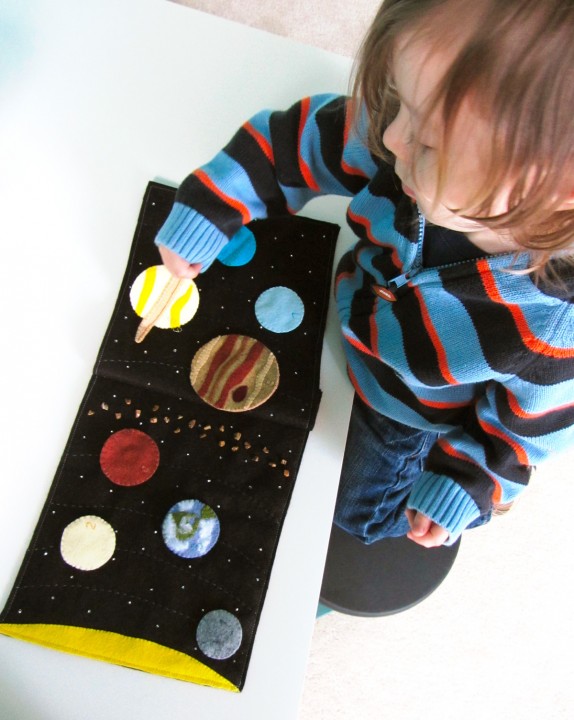
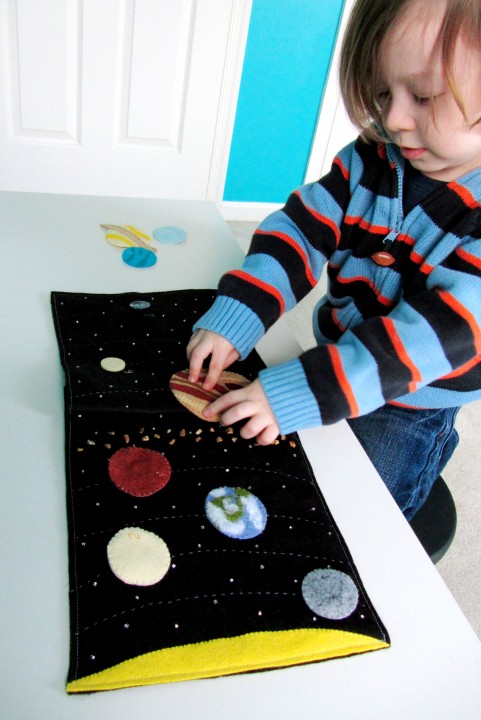
This page is mainly a learning page for Jax and I to use with our school studies, but it is also a little matching game with colors and numbers. The buttons that hold the planets in place match their colors. I also stitched numbers on the page and the planets. My planets are two layers with a button hole in the back layer. If you want to have the page be a buttoning exercise for your child, you could make the button holes go through both layers. You’ll lose some of the look of the planets and might need to use smaller buttons on some of them, though. (My cookie matching page is an example of this.)
For those with little ones who like to put things in their mouths – I did use beads. Jax is really good about things like that at this point. I always stitch through every bead two times for strength, but you can use some alternatives if they make you wary. Try cutting tiny felt scraps to sew on as the asteroids in the belt. Little * stitches would make cute stars.
I was able to use up a lot my scraps of felt from American Felt and Craft. The earthiness of the wool blend felt works so well for the planets.
What I Used:
- The Pattern
- Felt from American Felt & Craft (in black, buttercream, rubber duckie, banana nut muffin, toffee, doe, wine, beet, leather, gray flannel, cilantro, rainy day, ice, slushie and peacock.
- Silver-lined seed beads
- Stone chip beads
- Stuffing, Batting or white roving scraps
- 8 buttons from Lots of Buttons (Mercury: Bettie, Venus: Alona, Earth: Matthew, Mars: Ema, Jupiter: maybe Lida? [Sabina was sold out when I ordered; I used my own button], Saturn: Laci, Uranus: Tama and Neptune: Judith)
I started on the left hand side of the spread by sewing down the sun. I stitched the orbit lines one at a time while sewing the corresponding planet, so I could be sure there was enough space between each one. The orbit lines are gray thread in a dashed running stitch. The buttons were each sewn down with matching thread, and I used the leftover thread to stitch the number along side. I did them freehand in back stitch.
In between the orbit lines, I stitched on seed bead stars. I actually just did a vertical zigzag between each and that gave me a random-looking, but evenly spread star scape. After Mars, I stitched the asteroid belt using the same stone chip beads I used as nuts on my sundae page.
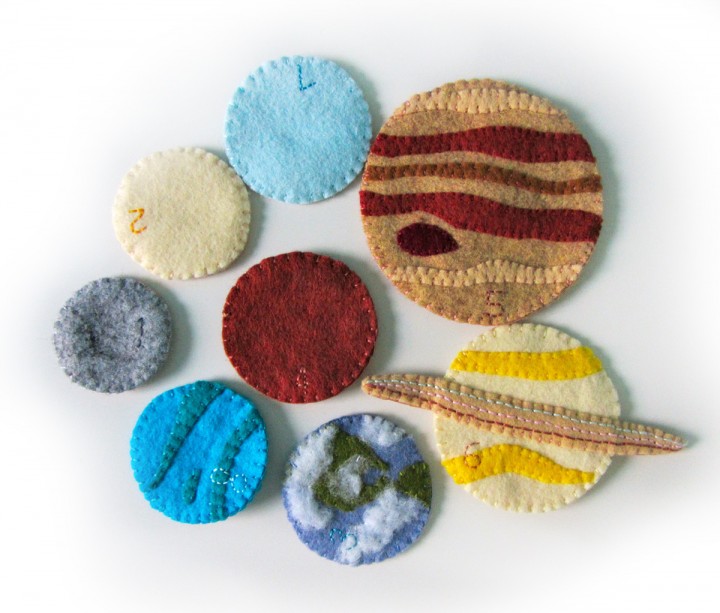
For each planet, I stitched all the details and a number on to the front piece. On the back piece, I cut a slit large enough for the button. I then did a blanket stitch around the slit to fortify the edges.
Planets: For Mercury, Venus, Mars and Uranus, I only stitched the number on the front before making the button hole and sewing the fronts and backs together.
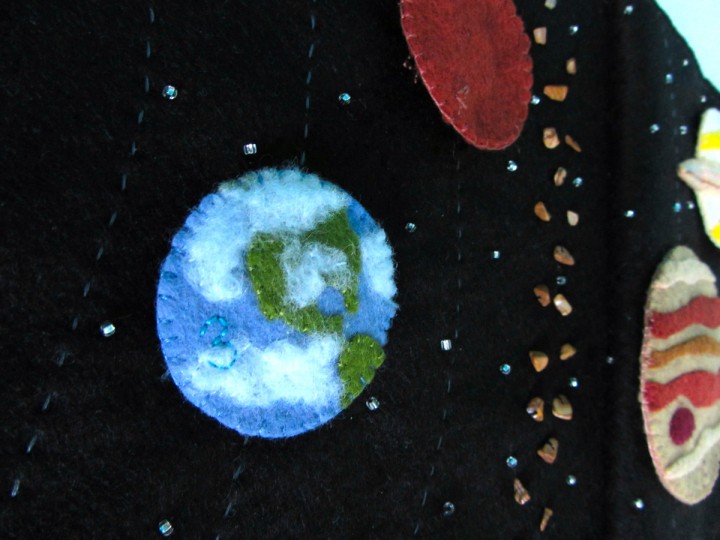
Earth: I started by sewing down the land mass shape. Then I took a very thin layer of batting that I had peeled apart, and ripped it into cloud shapes. I used white thread and stitched it down, then added a number 3 in blue thread. I added a button hole to the back, then stitched the front and back together.
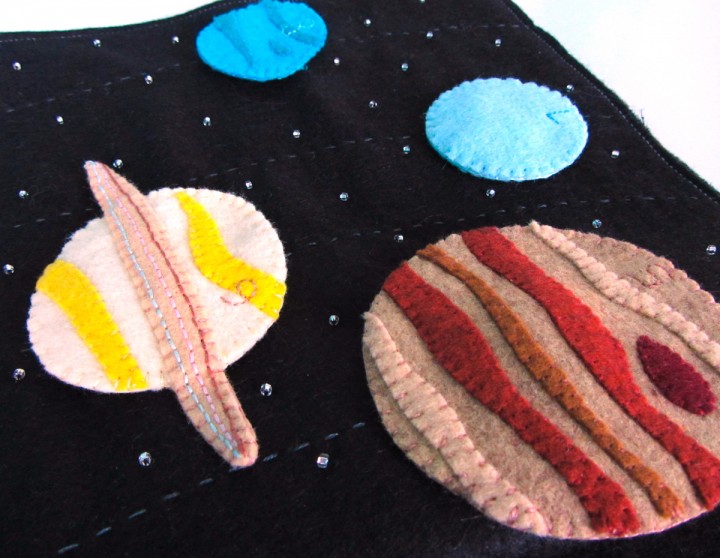
Jupiter: Jupiter has various stripes sewn on, as well as the red spot. I sewed a 5 on it in brown thread. I added a button hole to the back and sewed the two sides together.
Saturn: I started by stitching the two yellow stripes onto the planet front. Then I stitched some lines on to the front ring piece using back stitch in pale blue, pale pink and brown. I layered the front planet piece in between the front and back ring pieces and sewed all the way around the ring. I sewed the number 6 on in tan. I then added the button hole to the back and stitched it to the front. The back ring piece is mostly hidden inside the planet and adds stability.
Neptune: Neptune was simple with some swirls and a number 8 decorating the front before I added the button hole and sewed the two sides together.
I think this is the page that Jax has asked “Is it ready yet??” the most of all the ones he’s seen me sewing. He keeps calling the planets “moons” so his interest is a good opportunity to introduce him to astronomy. I’m going to look into some handouts and worksheets we can do together to start going over the planet names. Perhaps a nice book
?
I hope you enjoy this free pattern! I’d love to see your finish version. Email me a photo or post it to our Facebook page.


I love that you have the asteroid belt. I remember in Astronomy 101 learning that the planets a spaced according to some equation, but that there should have been one between Mars and Jupiter, but there isn’t. It so happens the asteroid belt is there, suggesting it may have once been a planet. Once again, great attention to detail!
Pingback: Solar System Quiet Book Page | Lotsofbuttons.com
You… may have just saved my sanity for this summer. This entire blog of yours is absolutely incredible. I’m traveling from San Diego to New York via airplane with my 3-year-old and my 2-year-old, need I say more? Thank you, thank you, THANK YOU for sharing your spectacular ideas with us. I’ll be sure to put up what my quiet book ends up looking like and link back to you!
Started this page this morning and just wanted to say that I love the details in your patterns (and that they’re free!) I’ve been sewing for quite a few years now but am new to the quiet book world. I’m hoping to include a version of your castle and fire truck in my kids’ books as well…actually I’m contemplating the merits of making the entire fire station book. 🙂 Thank you for the beautiful patterns!
I didn’t make the quiet book, but I took my inspiration from your creative genius (and your pattern) and we made a felt solar system. You can see it at the link below. Our four year old and I made and sewed and glued it together. It was a really fun way to study the solar system. Our planets are removable (Velcro) from the black felt. Wonderful idea. https://www.facebook.com/photo.php?fbid=212293852292920&set=a.115775298611443.1073741825.100005369199535&type=1&theater
I’m one proud mama!! Just finished the solar system for my almost 4 yr old son, back to the dollhouse for my 2 yr old daughter. Thanks again Stephanie for the freebie patterns you are super talented and a big help to make learning such fun for me and my children.
YOU ARE AMAZING!!! I’ve been surfing Pintrest for Quiet Book ideas – and I keep coming back to you! You are Amazing!!! Inspiring, talented. Thank you for sharing all of your great work. Bravo.
I absolutely adore this page and bought these to go with it http://amzn.to/1ZQKq7Y (that’s my affiliate link from my post). I am linking to this post (and the three part cards) in a post I am working on about all the projects on my to do list and it occurred to me that you might like those Safari Ltd solar system pieces.
Your books are WONDERFUL! I want to start creating one for my daughter’s children, that hopefully, God willing, she will someday have. It will take me a while to make something like this, but she is just a teenager as of now; so I think I have some time. Though time does go by fast! Your children are blessed to have such a loving mom like you, to make such wonderful teaching toys. God Bless! Mali
Wonderful! My 3-year old granddaughter has recently made a Lego orery(mechanical model of earth, moon & sun rotating round each other) with her dad. This may be the pattern that finally moves me from collecting quiet book patterns to actually making them.
Thank you for your awsome imputs! I just finished to sew my first quiet book page (solar system)! You’re great and helpfull!
You are so incredibly talented! I love all your creations and the detail in each of these ity, bity planets for your quiet book! I often use your template to make my own 3 part cards, thank you.
I admire you hand sewing! Fantastic work!
Pingback: Save The UFOs 2016 - Felt With Love Designs