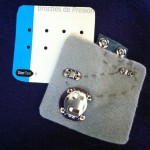
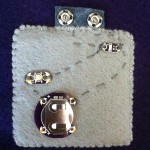
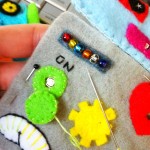
Tag Archives: E-Sewing

Make the World’s Best Robot Costume!

Make the World's Best Robot Costume!

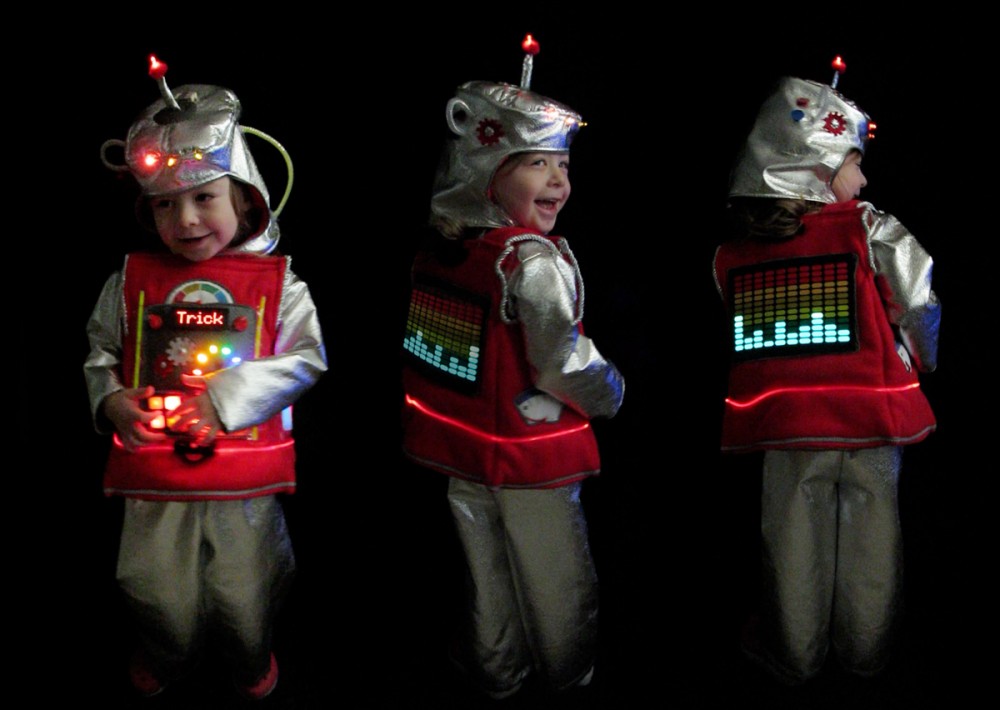
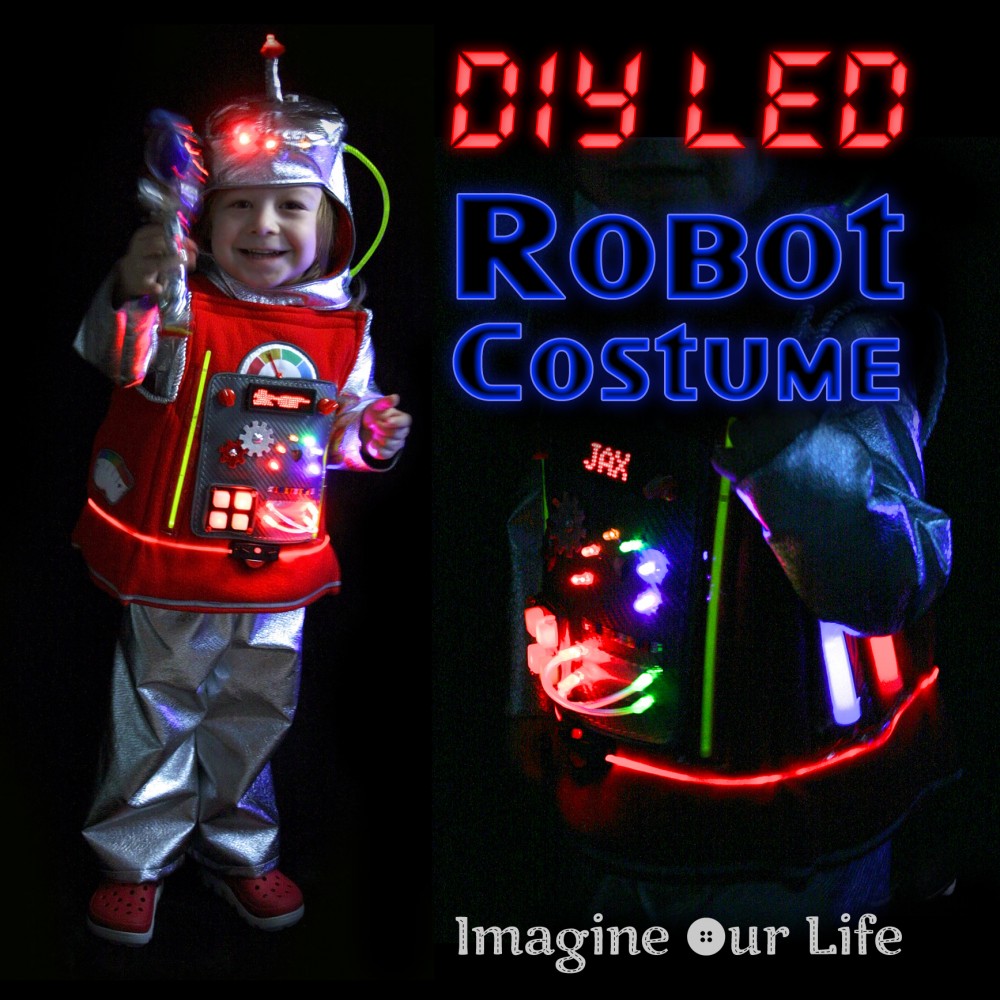
While I’m sure there are more spectacular versions out there, seeing Jax in his homemade LED robot costume rocks my world! I mean, seriously? The cutest! Jax can’t wait for Halloween, and neither can I!

Last year for Halloween, Jax was a train engineer wearing a cardboard and duct tape train I made with dollar store supplies. And it was fab! In fact, Jax loved it so much that it took me 6 months to convince him it was okay to be something new next year. When he chose to be a robot, I did a happy dance! While cardboard robot costumes are great, I wanted to sew this year. And because I love e-textiles so much, I was ready to go all out!

Make the World's Best Robot Costume!

Exhibit A: Jaxbot3000. Cute overload imminent!

I’m going to do my best to explain everything I did to create this costume. I will include the supplies I used in each section, but there will also be a master list sorted by purchase location at the bottom of the post. Fabric yardages and product counts are the totals for what I bought. I do have leftovers of everything but the fleece. Please feel free to contact me with questions. I’m easiest to reach via message on our Facebook page.

Prototype & Prime Directive

This costume uses a combination of LEDs sewn with conductive thread, ready-made LED components and glow sticks. There is a plain shirt and pants set with a decorated tunic/jumper for the main body that is worn on top.

The back of the body includes a sound-activated LED faux-equalizer. The head is a soft helmet-style hat with some decorations and LEDs. In addition, I got Jax a souvenir space laser toy on an outing. It matches the retro styling perfectly.

Manipulator Arms & Dynamic Locomotion Limbs

Supplies: silver pleather (~ 1.5 yd.)
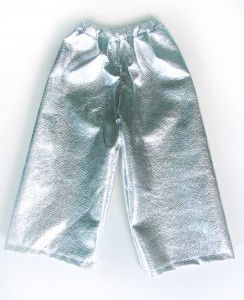
Make the World's Best Robot Costume!Also known as the arms and legs! For Jax’s costume, I sewed a very basic long sleeve shirt and pants set using a silver metallic pleather. I requested 1 yard and was given about 0.8 yds more for an additional 50% off because it was the end of the bolt.) As it is a non-stretch fabric, I had to keep that in mind while sewing the top.

The pants are very simple, made in an elastic-waist pajama style. You can find many toddler pajama pant patterns online. I cut my own pattern by tracing Jax’s existing pants and adding extra for seam allowances and wiggle room. Simple pants are actually very easy to sew!

For my shirt, I used a toddler long sleeve t-shirt pattern from here. It just happened to be the right size for Jax. Because my fabric is non-stretch, I made a long slit going down from the back neck. You could add a hook and eye closure, but I haven’t bothered so far. Getting the shirt on takes a little shoulder wiggling, but work just fine for us. You might want to wait to finish the slit’s edge until after trying on the shirt. That way you could make it long enough for ease of dressing. If you go with a stretch fabric, then you don’t need to worry about a slit.

Make the World's Best Robot Costume!

Central External Casing Assembly

Supplies: dm red anti pill fleece (~ 0.5 yd.), batting (~ 1 yd., from stash) silver rope trim (unknown, from stash), clear vinyl (scraps), reflective sew-in piping (2 packs), red velcro (6″)

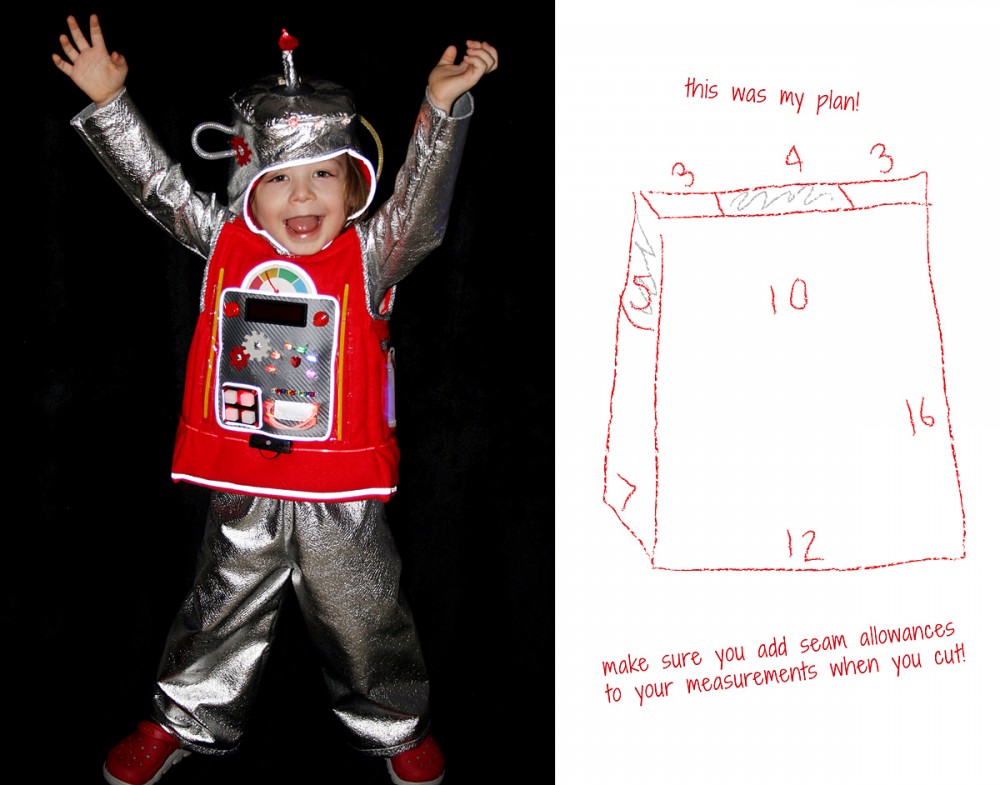
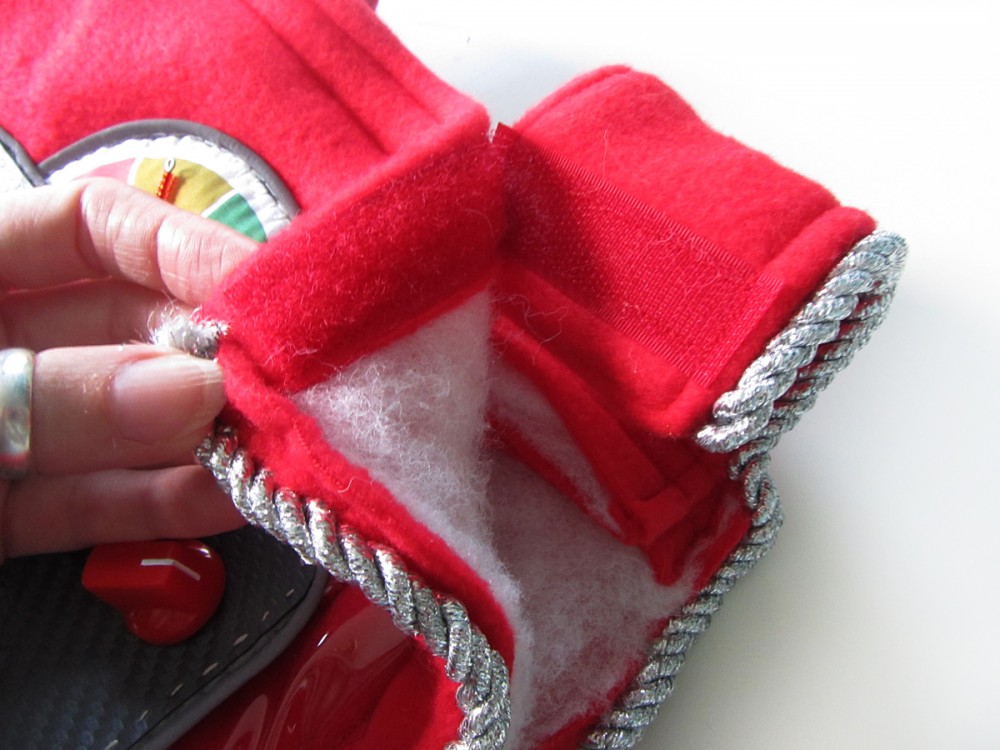
Otherwise know as the main body! I started designing the body by measuring Jax. I knew I wanted it to be boxy, so I took measurements based on where I wanted it to hang. I sketched out my idea and noted the measurements. I designed it to be narrower at the top and slightly a-line at the bottom, but still keeping a very boxy shape. The shoulder straps are double thickness and Velcro to front to make it easy to step into.

Make the World's Best Robot Costume!

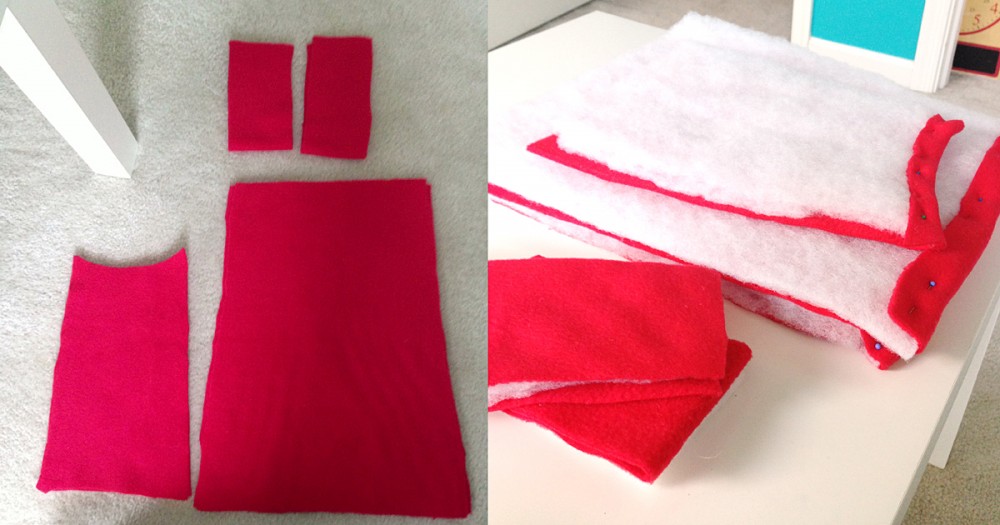
Chest: (This is sewn on my machine.) I cut one layer of fleece and two layers of batting for each of the 4 body pieces. On the top and bottom edges, I cut the batting slightly smaller so I could just fold the fleece in over the batting and hem. I didn’t bother to line the body, as I was saving on fleece and Jax will be wearing the shirt underneath (to spare him from the itchy batting.)

Make the World's Best Robot Costume!

I folded over the tops and bottoms of each section (towards the inside where the batting was) and hemmed them and top stitched to make a double seam. Then, lining up the bottoms, I sewed the four sides together into a rectangular tube. Along the bottom, I attached some of the reflective piping as a trim by folding over the piping seam allowance and zigzag stitching over it. At the top, I sewed two 3″ strips of Velcro, one on each end of the front panel. These are for the straps.

Make the World's Best Robot Costume!

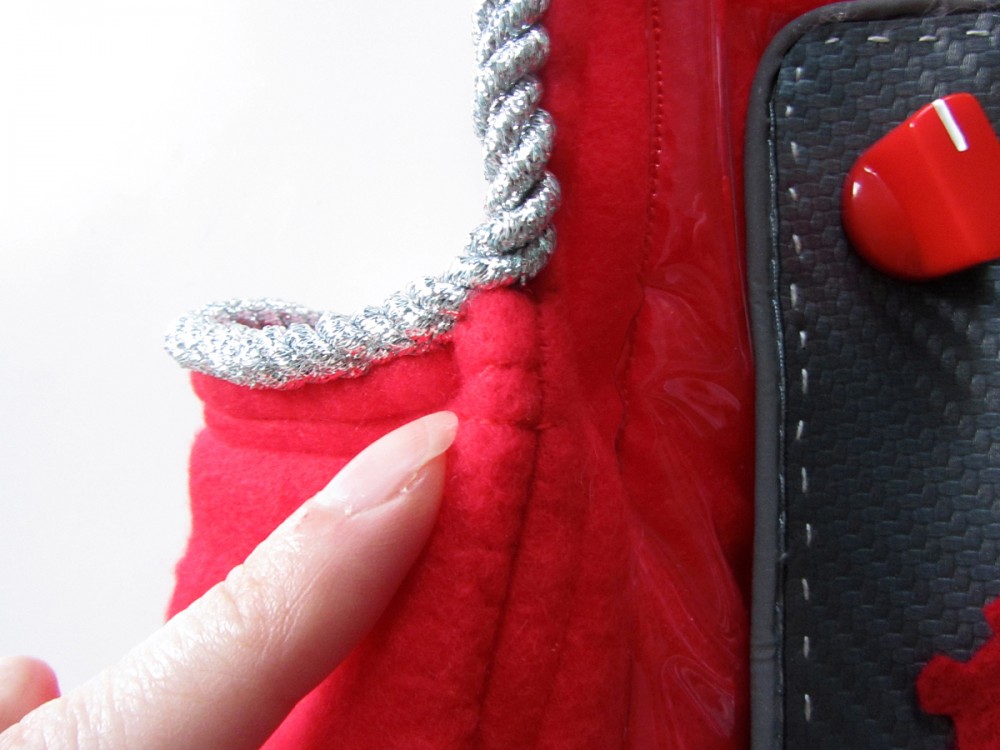
At the sides of the front and back panels, I tried added a double seam along the sides to give the body sharper corners. But what worked better was pinching the seams into corners and hand stitching through all the layers to hold the pinch in place. I did this at the tops and bottoms of each corner.

Make the World's Best Robot Costume!

Straps: (This is sewn on my machine.) For each strap, I cut two pieces of fleece and two pieces of batting. To sew a strap, I laid two pieces of fleece with right sides facing, then added two pieces of fleece on one side. I stitched around both long sides and one short side. I turned it right side out, then top stitched around the three sewn edges, pausing at the top of the strap to add Velcro. I repeated for the other strap. Lining the straps up with the Velcro on the body, I pinned and sewed them in place.

Arm Hole Trim: (This was hand sewn.) I then added silver metallic rope trim from my sewing stash all the way around the arm hole, including the outer edge of each strap. I just folded the ends of the rope towards the inside of the costume and stitched them down.

How to: Make LEDs Sewable

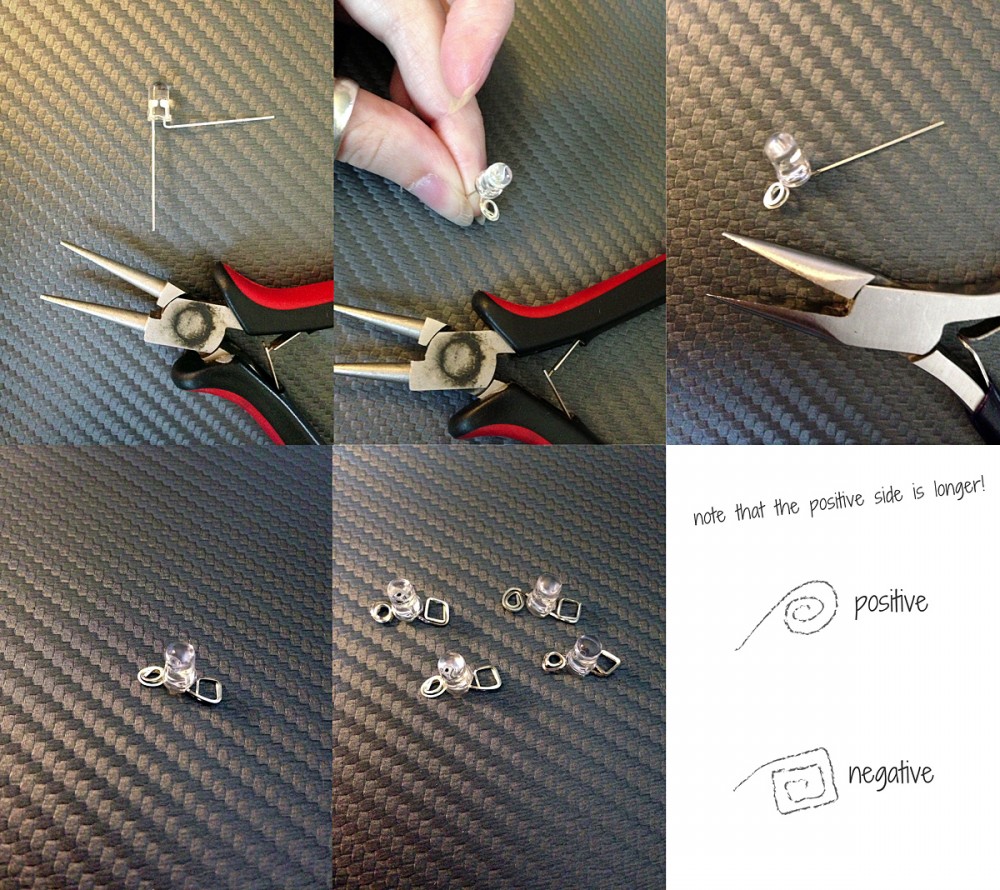
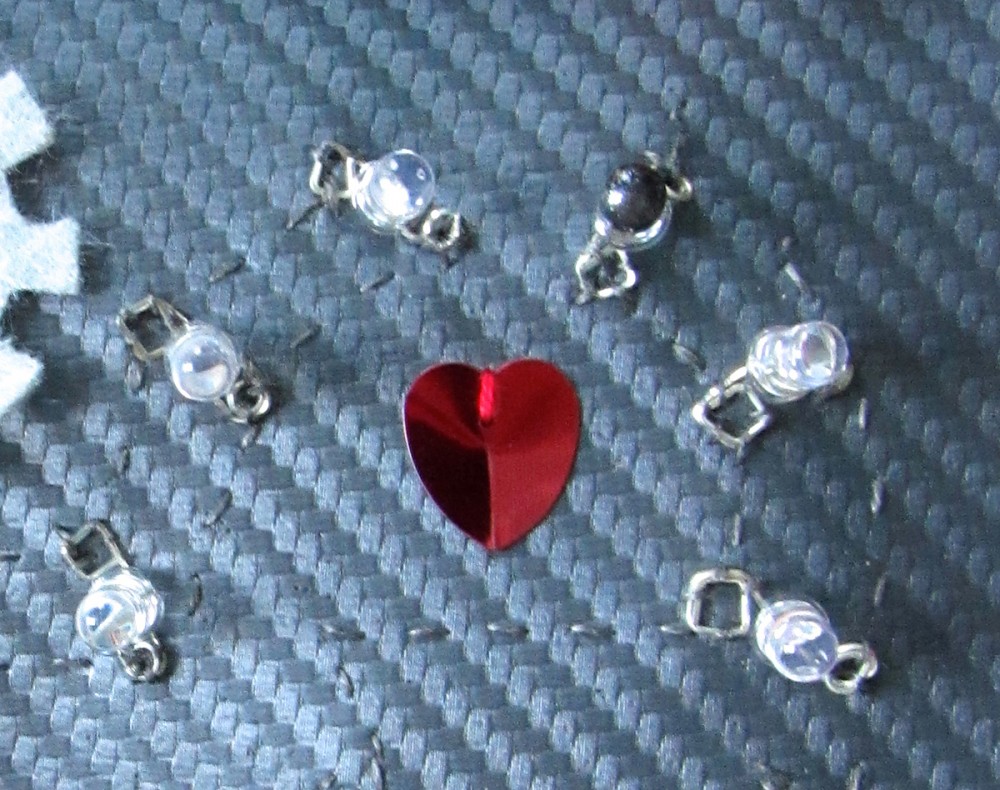
I chose to go with regular LEDs (as opposed to ones mounted to sewable boards) for two reasons: they are much cheaper and I love the large, domed look of them. But because they aren’t intended to be sewn, you need to do a little “jewelry making” to prepare them.

Make the World's Best Robot Costume!

An important note about LEDs: the longer wire is the positive wire! The shorter wire is the negative wire. You have to connect the correct sides to you battery’s two sides, or else your circuit will fail. To keep the sides distinct but still create a way to sew them on, it helps to curl the positive wire into a round coil and the negative side into a square coil. I used two jewelry making pliers to do it. You’ll need to do this for every LED you sew, but it is very quick. Sew the photo tutorial above to learn how to prepare your LEDs for sewing.

If you plan to mount the LEDs with the wires hidden, cut holes in your fabric (use Fray Check if needed on the hole’s edge) and sew the wires to the back side with the LED dome sticking through. I felt my wires went well with the robot look. I did mount my battery holders to the back side for both aesthetics and safety.

How to: Create E-Textile Circuits

Sewing circuits for your LEDs is easy, I promise! Let me show you the basics, so you are able to easily understand my circuit plans. Disclaimer: I am not an electrician! My programmer brother helped me to understand the basics over the course of all my e-textile projects. I’ll be explaining in non-technical terms.

Basic circuit examples.

Basic circuit examples.

Both the battery and your LEDs have positive and negative sides. Both sides need to be correctly connected to work. Take a look at the examples above to get an idea of how LED circuits work. You are basically making a chain going away from the battery. You must have separate lines for the + and – connections, and the cannot touch or you will short your circuit.
Make the World's Best Robot Costume!When you are making a simple line of LEDs, you can see how easy it is to sew your circuits. It gets a little trickier when you start arranging the LEDs into different shapes. It helps to sketch out your plan so you can be sure you have a clear path for each line that doesn’t touch or cross. Additionally, you need to consider the voltage your LEDs run on. This is something new I had to learn through experimenting this time! My red, orange and yellow LEDs ran on a lower voltage than my green, blue and pinks. (I’m very glad my LEDs came with a chart that helped me piece together the problem!) While my batteries appropriate for either, if I added a lower voltage LED to a chain with higher ones, the voltage was dropped down to the point where the higher ones turned off. With that in mind, I had to separate out my LEDs based on voltage.
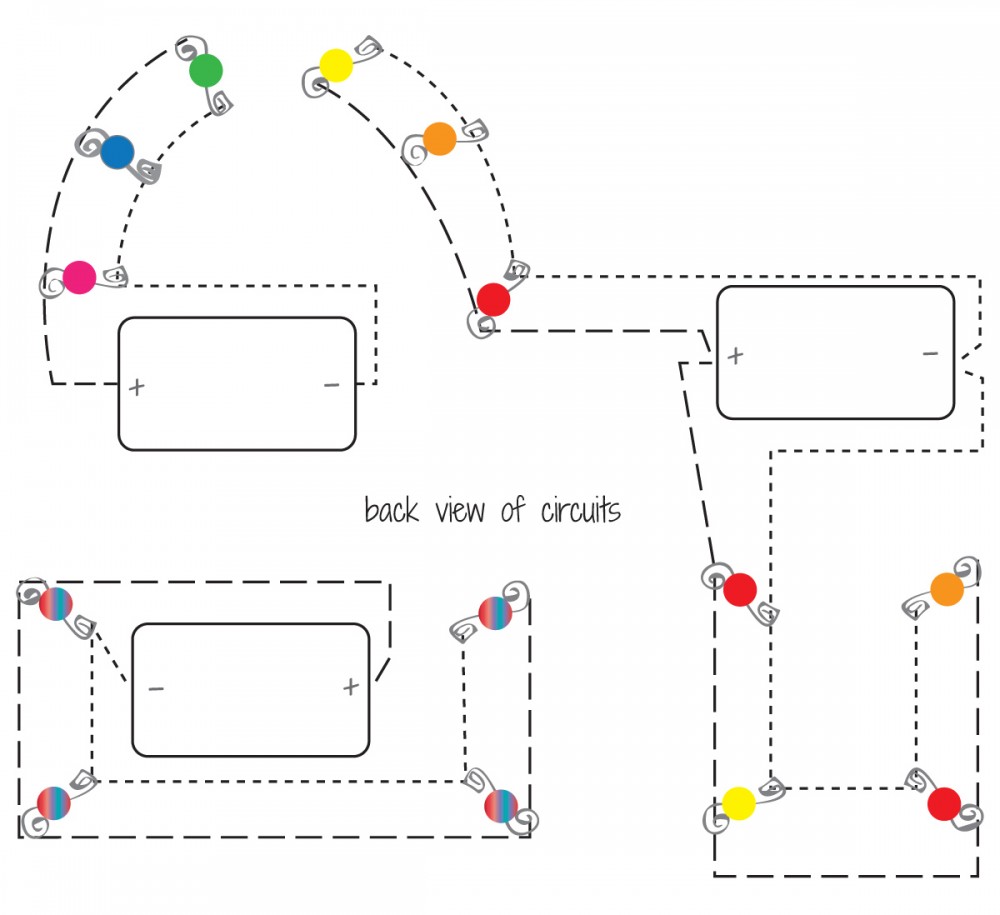
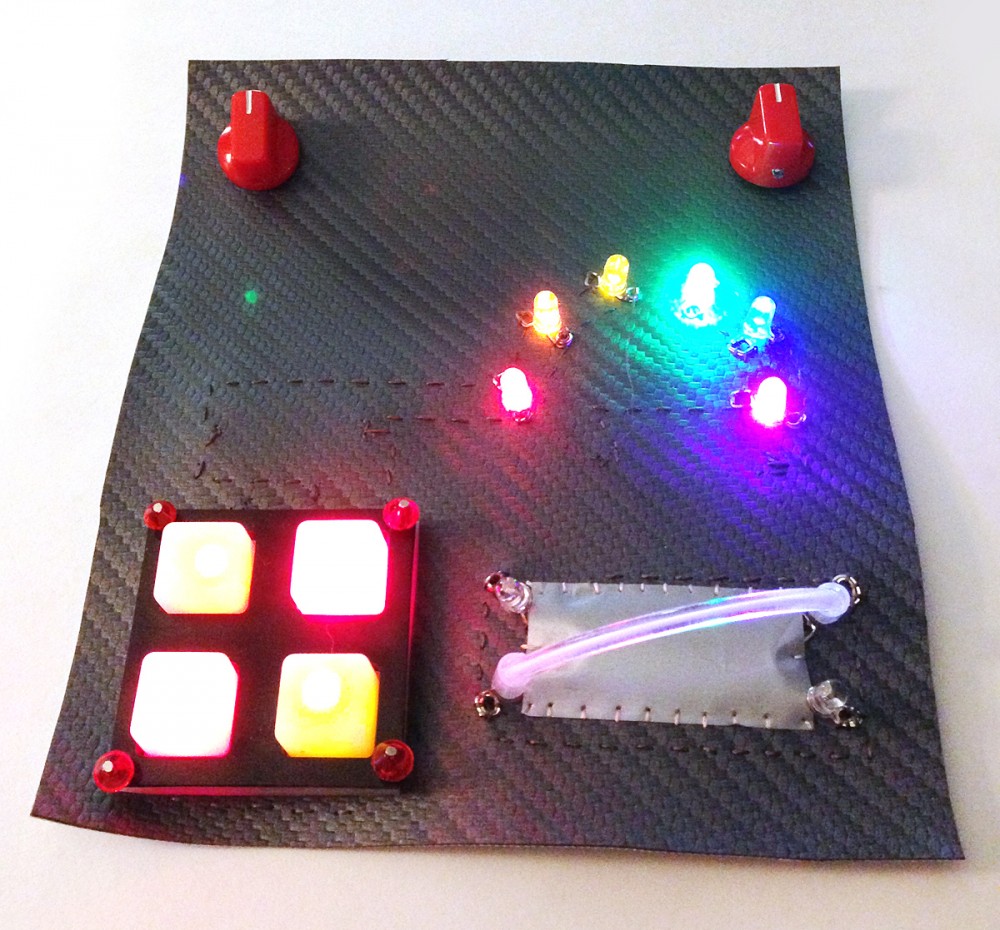
Make the World's Best Robot Costume!Here is my final plan for the LEDs on Jaxbot’s chest panel. My little man loves rainbows, so I made a rainbow. I had to keep the green/blue/pink separate from the other colors. I kept the color-change LEDs separate, then did all the red/orange/yellows together. Notice how each circuit is a chain, even if I had to stitch around the battery holder to get to my first LED.

I started the chest panel by cutting a rectangle of gray vinyl that fit well on the front of the body.
Mine was [6.5″ x 8″]. I rounded the corners.

Make the World's Best Robot Costume!

Color Change Power Tubes

Supplies: circuit plans, LED – 5mm Cycling RGB (slow) x4, Coin Cell Battery Holder – 20mm SewableConductive Thread Bobbin, Light Pipe – White Core (3.5mm, 1′ long), plastic glow bracelet connectors, reflective tape

Special Tools: round nose pliers, jeweller’s pliers, super glue, sand paper

Color Change LEDs with Ropes: (All LED work is hand sewn with conductive thread.) I prepped the 4 “slow change” RGB LEDs for sewing. These are special LEDs from SparkFun that slowly cycle through different colors. When combined with fiber optic light rope (which lights up when LEDs shine into the ends), the effect is super cool!

Make the World's Best Robot Costume!
To sew my circuit, I positioned my battery holder in place on the back of my vinyl and taped across the center to hold it. I threaded my needle with conductive thread, knotted the end and made about 5 stitches on the positive side of the holder (you’ll see a plus on it). Following my circuit plan, I stitched the positive line around to the first LED. I flipped to the right side of the vinyl, then stitched several times through the positive loop of the first LED. I then stitched to the next LED and repeated until I had all the LEDs sewn down through their positive loops. I tied off my conductive thread and started a new one. I then repeated the whole process, starting on the negative side of the battery holder and working my way around to each LED, sewing through their negative loops. When both lines are complete, you can pop in a battery to test it. (Note that I had an older version of the circuit plans in these photos, but it is the same.)

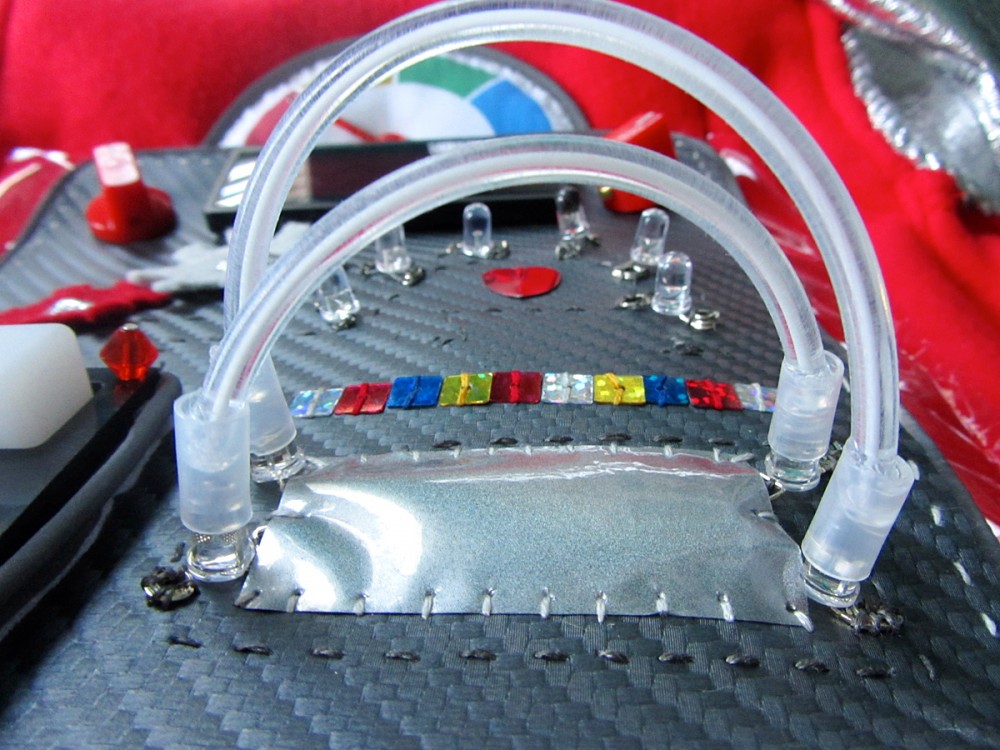
 I sewed a strip of reflective tape in between the LEDs for a little extra flash.
Make the World's Best Robot Costume!
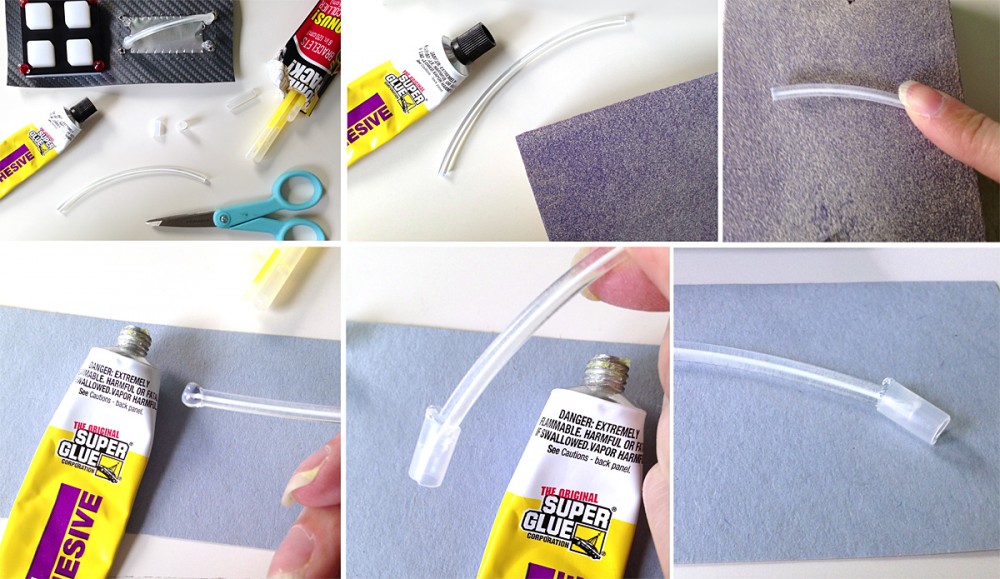
To make the “power tubes” glow, I started by sanding the surface of two lengths of light rope. Sanding the surface causes more light to “leak” out, which makes them look brighter. I cut one of my pieces a little longer than the other using sharp scissors so they could criss-cross. For each tube, I took one of the little drinking-straw-like connectors that come with glow bracelets. The perfectly fit my 5mm LEDs! I used 3mm light rope so it would be more flexible, so I couldn’t just still the rope into the connectors. I took Super Glue and put a pea-sized glob on each end, then stuck them into the connectors. I made sure they were at the angle they’d need to be when on the LEDs. After drying overnight, they were ready to stick onto the LEDs.

Make the World's Best Robot Costume!

Controller Button Pad

Supplies: circuit plans, 5mm Assorted Clear LEDs (8 Colors, Pack of 80), Coin Cell Battery Holder – 20mm SewableConductive Thread BobbinButton Pad 2×2 – LED CompatibleButton Pad 2×2 Top Bezel, 4 jewelry making head pins, 4 beads, reflective sew-in piping

Special Tools: round nose pliers, jeweller’s pliers, super glue, sand paper

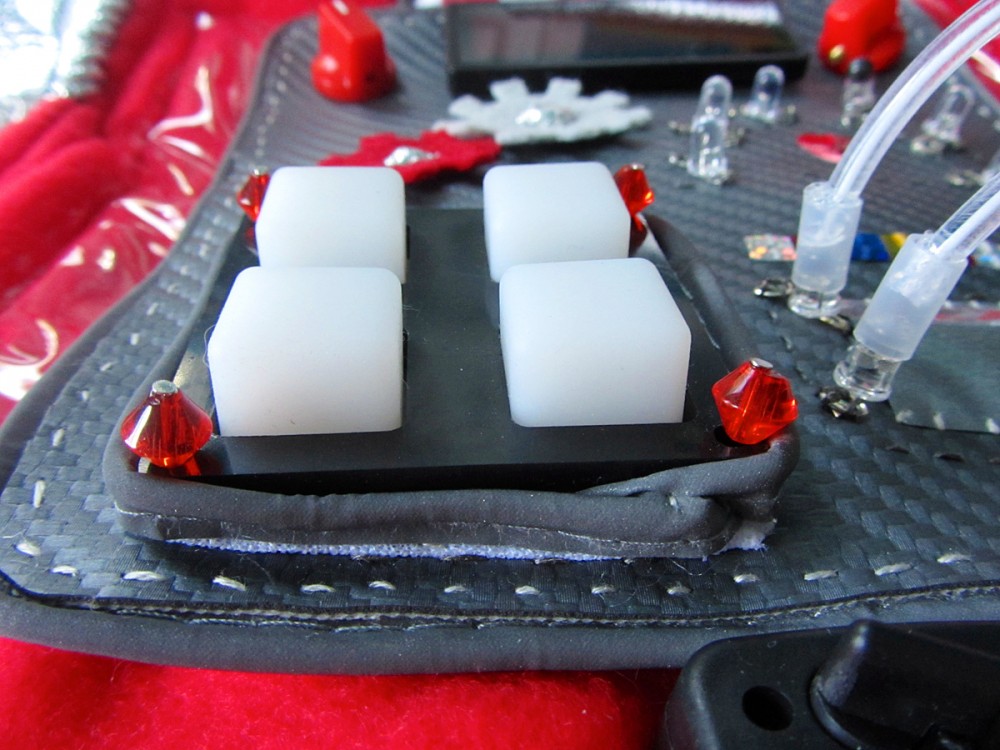
SparkFun sells so many great components to go along with LEDs. The majority are meant for traditional LED use, but I’m crafty – I knew I could adapt them! I absolutely had to have an LED button pad on Jaxbot. The button pads are molded white silicone with domes that go over the LEDs. Then you add the black plastic bezel over top (I skipped the bottom bezel.)

Make the World's Best Robot Costume!

I first sewed the battery holder and LEDs in place according to my plan. This section shares a battery with the first half of the rainbow above, so I needed to stitch down a ways from it. You need to be fairly precise with the the LED placement so they fit into the button pad grid. Using ssss decorated with red beads, I attached the button pad to the vinyl through the 4 corner holes. I used a sew needle to punch a hole for the wire, then used jeweler’s pliers to bend the wires into a coil.

For a more finished look, I sewed some reflective piping around the edge of the button pad, tucking the seam allowance towards the pad to hide it.

Make the World's Best Robot Costume!

Rainbow Central Processing Unit

Supplies: circuit plans, 5mm Assorted Clear LEDs (8 Colors, Pack of 80), Coin Cell Battery Holder – 20mm SewableConductive Thread Bobbin, large heart sequin, nail polish

I had to include a rainbow since I had the right colors. Jax loves them! (There is an LED in the set that seems like it is violet. It is actually ultraviolet – think blacklight – and not as bright as the others. I used the pink instead.)

When sewing the LED circuits for the rainbow, you have to do them in two parts. The red, orange and yellow LEDs will become a second chain coming off of the button pad’s battery. You then need to start a new battery holder and LED chain for the green, blue and pink LEDs.

Make the World's Best Robot Costume!

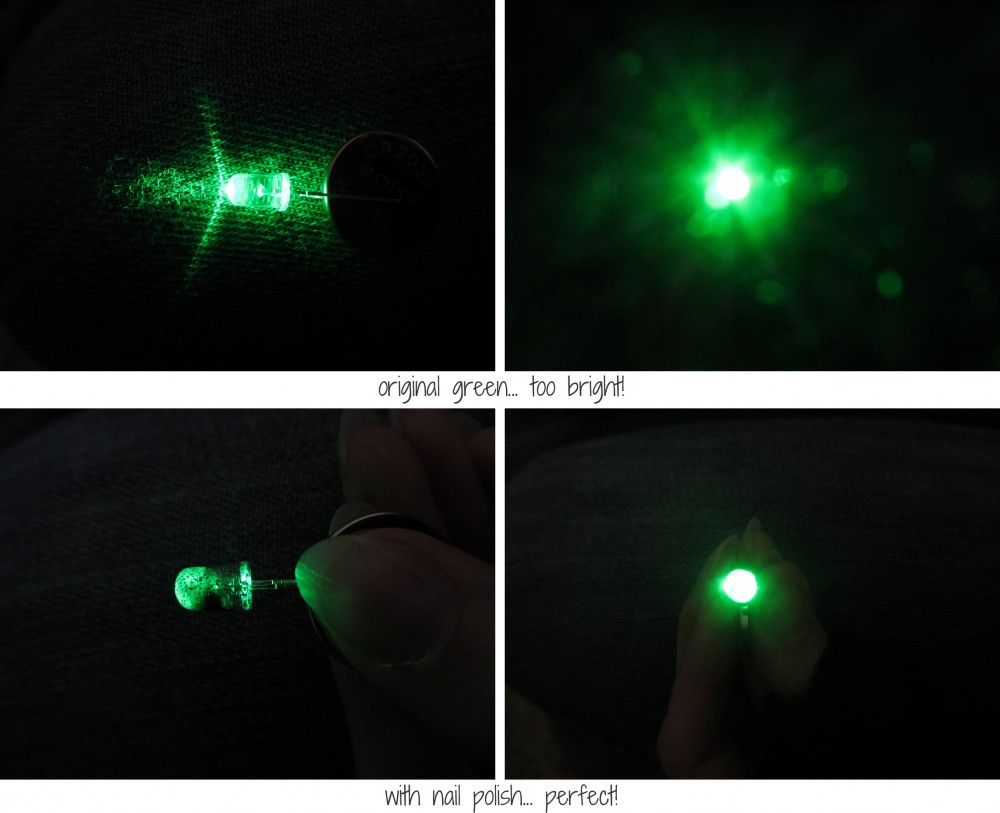
Circuits are sewn, but ow, that green is bright!!

One thing you might notice if you scroll back up and look at the LED chart, is that the green’s millicandela (mcd) is higher than most of the others. The mcd is a measurement of the LED’s intensity. Woo, that green is painfully bright! I tried various things with the circuits, such as adding a resistor, but ultimately I called on my craftiness again.

Make the World's Best Robot Costume!

I grabbed to dark gray nail polish I’d just bought and coated the top 1/3 of the green LED with it. I thought for sure it would dim it too much, but it was perfect! (The LED set I got comes with 10 of each color, so it was easy to do some testing to see what worked. I started with a sheer glitter polish, but the very dark one was what I needed.)

Make the World's Best Robot Costume!

I sewed a large heart sequin (from the thrift store) under the rainbow.

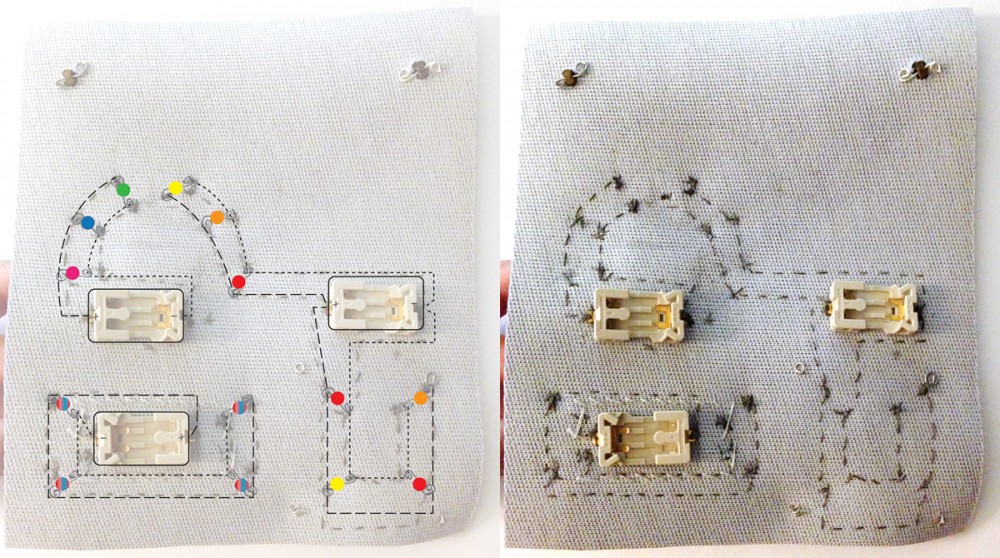
Here is my circuit plan overlaid on top of a photo of my circuits. You can tell where my LEDs are by the thick clumps of stitching. You can also see the attachment points of the two knobs, which I will explain next.

Make the World's Best Robot Costume!

Volume Control and Power Level Adjustment Knobs

Supplies: Red Knob – 15x19mm (2), shank-back buttons (2), wire scraps

Special Tools: round nose pliers, super glue

The knobs I chose are red and smaller that you might guess. But they are adorable and just the right scale for Jaxbot. They also come in black. They are intended to be placed onto a post that has a screw hole in the side, so you can screw the knob on and the whole this rotates. I had to be crafty to get mine attached but still able to turn.

Make the World's Best Robot Costume!

I ended up digging through my button jar to find two shank-back buttons that were slightly smaller than the indent in the back of the knobs. I used super glue to attach them and let them dry overnight. Using sharp scissors, I cut a hole in my vinyl. Then I used a scrap of wire to hold them in place on the back side.

Communications Center

Supplies: scrolling LED name badge

I’m all about simple and inexpensive when possible. There was no way I’d be able to figure out programing my own LED display (though SparkFun certainly sells what you’d need!) I knew that LED name badges existed, so I started searching Amazon. When I found one for $10 from the same seller I was getting my LED equalizer (I’ll tell you about that soon!), I decided to try it despite the 1 star review. I always read product reviews, but that one’s only complaint was that it was hard to figure out.

Make the World's Best Robot Costume!

I was expecting instructions in broken English and a unit that took 2 weeks to figure out. I seriously understood it in a minute. Read my Amazon review at the link above for more details. This badge is held on by a magnet panel. I placed it between the knobs.

Details and Attachment

Supplies: printables, photo fabric, gray felt, red felt, silver pleather scraps, square sequins, reflective sew-in piping, wire scraps, seed beads, tiny red button

Special Tools: round nose pliers

Make the World's Best Robot Costume!

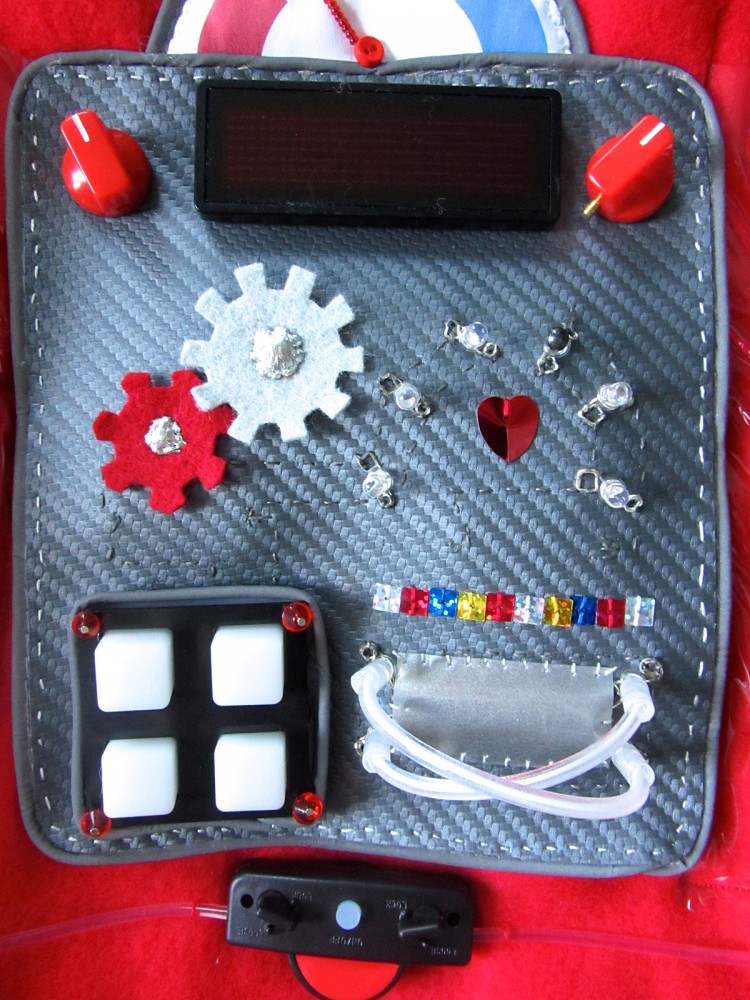
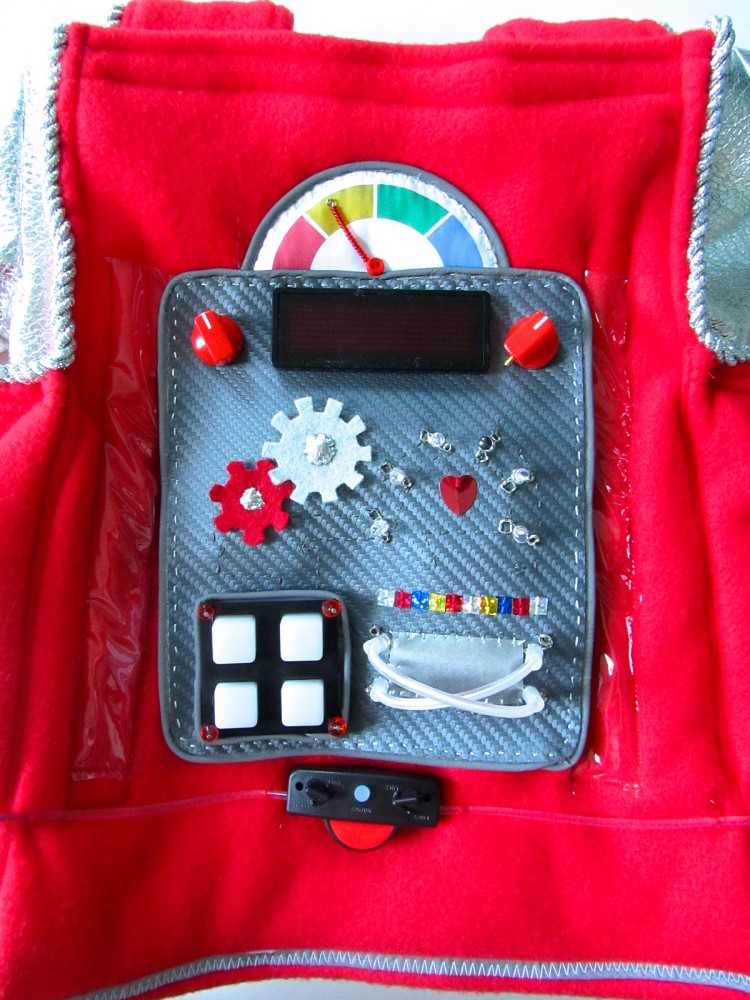
I added some details to the chest panel next: a row of square sequins; some felt gears with silver pleather circles sewn in the centers. Then I hand stitched some reflective piping around the whole edge. Using my sewing machine, I sewed two tall, skinny clear vinyl pockets for glow bracelets, leaving enough room for the control panel to be in the middle.
Make the World's Best Robot Costume!

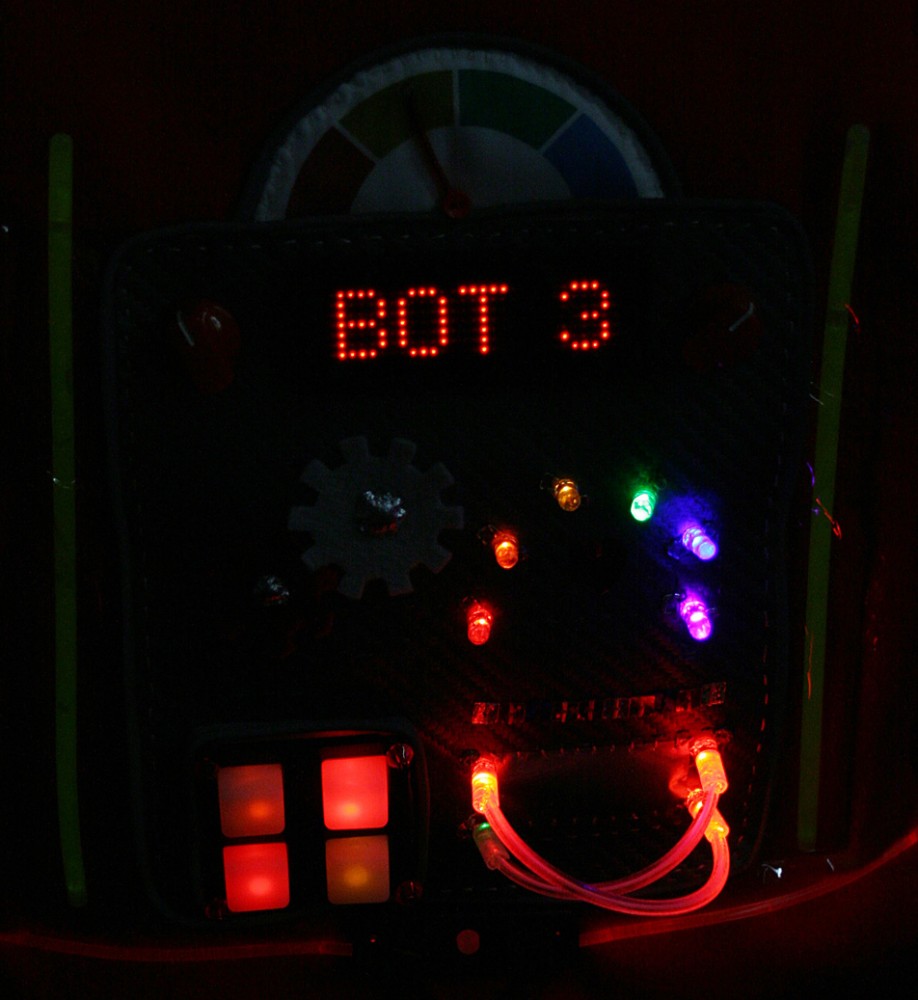
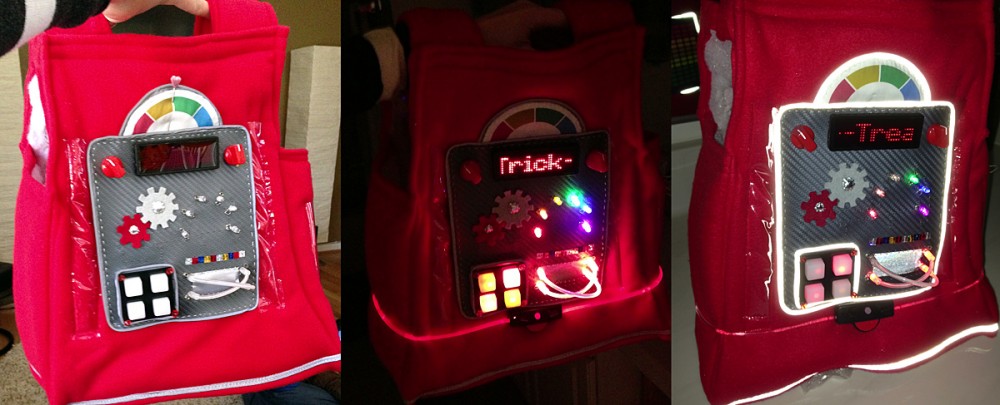
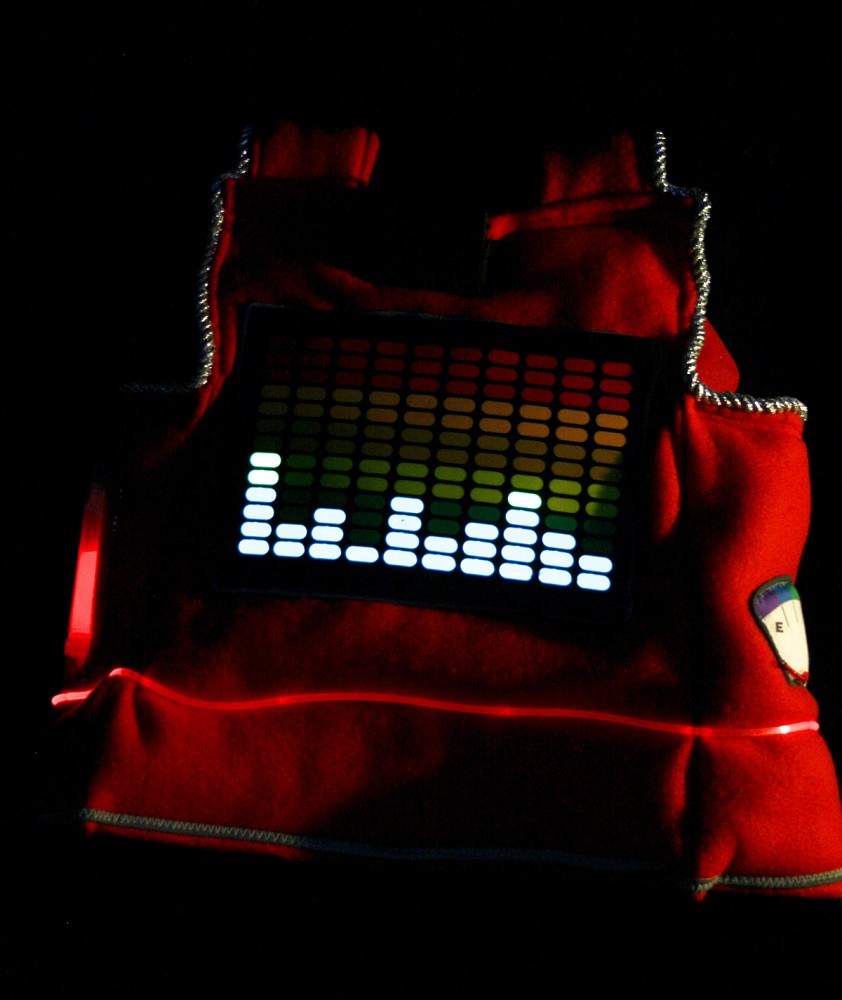
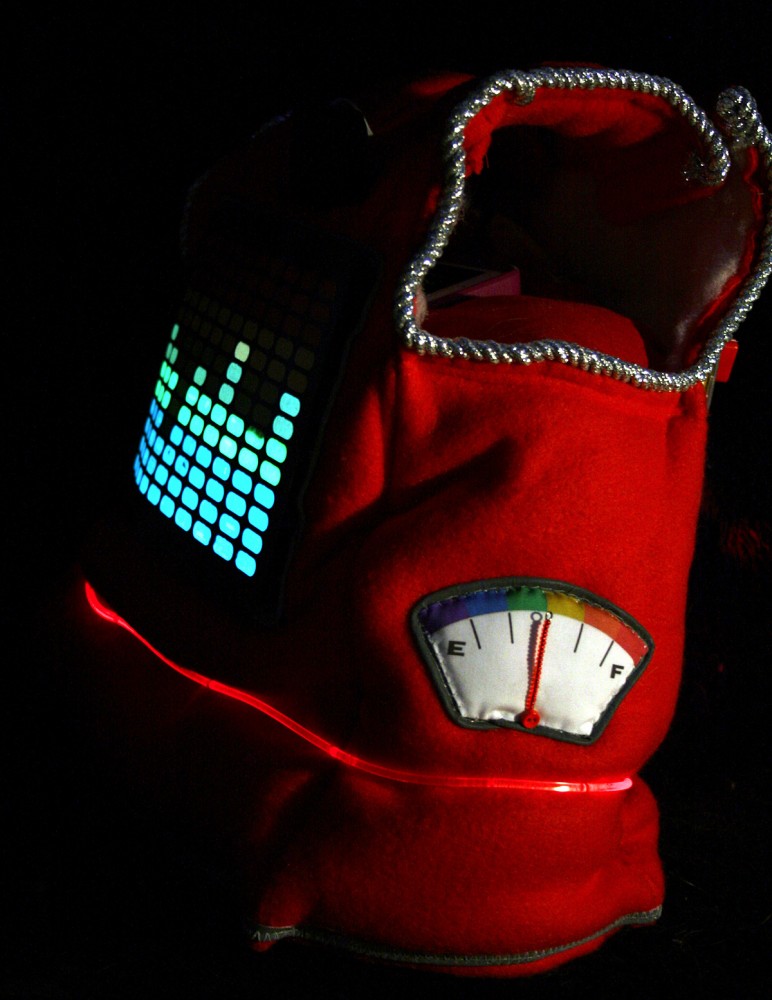
Final placement of the panel and Dial. Everything in the dark. Everything in a flash/headlights.

Make the World's Best Robot Costume!I printed out the printables onto photo fabric then cut out the front dial with a 0.5″ seam allowance. I added a layer of white felt behind the photo fabric before folding back the seam allowance. This gives it dimension and keeps you from seeing the folds through the fabric. I folded under the allowance and pinned the dial in place with a strip of reflective piping along the curve. I hand stitched along the curve to sew it to the chest.

I then laid the control panel in place at the bottom of the dial, and hand stitched along its piping on the top edge to attach it to the chest as a big flap. You need to be able to get to the back side of the panel to insert batteries, so I added 4 sew-on snaps to hold it in place (bottom corners and one on each side.)

Make the World's Best Robot Costume!

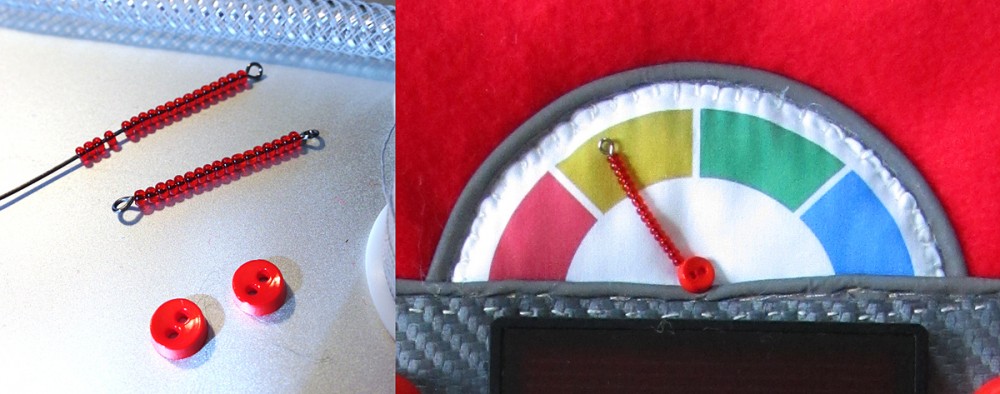
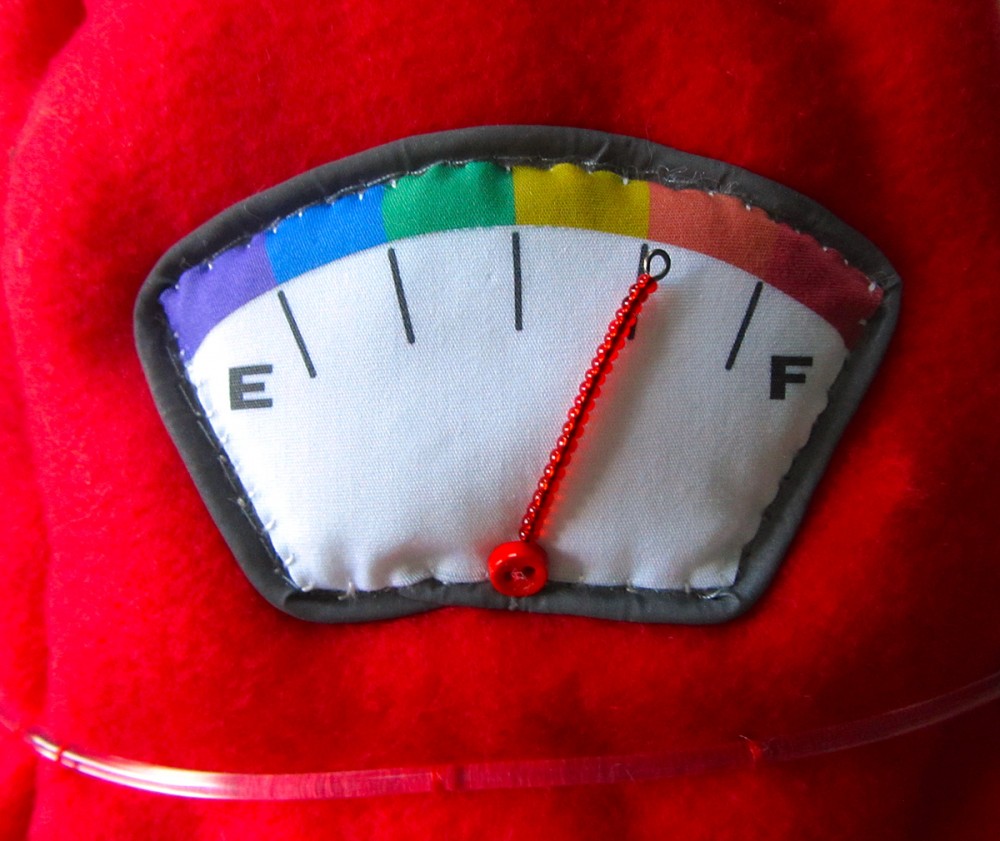
To make the dial’s needle, I made a loop at the end of a piece of wire, then loaded it up with red seed beads. When it was nearly long enough, I made another loop to hold the beads in place. I then placed it on the dial and sewed a button on, making my stitches all go through the bottom loop of the dial needle. This lets the needle turn. You may want to curve it in towards the chest a bit so it doesn’t flop down.

Midpoint Illumination Band

Supplies: LED shoelaces (only used one of them)

Also known as the glow belt! When I saw LED shoelaces in Target’s Dollar Spot, I grabbed a pair in red. I wasn’t sure what I would do with them, but they are basically a cheaper version of fiber optic light rope. If you can’t find them at Target, amazon has similar items.

I turned one of the shoelaces into a belt. It was just the right size! I just had to find the point on the A-line shirt that it was a perfect fit. Then I made little stitches around the tubing to hold it in place. The little power unit is not actually attached to the shirt. It is held in place by the tubes, but you can also pop it off to change the battery.

Audio Input Visualizer

Supplies: LED sound-activated equalizer panel, black elastic scrap, red fleece scrap

I definitely wanted the back of Jaxbot to light up, but I didn’t want to have to wire LEDs on both sides. I knew I’d seen sound-activated LED t-shirts before, so I did some hunting. It turns out, you can purchase the LED panels separately from the shirts for $7! It does need you need music or noise to have the panel light up. I plan to load my phone up with robotic songs and keep a custom Jaxbot soundtrack going as we trick-or-treat. Loud voices can trigger it as well.

Make the World's Best Robot Costume!

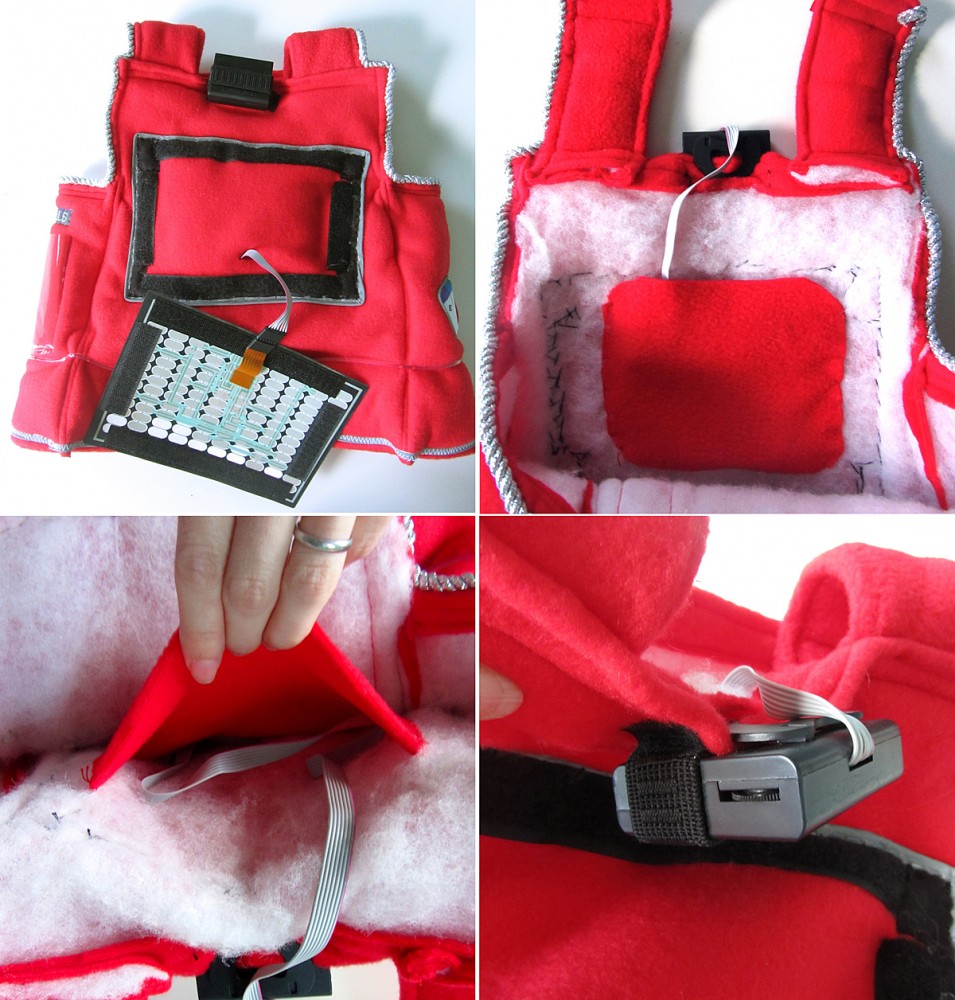
There isn’t a lot you need to do to the panel. You do need to make sure you plug it in correctly. The plug isn’t labeled and if you do it upside-down it with light up oddly. It comes with sticky Velcro (ugh, always annoying!) that you can press in place. I found it didn’t stick that great, so I spent an uncomfortable hour stitching mine down with an old needle. I threw the needle out afterwards, as it was all sticky. You may want to ditch their Velcro and use the sew-on kind (loop side). I added some black felt scraps to fill in the corners of the panel area, then surrounded it with reflective piping.

Make the World's Best Robot Costume!

I cut a slit in the tunic and fed the cord through. I basted a scrap of fleece inside so I could keep the excess cord neat and out of Jax’s way. I clipped the sensor unit to the back collar and added some elastic to keep it from flopping.

Fuel Cells

Supplies: printables, glow braid, clear vinyl, glow tubes (red and blue)

Make the World's Best Robot Costume!

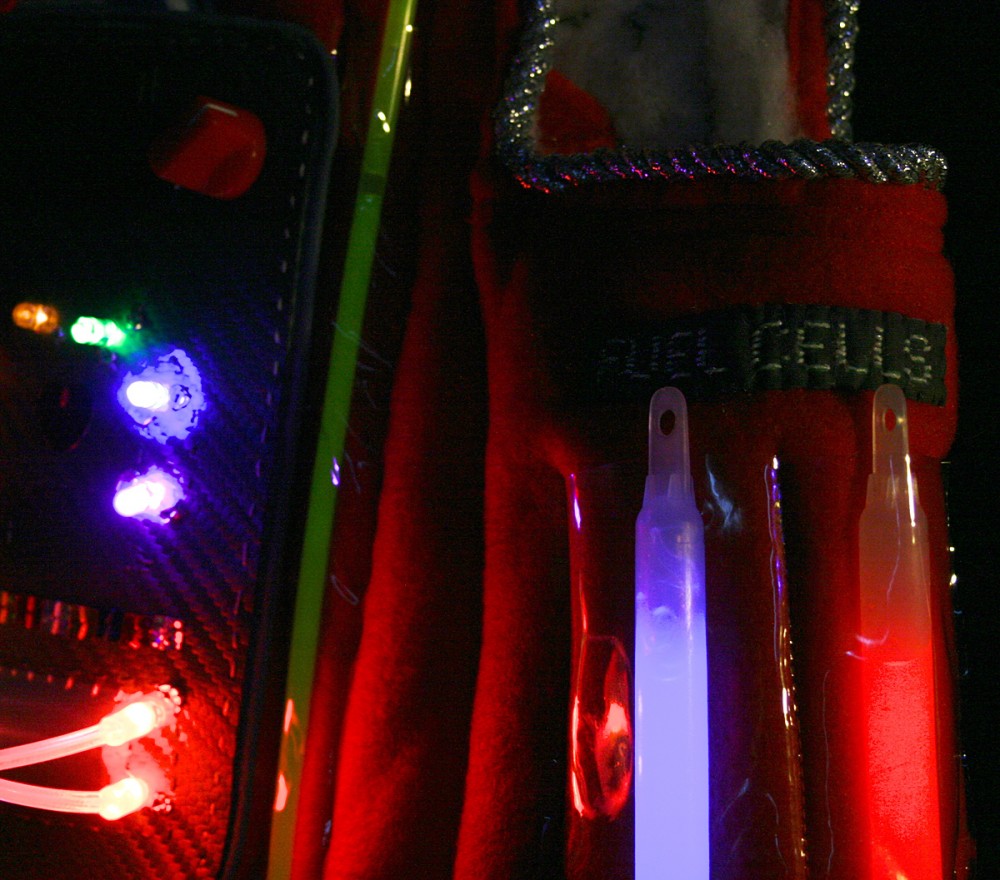
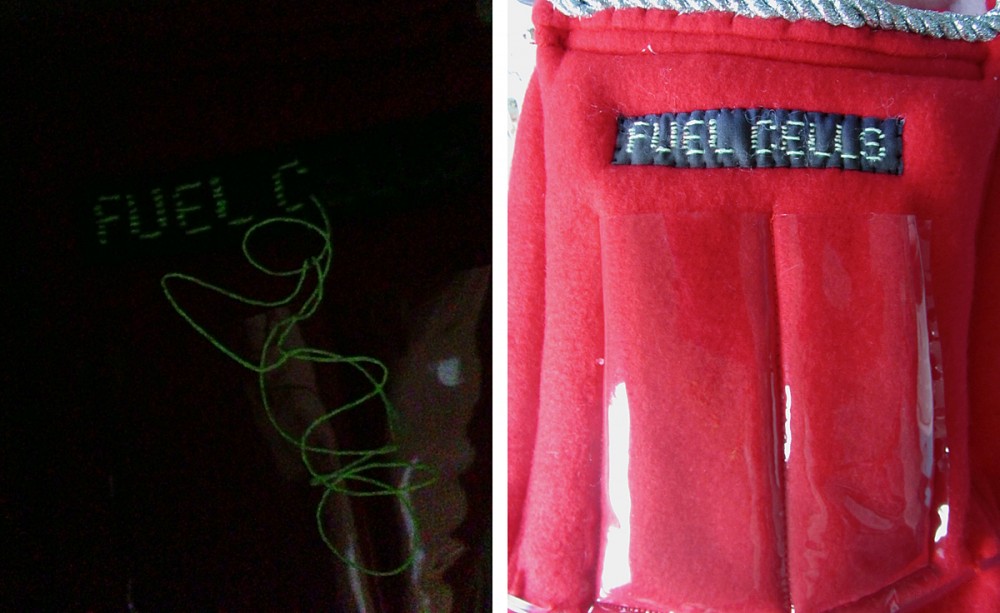
To decorate one side panel of the body, I machine sewed a clear vinyl pocket with a divider in the center. I made the two sections large enough to hold standard glow stick tubes. I took the “fuel cell” printable and stitched over the letters with glow-in-the-dark braid.

Make the World's Best Robot Costume!

You could leave your printout as-is, but I was running out of yellow ink and mine printed too dark. I stitched the label in place above the pockets. When we put the costume on, I activate two glow tubes to act as our fuel cells!

Make the World's Best Robot Costume!

Fuel Gauge

Supplies: printables, photo fabric, reflective sew-in piping, white felt, wire scraps, seed beads, tiny red button

Special Tools: round nose pliers

This gauge is made the same way as the one above the control panel, except you add the reflective piping all the way around. I added a layer of white felt behind the photo fabric before folding back the seam allowance. Then I sewed it down with reflective piping, beaded a gauge needle and sewing it on with a button.

Make the World's Best Robot Costume!

Head Encasement Unit

Supplies: printables, dm red anti pill fleece (~ 0.5 yd.), silver pleather (~ 1.5 yd.), batting (~ 1 yd., from stash), gray textured vinyl scraps, mesh tubing, red pompom, large circle sequins (2), reflective sew-in piping (2 packs), photo fabric, red felt, gray felt, pipe cleaner, glow bracelet, sew-on snaps (4), 5mm Assorted Clear LEDs (8 Colors, Pack of 80), Coin Cell Battery Holder – 20mm SewableConductive Thread Bobbin, helmet circuit plans

Make the World's Best Robot Costume!

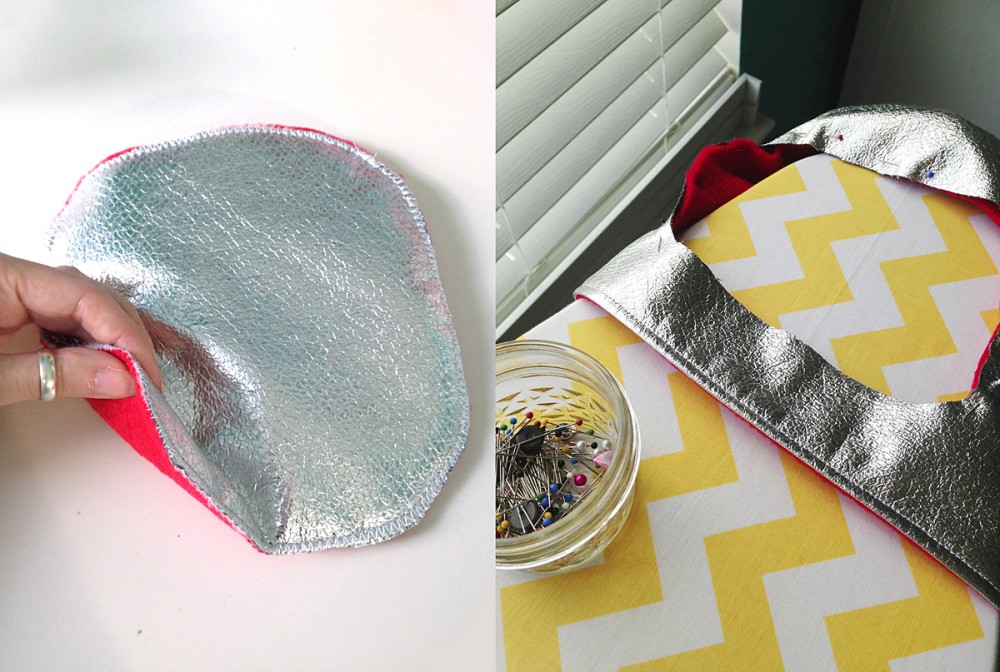
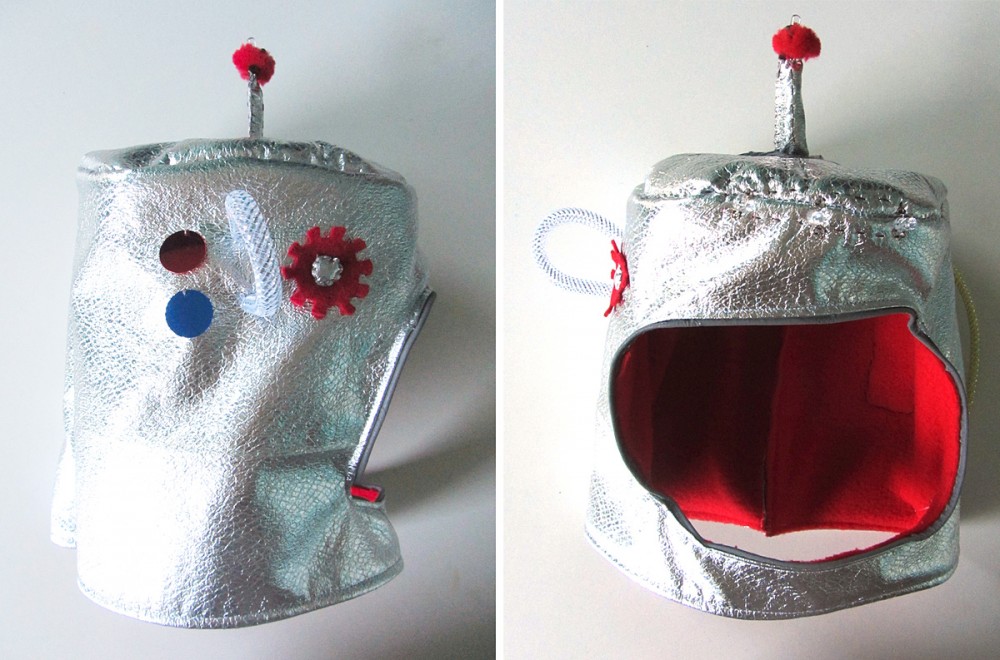
That’s the helmet! I didn’t use a pattern for this. I took basic measurements of how long and wide the top of Jax’s head is, then cut a rounded-corner rectangle slightly larger than that. I cut 1 layer of silver pleather, 2 layers of batting and 1 layer of red fleece. I zigzag stitched all the way around the layers.

Make the World's Best Robot Costume!

I then used a sewing measuring tape to measure the circumference of the of the helmet top (add 1″ for seam allowance) and the height of the distance from the top of Jax’s head to his shoulders (add 1″ for seam allowance) I cut this long rectangle out of 1 layer of silver pleather and 1 layer of red fleece. With right sides facing, I sewed along one of the long sides. I turned it the right way and top stitched along the hem. I then sewed it into a tube, making the fleece the inside, and then sewed the tube to the helmet top.

Make the World's Best Robot Costume!

I cut my face hole afterwards. I used the same rounded rectangle as the top of his helmet. Try making the shape out of paper and holding it up to your child’s face first. Once I cut it, I carefully folded in both layers of the hole’s edge, layering reflective piping between them. I machine sewed it in place, but hand sewing might be easier. It was slow and awkward, and I had to go back and hand stitch some places.

On the right side of the helmet, I sewed two large round sequins, A loop of mesh tubing and a red felt gear with a silver pleather center.

Make the World's Best Robot Costume!

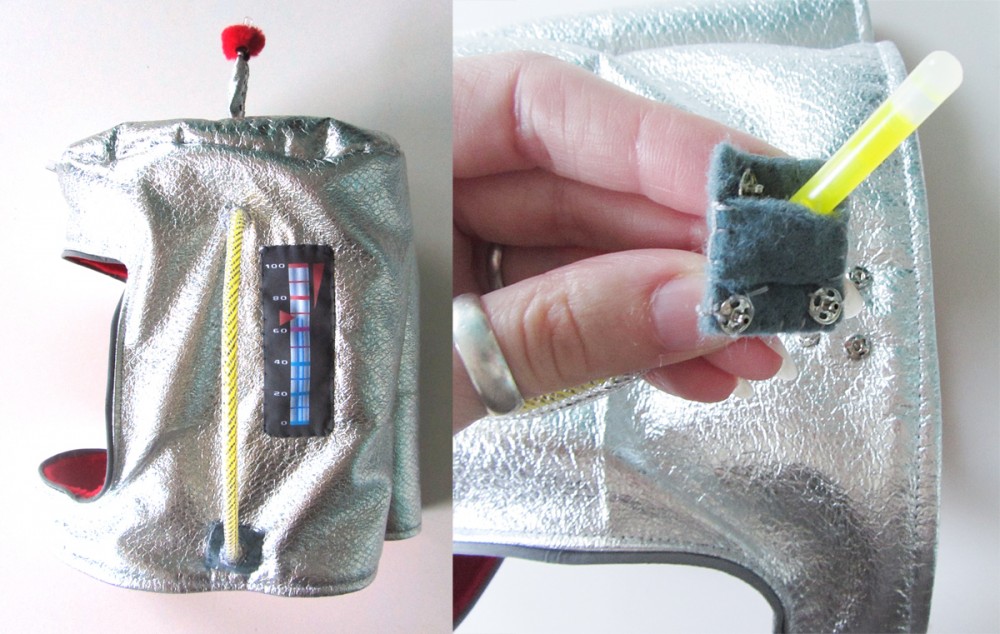
On the left side of the helmet, I sewed down the dark gauge with the edges folded under. I didn’t line that one. I cut a length of mesh tubing long enough for a glow bracelet and sewed the top end to the helmet.

Make the World's Best Robot Costume!

I cut two squares of gray felt and cut a hole in the center, large enough for a glow stick to fit through. Then I cut a strip of felt to be a cover over the hole and sewed all around the edges to hole it together. I sewed the other end of the mesh tubing to the top of the felt square (the side without the cover) and sewed four snaps to the bottom. I figured out where I wanted the tube to be positioned and sewed down the other half of the 4 snaps. You’ll have to sacrifice a glow bracelet to get the positioning just right, so be sure you have an extra.

To make the antennae, I folded a pipe cleaner in half and sewed a casing of silver pleather around it. at the top, I sewed on a pompom. I cut out a circle of gray vinyl and made a hole in the center for the antennae. I put the antennae through the hole, sewed the end to the center of the helmet and then sewed down the vinyl circle.

Make the World's Best Robot Costume!

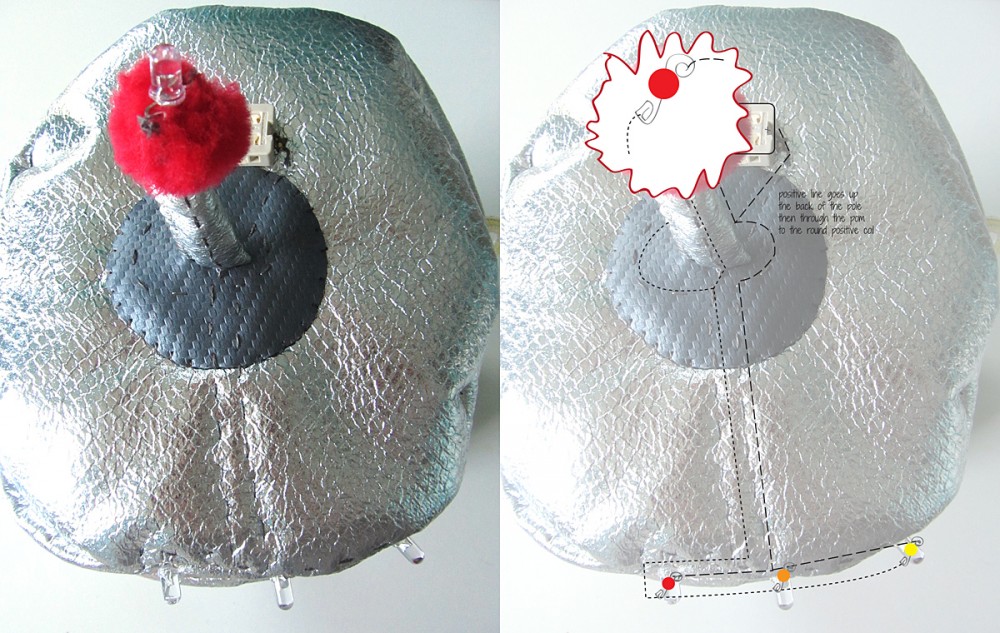
Helmet Circuitry: The helmet circuitry is hard to draw because at one point the lines go up either side of the antennae to an LED sitting on the pompom. Take a close at both the helmet circuit plans and the perspective view above.

I’ll try to explain best I can. I placed the battery holder just outside the gray circle towards the back of the helmet. I sewed the positive side of the holder down with several stitches, then stitched a line out and over to the antennae. On the back side of the antennae, I sewed a line of stitching up to the pompom. Make sure you only go through that side of the pleather so the folded pipe cleaner acts as a barrier between the circuits on each side of the antennae. I brought the positive thread up through the pom pom about 1/3 of the way in from the far side of it and made a few stitches. You can’t stitch super securely on a pom pom, so I tied off and put some Fray check on the stitching. I started another conductive thread and connected it to the positive line at the base of the antennae. I stitched around to the front in an arc and the straight out to the front of the helmet. I stitched through the round positive coil of the orange LED then stitched over to the yellow and did the same. I then stitched back to the orange over top of the stitches I’d just made. It’s fine because it is the same circuit. I continued my stitched out to the red LED, stitching through its round positive coil and tying off.

I started the negative line by stitching several times in the negative side of the battery holder. I stitched out in an arch to the front side of the base of the antennae, making sure to stop before reaching the positive line. I stitched up the antennae along the front side the same way as the positive line, this time attaching the negative side of the LED. I started a new conductive thread and linked it to the negative line at the front base of the antennae. I stitched out parallel to the positive line and then went around the outside of the LEDs as shown, sewing in each of their square negative coils.

I hope that made sense!

And now you should have…

The World’s Best Robot Costume!

Make the World's Best Robot Costume!

Final Shopping List

Joann’s Fabric

Amazon.com

SparkFun.com

American Felt & Craft

Target

Dollar Store

  • yellow glow bracelets (3)
  • glow tubes (red and blue)

Unknown/Already Owned

  • silver rope trim (unknown, from stash)
  • jewelry making pliers (round and flat)
  • large heart sequin
  • large circle sequins (2)
  • red pompom
  • pipe cleaner
  • shank-back buttons
  • black elastic scrap
  • red seed beads
  • tiny red buttons (2)
  • jewelry making head pins (4) and wire (2 scraps)
  • glow braid

What do you think of Jaxbot 3000? Do you think you are up for the challenge of sewing your own? I’d love to see photos of your little one’s home made costume. Stop by my Facebook page and post a photo to our wall, or tag me in an Instagram photo @iolstephanie.

Make the World's Best Robot Costume!

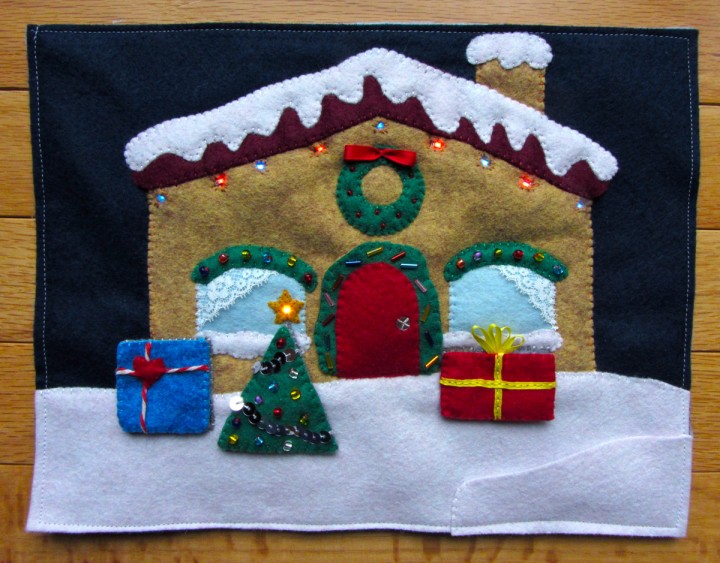
LED Holiday House Puzzle Quiet Book Page

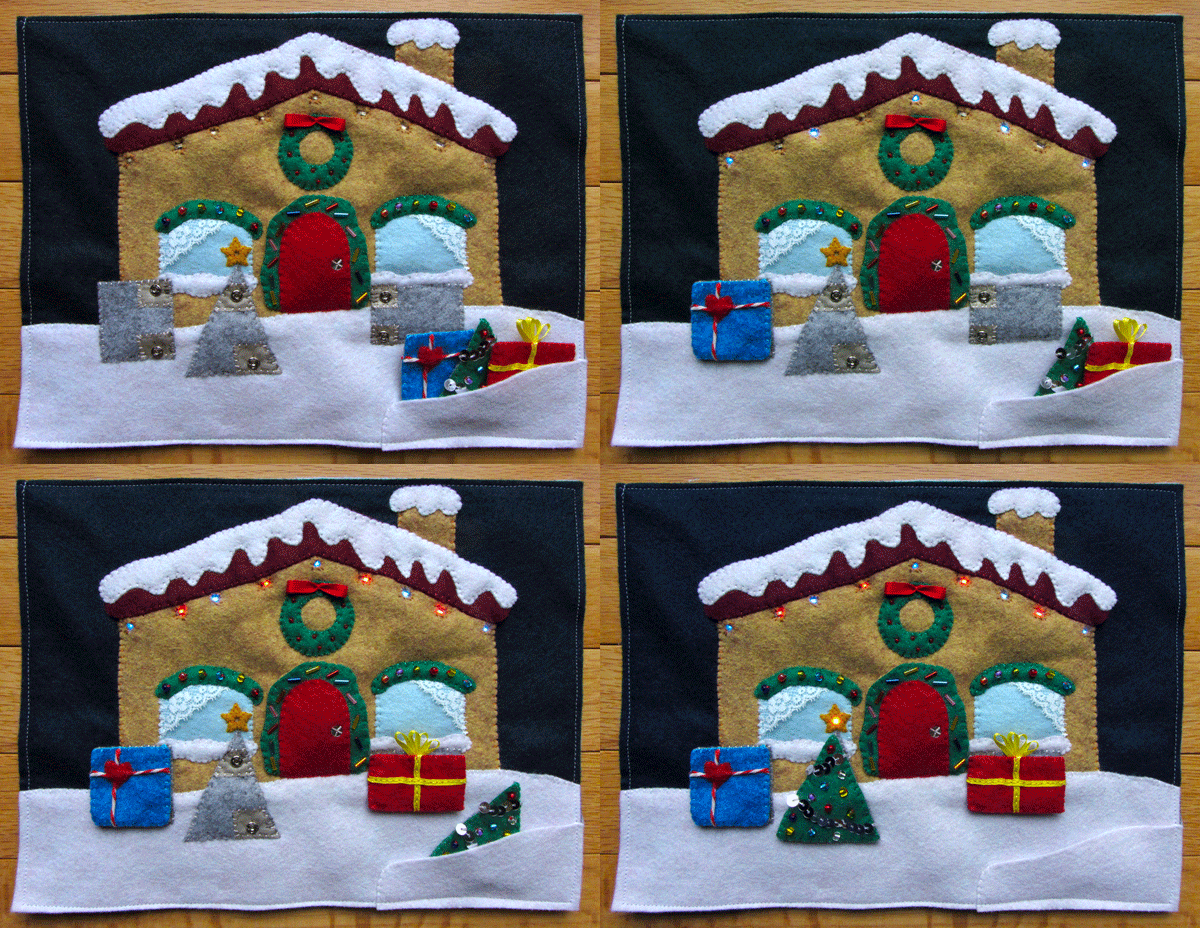
This quiet book page was quite the project! It is an interactive puzzle – you match the shapes to light up the LEDs. It is the second page in a series of pages I am doing for all 4 seasons. I’ll be doing one regular page and one LED holiday page for each season. The first was my Halloween Jack-o-Lantern page.
The planning of the circuits was a bit confusing to work out, but I really feel like I’m starting to get the hang of e-textiles. I admit, I went through two revisions of how I sewed the circuits before settling on the third. But, that is one of the things that makes e-sewing so forgiving. You aren’t soldering anything together… Not happy with it? Clip the threads and start again! But, don’t be scared. You can do it! Try the Halloween page first, or something similar using that wiring plan as a guide. You’ll get the hang of it!

This page can be made without the LEDs. Just skip that part and make it a regular shape puzzle. You could add a few more shapes if you wanted. You could still have the door open, but maybe put a photo or surprise behind it instead of the battery.
All of my e-textile supplies are courtesy of SparkFun. Their LilyPad line makes adding interactive circuitry to soft projects as easy as possible. They carry everything you need, from the conductive thread and fabric to snaps and needles. The lovely wool blend felt was provided by American Felt and Craft. I think the look and feel of wool felt is a match made in heaven for a Christmas themed page. The rich colors and soft, warm feel are just perfect!

What I Used:

This tutorial is going to be a little crazy! But, stay with me…

Red & Blue LEDs: Start by cutting some scrap felt into two strips that follow the roof line. On the first strip, stitch down the red LEDs: using conductive thread, make several stitches through the + hole of the first LED then use a running stitch across to the next. Make several stitches in that LED’s + hole and continue until you’ve linked all four positive (+) holes. Start a new conductive thread and repeat the process along the negative (-) holes. Don’t let the + and – threads touch. The strip holding the red LEDs will need to be layered behind the blue strip, so the running stitches need to be covered. I cut scrap felt and basted it down between the LEDs.


My strip of felt for the blue LEDs is thicker because the two circuits need to go over the red LEDs while still letting the blue LEDs line up. Stitch the positive (+) line of the blue LEDs the same way you did the red, but stitch along the edge to leave room for the negative line (see photos). Lay the blue over the red and cut out holes to let the red LEDs show through as shown. Then sew the blue LED’s negative line as shown.

At this point I tested both circuits and set them aside. To test: put a battery in the battery holder and cut two scraps of conductive thread. Lay the ends of one scrap on the + hole of the battery holder and the + hole of the last LED. Lay the other thread on the – hole of the battery holder and the – of the last LED. They should light up.


Main Circuitry: Pin the roof piece to one of the house shapes so you have an idea of where the LEDs will be. Cut a scrap of felt to go under the snow. Mine was about 8″ wide by 2″ high I suggest going 3″ high so you have more wiggle room. Cut out one set of the gray shapes and decide where they will be positioned on the house. Place the battery holder so the positive (+) holes are at the right.

Red: I started with the red circuit first. Sew a few stitches where the upper left corner of the rectangle will be. Do a running stitch up to just below where the far right red LED will go. Tie it off. (We will link it up to the LEDs later.) Start another thread by making several stitches in the upper right (+) hole of the battery holder. Go out and down (staying out of the way of the negative hole), then go right under where the rectangle will be. Go up and end near where you ended the first (negative) line. Now we stitch the other half of the negative line (broken by where the squares of conductive fabric will be.) Start a thread and make several stitches in the upper left negative (-) hole of the battery holder. Go out and down (staying out of the way of the negative hole), then stitch down and around the triangle as shown. You need to leave plenty of room over the triangle for the yellow LED circuit. End with several stitches under where the lower left corner of the rectangle will be.

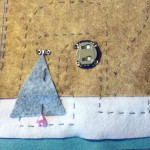
You can test your red circuit by laying the red LED strip in place and running scraps of conductive thread from the – and + holes of the last one to the corresponding thread lines in the upper right corner of the house. Then place a scrap of conductive thread or fabric (I saved the selvage to use as test strips) to complete the gap where the rectangle will be. (See photo below of me testing the yellow.)

Yellow: Next is the yellow LED circuit. start a thread and make several stitches in the upper right (+) hole of the batter holder and go up and over (staying out of the way of the negative hole) to the triangle as shown. Position the LED just above the point of the triangle (with the positive hole on the left) and make sever stitches in the (+) hole.


The negative line of for the yellow LED is a quick one. Make several stitches in the negative hole of the LED then a couple stitches down to under where the triangle tip will be. Start a new thread and stitch several times in the upper left negative hole of the battery holder. make a line of stitching going out and down (don’t touch the blue line!) and end it under where the lower right corner of the triangle will me. You can test this circuit by placing a scrap of conductive thread across the gap in the circuit.

Blue: To start the blue circuit, make several stitches under where the upper right corner of the square will be. Running stitch up to just below where the blue LEDs will be as shown.


To sew the other half of the blue LED’s negative line, make several stitches in the lower left negative hole of the batter holder, then stitch down and under the triangle, just below the red line you made earlier. My lines were close, which is why I suggest using a slightly longer scrap of felt down there. Make sure you leave room below the line you are stitching. There will be one more line down there. Continue your stitching up to where the lower right corner of the square will be and make several stitches.

Make the positive blue line by starting with several stitches in the lower right positive hole of the battery holder. Stitch down and over to the left (it will be the third line running under the triangle) as shown. Stitch over and up to the roof, ending beside the negative line. You can test your circuit the same way you tested the red earlier.

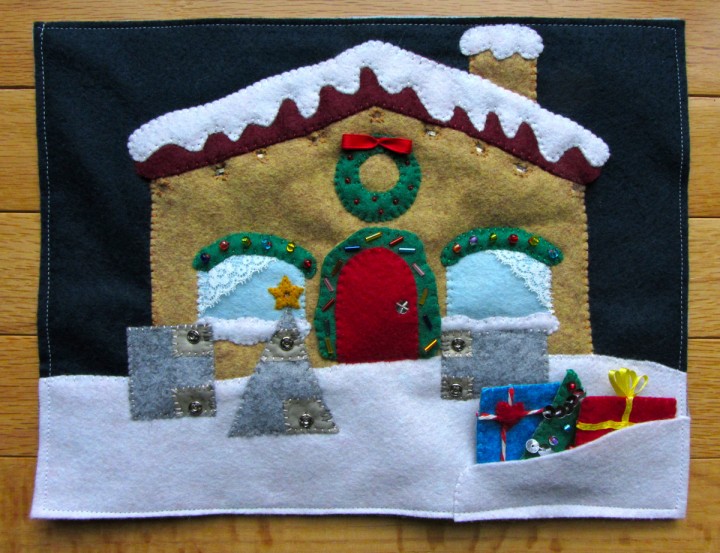
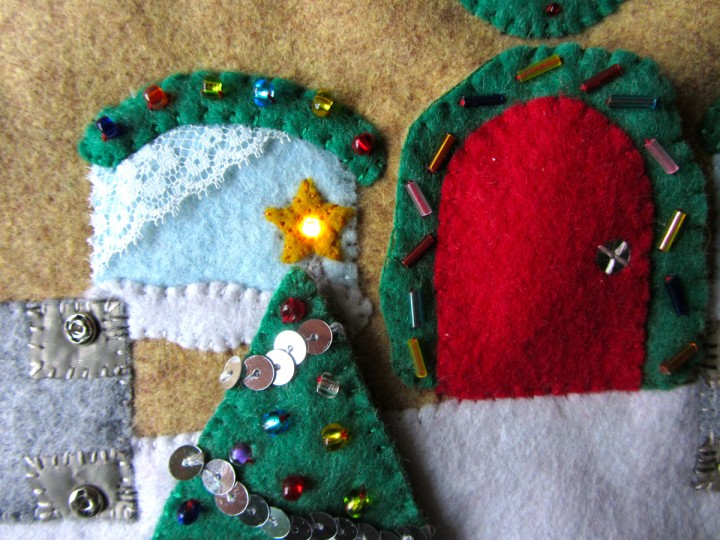
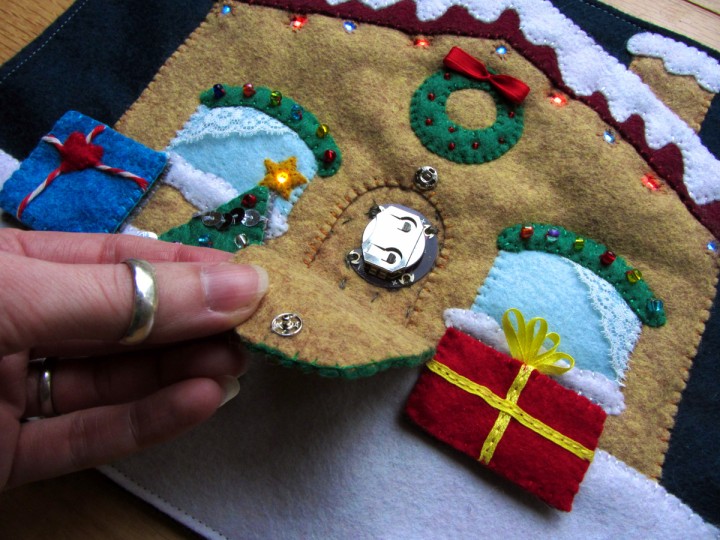
Conductive Shapes: Cut out a second house piece and use the door pattern piece to cut out a hole for access to the battery holder. Pin the roof piece on to it and sew it down (I was not sewing things down to a background at that point. The light blue was just a layer to insulate my laptop from the exposed circuits while I photographed steps.) I also sewed down the windows and window snow, as they are overlapped by the shapes. Cut out your star felt piece and cut a hole in it so the yellow LED can show through. I stitched around the hole for strength and also stitched it down around the narrow width of the LED so the hole doesn’t move. Stitch down the star.

Big Note: You don’t need the snaps I added to my puzzle! In fact, they almost make the conductive fabric unnecessary… But I was a little disappointed to find that (unlike the conductive thread) you needed some pressure when laying the two layers of conductive fabric together in order to power the LEDs. The finished puzzle pieces did not have enough weight to do this on their own once you let go. Since Jax is not old enough to understand he needs to press down on the pieces to get them to light, I went back and added snaps to hold the pieces down against the puzzle. I also used conductive thread when sewing them on to add conductivity.

Cut scraps of conductive fabric and sew them to the triangle as shown. Cut out a piece of felt to be your snowy ground for the page (mine is “soap sud” – a blueish white) and lay it over the bottom of the house. Sew the triangle down. Using conductive thread, make several stitches through all layers to link the two “broken” ends of the yellow negative line to the two scraps of conductive fabric. Each scrap should be connected to its corresponding line of conductive stitching. Test the puzzle piece by pressing a scrap of conductive fabric across the triangle. (See photo below.)

Do the same for the square and rectangle, adding scraps of conductive fabric (and snaps if preferred) as shown and sewing them down. Be sure to link the conductive fabric to the circuits with conductive thread. (See the last photo below. You can see my 3 dark stitches in the side of each square of conductive fabric.)


When designing this puzzle, I worked hard to find a balance between making the project easy to explain and having a design that was easy to product with minimal user errors (such as stitching circuits too close to each other and shorting it out.) In this third revision of the design, I knew this would be the most difficult part to explain. It really isn’t that bad, though! Stay with me…

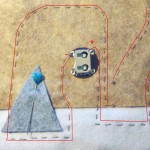
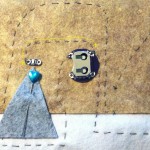
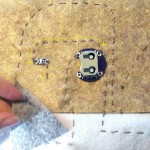
Take your strip of blue LEDs and pin them in place between the house layers. The second photo above shows the top layer of the house pulled back. I hadn’t moved the roof piece up to the front house piece yet for that photo. Simply put, you need to connect your negative line from the house to the negative hole of the first LED and connect the positive line from the house to the positive hole of the same LED, WITHOUT touching! Touching the lines together will “short” the circuit and the LEDs will not light. To do this, I added an additional scrap of felt between the bottom house piece and the blue LED strip piece. I was able to directly link up the negative line from the house to the negative hole by just stitching up the house and then straight through the scrap of felt into the hole. For the positive line, I went up the house and then through to the scrap of felt, where I continued up and around the LED to get to the positive hole. I hope the sketches on my photos help explain!

You can new test and light up your blue LEDs with a strip of conductive thread. I kept mine pinned in place so the LEDs glowed while I cut tiny holes for them out of the front house piece. I stitched around the hole and stitched them down around the LEDs same as with the yellow star. You are done the blue! Phew!


To attache the red LEDs, lay them so they line up with the holes you made in the blue strip, as shown in the first photo below. It was easy to connect the negative and positive lines from the house to the corresponding holes on the LED. Just follow the house lines and check the LED holes to make sure you are connecting the right ones. The positive line will go up beisde the LED to where the positive hole is at the top of the LED. Keep your stitches in the hole you cut out of the blue strip to avoid crossing and shorting circuits. Test it out with a strip of conductive fabric across the rectangle puzzle. You finished all the circuits! I knew you could do it!

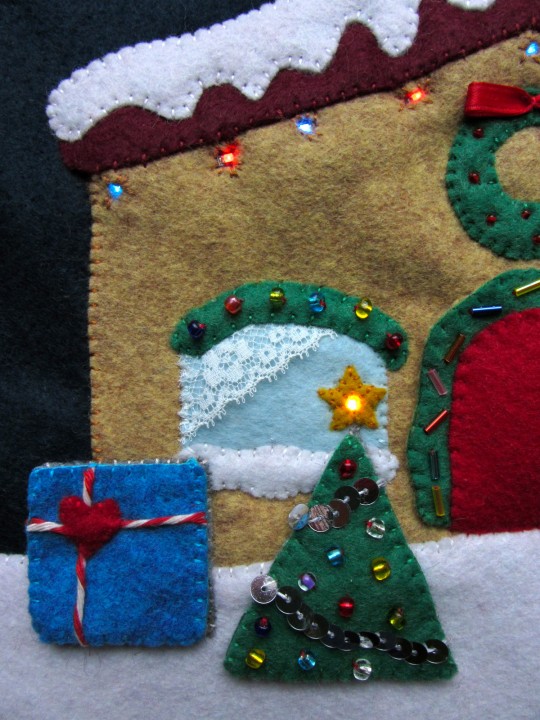
Decorating the House: At this point, after thoroughly testing all the circuits, I sewed the house and snowy ground down to the page. Before sewing the snow to the roof, I layered the chimney behind it. I also stitched down the opening of the door.

If you aren’t using LEDs, you can add a photo window or little surprise behind the door in place of the battery… Santa? A loved one? Whatever you’d like!

For the windows, I cut scraps of vintage lace as curtains, and stitched them down along the outside of the windows. Then I decorated the window garlands with beads and sewed the, down over top.

For the wreath, I decorated it with red seed beads before sewing it to the house. I folded a scrap of red ribbon into a bow shape and stitched it down at the top of the wreath.

If you are not doing LEDs, You can stitch beads or sequins down in place of the LEDs to be the string of lights.

Making the Door: Sew a snap to the house just above the door hole. Sew the matching half of the snap to the back of the tan door garland backing piece. Sew the door to the garland piece and decorate the garland with beads. I also added a sequin doorknob. Sew the front and back pieces of the door flap together and sew it in place. I sewed mine along the bottom instead of the left as it is not there to function as a regular door and that felt more secure. If you are not using LEDs, a regular door would work well, and you might not even need a snap.

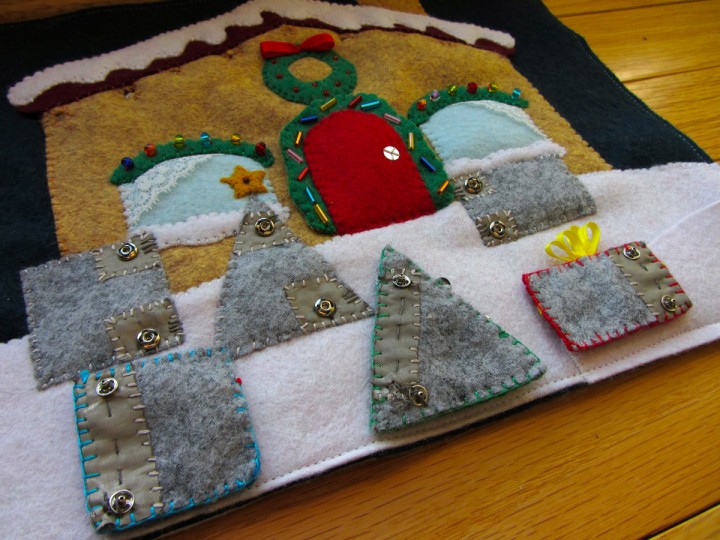
Puzzle Pieces: To start each puzzle piece, you need to make the gray backing that will complete the broken circuits when laid in the correct place. To do this, sew strips of conductive fabric onto the gray backings so that they line up with the conductive scraps on the page AND span the gap. I also added the optional snaps to hold the pieces against the page.

Decorate the fronts of the puzzle pieces however you like! On my tree, I used sequin trim to make a garland and beads as ornaments. On the square and rectangle, note that you will need to show which side is the top of the shape (so the conductive fabric lines up.) I added a bow to the top of my rectangle, and cut out a quick heart shape to Jax would realize which end was up on the square. Sew the fronts and backs together.

Before sewing your page to its backing, add a felt “snow drift” pocket to the corner to hold the shapes while not in use. You don’t want to store them on the puzzle unless you upgrade your battery holder to the one with a power switch.

All done! Not so bad, right? I admit, it was tricky at times. Electrical wiring is not something I learned while pursuing my fine art degree in college, But I am sure proud of myself for figuring it all out! Mad props to my programmer brother for patiently checking all my circuitry drawings for errors!

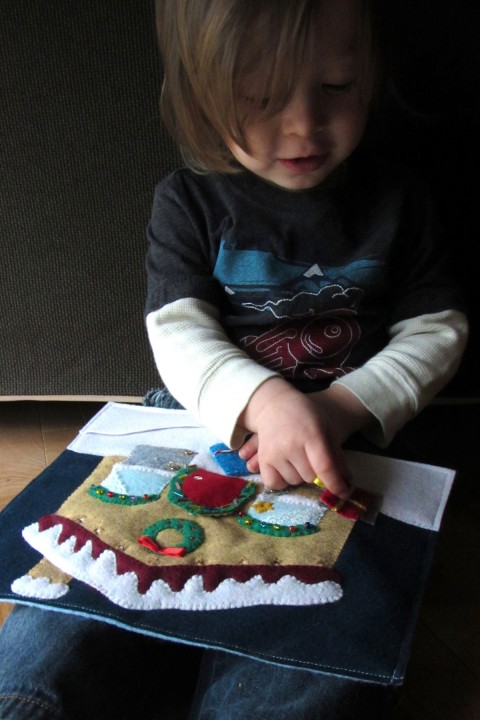
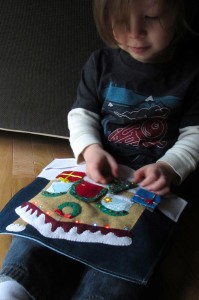
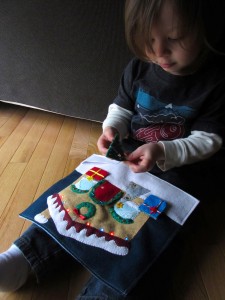
Jax knew exactly what this page was for before I even had all three of the puzzle pieces sewn. He kept asking if the shapes were all done so he could play with it. He can’t do little snaps yet, but this page will help him practice. I close the snaps for him after he solves each piece.


If you make this page, send me a photo! You can email it or post it on the Facebook page. I’d love to see both versions with and without LEDs. Happy sewing!

LED Halloween Jack-o-Lantern Quiet Book Page

I’m so excited to be working with e-textiles again! (The robot page was my first effort.) Quiet books and LEDs can really be a perfect pairing. I really like to include a lot of interaction into my page designs, and what better to add than working lights?

This is a very simple e-sewing project – a perfect one to start with if you want to get the hang of it. And better yet? SparkFun has provided me with 3 $50 gift certificates so you can load up on supplies and create some LED projects of your own! Head to the bottom of the post to enter.

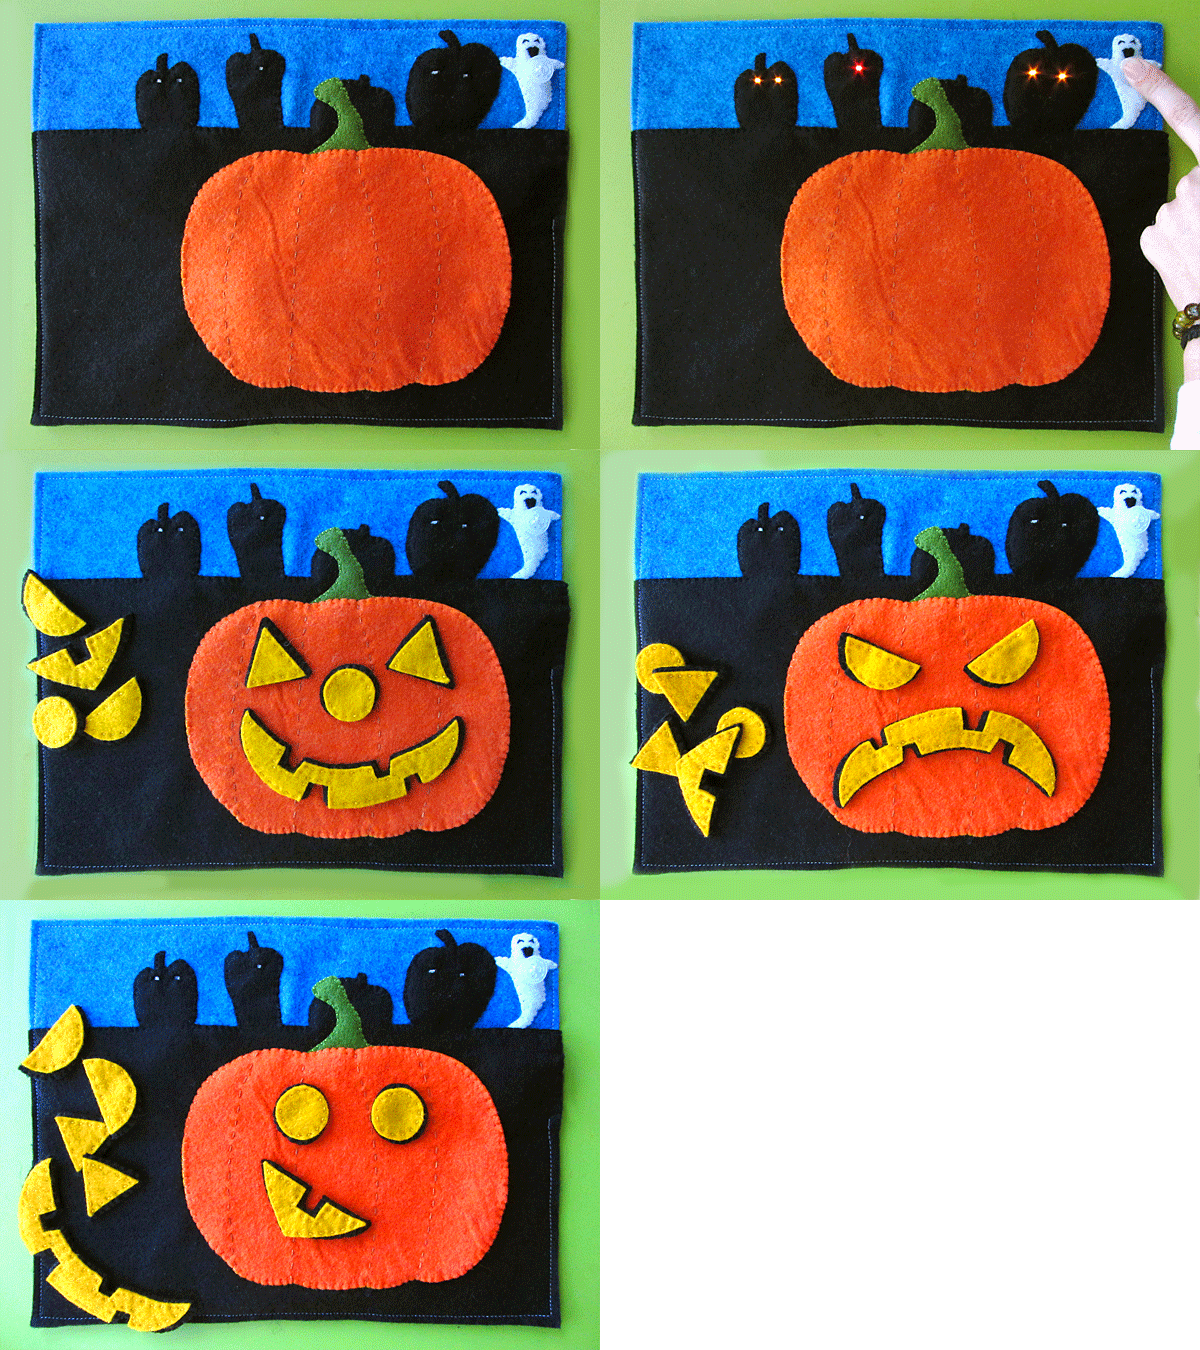
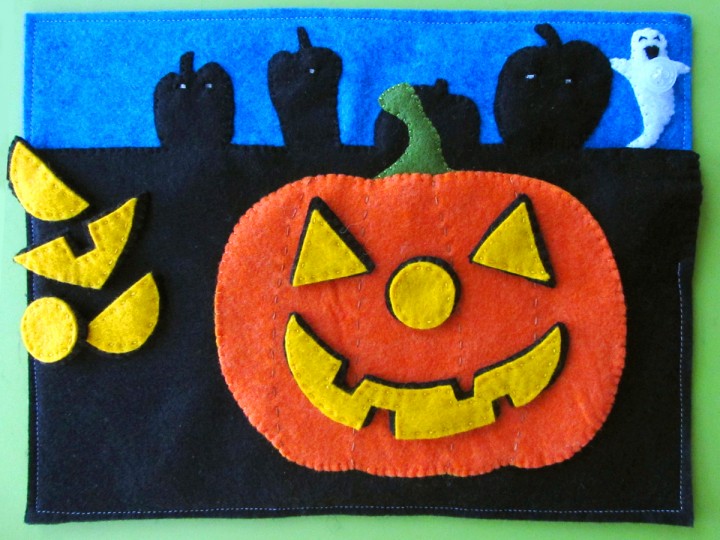
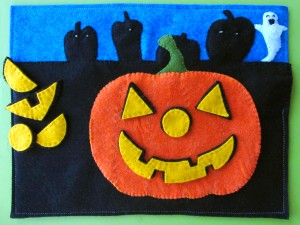
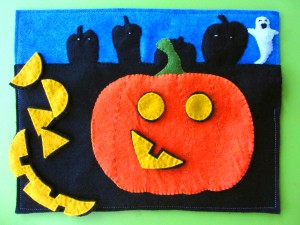
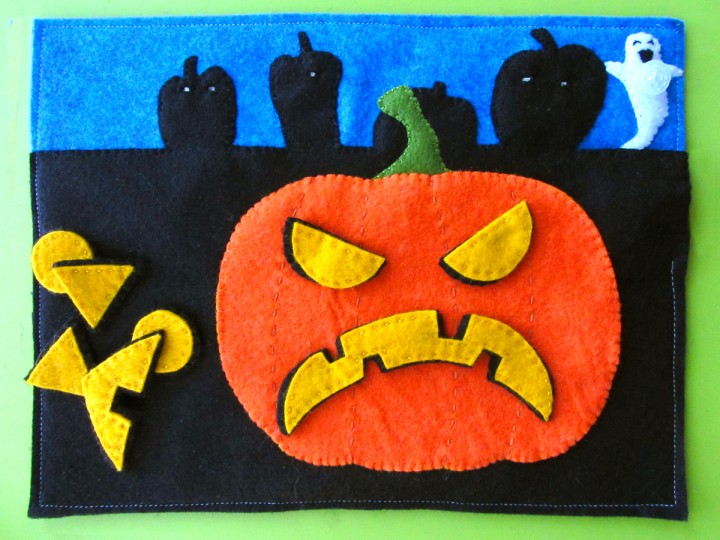
If you aren’t feeling up to the LEDs. this page works great without them. The main activity is a create-your-own jack-o-lantern face with pieces that hide inside the pumpkin.

This is the first in a series of pages I am doing for all 4 seasons. I’ll be doing one regular page and one holiday page for each season.

The beautiful felt for this page is provided by American Felt and Craft. See that beautiful aqua blue with swirls of cobalt it it? When I received samples of their newest colors, I HAD to change my background for this page to Pool Party. It is the perfect twilight sky color. It reminds me of when the sun has just barely set on Halloween night and you go out on the porch to light the candles in your jack-o-lanterns. Perfect. AF&C is having a giveaway on their Facebook page. Hurry and check it out!

What I used:

Start by cutting everything out. Lay the pumpkin silhouettes at the top of a full black sheet of felt and cut away the negative space above them. (See photos.) Pin it on to the blue background, leaving the top loose so you can flip it down if you are adding the wiring and LEDs.

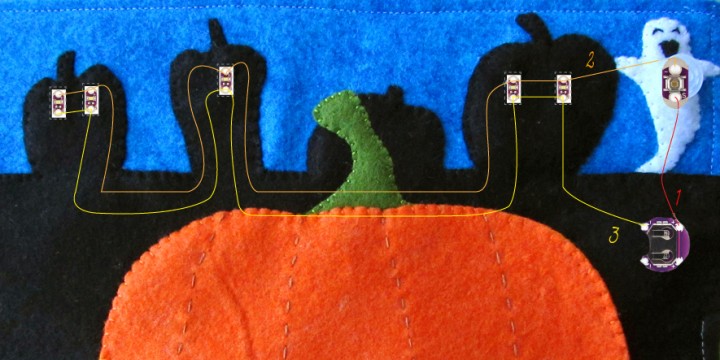
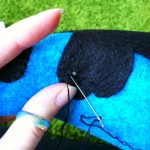
E-Sewing: Start by basting your battery holder in place as shown under the black felt near the edge of your page. Thread your needle with conductive thread and tie a knot in the end. 1. Come up through the top + (positive) hole and make several strong stitches through it. Using the white ghost shape as a guide, do a running stitch up to where the button will be (so that the stitches will hide under the ghost.) Stitch several times through the button board as shown. Tie off  your thread with a knot, making sure the tail is short and can’t touch other threads. 2. Start a new conductive thread and make several stitches through the other hole of the button board. Stitch a running stitch over to the + hole of the first LED and make several stitches in the hole. Continue the + (positive) thread as shown until you’ve gone through all the + holes in a chain. Tie off with a knot and trim the tail. 3. Start a new conductive thread and make several stitch in the top –  (negative) hole of the battery holder. Running stitch over to the negative hole of the first LED and make several stitches. Continue the – (negative) thread as shown until you’ve gone through all the + holes in a chain. Tie off with a knot and trim the tail. 4. Insert a battery into the holder and test the button.

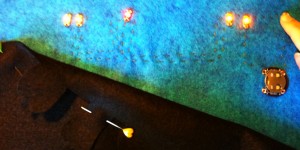
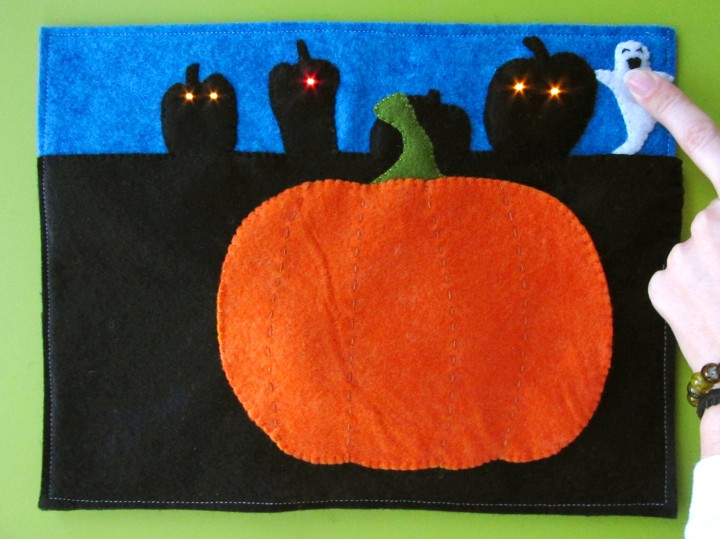
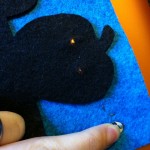
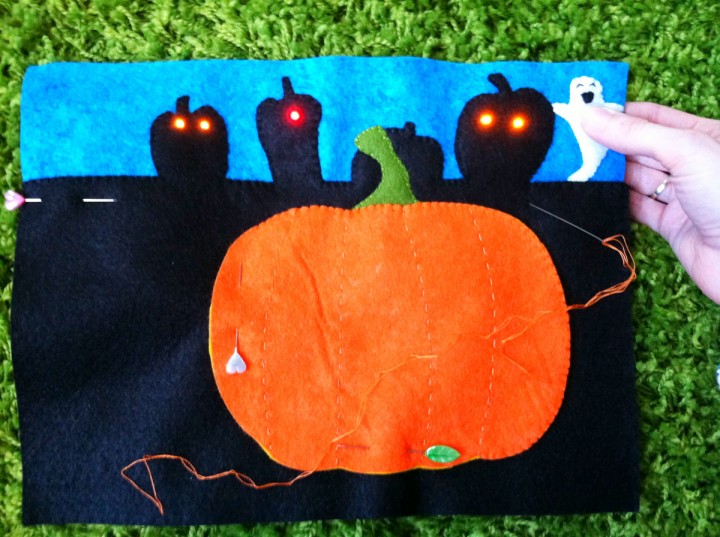
Pumpkin Silhouettes: Lay the black pumpkin shapes down over the LEDs and press the button to see where they are. Cut tiny rectangles for the LEDs to shine through. Stitch around the holes to fortify them, and stitch the short sides of the hole down to the page so the holes don’t move out of place. Stitch around all the pumpkins, but leave the straight section between the far right pumpkin and the edge of the page unstitched.


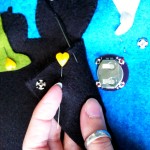
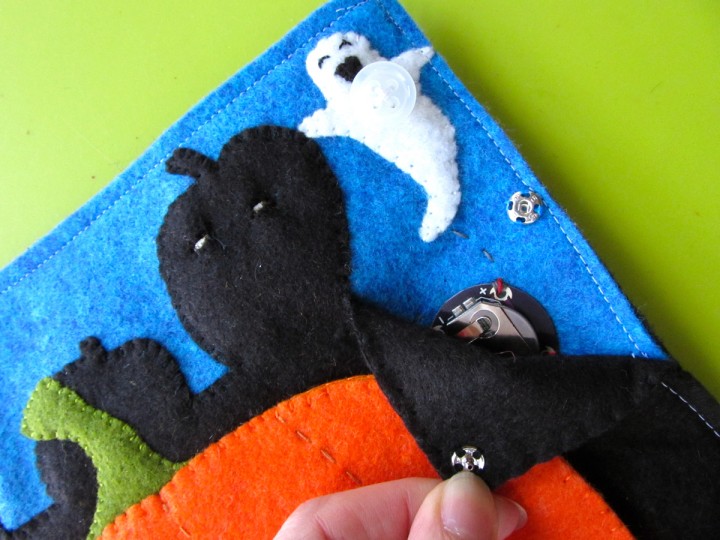
Cut a square of felt to be the lining of the little flap you left unstitched over the battery holder. Add half of  snap to the edge of the page (leave room for the edge seam) and add the other half to the lining. Sew the lining in using a blanket stitch on the two exposed edges and baste along the other two. (I basted by making long stitches on the inside of the flap and tiny stitches on the visible side.)

Ghost Button: Sew a scrap of black felt on to be your ghost’s mouth. I made mine a happy ghost. For his eyes, I made curved stitches. Find a white button with a convex back (so that the back curves out like the bottom of a bowl.) Test placing the button on top of the LilyPad button board and pressing lightly. If it turns on the lights, you have a winner. Sew the button in place on the ghost so it lines up with the button board, then sew around the ghost to secure him the the page.

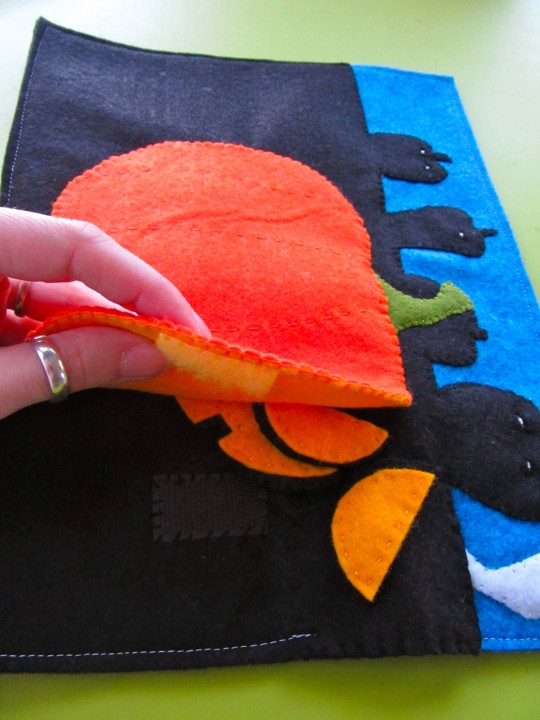
Pumpkin: Sew the stem down to the page. I didn’t bother sewing the base of the stem, as it gets hidden under the pumpkin. Take your orange pumpkin piece and sew a running stitch to indicate all the folds in its shape. I used an orange-brown thread. Sew some yellow hook & loop tape to the inner yellow pumpkin piece (see the pocket photo below.) Pin the two layers together and sew a blanket stitch along the outside of the far right segment of pumpkin. (You’ll be sewing the opening of the pocket. Mine went from the bottom of the far-right fold line to the top of it. Pin the pieces to the page and sew around the rest attaching it to the page as a pocket. Sew some black hook & loop tape down to the page so it lines up with the yellow.

Jack-O-Lantern Pieces: For each jack-o-lantern piece, I sewed the yellow shape down to some black felt using a running stitch. Cut out around the shape so that the black is a bit wider than the yellow. Cut another piece of black felt to match and sew it on as a backing.


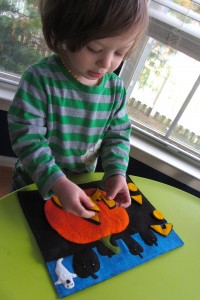
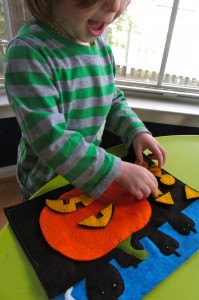
Jax adores this page and really loves making different emotions with the face shapes. He spent a whole bedtime routine the first night saying “He’s mad!!” and laughing hysterically over his memory of the smile turned upside down. You could add shapes of your own. There is plenty of room in the pocket!


The Good Stuff

I’m excited to announce a really great giveaway! I reached out to SparkFun recently because I think e-textiles are a really great match for quiet books. My next page will be very interactive and provide feedback to the child while they play. SparkFun has generously offered up three $50 gift certificates to their online store. (You will need to have at least $50 pre-tax and pre-shipping in your cart for the code to work.)

To enter, leave a comment on the blog post below. Make sure you include your email address in the right field so I can contact you if you win.

The Boring Stuff: NO PURCHASE NECESSARY. Sweepstake is open to those age 18 and older. Entries must be received between 12:01am 10/24/2012 and 12:01 10/31/2012. Three (3) winners will be chosen on 10/31/2012 and will each win one (1) $50 code for sparkfun.com. The codes require that you have at least $50 pre-tax and pre-shipping in your cart to work. International shipping charges and fees may apply. See the SparkFun website for details. The number of eligible entries received determines the odds of winning. If a potential winner forfeits or does not claim the prize, the prize will be re-awarded, at the sweepstake host’s sole discretion. All prizes will be awarded. Neither Imagine Our Life, prize sponsor SparkFun nor their affiliates will have any liability whatsoever for any injuries, losses or damages of any kind caused by any prize or resulting from acceptance, possession, use and/or misuse of any prize or participation in this promotion. Acceptance of a prize shall be construed as the winners’ consent to having their first name and last initial posted on the sponsor’s site following the contest duration. VOID WHERE PROHIBITED BY LAW.

Good luck! If you sew this page, with or without the LEDs, please send a photo or post it on the Facebook page. I’d love to see it!

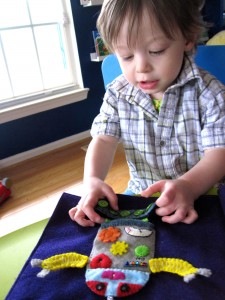
LED Robot Quiet Book Page

Quiet books, welcome to the 21st century!

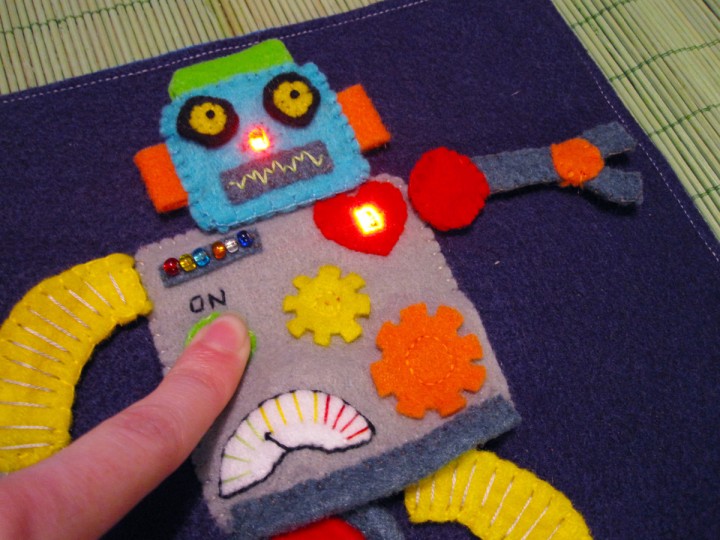
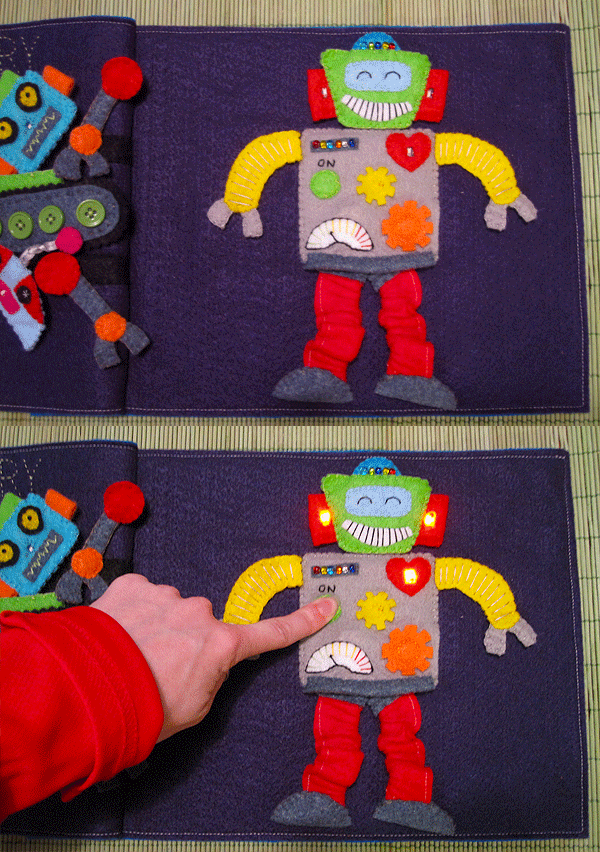
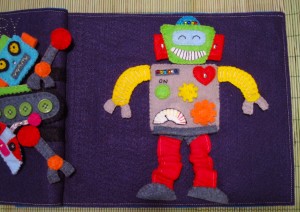
I’ve wanted to create a robot page ever since I learned what a quiet book is. I’m very glad I waited so long to really think it through, because I learned about e-sewing. E sewing is using special electronic components and conducive thread to create interactive textile projects. In simple terms? Push a button and my robot lights up!!


E-sewing is easy, but you have to make your circuits just right, or it will not work. The LilyPad system I used can be spot washed, which is all I’d recommend for a detailed quiet book. I did read somewhere that the conducive thread will eventually need to be replaced years down the road, so that is something to keep in mind. I sewed my thread to a piece of felt and not the actual page, to make it easier to pull off should I need/want to run new lines in the future. Make sure you cut your knot tails short on the back of your work so they don’t touch anything else. If threads from two different parts of your circuits touch, you will have a short and it won’t work.

This page can certainly be made without the electronic components. It is still fun to mix and match the robot parts! My tutorial assumes you are installing the LEDs.


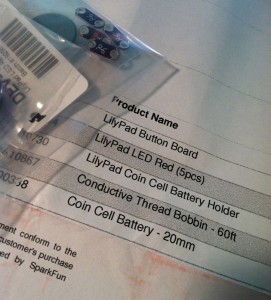
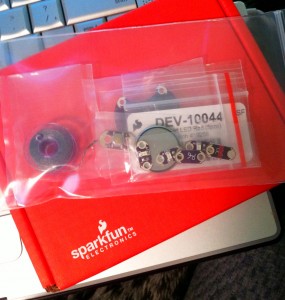
My supply list:

The Body

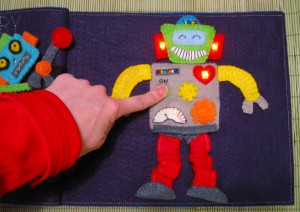
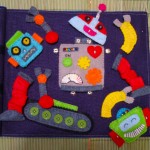
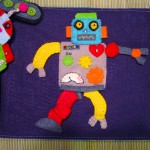
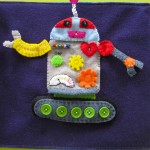
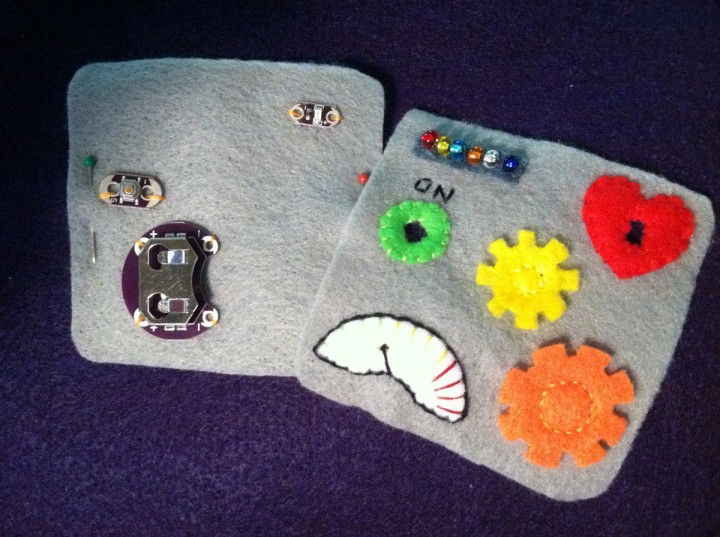
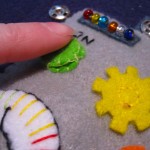
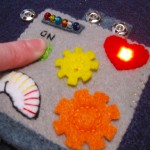
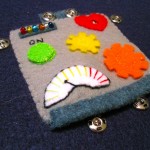
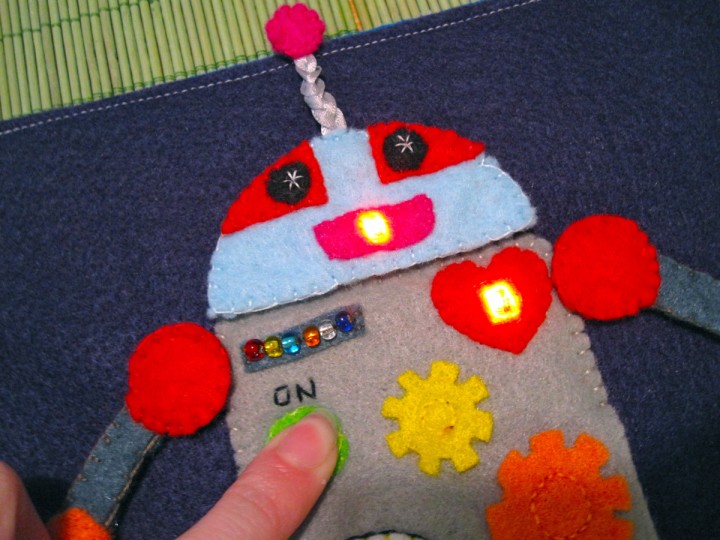
Start out with your body squares. Lay out the decorations on the front piece and the battery holder, button and 1 LED on the inside piece. Lay all the parts out so the + is on the left and the – is on the right, like the photo below. The button and LED will need to line up with the front. Cut a circle out of the green button piece so the button can stick through. You’ll make a button top later. Cut a tiny rectangle out the the heart for the LED. I stitched around both holes to keep them from stretching. Sew down your front pieces. On the white meter, I stitched green, yellow and red lines, as well as a black arrow. For the gears, I stitched them down with a circle in the center of each. Sew some seed beads down along the gray rectangle. I made 2 stitches through each bead for strength. Confirm the placement of the electronics and baste them down. Baste a scrap of felt to the top as the robot’s neck and sew down some snaps.

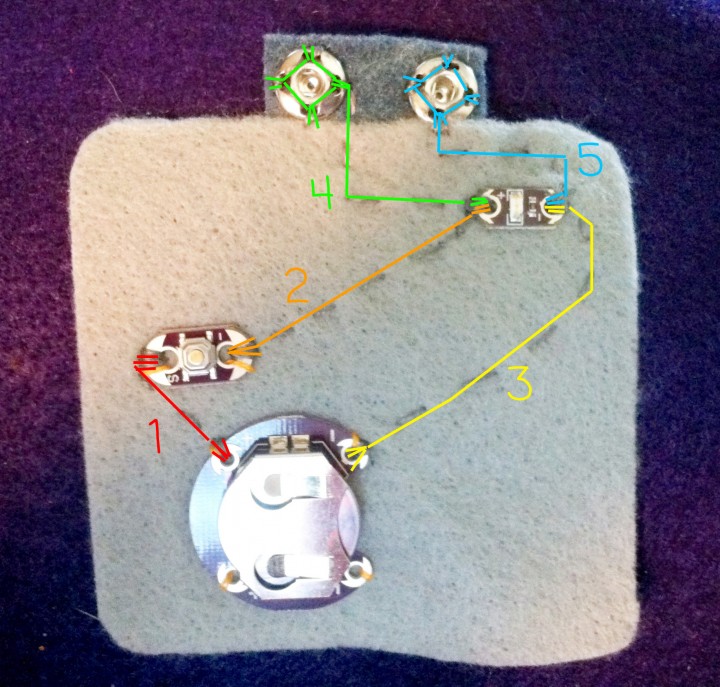
For each of the next steps you will need to thread a large-eye needle with a length of conducive thread. I only used about 12″ – 18″ at a time. Tie a knot in the end. Make several stitches in the upper + hole of the battery holder. Use a simple running stitch (looks like a dashed line) from the battery holder + hole to the button’s + hole. Make several passes through the hole and tie off. Start a new thread and make several stitches in the button – hole. Running stitch from there to the LED + hole. Make several stitches in that hole and tie off. Start a new thread and make several passes through the LED – hole. Running stitch from there to the battery holder’s top – hole. Stitch through the hole several times and tie off. Steps 1 – 3 complete a circuit. You can put your battery in and test the LED by pressing the button.

Next we need to create half of a second circuit for the head LEDs. The additional circuit needs to be piggy-backed off the first LED. If the circuit is a diamond shape, the body LED is the bottom point, the neck snaps are the left and right points and a head LEDs will be the top point when snapped on. Start a new conducive thread and make several passes through the LED + hole. Running stitch up to the left snap. Make several stitches through all 4 holes on the snap, and make long stitches between each hole in a diamond shape. Tie it off. The idea is to get a lot of coverage with the thread on the snap. Start a new thread and make several passes through the LED – hole. Running stitch up to the right snap and sew it just like the first snap. Tie off your thread. Having the second circuit incomplete should not affect your body LED’s circuit. It should still light when you push the button.


Layer some light cardboard cut a bit smaller than your body under the inner body piece and stitch it down to the page. Since quiet books are squishy, the cardboard will make it a bit easier to press the button. Next we make a button cover. Cut a circle of cardboard that is slightly larger than the button hole in your front body piece. Cut two felt circles that are large enough to cover the cardboard and sew it in between them. Lay the button cover over the button hole and sew it down with four stitches: top, right, bottom and left. Lay your body front over the inner body and test that the button cover presses the button. The button should be sticking up through the hole, making the cover press it easily.


Sew a strip of felt along the bottom of your front body piece to finish it off. Sew the front body piece down to the page, leaving the bottom and the lower half of the right side unstitched. You need to be able to lift up the front to get to the battery for changes. I added a small snap to the corner.

Sew snaps on (with regular thread) for your arms and legs.

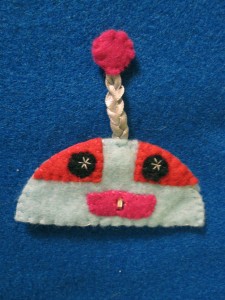
Robot Head 1


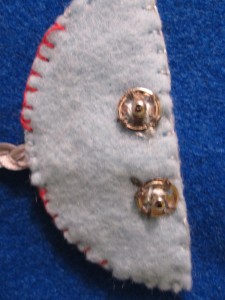
Sew down your two snaps to the back side of the back piece of head 1. Make sure you use the opposite snap parts as the ones you sewed to the page! (I used the “male” sides on the body parts and the “female” side on the page.) Flip the back piece over and baste your LED down with the + on the left and the – on the right. Have the LED part line up with the center of the mouth.

Thread your needle with conducive thread and sew through the + hole of the LED several times. Make a stitch or two to connect the thread to the left snap (the one on the left when you are looking at the robot’s face.) Tie it off. Start another conducive thread and sew through the – hole of the LED several times. Make a stitch or two to connect the thread to the right snap. You can now test the head by snapping it to the body and pressing the button. Both the body LED and head LED should light up.

Decorate the front head piece. Cut a small rectangular hole in the front head piece for the LED to stick through. Cut a matching hole in the mouth piece. I made red eye pieces with black felt circles. I stitched little white starburst shapes in the eyes for extra cuteness. I sewed the mouth down and stitched around the hole for strength. For the antennae, I braided some gray ribbon and sewed pink circles of felt to the top. Sew the front and back pieces together with the antennae in place.

Robot Head 2


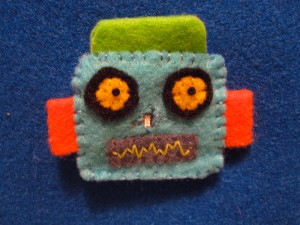
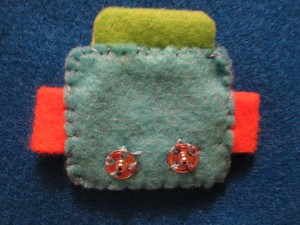
Sew the snaps and LED onto the back piece of head 2 in the same way as head 1, but position the LED to be the nose. Decorate the front piece. Cut a hole for the nose LED and sew around it for strength. I sewed a zigzag line on the mouth piece in lime green. My eyes are yellow circles on top of black circles, with a black French knot in the center. The ears and hat pieces are folded but not sewn, so they are loops that are open on the sides. Sew the front to the back.

Robot Head 3


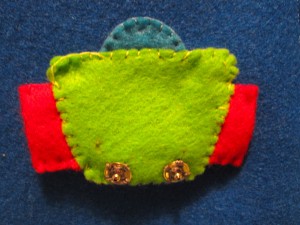
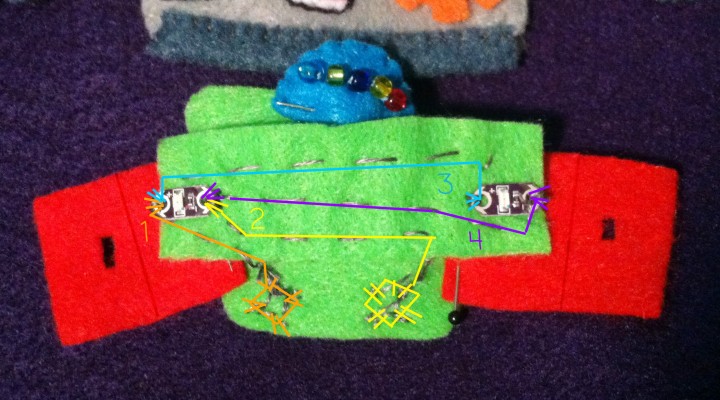
This head is a little trickier because it has 2 LEDs. The first LED (I did the one on the left) will be sewn to the two snaps like the previous heads. The second LED will be sewn in a circuit to the first LED. Baste the snaps down to the back of the back head piece. The ears are folded pieces of felt. Pin them in place to figure out where the holes need to be for the LEDs. I cut a scrap piece of felt to lay inside the head and do all the conducive stitching (except the stitches that are on the snaps) so the back of the head doesn’t look too messy.

Baste down the two LEDs with the + sides on the left. Thread your needle with conducive thread and make several stitches in the + hole of the LED on the left. Running stitch down the the snap on the left (when looking at the robot’s face) and stitch on the snap as before. Tie off the thread. Start another thread and make several stitches in the – hole of the same LED. Running stitch over to the right snap and sew on the snap as before. Tie off the thread. If you test the head on the body at this point, the left LED should light up. Start a new conducive thread and make several stitches in the + hole of the same LED you’ve been stitching in. Running stitch over to the + hole of the right LED and make several stitches. Tie it off. Start one more conducive thread and make several stitches in the – hole of the first (left hand) LED. Carefully running stitch over to the – hole of the right LED. You don’t want the running stitches to touch any of the others (the stitches you make in the LED holes are fine touching each other.) Make several stitches in the – hole and tie off. Testing the head now should light up both LEDs.

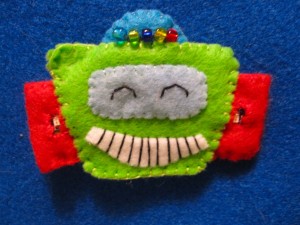
Decorate the head. Sew around the LED holes for strength. Fold the ear pieces down and sew the sides shut. For my mouth, I made long black stitches for teeth. For his hat, I sewed seed beads along the bottom (leave room to stick the hat in between the head pieces) and the sewed the two sides together. I used light blue for the eye piece and stitched arches for the eyes. Sew the front and back of the head together.


Other Parts

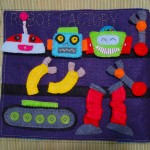
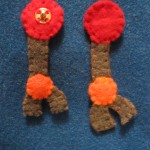
For the first set of arms, long gray pieces are layered between circles for the shoulder and wrist joints. Gray claw shapes are layered in the wrist joint.

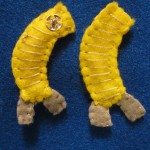
The yellow arms have the claw shapes layered into the bottom. I made long stitches to make the arms look like tubes.

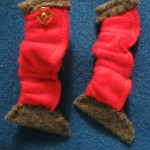
For the stretchy legs, I cut folded rectangles an inch or so longer than I wanted them to be. With a piece of elastic inside the folded felt, sew across the top, catching the elastic. Continue sewing down the side (I did all this on the machine). When you get the the bottom, stretch the elastic tight before sewing across, again catching the elastic. When you let go, the leg with scrunch up. Clip off the extra elastic. Sew scraps of gray to hide the elastic at the top. Sew the foot pieces to the bottoms.

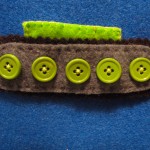
For the tank-style tread, cut out the black tread with pinking shears. Add a row of buttons to the gray piece and sew it down. cut two scrap rectangles to sew your snaps to. Sew them together and attach it to the back of the tread so it can hang down below the body.

Spare Part Storage

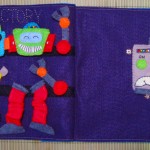
On the facing page, I stitched the words “ROBOT FACTORY” by pinning the word template down and sewing right through the paper. I then ripped the paper away gently. I sewed strips of black felt down to make “shelves” and added snaps to hold all the pieces. Because you have the “female” halves of the snap on both the body and the storage shelves, you will have some orphaned “male” snap halves.

All done!

I love, love, love how this came out!! Hopefully my tutorial and diagrams make sense. This is definitely the most complicated page I’ve had to explain. It was very worth it. I haven’t let Jax play with it much because it is for our vacation, but he already loves to push the button and choose robot parts.


If you make this page, leave a comment with your link or stop by the Facebook page and post a photo. I’d love to see yours!

Are you ready to take it to the next level? Here’s my LED robot *costume* tutorial!