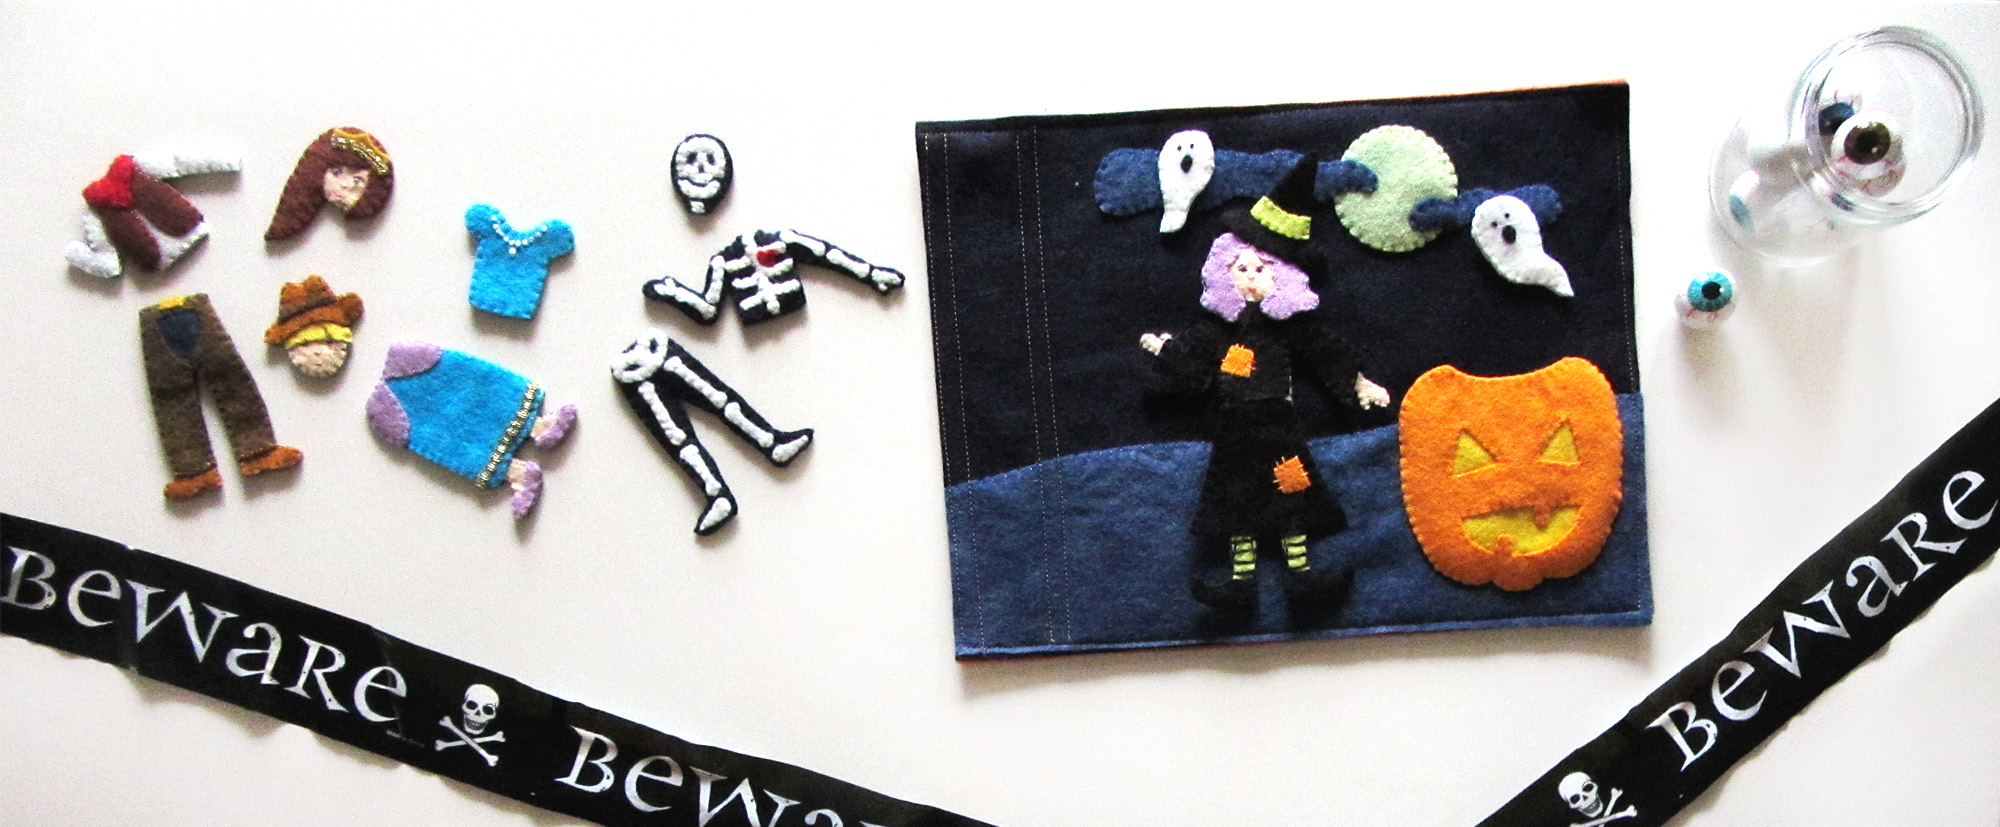
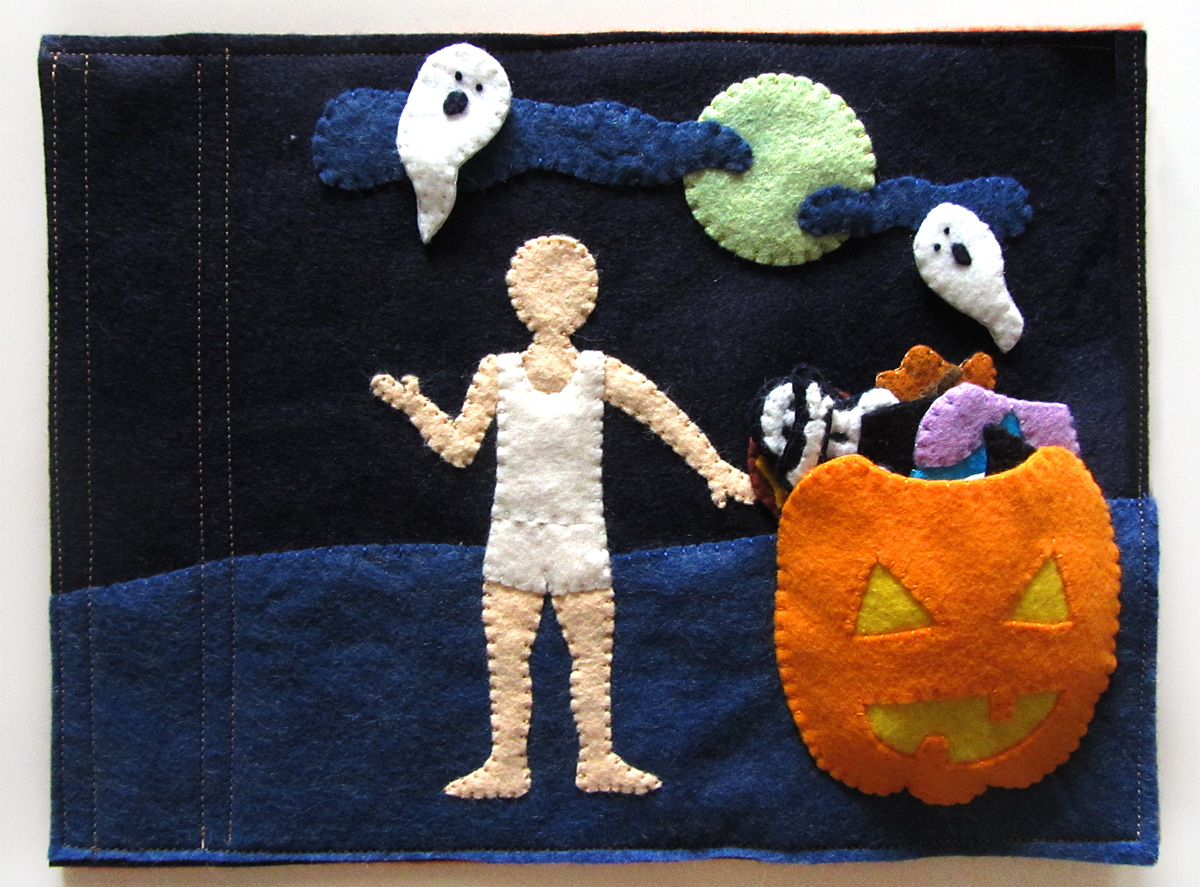
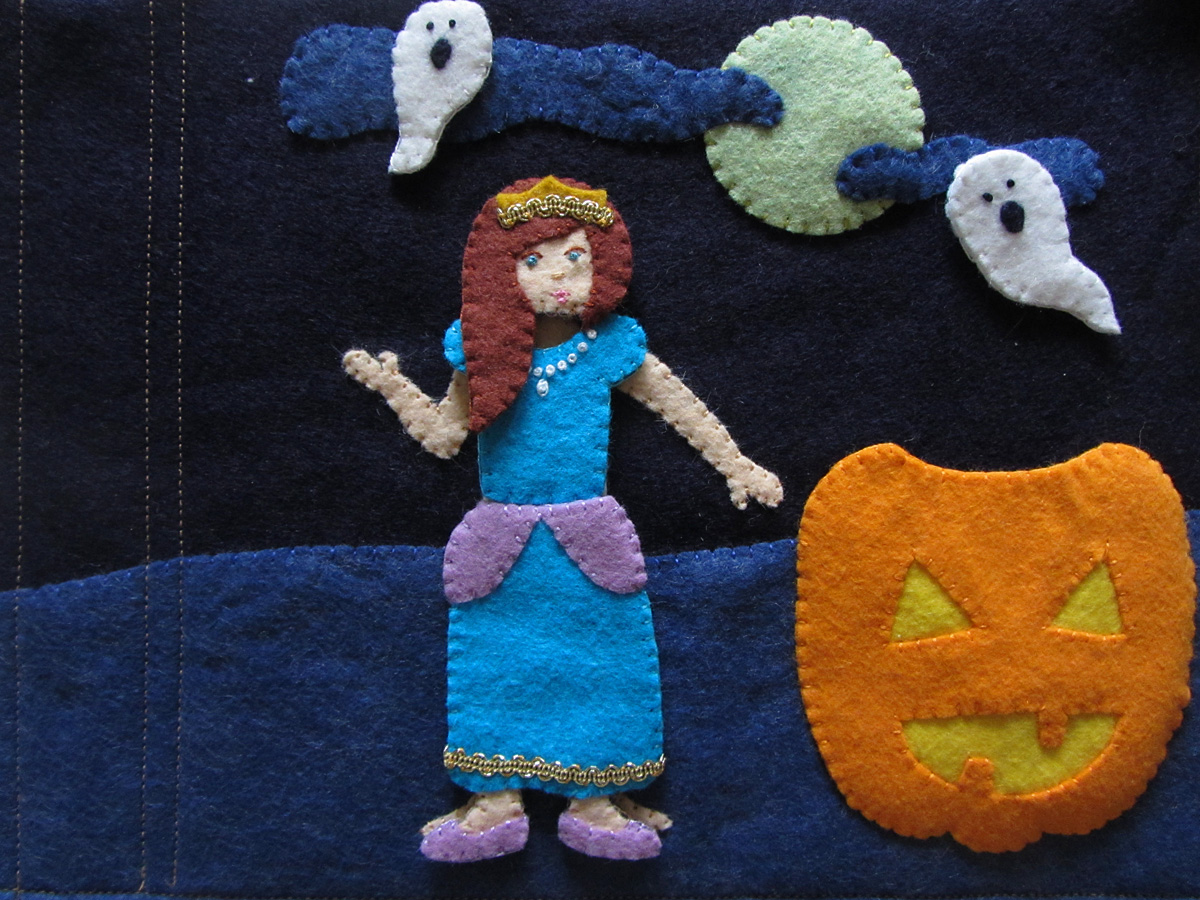
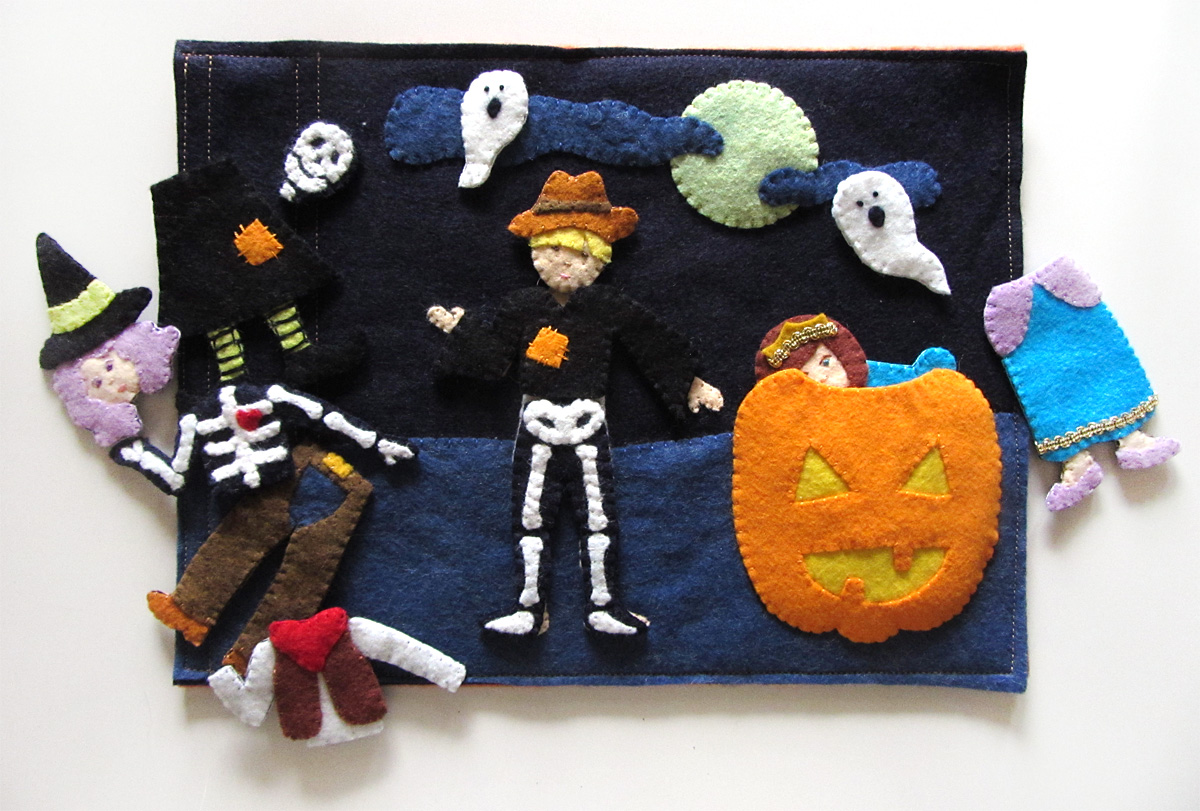
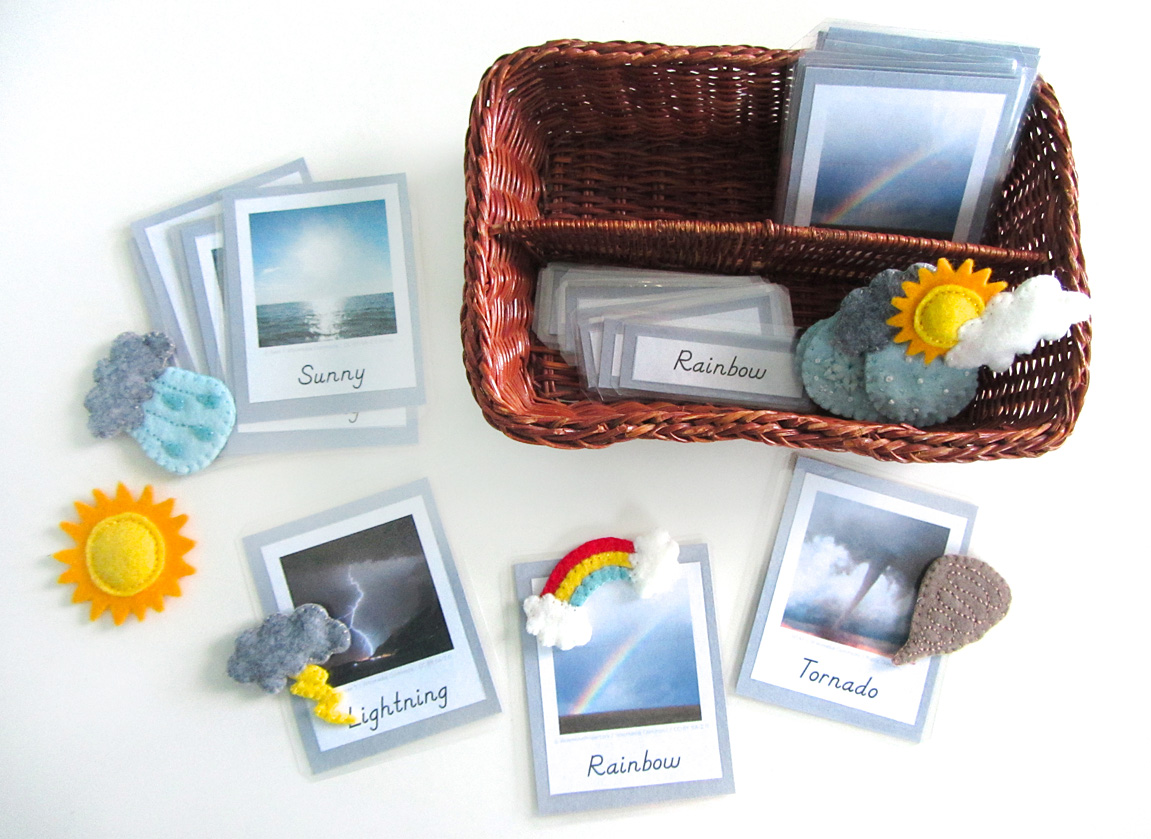
 This is a fun quiet book page that would be a great addition to a holiday, seasonal or month activity book. The free pattern comes with 4 mix and match costumes, and you can easily make you own. There is a jack-o-lantern pocket for storage and two ghost friends that snap off.
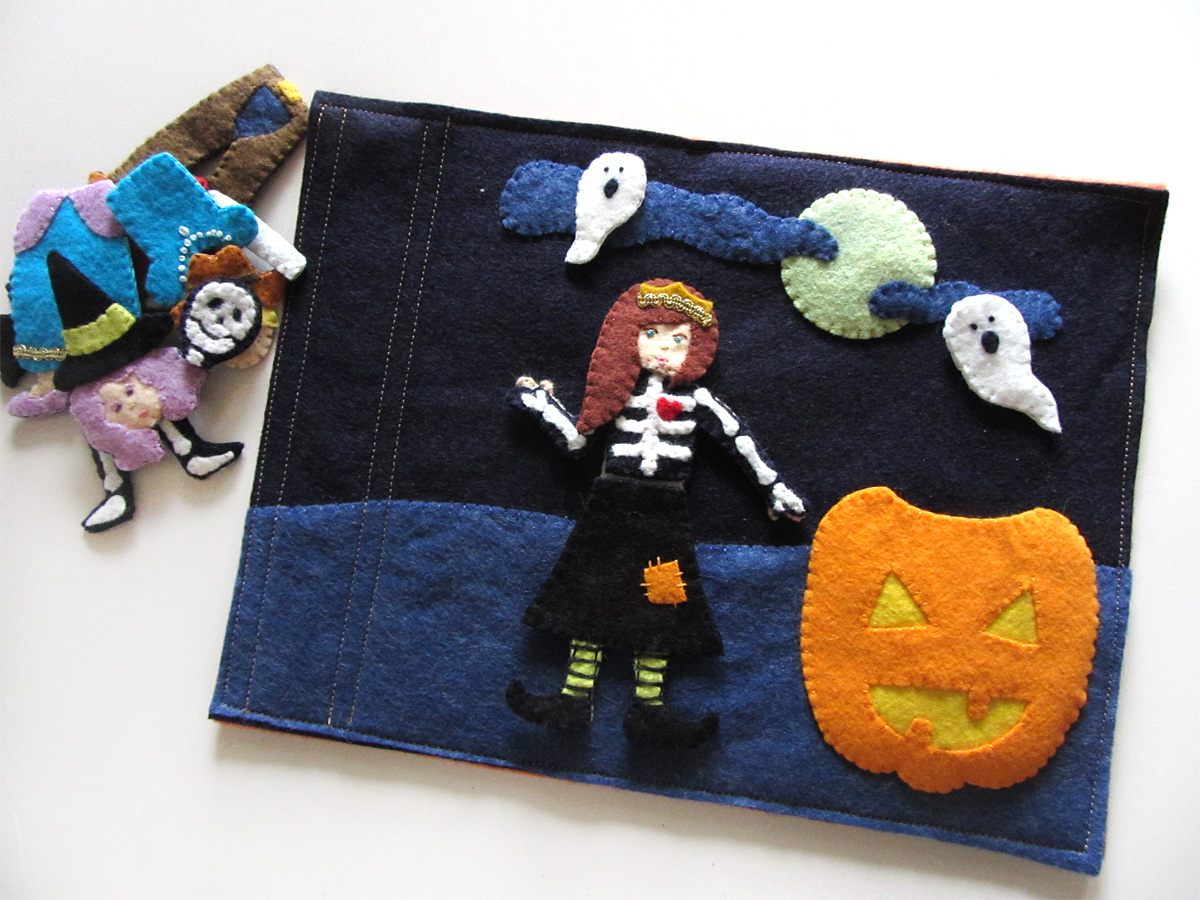
Children can sort the costumes into their matching sets or have fun making silly combinations. This page would work great with my Halloween Jack-o-lantern page!
 What I Used:
- The Pattern
- Felt (in Wild Blueberry, Favorite Jeans, White, Black, Bisque, Orange Juice, Lemon Meringue, Honeydew, Limeade, Monkey, Ice, Lavender, Gold Nugget, Tobacco, Sweet Potato and Big Apple)
- Backing Felt (in Embossed Pumpkin) optional
- Scraps of gold trim
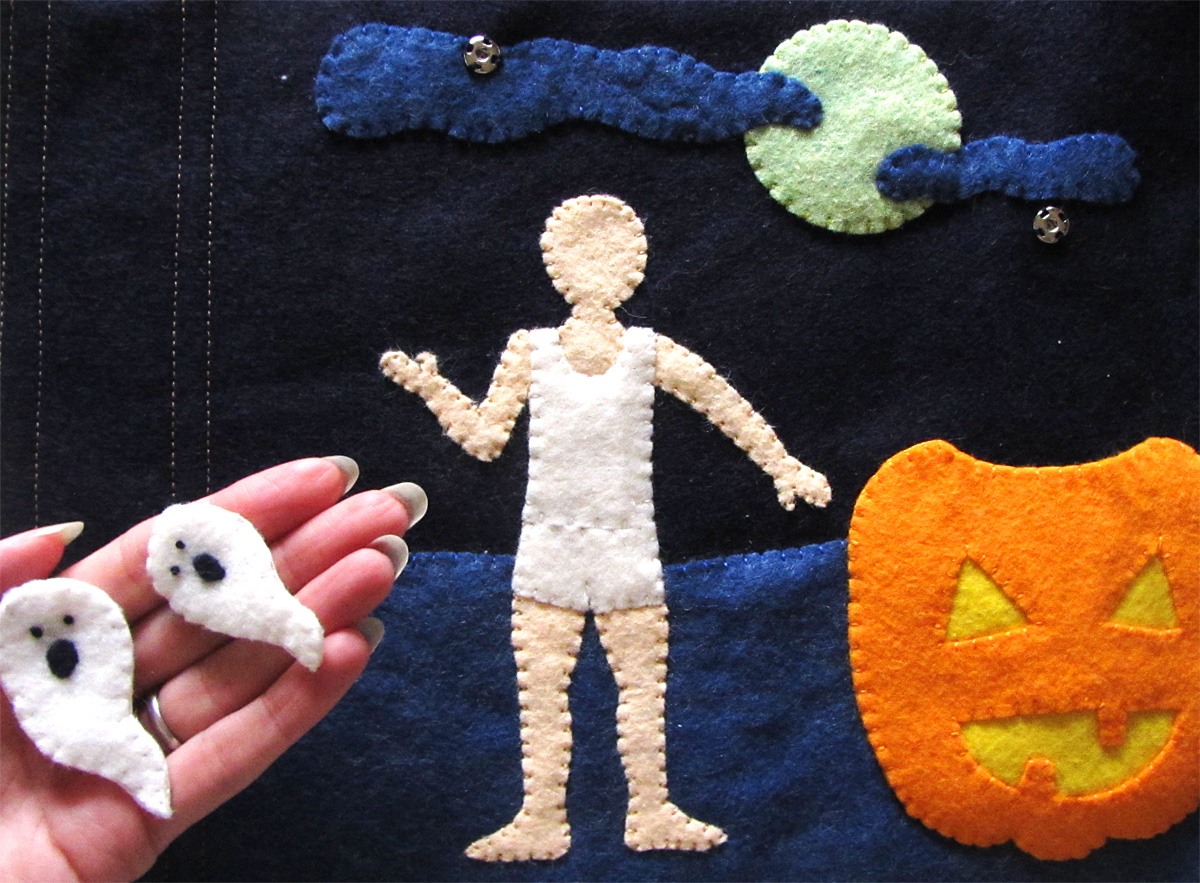
- Sew-on Snaps (two for ghosts; you can add snaps to the clothes and body if you’d like)
- Felt Glue

Are you ready to sew a fun Halloween costume match page?
Background
I started by cutting a 12″ x 4″ strip of denim blue felt into a sloping hill, then I sewed it down to the background. (When adding details to your page, be mindful of the way you bind your books. My way requires 2″ of width on the binding edge.) I then sewed down the moon and two clouds. Sew two snaps down where you want the ghosts to be. Pin the body and undies in place and sew them down. If you’d like to add snaps or Velcro to the backs of your costume pieces, sew them to the head, torso and groin of the body. (If you use Velcro, I recommend the snag-free kind for use with felt.)
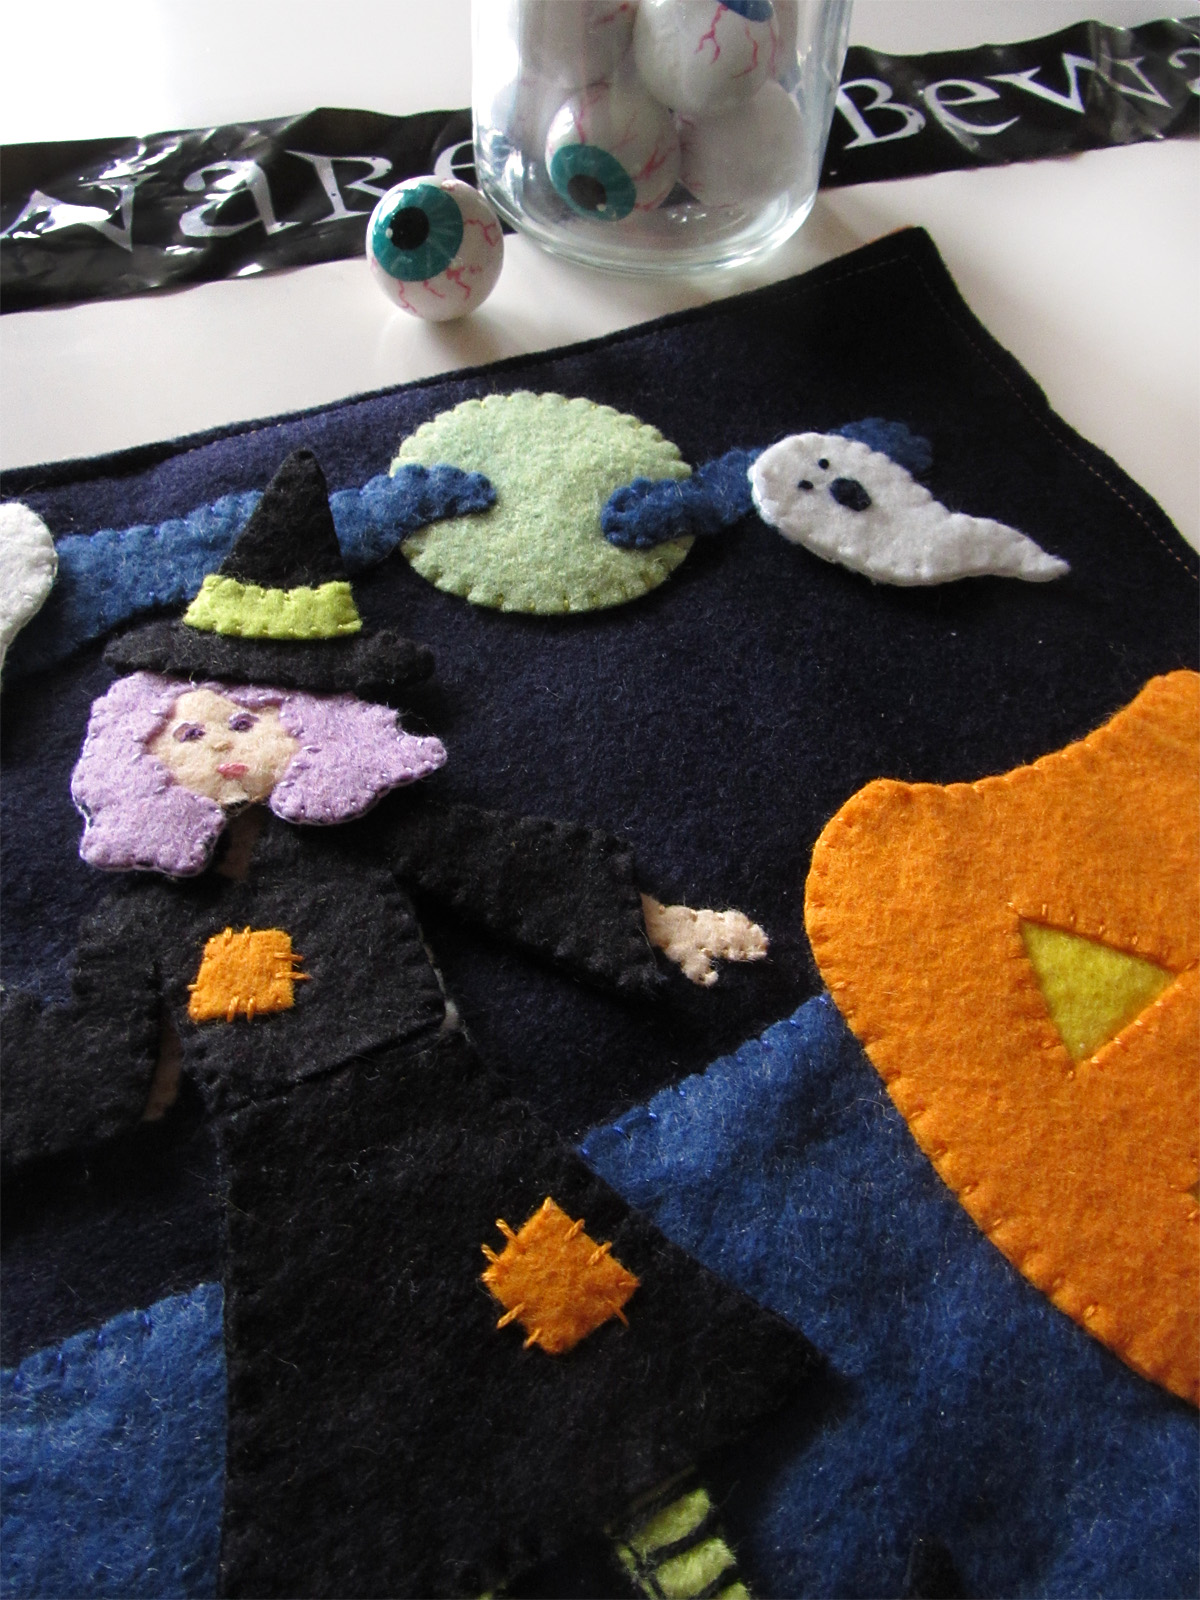
 Ghosts
For each ghost: Sew the other half of the snap onto the back of the ghost. On the front, make two French knot eyes and sew down the mouth. Sew the front and back together with a blanket stitch.
 Pumpkin
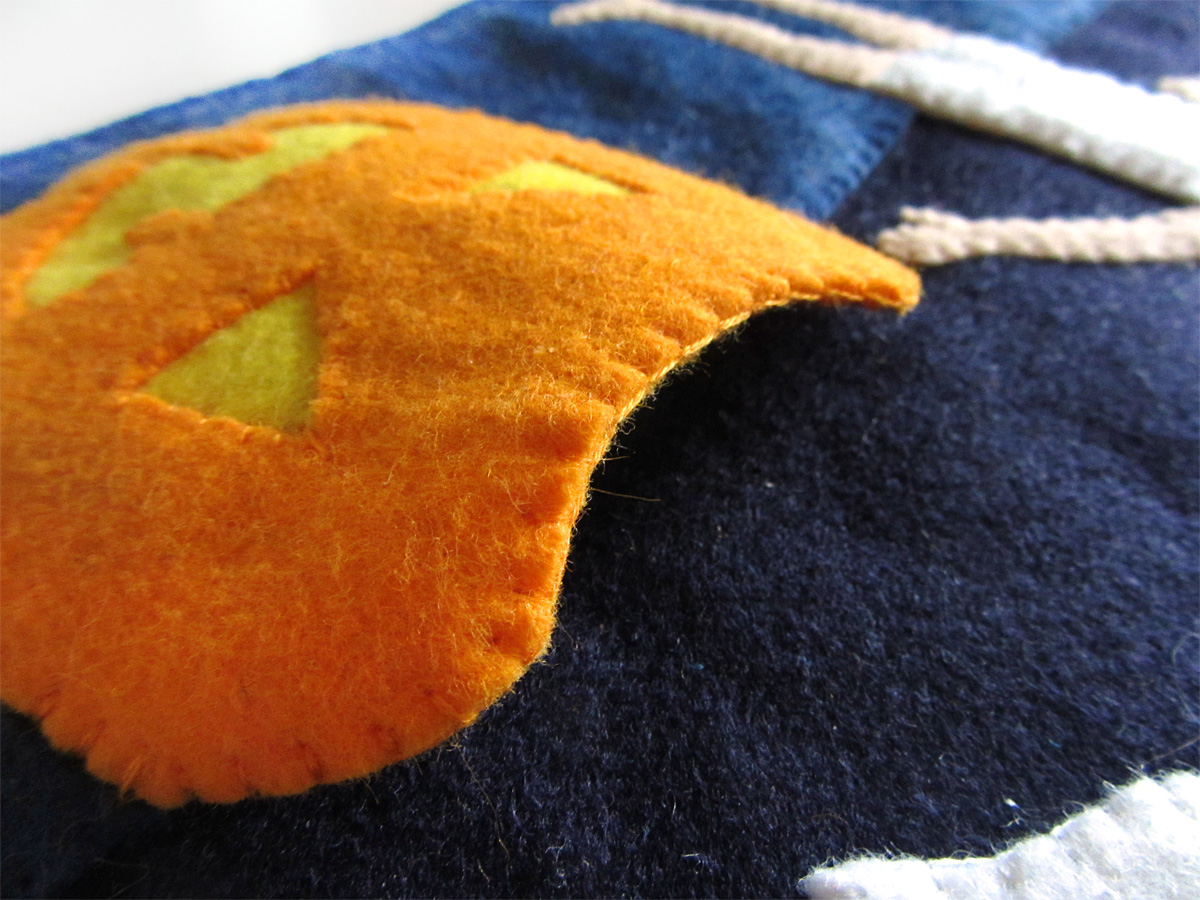
To make the pumpkin pocket, I cut a scrap of yellow felt large enough to go behind the cut-outs of the pumpkin face. I tacked it behind the face with a bit of felt glue, then sewed it on around the eye and mouth holes. I then layered another pumpkin piece behind the yellow to hide it, and sewed both layers together across the curved top with a blanket stitch. I positioned the pumpkin onto the page and sewed through both it and the background the rest of the way around. This makes a pocket that is open at the top.
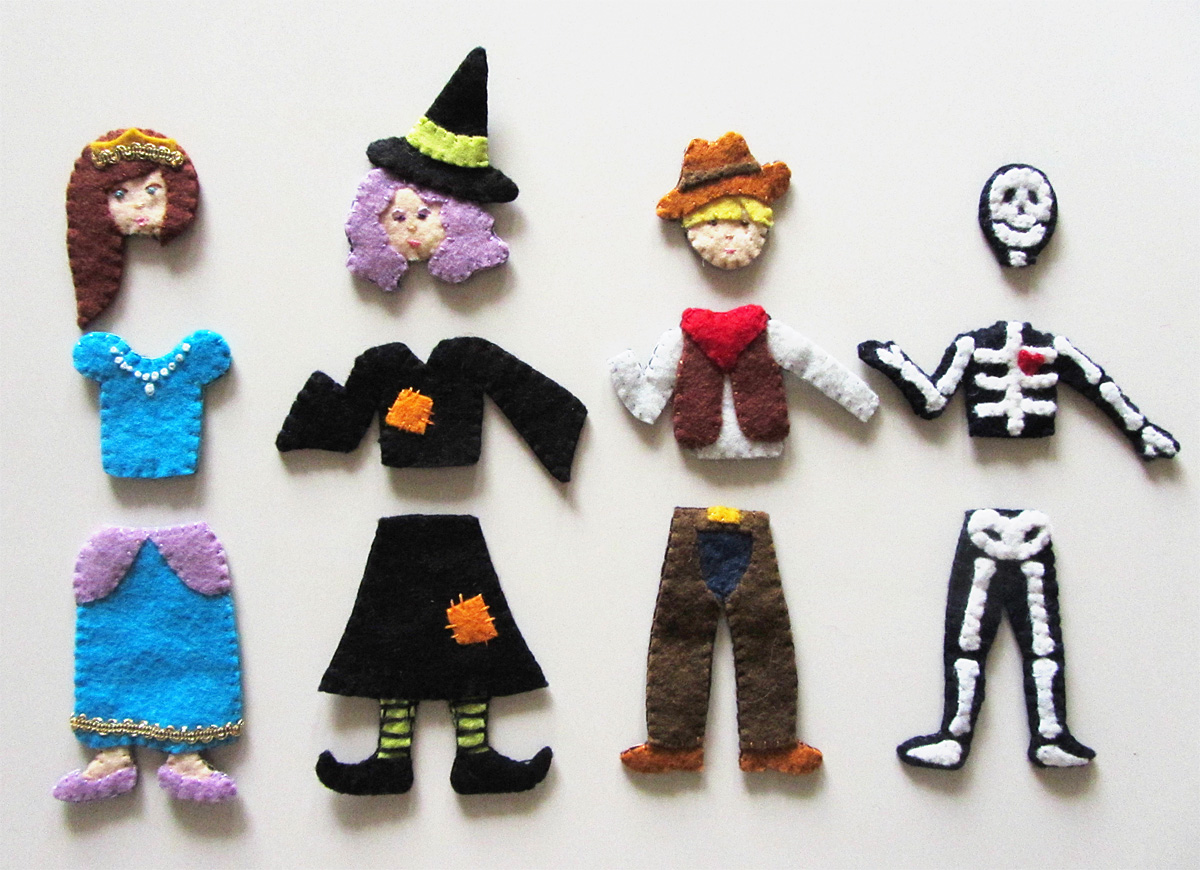 Costumes
To finish each costume piece: cut out a piece of backing felt to match the shape of your final piece, then sew it on with a blanket stitch, matching your thread colors to the felt. (If you are adding Velcro or snaps, do it before the blanket stitch.) I used the same “wild blueberry” dark blue felt as my costume backings.
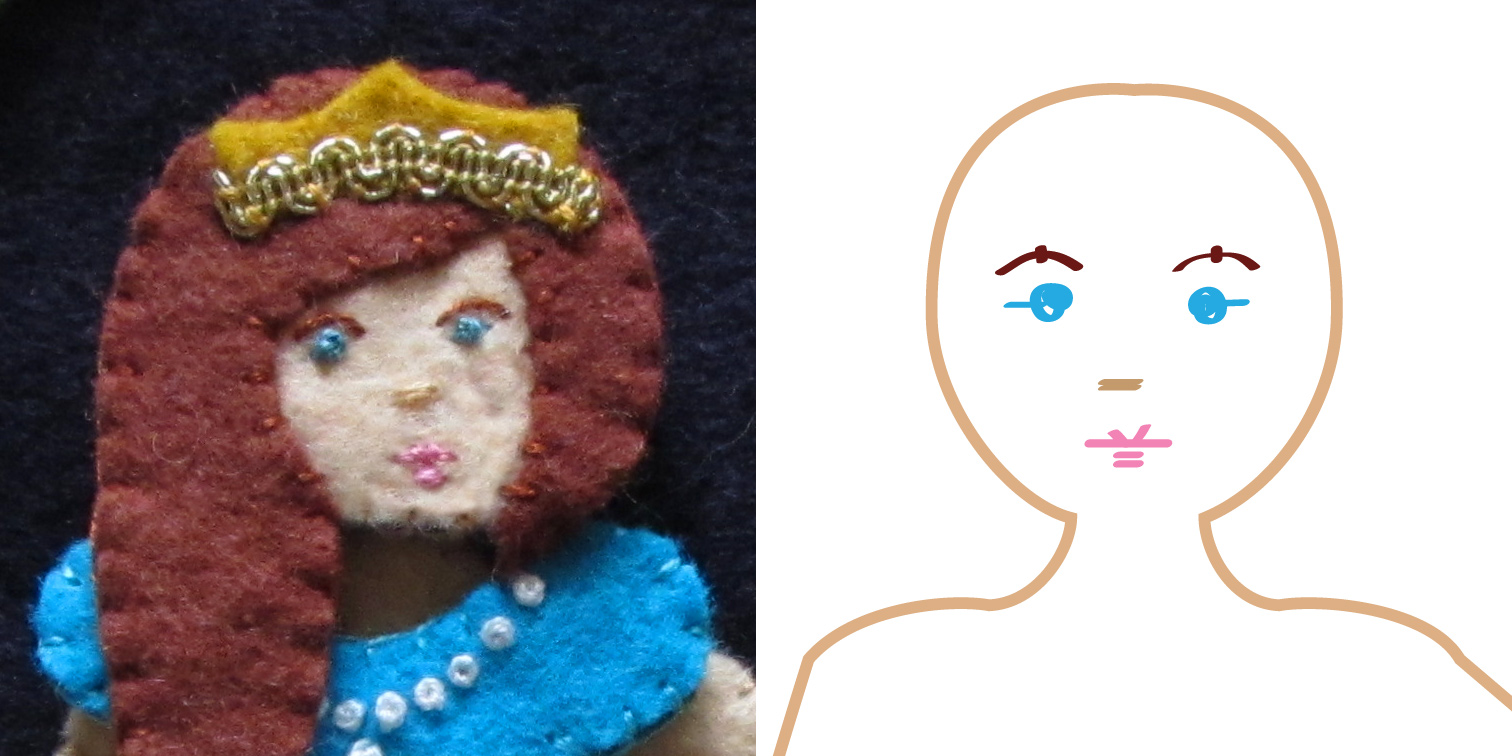 Princess: I started by stitching on her face. I made aqua French knots for her eyes with tiny stitches beside them as shown. I made two peach stitches together for the nose. I used red-brown for her eyebrows and made a long, loose stitch and tacked it down into a curve with a tiny vertical stitch. Using pink I made two small stitches together for the bottom lip, one longer one for the upper lip. On the upper lip, I made a small “v” of stitches in the center as shown. Using a light layer of felt glue, I tacked down her hair and crown. I stitched the hair down around her face. I took a small piece of gold trim and stitched it down to the crown with the ends tucked under. Then it was ready to attach the backing.
For her blouse, I made a series of French knot pearls, then attached the backing. On the skirt, I stitched the skirt puffs on, then stitched more gold trim along the hem. I glued the feet to the back of the skirt after confirming their positions by laying it on the body pattern. I tacked down the shoes with glue then stitched them on. I then attached the backing.
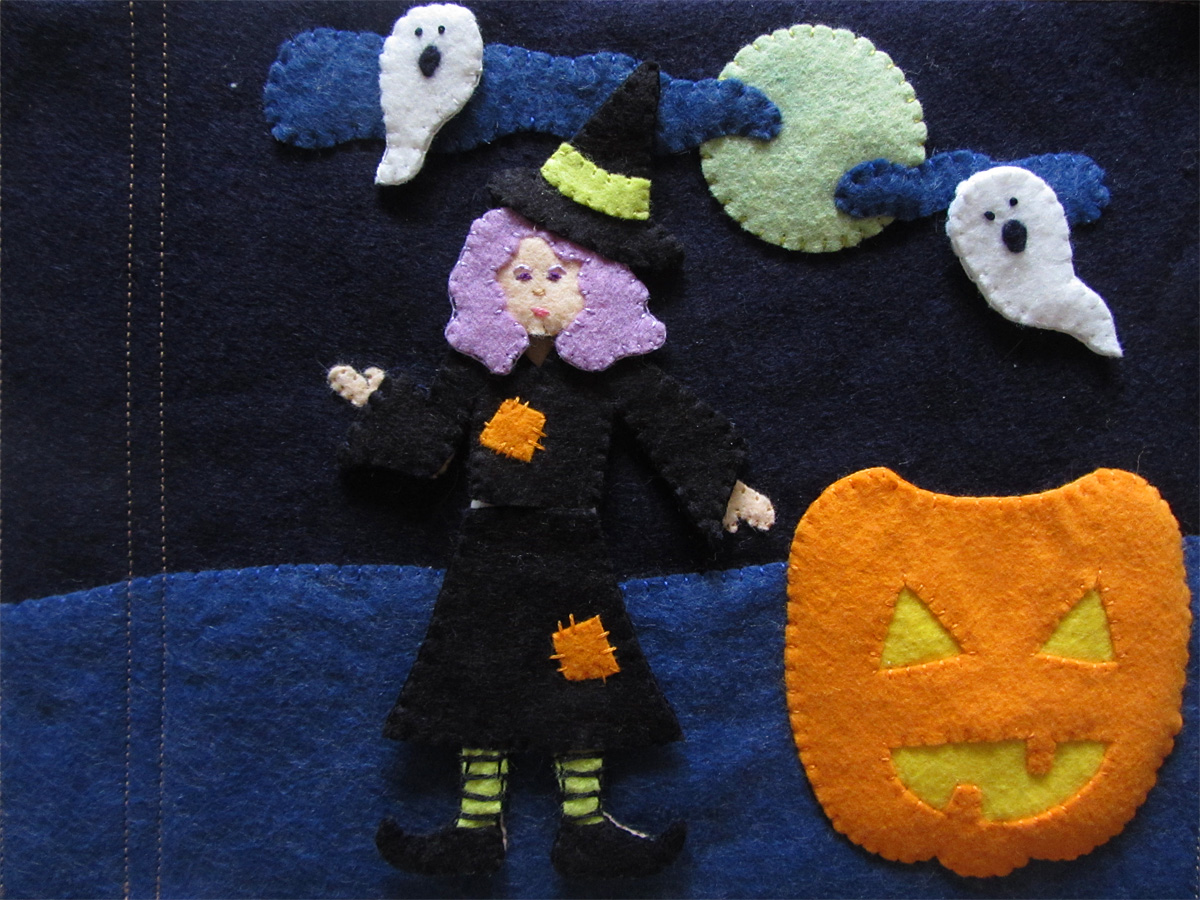
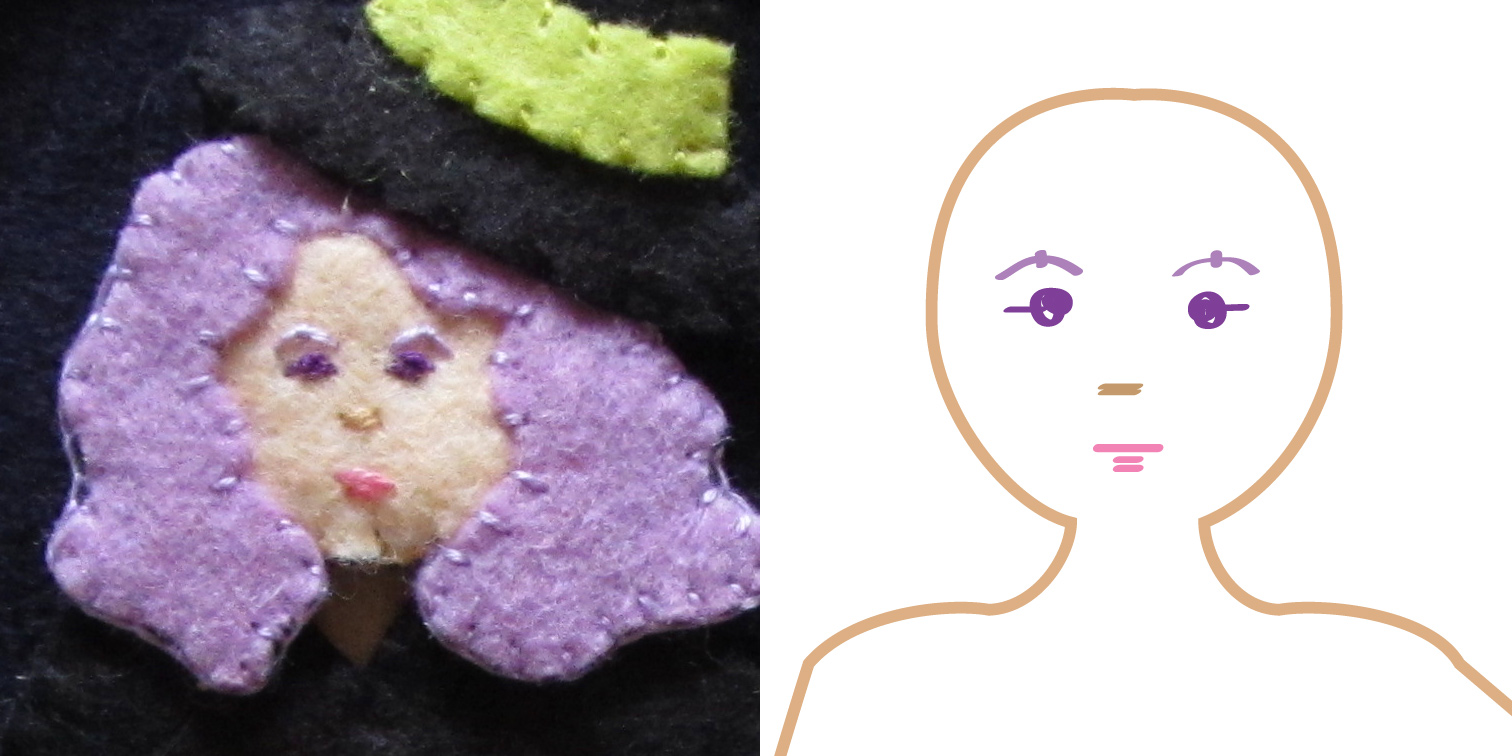 Witch: I started by stitching on her face. I made purple French knots for her eyes with tiny stitches beside them as shown. I made two peach stitches together for the nose. I used lavender for her eyebrows and made a long, loose stitch and tacked it down into a curve with a tiny vertical stitch. Using pink I made two small stitches together for the bottom lip, two longer one for the upper lip. Using a light layer of felt glue, I tacked down her hair, hat and hat band. I stitched the hair down around her face and stitched down the hat band and where her hat meets her hair. Then it was ready to attach the backing.
On her blouse and skirt, I glued and sewed down the two patches using large, uneven stitches. I continued on with the skirt by positioning her stockings using the body pattern and gluing them and her shoes into place. On her stockings, I made long horizontal stitches to add stripes before attaching the backing.
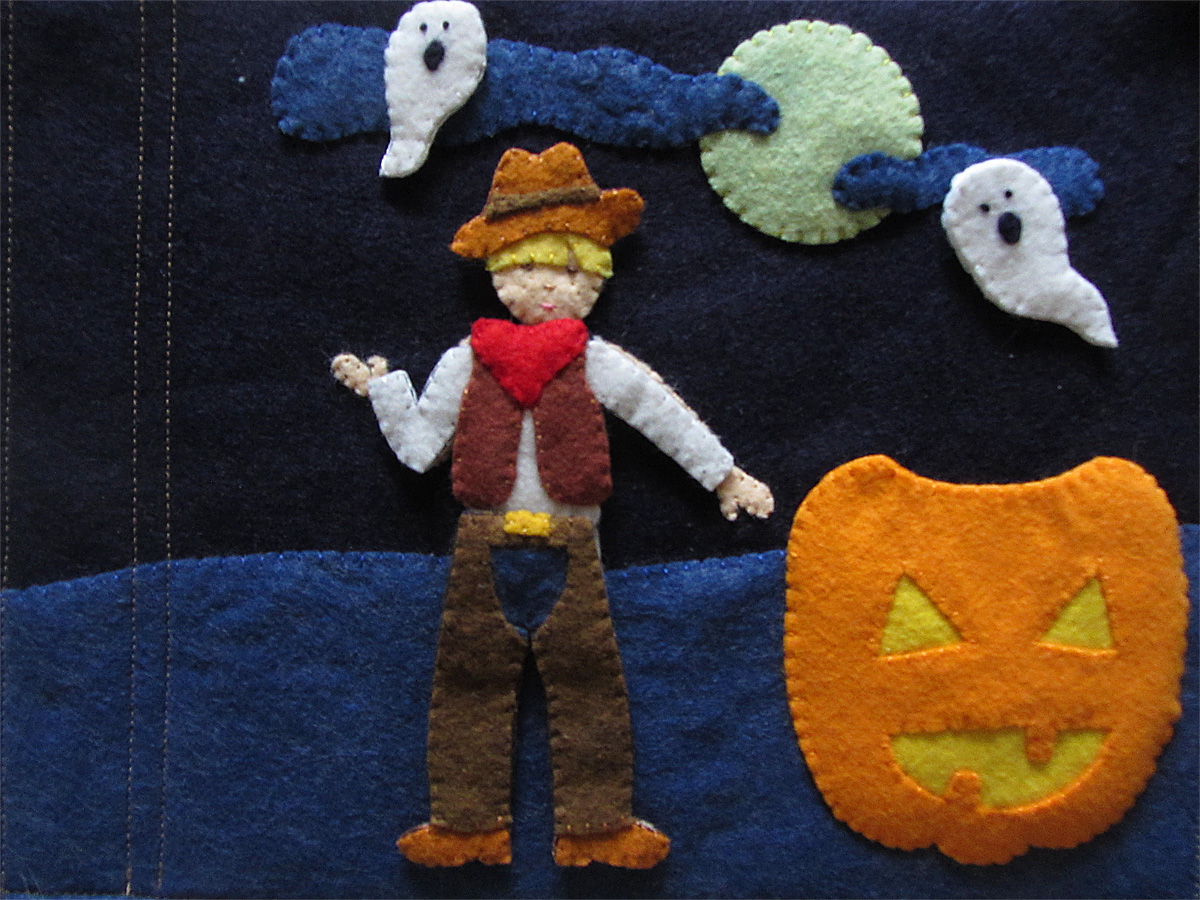
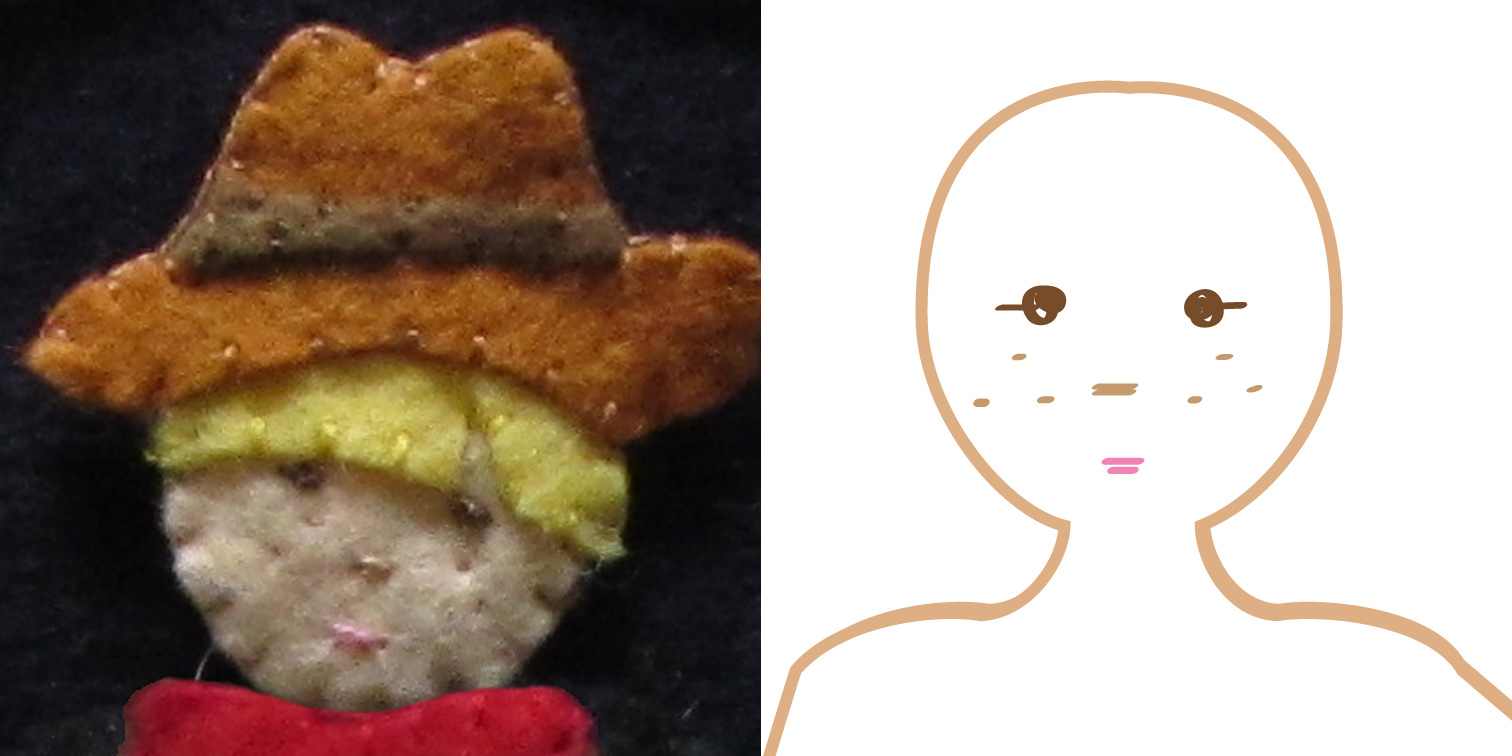 Cowboy: I started by stitching on his face. I made brown French knots for her eyes with tiny stitches beside them as shown. I made two peach stitches together for the nose. Using the same dark peach, I made teenie stitches for freckles. Using pink I made two small stitches together for the mouth. Using a light layer of felt glue, I tacked down his hair, hat and hat band, then stitched all the inner edges. Then it was ready to attach the backing.
On his shirt, I tacked down the vest and then the scarf. I sewed down all the inner edges, then attached the backing. On his pants, I layered the jeans and shoes behind the chaps, using the body pattern for positioning, and tacked them with glue. I tacked down the belt buckle, sewed all the inner edges, then attached the backing.
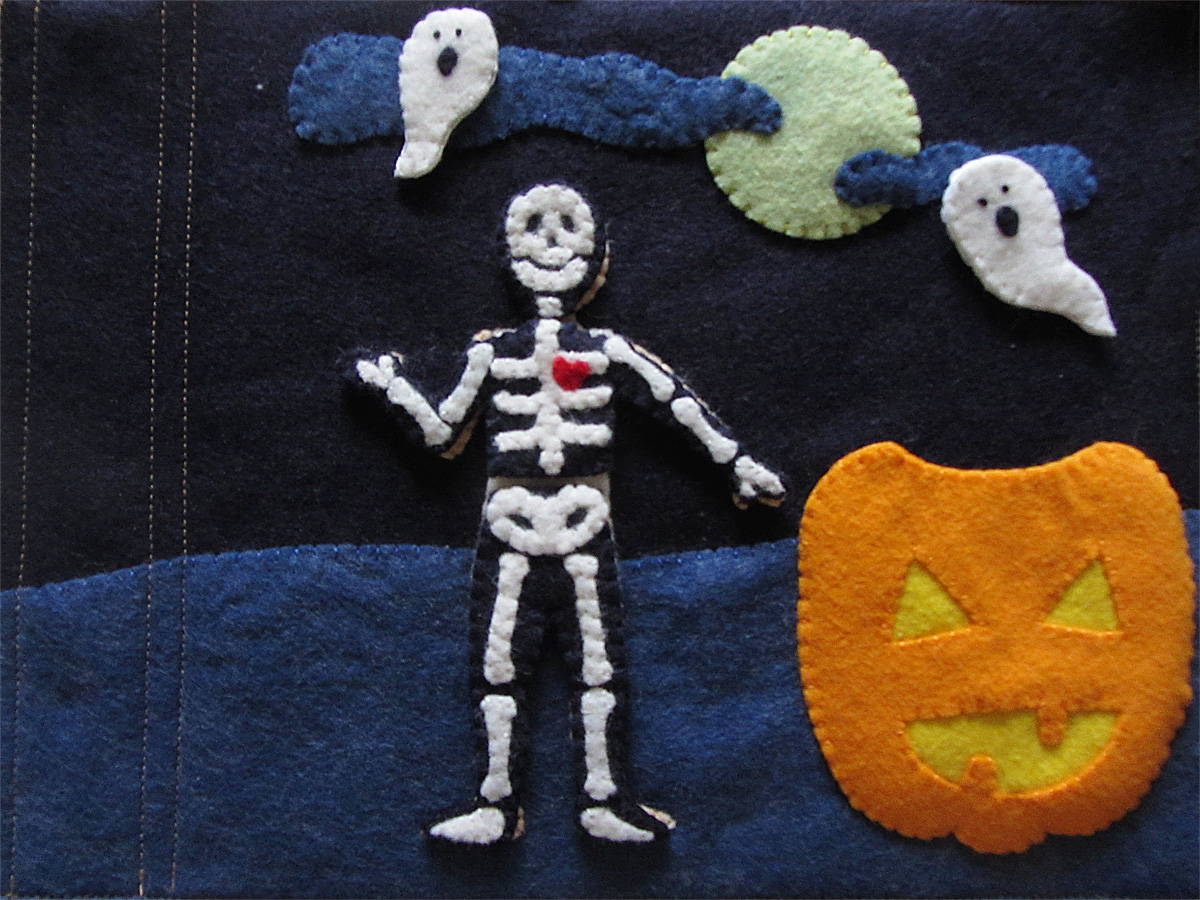
Skeleton: For all parts of the skeleton, I tacked the bones down into place with a light layer of felt glue and them stitched them down. I added the red heart on top of the ribs because it was easier to see. I then attached all the backings.
And there is something that makes it even more fun… Flocked pumpkin felt on the back of the page! The jack-o-lanterns are fuzzy and a little glittery. Super cute!

I hope you enjoy this free pattern! The commercial license for selling completed products from this pattern will be available in my Etsy shop.
Do you have a special pattern request? Stop by my Facebook Page or my Instagram (@iolstephanie) and let me know! Happy Halloween!
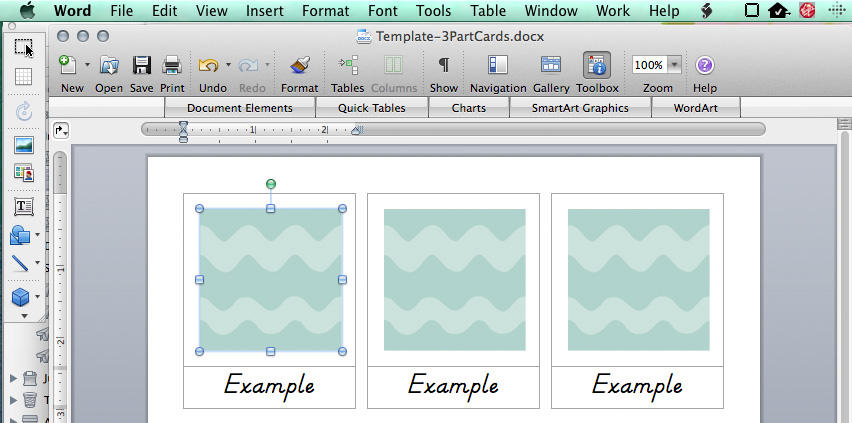

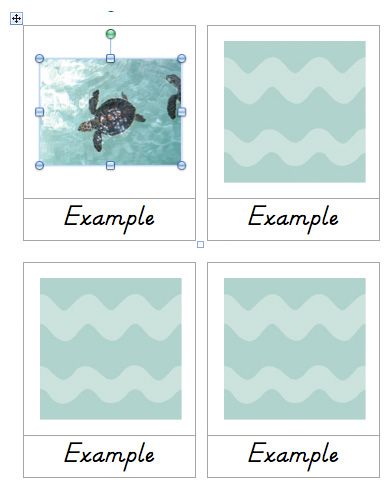
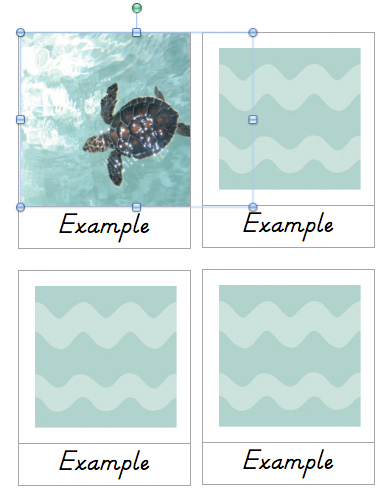
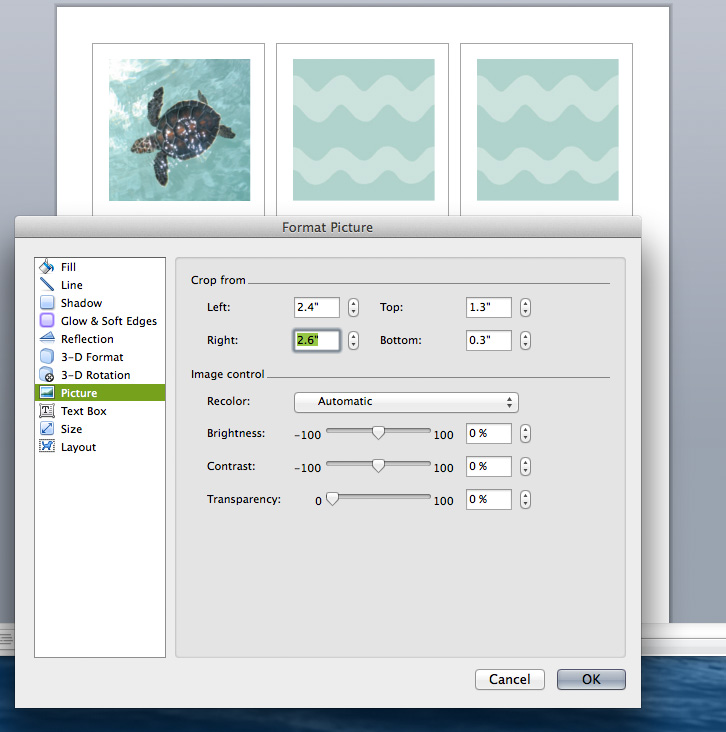
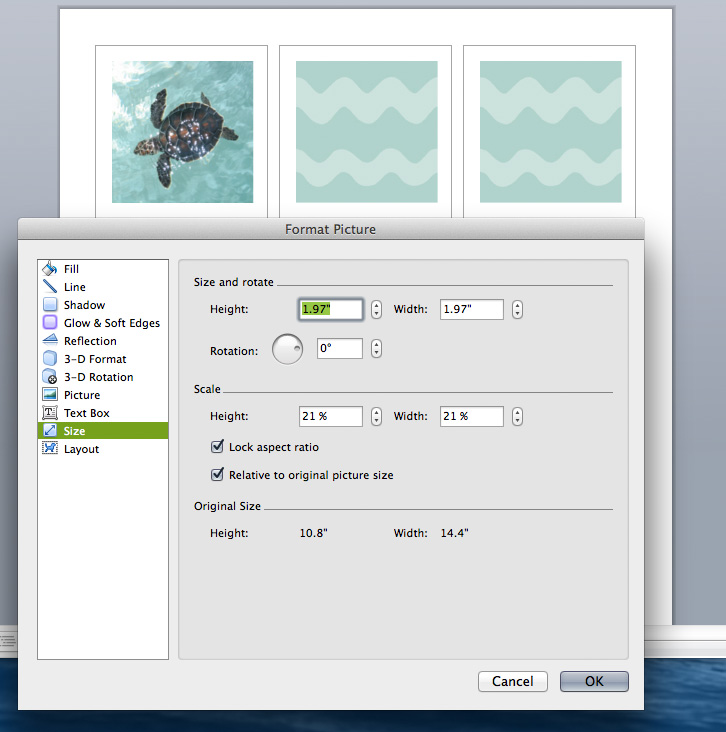
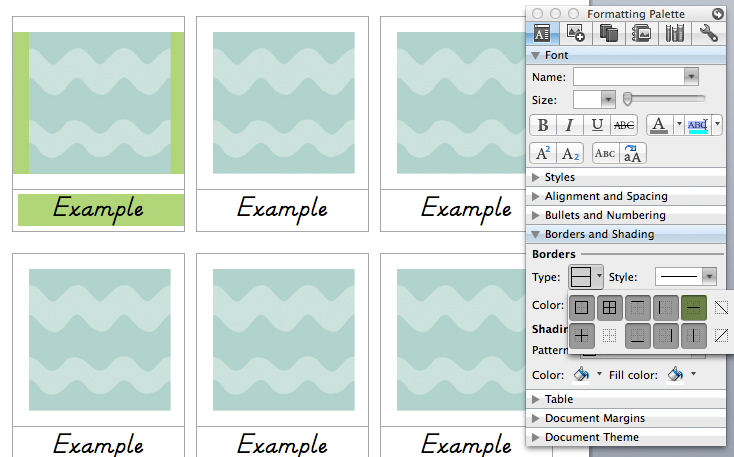
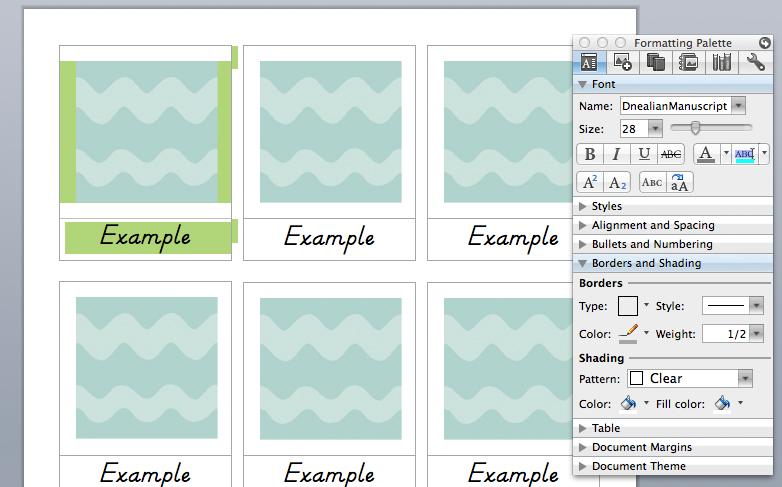
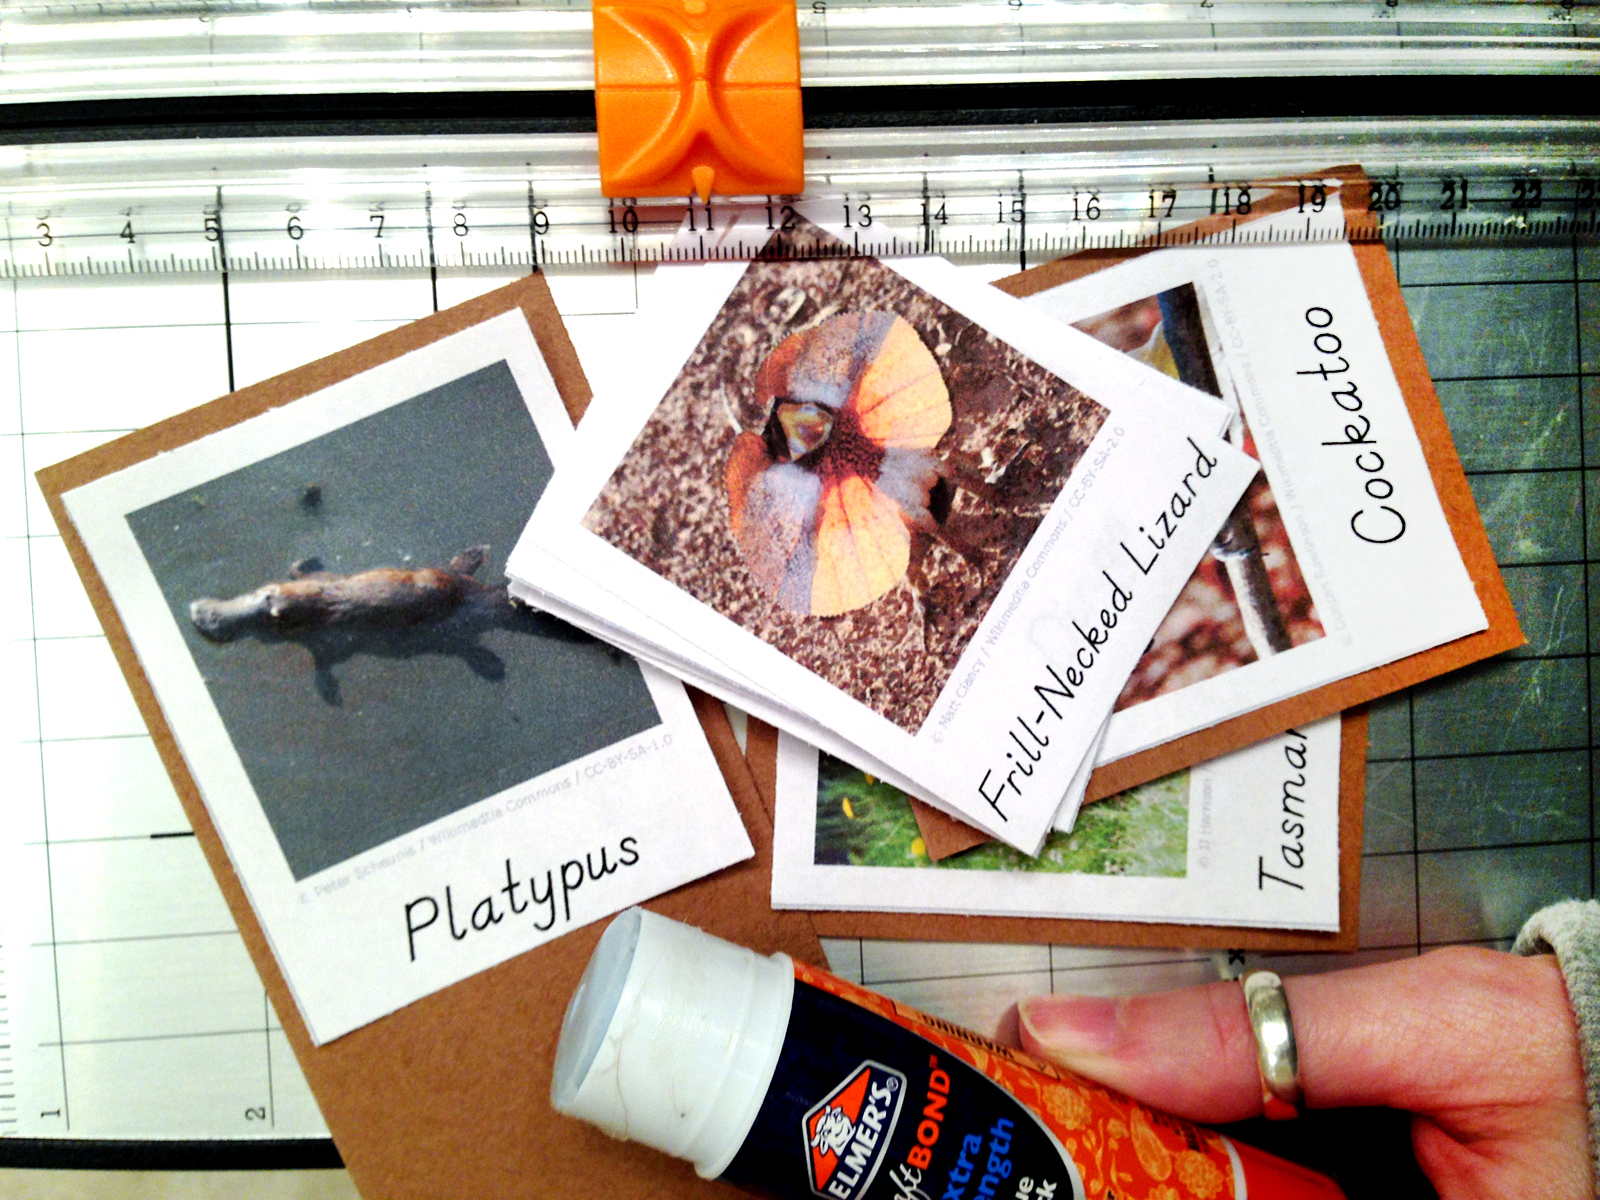
 Next you’ll want to open the “Format Picture” window. You can get to it from the menu bar (“Formatting” menu), right-clicking or via the “Formatting Palette” that appears when an image is selected. You will want to go to “Crop” and use the arrows to gradually crop the photo down to a square that you are happy with. Pop over to the “Size” tab to make sure the width and height are the same. If you are going for the size of square I always use, you can set the width to 1.97″ once you have it cropped to a square.