Tag Archives: Quiet Book

Mailbox & Letters Quiet Book Page

I finally have another quiet book page done! First there was vacation, then working to make up lost hours, Thanksgiving and a bad cold. And there went November!

There’s nothing super original or crazy about this page, but it was one I wanted to include. “Mail” was one of Jax’s first words thanks to the mail song on Blue’s Clues. I have to give a shout out to Handmade By Jill, as her mail page was the first I came across.


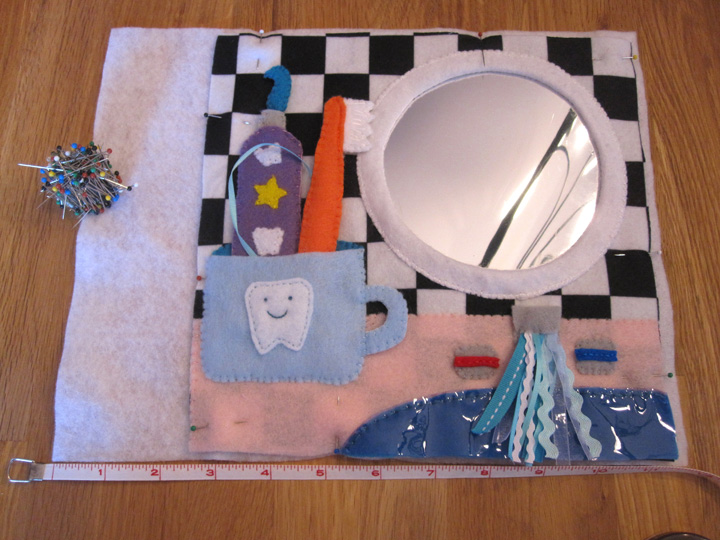
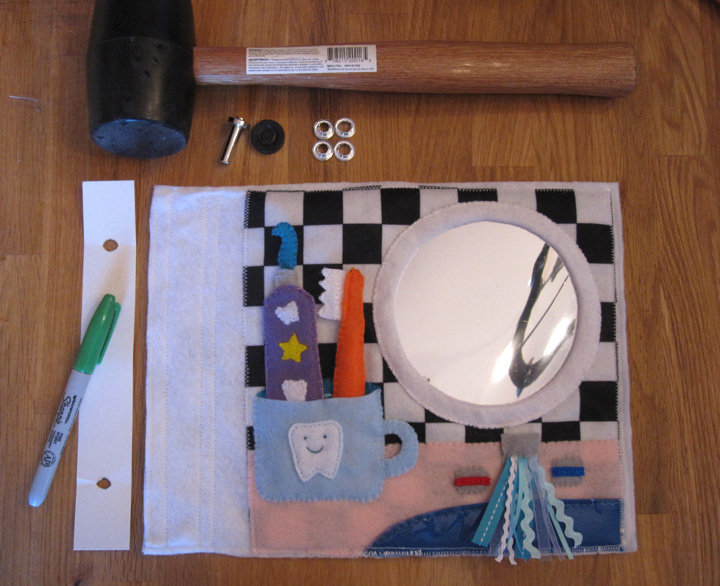
Here is what I used: a 9″ x 9″ sky blue felt background, felt (in light gray, dark gray, red, brown, white, and assorted colors for the envelopes), ribbons and ric-rac, buttons, 1 grommet, Velcro and thread to match.

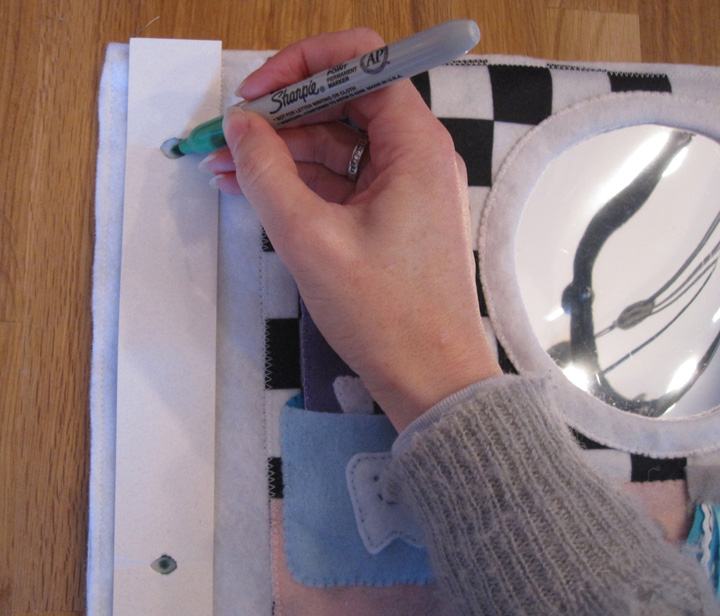
To make the page: I stared by sewing the two sides of the red flag together. I installed a grommet at the end – the same kind I use on the finished pages. I then sewed the lettering down onto the side of the mailbox. Placing the flag where I wanted it, I sewed on a button through the grommet hole. This lets the flag move just like on a real mailbox. To make the mailbox door, I sewed the two sides together with a loop of ribbon at the top. You could use elastic as well. I sewed the brown stake to the page, followed by the dark gray mailbox interior (the dashed line on the pattern shows where I sewed a decorative line to add dimension to the inside). I sewed the top, back and bottom of the outside of the mailbox down leaving the front open to put the letters in. To finish the page, I sewed down the bottom of the mailbox door and attached a button above it.

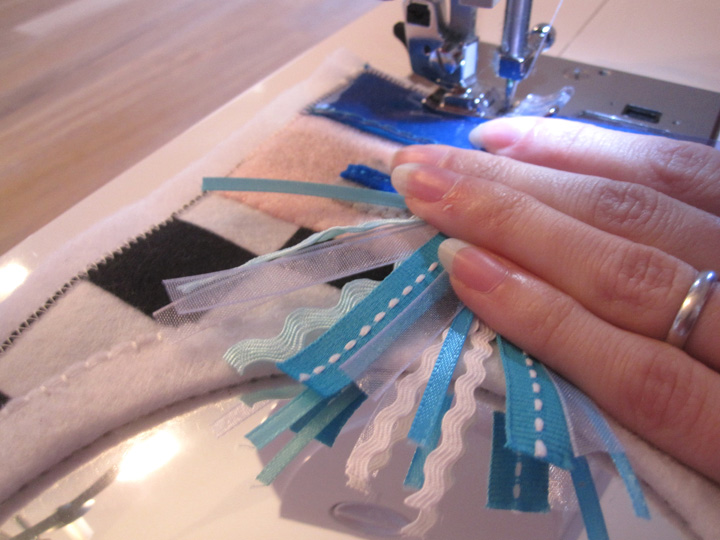
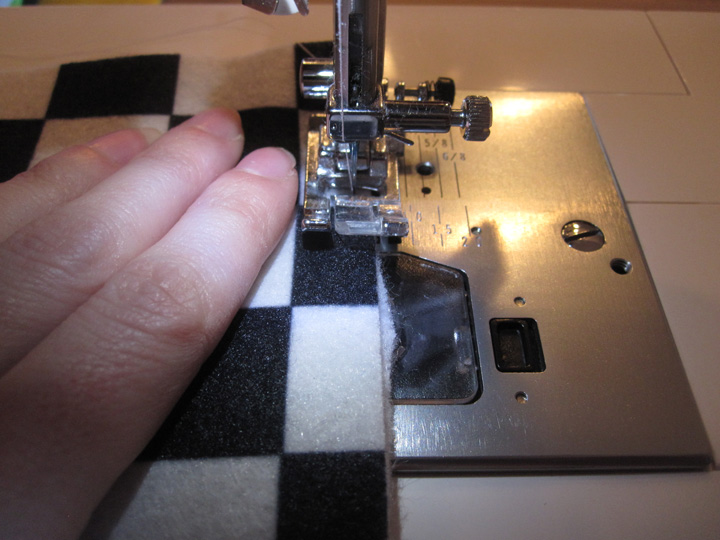
The mail is a blast to make! Get out your ribbon and ric-rac stash and  have some fun! I used my sewing machine for them and had to rush. Please excuse the shoddy stitching in my example – I was actually nursing at the same time!


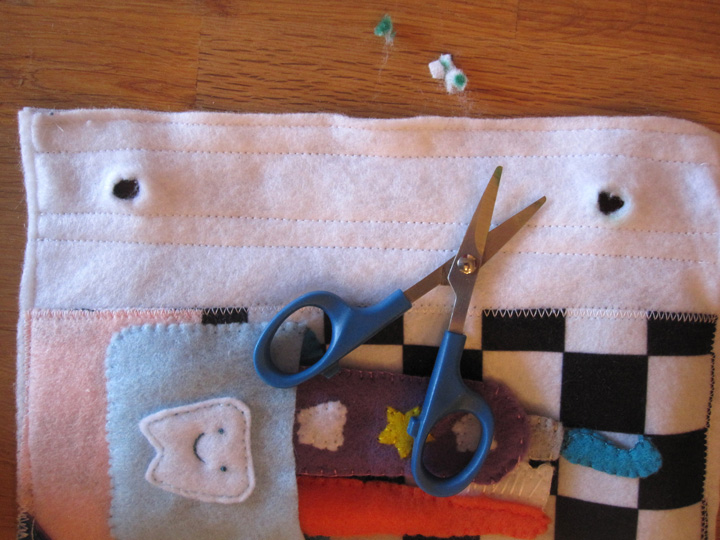
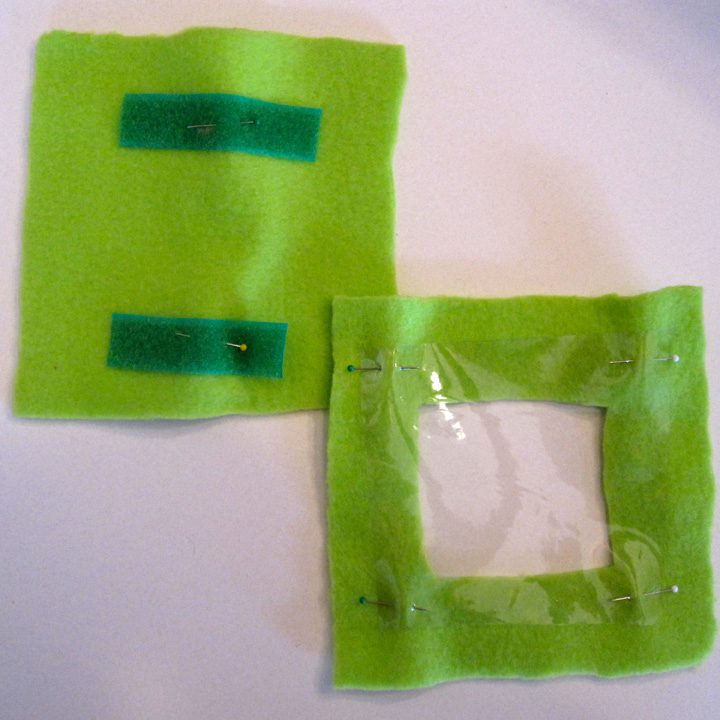
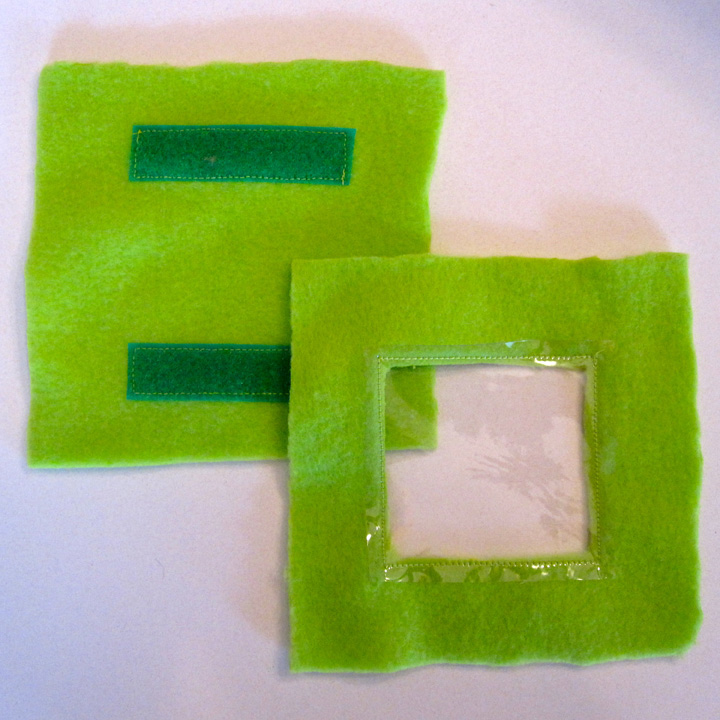
To make the envelope: Fold the envelop flap over and stitch beside the fold to set it in place (felt doesn’t fold well on its own.) Sew a piece of Velcro on the inside of the flap and decorate the outside with a scrap of ribbon or felt. Fold the envelope body up to find where the other half of the Velcro should be, the sew it on. Cut a little rectangle of white felt with your pinking shears. Sew it on as the stamp with a scrap of ribbon or felt. I used ribbon and folded under each end. Cut some ribbon or ric-rac and position it where the address would be. Sew it down. Fold the envelope back up and sew around the sides and bottom. All done!

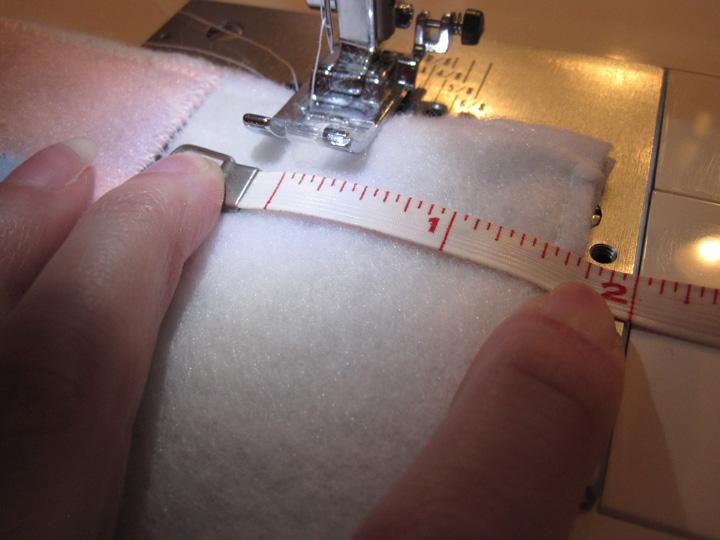
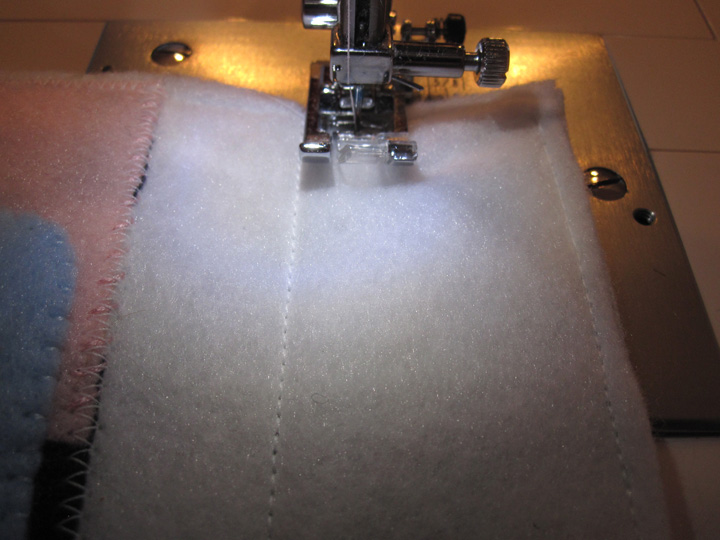
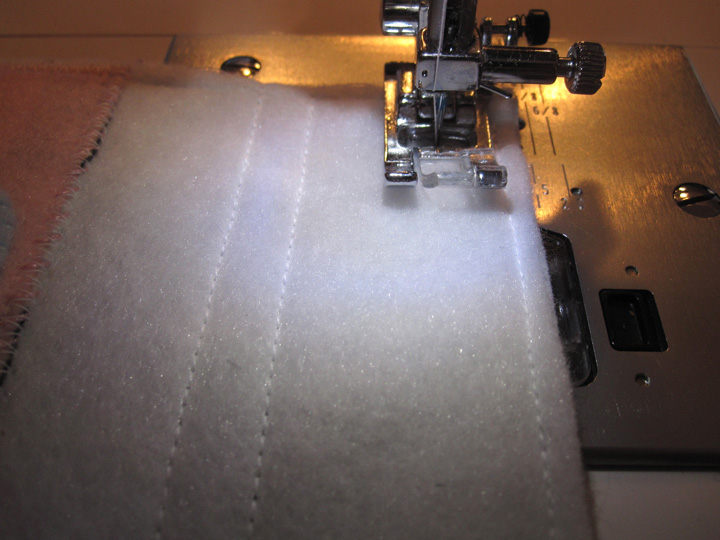
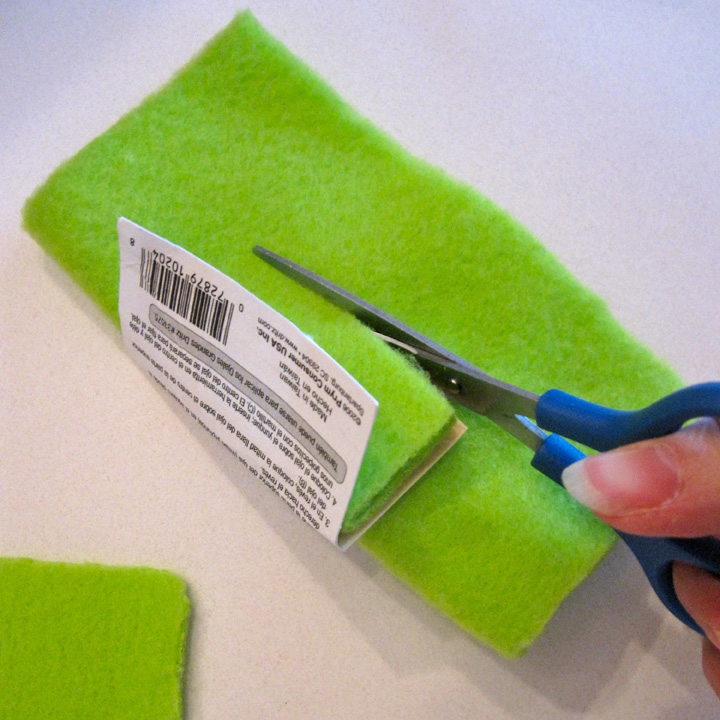
To mail a letter: Sew ribbons or ric-rac down on the bottom half of the white felt rectangle. Fold the whole thing in half and sew along all four sides and trim it to neaten it up. I just did two ribbons on each, but you could go crazy!


I hope the pattern is helpful! This page came out very cute thanks to the mail. I had to stop myself after 5 letters because the mailbox was getting too full! If you use this pattern, I’d love to see your end result. I hope you’ll share it with me!

Quiet Book Cover Tutorial

There are a million ways to sew a quiet book cover, but this tutorial covers (ha!) what I did. To see how I sewed together my pages, read this post.

I used 3″ diameter binder rings I bought here. I had 1 yard of flannel and a 29″ x 11″ piece of fusible fleece from my leftovers pile. I also used a white, 1″ plastic buckle from my dog collar supplies. They sell black ones in fabric stores.

  1. I started with two rectangles of flannel. You could use different fabric for the cover and inside, but I was using some I already had. My width was 30″ and height was 12″. To find your width: (page width x 2) + the diameter of your rings + 2″ for overhang + 1″ seam allowance. To find your height: page height + 2″ for overhang + 1″ seam allowance. I also cut a piece of fusible fleece 1″ smaller and ironed it to the back of one piece.
  2. I sewed the two sides together, right sides facing, leaving a 4″ hole to turn it.
  3. Turn it right side out and press. (Clip the corners first if you’d rather they not be rounded. I like that.)
  4. Top stitch all the way around, closing your hole in the process.
  5. Fold the cover in half to find your center, then measure half the diameter of your rings from the fold. Use the same template you used on your pages to mark grommet holes. Repeat on the other side.
  6. Install your grommets. You will have two sets of grommets centered on your cover piece that are set apart the diameter of your rings (3″ for me.)
  7. I made two lengths of straps with half of the buckle on the end of each one. I believe my finished sizes were 30″ x 1″ and 8″ x 1″. I attached the short one to the front with the buckle aimed away from the spine.
  8. I attached the long strap right behind the short one going in the opposite direction, across the spine and around the book to hold it closed when buckled.
  9. With the buckle closed, I determined how tight I wanted the strap and sewed the extra into a handle by sewed the strap down on the other side of the spine (see photos for clarification.)

That isn’t even all of my pages! I bought extra rings so I can keep the pages not in use organized. Swapping the pages out regularly will keep the quiet book interesting for Jax.

I’m bringing about half the pages shown there on the plane ride. I chose the ones most exciting to him that don’t have tiny parts. I also punched holes in the top of a freezer bag and have that in there with a notebook, crayons and stickers.

We should be in the air right now as this post goes live. Wish us luck!

Friday Follow-up

This post is to show some updates to my Starbucks felt food quiet book page (that goes with my Starbucks coffee and tea page.)

When I started the food page, I wasn’t able to find and brown felt to match the background I’d used on the drink page. I went with green and called it a day. But when I decided to make the two pages face each other, I realized I would have to move the pastry bags from the top to the bottom to make room for all that whipped cream. I’d just found that brown again, so I ripped everything off and sewed it to the new background.

I think it came together nicely. It’s still Jax’s favorite page. He is in love with the tiny strawberries!

Make your own with my free patterns at the links above.

How To Sew Quiet Book Pages

Here is a little tutorial on how I sew up my final quiet book pages. My designs are 9″ x 9″ on a felt background. I sew my final pages using 9″ x 12″ felt sheets – white for the front and colored or patterned for the back. If your pages are a different size you’ll have to modify accordingly.

  1.  Pin your design to the white felt. I put mine close to the right edge but leave about a half inch.
  2. Zigzag stitch around all four sides. If you have dangly bits, make sure you hold them out of the way!
  3. On the reverse side, pin on the background (wrong sides facing.)
  4. Sew all the way around.
  5. On the front, I sew a line 1.75″ from the left edge. I use a hole on my machine as my guide.
  6. Sew another line just inside of it. I use my presser foot as my guide.
  7. Sew a line just to the side of the far left seam like in step 6.
  8. Gather what you need to put in grommets. I made a template so all of my pages would match up.
  9. Mark your holes. Place them in the channel you made for strength.
  10. Cut out holes as directed on your grommet package.
  11. Put in your grommets as directed on the package.
  12. All done!

When I have a 2-page spread, I sew the right-hand page with steps 1 – 4. Sew the left-hand page like steps 1 – 4 but align everything to the left of the page instead of the right. Place the pages together, right sides facing. Sew over the far left seam, then make the same seams as in steps 5 – 7. Continue on to make your grommets. You’ll now have a separate page you can take out of the book and the two halves will always stay together!

I hope this helps! I’ll post about my cover soon… I still have to make it!

Brush Your Teeth Quiet Book Page

A while back I picked up a beat-up fabric book at the thrift store for 75 cents because it had a great 5.5″ circular mirror in it. I knew I wanted to cut that out and add it to Jax’s quiet book. Since he is a huge fan of brushing his teeth (he signs asking to do it, then hums the song I made up for him to brush to) I had to do a sink scene!


The toothpaste and brush are attached by a ribbon inside the cup. The toothpaste tube actually slides on its ribbon and makes a crinkly noise. The toothpaste swirl is at the end of the ribbon so you can put it on the toothbrush. I didn’t want it separate or it would get lost. The water in the sink is a bluish vinyl from my scrap stash layer over aqua felt and the running water is a bunch of blue and white ribbon scraps.

Here’s what I used: checkerboard printed felt background, kid-safe mirror cut from an old book, felt (in pink, aqua, sky blue, lavender, orange, red, blue, gray and white), ribbons and ric-rac, batting/stuffing, a crinkly cereal bar wrapper and embroidery thread to match.

My pattern doesn’t include the counter or sink shapes since everyone’s pages are different sizes. Depending on what size mirror you are able to rind, freehand it to what fits your layout best.

I did all the sewing by hand on this page (sewing machine time is rare in my house!) To start, I sewed down the counter, sink and mirror. I sewed the hot/cold stripes on the faucet knobs and sewed them down (you could make yours circles with buttons and have them turn if you want to get fancy!) I sewed the bottom 3/4 of the faucet on, then folded down the top. I folded a variety of ribbon scraps in half and stitched them into a bunch. I sewed them down under the fold of the faucet then stitched the edge down.

Next was the cup. I sewed down the inner cup piece. I made a smiley face on the tooth and sewed it to the cup front. I sewed the handle pieces together and pinned them in place. I took a long ribbon – long enough for both the toothpaste and toothbrush – and folded it in half. I stitched the mid-point down under where the cup would go. Then I just sewed the cup front on, leaving the top open to make the pocket.

On the toothpaste, I sewed the teeth and stars to the front piece. I cut a piece of crinkly wrapper (mine was a Trader Joe’s cereal bar) to fit in the tube and put it and one of the halves of the ribbon in between the two sides. I sewed along the sides of the tube and along the bottom, but left a gap in the bottom-middle so the ribbon could slide. At the top, I sewed the grey cap pieces to each side of the toothpaste tube, then sewed them into a tube around the ribbon. At the end of the ribbon, I sewed the two halves of the toothpaste. I may add a stripe of glitter paint to the toothpaste if I have a color that works.

For the toothbrush, the toothpaste bristles were sewn together then decorated with long stitches. I layered them between the two handle pieces along with some batting with the ribbon sandwiched at then and sewed it together.

Do you like it? Jax sure does! He keeps looking in the mirror and saying “Baby!”

If you use this pattern, leave me a comment with a link so I can check your version out!

Quiet Book Progress

While the majority of my Quiet Book sewing is on hold while I work on Jax’s Halloween costume, hand sewing pages can still be worked on during the times I am watching Jax and can’t get to the sewing machine.

So what to make next?

Here’s some options on my list: a city map page for driving cars, a toothbrush and mirror page (Jax LOVES to brush his teeth!) and a mailbox page (his would be Blue’s Clues themed. He gets to watch a Blue’s Clues episode after dinner.)

Any pages you’d like to see? What do you think I should work on next?

Ocean Counting Quiet Book Page

I’ve been so super busy between work and starting Jax’s Halloween costume, plus starting to get ready for our California trip in two weeks. I’ve also sewn a bunch of his quiet book  pages into their final double-sided pages with grommets. So much to do! But today I got another page done at last!

I love the beads-on-a-string style counting pages that are common in quiet books, and when I came across these ocean life beads in the kids’ craft aisle of Joanns, I knew I had my theme.

It’s a pretty simple page in terms of cutting and sewing because the beads are so crazy.

Here’s what I used: aqua felt background, felt (in natural, lime, yellow, hot pink, blue, orange, purple and browns), blue ribbon, ocean beads and embroidery thread to match.


I started by sewing down the sand. My page is 9″ wide. If yours is different, you’ll need to adjust the sand pattern accordingly. You can totally just freehand it!

I sewed down all the numbers then went back with pale blue floss and did a stem stitch border around them to make them pop.

On the coral, I made large French knots randomly all over instead of sewing it down normally. For the plant, I stitch down the center of each leaf. I sewed down the starfish, then cut out some pebble shapes in tan and brown and sewed them on.

For the counting beads, I used 3 lengths of ribbon. I would sew down one end, add the beads and sew down the other end. I also sewed the ribbons into separate sections so they didn’t droop. I then cut out some bubble shapes and sewed them down over all the ribbon stitching.

All done! I think Jax is going to love this page because he gets so excited when he sees these beads.


What do you think? If you use this pattern, leave me a comment with a link so I can check your version out!

Starbucks Felt Breakfast Quiet Book Page

Edit: Updated photos here.

I wanted a food page in Jax’s quiet book, because he is so into his play kitchen. Since I already did a Starbucks page, I decided to make the food page go along with the same theme.

Nothing too fancy here. Just a lot of food and a plate to play on. You could add silverware too. I didn’t because he would just try to put the food on a felt fork and end up dropping everything on the plane. I made so much food, I had to make two “pastry bags” to hold it!

Here’s what I used: dark green background felt (because I couldn’t find any more of the same brown I’d used on the Starbucks page), felt (in white, yellow, orange-yellow, green, tan, cream, natural, pink and light brown), batting/stuffing, pinking shears and embroidery floss to match.


Mini Birthday Cake Donut: Make white French knots as sprinkles on the pink frosting. Sew the frosting to the donut top. Roll a strip of batting into a ring and sew it between the two halves. Banana: Roll a strip of batting into a tube and sew it between the two banana pieces. Using one strand of dark brown thread and a sharp needle, take your peel pieces and run the thread up through the felt as if the felt was made of two layers and you were going between them. Every now and then, come out of the felt and loop back to make a random stitch on the surface, then go back into the felt. Do this to make all the subtle, dotted lines that form on banana peels. Sew the two sides of the peel onto the banana halfway. You could add snaps or Velcro if you wanted the peel to stay closed.

Egg: Sew the yolk down with a bit of batting. Sew the two sides together. Bacon: Cut wavy pink stripes to fit your bacon and sew two on to each side. Sew the two halves of each piece of bacon together. Cheese: I made cheese and an English muffin so you can build a breakfast sandwich. Simply sew the two cheese halves together. English Muffin: Sew the darker circles to the muffin bottoms to make the crust, then sew the two sides together with a thin layer of batting.

Pumpkin Scone: Take a piece of embroidery thread and knot the end. Come up from the back of the icing and lay the thread out in a squiggle as you’d like to have the decorative icing to look. Go back down throughout the felt, being careful not to disturb your squiggle. Make a series of couching stitches all along the squiggle to hold it in place. Sew the icing to the top of the scone, then sew the two halves together with some batting in between.

Pastry Bags: Decide if you need one or two bags. If you make all of the food, you need two! Sew the stars to the green circles to make the logos, then sew them to the center of the bag pieces. You will be making a pleat in the bottom of each side of the bag, like in the photo to the right. Sew the edge of the bag down until you are an inch from the bottom, then sew through the edge and the fold above it. Sew across the bottom, then through the edge and the fold for an in, then up the edge to the top. Leave the top open for a pocket.


Plate: Sew the plate down to the background then pin the stitch template to the center. Stitch around the template with gray thread to make the plate edge.

I’ll be sewing this page into the quiet book beside the Starbucks drink page. The logos tie together and you can dunk the donut in the tea or put the strawberries on the plate.


If you use this pattern, please add a comment or link to me. I really would love to see your version! Jax loves these pages and had a meltdown after I finished taking pictures and put it away. His favorites are the banana and strawberries (neither of which he likes to eat in real life, silly boy!)

Here is an update on this page.

Hungry yet?

Dinosaur Quiet Book Page

Dinosaurs! Roar! Here’s the next page in Jax’s quiet book. His book is seriously going to be 10″ thick… And there are more pages I want to add. I still haven’t decided how I’m going to do the cover/case.

This is a fairly simple page. It has ribbons for texture and a peekaboo flap with a baby dinosaur inside an egg. Here’s what I used: sky blue background felt, olive green ground felt, lots of ribbon scraps, felt (in 3 shades of green, brown, natural (the egg), camel (inside the egg and some spots) and pink (spots on egg)), batting/stuffing, pinking shears and embroidery floss to match.


Start with your sky blue background piece. Cut a piece of felt for the ground. I used olive green and cut a slight hill into the top. Pin the tree trunk in place and sew the ground down. Cut some leafy fern shapes out of green felt with pinking shears. I made 4. Sew them in a fan shape at the top of the tree. I sewed up the middle about 3/4 of the length. Sew the tree trunk down.

Dinosaurs: To make the faces, I made a stitch for an eyelash then a French knot eye. I stitched the smile in stem stitch. Stitch loops of ribbon along the spine – shorter at the tail and neck. Stitch long, thin “spikes” to the end of the tail. I used all kinds of ribbons and rickrack from my stash (many were scrapbooking ribbons) but you could use all one color.

Egg: Start out by sewing the grassy nest down where you want the egg to be. I cut 2 pieces for my egg out of a natural colored felt and one out of a camel color for the inside of the egg. Sew the inner egg to the grass and sew the dinosaur baby onto it. I took scraps of pink and camel to make splotches to sew onto one piece of the egg shell. Be creative and decorate your dinosaur egg however you’d like! Layer a loop of ribbon between the two outer egg pieces as a handle, then sew them together. Sew an inch long section of the outer egg down to make the flap.


To finish up, I sewed the big dinosaur down, then embroidered freehand “Stomp!! Roar…” into the lower left corner. You could do the same, or have a big “D” for dinosaur.


If you use this pattern, please add a comment or link to me. I really would love to see your version! I think I’m in love with the little baby dino.

Do you like the page?

iPhone & Pocket Watch Quiet Book Page

This page is dedicated to the late Steve Jobs, whose innovations shaped my generation. RIP.

Another page done for the quiet book! Phones and clocks are classic pages that are almost always included, but I just wasn’t feeling the rotary phone and boring clock.

When I started brainstorming how to update them, I knew I wanted to do my white iPhone. Jax has a play phone app and loves to hold it up to his ear and say “Yeah-Oh?” (hello). I wanted to combine the clock with the phone since both deal with numbers and using household gadgets. My first idea was to have a slap bracelet covered in felt with a felt clock face to make a wristwatch, but I thought the scale wouldn’t work. Since phones go in pockets, I settled on a pocket watch and a big jean pocket to put them in!


My materials were: a 9″ blue felt square (you could use denim or even cut up jeans, but both items might not fit in the pocket), felt (in white, red, orange, yellow, green, aqua, blue, white, dark gray and light gray), clear vinyl, batting/stuffing, thin white ribbon, 7/8″ – 1″ wide ribbon 1 inch longer than your page width, a paper fastener and floss/thread to match. Everything was hand-sewn except the vinyl, but you could use the machine for parts.

Sewing the iPhone: I appliqued the symbols to each button and outlined them in white stitching. I hand-stitched the phone numbers to the dark gray screen in stem stitch and the “HELLO!” to the aqua header in running stitch. I sewed the buttons, header and light gray top bar to the screen then sewed that to the phone front. I sewed the home button to the front as well, then did some embroidery and a French knot to make the speaker and front camera. On the sewing machine, I sewed clear vinyl over the phone screen. On the back of the phone, I sewed the camera circle and Apple logo. Layering batting and the end of a white ribbon, I sewed front and back together.

Sewing the pocket watch: I hand-stitched the clock numbers to the face with stem stitch. I made the clock hands by sewing two layers of felt together for each, then pushed a paper fastener through the ends of both. I pushed the fastener through the clock face and bent the backs so that there was plenty of height for the hands to turn around. I sewed the face to the front of the clock. I sewed the end of a white ribbon between the two pieces of clock dial, then layered that and some batting between the two clock sides and sewed them together. I actually added a small rattler to my clock. I got a stained baby toy for 50 cents at the thrift store and cut it open. I don’t need my quiet book to be silent.

I decorated my pocket with two rows of stitching along the top and used my paper pattern to do two rows for the decorative arch. I sewed the other ends of the two ribbons down under where the pocket would go, then sewed three sides down with double rows of stitching. I sewed the three belt loops on and ran a ribbon through it, tacking it down on each side on the back.

What do you think? For more free quiet book patterns, go here! If you use this pattern, please add a comment or link to me. I really would love to see your version!

iSpy Quiet Book Page

So I originally made a stand-alone iSpy game and Velcroed it to a Quiet Book page, but the next day I decided the 2″ thick bag was just too much for the book. I also wanted a larger window so Jax could find the items easier. So, I cut the bag open and started over!

Here is what I did to make a large, flat iSpy game that will be zigzag-stitched to my white flannel quiet book page. (You can see an example of a finished page here.) My materials were: two squares of felt that are slightly smaller than my book pages (mine are 9″ in tie dye and lime green), a square of clear vinyl that is slightly smaller than your felt, poly pellets, buttons and trinkets, ribbon, stick-on felt letters and a key card. For more details on the key card and supplies, see my iSpy bag tutorial.

I took my top felt piece cut out a square in the middle for the window. You can cut out any shape and any size. I went for a large window to make it easier for Jax. I don’t want him to have to squish the page a lot like you would an iSpy bag. A couple shakes moves everything around. I sewed the square of clear vinyl to the back of the window, going around twice for security. Then I trimmed the extra vinyl and rounded the corners so they didn’t poke through.

I layered the front and back felt pieces together and sewed them together on 3 sides, again going around twice. You don’t want to leak pellets! I didn’t sew all the way at the edge of my felt because I didn’t want a lot of the bag contents to be hidden. The more you have hidden, the harder the game will be. I filled the bag with pellets and trinkets then sewed the top shut with my key card ribbon in the seams.

To finish it up, I added “I SPY” to the top of the page. Easy!

iSpy Bag Tutorial

Update:The iSpy bag came out so freaking cute, but I ultimately decided it was too thick for the quiet book. I’ll be posting my redo of it tomorrow or Monday. But, I still plan to use the method blow to make iSpy games as fun, easy gifts!

I love iSpy games! They have all kinds of fun trinkets buried in beads/pellets/rice and you have to squish them around to find everything. It’s a little beyond Jax right now, but I wanted to make one and have it be able to attach to a page in his quiet book.

On the quiet book page

The page itself is simple. I took a piece of fancy felt (tie dye) and sewed down two strips of Velcro so the game would have a place to live when it wasn’t in use. This page will be thick, but most of mine are.

Here’s how you make an iSpy bag. They are fun to make even if you aren’t making a quiet book!

You’ll need:

  • fleece scraps (mine were two 6″ squares)
  • a scrap of clear vinyl (mine was about 5″)
  • poly pellets, beads or rice
  • ribbon (to attach your key card)
  • fun objects (buttons, trinkets, paperclips…)
  • print out of your objects (laminated or covered in clear packing tape)
  • sewing machine/thread/scissors
  • Velcro (if you are attaching it to a Quiet Book page

I started with two pieces of fleece that were about 6″ square. I sewed the other half of the Velcro strips to the back piece. I took the front piece and folded it in half. I took a square of scrap cardboard and folded that in half as well. I centered it over the fold of the fleece and cut it out to make the window hole.

I took a square of clear vinyl that was larger than my window and sewed it to the wrong side of the fleece, then trimmed it down to about 1/4″. I pinned the front and back pieces together, right sides facing, and added one end of a ribbon. (I sewed the ribbon into a side seam then pulled it up through the side I left open. I wanted it to be anchored into two seams.) I sewed around 3 sides then turned it right side out. I was going for rounded corners, so I didn’t clip mine before turning.

I took all my fun objects I’d collected and placed them in the bag. I mostly had decorative buttons I’d found for a great price at the craft store. They gave me a really good assortment of objects to search for. Then I filled the bag about 2/3 full of poly pellets. I folded in the open side and pinned it shut. I top stitched around the whole bag, going 2 times over the open side (and testing the seam by trying to pull it open afterwards. You don’t want pellets going everywhere!)

For my key card, I laid out my objects beforehand and took a photo of them on a white background. In Photoshop, I rearranged them a bit and added text. (You can download the font I used for free here. It is made from my handwriting.) I printed the 4″ square on 4″ x 6″ photo paper and trimmed it down. I don’t have and laminating pouches, so I took clear packing tape and covered both sides to make it waterproof and more stable. I expect I’ll need to replace it eventually if it gets too folded. I punched a hole in the top and tied it to the other end of the ribbon.

So fun! I’ve played with it a bit with Jax and he was excited when we found the “choo choo”! I think adults can have just as much fun as kids. I may do something with iSpy bags as gifts or party favors in the future. They take so little time to make!