Tag Archives: Christmas

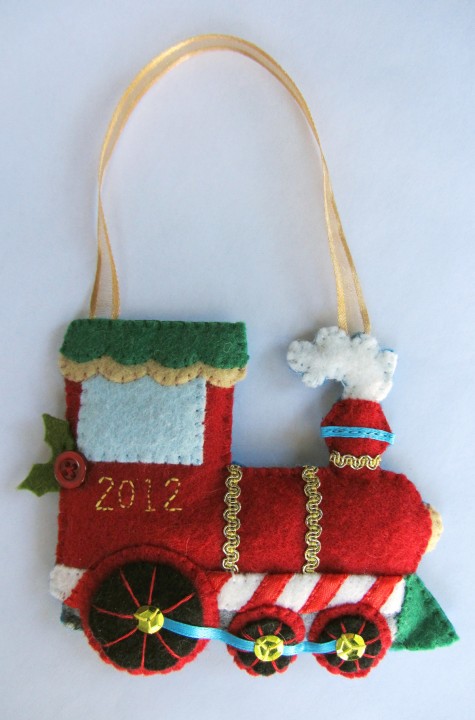
Felt Holiday Train Ornament

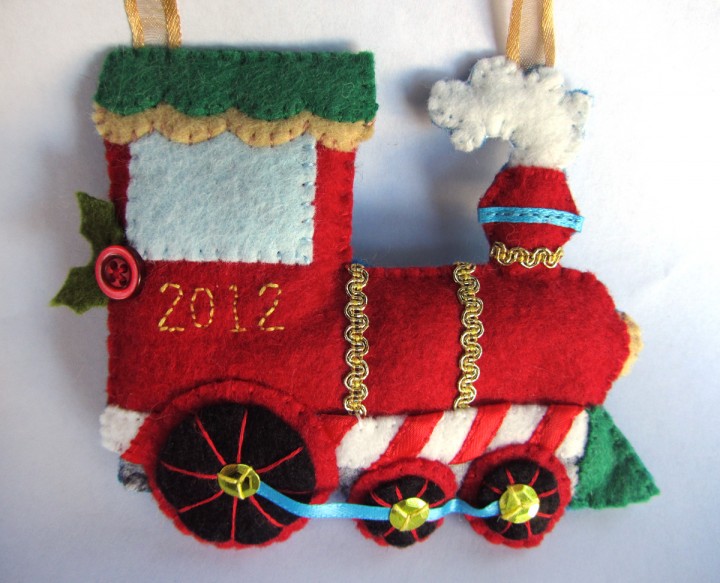
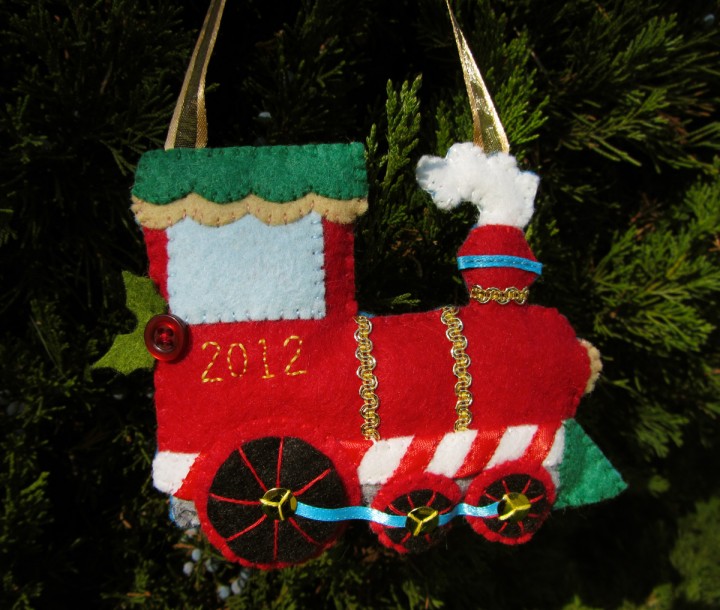
This is a new felt ornament I designed especially for my train-loving little guy. I added the year to this one, so hopefully I can make it a yearly tradition to sew him a special new ornament. He loves it and thinks it’s a toy! He played with it for 10 minutes before bed and handed it back wet and covered in dog hair. Haha! I tried my best to de-hair it for photos.

What I Used:

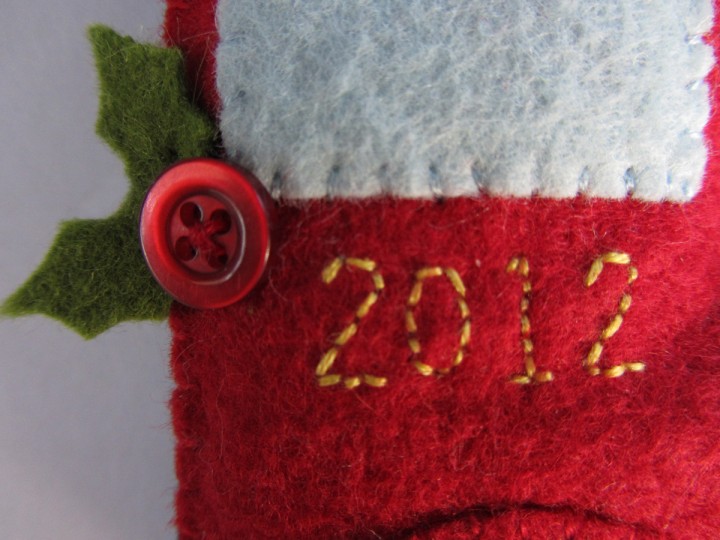
To start, I embroidered the year onto the train. I actually sewed right through the pattern paper, then cut away the paper very carefully. (Here is an example from another project.) I sewed the window on, lining its top with the top of the red train piece. I took some gold trim (the same stuff I used on my treasure page) and thin blue ribbon and sewed it on to the train.

I took some red ribbon and wrapped it diagonally around the white trim piece, stitching the edges down as I went. You could use red felt strips or even 3/8″ candy cane striped ribbon. I sewed the striped trim down onto the bottom of the train. I sewed the gray undercarriage strip below that, then sewed on the front bumper thingy. (What *is* that thing called??)

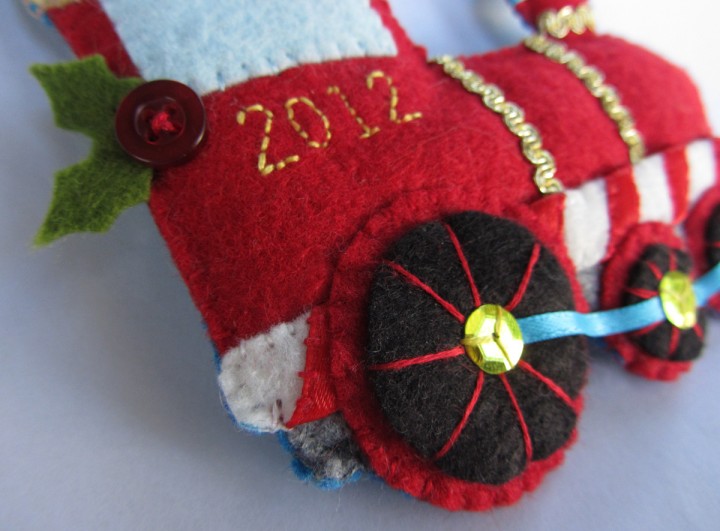
For the wheels, I layered the black centers over the red circles then crisscrossed thread to make spokes. I made a little * shaped stitch in the center where they crossed to hold the threads in place. I sewed the wheels down onto the train around the edges that overlapped. I cut a strip of thin blue ribbon and laid it across the centers of the wheels before sewing gold sequins over each.

To sew the roof on, I first sewed down the gold piece, then the green piece. For the headlight and the steam, I pinned them behind the train and stitched them on with thread that matched the train body.

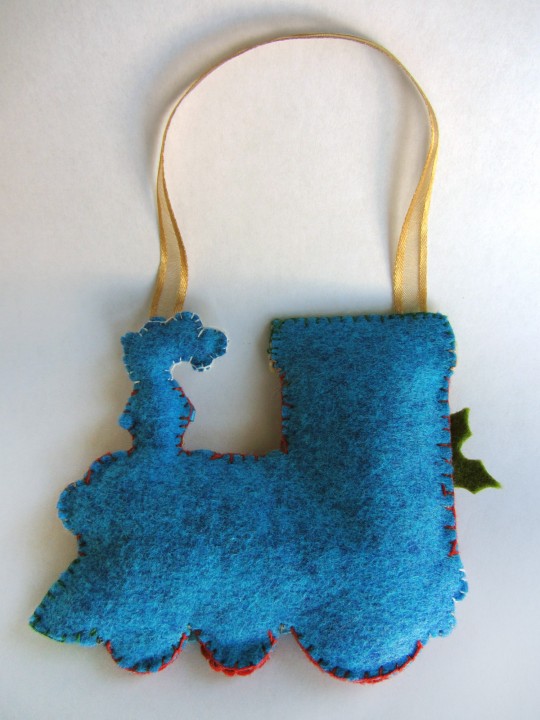
To add a back to my ornament, I laid the finished front piece down on my blue felt and cut out around it. I’ve drawn a backing piece for the pattern, but you need to make sure every lines up just right if you use it. I added some gold ribbon while sewing the front and back together.

The last thing I did was stitch a red vintage button and holly leaves onto the front.

I really like how it turned out, and it is so perfect for Jackson. What do you think?

If you make one of these ornaments, I’d love to see yours! Post a photo in our Facebook page or email me.

Felt Gingerbread Star Cookie Ornament

Photo Courtesy Tikkido/tikkido.com

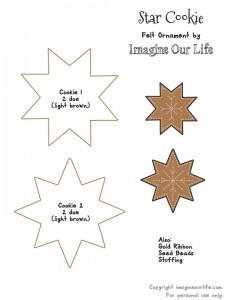
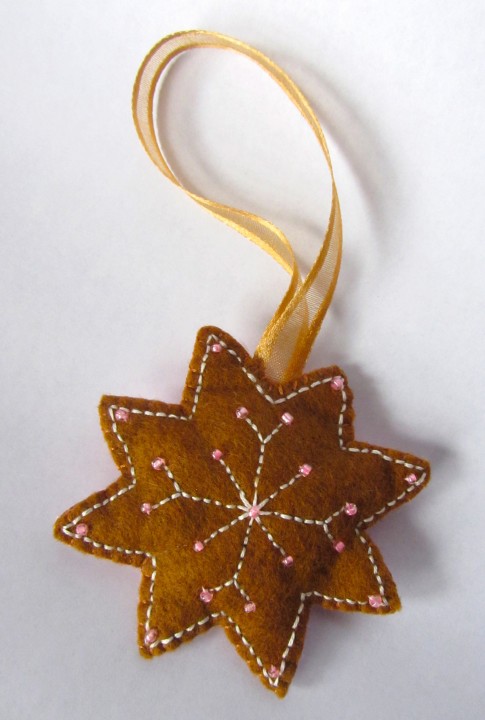
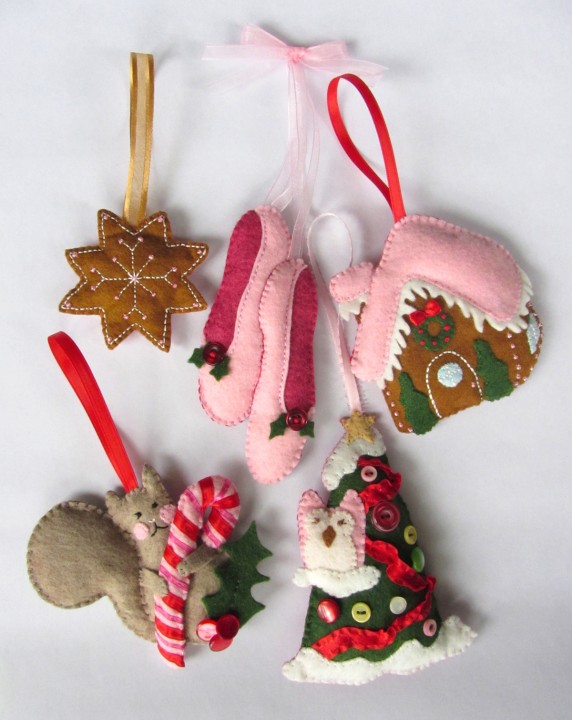
Here is the fifth ornament in the series of five I make for Nikki of Tikkido.com. Her beautiful Christmas Cottage ideas were featured in the newly released Bird’s Party magazine. This is a very simple ornament. Though I’ve only had a chance to make one, I’ve included 2 versions of the cookie on the pattern.

What I Used:

There isn’t really many steps to making these, and you could easily make your own variations.

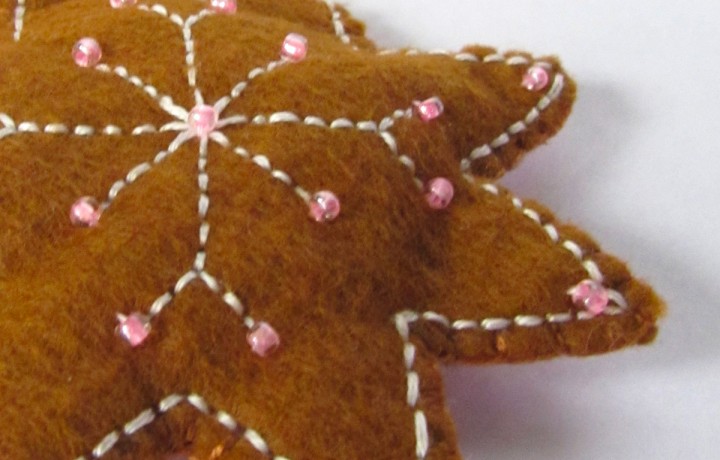
You start by embroidering the snowflake designs onto the front (or both) sides of the ornaments. I used two strands of white embroidery floss to stitch mine. Switch to one strand of floss and a beading needle to sew on the beads. I made two passes through each bead for strength. To finish, add some batting and a ribbon and sew the two sides together.

To view all of the ornaments I’ve designed (with more to come) look here. Ornaments have been a fun break in between quiet book pages. If you have a request, let me know here or on the Facebook page, and I just might get a chance to design one!

Felt Owl & Tree Ornament

Photo Courtesy Tikkido/Tikkido.com

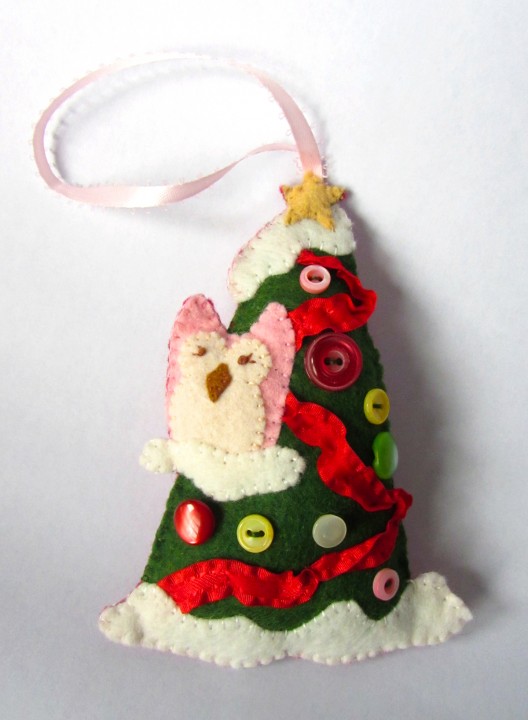
Here is my next felt ornament pattern. A little pink owl in a Christmas tree. I love that owls have made a comeback from the 70’s! (Of course, even I get a little tired of them sometimes.) Snowy owls go well with winter holidays. I wanted to make mine pink. Why not! I did a little tree so she’d have a home and I’d have an excuse to use some of my vintage buttons.

This little owl is the fourth felt holiday ornament pattern in the series of five I designed this year. (You can grab the first three: here and here and here.) The candy candy stripes turned out to be very simple to do, so he really doesn’t take long to sew.

What I Used:

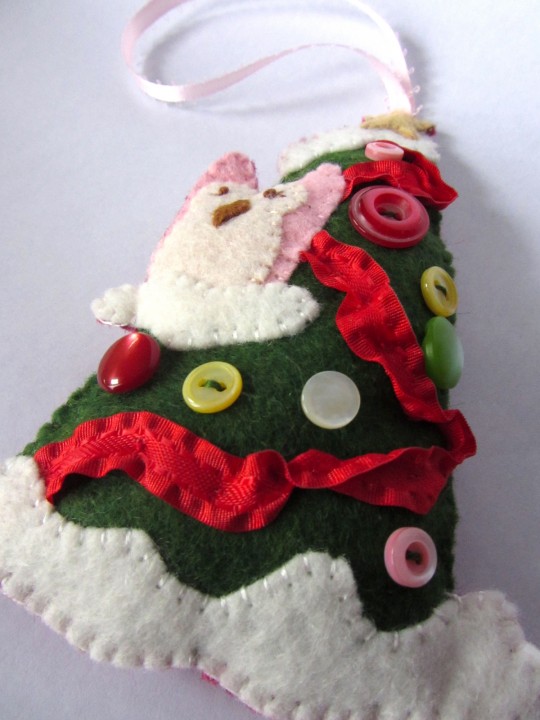
I started by sewing the red ruffled ribbon on to the tree in a zigzag, twisting and bunching it as I went. Then I sewed down the snow ground and on the top of the tree. I sewed the star on to the top.

To make the owl, I sewed the beak onto the cream colored piece. Her eyes are French knots with little stitches to make eyelashes. I sewed the cream part onto the pink, then sewed her onto the tree. I sewed the branch snow over top.

I chose an assortment of cute vintage buttons and sewed them onto the tree as ornaments. I laid my ornament down onto the backing felt and cut around it to make the backing. I also drew a version of the pattern, but you will need to make sure you line everything up if you use that. I added some batting to the ornament before sewing it closed. I used thread colors that matched all the pieces of the front, to keep the front looking nice.

You could use any number of colors to change this ornament’s look. If you make one, I’d love to see! Share a photo on our Facebook page or email me. I have one more ornament to post tomorrow from my original series, but I just drew up two more! It’s hard to stop, they are so fun. I have a winter quiet book page to post very soon as well.

Photo Courtesy Tikkido/Tikkido.com

{ This pattern is free for personal use only. If you would like to purchase a $25 license to sell the finished project in your shop, please email me. }

Felt Squirrel Holiday Ornament


Photo Courtesy Tikkido/Tikkido.com

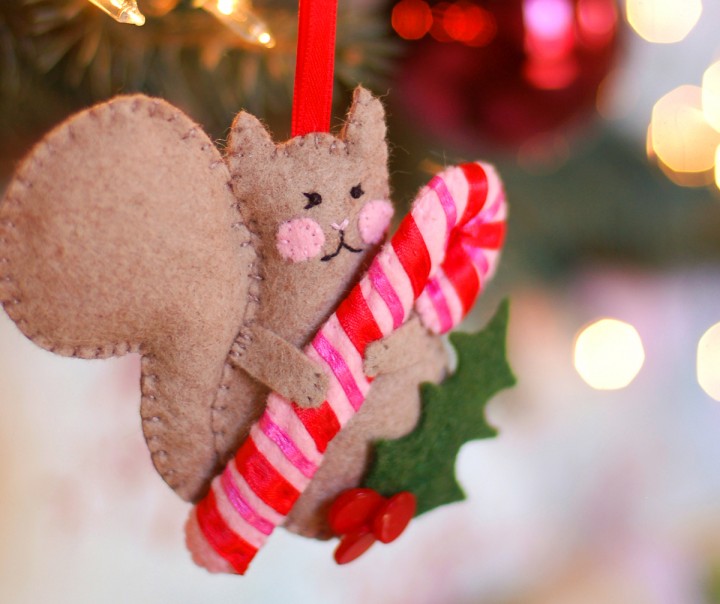
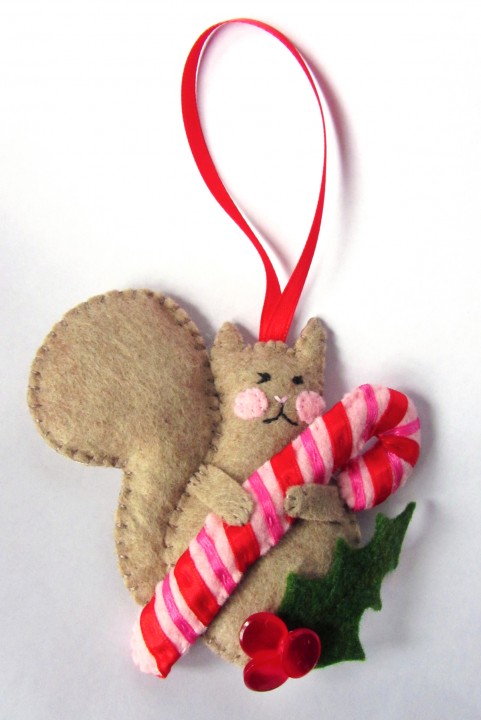
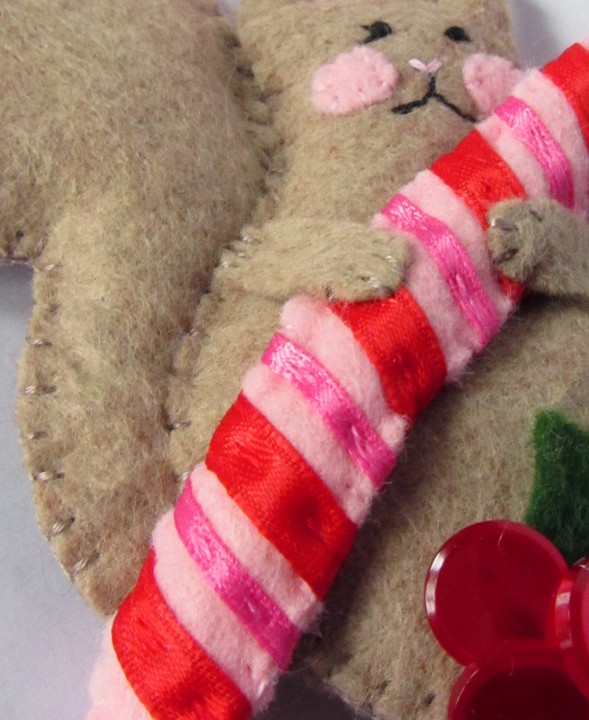
I’m not 100% sure which of the ornaments in the series is my favorite, but it just might be this guy! If squirrels ate candy canes I think they’d look just like this.

Mr Squirrel is the third felt holiday ornament pattern in the series of five I designed this year. (You can grab the first two: here and here.) The candy candy stripes turned out to be very simple to do, so he really doesn’t take long to sew.

What I Used:

Photo Courtesy Tikkido/Tikkido.com

I started by sewing the two sides of his tail together with some batting in between. I didn’t bother sewing all the way around, since his tail would be placed between the body pieces.

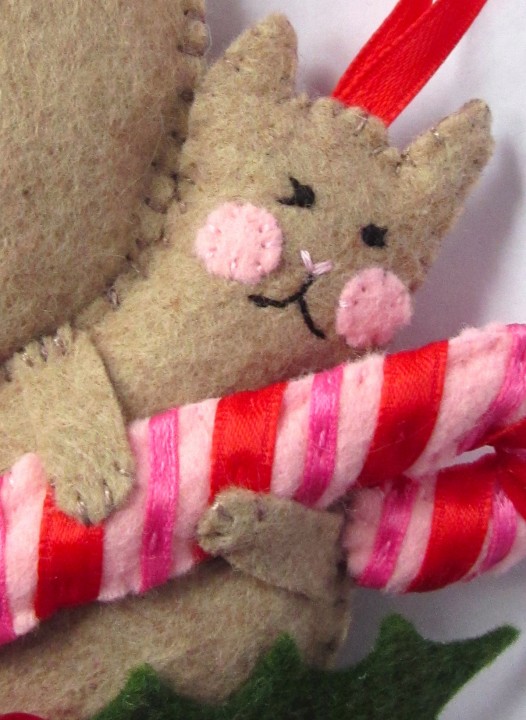
I then embroidered the squirrel’s face. I stitched on the felt cheeks, then made his mouth with a black back stitch. His nose is a little V in pink thread. His eyes are French knots with little sideways Vs for eyelashes.

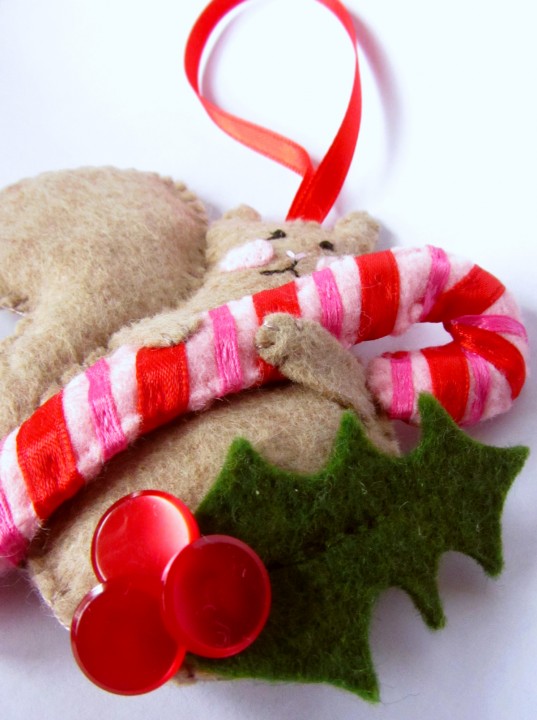
I then pinned the tail in place between the body front and back, along with some batting for the body, and sewing all the way around. To add the holly leaf, I did a line of back stitch (through only the front layer of the squirrel) partway up the center of the leaf. Then I sewed on 3 vintage buttons form my mother’s stash. You could sew the leaf and buttons on before sewing the body together if that is easier for you.

To make the candy cane, I sewed the two sides together with a length of batting twisted up into a long tube inside. Starting with the red ribbon, I folded the end over and made a stitch to secure it to the bottom back of the candy cane. I wrapped it around the cane, doing a basting stitch through the middle of the ribbon in matching thread. When I got to the top, I folded the end under and stitched it to the back. I repeated the process for the pink ribbon.

His arms are very simple. I sewed each on to a side of his body, then made 4 little stitches on the paw od each one to attach it to the front layer of the candy cane. They look like little squirrel toenails.

Photo Courtesy Tikkido/Tikkido.com

You could definitely make him less girly by changing the candy cane and ribbon colors. He could even hold something different – acorns or a mug of hot cocoa! If you make this or any of the other ornaments, I’d love to see yours! Post them on our Facebook page or email me a photo.

{ This pattern is free for personal use only. If you would like to purchase a $25 license to sell the finished project in your shop, please email me. }

Felt Ballet Slippers Ornament

Would you like to make and sell items from this pattern? Commercial licenses are available!

photo courtesy Tikkido/Tikkido.com

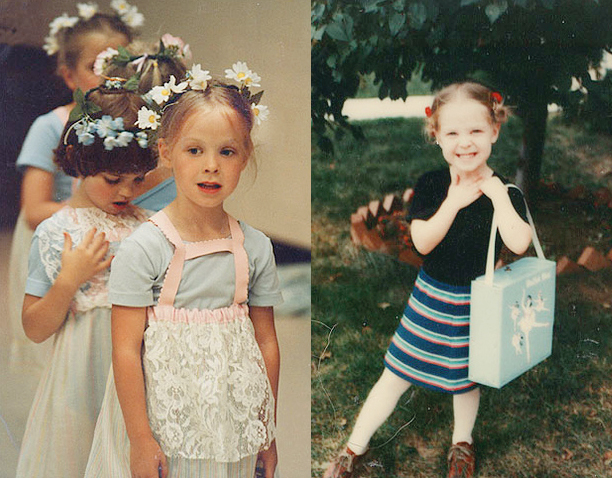
I grew up taking weekly ballet classes form a dear family friend. They were more for fun, and she often let me be the free spirit I tend to be when it comes to creative things. As I got older, my classmates outgrew ballet. The classes shrunk until I only had one or two other girls with me. I adored my classes – they were the highlight of my week! I still have my pointe shoes, and I’m planning on hanging them up in my new craft room.

Little Me

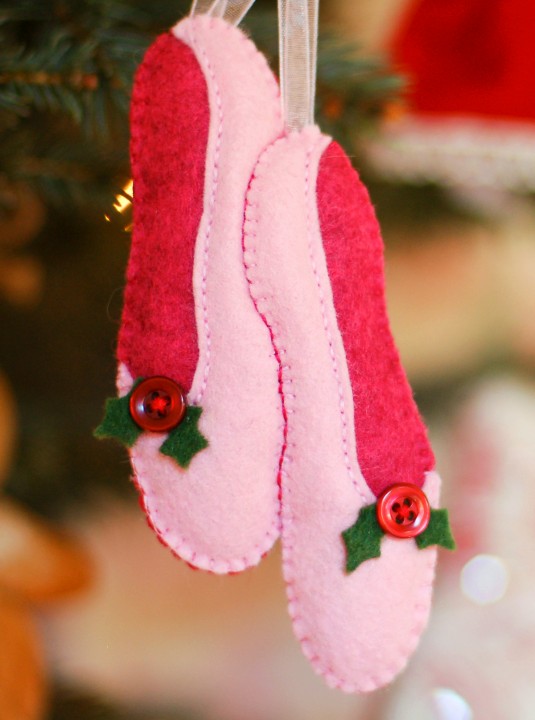
These pink ballet slippers are the second felt holiday ornament pattern in the series of five I designed this year. (You can grab the free pattern for my first, a gingerbread house, here.) This is a project that works up very quickly, but turns out so sweet!

What I used:

I started by sewing the two pink slippers down to the pomegranate pink inner shoe piece using a back stitch along the foot opening (see photo). I also did an applique stitch along the two shoe soles. I didn’t worry about sewing down the outer edges yet, as they would be sewn down as I sewed the ornament back on. Once I sewed down the two slippers, I used hot pink thread and did a back stitch to show where the two slippers overlapped.

I cut out the two sets of holly leaves and sewed each one down with a red vintage button from my late mother’s sewing stash.

I cut two pink ribbons for each slipper, to look like the double ribbons used to tie on point shoes. When I sewed the red backing on, I added some batting for dimension and I made sure the ribbons were caught in the top of each slipper. I fanned them out a bit so you can easily see both ribbons for each shoe. When the ornament was all sewn together, I tied the ribbons into a bow and placed a few stitches in the knot to hold it together.

Photo courtesy Tikkido/tikkido.com

This is another ornament that could easily be customized by using different colors of felt and new embellishments. If you make this or any of the other ornaments, I’d love to see yours! Post them on our Facebook page or email me a photo.

Stop by tomorrow for the next ornament. Which should I post?

{ This pattern is free for personal use only. If you would like to purchase a $25 license to sell the finished project in your shop, please email me. }

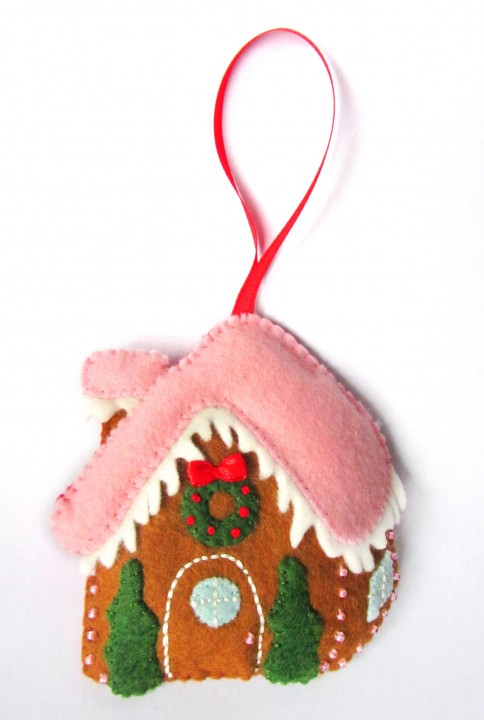
Felt Gingerbread House Ornament

Would you like to make and sell items from this pattern? Commercial licenses are available!

Photo courtesy Tikkido/tikkido.com

Do you have the holiday season on your mind already like I do? You almost have to when you are a crafter, as projects take time to complete.

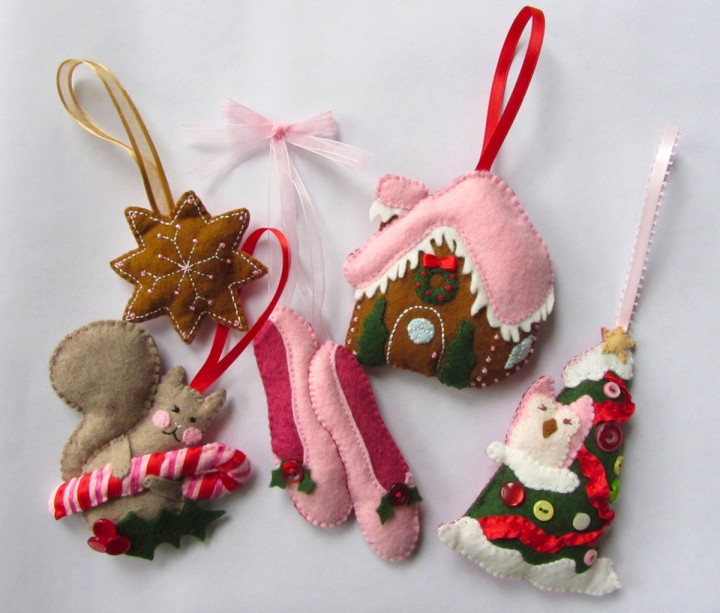
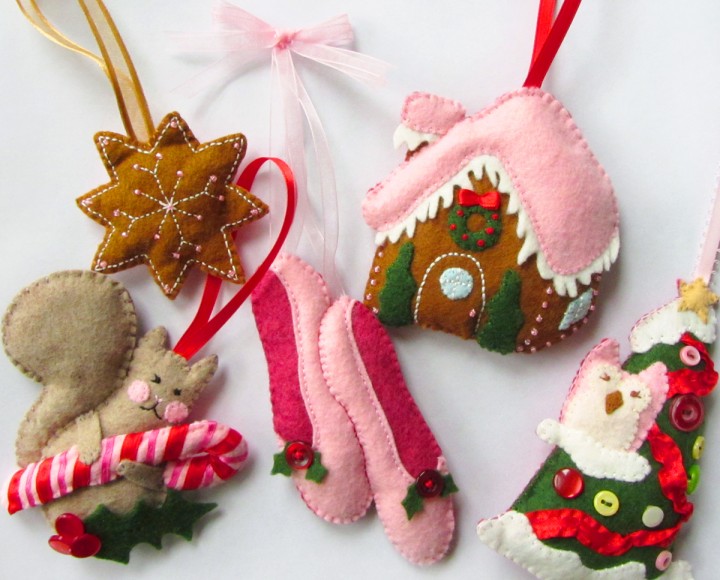
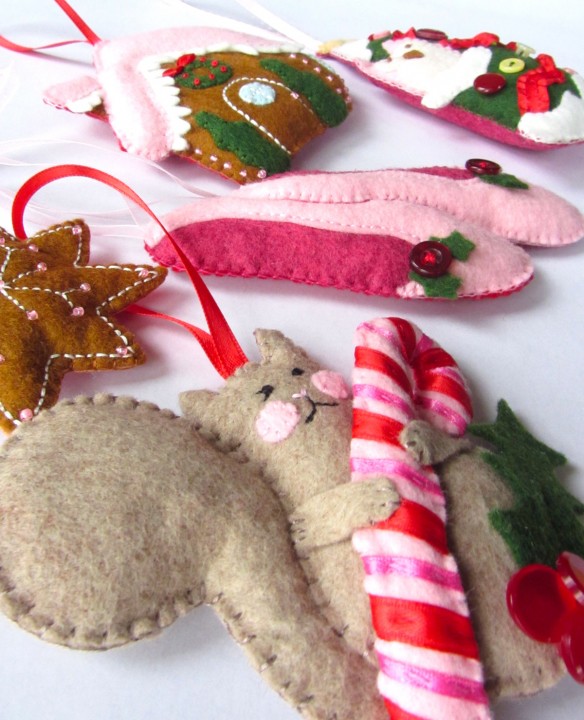
A while back, I was asked by Nikki of Tikkido to contribute some felt ornaments to an upcoming Christmas e-zine feature. Her theme was very sweet and girly, so I jumped at the chance! Too many of my projects are for boys or gender-neutral. It’s nice to use pink every now and then! I’ve designed 5 hand-sewn felt ornament patterns and I’ll be sharing them with you over the next few days.

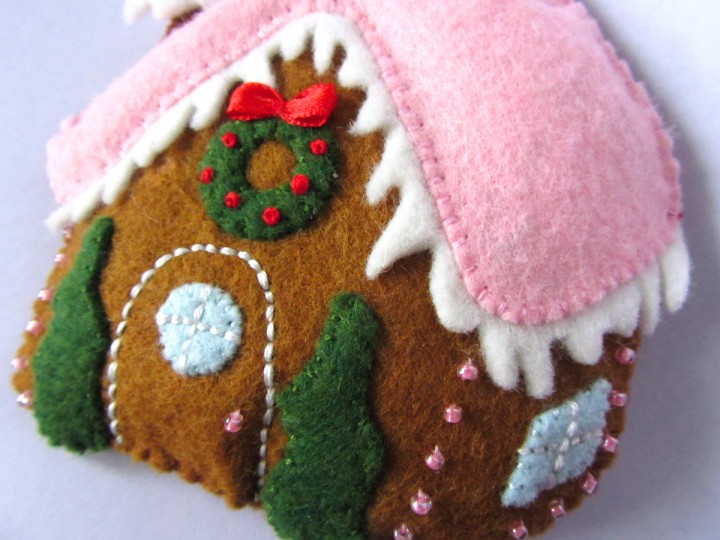
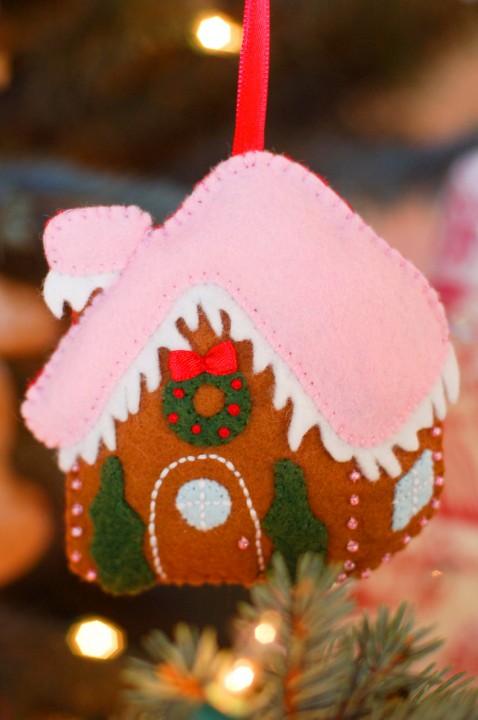
Today’s pattern is a sweet pink gingerbread house. I adore how it turn out! You could very easily change the colors and embellishments to customize this pattern for your tree.

What I used:

I started by laying the icicles in place on the house front under the roof and chimney top pieces. Then I sewed the roof and chimney top down, leaving the icicles hanging loose.

I normally use two strands of embroidery floss while sewing with felt, but I used four strands of white to make a back-stitched arch to form the door. I sewed down the two windows and again used 4 strands of white to back stitch the window panes.

I sewed down the two trees and the wreath next. I used four strands of red floss to make French knot berries on the wreath. You could also use seed beads. I took a little scrap of red ribbon and folded both ends in to the center to make a bow shape. I made a stitch to hold it together then flipped it over and placed it on the wreath. I sewed it down at the center while cinching the middle of the bow.

Using a beading needle and one strand of thread, I sewed on lines of seed beads (going twice through each bead for strength.)

Photo courtesy Tikkido/tikkido.com

Once the front of the ornament was decorated, I cut out a matching back in red felt and started sewing the sides together. I added a loop of ribbon as I sewed across the top. When I was halfway around, I added some batting to the ornament to give it dimension. Once I sewed it closed, it was ready to hang! (For tips on sewing around felt edges, see my blanket stitch tutoral.)

Visit often this week to collect all five of my holiday felt ornament patterns! Which is your favorite?

{ This pattern is free for personal use only. If you would like to purchase a $25 license to sell the finished project in your shop, please email me. }

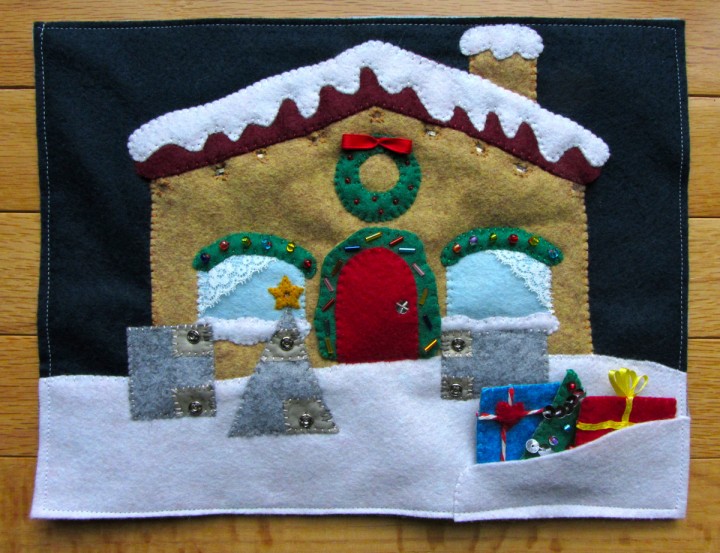
LED Holiday House Puzzle Quiet Book Page

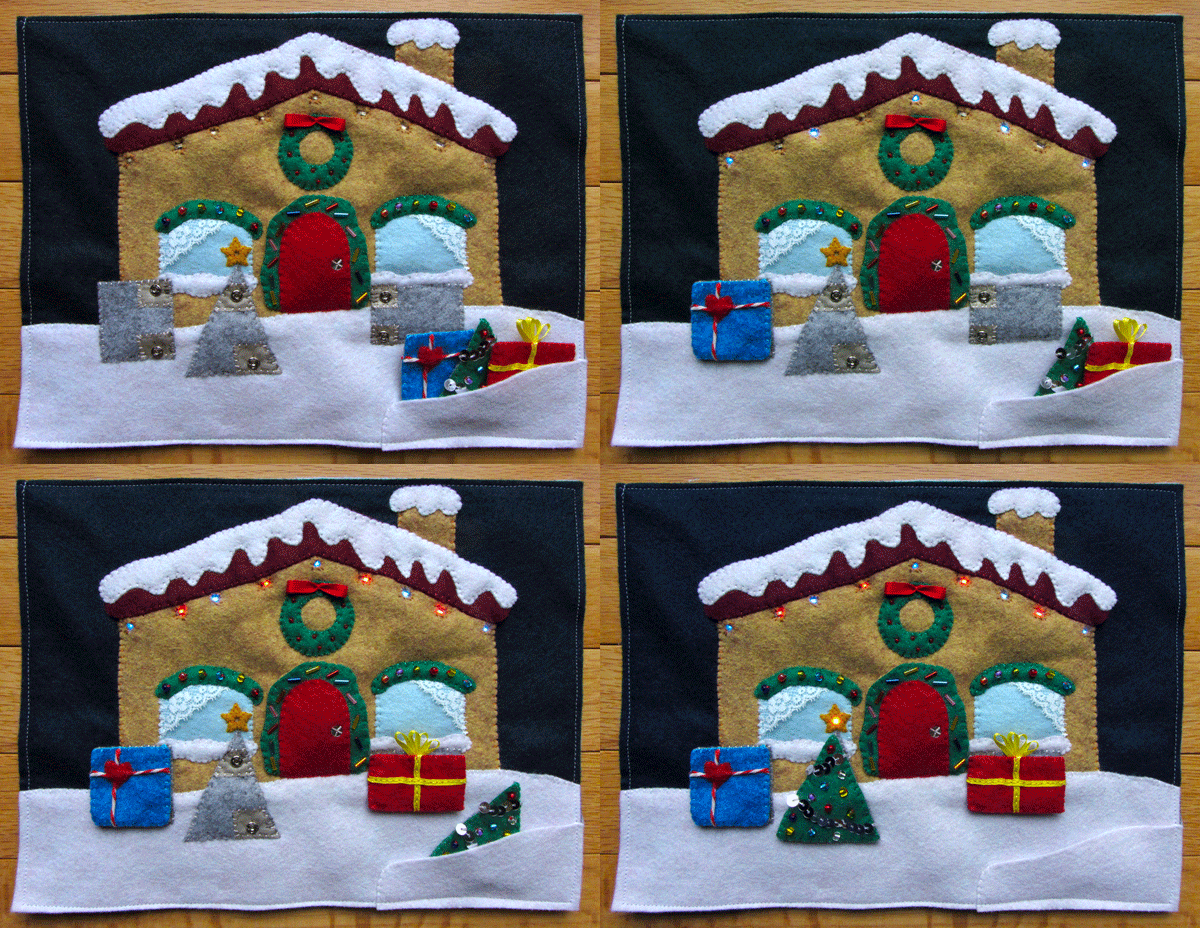
This quiet book page was quite the project! It is an interactive puzzle – you match the shapes to light up the LEDs. It is the second page in a series of pages I am doing for all 4 seasons. I’ll be doing one regular page and one LED holiday page for each season. The first was my Halloween Jack-o-Lantern page.

The planning of the circuits was a bit confusing to work out, but I really feel like I’m starting to get the hang of e-textiles. I admit, I went through two revisions of how I sewed the circuits before settling on the third. But, that is one of the things that makes e-sewing so forgiving. You aren’t soldering anything together… Not happy with it? Clip the threads and start again! But, don’t be scared. You can do it! Try the Halloween page first, or something similar using that wiring plan as a guide. You’ll get the hang of it!

This page can be made without the LEDs. Just skip that part and make it a regular shape puzzle. You could add a few more shapes if you wanted. You could still have the door open, but maybe put a photo or surprise behind it instead of the battery.
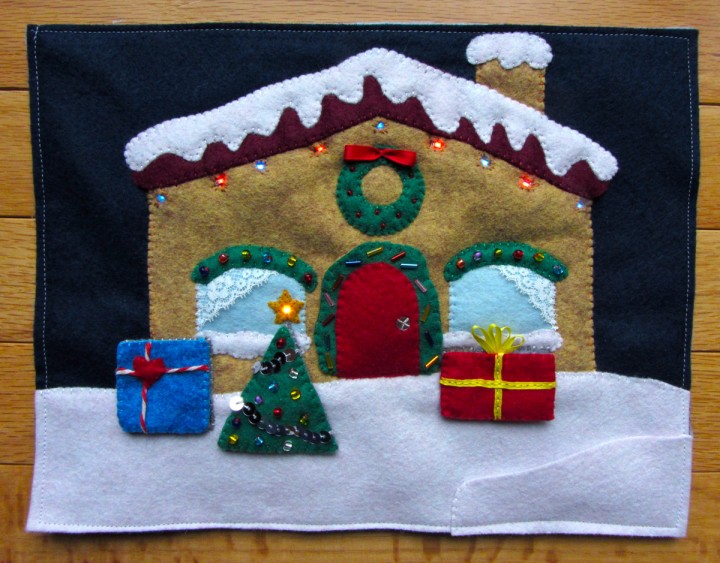
All of my e-textile supplies are courtesy of SparkFun. Their LilyPad line makes adding interactive circuitry to soft projects as easy as possible. They carry everything you need, from the conductive thread and fabric to snaps and needles. The lovely wool blend felt was provided by American Felt and Craft. I think the look and feel of wool felt is a match made in heaven for a Christmas themed page. The rich colors and soft, warm feel are just perfect!

What I Used:

This tutorial is going to be a little crazy! But, stay with me…
Red & Blue LEDs: Start by cutting some scrap felt into two strips that follow the roof line. On the first strip, stitch down the red LEDs: using conductive thread, make several stitches through the + hole of the first LED then use a running stitch across to the next. Make several stitches in that LED’s + hole and continue until you’ve linked all four positive (+) holes. Start a new conductive thread and repeat the process along the negative (-) holes. Don’t let the + and – threads touch. The strip holding the red LEDs will need to be layered behind the blue strip, so the running stitches need to be covered. I cut scrap felt and basted it down between the LEDs.


My strip of felt for the blue LEDs is thicker because the two circuits need to go over the red LEDs while still letting the blue LEDs line up. Stitch the positive (+) line of the blue LEDs the same way you did the red, but stitch along the edge to leave room for the negative line (see photos). Lay the blue over the red and cut out holes to let the red LEDs show through as shown. Then sew the blue LED’s negative line as shown.

At this point I tested both circuits and set them aside. To test: put a battery in the battery holder and cut two scraps of conductive thread. Lay the ends of one scrap on the + hole of the battery holder and the + hole of the last LED. Lay the other thread on the – hole of the battery holder and the – of the last LED. They should light up.
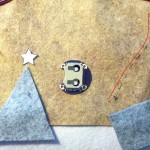
     

Main Circuitry: Pin the roof piece to one of the house shapes so you have an idea of where the LEDs will be. Cut a scrap of felt to go under the snow. Mine was about 8″ wide by 2″ high I suggest going 3″ high so you have more wiggle room. Cut out one set of the gray shapes and decide where they will be positioned on the house. Place the battery holder so the positive (+) holes are at the right.

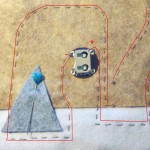
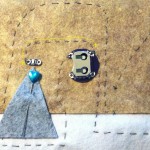
Red: I started with the red circuit first. Sew a few stitches where the upper left corner of the rectangle will be. Do a running stitch up to just below where the far right red LED will go. Tie it off. (We will link it up to the LEDs later.) Start another thread by making several stitches in the upper right (+) hole of the battery holder. Go out and down (staying out of the way of the negative hole), then go right under where the rectangle will be. Go up and end near where you ended the first (negative) line. Now we stitch the other half of the negative line (broken by where the squares of conductive fabric will be.) Start a thread and make several stitches in the upper left negative (-) hole of the battery holder. Go out and down (staying out of the way of the negative hole), then stitch down and around the triangle as shown. You need to leave plenty of room over the triangle for the yellow LED circuit. End with several stitches under where the lower left corner of the rectangle will be.

You can test your red circuit by laying the red LED strip in place and running scraps of conductive thread from the – and + holes of the last one to the corresponding thread lines in the upper right corner of the house. Then place a scrap of conductive thread or fabric (I saved the selvage to use as test strips) to complete the gap where the rectangle will be. (See photo below of me testing the yellow.)

Yellow: Next is the yellow LED circuit. start a thread and make several stitches in the upper right (+) hole of the batter holder and go up and over (staying out of the way of the negative hole) to the triangle as shown. Position the LED just above the point of the triangle (with the positive hole on the left) and make sever stitches in the (+) hole.
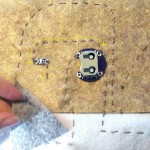
     

The negative line of for the yellow LED is a quick one. Make several stitches in the negative hole of the LED then a couple stitches down to under where the triangle tip will be. Start a new thread and stitch several times in the upper left negative hole of the battery holder. make a line of stitching going out and down (don’t touch the blue line!) and end it under where the lower right corner of the triangle will me. You can test this circuit by placing a scrap of conductive thread across the gap in the circuit.

Blue: To start the blue circuit, make several stitches under where the upper right corner of the square will be. Running stitch up to just below where the blue LEDs will be as shown.


To sew the other half of the blue LED’s negative line, make several stitches in the lower left negative hole of the batter holder, then stitch down and under the triangle, just below the red line you made earlier. My lines were close, which is why I suggest using a slightly longer scrap of felt down there. Make sure you leave room below the line you are stitching. There will be one more line down there. Continue your stitching up to where the lower right corner of the square will be and make several stitches.

Make the positive blue line by starting with several stitches in the lower right positive hole of the battery holder. Stitch down and over to the left (it will be the third line running under the triangle) as shown. Stitch over and up to the roof, ending beside the negative line. You can test your circuit the same way you tested the red earlier.

Conductive Shapes: Cut out a second house piece and use the door pattern piece to cut out a hole for access to the battery holder. Pin the roof piece on to it and sew it down (I was not sewing things down to a background at that point. The light blue was just a layer to insulate my laptop from the exposed circuits while I photographed steps.) I also sewed down the windows and window snow, as they are overlapped by the shapes. Cut out your star felt piece and cut a hole in it so the yellow LED can show through. I stitched around the hole for strength and also stitched it down around the narrow width of the LED so the hole doesn’t move. Stitch down the star.

Big Note: You don’t need the snaps I added to my puzzle! In fact, they almost make the conductive fabric unnecessary… But I was a little disappointed to find that (unlike the conductive thread) you needed some pressure when laying the two layers of conductive fabric together in order to power the LEDs. The finished puzzle pieces did not have enough weight to do this on their own once you let go. Since Jax is not old enough to understand he needs to press down on the pieces to get them to light, I went back and added snaps to hold the pieces down against the puzzle. I also used conductive thread when sewing them on to add conductivity.

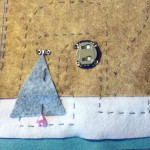
Cut scraps of conductive fabric and sew them to the triangle as shown. Cut out a piece of felt to be your snowy ground for the page (mine is “soap sud” – a blueish white) and lay it over the bottom of the house. Sew the triangle down. Using conductive thread, make several stitches through all layers to link the two “broken” ends of the yellow negative line to the two scraps of conductive fabric. Each scrap should be connected to its corresponding line of conductive stitching. Test the puzzle piece by pressing a scrap of conductive fabric across the triangle. (See photo below.)

Do the same for the square and rectangle, adding scraps of conductive fabric (and snaps if preferred) as shown and sewing them down. Be sure to link the conductive fabric to the circuits with conductive thread. (See the last photo below. You can see my 3 dark stitches in the side of each square of conductive fabric.)


When designing this puzzle, I worked hard to find a balance between making the project easy to explain and having a design that was easy to product with minimal user errors (such as stitching circuits too close to each other and shorting it out.) In this third revision of the design, I knew this would be the most difficult part to explain. It really isn’t that bad, though! Stay with me…

Take your strip of blue LEDs and pin them in place between the house layers. The second photo above shows the top layer of the house pulled back. I hadn’t moved the roof piece up to the front house piece yet for that photo. Simply put, you need to connect your negative line from the house to the negative hole of the first LED and connect the positive line from the house to the positive hole of the same LED, WITHOUT touching! Touching the lines together will “short” the circuit and the LEDs will not light. To do this, I added an additional scrap of felt between the bottom house piece and the blue LED strip piece. I was able to directly link up the negative line from the house to the negative hole by just stitching up the house and then straight through the scrap of felt into the hole. For the positive line, I went up the house and then through to the scrap of felt, where I continued up and around the LED to get to the positive hole. I hope the sketches on my photos help explain!

You can new test and light up your blue LEDs with a strip of conductive thread. I kept mine pinned in place so the LEDs glowed while I cut tiny holes for them out of the front house piece. I stitched around the hole and stitched them down around the LEDs same as with the yellow star. You are done the blue! Phew!

   

To attache the red LEDs, lay them so they line up with the holes you made in the blue strip, as shown in the first photo below. It was easy to connect the negative and positive lines from the house to the corresponding holes on the LED. Just follow the house lines and check the LED holes to make sure you are connecting the right ones. The positive line will go up beisde the LED to where the positive hole is at the top of the LED. Keep your stitches in the hole you cut out of the blue strip to avoid crossing and shorting circuits. Test it out with a strip of conductive fabric across the rectangle puzzle. You finished all the circuits! I knew you could do it!
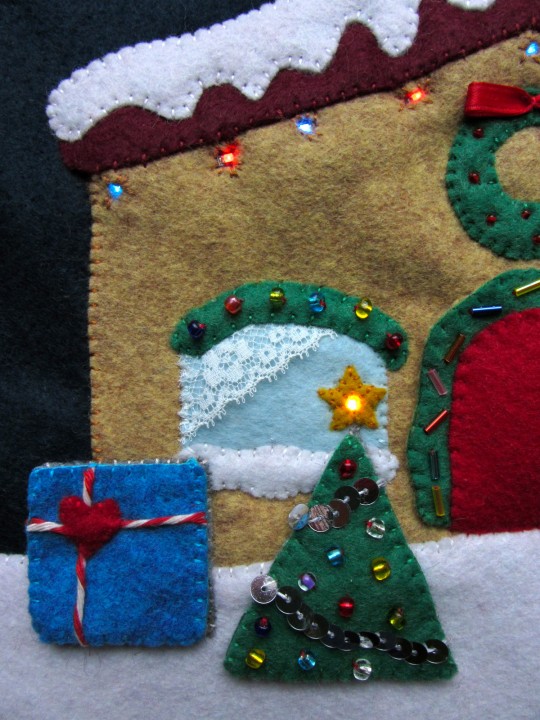
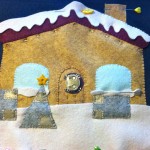
Decorating the House: At this point, after thoroughly testing all the circuits, I sewed the house and snowy ground down to the page. Before sewing the snow to the roof, I layered the chimney behind it. I also stitched down the opening of the door.

If you aren’t using LEDs, you can add a photo window or little surprise behind the door in place of the battery… Santa? A loved one? Whatever you’d like!
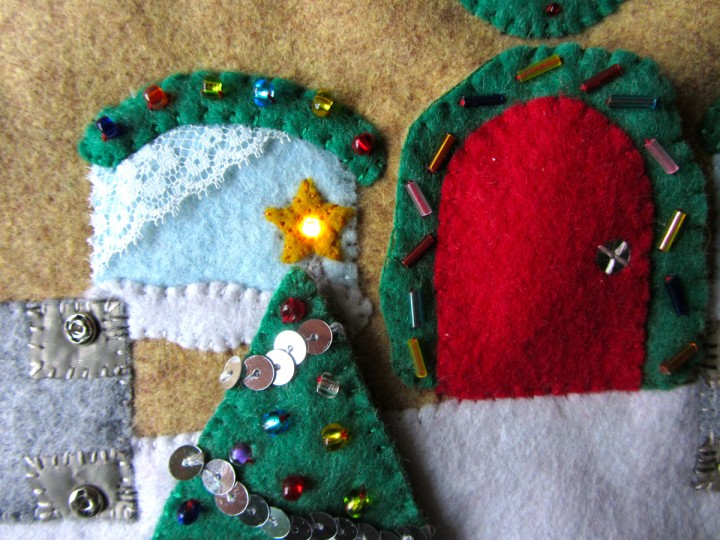
For the windows, I cut scraps of vintage lace as curtains, and stitched them down along the outside of the windows. Then I decorated the window garlands with beads and sewed the, down over top.

For the wreath, I decorated it with red seed beads before sewing it to the house. I folded a scrap of red ribbon into a bow shape and stitched it down at the top of the wreath.

If you are not doing LEDs, You can stitch beads or sequins down in place of the LEDs to be the string of lights.
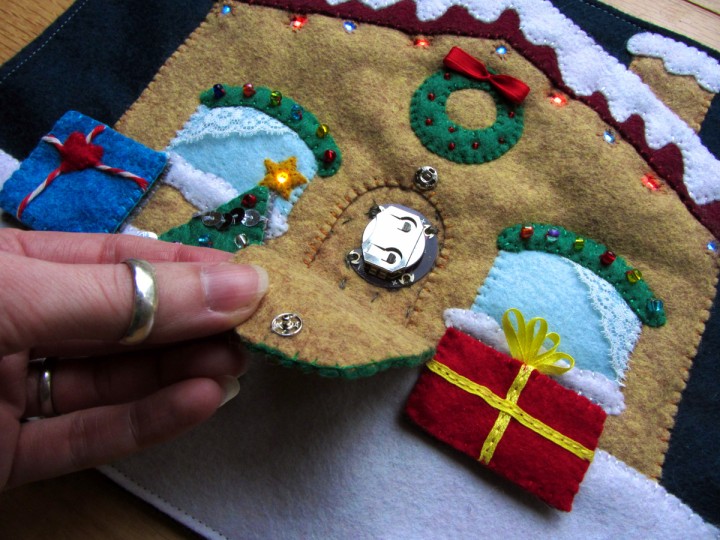
Making the Door: Sew a snap to the house just above the door hole. Sew the matching half of the snap to the back of the tan door garland backing piece. Sew the door to the garland piece and decorate the garland with beads. I also added a sequin doorknob. Sew the front and back pieces of the door flap together and sew it in place. I sewed mine along the bottom instead of the left as it is not there to function as a regular door and that felt more secure. If you are not using LEDs, a regular door would work well, and you might not even need a snap.
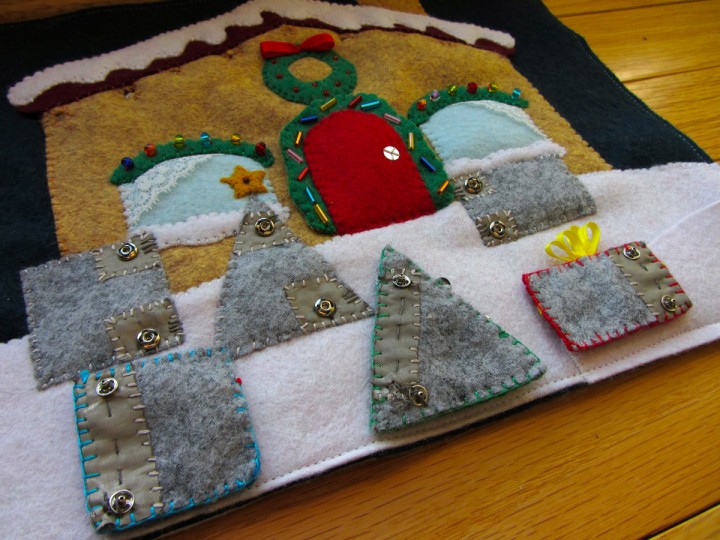
Puzzle Pieces: To start each puzzle piece, you need to make the gray backing that will complete the broken circuits when laid in the correct place. To do this, sew strips of conductive fabric onto the gray backings so that they line up with the conductive scraps on the page AND span the gap. I also added the optional snaps to hold the pieces against the page.

Decorate the fronts of the puzzle pieces however you like! On my tree, I used sequin trim to make a garland and beads as ornaments. On the square and rectangle, note that you will need to show which side is the top of the shape (so the conductive fabric lines up.) I added a bow to the top of my rectangle, and cut out a quick heart shape to Jax would realize which end was up on the square. Sew the fronts and backs together.

Before sewing your page to its backing, add a felt “snow drift” pocket to the corner to hold the shapes while not in use. You don’t want to store them on the puzzle unless you upgrade your battery holder to the one with a power switch.

All done! Not so bad, right? I admit, it was tricky at times. Electrical wiring is not something I learned while pursuing my fine art degree in college, But I am sure proud of myself for figuring it all out! Mad props to my programmer brother for patiently checking all my circuitry drawings for errors!
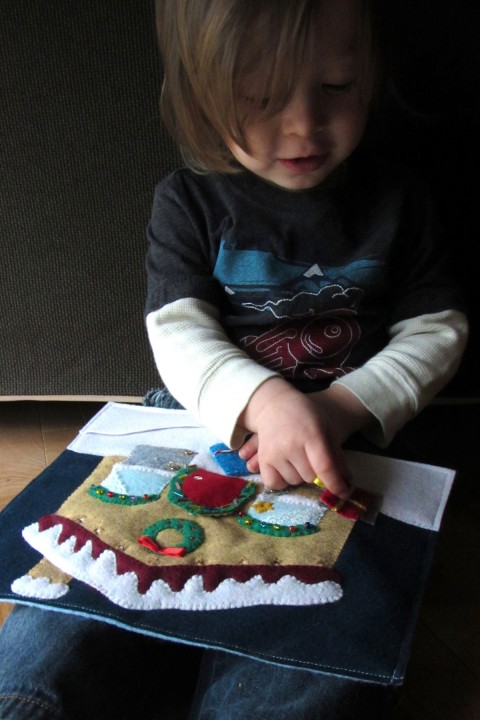
Jax knew exactly what this page was for before I even had all three of the puzzle pieces sewn. He kept asking if the shapes were all done so he could play with it. He can’t do little snaps yet, but this page will help him practice. I close the snaps for him after he solves each piece.
  

If you make this page, send me a photo! You can email it or post it on the Facebook page. I’d love to see both versions with and without LEDs. Happy sewing!

Jax’s Barn – Wooden Dollhouse Makeover

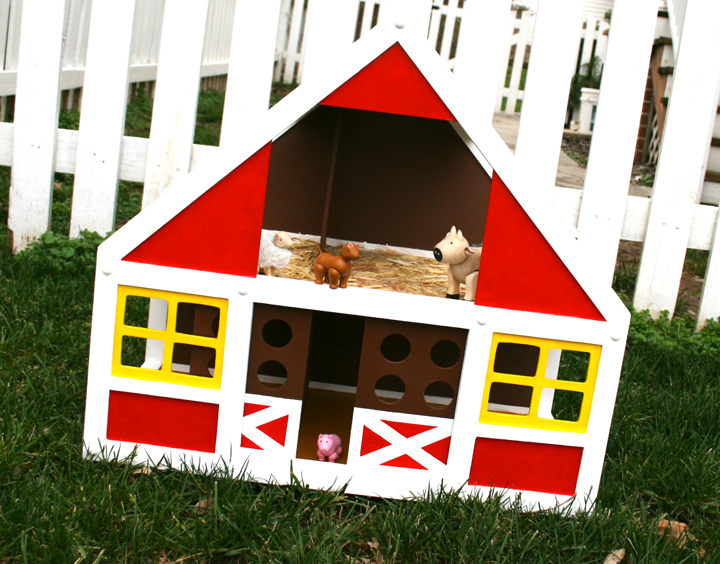
Jax’s Barn

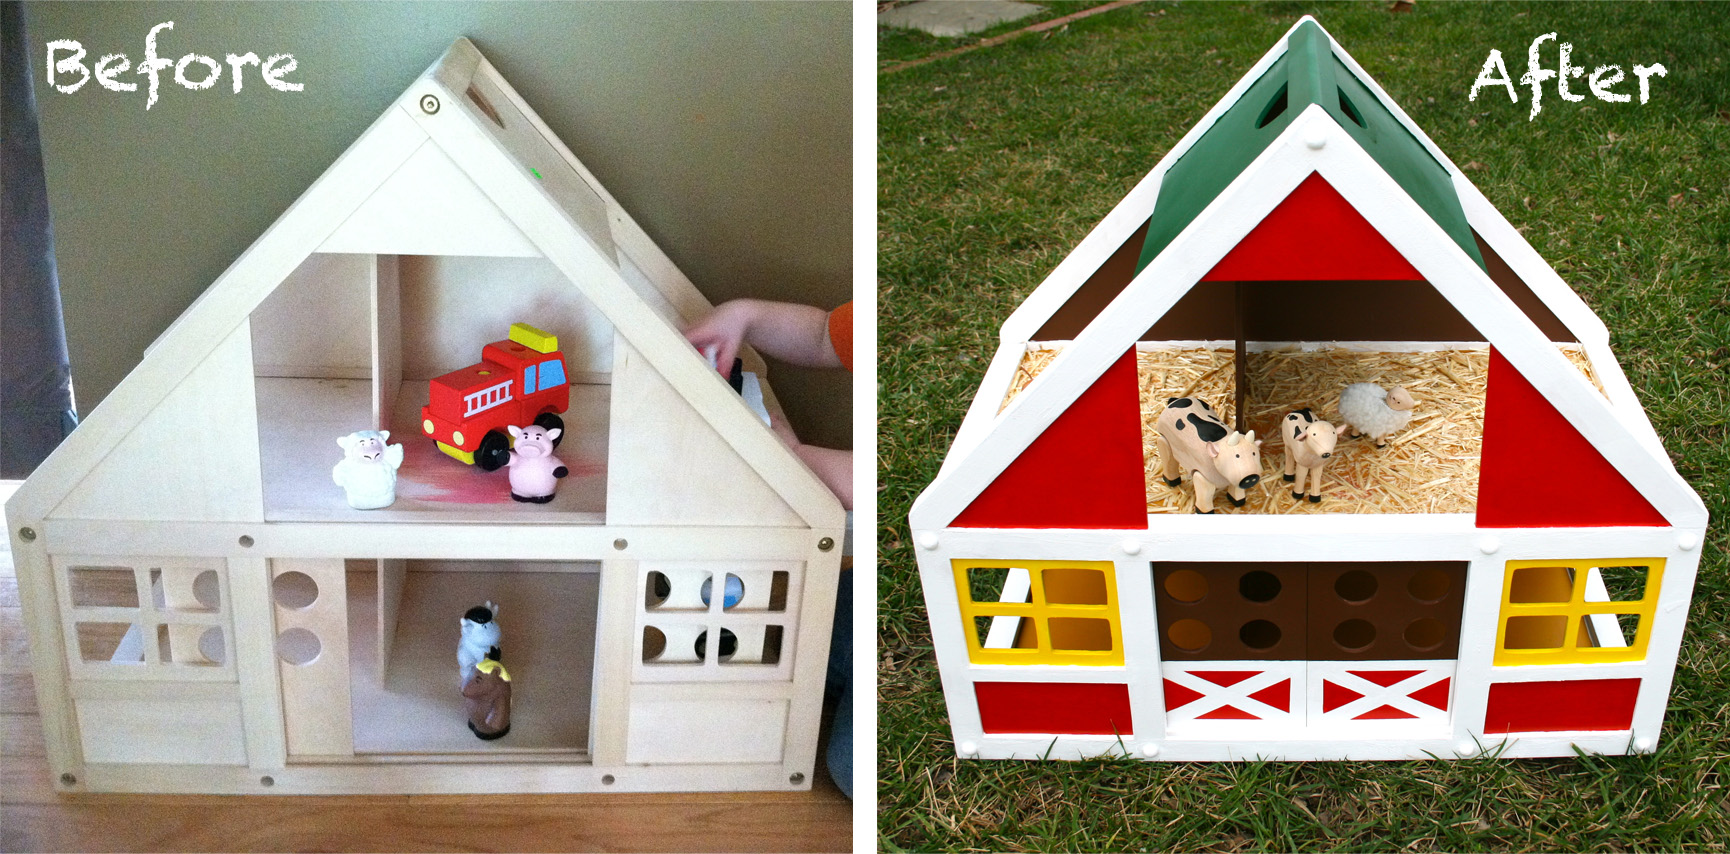
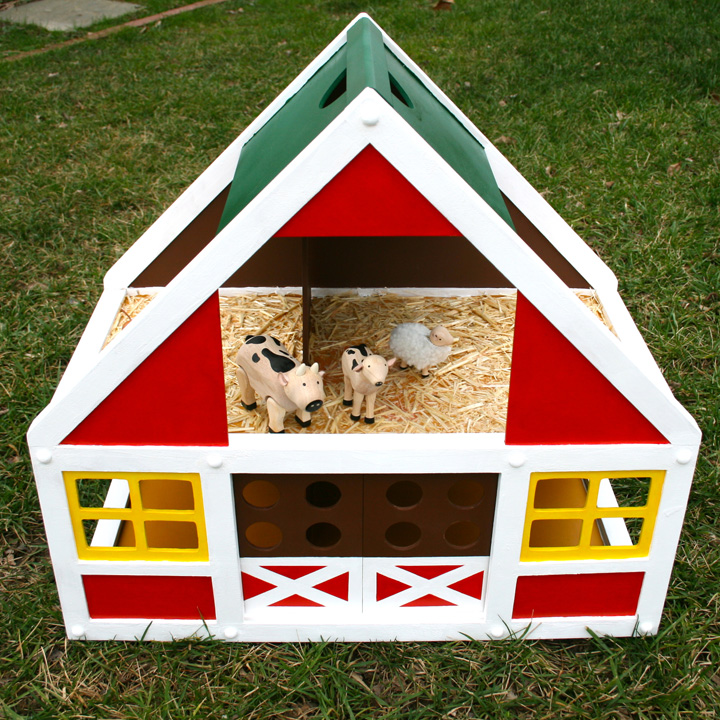
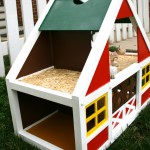
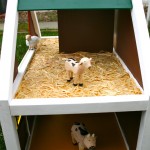
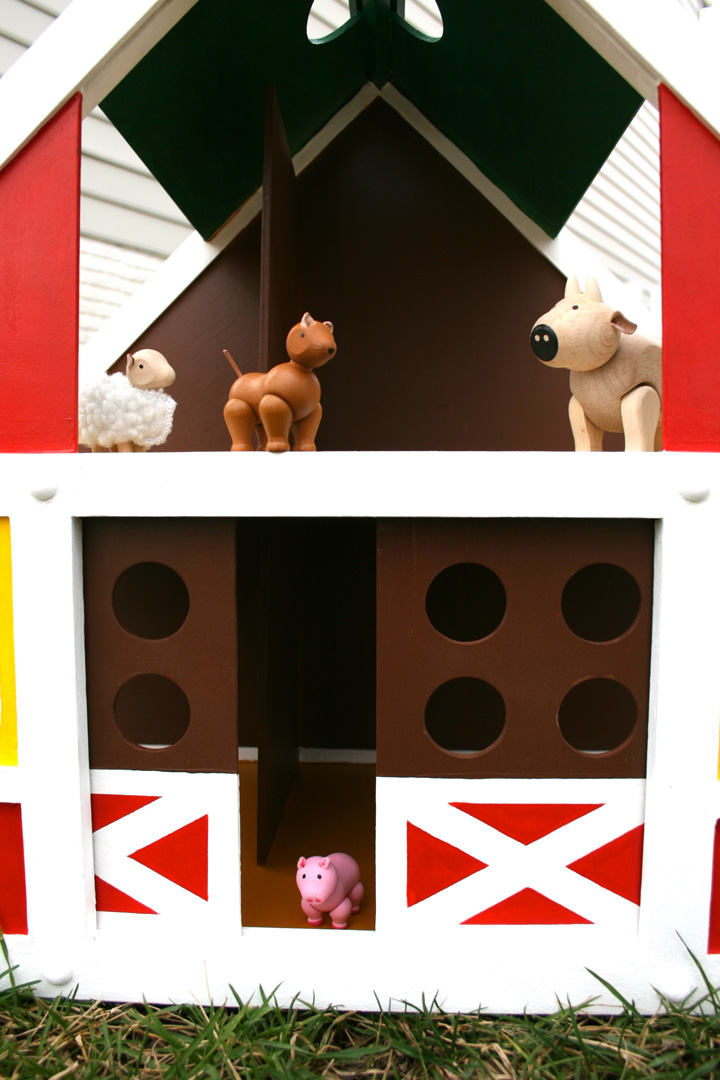
Jax’s Christmas present is done! I started with an under $10 thrift store dollhouse and turned it into a sweet little barn for Jax to enjoy.


It took me about a month of stealing 30 minutes here and there to add more layers of paint. Lots of paint! On the floor of the upper level, there had been a pretty dark red stain. Let’s just call it paint, since the dollhouse didn’t appear to be haunted! I hid the stain and added to the barn feel by using Mod Podge to glue craft straw down and sealed it with a few layers of acrylic sealant. I may eventually do one of those acrylic water kits up there so the floor is smooth, but it works for now. Just a little bumpy for some of the animals. I also filled all the screw holes with wooden plugs I painted white. Once my million coats of paint (to get the edges just so) were dry, I sealed it all with Krylon spray. Right now, I’m just letting the house cure and air out for a few days before wrapping it up.

The animals I got Jax are by Plan Toys. They are so cute, and I love that they are wooden. I wish I could have afforded the horses/stable and the tractor (see Jax’s Wishlist), but at least he has a few friends to start out with. I did get him a farm train to go along with it.

If he plays with his barn a lot, I may sew him a farm play mat with roads for tractors, fields and pastures. What do you think of the makeover?

Easy Oreo Pops

These are so good and so easy! I wanted something fun to round out this year’s cookie tins that would use up some extra candy-making supplies I had laying around. I still had candy sticks and bags from making chocolates for my baby shower two years ago!

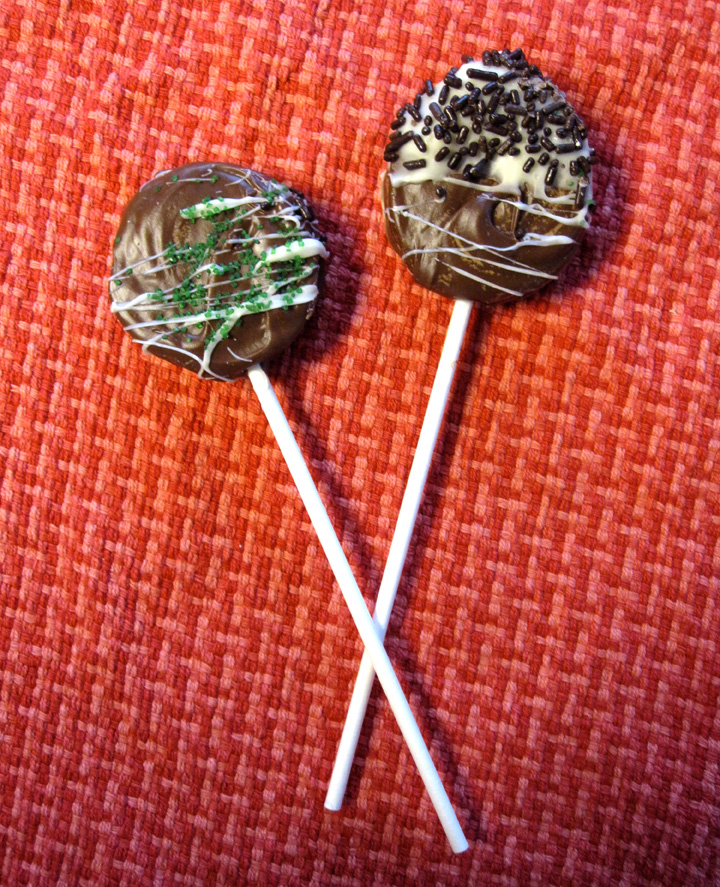
Oreos are already delicious, but put them on a stick and cover them in chocolate? Yes, please! You could make so many varieties of Oreo pops using different cookie flavors and different coatings. Dark chocolate mint! Peanut butter chocolate! White chocolate peppermint!

Here’s what you need:

  • Double Stuf Oreos (you can’t fit the sticks into plain Oreos!)
  • Candy/cookie sticks
  • Candy Melts (I used milk & white chocolate I had leftover)
  • Sprinkles (I just used some leftovers again)
  • Wax Paper
  • Candy bags and ties

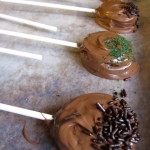
Line a couple cookie trays with wax paper. I used old ones that had a lip to catch the extra sprinkles. Hold the two sides of the Oreo together firmly but gently, and push a candy stick into the filling. Lay them out on your trays so they are ready for chocolate.


Melt your chocolate according to directions. I usually put some in a mug and microwave it on 50% power in 20 second intervals until it is fully melted. I didn’t have success dipping the Oreos in the hot, melted chocolate – they fell apart! So I spread chocolate onto one side of the cookie, spread it all around the sides, then set it on the wax paper chocolate-down to coat the final side. While they are still wet you can add sprinkles or crushed candy. I melted some white chocolate and flung it over half of them for a fun look. I had extra white chocolate so some even got dipped.

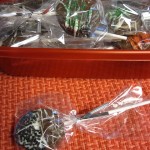
Stick the cookie sheets in the refrigerator for 15 minutes or until fully hardened. Then place them in candy bags and tie them off below the pop. Store them in the fridge until you are ready to put them in your cookie tins (or eat them all yourself – I won’t tell!)

Enjoy!

Sunday Souvenir – Christmas Traditions

Christmas at our house

I grew up in a small family. It was just myself, my dad and my brother. While my mom passed away when I was 5, we continued to get together with her family over the holidays. We had a tradition of holding Christmas either at our house, my grandparents house in Iowa or my aunt’s house in Colorado. I think we sort of rotated through locations, but I’d guess more were at my grandparents house than the others. Later on (when I was in my teens) we switched to renting condos in Florida and having a tropical Christmas. We had extended family in the area and got to share Christmas dinner.

Because we were Christmas nomads so often, we didn’t have a ton of traditions. I liked going to the Christmas Eve church service so I could sing carols and ask far too many questions about the logistics of the whole nativity story. I also had a stretch of years where I insisted on only eating Christmas dinner with my left hand (I’m right-handed), because I’m strange, I guess!

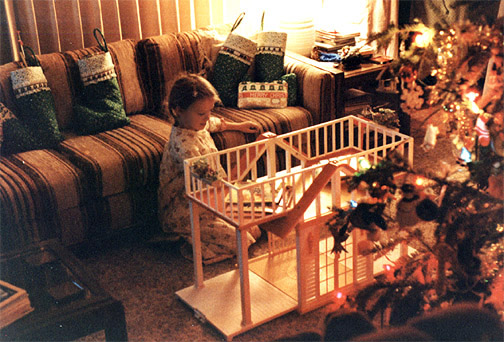
Christmas at my aunt's house. Hello, Barbie Dream House!

Stockings at my grandparents' house

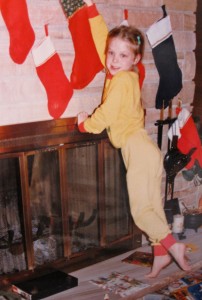
One tradition I loved was stockings! They’d change based on whose house were were at (gift bags were used at the Florida condos) but they were always include an orange that would be added to Christmas breakfast. There were filled with candies and little wrapped gifts without to/from tags, that I suspect everyone contributed. I hang stockings for us every year, but they typically stay empty unless I put something in them. I plan to do some stocking stuffer shopping after all this reminiscing, but chances are mine will be empty come Christmas morning, heh.

Jax is still too young to understand the holiday, but I bet in the coming years we will start creating our own traditions.

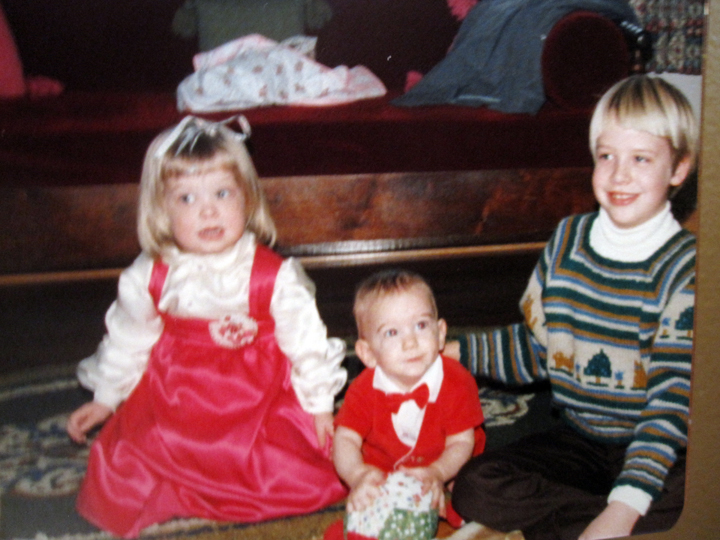
I like my brother's sweater. No, really! I do!

Do you have any favorite traditions?

Peace & Love Felt Ornament Patterns

I plan to design and sew a couple felt ornaments every week until Christmas. I’ll be sharing the patterns here for anyone who is interested!

Peace & Love

Here are my first two ornaments: Peace and Love. Some of the photos came out with the colors off, but the photo at the top is accurate.

The supplies you’ll need are:
Felt (in red, sky blue, aqua blue and green), embroidery floss (in red, aqua blue and green), red ribbon or ric-rac, batting/stuffing, needle, scissors, pins, water-soluble marker or thin Sharpie and the pattern print out.

  • Start by cutting out your pattern pieces, pinning them to the felt and cutting all the elements out.
  • Decorate the fronts of each ornament. For the Peace sign, I did the stitch I usually use when sewing a felt applique: short, perpendicular stitches across the edge of the applique all the way around. I did the same for the berries, but sewed the leaves down first. For the leaves, I did a simple back stitch ⅓ of the way up the centers and left the rest loose. On the Love ornament I did the little heart and the holly with the same techniques. To transfer the text, I pinned the pattern behind the felt and held it up to a light. I was then able to trace over the word with a marker. I sewed the word using a chain stitch with 4 strands of floss (I normally use 2 strands for everything else.)
  • Cut two 6″ length of ribbon or ric-rac. Fold them into loops and pin them in place between the two sides of each ornament. Sew halfway around each ornament with a blanket stitch (I used red floss as an accent.) Add batting or stuffing (I used batting and cut them ¼” smaller than the main shape) then continue all the way around to finish them.

Peace & Love Felt Ornaments

Simple and sweet!

If you make your own, I’d love to see them! Send me a photo or link and I can add yours to this post.

The Holidays are Coming!

I can’t believe it is already mid-November! I’ve been so focused on preparing for our vacation that I haven’t had time to think ahead to Thanksgiving and Christmas.

Last Christmas

Here are some things on my to-do list:

  • Try to take holiday card family portraits and go somewhere for them if I fail.
  • Decide if we are putting up a tree and if we do, how to make it toddler-safe.
  • Makeover the wooden dollhouse I got at the thrift store into a play barn for Jax’s Christmas gift.
  • And you can help me with this one: Decide what projects to make and post here on Imagine Our Life!

[poll id=’1′]