Tag Archives: Crafts

Felt Fire Station – Cover

IMG_1900

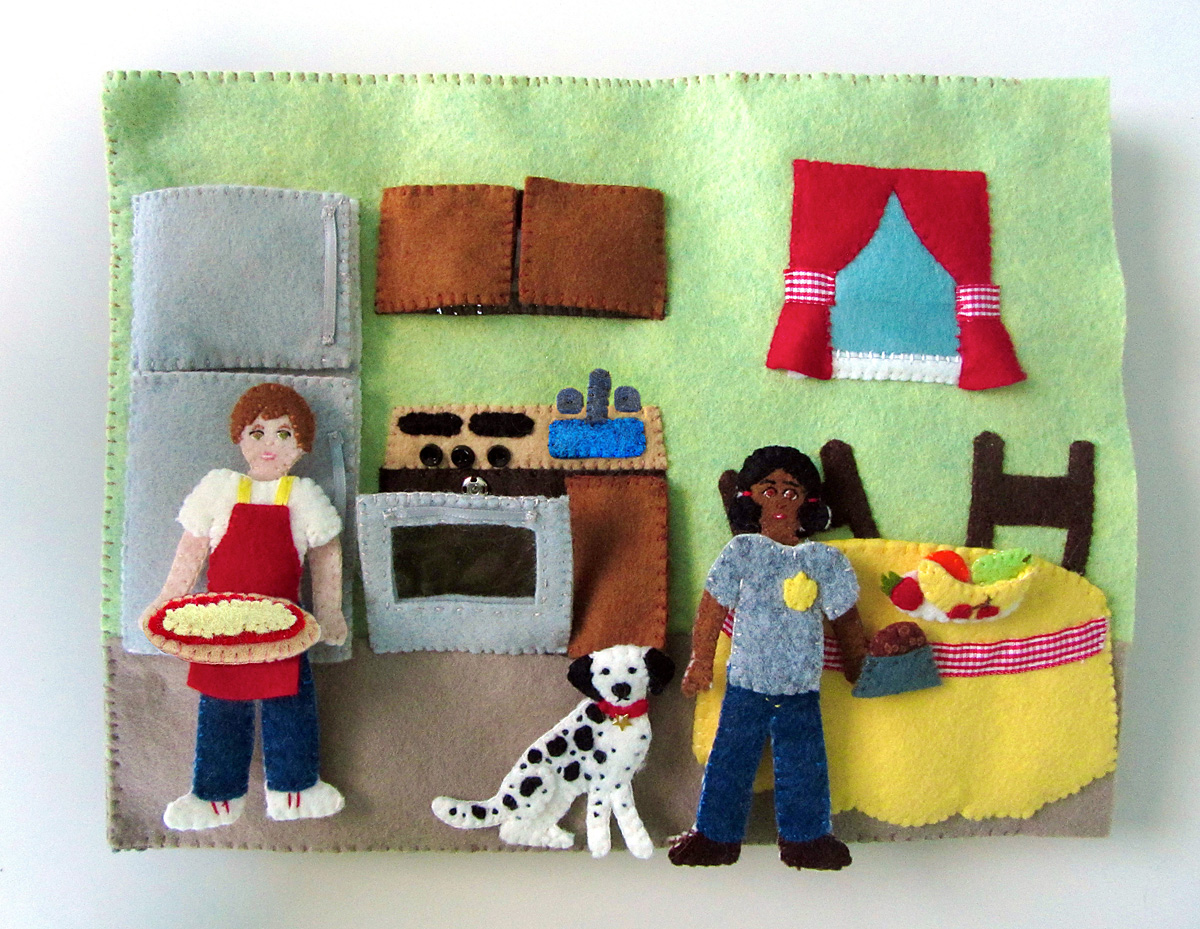
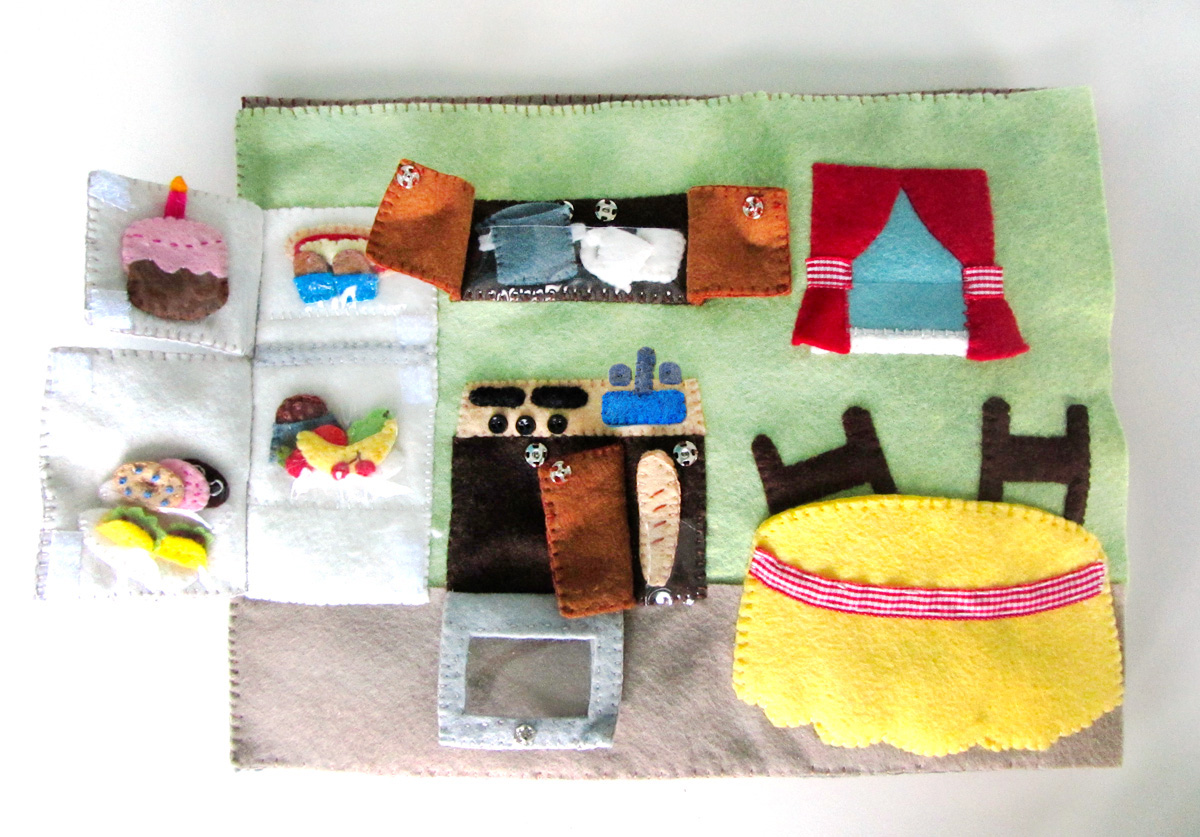
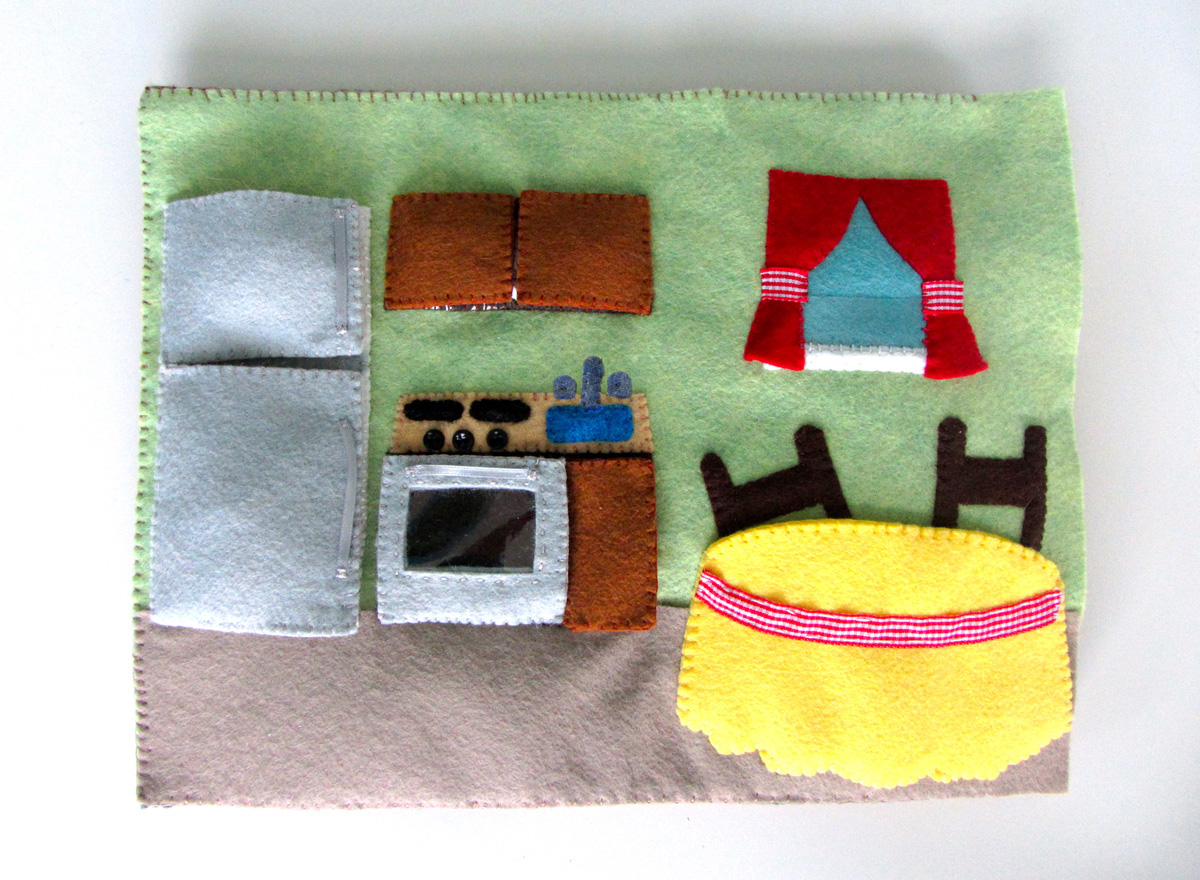
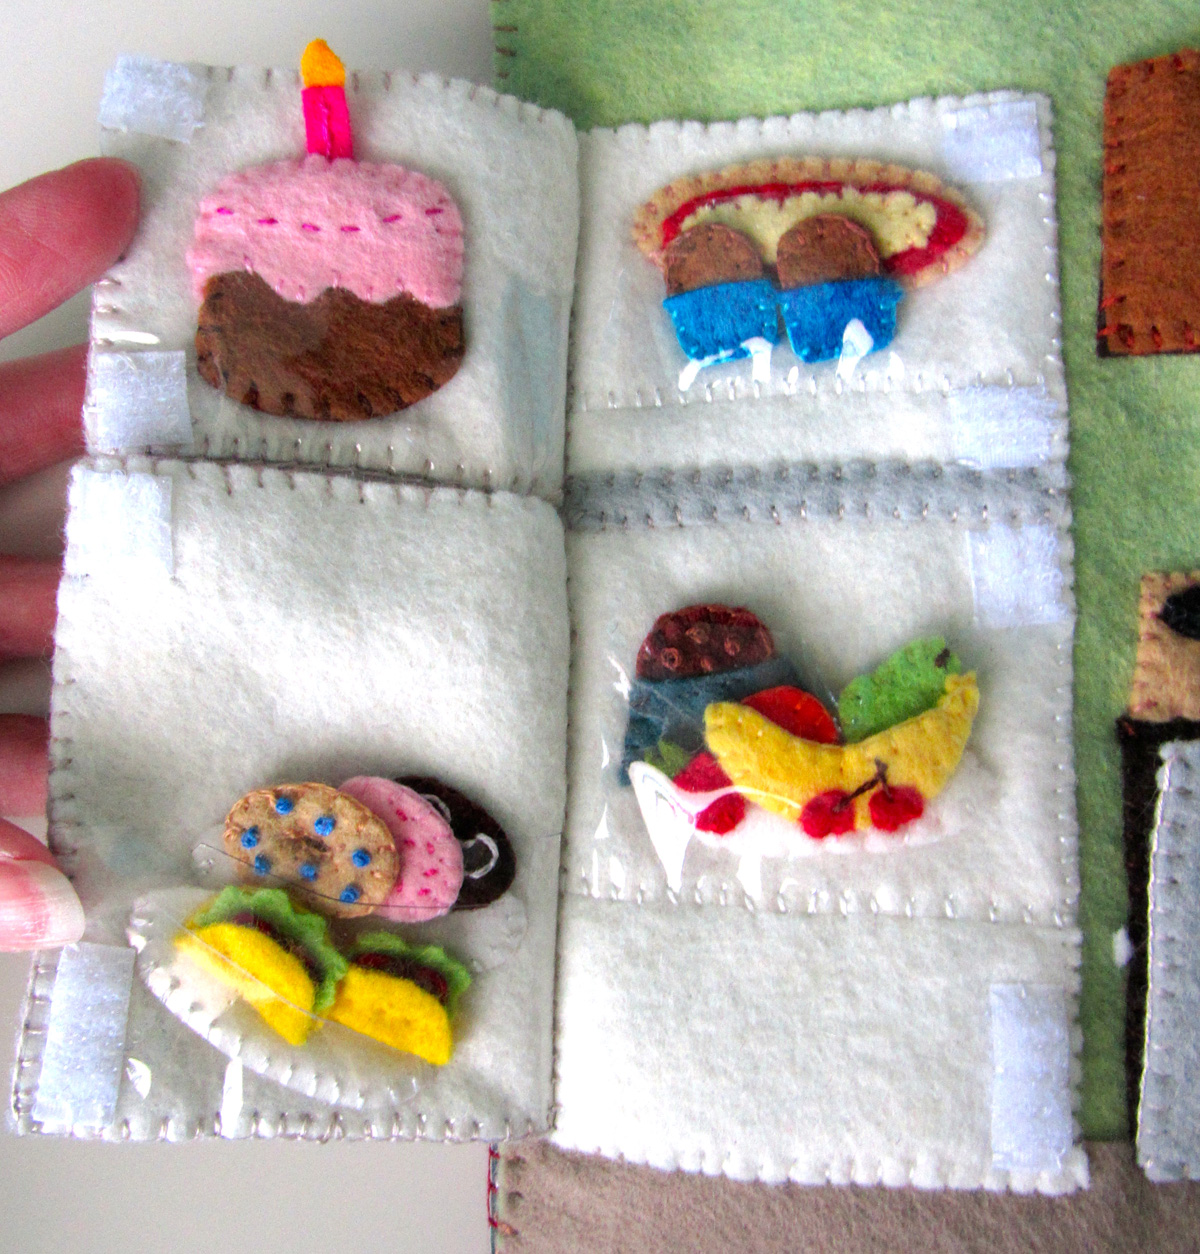
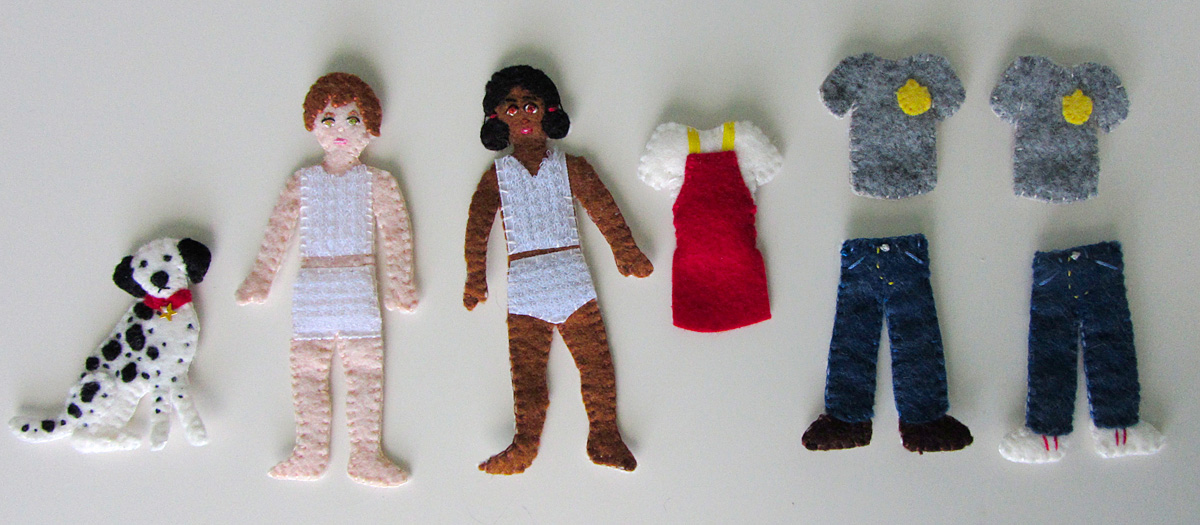
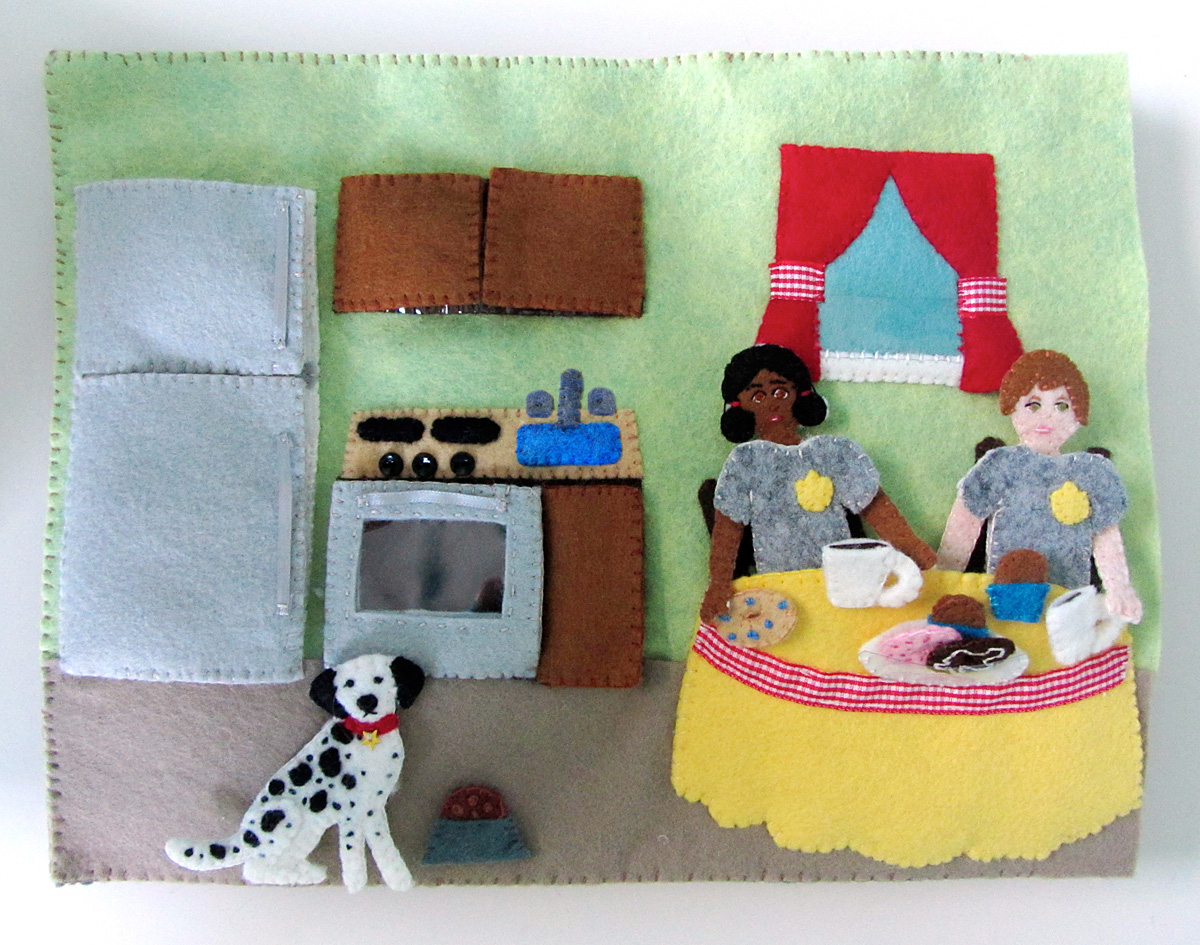
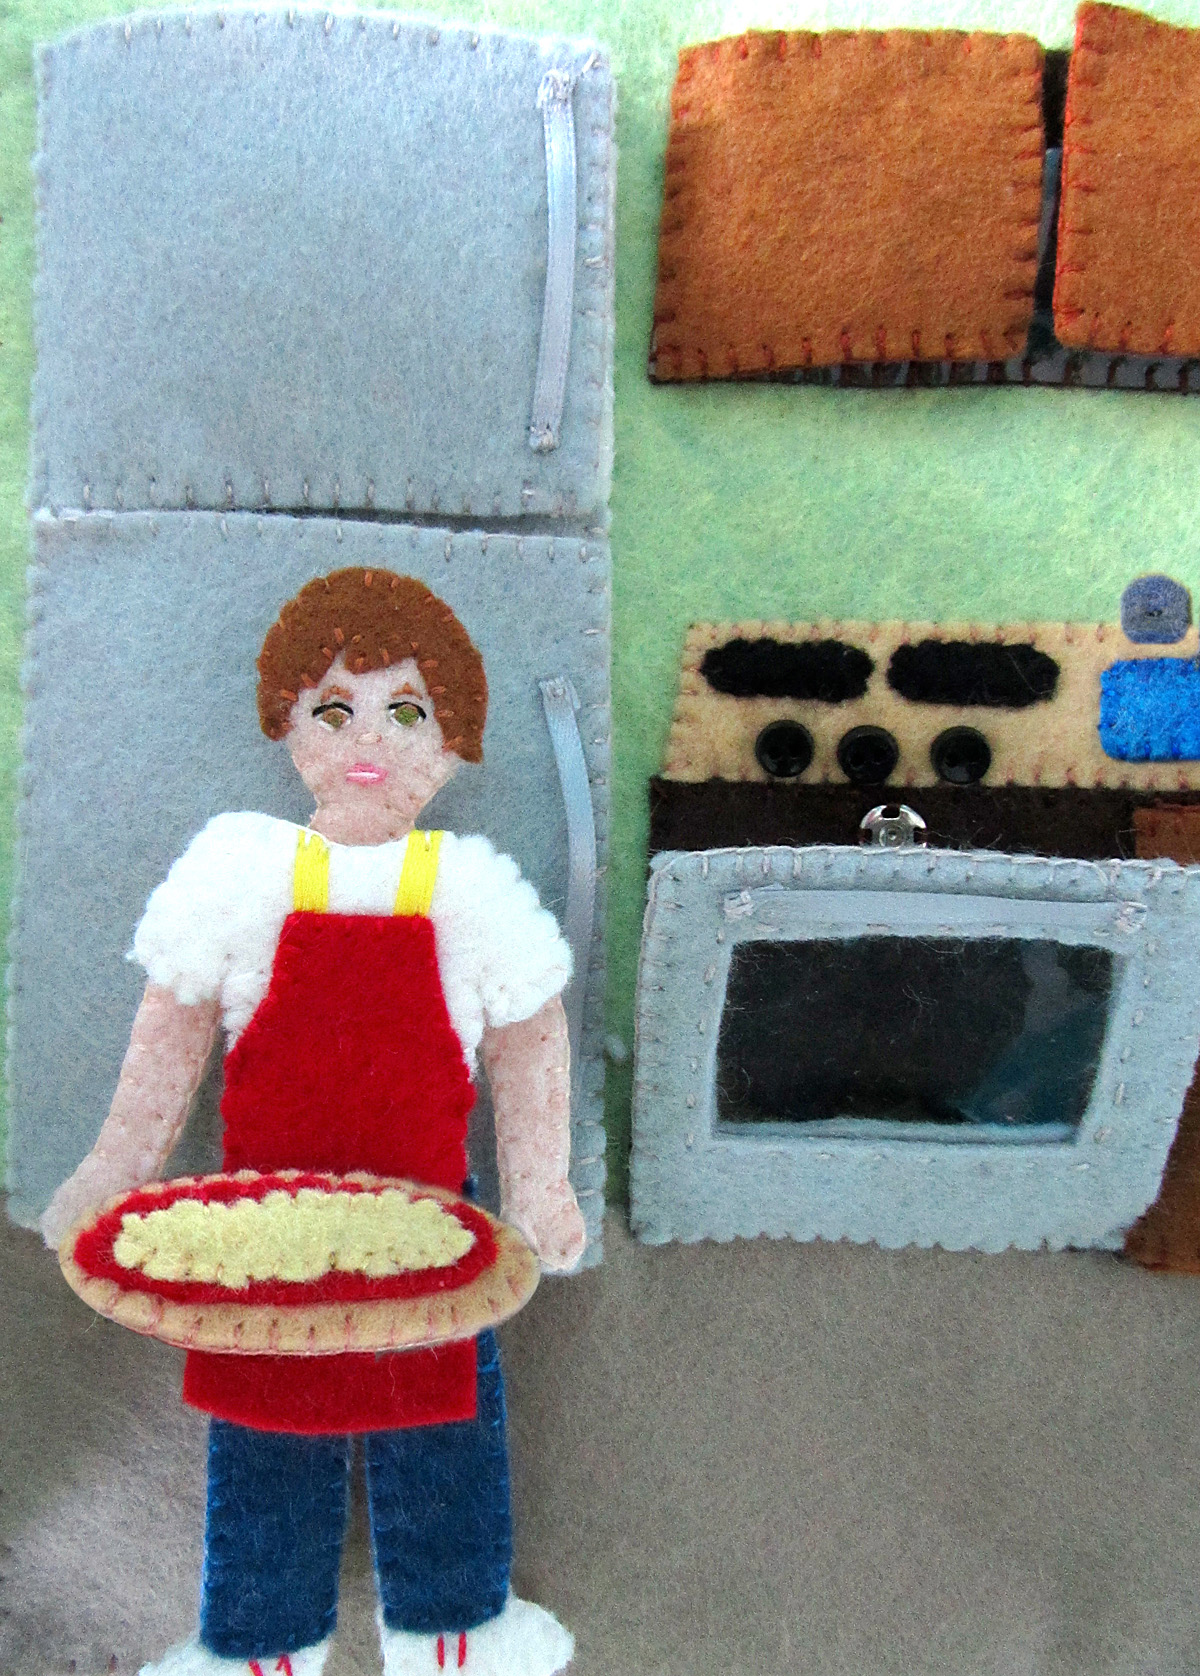
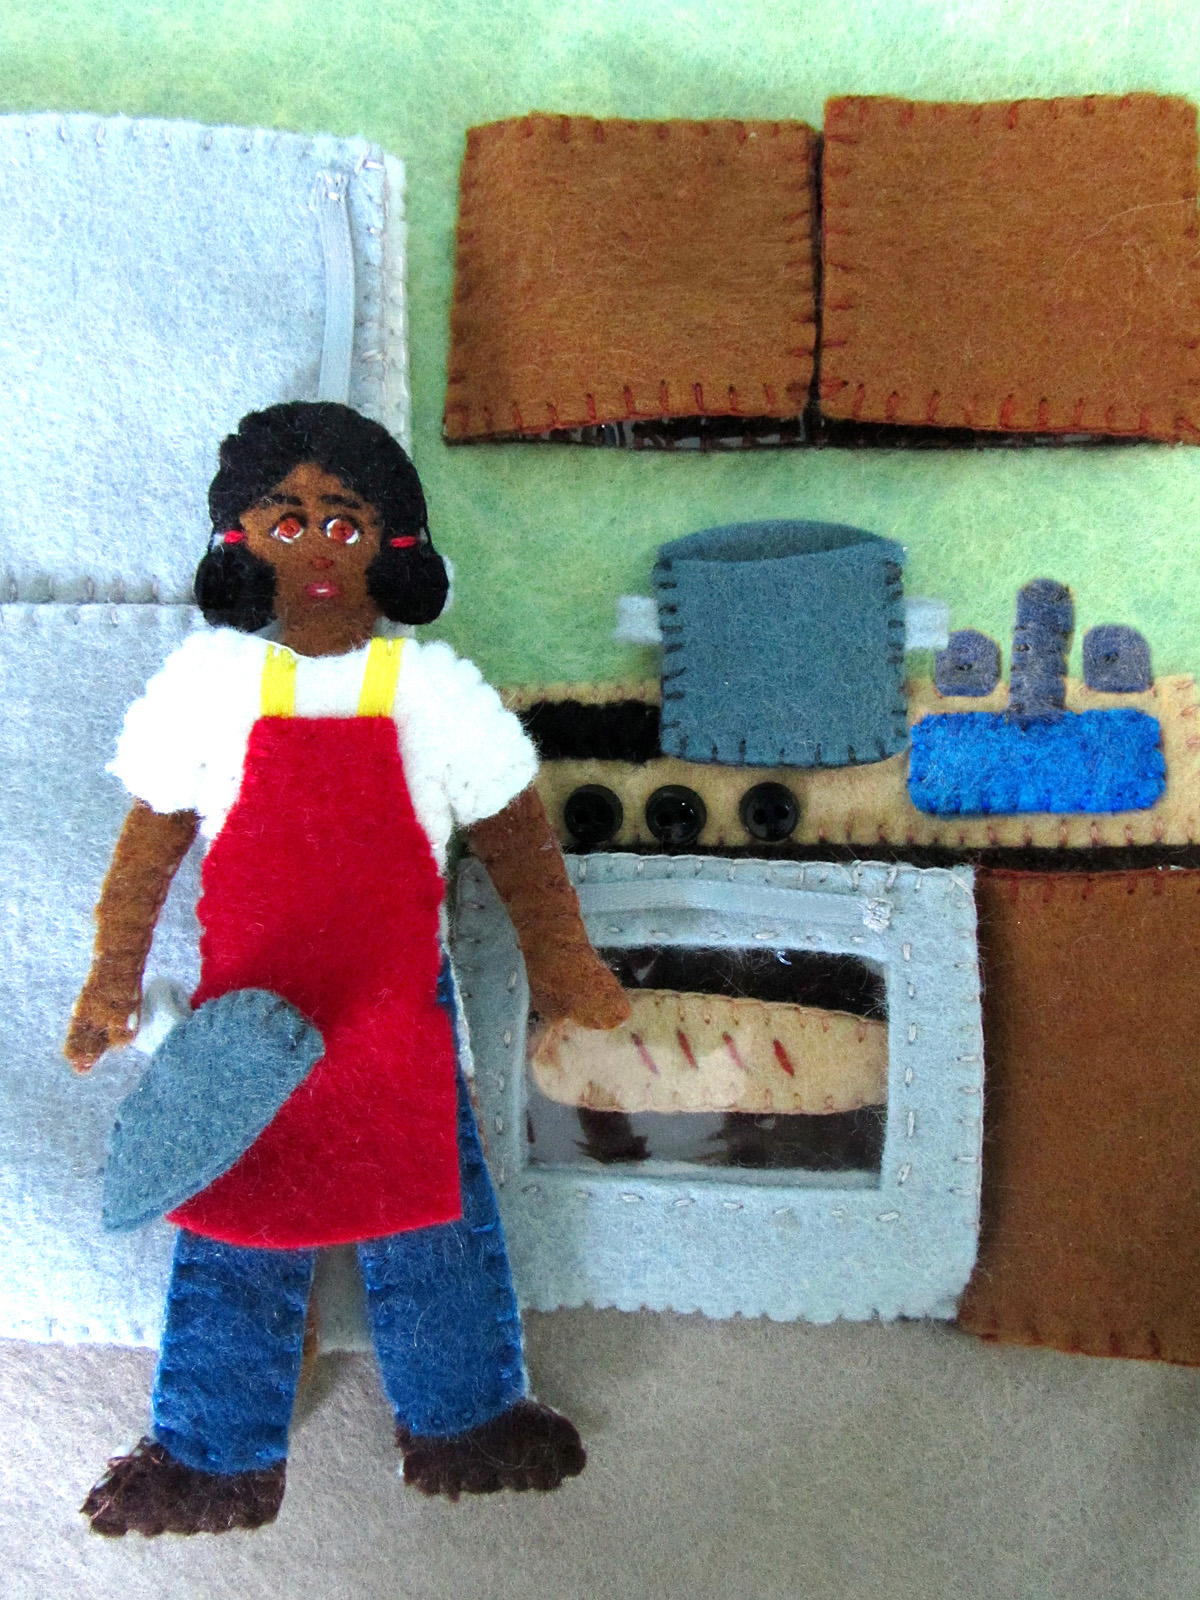
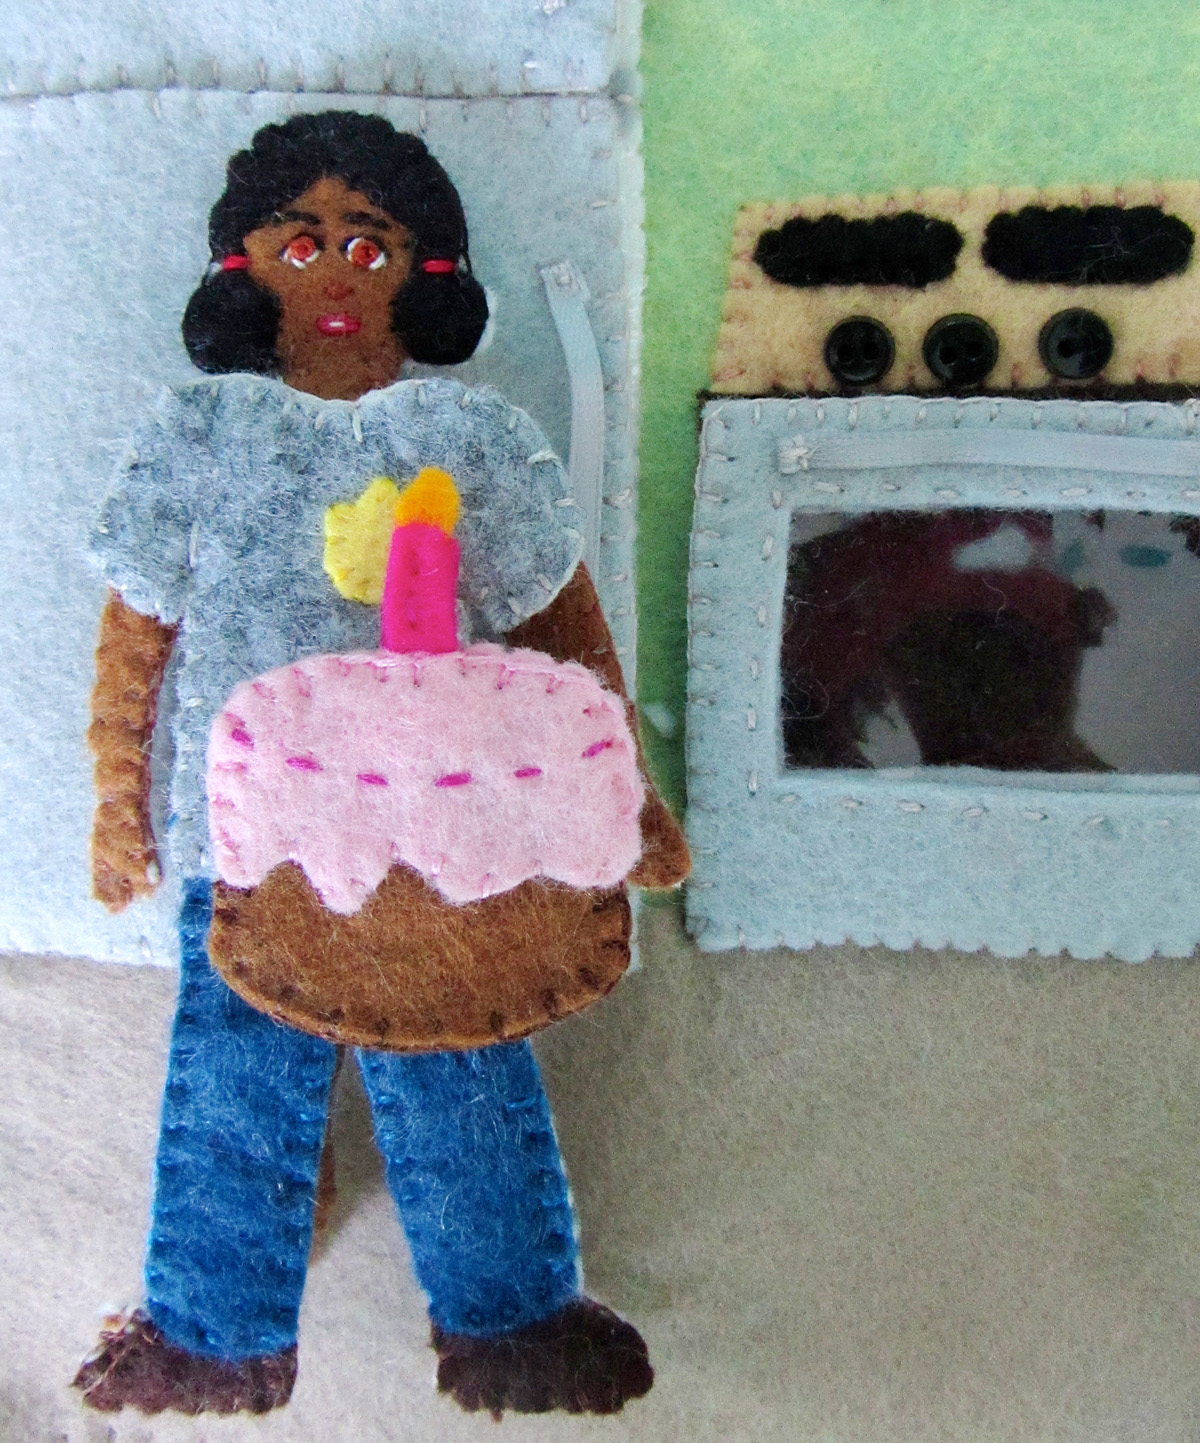
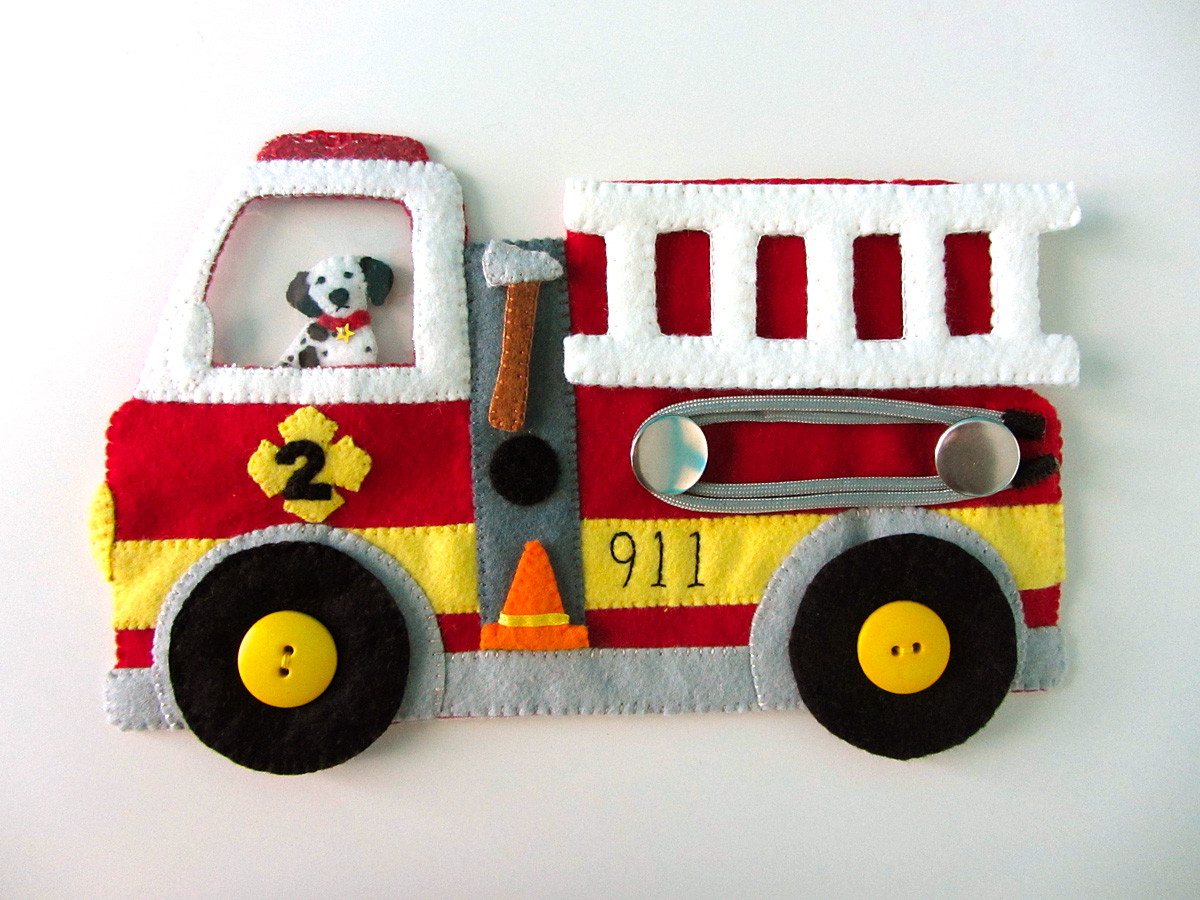
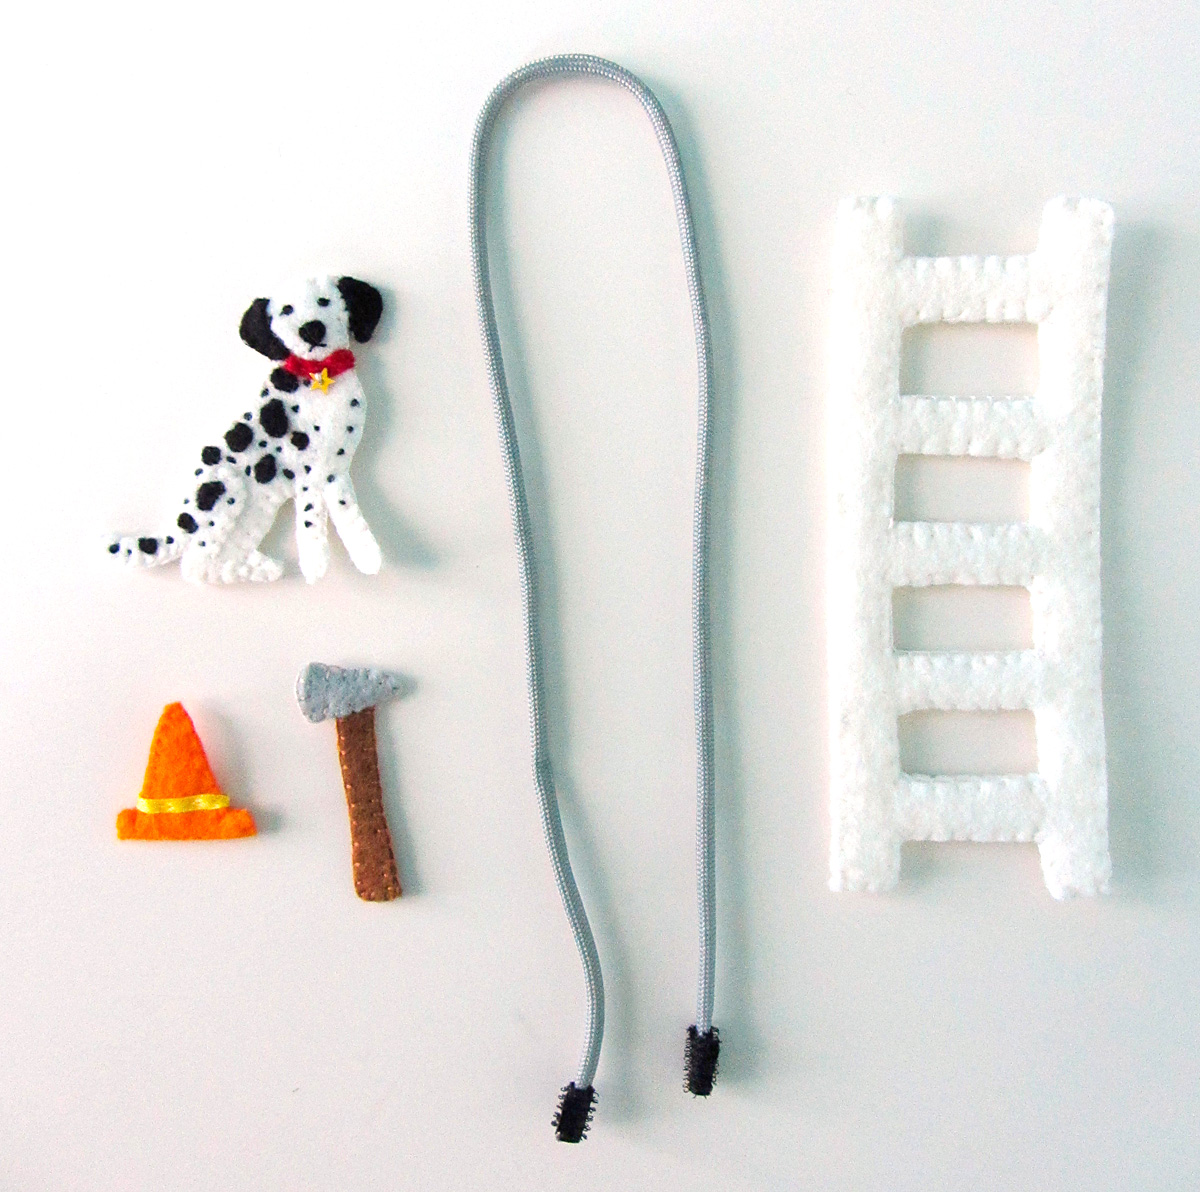
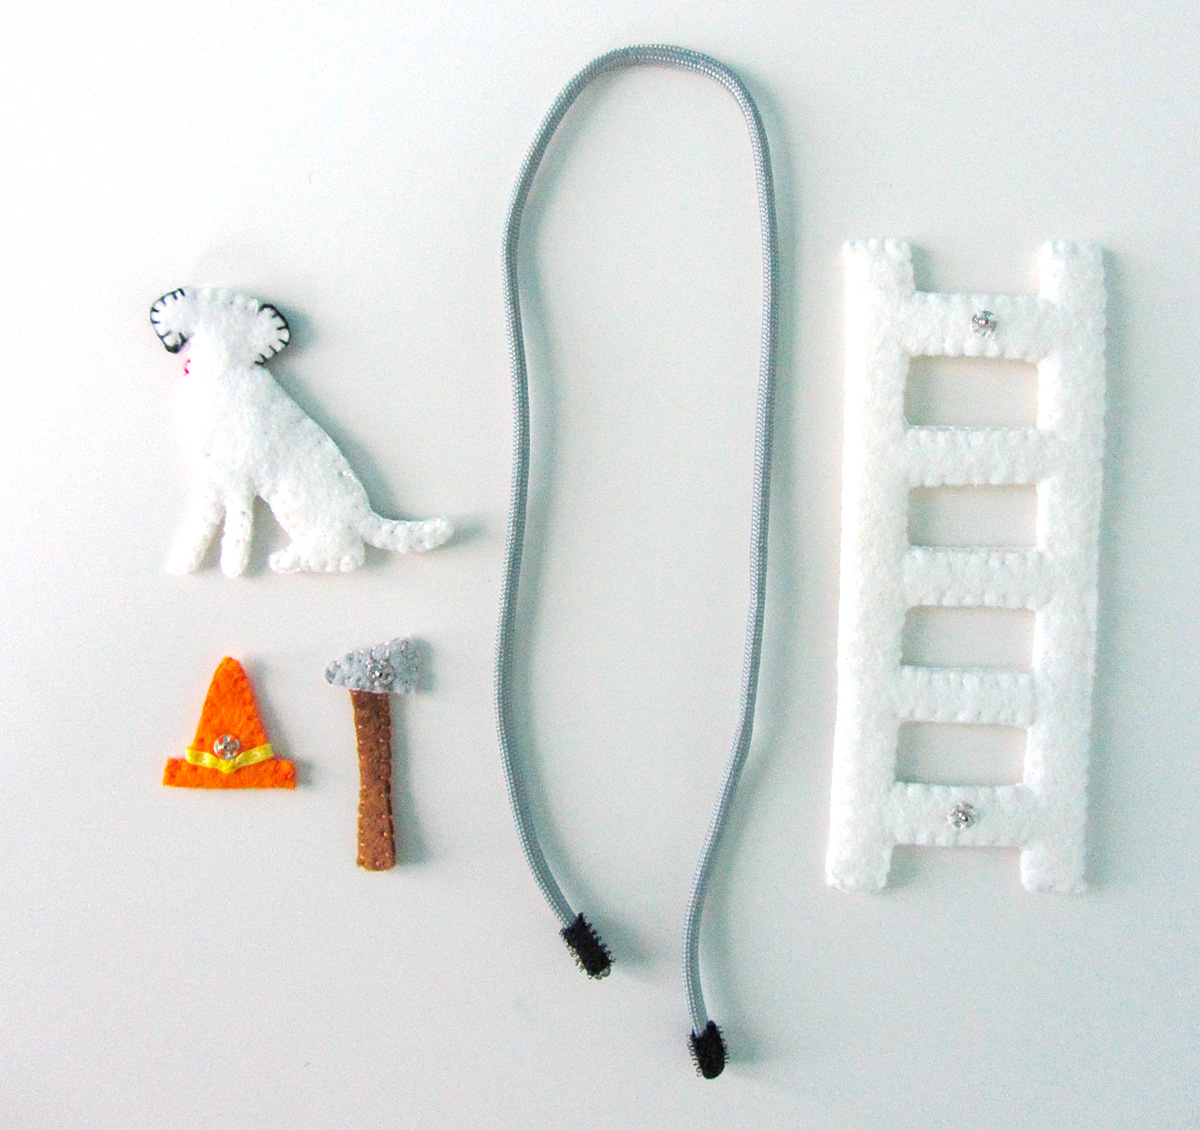
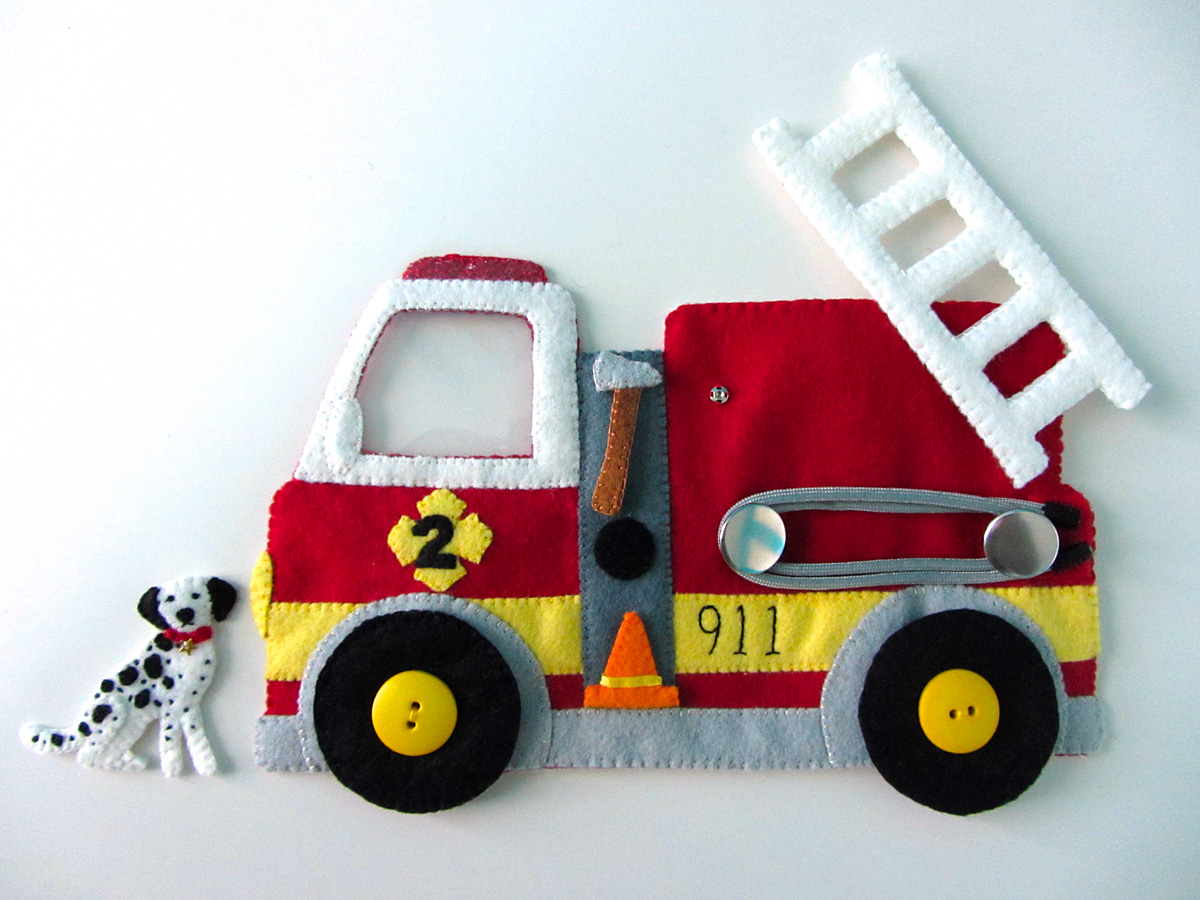
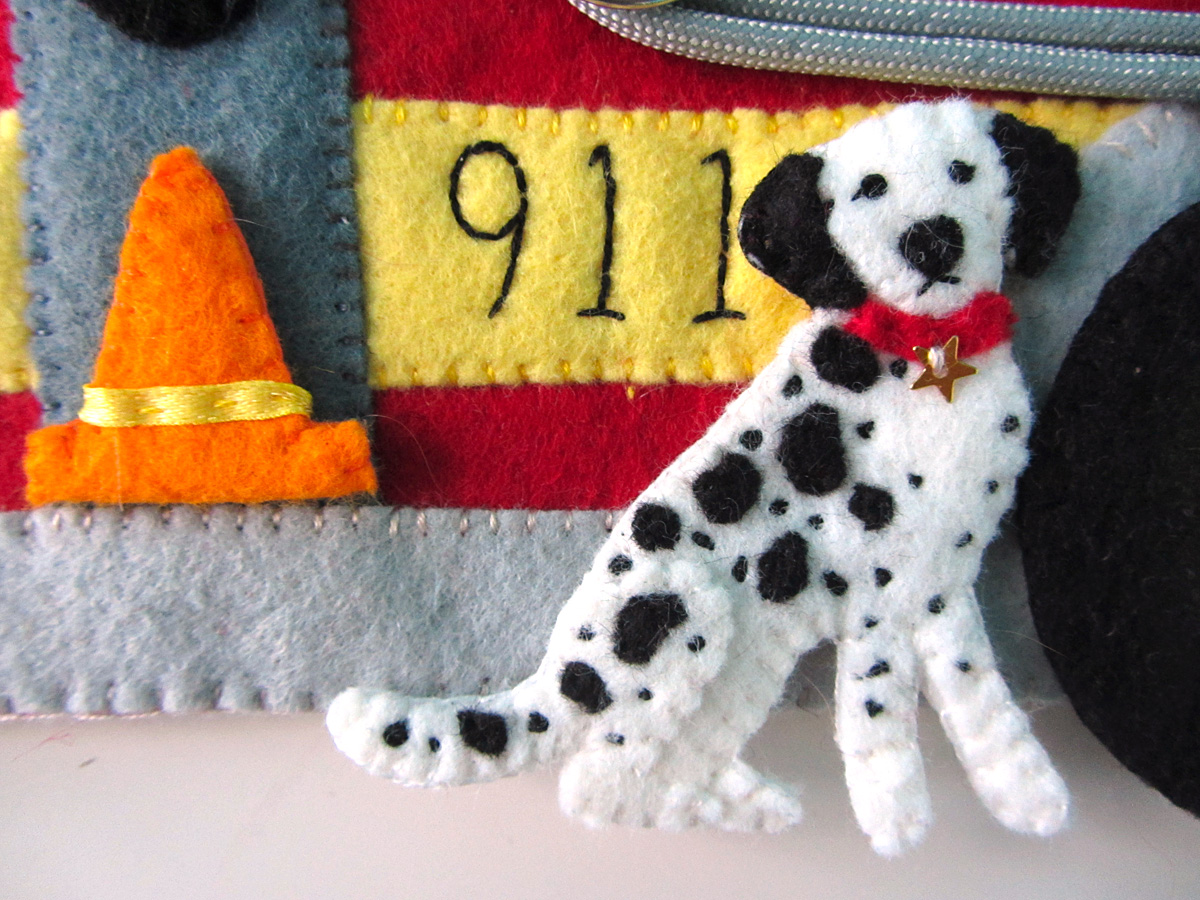
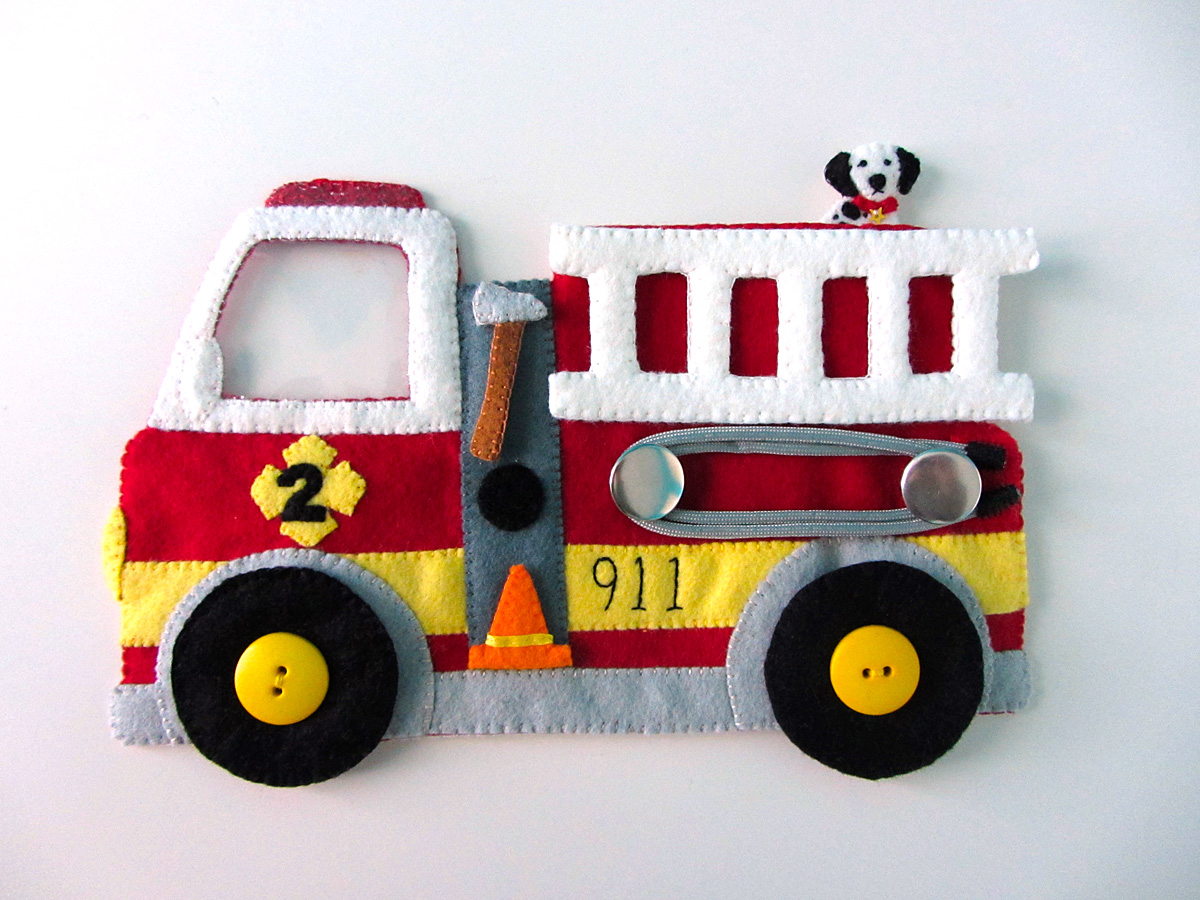
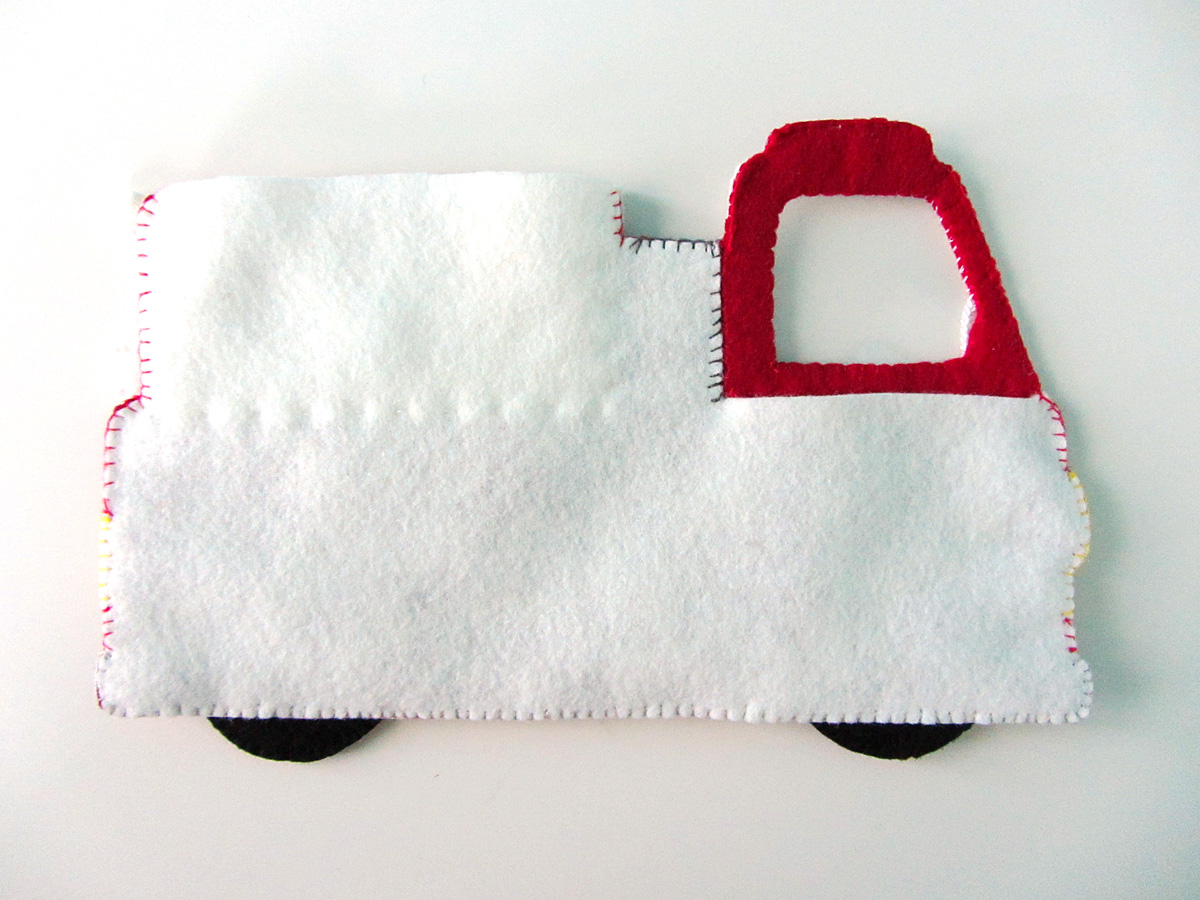
This fire station project is a full stand-alone quiet book, just like the dollhouse book, but using full size 9″ x 12″ sheets of felt for each page. The fire fighters are made from the same pattern as the dollhouse dolls, so they will be interchangeable. To see the other sections of the project, go here: Felt Fire Station – Fire Truck & Dalmatian, Felt Fire Station – Garage & Locker Room, Felt Fire Station – Kitchen and Felt Fire Station – Office & Bedroom.

This tutorial is for the cover and assembly. I had to sew my book together as I went in order to have better pictures for the blog. I’ll do my best to explain!

Felt Fire Station - Cover

What I Used:

IMG_17011 Felt Fire Station - Office & Bedroom

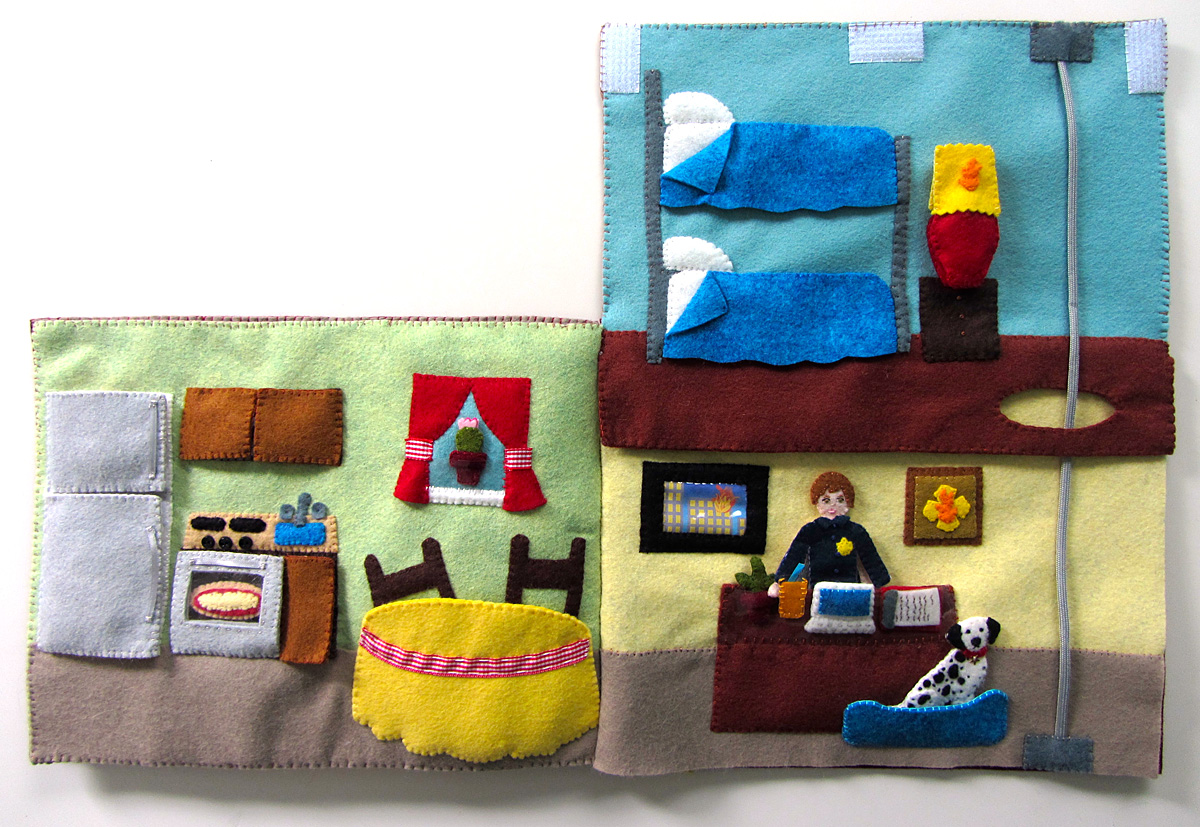
To prep your interior pages, sew each set of facing pages together at the middle seam. I just put right sides together and used a blanket stitch. You will have these sets: garage/locker room and the kitchen/office (with the bedroom already sewn to the top of the office.) You then pin the locker room and kitchen together, wrong sides faceing, and sew around 3 sides (leaving the binding edge open for later.) It will look like an accordion of pages at this point.

Felt Fire Station - Cover

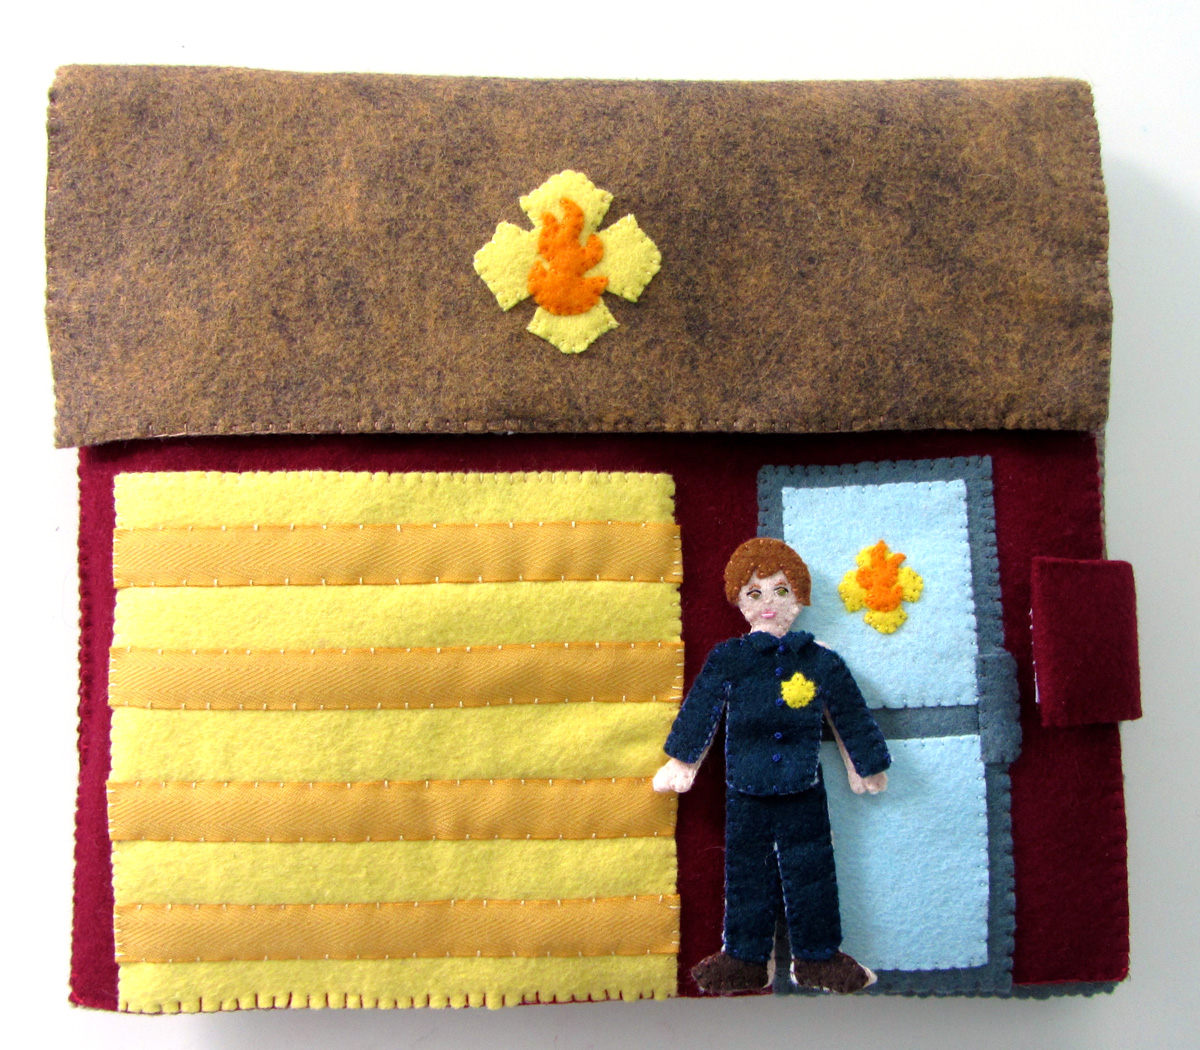
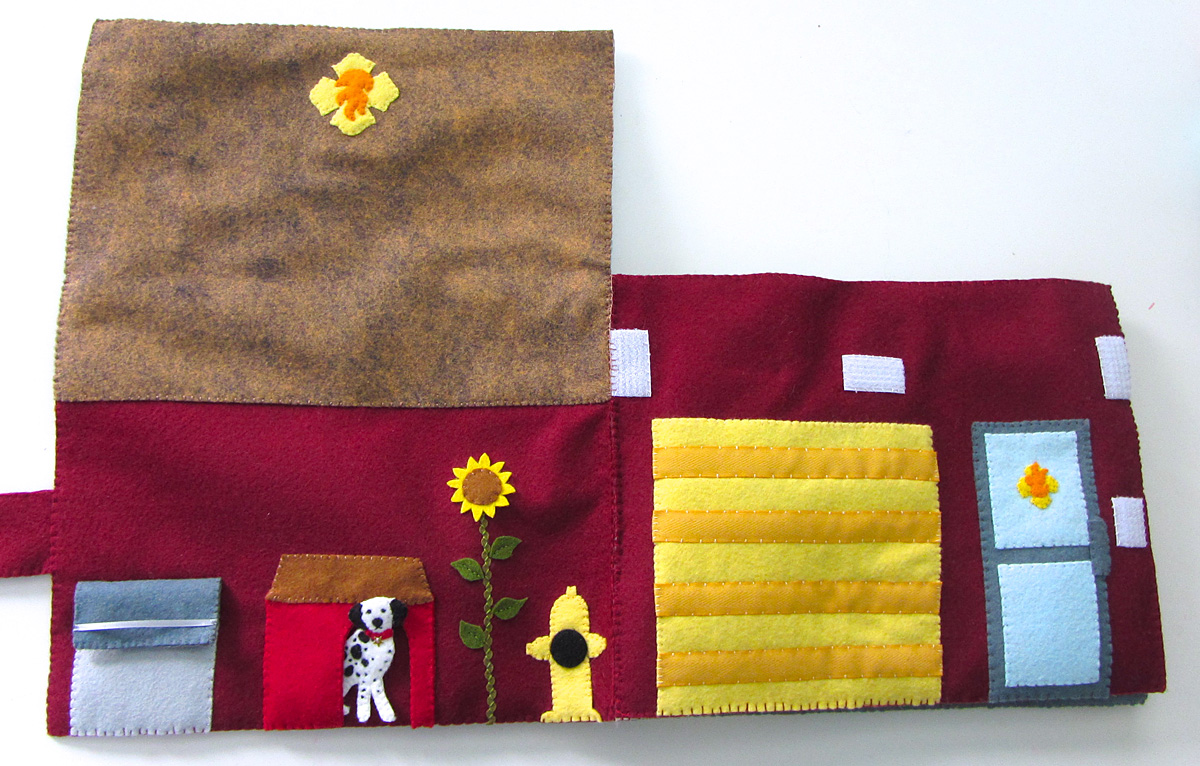
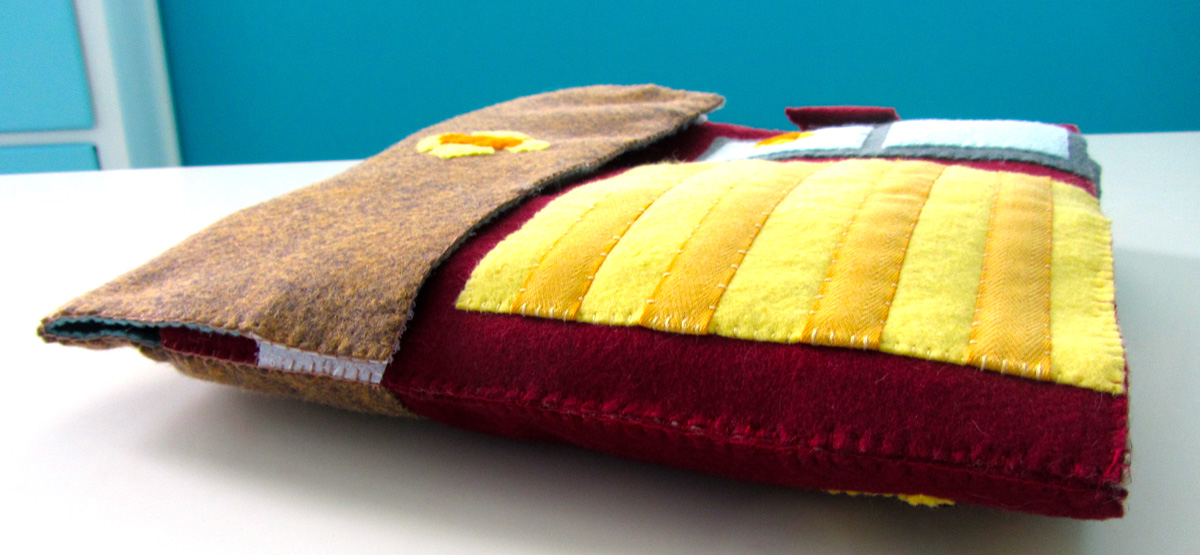
I started by sewing everything that goes on the front an back cover to the beet (burgundy) felt sheets and the leather (brown) roof.

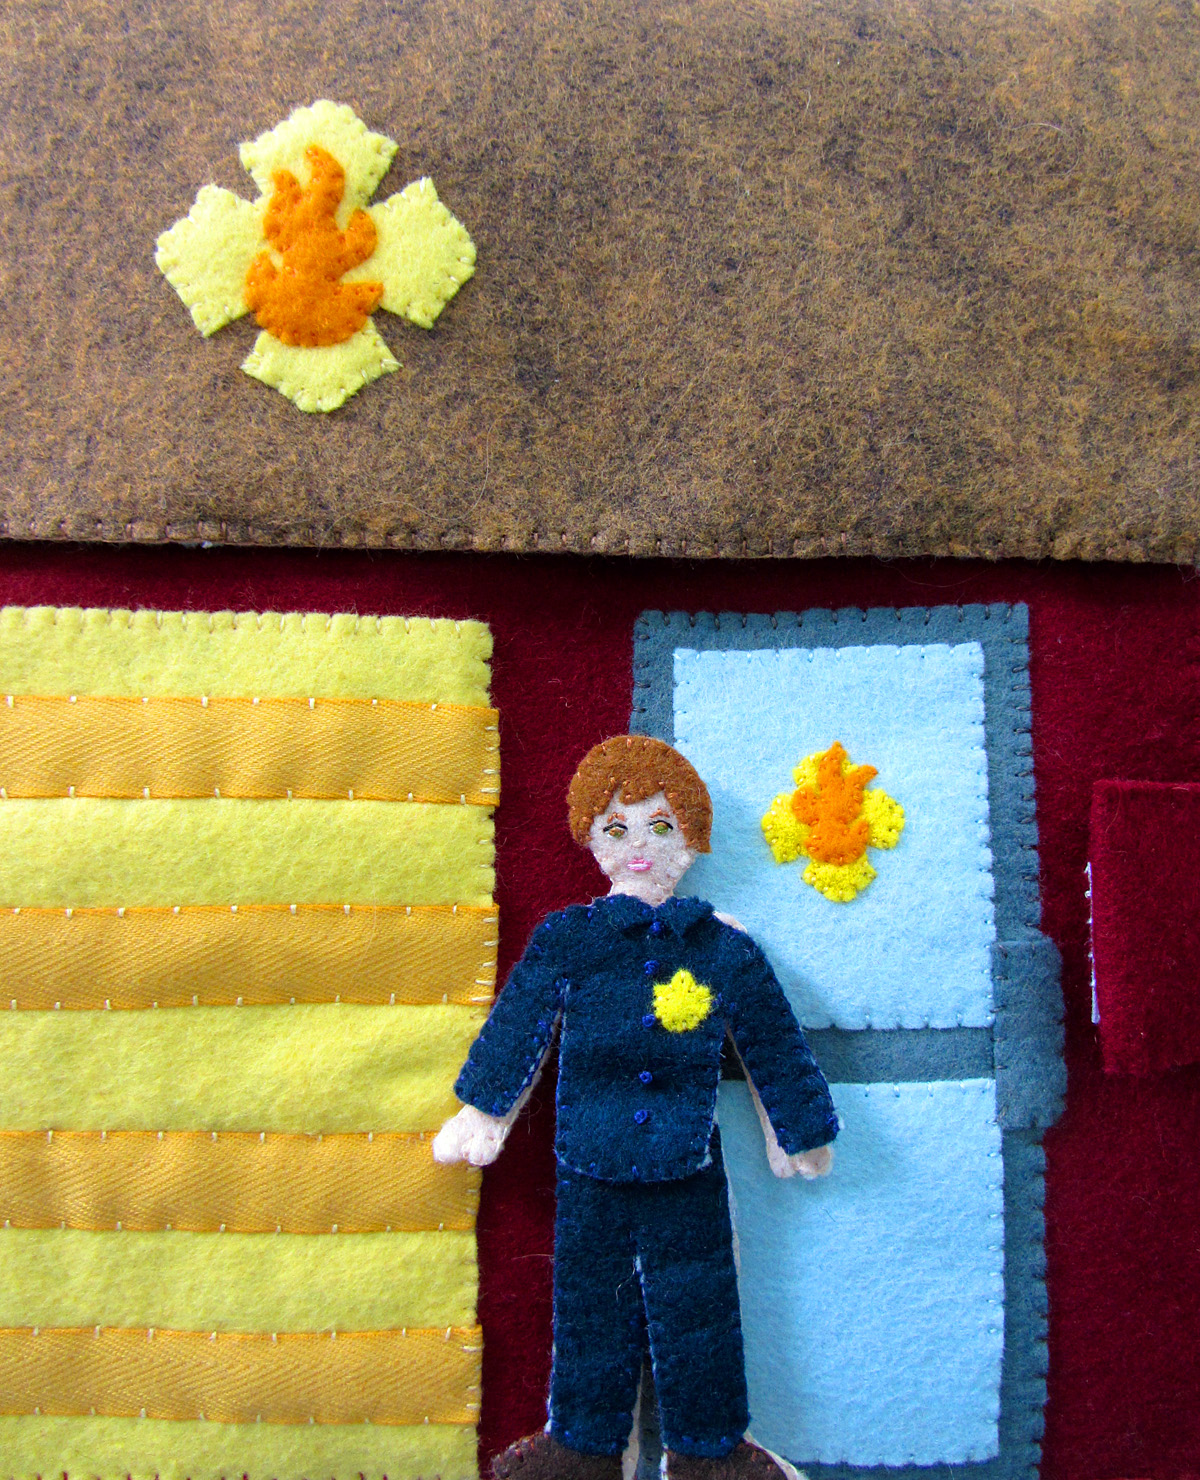
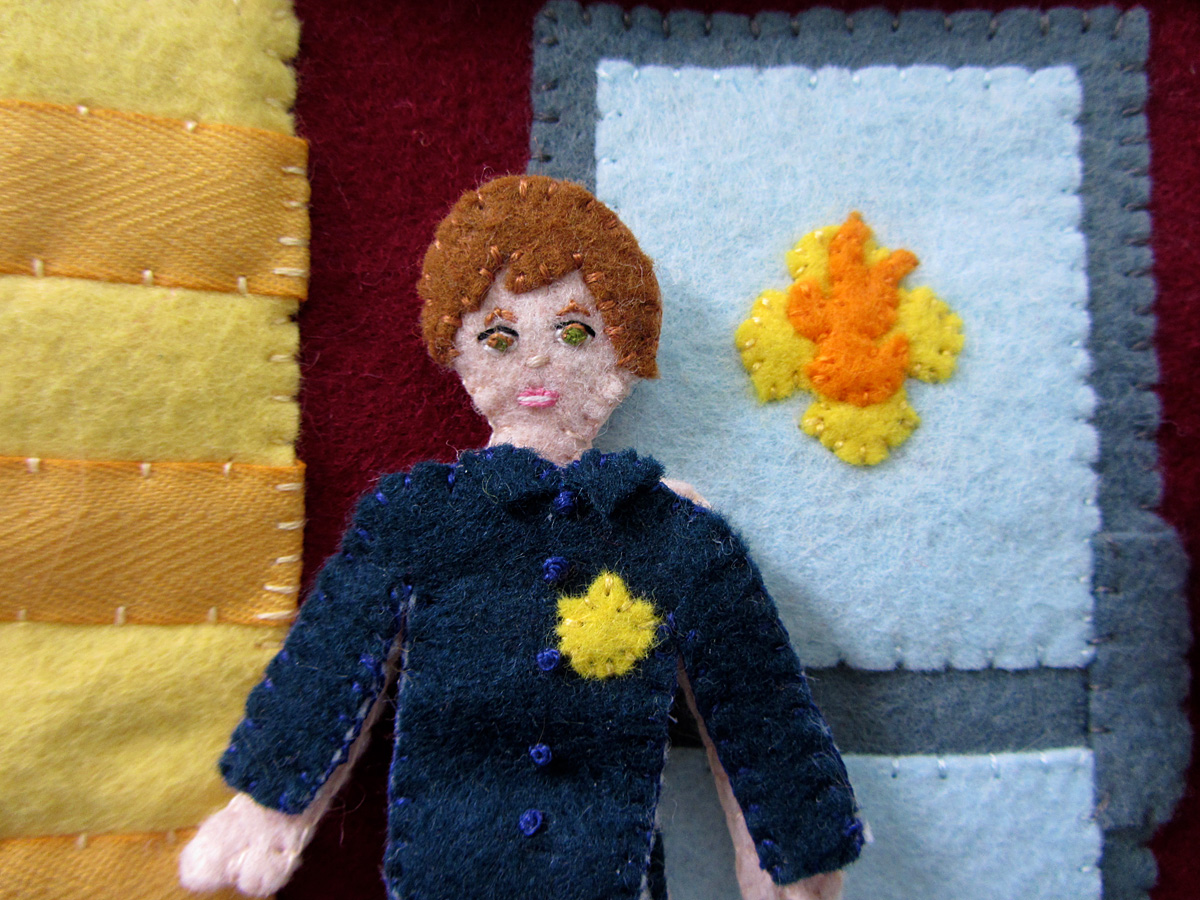
Front Exterior: I pinned the garage door in place with strips of ribbon tucked under the sides. I sewed the ribbons down, then sewed around the sides and top of the garage. I sewed the door down beside the garage, leaving space to the right for a piece of snag-free Velcro. I sewed the door emblem onto the upper window, then sewed both windows down. I finished the door by sewing down the handle.

Felt Fire Station - Cover

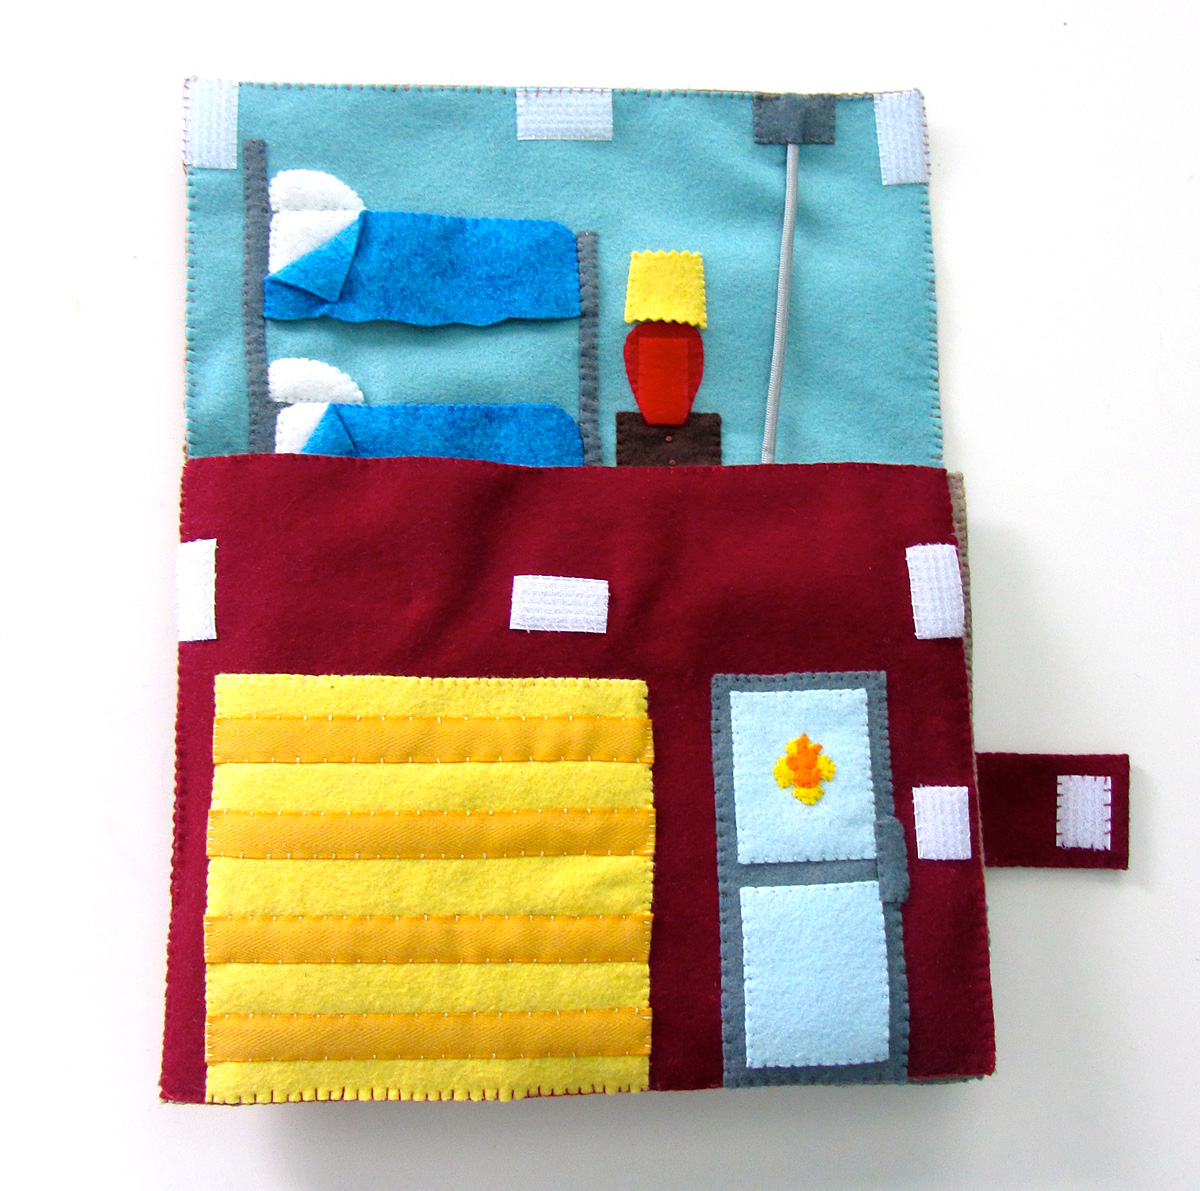
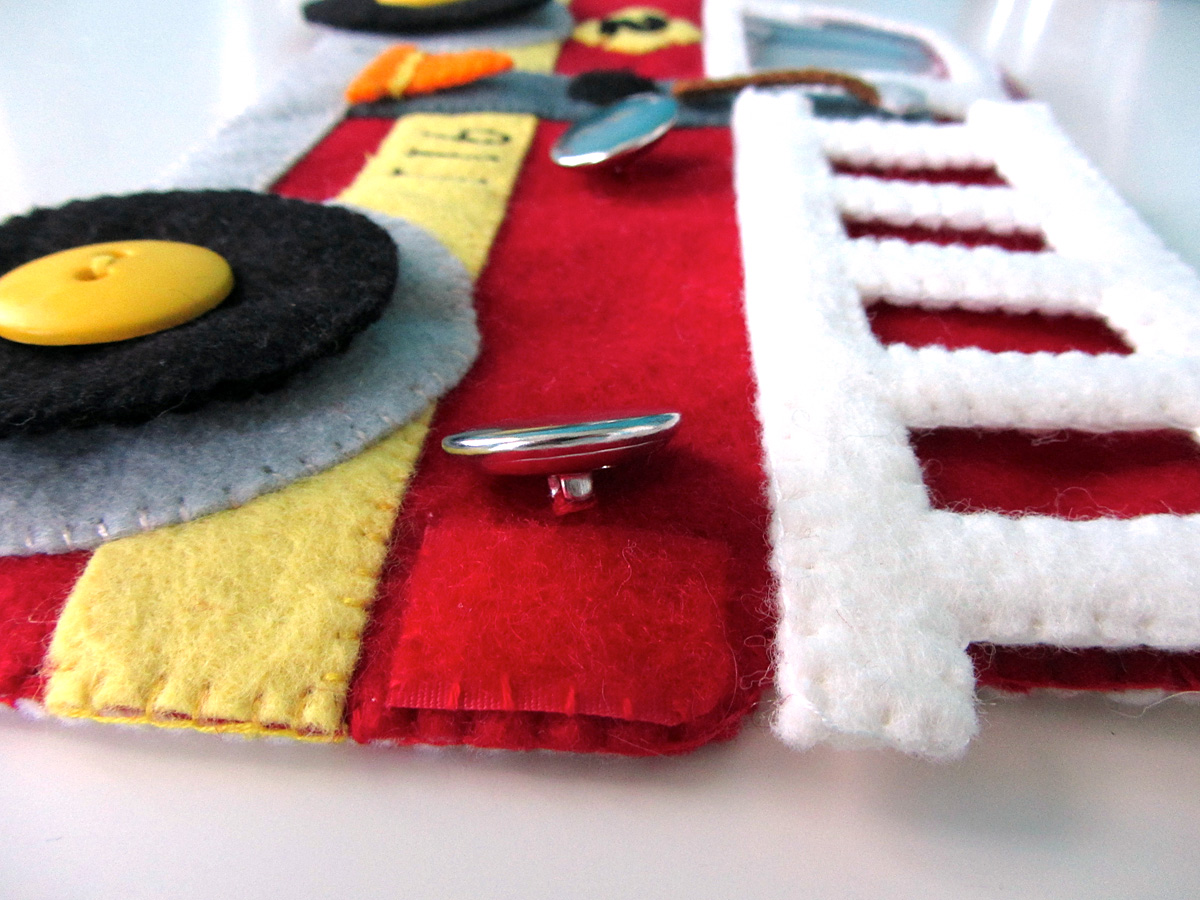
I added 4 pieces of snag-free Velcro to the front, as shown in the above picture. Line it up with 3 matching pieces of Velcro on the top of the bedroom (add those now if you didn’t already.) At this point, you can sew the front exterior to the garage (wrong sides facing). Sewed 3 sides, leaving the spine open for later. (I sewed all 4 sides then had to sew on top of my stitches when sewing the binding closed.)

Felt Fire Station - Cover

Back Exterior:

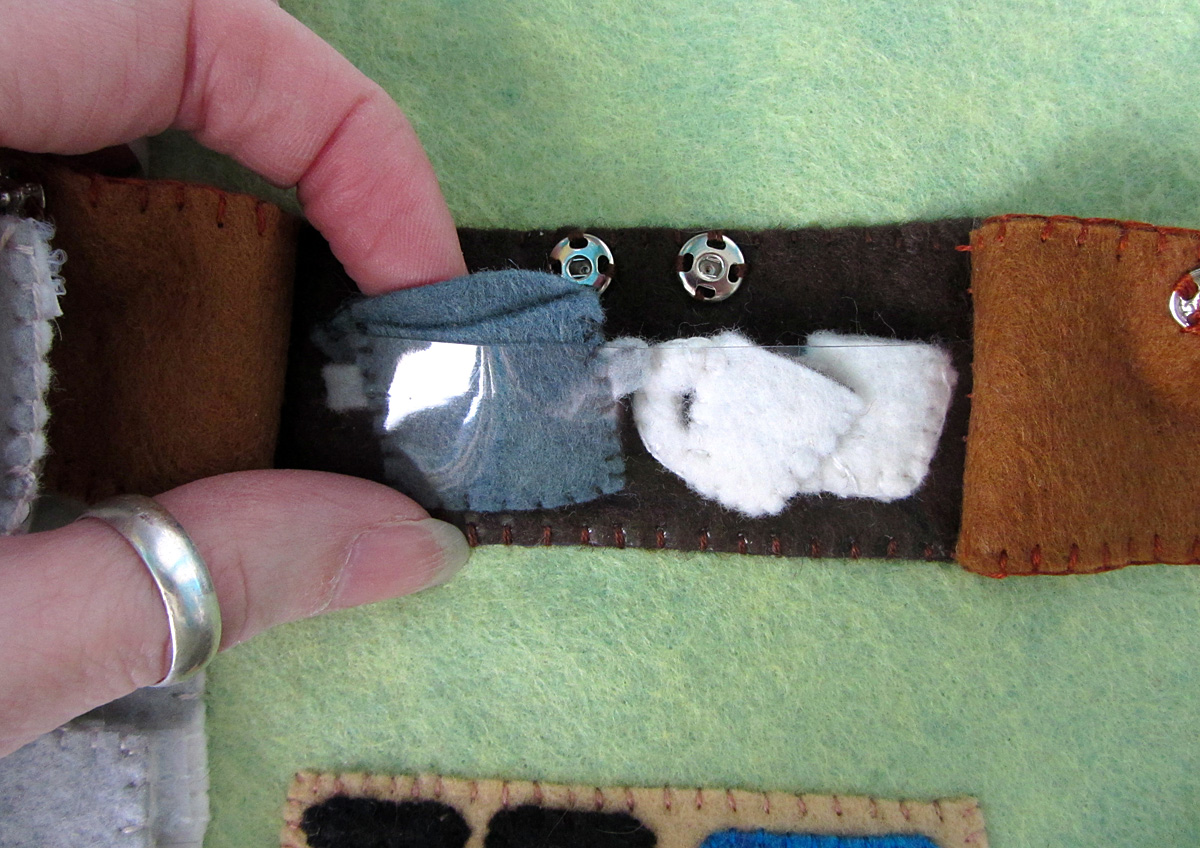
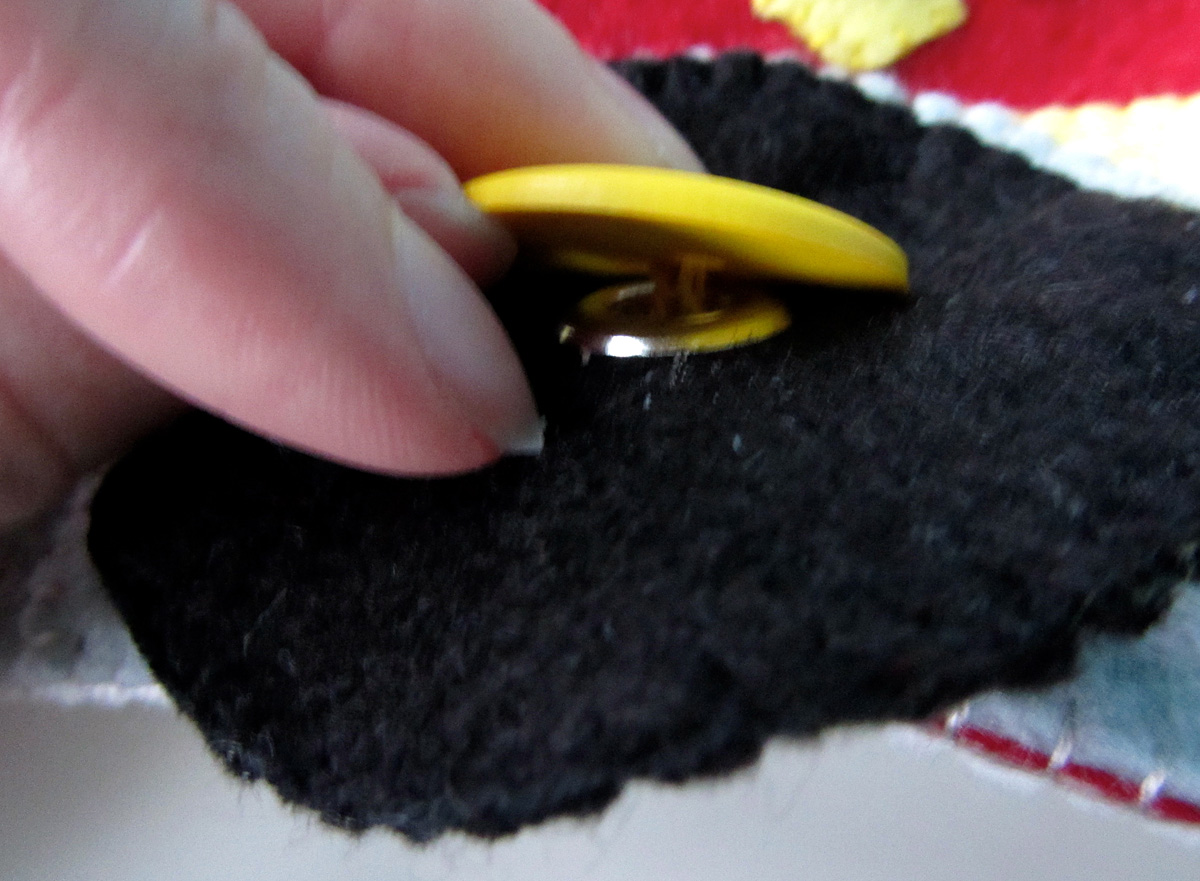
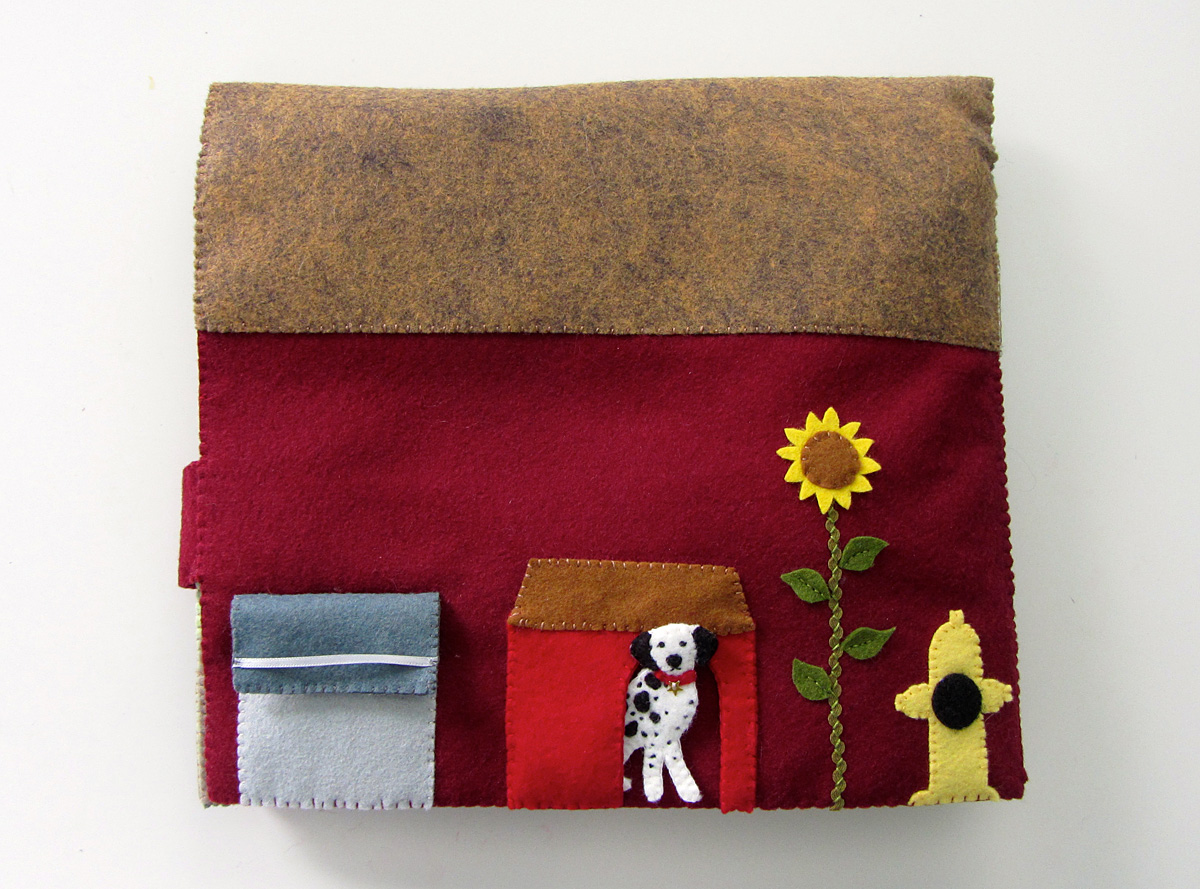
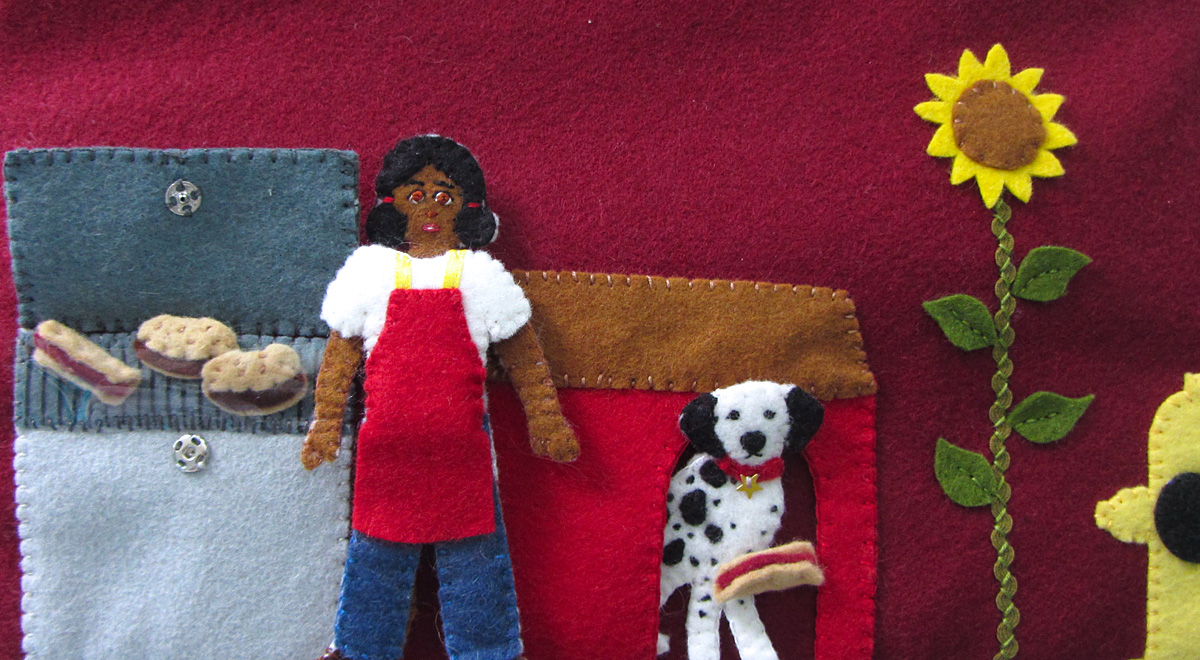
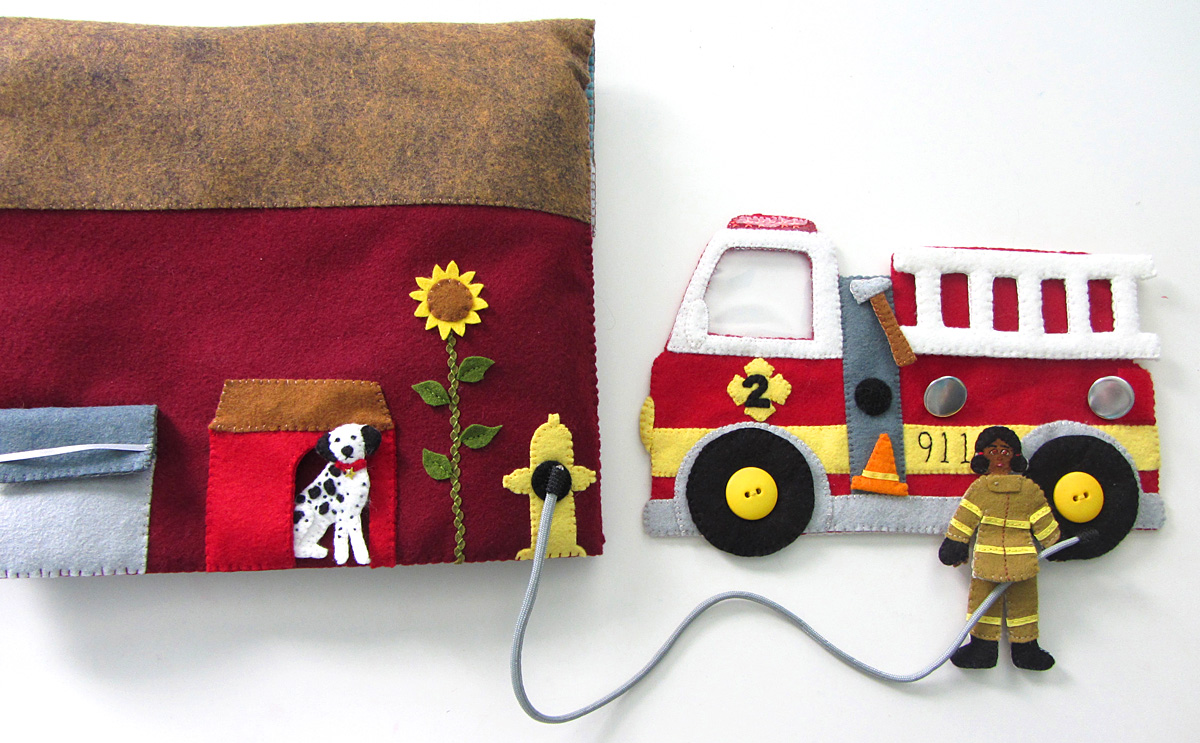
Hydrant: I sewed the fire hydrant down on the far right and sewed a black Velcro dot (loop side so the hook on the hose can attach) to it.

Sunflower: For the sunflower, I made a zigzag stitch that went across the ric rac stem, then added some leaves by stitching a line up the centers. I pinned the flower and flower center in place and sewed around the center, leaving the petals loose.

Felt Fire Station - Cover

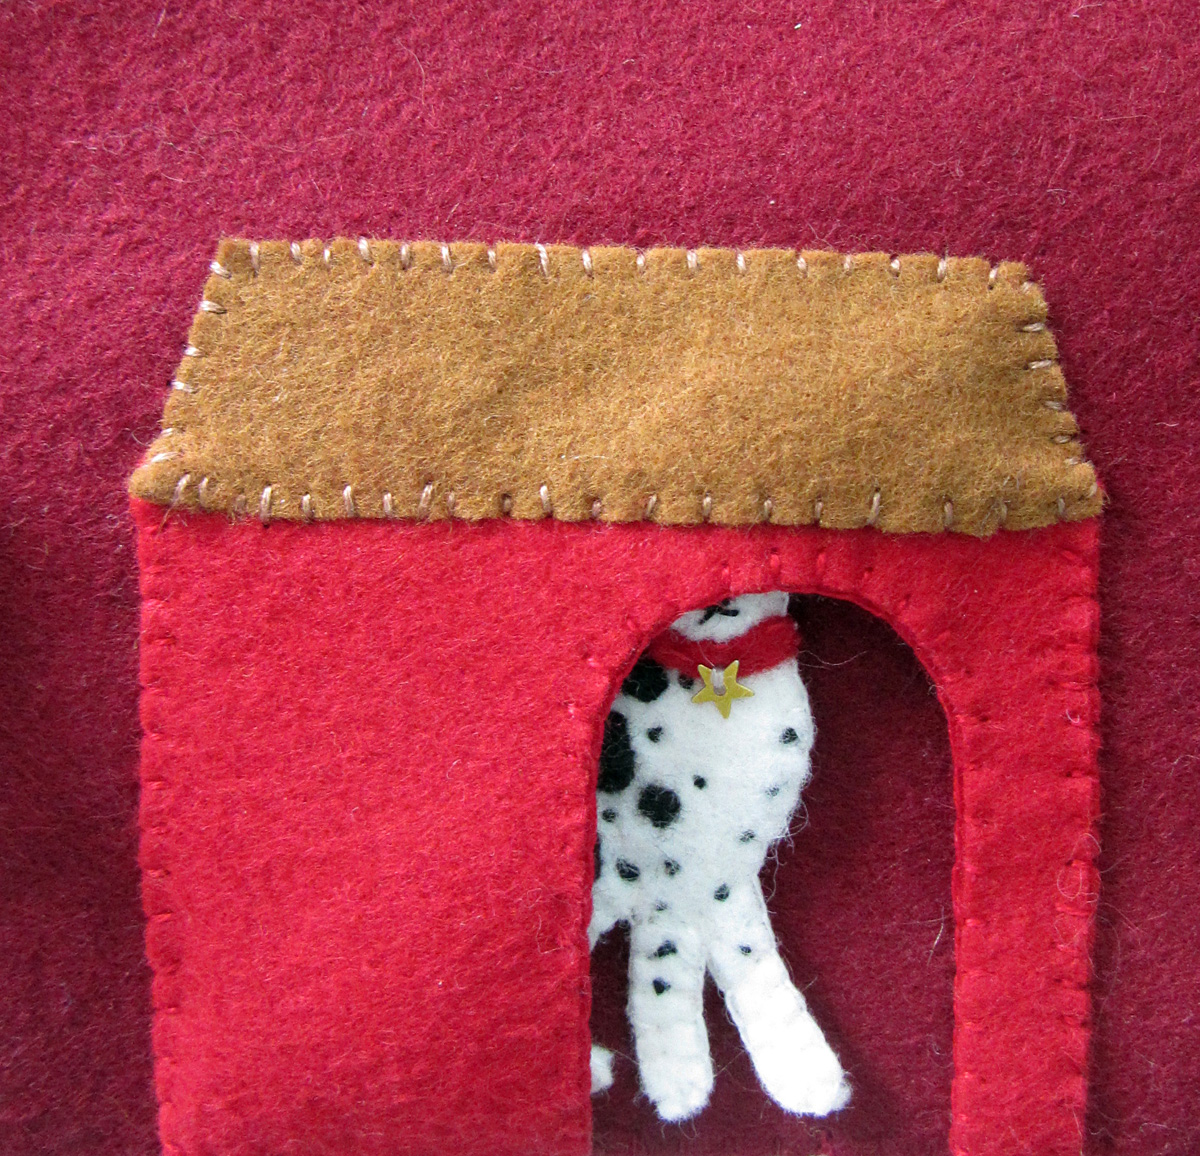
Dog House: I pinned the two layers of the red dog house together and sewed around the door. I pinned the roof in place and sewed them together along the bottom of the roof. I pinned the doghouse in place on the page, and sewed around the sides and top. This makes a nice pocket for the puppy to go into.

Felt Fire Station - Cover IMG_1902

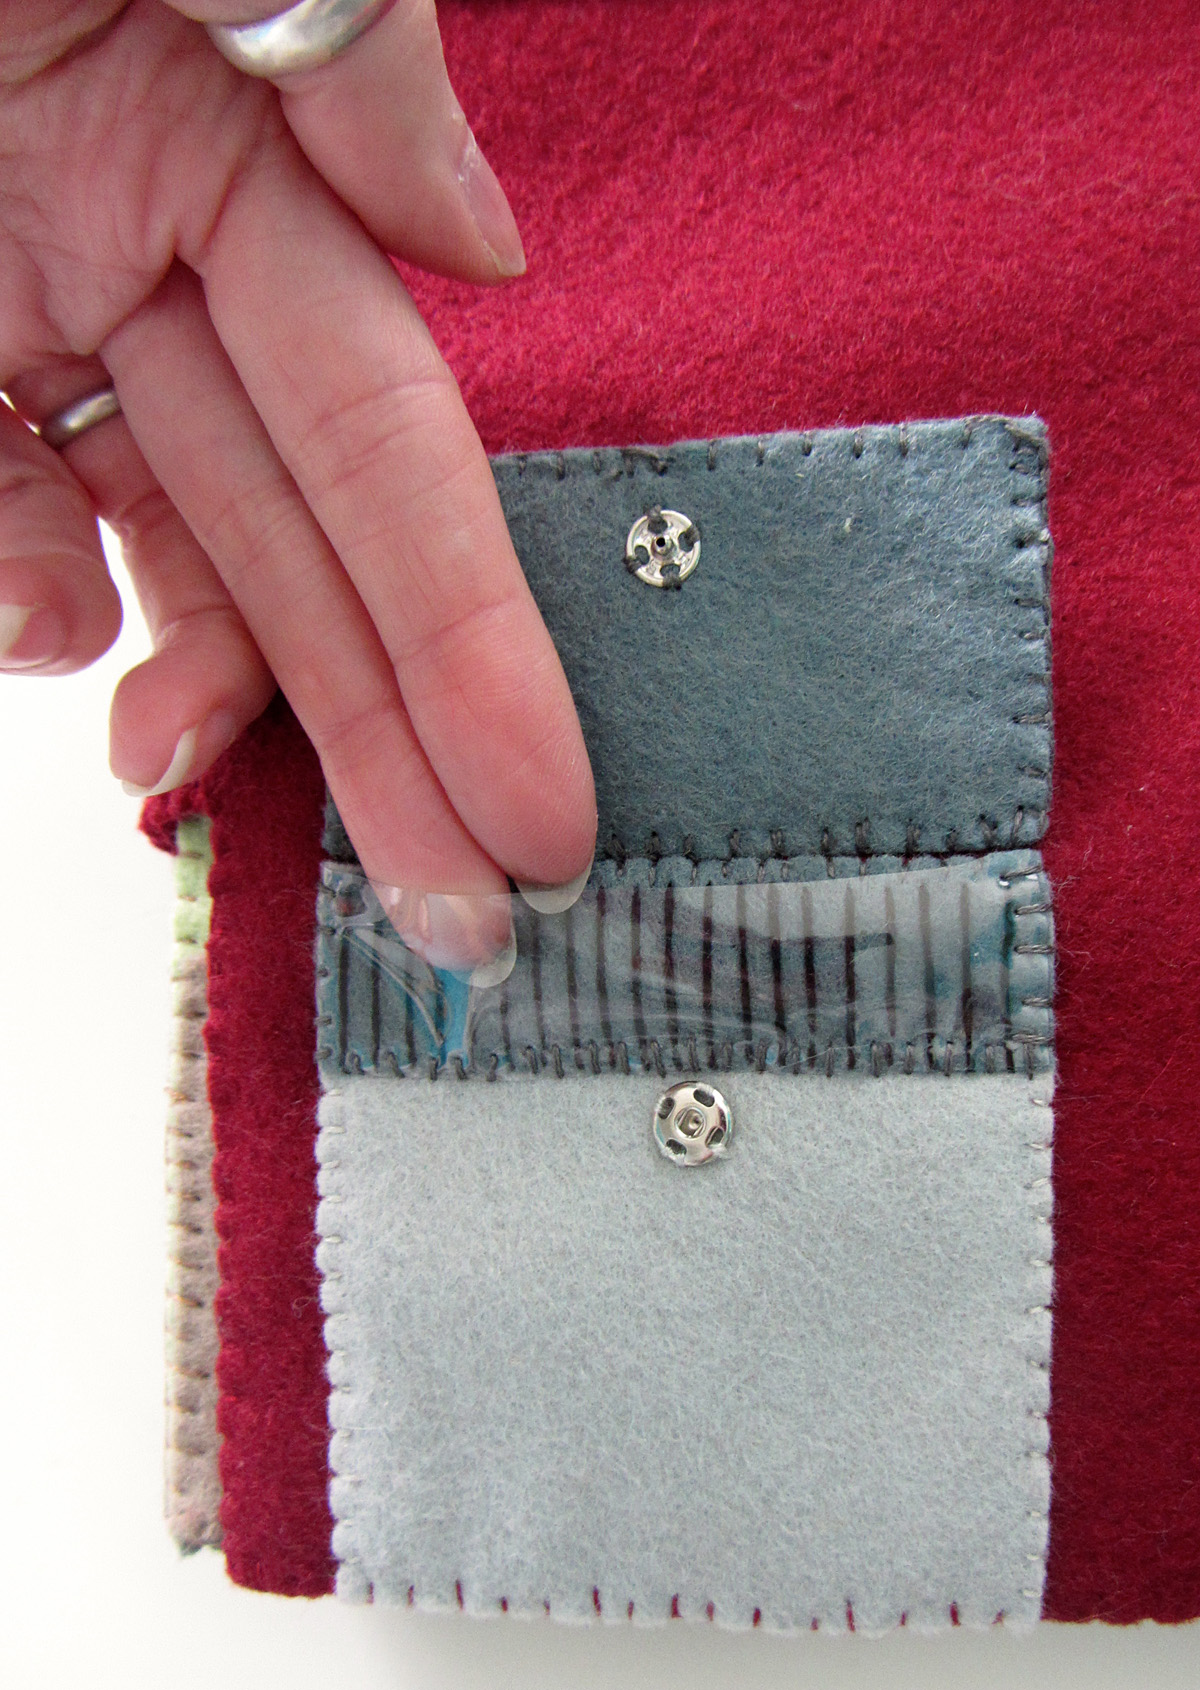
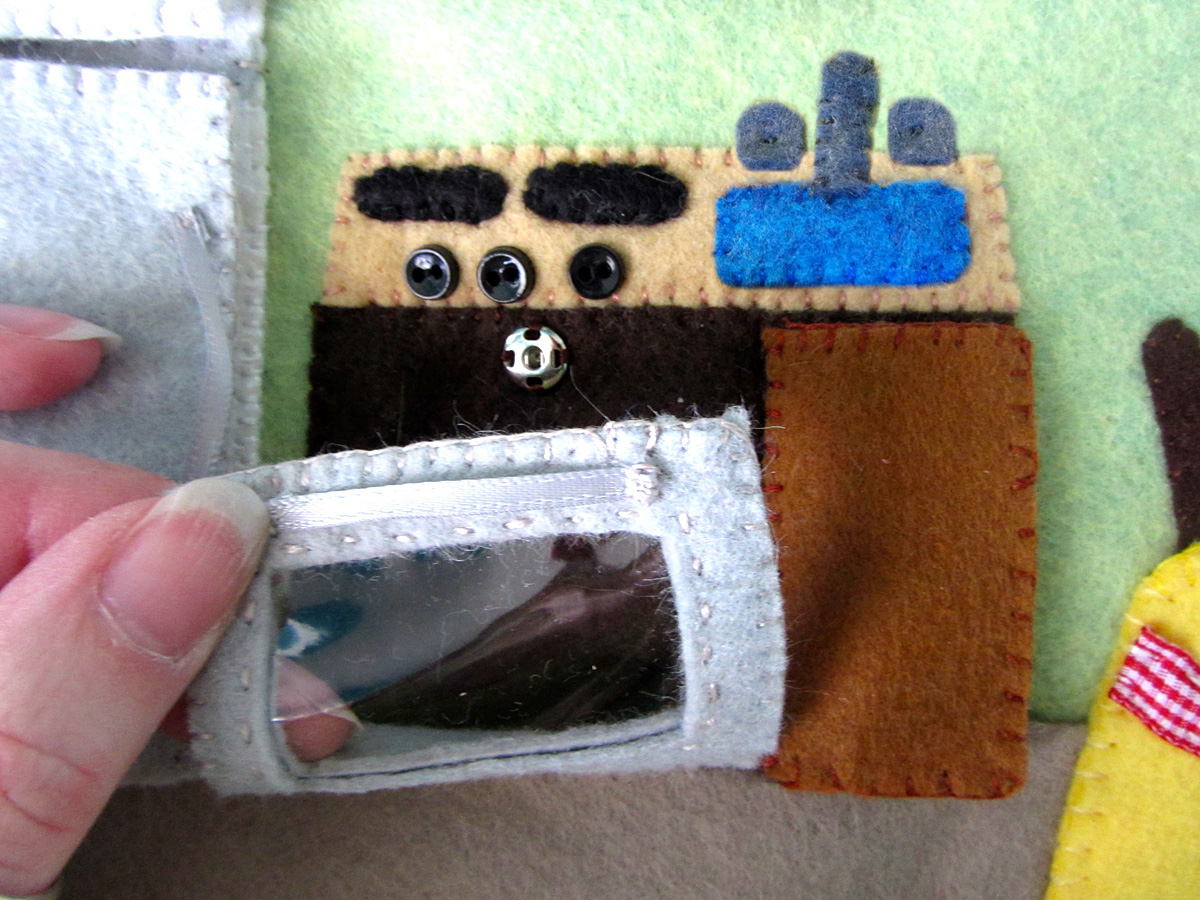
Grill: For the grill, I pinned the grilling surface to the grill body then made long stitches for the grill bars. I made tiny stitches at the end of each long stitch to hold everything tight. I pinned the grill to the page, sewed the top down, and laid the clear vinyl pocket in place. I sewed along the bottom of the pocket, then added a sew-on snap just under it. I sewed around the sides of the grill, making sure to catch the sides of the pocket in my stitches.

Felt Fire Station - Cover

For the lid, I sewed a matching snap to one side, then sewed the front and back together with a ribbon handle stretched across and tucked between the layers at each end. I pinned the lid to the page with it already open, and sewed it to the page. Sewing it down while it is open helps it stay open on its own while you are playing.

Felt Fire Station - Cover

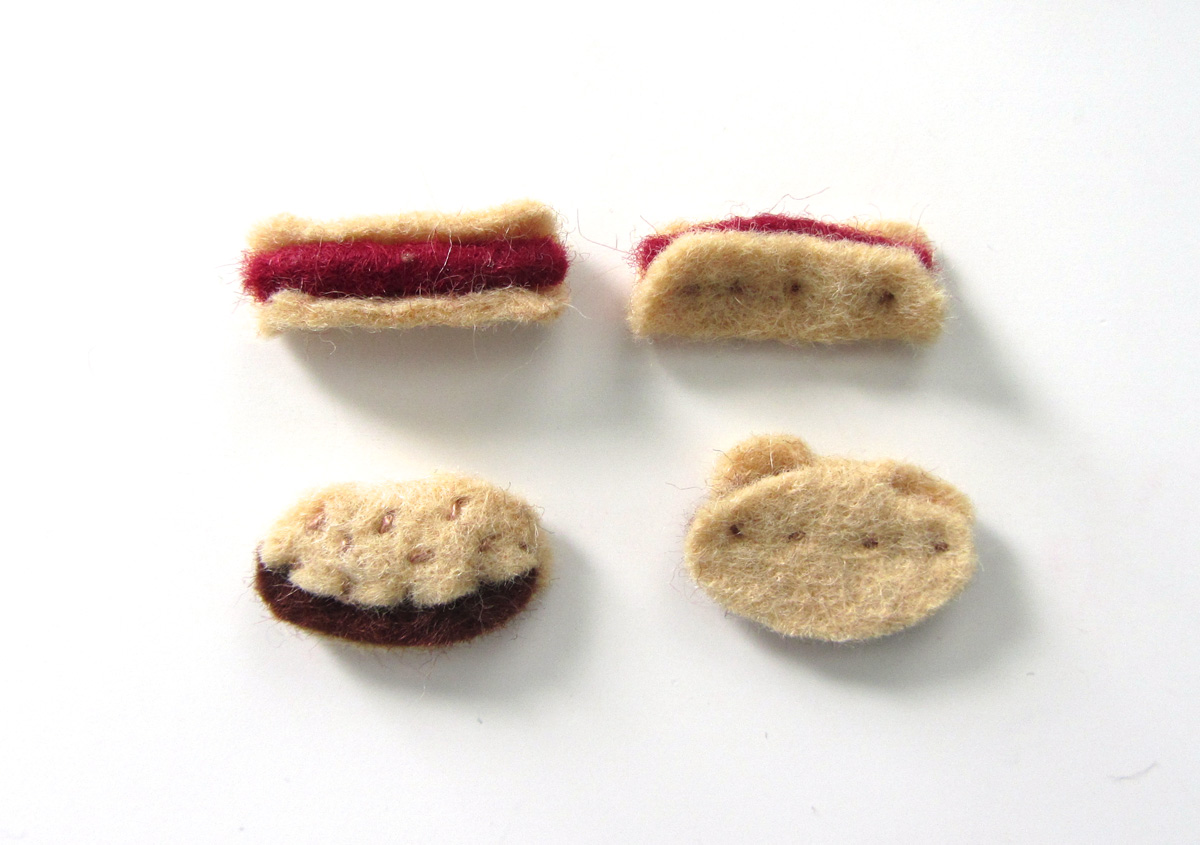
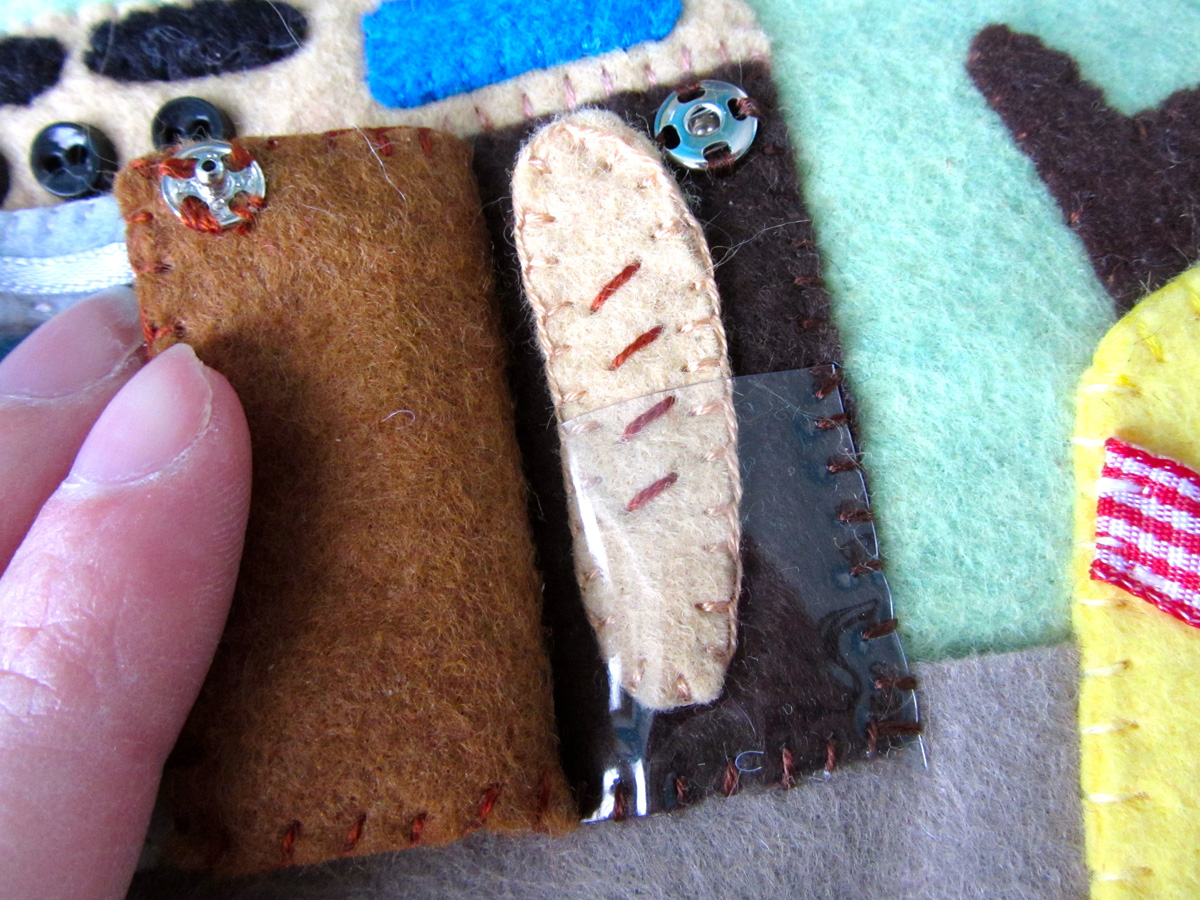
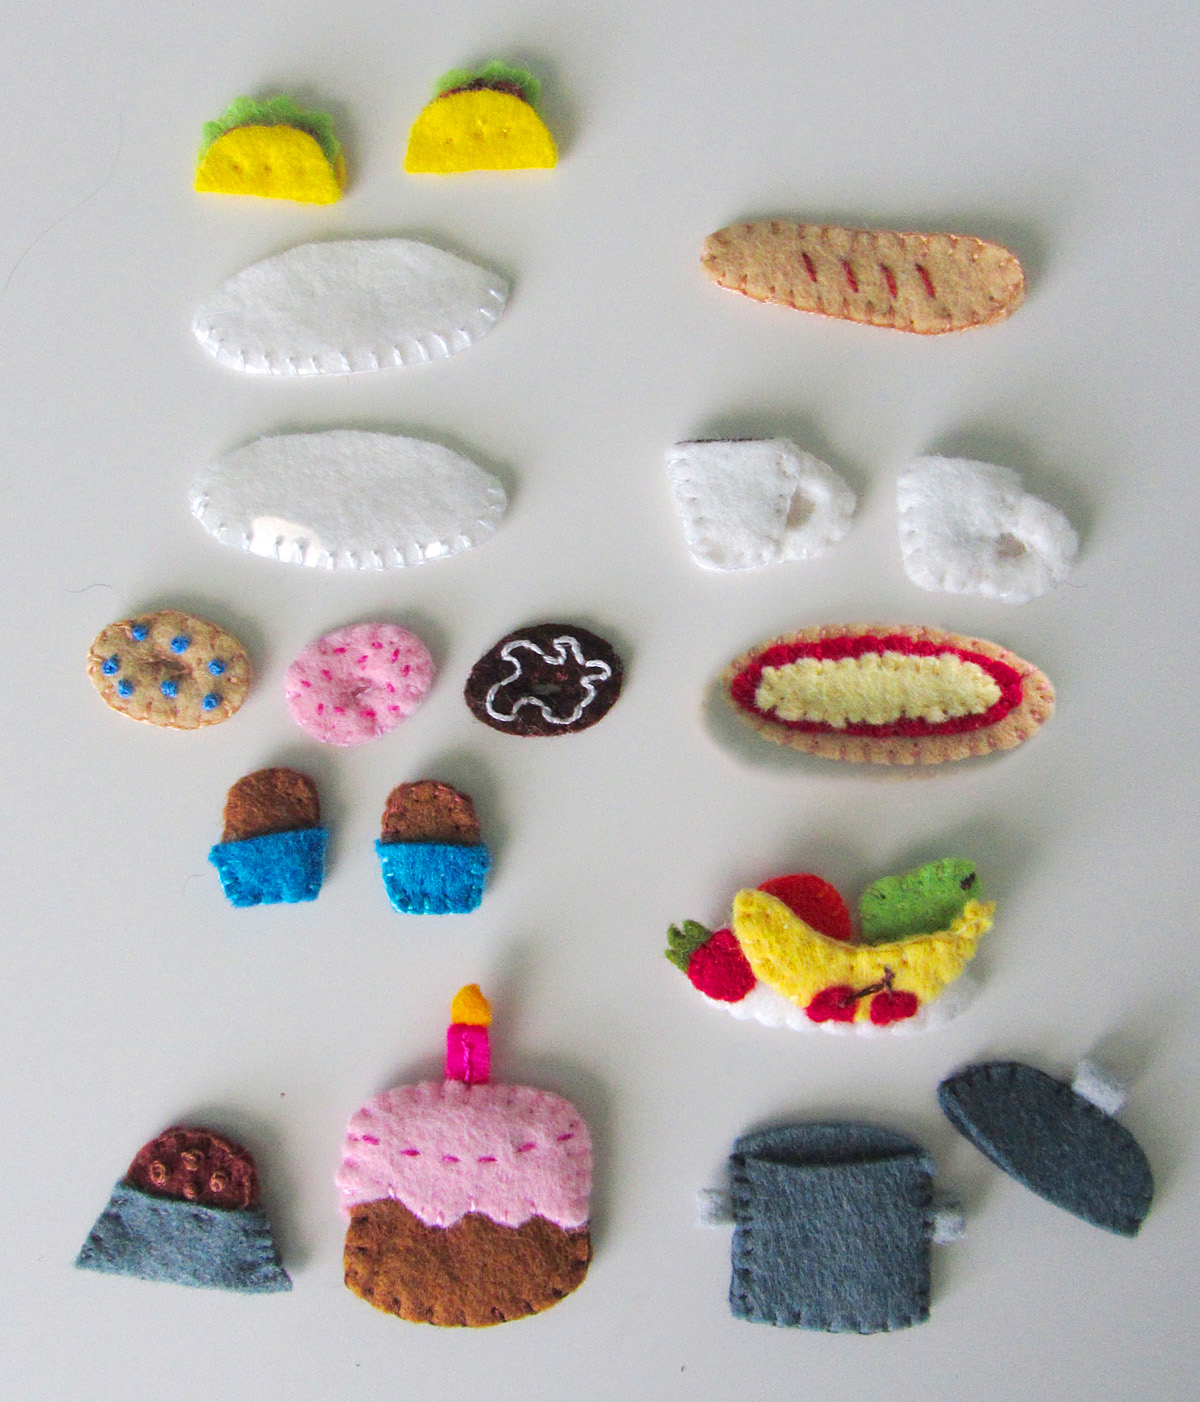
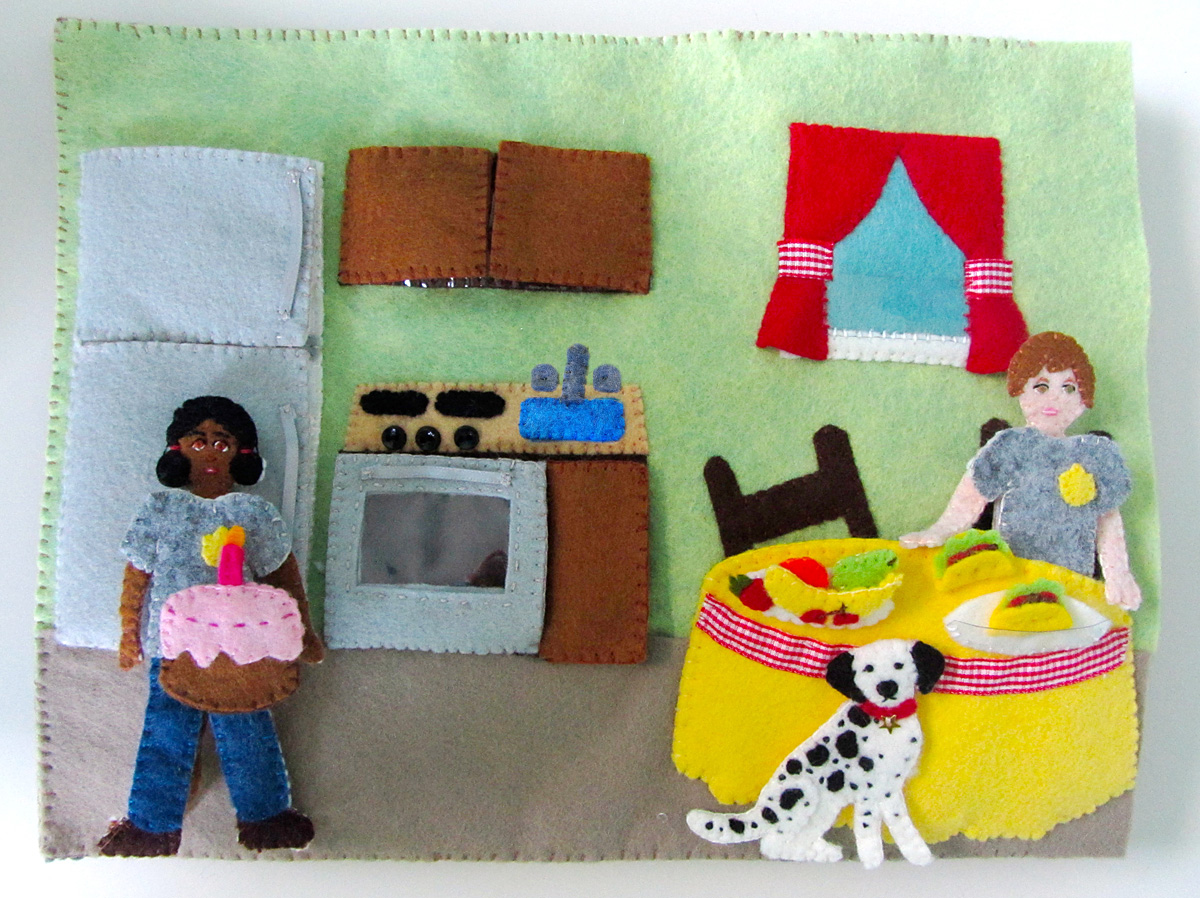
Hotdogs & Hamburgers: (Veggie dogs and Gardenburgers for us!) Fold each hotdog lengthwise and sew around the edges. Place each one in the center of a bun. Wrap the bun up around the hotdogs and make small stitched through all layers along the length of the hotdog to hold them together. For the hamburgers, stitch tiny sesame seeds to the outside of the top of the bun. Place each patty on the inside of the bottom of each bun, fold over the tops, then make a few tiny stitches to hold them closed.

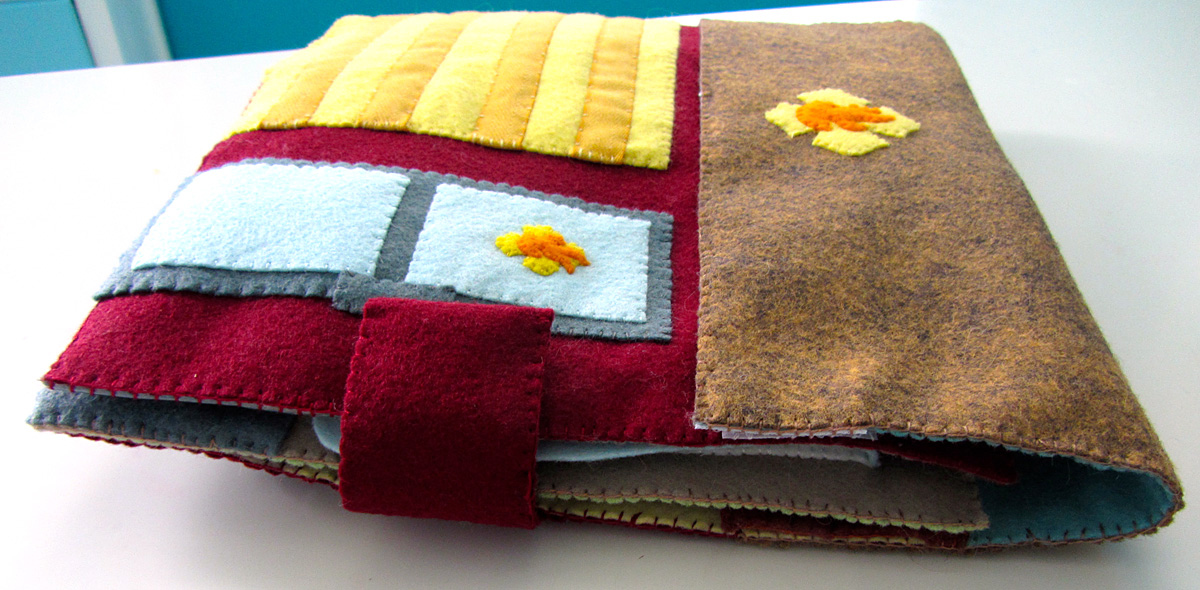
Side Strap: Sew some snag-free Velcro on to one side that matches the Velcro by the front door, then sew the two sides together.

Felt Fire Station - Cover

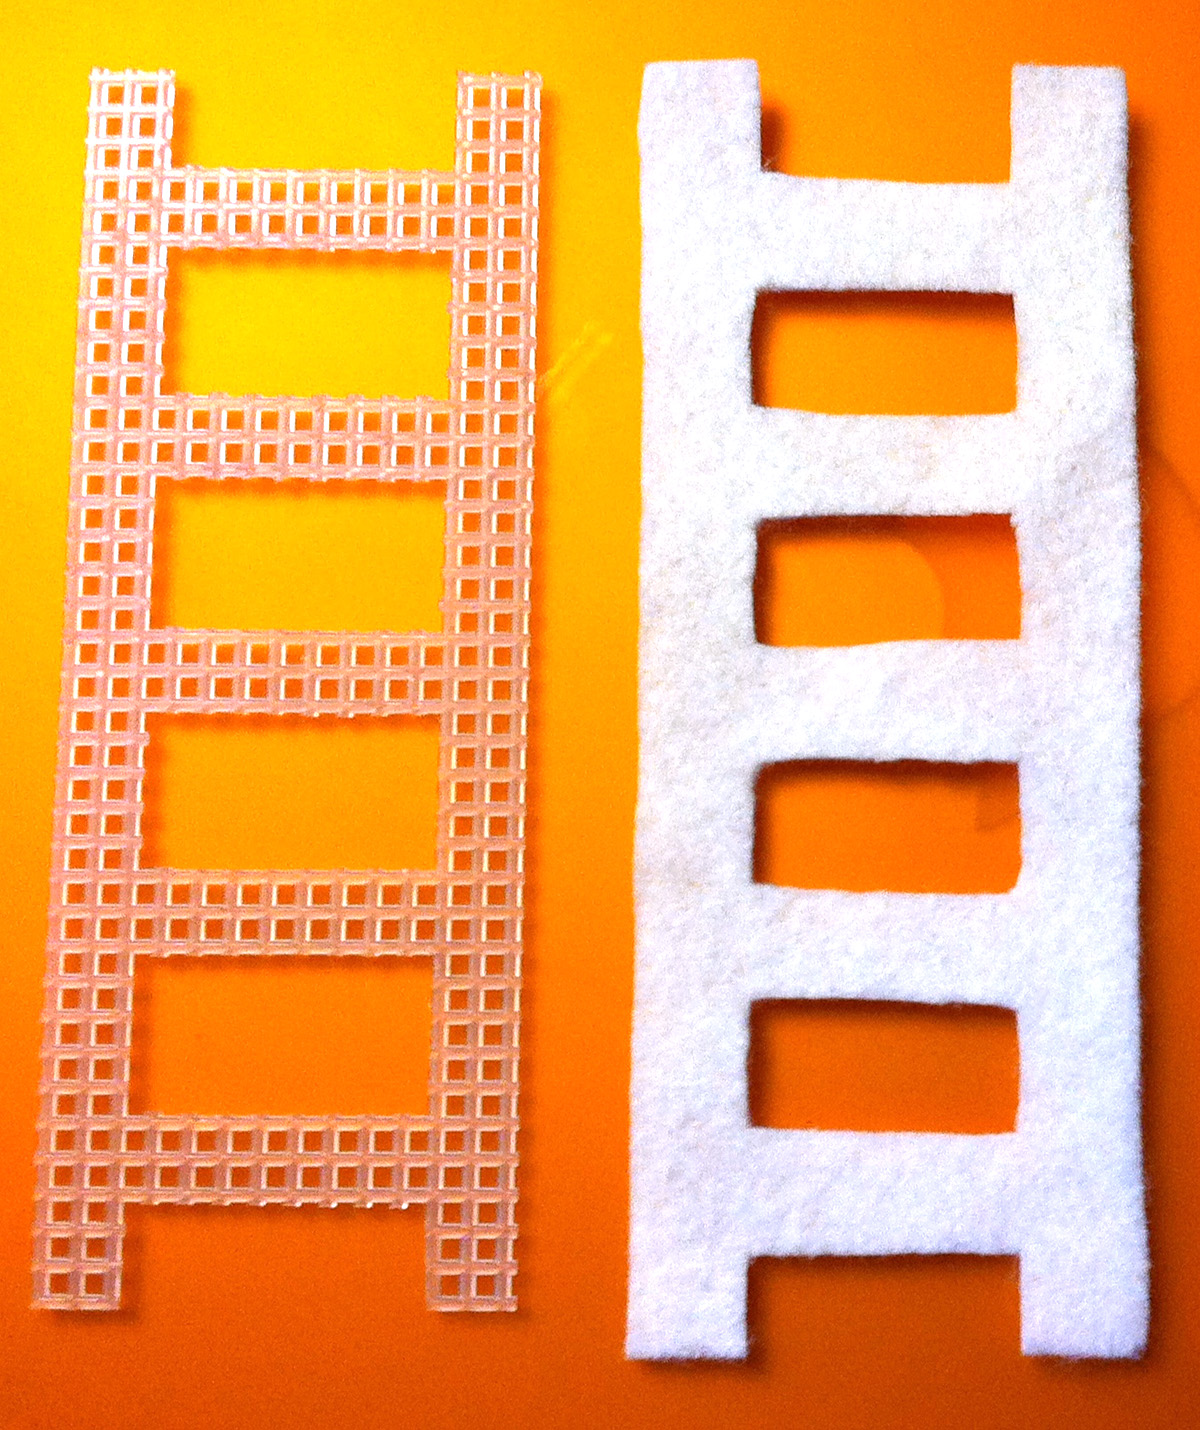
Roof: Sew the roof emblem to the center bottom of the roof, as shown above.

Felt Fire Station - Cover

Pin the back exterior to the office (wrong sides facing) with the side strap caught in the side (Velcro on the interior side). Briefly pin the roof to the bedroom, aligning it to the top (wrong sides facing) to find where it needs to be sewn to the back exterior. Unpin the roof from the bedroom and sew the bottom edge down to the back exterior. Pin the roof back in place and sew the back exterior and roof to the office/bedroom, taking care not to sew the bedroom floor flap when you go past it on each side.

Felt Fire Station - Cover

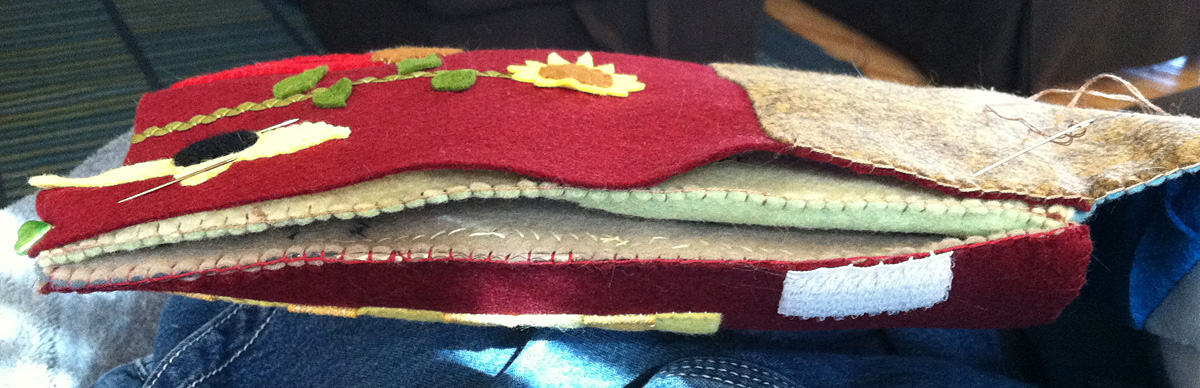
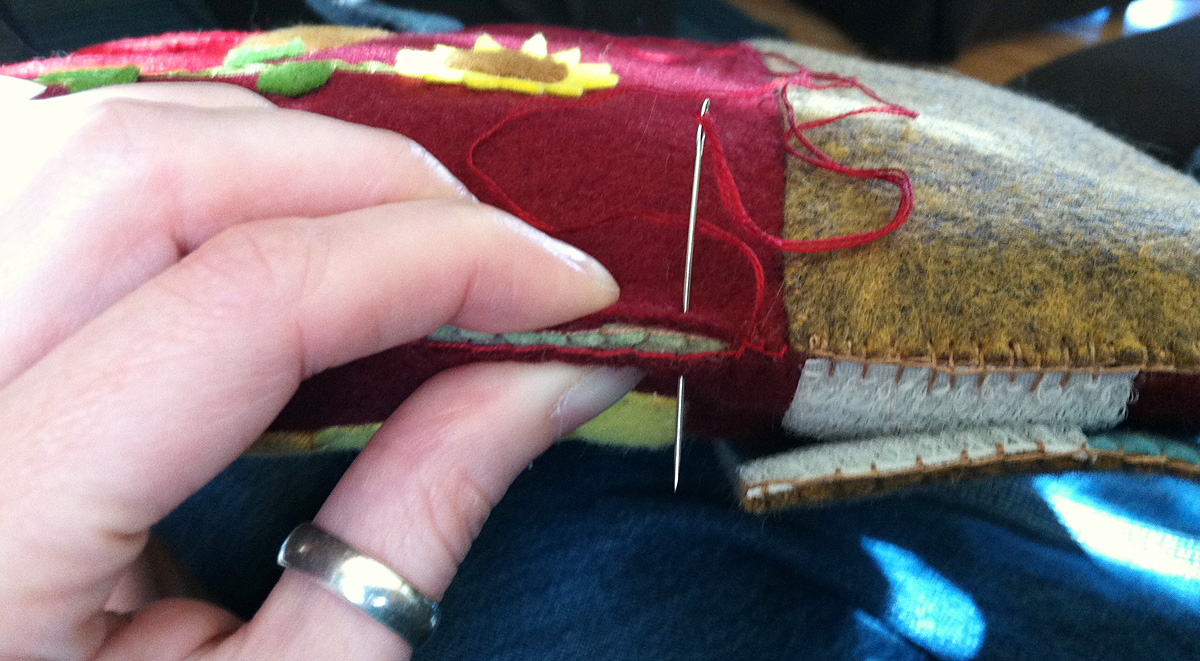
At this point, the book is all sewn together except the side binding is open. With the roof flap open, Sew through all the layers of the book to close the binding. I used a blanket stitch, and used floss that matched the roof to start with, then switched to floss to match the walls.

Felt Fire Station - Cover Felt Fire Station - Cover

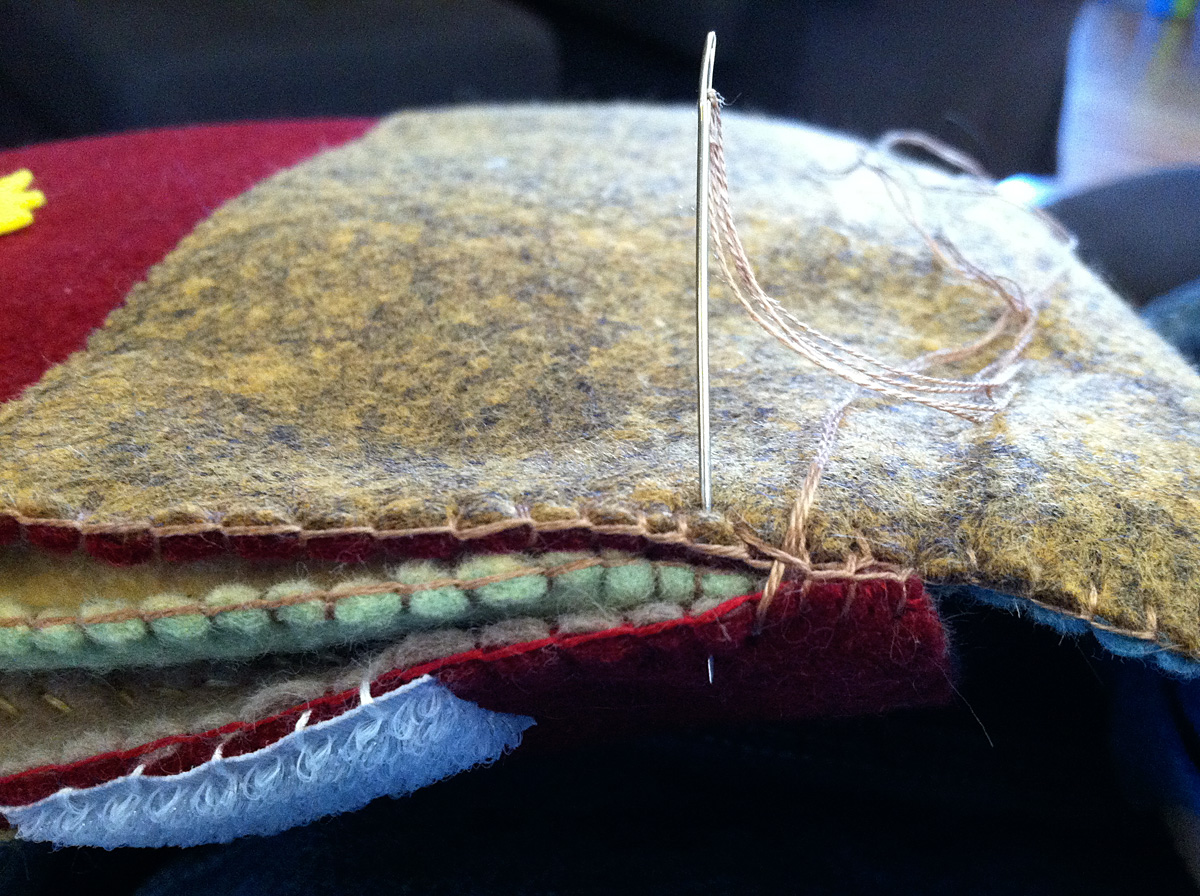
I didn’t pin mine, as it was so thick. I just went slowly and pinched the layers close and all lined up as I went. Excuse the phone photos here. Jax was napping on my lap and I used his lap as my sewing table. Shh, don’t tell him!

Felt Fire Station - Cover

As you can see, the edges came together nicely. This quiet book actually isn’t as thick as I expected it would be all finished.

Felt Fire Station - Cover

This is a view of the bottom edge of the book.

Felt Fire Station - Cover

Here is a view of the right side. I matched my threads to the exterior (roof and brick colors) when sewing the pages together. But that is just personal preference. I like the clean look on the outside. Since the interior rooms are already busy, the contrasting floss around the edges isn’t really noticeable.

Felt Fire Station - Cover

Stay tuned for an fun add-on pattern to be released soon, because firefighters need to have fires to put out! I hope you had fun visiting our little fire station quiet book! Jax will be bringing this along on our week-long vacation in California. We are renting part of a Spanish bungalow so he won’t have any toys but what I bring him.

Are you making the fire station from my pattern? I’d love to see! Email me photos, or stop by the Facebook page to share!

Felt Fire Station - Cover

Come back soon!

Felt Fire Station – Kitchen

IMG_1748

This fire station project will be a full stand-alone quiet book, just like the dollhouse book, but using full size 9″ x 12″ sheets of felt for each page. The fire fighters are made from the same pattern as the dollhouse dolls, so they will be interchangeable. To see the first section of the project, go here: Felt Fire Station – Fire Truck & Dalmatian and Felt Fire Station – Garage & Locker Room.

This tutorial is for the third interior page of the fire station – the kitchen!

IMG_1738

IMG_1732

Background: I started with a background sheet of honeydew green felt. I pinned down a 12″ x 2.5″ strip of chai felt for the ground. Don’t sew anything important about 1/4″ from the center edges of the two-page spread to allow for sewing the binding. But having the floor go to the edge is fine!

IMG_1735

Fridge: I sewed the white background down, catching clear vinyl pockets in my stitches as I went around. I sewed the bottoms of the pockets closed. (You can add more pockets, but I staggered mine between the doors and interior so that the fridge didn’t get too bulky. I then sewed the gray line down between the freezer and the fridge. This hide the white when the doors are closed. I sewed four small squares of snag-free Velcro on the right edge (as shown above.)

I sewed the doors around the top, right and bottom edges with the gray outside, white inside, and clear pockets layered together, then added matching Velcro squares to the corners. I positioned the doors in place on the fridge and sewed the fourth side while attaching them to the page.

IMG_1733  IMG_1734

Lower Cabinet/Oven: I started by sewing the dark brown cabinet interior down, followed by the counter. On the counter, I sewed the sink, taps, faucet and burners. I added 3 tiny buttons left over from my Snowman page. I sewed a clear pocket down where the cabinet would be, and added snaps for the cabinet and oven door.

I sewed a silver ribbon handle on to one of the gray oven door pieces and a matching snap half on the other, then sewed the two sides together with clear vinyl sandwiched between. I did a running stitch (dashed line) around the window to keep it from stretching. I sewed it down to the cabinet along the bottom.

For the cabinet door, I sewed the matching snap half to the corner of the inside felt piece, then sewed the two sides together along the top, right and bottom. I sewed the last side while attaching it to the page.

IMG_1736

Upper Cabinet: I sewed the cabinet interior down tot he page along with the clear vinyl pocket. I added snaps, then did the cabinet doors the same way as with the lower cabinet.

IMG_1737

Table & Chairs: I sewed the chairs in place on the page. Only the tops show from behind the table, so that is all I used. I unpinned the floor and basted the interior of the table in place along the floor. (See above photo showing the inside of the finished table pocket.)

IMG_1752

I decorated the table front felt piece with some red gingham ribbon. I pinned the table front to the page, lined up with the table bottom, and sewed it to the page around the sides and the bottom. Sewing only through the two table felt pieces, I sewed along the top.

Window: I sewed the blue glass felt piece down, catching some clear vinyl in the bottom to make a pocket (for potted plants included with the next page.) I sewed the white window sill down over the bottom. I sewed the red curtains in place, leaving the bottoms open, then added some more of the gingham ribbon as tiebacks.

IMG_1746

Clothes: This page includes casual clothes for the fire fighters. The dolls are sewn like the one included in the Dollhouse.

Logo T-shirts: I sewed the yellow emblem to the pocket area of the heather gray tees, then sewed them to a white felt backing with a bit of snag-free Velcro sewn to it.

Tee with Apron: I sewed the top of a red apron (only one thickness of felt) down to the white t-shirt, catching two yellow ribbons in my stitching. I sewed only the t-shirt part to a white backing with Velcro, catching the other ends of the straps between the two layers.

IMG_1747

Jeans: I decorated the jeans with a yellow dashed line of stitching at the crotch, a gray French knot button, four light indigo stitches as belt loops and 2 slanted long stitches as pockets. I stitched shoes to the bottom cuffs (decorating the white ones with red stripes) and sewed the whole thing to white backing felt with Velcro at the top.

IMG_1751Food: I’ve included a lot of food in this pattern, and will be adding a bit more when I do the back cover with a grill. You can also use food from the Dollhouse Kitchen.

Coffee Mugs: I sewed the two handle pieces together, then layered it and the coffee felt between the two sides of the mug. I sewed it together along the sides and bottom, then trimmed the extra handle inside the mug so it was less visible.

IMG_1745

Muffins: I sewed the muffin tops (hah) together, then sandwiched them in place between the muffin liner pieces. I sewed along the sides and bottom of the liners, then made a couple tiny stitches at the top to hold the muffins in.

Fruit Plate: Each little piece of fruit is sewn separately, but stitched to the top of the plate at their bottoms. The exception is the cherries, which are appliqued to the banana. I added stitched brown stems to the cherries and pear, and caught a bit of green felt in the top of the strawberry to make the green leafy top. I sewed the back of the plate on once I finished the fruit.

IMG_1750

Pizza: I sewed the cheese to the sauce and the sauce to the top of the crust, then sewed the back of the crust on. Note that I didn’t center the sauce on the crust – I had it closer to the back to created a foreshortened look.

IMG_1756

French Bread Loaf: I sewed slanted long stitches in brown to make the slashes in the crust on both sides, then sewed the sides together.

Stock Pot: I sewed the sides and bottom of the pot together, catching folded scraps of gray felt in the sides to make handles. I sewed along the curved top of the lid, catching a folded bit of gray felt in the top center ans a handle.

Donuts: I decorated both sides of the tan “blueberry” donut with periwinkle French knots and sewed the sides together. I decorated both sides of the “strawberry” donut with stitched sprinkles, then sewed the two sides together. I decorated the top of the “chocolate” donut with a curvy white line of stitching, then sewed both sides together.

You could sew the donuts to the platter as with the fruit, but I decided to let Jax have some loose food to “feed” to the dolls. So I sewed the platter separate, added a clear vinyl pocket to hold the food.

IMG_1754

Tacos: I sewed scraps of red felt to the lettuce felt, then added brown French knot “taco meat”. I placed the toppings inside the folded taco shell felt and made tiny stitches to hold it closed. Note that the taco shell is folded so the front is a bit shorter than the back.

I did the platter with a pocket the same way as for the donuts.

IMG_1755

Cake: I first stitched a curving running stitch (dashed line) on the frosting pieces, then stitched them each to a cake piece. I stitched together the candle pieces with the flame caught in the top. I placed the candle between the two sides of the cake and sewed around the edges.

IMG_1749

Dog Kibble: Puppy needs to eat too! I sewed brown French knots on both sides of the kibble felt,, then sewed the sides together along the top. I layered it between the bowl pieces and sewed along the sides and bottom. I added a couple small stitches along the top to hold the kibble in the bowl.

I’d almost say this is Jax’s favorite in the fire house so far – he’s always been a fan of play food. But, He’s been so excited about the whole thing that it is too close to call. I’ll be hiding this book away once it is done so it is new and fun during out California trip in May.

Have you been sewing along with me on this Fire Station book? I’d love to see your progress! Stop by the Facebook page and post a photo!

The next two pages in this series will be the office and bunk room. So close to finishing! Happy sewing!

Felt Fire Station – Fire Truck & Dalmatian

Felt Fire Station - Fire Truck & Dalmatian

Jax enjoys the little toy fire station he received from our friend when he was little. I’ve even caught him playing with it wearing his fire fighter hat! After getting many requests for a fire fighter quiet book page, I decided to start designing.

My project will be a full stand-alone quiet book, just like the dollhouse book, but using full size 9″ x 12″ sheets of felt for each page. The fire fighters will be made from the same pattern as the dollhouse dolls, so they will be interchangeable.

Felt Fire Station - Fire Truck & Dalmatian Felt Fire Station - Fire Truck & Dalmatian

Here is my fire truck, shown with a ruler and one of my regular pages for scale.

Because the dolls needed to set the scale of the page, the fire truck is quite large. I wanted them to be able to ride in the truck, so I couldn’t have a tiny truck. If you plan to use the fire truck pattern on a page that is the size I normally sew, you may need to shrink it a slight bit if you don’t want it sticking out. My fire station will be sewn differently, and I’ll post all about the construction when I get to that point.

This tutorial is for the first two parts of the fire station book – the fire truck and the dalmatian!

Felt Fire Station - Fire Truck & Dalmatian

What I Used:

Felt Fire Station - Fire Truck & Dalmatian

I started by stitching tiny red star sequins to the siren area on the red truck piece. Then I laid the window and siren vinyl between the red truck piece and the white cab piece before sewing them together.

Felt Fire Station - Fire Truck & DalmatianI sewed the side mirror piece over top. I sewed down the yellow stripe pieces, then sewed the dark gray tool panel crossing it. I sewed the gray running board/bumper down along the bottom (but I didn’t sew the outside edge of it down until I was sewing the white backing onto the finished truck.)

Felt Fire Station - Fire Truck & Dalmatian

I sewed the yellow emblem onto the truck door then sewed the black 2 on top of it. Using my pattern as a guide, I stitched 911 onto the yellow stripe with a back stitch. (I actually pinned the paper to the felt and stitched right through it, following the lines. Then I carefully ripped the paper away.)

Felt Fire Station - Fire Truck & Dalmatian  Felt Fire Station - Fire Truck & Dalmatian

I sewed the wheel wells down where I wanted the wheels to be, the sewed two black felt circles together for each wheel. I added a large eyelet to the center of each wheel, then chose 1″ buttons as my hubcaps. I positioned the wheels where I wanted then to end up, then sewed the button to the truck through the eyelet hole. This lets the wheels spin.

Felt Fire Station - Fire Truck & Dalmatian

To make the ladder, I cut out plastic canvas and sewed it between two pieces of white felt. I also added snaps to the center of the top and bottom rungs to hold it on the fire truck. See the photo above to know how large to cut your plastic canvas.

Felt Fire Station - Fire Truck & Dalmatian

Once I had the ladder snapped to the side of the truck, I sewed on two large shank-back buttons. These are used to wrap the fire hose around when not in use. I sewed a small square of red loop (soft) Velcro beside one of the buttons so the hose can be secured.

On the center of the tool panel, I sewed down a circle of loop Velcro. This can be used to hook one end of the hose up to the truck. (There will be a fire hydrant on the fire station cover with Velcro as well.)

Felt Fire Station - Fire Truck & Dalmatian  Felt Fire Station - Fire Truck & Dalmatian

Axe: I sewed the two handle side together, then sewed a snap to the back piece of the axe blade. I sandwiched the top of the handle between the axe blade pieces and sewed them together. I positioned the axe on the tool panel and sewed the other half of the snap down to hold it in place.

Traffic Cone: I sewed a snap to the back piece of the traffic cone then sewed the two sides together. I wrapped a scrap of yellow ribbon around the base and stitched it on with a dashed running stitch. I positioned the cone on the tool panel and sewed the other half of the snap down to hold it in place.

Felt Fire Station - Fire Truck & Dalmatian

Hose: I wrapped some parachute cord around the buttons on my truck and cut it so I had enough for both ends to finish right at the red Velcro. I melted the cut ends with a flame, the stitched some hook Velcro around the ends in a tube. That isn’t easy – a sharp needle and a thimble might help.

Felt Fire Station - Fire Truck & Dalmatian

Dalmatian: I started by decorating the face piece with his ears and nose. His eyes are French knots with a stitch for eyelashes. His mouth is just two little stitches in an upside down V. I stitched the red collar onto the body front the stitched the finished face on as well.

To make the larger spots, I cut random tiny scraps of black felt and sewed them down. Wool felt works well for such tiny pieces because it fuzzes less. You’ll still need to clean black lint off the dog when you are done, though. The small spots are just groups of black stitches in random shapes. I made spots on the hind leg and sewed it down to the body front.

Felt Fire Station - Fire Truck & Dalmatian

I stitched a tiny gold star sequin on the the collar as a dog tag, then sewed the front of the dog to his backing. I plan to make an extra fire hat for him in the next phase of the fire station book project, so stay tuned!

Felt Fire Station - Fire Truck & Dalmatian  Felt Fire Station - Fire Truck & Dalmatian

On the back of the fire truck, I sewed on the white backing piece, leaving it open at the cab and the top back to form pockets for the dog and dolls. I added a scrap of white felt to make the truck back pocket more shallow.

I am very pleased with how the truck (and the puppy!) turned out! I wasn’t sure what I was going to use for the hose until I found the parachute cord and got it for $1 with a coupon. I’m excited to move on to the two fire fighter dolls – one boy and one girl! They will have different clothes they can put on.

To see photo updates of this project as I work on it, follow my Instagram or join the Facebook page. I’l also taking suggestions for Valentine’s day projects now. Is there anything you’ve been wanting to make?

Toddler Crafts: Painted Tree Garland

IMG_1211

Jax and I made some decorations this week. We don’t have our tree yet, but we’ve enjoyed bringing out some of our Christmas items early. Jax asked to do some painting, so I put together a little project for him.

We started with a roll of craft paper from the dollar store. I rolled out some and used paper tape to mark off a bunch of triangle shapes. I set Jax up with paint brushes and crafts paints in red, green and silver. He had a lot of fun painting all the triangles!

At the end, I helped him do some drip painting to add some silver dots. We set our paintings aside to dry, and I let him paint some $1 wooden ornaments he’d picked out at the craft store. We also used a dollar store foam ABC puzzle as stamps and stamped out “peace”, “love” and “joy”. Jax found the letters we needed and helped press them onto the paper.

Decorating Ornaments

Today after breakfast, I pulled off the tape and cut out all the triangles. I set us up at Jax’s school table with baker’s twine, green and red paper and a glue stick.

I cut out red and green triangles to match our little trees, as well as shapes to match the backs of the words. Jax helped me put glue all over the backing papers then we pressed them together with the twine sandwiched between.

We did a pattern of three trees followed by a word. I have a nice pile of trees leftover that will become gift tags on gifts going under the tree.

I wasn’t sure where to hang it at first. I wanted it on the stairs, but Jax thought it would be great to tug on there. So, it ended up hung on the wall in the foyer.

Too Tempting…

Jax was very proud of himself! He keeps reading the letters to me and and asking what the words mean. Well done, little man!

Solar System Quiet Book Page

I’ve had this page started for quite a while, but other projects needed to be completed for me to stay on schedule with my sewing. I know a lot of you were waiting on this one – thanks for being patient!

My inspiration for this page came when I was contacted by Lots of Buttons and offered a $10 code to try their service. As soon as I saw some of their buttons I thought of planets! It took a lot of searching to find buttons that would work for each planet and were all about the same size. I was disappointed to find out may favorite button was sold out after placing my order, but their customer service was very helpful and offered a substitute. I ended up not using the replacement button, as it was a lot muddier looking in person, but I was very happy with the others.

This page is mainly a learning page for Jax and I to use with our school studies, but it is also a little matching game with colors and numbers. The buttons that hold the planets in place match their colors. I also stitched numbers on the page and the planets. My planets are two layers with a button hole in the back layer. If you want to have the page be a buttoning exercise for your child, you could make the button holes go through both layers. You’ll lose some of the look of the planets and might need to use smaller buttons on some of them, though. (My cookie matching page is an example of this.)

For those with little ones who like to put things in their mouths – I did use beads. Jax is really good about things like that at this point. I always stitch through every bead two times for strength, but you can use some alternatives if they make you wary. Try cutting tiny felt scraps to sew on as the asteroids in the belt. Little * stitches would make cute stars.

I was able to use up a lot my scraps of felt from American Felt and Craft. The earthiness of the wool blend felt works so well for the planets.

What I Used:

I started on the left hand side of the spread by sewing down the sun. I stitched the orbit lines one at a time while sewing the corresponding planet, so I could be sure there was enough space between each one. The orbit lines are gray thread in a dashed running stitch. The buttons were each sewn down with matching thread, and I used the leftover thread to stitch the number along side. I did them freehand in back stitch.

In between the orbit lines, I stitched on seed bead stars. I actually just did a vertical zigzag between each and that gave me a random-looking, but evenly spread star scape. After Mars, I stitched the asteroid belt using the same stone chip beads I used as nuts on my sundae page.

For each planet, I stitched all the details and a number on to the front piece. On the back piece, I cut a slit large enough for the button. I then did a blanket stitch around the slit to fortify the edges.

Planets: For Mercury, Venus, Mars and Uranus, I only stitched the number on the front before  making the button hole and sewing the fronts and backs together.

Sorry, Pluto… You were demoted and I’m out of room!

Earth: I started by sewing down the land mass shape. Then I took a very thin layer of batting that I had peeled apart, and ripped it into cloud shapes. I used white thread and stitched it down, then added a number 3 in blue thread. I added a button hole to the back, then stitched the front and back together.

Jupiter: Jupiter has various stripes sewn on, as well as the red spot. I sewed a 5 on it in brown thread. I added a button hole to the back and sewed the two sides together.

Saturn: I started by stitching the two yellow stripes onto the planet front. Then I stitched some lines on to the front ring piece using back stitch in pale blue, pale pink and brown. I layered the front planet piece in between the front and back ring pieces and sewed all the way around the ring. I sewed the number 6 on in tan. I then added the button hole to the back and stitched it to the front. The back ring piece is mostly hidden inside the planet and adds stability.

Neptune: Neptune was simple with some swirls and a number 8 decorating the front before I added the button hole and sewed the two sides together.

Like our new white “school table”? $7 thrift store coffee table!

I think this is the page that Jax has asked “Is it ready yet??” the most of all the ones he’s seen me sewing. He keeps calling the planets “moons” so his interest is a good opportunity to introduce him to astronomy. I’m going to look into some handouts and worksheets we can do together to start going over the planet names. Perhaps a nice book?

I hope you enjoy this free pattern! I’d love to see your finish version. Email me a photo or post it to our Facebook page.

Felt Peacock Baby Rattle

This sweet little guy came about because I needed a gender-neutral baby gift and I wanted to try out some of the new colors of felt available from American Felt & Craft. Plus, it was a great excuse to use some of the cute ribbon scraps I’ve been collecting. I wanted to choose something that isn’t typically made into toys. Owls are SO trendy right now, but it’s time to give some other birds a little love! So, allow me to introduce you to Mr Peacock!

What I Used:

I started this little guy by decorating his body. I sewed his cheeks and beak on and made little eyes by sewing a long stitch then pulling it up into an arch with a tiny little stitch in the middle. I sewed his body to the feather piece with a little bit of batting to make him pop out.

I sewed each of the chartreuse ovals on, catching a loop of ribbon in the stitches of each one. Then I stitched on the aqua ovals and the purple circles.

I flipped him over and cut out 2 layers of crinkle material to fit inside him. I traced him, adding about a mm or 2 all around to get my backing piece. The extra space gives more room for stuffing and the rattle. I drew my backing piece up in the pattern, so you could use that if you prefer. I sewed the front and back together with the crinkle material inside, pausing 2/3 of the way around to insert stuffing and the mini rattle (wrapped in some batting.)

All done, and super sweet!

I still have three more Christmas ornaments to share with you this week! Which one should be next? Let me know on our Facebook page.

{ This pattern is free for personal use only. If you would like to purchase a $15 license to sell the finished project in your shop, go here. }

Quiet Book Dollhouse – Bed & Bath Page


This page is a part of my Dollhouse mini quiet book. You can find the instructions for the doll and the kitchen page here, and the backyard page here. In the next couple of days I will post the cover! The book is designed on 12″ w x 9″ h felt sheets that will fold in half to 6″ w x 9″ h when closed.

All the felt for this mini book has been provided by American Felt and Craft. I am using their wool blend felt, which cuts like butter and has been holding up so much better than the craft store recycled felt I’d been using. If it is in your budget, it is absolutely worth upgrading for a long-lasting handmade item such as a quiet book. They have some new colors of felt in, and I can’t wait to try them!

What I Used: The pattern, felt (in pink tutu/pink, rainy day/blue-gray, toffee/tan, sunshine/light yellow, soap sud/pale gray, hot pink, whitelimeade/lime green, doe/brown, royal purple/purple, buttercream/pale yellow, sweet pea/pinkish-purple, gray flannel/gray and bisque/flesh), felt scraps (I used rubber ducky/yellow and orange juice/orange for the duck, and forget me not/periwinkle for the front of her nightie.), clear vinyl, white snag-free Velcro, size 1 sew-on snap, 3 small buttons (red and blue for the taps, a mini aqua one for the nightie.), ribbon scraps (many blues for the water, wide polka dot for the mat, hearts for the bed spread, silver for the curtain rod, pink for the towel and robe and white ric-rac for her nightie.), sequins, white snag-free Velcro and a child-safe mirror.

Backgrounds: The background of the whole 2-page spread is a full sheet of pink felt. I cut two rectangles of felt to be the floors (one tan and one blue.) I also cut some light yellow to give the bathroom side a different wall color. On the bathroom floor piece, I sewed the tub and tub feet down so there was some overlap (as shown above.) I didn’t sew it down to the background yet, though. I sewed down the yellow wall and just pinned everything else in place. While sewing the yellow wall, I sewed in a length of silver ribbon about a half inch down from the top. This will be for the shower curtain later. Leave it loose so just the ends are sewn into the sides of the yellow background piece.

Bath Tub: To finish the bath tub, I cut out the two sides of the bubbles and sewed sequins on to the front. Mine were Darice “Crystal Iridescent” that I bought at the fabric store. I sewed both sides of the bubbles together and layered it behind the tub. Using the dashed line on the tub pattern piece as a guide, I folded the extra tub fabric backwards to make a rounded lip. Then I sewed through the tub, the tub fold and both layers of the bubbles to attach them all together.

Showing the floor pockets

Once that was done, I sewed down a ribbon as a bathmat and sewed the floor down to the background along the sides and bottom (also sew the little bits of floor seen to the left and right of the tub). This turns the tub and floor into a big pocket so the doll can fit in her bath.

Bath Fixtures: Sew one of the faucet pieces to the wall, and sew the two buttons on a taps. With the other two faucet pieces, sew them together with different scraps of blue ribbons sticking out one end to look like water. Lay the faucet with water over-top of the one on the page, and stitch it down just at the top so it can flip up out of the way. It will be hidden under the towel while not in use.

Sew the towel bar by folding it and sewing the open edges together. Decorate the two towel pieces with some ribbon and sew the front and back together. Wrap the top of the towel around the bar and sew it on. Position the towel/bar on the page so that it covers the second faucet and water stream and sew the sides of the towel bar down.

What really adds a lot is the little mirror. I hunted the thrift stores for fabric baby books and snagged the mirror out of the one I found. I left the green fabric edging on mine and chose my shower curtain fabric to match. However, you can make your own mirror. Here is a tutorial about it.

The shower curtain is one layer of felt that is folded at the top and sewn around the silver ribbon. Because felt is thick, the curtain doesn’t slide/bunch on the ribbon like a normal curtain. It just flips up like a peek-a-boo panel. You could hem some regular fabric to use as a curtain if you wanted yours to slide.


Bed: I cut a slit in the tan floor piece to match the length of the top of the bed (stopping at where the bed curves at the foot.) I sewed the pillow on to the upper left of the slit (see the above photo.) The bed gets sewn down below the slit (I pinned mine at first so I could sew through both the bed and the blanket at the same time.) I decorated the bed spread with a ribbon and sewed the left side into a fold. I sewed the blanket on to the bed, leave the wavy bottom hanging open. When the bed was all sewn to the floor, I sewed the floor down to the background. The open slit makes a pocket for the doll to go in when she lies in bed.

Shown with clothes from the other pages

Wardrobe: For the wardrobe, I cut two pieces of felt for each door (I used brown on the outside and pale yellow inside.) I also cut some clear vinyl about half the size of each door and sewed them into small pockets to hold the doll’s hat and toys. On one door, I sewed on a folded strip of felt with a snap. On the other, I sewed the other half of the snap. This holds the doors closed.

To assemble the wardrobe, I cut a large square of clear vinyl (the size of the two doors closed) and sewed it down to the page as a pocket. Then I sewed the doors on to each side.

Extras & Clothing:

On the back side of the robe, I sewed two bits of snag-free Velcro where it would match up with her underclothes. On the front, I sewed down the two collar pieces and pinned on a ribbon belt. When I sewed the front and back together, I made sure to catch the ends of the ribbon belt in the seams.

For her nightie, I decorated the front with the contrasting felt, then added ric-rac trim and a mini button. I sewed Velcro on the backing piece and then sewed the two halves together.

The rubber ducky has French knot eyes. I sewed the body pieces together, then sewed the beak on.

The teddy bear has pink ovals sewn on for his muzzle and tummy. I added a satin stitched nose and two French knot eyes. The ears are each one thickness of felt that I sandwiched between the two sides of his head while sewing him together.

I can’t decide which “room” in this dollhouse is my favorite! I love them all…

Night Night!

If you sew the dollhouse quiet book, I’d love to see it! email me photos or post them on the Facebook page!

Quiet Book Dollhouse – Backyard Page

This page is a part of my Dollhouse mini quiet book. You can find the instructions for the doll and the kitchen page here. Still to come are the bedroom, bathroom and the cover/construction. The book is designed on 12″ w x 9″ h felt sheets that will fold in half to 6″ w x 9″ h when closed.

All the felt for this mini book has been provided by American Felt and Craft. I am using their wool blend felt, which cuts like butter and has been holding up so much better than the craft store recycled felt I’d been using. If it is in your budget, it is absolutely worth upgrading for a long-lasting handmade item such as a quiet book.

Shown with food from the kitchen page.

What I Used: The pattern, felt (in ice/light blue, soap sud/pale gray, jade/green, peacock/aqua, hot pink, white, rubber ducky/yellow, limeade/lime green, doe/brown, forget me not/periwinkle, beet/dark red and bisque/flesh), felt scraps (I used a zebra print craft felt for the swimsuit and cilantro/olive for the leaves), clear vinyl, white snag-free Velcro, size 1 sew-on snaps, 2 small buttons, thin blue and green ribbon, white snag-free Velcro and ribbon scraps.

Pool Background: I started by cutting a strip of white and sewing it down along the top to make the edge of the pool. I took a large rectangle of peacock blue and sewed it down along its top edge, overlapping the white. I cut a piece of clear vinyl the same size as the blue pool water and sewed it down along the sides and bottom, going through all three layers (vinyl, blue felt and background felt), making a clear pocket.

Patio Table: I sewed the hot pink table top down, then used a back stitch to sew the legs. I took a scrap of thin, yellow ribbon and sewed it down to make a pole for the umbrella. The umbrella was sewn down along the bottom curve, letting the scallops hang free.

Pool Toys: The inner tube is just sewn back to front. For the beach ball, I sewed the colored segments to each side, then sewed the two sides together.

Garden Background: I cut some jade green felt into a hill and sewed it down to the left side of the page to make the ground. I sewed the fence pieces down to a rectangle of green felt, then trimmed the green from between the pointed tops of the fence posts, as shown above. I sewed the fence into a pocket on the bottom of the page. The doll can stand behind the fence, or you can store the page pieces there.

Flowers: For each flower, I started by sewing a button to the front piece and a leaf to the back piece. I cut two lengths of ribbon – one blue and one green – and had them sticking out of the flower (as shown above) when I sewed the fronts to the backs. At the end of the green ribbons, I sewed on folded rectangles of jade green felt.

Planter: I folded the top of the planter down (towards the front) and sewed it down to make a lip. I positioned the flowers and their green ribbons where they needed to be on the page, and pinned down the planet over top. I sewed along the sides and bottom of the planter, but made sure to leave holes where the ribbons stuck through the bottom. This is so you can pull the green felt tabs to pull the flowers back into the planter.

Clouds: The clouds have snaps sewn to the back pieces. I pinned the tops of the blue ribbons in between the cloud pieces before sewing fronts to backs. I pulled the flowers all the way into the planter then marked where the other halves of the snaps needed to be to hold the clouds in place. I sewed them down to finish the clouds.

Watering Can: The watering can is made by sewing the fronts and backs together with the following things sticking out: A bit of yellow ribbon to make a handle, three bits of blue ribbon coming out of the spout and a scrap of blue felt in the top to make the water.

Find directions for the doll on the kitchen page

Swimsuit: The swimsuit  has a ribbon and bow sewn to the waist of the front piece to make a belt. At the bottom, I took a length of ribbon and sewed it down in loops to make a ruffle. I switched the direction of the the loops halfway through. I sewed bits of snag-free Velcro to the white back piece then sewed the front and back together.

Garden Outfit: I started by sewing bits of Velcro to the back of the white back piece. I then sewed the yellow boots to front of it. I sewed down the pants, folding up the cuffs and sewing them in place. I decorated the shirt with some back stitch and daisy stitches before sewing it down.

Garden Hat: I sewed thin blue ribbon across the brim of each side of the hat. I took a scrap of flower ribbon and folded the ends under to make a little square with one flower motif on it. I sewed one of those down on to each side. I sewed the hat together, leave the bottom open so you can slide it on the doll’s head.

Hope you’ve been enjoying my free quiet book patterns! I love seeing what you’ve done with them. Email me your photos, or leave them on our Facebook page. Stop by tomorrow for a toddler iPad app review and a giveaway of two free app codes!

Quiet Book Dollhouse – Kitchen Page

Having a little boy, I don’t often get to do super girly sewing projects. I really wanted to design a dollhouse quiet book, so I decided to go for it!

This page is sponsored by American Felt and Craft, who provided the beautiful wool blend felt. It is such a delight to work with! The feel of it really doesn’t compare to craft felt. If you can afford to spend a little more, I really recommend using wool blend felt. It has been holding up so much better than the acrylic.

You’ll notice from the photos that this page is laid out different than my others – there is no blank area on the side to allow for the binding/grommets. This is because I plan to fold the pages in the center and sew them together as a mini book that is 6″ wide x 9″ high when closed. I will be posting each double page separately, then showing how I bind it all together. You could use the elements from this page to design a regular quiet book page, but you’ll need to rearrange and shrink some things.


The book will contain one felt doll (or possibly two) with Velcro underthings. I plan to make two outfits per double page. They will be stored on the bedroom page, but there will be places to put them on each spread. Here the table is a pocket. This page also contains many little food items that were a great way to use up felt scraps! Because they are tiny, I’d recommend this page for a 4 year old unless you are supervising. The colors I used are all totally changeable, so just think of them as suggestions. I was in love with that green “honeydew” color and wanted to pay homage to the avocado appliances I grew up with.

What I Used: The pattern, felt (in pink tutu/pink, soap sud/pale gray, white, honeydew/spring green, hot pink, salt & pepper/dark charcoal and bisque/flesh), felt scraps (in lilac, gold nugget/gold, peacock/aqua, rainy day/light blue, big apple/red, cilantro/olive green, rubber ducky/yellow, orange juice/orange, chocolate/brown, banana nut muffin/tan and gray flannel/gray), clear vinyl, white snag-free Velcro, size 1 sew-on snaps, 7mm mini buttons, ric-rac and ribbon scraps.

I sewed this entire page by hand, but you could certainly machine stitch some or all of it.

Background Elements: I started by sewing a strip of felt down for the floor. I used “soap sud” which is a white with a pale tint of pink and blue to it.

For the frame hanging above the table, I cut a rectangle of clear vinyl to fit the opening, then straight stitched it onto the back. I sewed the frame to the wall, leaving the top open so you can slide in a photo. (I stitched across the top of the frame just so it would would match the other sides – but it isn’t sewn to the background.)

For the window, I cut a rectangle of light blue and sewed it down with a + shape of white back stitch. I sewed a strip of white to the bottom for the sill, then sewed the curtains on, leaving the bottoms open for volume. I made two little aqua blue bows and sewed them on as curtain ties. I stitched through the knots so they won’t untie.

I added a shelf under the window to hold the tea set. It is just a strip of hot pink felt sewn down over a small pocket of clear vinyl. The vinyl holds the tea set in place while it looks like it is just sitting on the shelf.

Oven: I sewed down the inside of the oven with snaps in the upper corners, then sewed down the stove top above it. I added 4 7mm buttons (from the craft store) as dials and two felt burners. I made the door by sewing the matching snap halves to the upper corners of the inner door felt and sewing some ric-rac to the door front as the handle (I added squares of felt over the ends of the ric-rac to hide where it was sewn on and prevent fraying.) I then sandwiched clear vinyl between both door sides and sewed them all together. I sewed the oven door to the oven along the bottom, making sure the snaps lined up.

Refrigerator: I started by sewing down a white rectangle the size of both doors. I also sewed a strip of the door color down to separate the freezer from the fridge. I cut scraps of clear vinyl and sewed them down into pockets to hold the food. I added one snap for each door. To make the doors, I sewed ric-rac handles to the front pieces the same way I did it on the oven. I sewed the matching snap halves to the white inner door pieces, then sewed the two sides of each together. I sewed the doors down along the left sides, making sure the snaps lined up.

Table & Chair: I started with the chair (half a chair, really.) The table is sewn as a pocket so the doll can “sit” at the table. I added the top portion of a chair to make it look like she’s sitting. I did some decorative stitching, including a daisy stitch in the center. I sewed it down so the bottom would be hidden behind the table. To make the table, I sewed the hot pink trim to the bottom of the tablecloth. I added an extra layer of white felt to the back of the table top (the oval shape) so the bright chair wouldn’t show through. I also added a line of stitching in gray to show the edge of the table. I sewed the table down along the sides and bottom to make a pocket.

Tea Party Items: For the tea set, I cut a front and back piece for each item (one tea pot and two cups) and sewed them together. With the cups, I left the tops open.

The cookie sheet is made with tan ovals sewn to the top layer of the cookie sheet, then the front and backs are sewn together.

For the fruit bowl, I sewed together two layers for each fruit, then sewed the bowl around them, so they are stitched in place and can’t get lost.

I did the same with the ice cream bowl. (I didn’t have extra pink, since I used the full sheet for the background. I ended up cutting a square of felt out of the back of the page behind the oven and using that for the strawberry ice cream!)

For the cake, I started with the flame, sewing the back and front together. I then sewed the two sides of the candle stick together around the base of the flame. I sewed the two layers of the plate together. I sandwiched the end of the candle between the two cake pieces and sewed it down around the top of the plate.

The milk has two identical sides – each with an M sewn on. Then, the two sides are sewn together.

Doll: The doll is made with colored felt on the front and plain white on the back. I started by sewing the hair on to the body piece around her face. I then embroidered her features on. For the mouth, I used the same technique that I used one my princess finger puppet, but I added a stitch of white for teeth between her lips. Her nose is a dashed stitch that is tilted up a bit. I started the eyes by stitching the almond/eye-shape with white thread. I made a French knot in the center, and made a tiny stitch from the edge of the knot through the center to really hold it in place. I outlined the tops and outer corners of the eyes with brown thread, then back stitched eyebrows. Her under clothes are cut out of snag-free Velcro to hold her outfits on. I sewed them down the same way I would sew felt. I sewed a tiny belly button, but it’s hard to see. Once she was decorated, I sewed her backing on.

Clothes: Her red dress was decorated with black back stitch at the cuffs, collar and hem. The buttons are pink French knots. Her apron is a cherry ribbon I found at Dollar Tree. I folded the bottom under into a curve as I sewed it on. I made her apron belt with a scrap of pink ribbon. I sewed Velcro to the back piece, lining it up with her body, then sewed the front and back together.

The green dress has a gingham ribbon scrap sewn on as a belt. I sewed on a white collar and added two 7mm mini buttons. I sewed the Velcro on to the back then sewed both sides together.

Stay tuned for two more double pages for this dollhouse book, followed by the exterior of the house and book construction! I am posting progress photos on the Facebook page as I go. I am also working on a solar system page, so photos of that may pop up too.

Do you have a blog or online business that fits in well with the theme of Image Our Life? For as little as $5 a month, you can have your banner in the sidebar. I am also interested in swapping banner space with other blogs. Drop me a line or check out the sponsor page!

Preschool Fun – Letter A for Apple

This post has been updated to feature our whole week of activities.

This week I started homeschooling Jax. He will be 3 in February, so we are starting with very basic preschool lessons. He knows his alphabet, can count to 20 (and sometimes 35) and knows colors and shapes. I want to focus a lot on pre-writing skills, crafts for dexterity, music, science and tasks that increase attention span.

After asking on the Facebook page, I decided I’d share what we do here. I only expect to post once a week about his lessons. I have to work in the afternoons, and some mornings are taken up running errands (that pesky grocery shopping!) But I’ll try to stay on top of it and share where I get my resources.

This week we are focusing on the letter A is for apples.

We started our school week with A-shaped apple pancakes. To make them, I used a pancake mix that only needs water. I replaced half the water with unsweetened applesauce and added cinnamon, ginger and all spice. I used a spoon to drip the batter into the shapes. Then I peeled and chopped an apple and put it in a bowl with a tablespoon of brown sugar and some cinnamon. I stirred it up and microwaved it 2 minutes for yummy cinnamon apple topping.

Monday

We started at the chalkboard to take a weekly photo for our alphabet book. Jax held up a mini apple (and couldn’t resist sneaking a bite.) After the photo, I helped him trace a large uppercase and lowercase A on the chalkboard in pink, then had him do it himself in blue. He did great!

We moved to the table and worked on tracing the number 1 with dry erase markers. (I got our number tracing sheets here and laminated them.) Jax has been excited about his new dry erase markers since we got them Sunday night. I had to guide him in tracing all the 1s. He just wanted to scribble.

We moved on to craft time.

Color Sorting Apple Trees
The first craft is a color sorting with an A is for Apples theme. Start with a blue background paper. Cut out 3 brown As to use as tree trunks. Cut out three green treetops. Make the labels, one for each color: red, yellow and green. You’ll need about 6 pom poms of each color, a glue stick and a plate with some glue to dip in. I glued down the treetops and A trunks with Jax’s guidance, then added a color label to each tree. I had Jax pick a pom pom, dunk it in the glue and stick it on the right tree. He really loved it!


a is for apple
I wanted to do a lowercase A as well, so I pre-cut a red lowercase A, a white circle for the apple flesh and a green leaf. I guided Jax in putting glue on the backs of the shapes, then he put them on the paper (following my instructions.) I showed him how to make an apple seed, then he made the rest. (You could glue real seeds down with an older child.) We drew one lowercase A together, then I had him do one. (I told him to make a circle, then add a line. He did better than I thought he would!)

I will be putting all of his creations (except for lumpy things like the pom poms) into a hard bound sketch book (14″ x 11″) with an alphabet theme. I’ll show what we have at the end of the week.

We moved on to an alphabet matching game I printed out. I had a set one upper and lowercase letter cards that were cut in half, plus a set I didn’t cut out at all. I had him take each half card and put it where it belonged on the uncut sheets. He was very proud when he finished, but I had to work to keep him focused. I got the printables here.

We did story time next. I choose Pepo and Lolo and the Red Apple (Jax loves it because we act it out), How Do Dinosaurs Go to School? and Planes. Jax chose a couple other books as well.

I offered Jax the chose of music time or math, and he chose math. We used our abacus to do some simple addition. He doesn’t get it yet, but we are getting closer.

Resources:
Number Tracing Pack – Confessions of a Homeschooler
Alphabet Flash Cards – Homeschool Creations

Tuesday

Tuesday Jax woke up with a cold, so it was tough having him stay focused. We kept our activities short and I followed his lead as to what he was interested in doing that day.

He requested the “ABC cards” game (Alphabet Flash Cards) we did Monday, so we played that again. When he had them all matched up, I added a twist for cleaning them up. I asked him to find different groups of items, such as “things you can eat”, “toys”, “animals” or “things that are blue”. I’m really happy we had these printed these out. I think we’ll get a lot of use out of them.

We did the same number tracing page that we did on Monday. I stuck a laminating sheet to the front of it so we could reuse it. Jax has trouble making the 1’s because I think he finds them boring. It is much more fun to scribble wildly and make big swooshes.

We did a worksheet for tracing uppercase As to put in Jax’s alphabet book. We counted the steps to remember how to write it: one, two, three! The worksheet was from Oopsey Daisy. Jax did really well and did the last three As on his own, with me just setting his hand at the starting point for each A.

We did some dancing to music after that, with me having him follow my movements the best he could. I’m going to try to do music and movement once a week at least. Since we wasn’t feeling well, we ended on storytime. We read Dr. Seuss’s ABC and My Nursery Rhymes Collection.

<

Resources:
Number Tracing Pack – Confessions of a Homeschooler
Alphabet Flash Cards – Homeschool Creations
A is for Apple – Oopsey Daisy

Wednesday

We had errands to run, so we did school in Starbucks on the iPad. We made a picture book with sounds with My Story – Book Maker for Kids. We practiced writing with Write My Name. I really love that app. We stopped by the playground to play with other kids, but Jax managed to hit his head hard, cutting our playtime short.


Thursday

Jax was interested in playing with his new supermarket set. I recently bought this for him from MYHABIT, and I love it! (You have to sign up to see the sales they have there, but it is free.) It is a great toy! It doesn’t come with food, but you get a cash register with money, a scanner and a card swiper, plus a produce scale. Mine arrived with a crack in the card swiper, but they sent me a whole new cash register set to replace it. The set isn’t on MYHABIT any longer, but Amazon has a decent price. Zulily has a different one that I like a lot, too.

I already had a magnetic chalkboard up on the wall and wooden number magnets, so I drew some of the food items we had and Jax and I did number recognition games for each one.


I wasn’t feeling well Thursday, so we repeated a lot of the activities we had done that week, including rereading the same books. He enjoys the repetition so he can start saying the words along with me.

Friday

First page in Jax’s alphabet book.

We focused on alphabet crafts for Jax’s alphabet book on Friday. I have been cutting out letters and pictures from old magazines and ads, so we glued them down to a page with the letter A on it.

We did a lot of practice writing upper and lowercase As, first on the chalkboard, then on colored paper. We said “one, two, three” to make the big As, and “circle and a line!” for the lowercase As. He did very well and was excited by my cheering him on and high-fives. I cut some out to glue down around a large A he wrote.

We did some quick letter puzzle crafts with construction paper. I drew the letters with dotted lines and cut out paper strips to match. Jax put the puzzles together, then we glued them down.

Resources:
Alphabet Cut & Paste Sheets – Homeschool Creations
Alphabet Beginning Sounds Poster – Homeschool Creations

Castle Puppet Theater Quiet Book Page

It’s a quiet book page! It’s a puppet theater! It’s both!

This page was inspired by the rich colors of wool blend felt carried by American Felt and Craft, who provided the felt for this project. (Visit AFC’s Facebook page for sales and giveaways.) There are so many beautiful shades of green, gorgeous grays that look like stone and bright jewel tones. And the fact that the wool felt is stronger and thicker than craft felt helped to make this page work well.

This page doesn’t use anything special other than some plastic canvas, I used glitter ribbon for some of the tiny pieces, like the crown and the sword, but you could swap that for felt. I also used many shades of green because I had leftovers from other pages. The ground (“fresh cut grass”) and the dragon (“jade”) are the most important greens. the leaves (“limeade”) and shrubs (“cilantro”) could be swapped for one of those.

What I Used: The pattern, wool blend felt from American Felt & Craft (in fresh cut grass, beet x 3, powder blue, white, gray flannel, salt & pepper, cilantro, limeade, royal purple, doe, orchid, rubber duckie, peaches & cream, indigo, jade, orange juice), plastic canvas (I got mine at the craft store), glitter ribbon in gold and silver (I got mine at the craft store) and sew-on gems.


This page fits into my normal quiet books, yet unfolds into a working finger puppet theater. There is a pocket to store the three puppets, a wizard, a princess and a knight, plus a stuffed dragon that flies on a loop of ribbon. There are two supports that can be stored in a loop of felt when the page is closed. The supports slip into little pockets to prop the stage open.

Supports: Sew two layers of plastic canvas inside the felt strips to make two supports. I cut my plastic canvas slightly smaller than the felt.

Castle Facade: Start with a 9″ square of gray felt and cut away the roof line using the sky pattern. Layer a strip of light blue behind the castle piece to make a 9″ square again and sew them together. Cut out the puppet theater hole. Sew on the windows and door, then sew on the shrubs. I cut out a bunch of little leave and stitched a wandering back stitch vine up each side of the castle. I used two back stitches to attach each leaf. Sew on the two purple tower roofs. Cut bits of ribbon or felt into triangle flags and sew them to the roof peaks. (My ribbon was non-fraying, so I was able to easily cut it into shapes.)

I embellished my roofs with embroidery to look like tiles. To do that, start with a long horizontal stitch, but don’t pull it tight. Come back up through the felt down at the point where you want your tile to end, making sure to put the needle through the stitch. Go back down through the felt making a tiny vertical stitch that holds your first long stitch down into a scallop shape. Repeat, staggering the scallops as shown.

Backstage: Cut out the burgundy felt into the 9″ square with a matching hole cut out. Sew it to the back of the castle facade with plastic canvas in the middle. Take the two curtain pieces and overlap them slightly in the middle. Sew them to the top back of the theater piece.

The castle theater gets sewn to the right hand side of the two-page spread. Line the top of the castle up with the far right side of a full 9″ x 12″ sheet of burgundy felt and sew it down along the bottom. On the left side, decorate the few inches that are in front of the castle with grass and a road. I matched my road with the width of the door.

Cut out the storage pocket felt piece and sew it to the page under the castle as shown on the pattern and the photos. the skinny side pockets are where you insert the bottom of the supports. Sew the smaller pockets to the back of the castle after pinning them to see what angle works best. Sew the pockets upside-down so the top of the supports can slip up into them.

Front Lawn: That side of the two-page spread is super easy. I just sewed more road down to the grass color. You could embellish yours with flowers, a fountain or a hedge maze… Whatever you can imagine!

To construct my page, I sewed purple felt (I just used craft felt) to the back of each side of the spread. You have to start and stop your seam to get around where the castle is attached on that side of the page. I then lined the pages up facing each other (as they will be when the page is closed, and sewed my usual seams.

Puppets: All three of my finger puppets have plain white felt backs. If you wanted to have yours be two-sided, you’d need to work out how they would look from behind.

Knight: For Sir Knight, I started with his basic shape cut out of gray. I laid his face in place and sewed the helmet and neck pieces over top. I sewed his eyes with French knots and a tiny horizontal stitch going from the center of each knot out to the corner of his eyes. This makes sure the knot doesn’t wiggle loose. His mouth is just back stitch. I sewed down his tunic and the trim next. For his shield, I cut some glitter ribbon into a J for Jax. You could do a cross or another letter or symbol. I sewed the J to the inner shield piece, then sewed that and the outer shield piece down. I cut the sword blade and hilt out of more glitter ribbon and sewed them down, adding the glove over top.

To make his backing, I cut out white felt to the same shape as his body, but added an extra 1/4″ to each side from the bottom down. The knight is fairly skinny, so adding width to the backing gives room for bigger adult finger to play too. The photo to the right shows one side sewn and the other side read to be sewn. Once you’ve sewn the back on (leaving the bottom open for your finger), trim the bottom edge so it is flush with the front.

Princess: The princess was fun for me! I don’t get to do many girlie sewing projects. You can personalize her by changing up her colors.

I started with her shape cut out in pink. I sewed down her belt, arms, hands and puffy sleeves. I sewed on her sash and added some sew-on gems. I laid her face piece in place and sewed her hair down over top. I added some stitches to her face to make her chin, then made a French knot pearl necklace and earrings. I made tiny stitches in the knots as before to secure them. Her eyes are the same as the knight’s, and her nose is a little stitch. Her mouth has two stitches for the lower lip (the bottom stitch a little smaller), then a longer stitch with a little “v” stitched over top to make the bow of her lips. See the drawing to get the idea.

The finishing touch was her crown, made out of glitter ribbon with a sew-on gem.

Wizard: The wizard is pretty simple, but very cute! Start with his shape cut out of indigo felt. Lay his face in place and sew the beard down on top of it. Lay a scrap of ribbon (mine was purple) on his hat, and sew the hat brim in place. Cut a scrap of felt in a mustache shape and sew it down along the top side. His eyes were made the same as the others’ and his mouth is made like the princess’s lower lip (the two dashes.) Sew down his sleeves and hands, then sewn on a star and stitch the wand with back stitch.

For both the princess and the wizard, I cut their finished shape out of white felt and sewed the back on (with the bottom open) to make them into finger puppets.

Stuffed Dragon: The dragon is the hardest part, as I made him into a full stuffed animal. I wanted him to be able to fly in to the castle from any angle.

The dragon has two sides that are the same, but mirrored, so do everything twice for him. I started with the wings. I stitched two curved back stitch lines to show the veins/folds int he yellow part. Then I sewed each wing together with the yellow layered between the green backing and the green outer edge. Remember you need a wing for each side, so they have to point opposite directions. Sew the green body pieces to the yellow body pieces and then sew a wing onto each (picture 1 below.)

For his face, I stitched on the white eye, then made a French knot with a reinforcing stitch for the iris. I back stitched an outline around it. I satin stitched a sideways tear shape for his nostrils and back stitched an arc over each one. I sewed the two sides of his purple crest together and the two sides of the flames together. I cut out a bunch of back scales (including a few smaller ones for the end of his tail.) Have a loop of ribbon ready for his back. I sewed the two sides of the dragon together from under his chin, around his nose (with the flames in his mouth) over his head (with the crest in place) and then down his back, adding scales and the ribbon loop between his wings (see photo 2 below.) Sew all the way around his tail, but stop when the green ends.

Sew all the legs together, and sew them in place on each side. Add a little stuffing or batting – not too much or he’ll be too fat to store int he page. Take the chest piece and stitch it to the edges on the yellow as shown below. Trim the piece as needed to get it ti fit just right.


Jax didn’t know what a puppet show was until I started sewing this, but he got so excited when he figured it out. His current favorite thing to do is steal the puppets off my hand mid-show. He told me the knight puppet is “Jackson”, the princess is “mama” and the wizard is “dada”. Hah! (No, my husband doesn’t have a long white beard and a wand.)

You don’t have to sew this into a quiet book page. You could add a Velcro closure and felt handles to turn it into a portable puppet theater case!

Enjoy! Stop by the Facebook page to see progress photos from my next two pages. they are fun ones!

DIY Ribbon Station

Scroll down for a giveaway!

This couldn’t be easier!

I’m in the process of turning Jax’s old nursery (a room that adjoins our master bedroom) into a craft room. A spare room down the hall is becoming Jax’s big boy room. My budget is pretty much nonexistent, so I’m thrifting and salvaging whatever I can. On a recent trip to my childhood home, I picked up this old hutch shelf that was on the floor of the basement under our utility room table.

After driving it the 60 miles home, de-spider-egging it, sanding it and washing it, I had this:

Not a pretty sight…

It had good bones, and I am in need of craft room storage. eventually I’d like a table for the room that is wide enough to put these shelves on. For now, they will take up a chunk of my vintage desk. The desk came in the basement of our house when we bought it. Since the desk was painted white (but needed a fresh coat), I decided to paint the shelves as well.

For both the desk and the hutch, I used white paint that we had in the basement. I also used it on a vintage dresser from my childhood basement.

Once it was painted with two coats, I headed to the hardware store. I got a dowel, spray paint and screw-in eye hooks. (I already had the larger screw-in hooks.) My shelf was about 25.5″ wide inside the shelf. I had my dowel (which came in a 3′ length) cut down to 24″. I chose a 3/8″ dowel because it is strong and less likely to bow under the weight of the ribbon spools. It is exactly the width of the holes in most of my spool, so the smaller spools got put in vintage jars.

I screwed the eye hooks into the ends of the dowel and spray painted the whole thing, as well as the two hooks. When it was all dry, I screwed the hooks into the sides of the shelf and loaded my ribbon on the dowel. I ended up opening my hooks wider so I could slide the eye hooks down onto them easily.

Scissors on hand to cut my ribbon.

It was so simple, but works so well!

My shelves don’t have a lot going on yet (don’t mind that unpainted letter S up there – I just got it int he dollar spot at Target.) I haven’t even finished painted the room, so I’ve yet to fully move in. But I am so happy to get all those pretty ribbons out of ziplock baggies!

What do you think of how it turned out?

Introducing Sponsors!

Do you have a blog or a business you’d like to advertise on Imagine Our Life? Ad spaces are now available here. I am giving away a chance to win a code for one free month of advertising on this blog. The winner will receive a free side bar ad. Enter below!

a Rafflecopter giveaway