Winter Games Homeschool Printables

Winter Games Homeschool Printables

The winter Olympics are always a favorite in our house. This year we can’t wait to share them with Jax! And, now that we are homeschooling, it’s such a wonderful opportunity to learn.

When I began preparing works based on the Sochi Olympics, I quickly realized I needed to make some printables. Montessori 3-part cards are such a wonderful resources to learn new nomenclature. I prepared a large pack of printables for him – and also for you!

If you follow us on Facebook, you probably already saw our winter Olympics pack. I wanted to get it out to everyone right away as I knew I wouldn’t get a chance to post it on the blog for a few days.

Winter Games Homeschool Printables

What’s Included

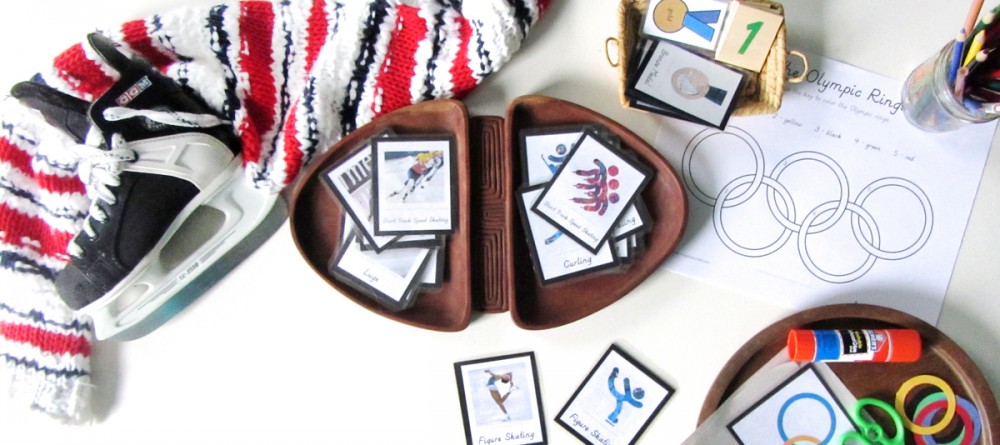
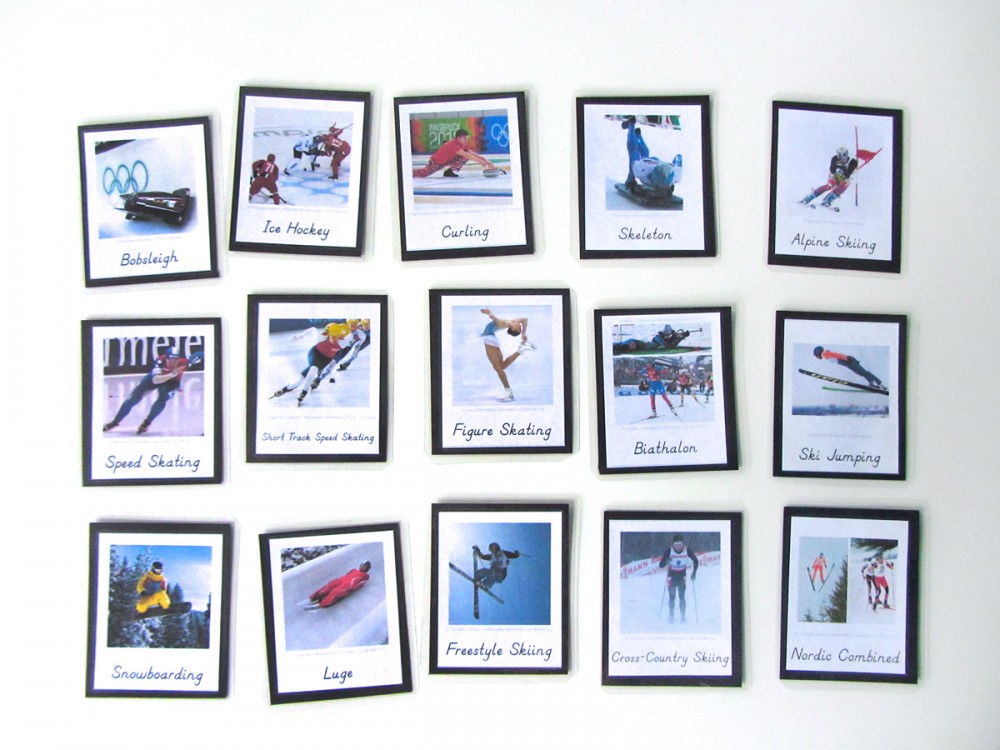
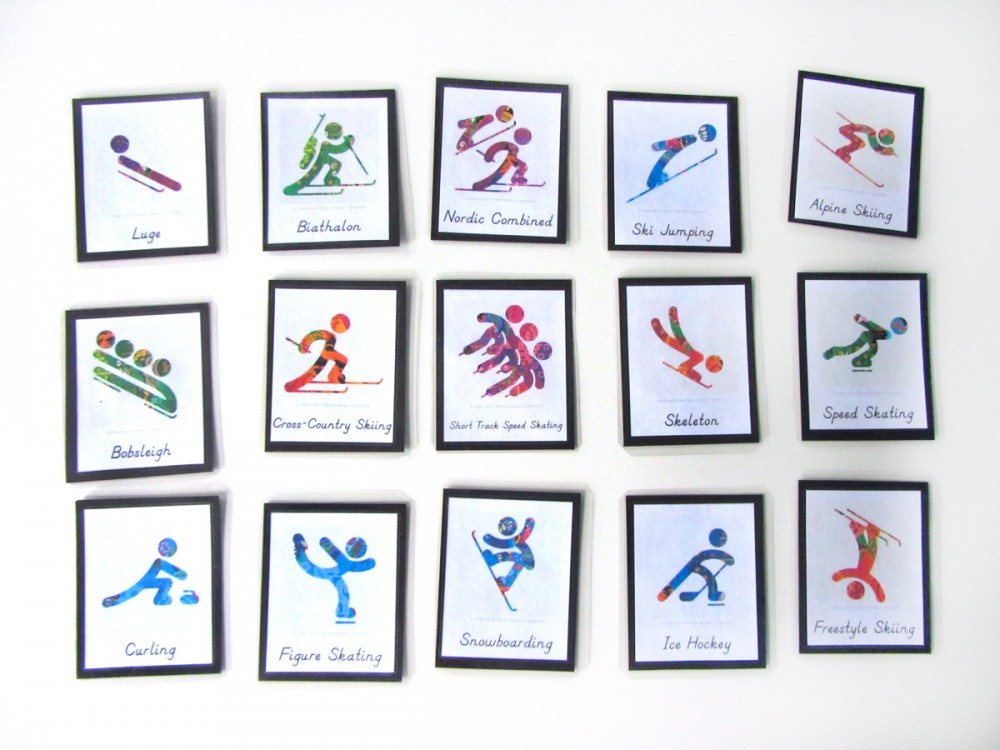
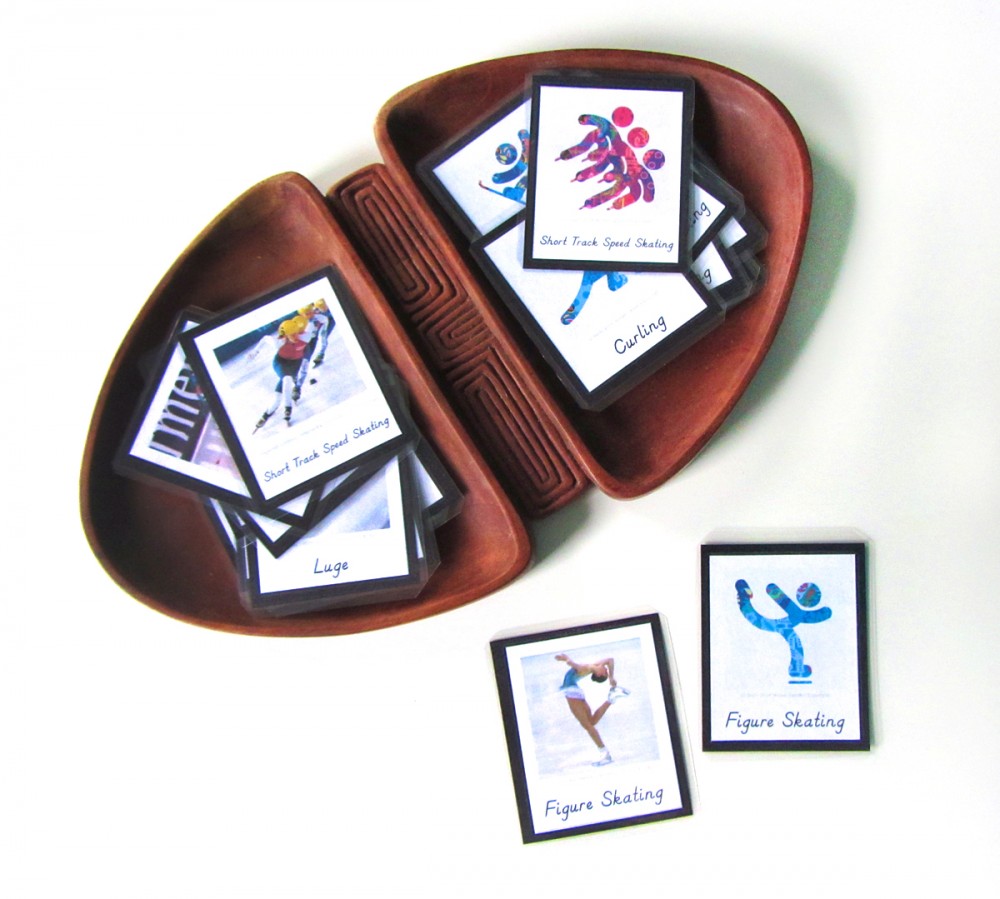
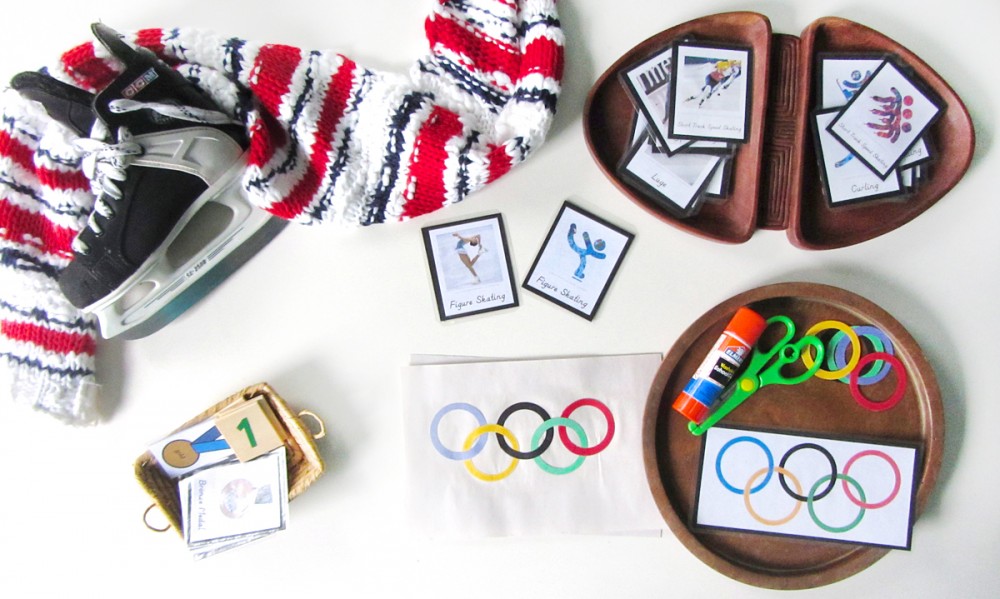
I created 3-part cards for all the base sport categories featured in the winter Olympics. I made both a photographic version and a version featuring the beautiful Russian pictograms created for the games.

Winter Games Homeschool Printables

A fun activity to do with both set is matching the pictogram to the correct photo. You can do this with the labeled card at first, them move to the unlabelled version. For now, I am just using the labelled cards with Jax.

Winter Games Homeschool Printables

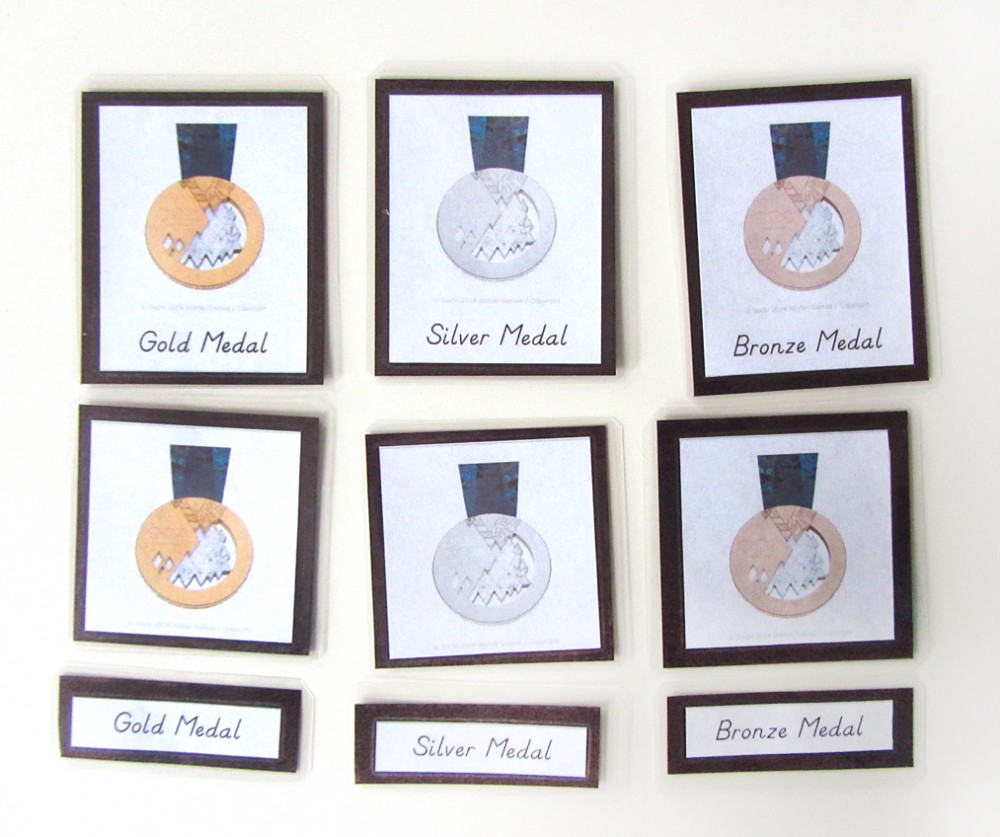
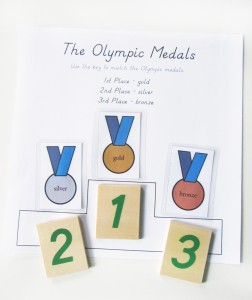
Another feature of the Olympics that I wanted to feature was the medals. Jax will be hearing “gold medal” a lot and won’t necessarily understand that means 1st place. I wanted to teach him the three medals and which place they represent.

Winter Games Homeschool Printables

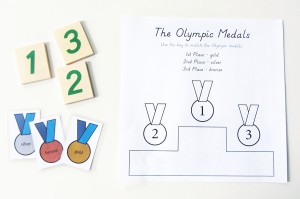
I created a little set of 3-part cards with the actual medal designs being used this year in Sochi. I also put together a little matching game with a key Jax can follow to match the correct medal to each place on the podium. He can add some of his wooden number cards to reinforce the activity.

Winter Games Homeschool Printables  Winter Games Homeschool Printables

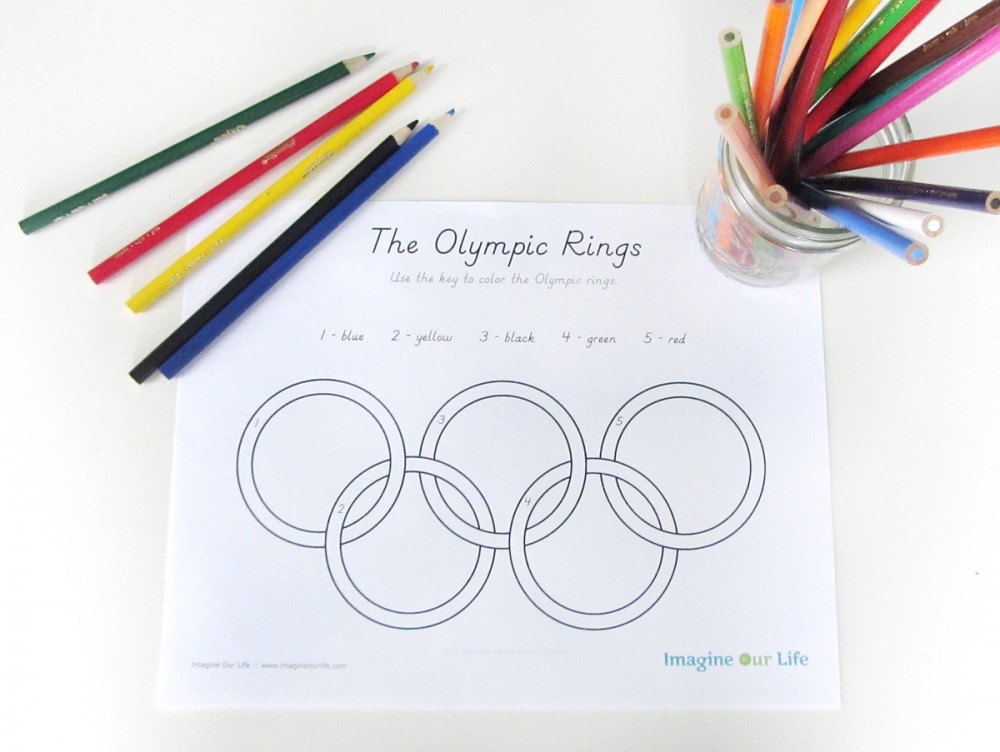
The last printable I included was the Olympic rings. The logo was originally designed to feature all the colors in the flags of the countries competing. There are many more countries in today’s Olympics, but they all have at least one of the ring colors on their flags.

Winter Games Homeschool Printables

I made a color by number sheet so Jax can color his own Olympic rings. And to give him some self-correction of error, I included a color version of the rings that I printed and laminated.

Winter Games Homeschool Printables

Olympic Rings Craft

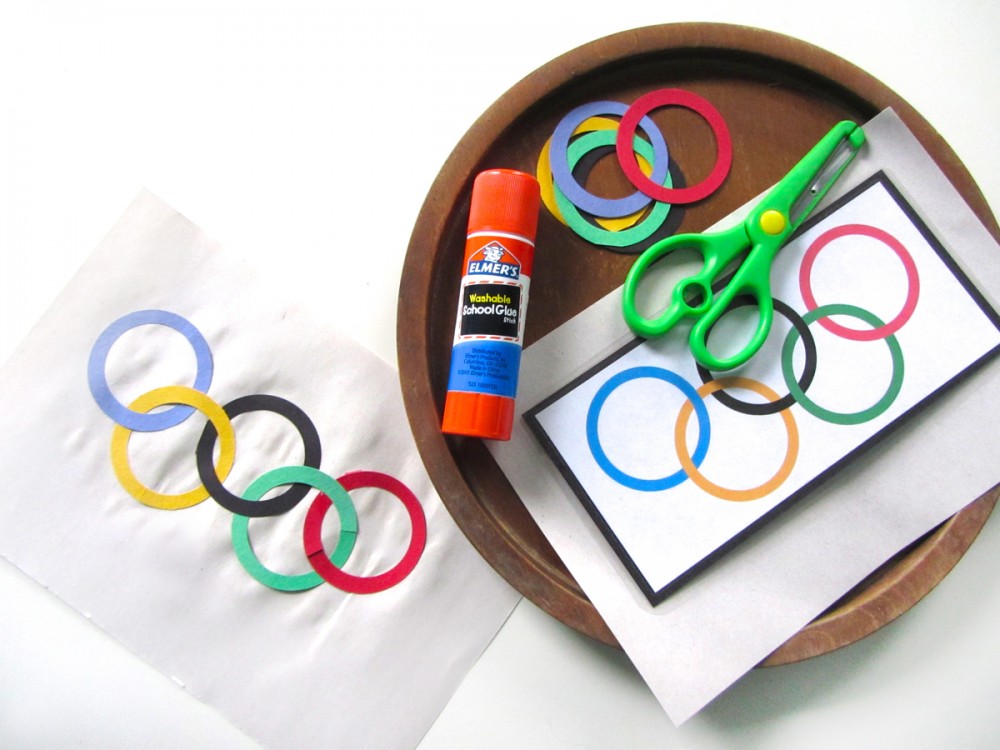
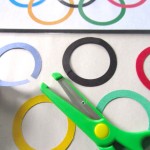
I’ve prepared a quick paper craft for Jax to do. This can be done with or without cutting. Your child can simply place the precut rings in their correct places and glue them down, or you can have them make a cut in each ring and interlock them.

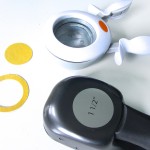
To create the rings, I used two of my circle punches. I punched a 1.5″ hole in the paper, then centered that in my 2″ punch and cut out the ring. Two inch rings match the color printable perfectly.

I hope you enjoy these free winter Olympics printables! Do you have any fun ideas for this learning unit? Leave a comment for me or tag me on your Instagram photos @iolstephanie.

Winter Games Homeschool Printables

Please visit the Montessori Monday linkup on Living Montessori Now for more great homeschool ideas!

Montessori Monday

Animals of Australia for the Montessori Wall Map & Quietbook with Printables

Animals of Australia for the Montessori Wall Map & Quietbook with Printables

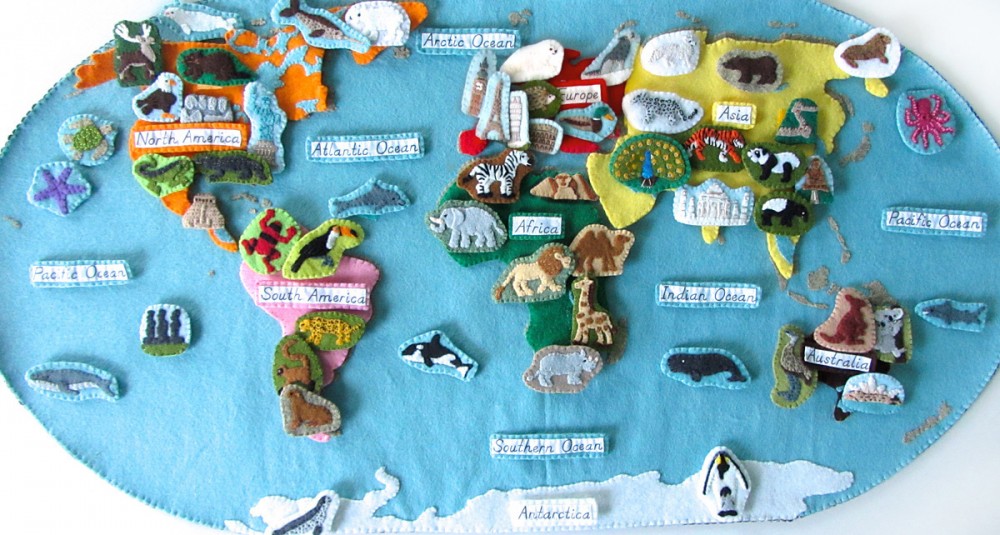
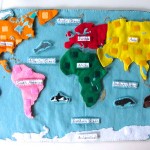
At last, the final sewing installment the Montessori wall map! It’s hard to believe I’ve finished sewing the whole world (just about)! The next and final post in this series will feature the world landmark printables. If you haven’t been following our Montessori wall map and quiet book yet, you can read all about it here. This post is for the continent of Australia.

Animals of Australia for the Montessori Wall Map & Quietbook with Printables

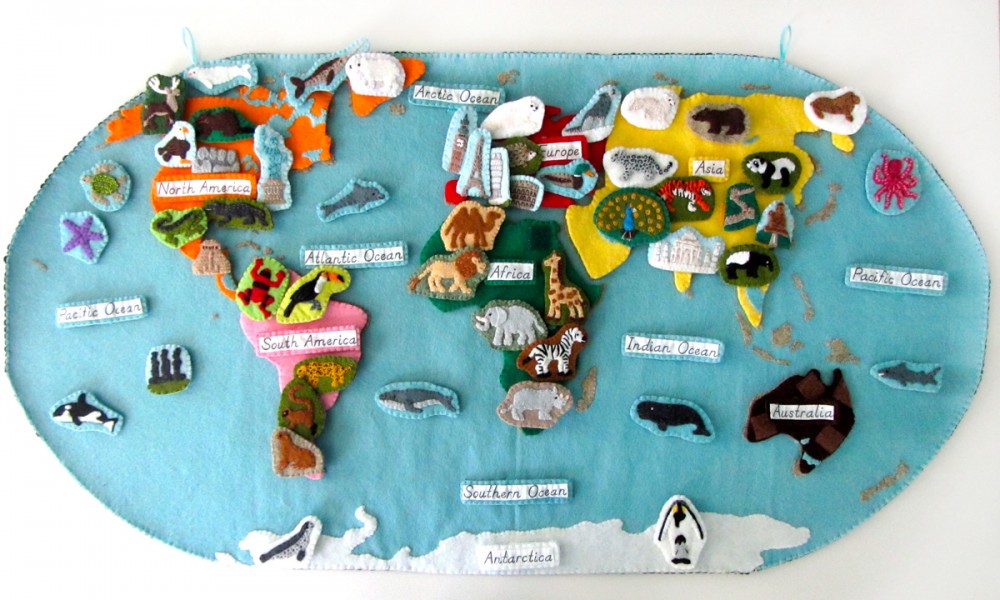
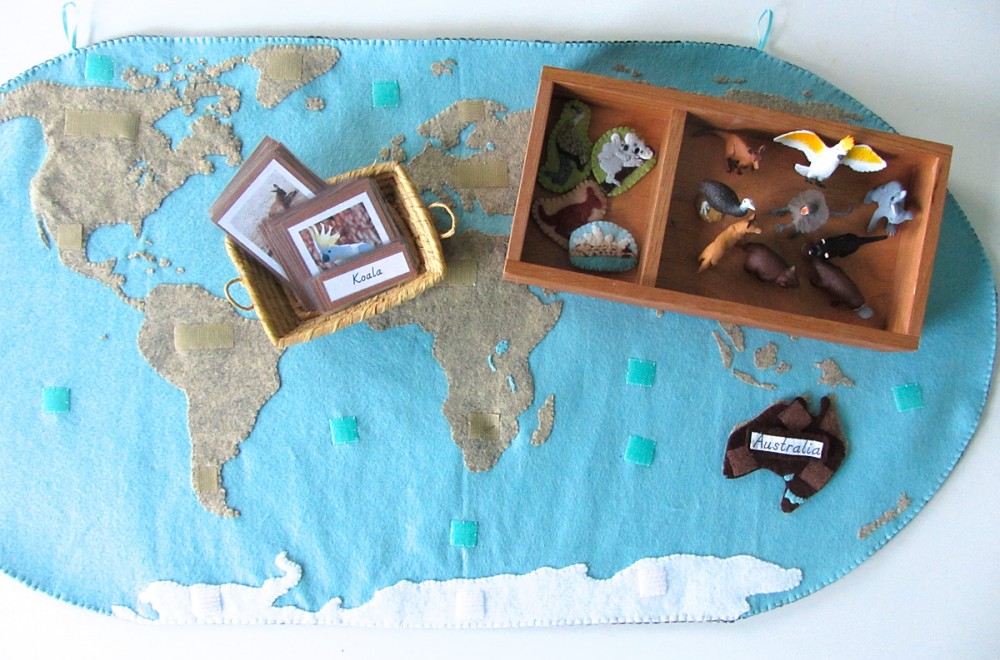
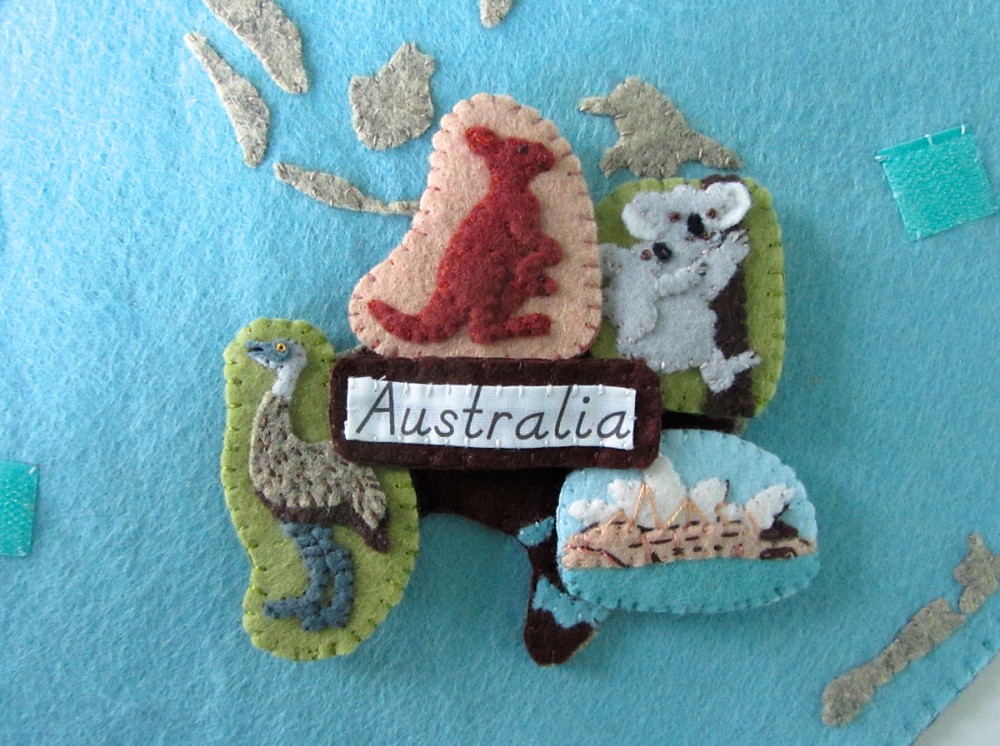
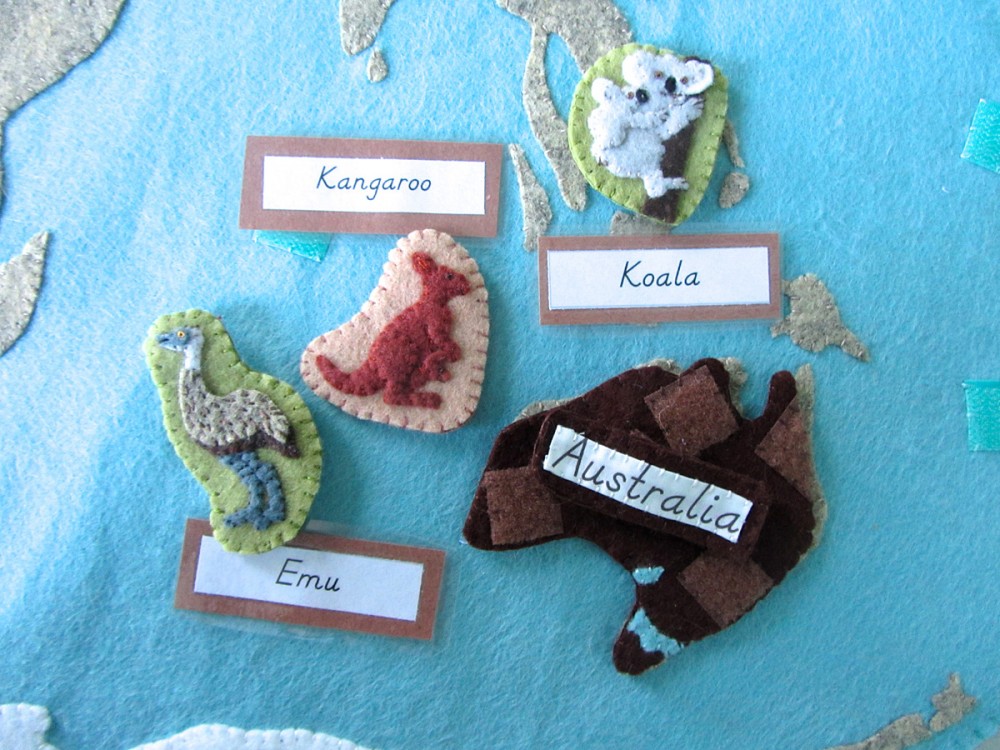
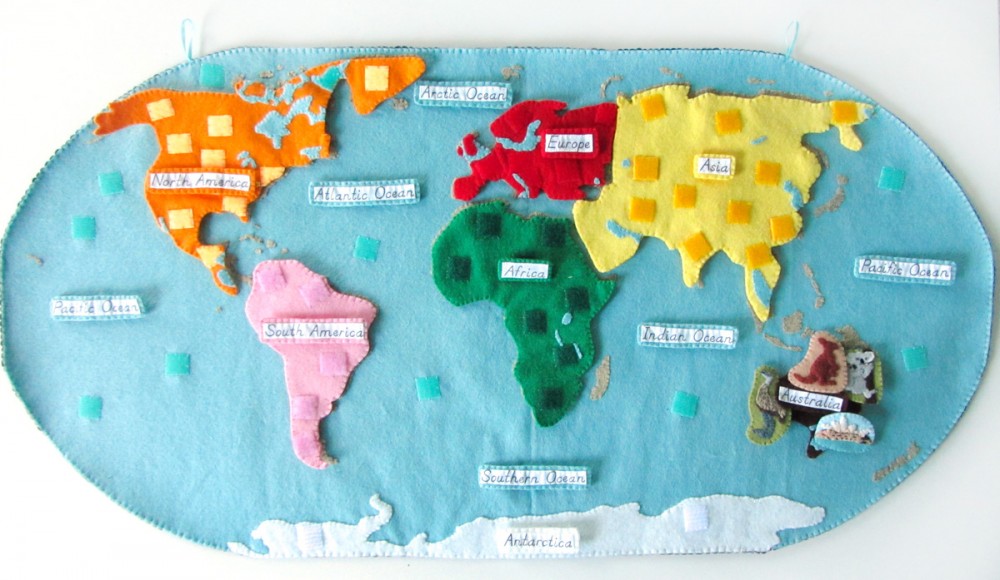
Every continent (and the oceans) will have landmarks and animals. Australia has so many wonderful animals, but is too small on the scale of this map to fit more than 4 pieces I ended up choosing 3 animals (thanks to your votes on Facebook!) and one landmark for this continent. The landmark, the Sydney Opera House, is the only landmark I chose in this project that doesn’t have a matching Safari LTD figurine. It was so iconic that I couldn’t not make it, though. I included: The Sydney Opera House, and Emu, a Koala and a kangaroo.

Overview and Map PatternsAfricaAntarcticaAsia • Australia EuropeNorth AmericaOceansSouth America

Our finished map!

Our finished map!

This project is totally free for you to use (though commercial use requires a license.) If you’d like to support my designs, one way is to make a purchase off of Jax’s Amazon wishlist – he turns 4 on February 5th! I use his list to bookmark school and craft items until I am able to get them. For more ways to contribute to this site, visit my support page.

Animals of Australia for the Montessori Wall Map & Quietbook with Printables

Materials I Used

The Pattern (see the first post for the main patterns) Felt from American Felt & Craftpastry [golden taupe], chocolate [deep brown], fresh linen [off white], monkey [red brown], honeydew [light green], sparrow [light blue], ice [aqua blue], rocky point [heather taupe], elephant [charcoal], graywhite and black. Hook & Loop – I used white snag-free Velcro on the backs of all these pieces and brown hook & loop (loop only) on the front of the Australia puzzle piece. My brown hook & loop was from here. Felt glue to tack down the pieces before sewing, printer fabric for the continent label, embroidery floss in colors to match the felt and micro tip scissors.

Animals of Australia for the Montessori Wall Map & Quietbook with Printables

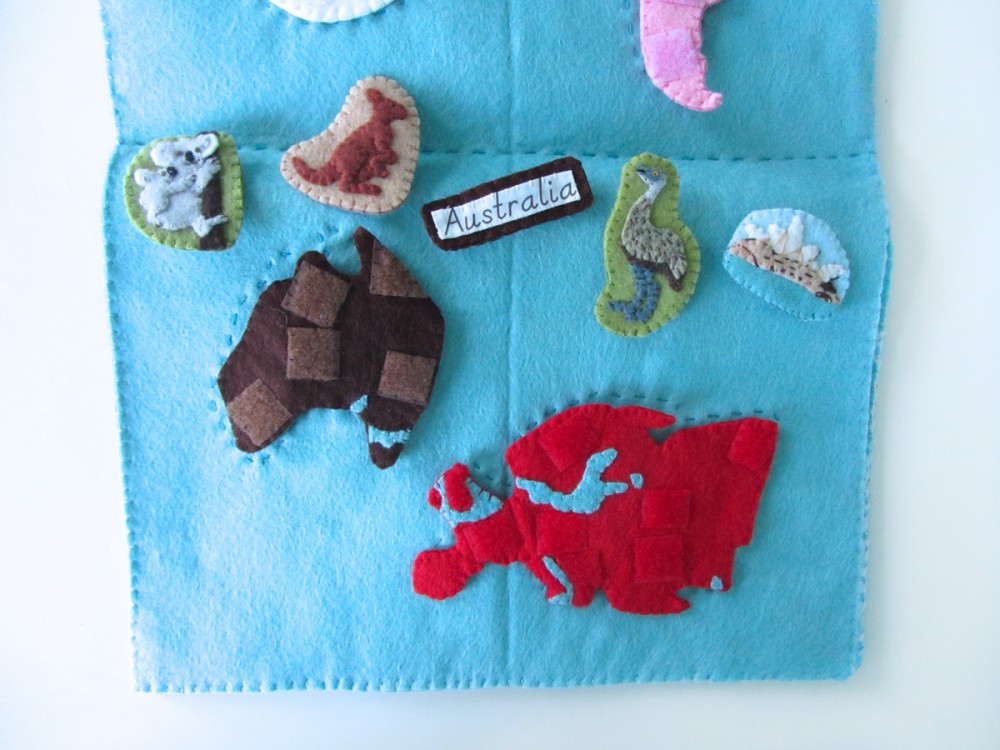
For the Australia quiet book page, I sewed a running stitch (dashed) outline around the Australia pattern piece and sewed down snag-free Velcro to line up with the Velcro on the back of the Australia piece.

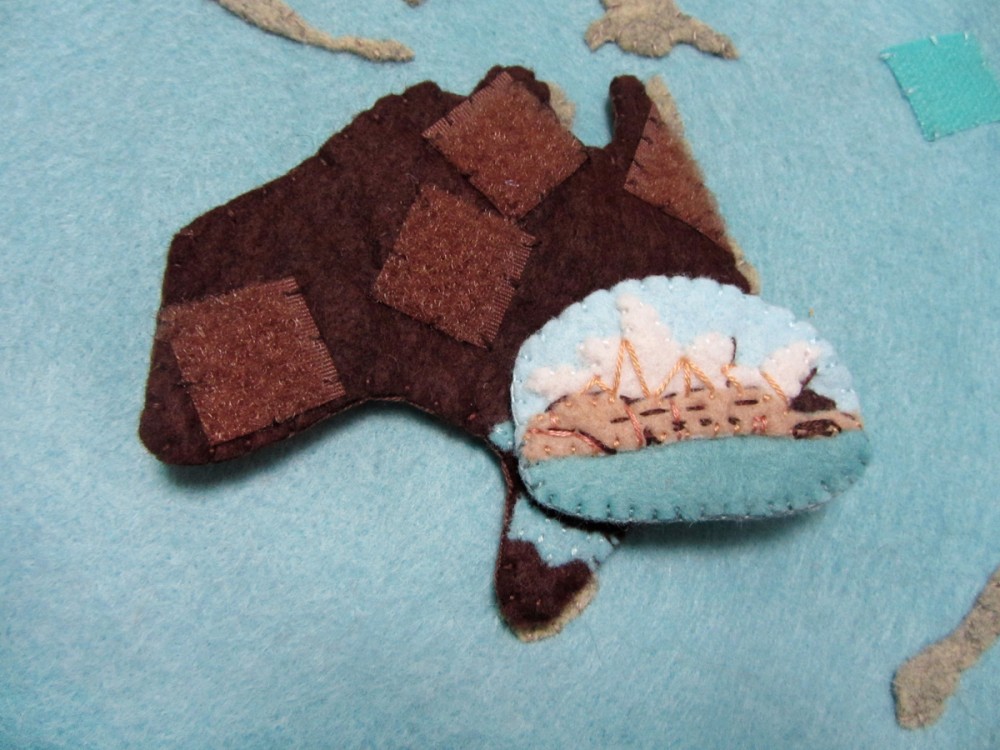
Australia: (Felt used: chocolate brown) For the Australian continent puzzle piece, I sewed down pieces of brown loop Velcro. On the back, I sewed strips of white snag-free Velcro to correspond with the Velcro in the quietbook and the wall map. I finished it by sewing the two sides together around the edge with a blanket stitch.

Animals of Australia for the Montessori Wall Map & Quietbook with Printables

Label: (Felt used: chocolate brown) For the continent label, I folded under the edges (just a tiny bit to hide the rough edges) and creased it with my nails. The printer fabric held the folds nicely without ironing. Then I stitched the label to some brown felt and trimmed it down to be a border. I cut a matching felt rectangle for the back, sewed snag-free Velcro to it and then sewed both sides together.

Animals of Australia for the Montessori Wall Map & Quietbook with Printables

For all of the animals, I started by gluing the pieces down to a scrap of background felt with a very light amount of felt glue. I glue multiple animals at a time to give them time to dry. I sewed them down, trimmed the background and cut a matching backing piece. I sewed snag-free Velcro to the back and sewed both sides together with a blanket stitch.

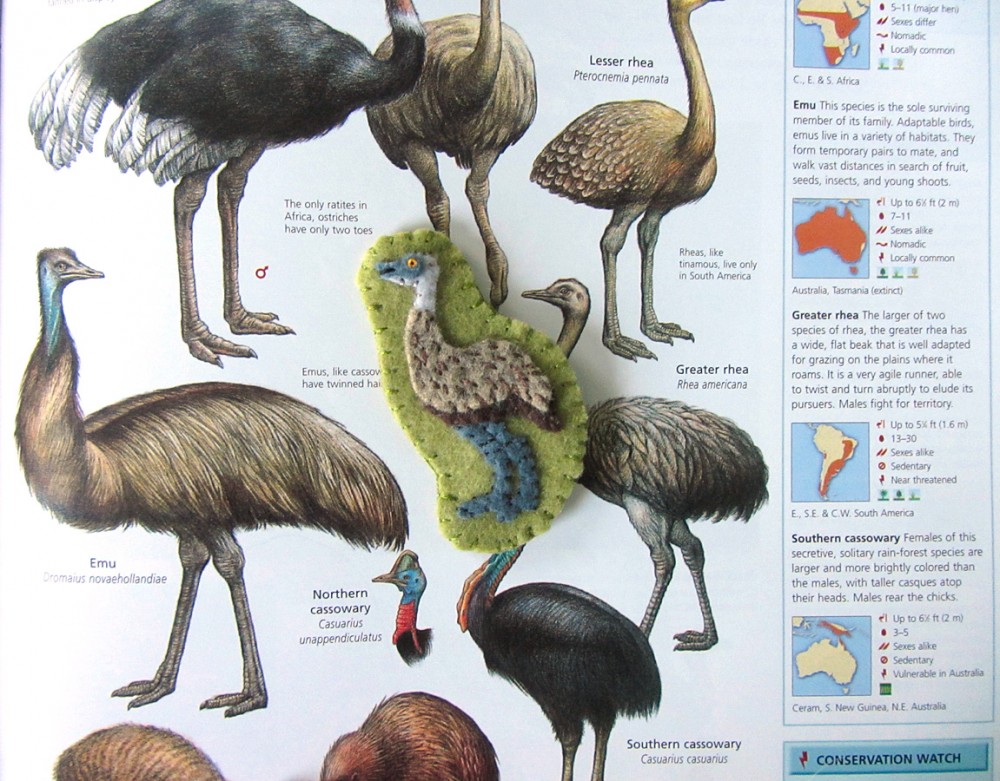
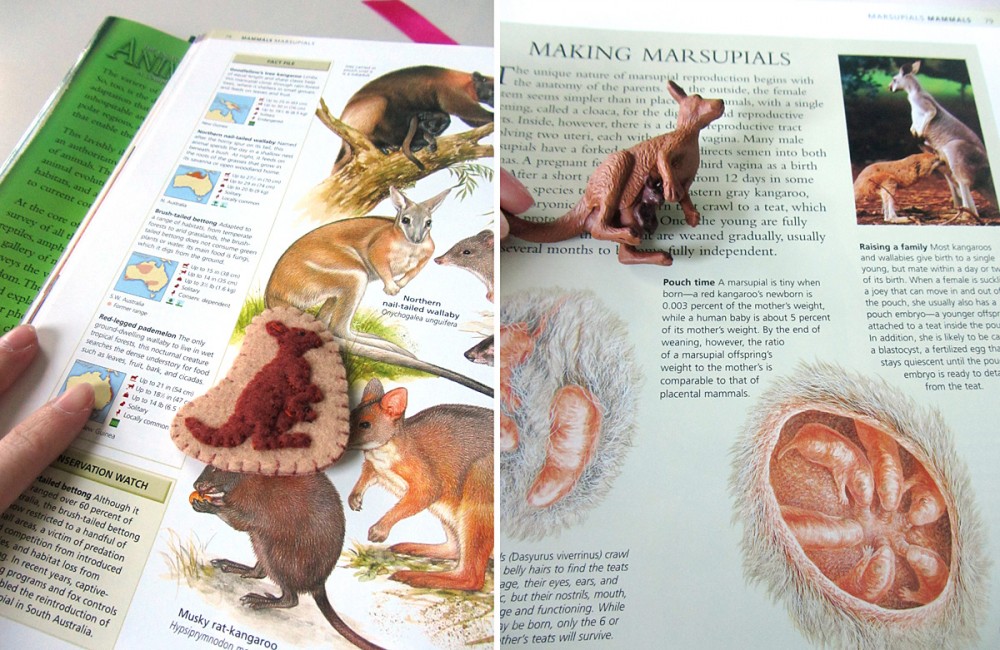
We love this animal encyclopaedia!

We love this animal encyclopaedia!

Emu: (Felt used: rocky point heather beige and chocolate dark brown for the body, grey light grey and elephant charcoal gray for the head and legs and honeydew light green for the background) For the emu, I tacked everything into place with felt glue. I then sewed all the pieces down around their edges. I made little dashed stitches with brown floss to make his feather texture. His eye is a gold French knot with a tiny black stitch in the center. His mouth is a black line.

Animals of Australia for the Montessori Wall Map & Quietbook with Printables

Kangaroo: (Felt used: monkey red-brown for the body and pastry beige for the background) I started by tacking everything down with felt glue. The joey’s head and kangaroo leg go on top of the body. I stitched everything down around the edges, the back stitched the line of the kangaroo’s elbow. There is a straight stitch in her ear and the pouch. Both eyes are black French knots.

Animals of Australia for the Montessori Wall Map & Quietbook with Printables

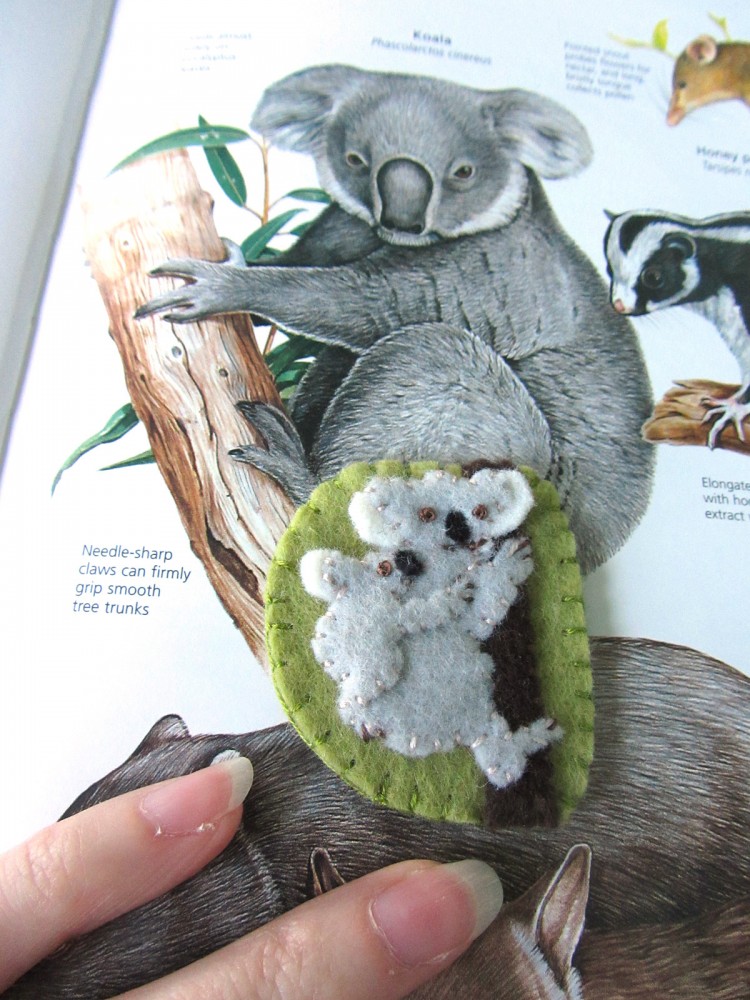
Koala: (Felt used: gray for the bodies, white for the ears, black for the noses, chocolate dark brown for the tree and honeydew light green for the background) I started by tacking everything down with felt glue. Then I stitched everything down around the edges (except the white of the ears). The eyes are brown French knots. Their nails are brown straight stitches. I back stitched the mama koala’s mouth.

Animals of Australia for the Montessori Wall Map & Quietbook with Printables

Sewing the Landmarks

For all the landmarks in this project, I started by sewing the front piece. Then I cut out a backing felt to match the final shape and added some snag-free Velcro to it. I finished sewed around the whole edge, switching colors where needed. For all of the detail work, see the photos for a sample of where to stitch.

Animals of Australia for the Montessori Wall Map & Quietbook with Printables

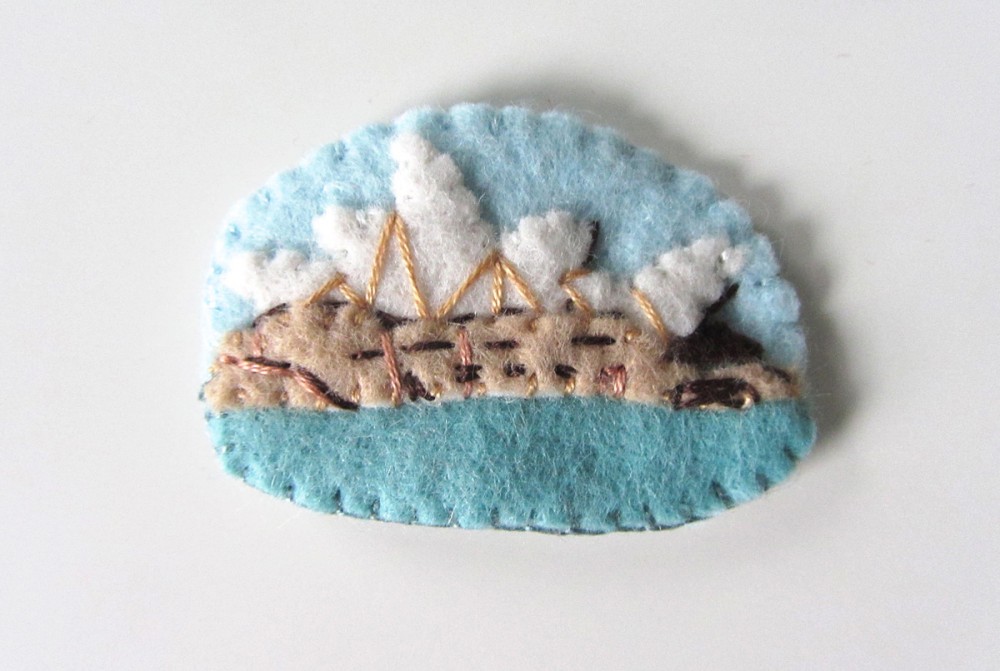
Sydney Opera House: (Felt used: pastry beige and white for the building, ice for the water and sparrow blue for the background) I glued down the building pieces and stitched down the edges. Using three shades of brown floss, I made many straight stitches to add details of the building. I looked at photos online for reference. See my close up for exactly what I did.

Animals of Australia for the Montessori Wall Map & Quietbook with Printables

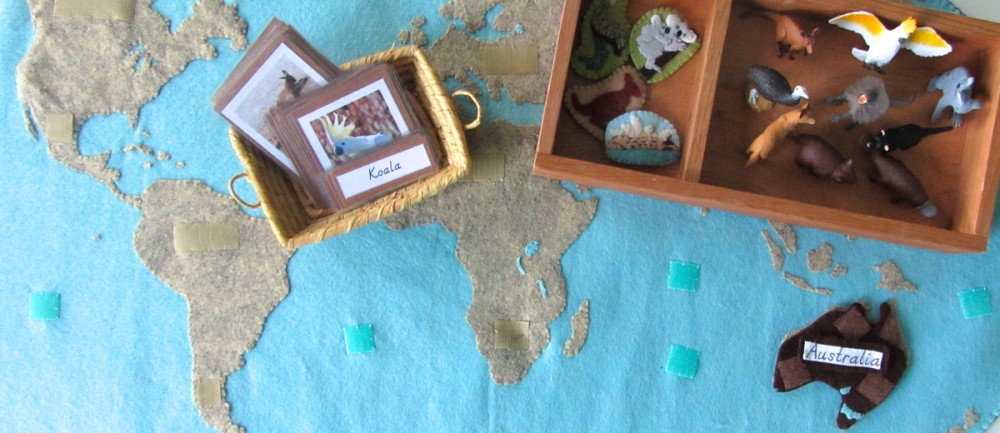
These animals are from Safari LTD’s Down Under TOOB

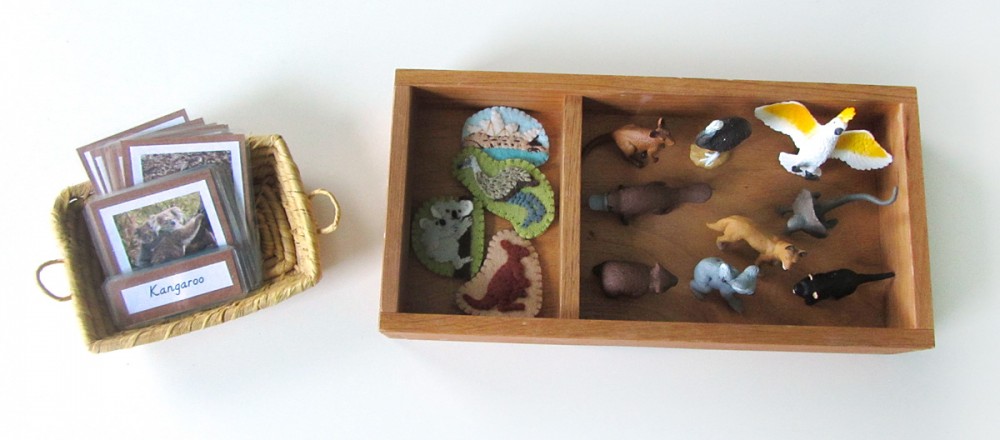
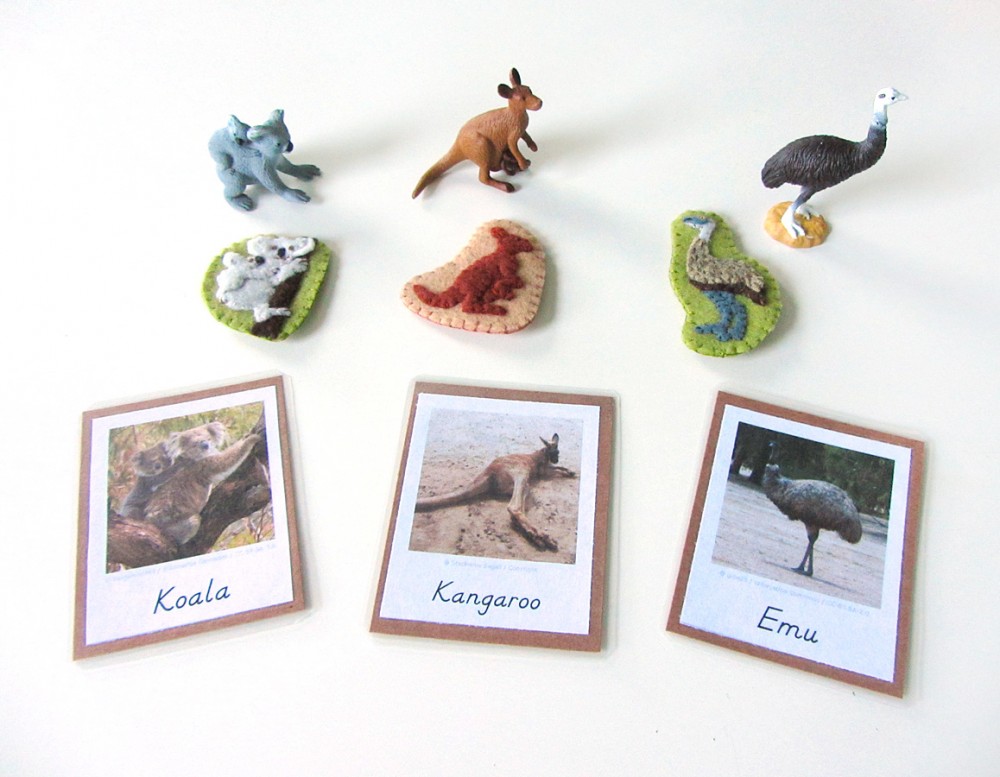
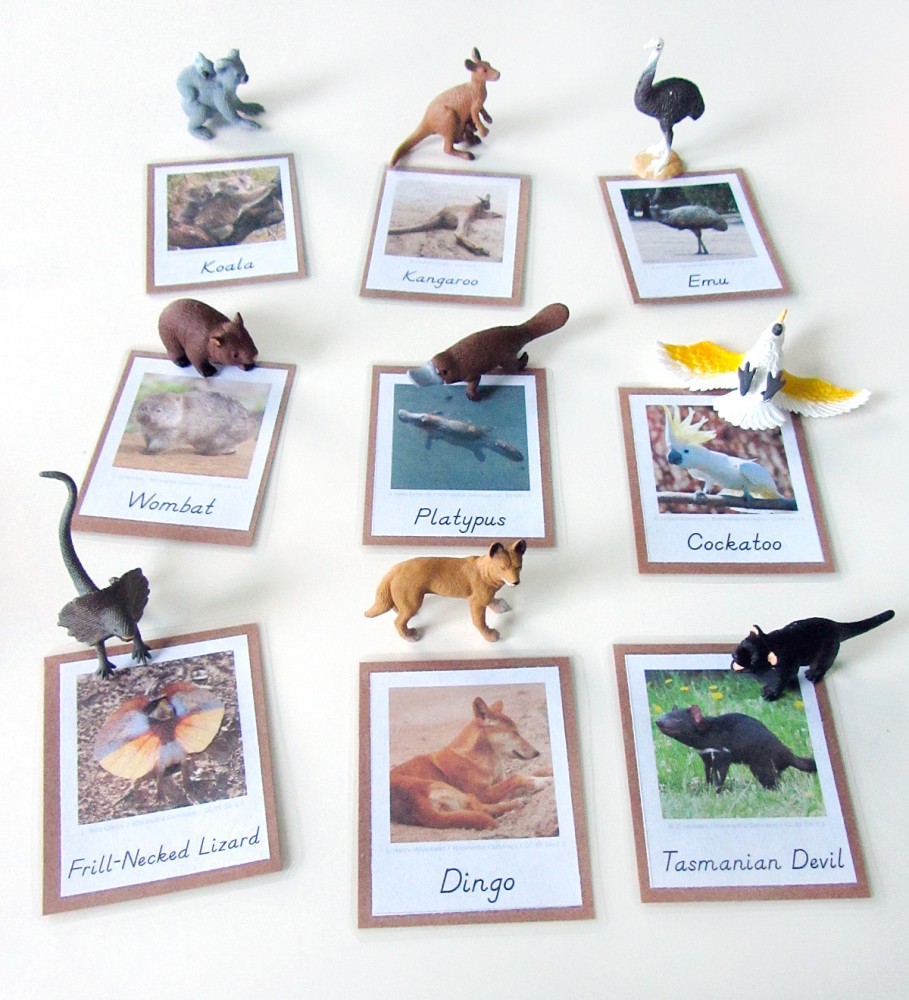
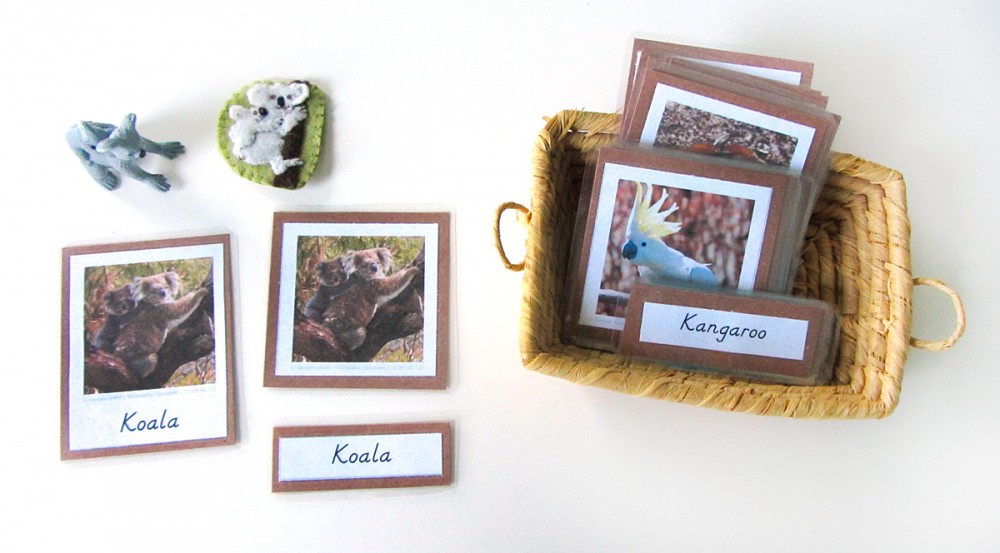
Montessori Australian Animals 3-Part Cards

The series of 3-Part cards I am making for this project is something that Jax will be using for many years in homeschool. I have been focusing on the animals in these posts, but the next post will feature all the landmarks we sewed. Eventually, we will expand our collection of cards even more to include cultures, more landmarks, and so much more. Three part cards are extremely flexible learning tools.

Animals of Australia for the Montessori Wall Map & Quietbook with Printables

Click here to download my free pdf file to make your own animals of Australia cards. To make mine, I cut them out, glued them to brown construction paper (to match Australia’s Montessori color) then laminated them. I use this laminator and I’ve been very happy with it. It makes everything so shiny and strong! My photos come out slightly faded from the printer (I use normal paper) but turn gorgeous after lamination. (Quick tip: Add a dab of glue stick on the back of your pieces before you place them in the lamination pouch to keep them from sliding around as you feed it through the machine.)

Animals of Australia for the Montessori Wall Map & Quietbook with Printables

I know many of you are sewing along (or plan to after the holidays!) If you are, stop by my Instagram @iolstephanie and leave a comment on one of my photos (I can’t see your photo if it you are private, but I can request to follow you temporarily if you leave a comment on mine about it) or share photos on Facebook. You can also email me. I love seeing what others make from my patterns!

Animals of Australia for the Montessori Wall Map & Quietbook with Printables

I know many of you are sewing along, or will be soon. If you are, stop by my Instagram @iolstephanie and leave a comment on one of my photos (I can’t see your photo if it you are private, but I can request to follow you temporarily if you leave a comment on mine about it) or share photos on Facebook. You can also email me. I love seeing what others make from my patterns!

Montessori Monday is a fabulous resource of Montessori and homeschool ideas! Please visit for more great projects…

Montessori Monday

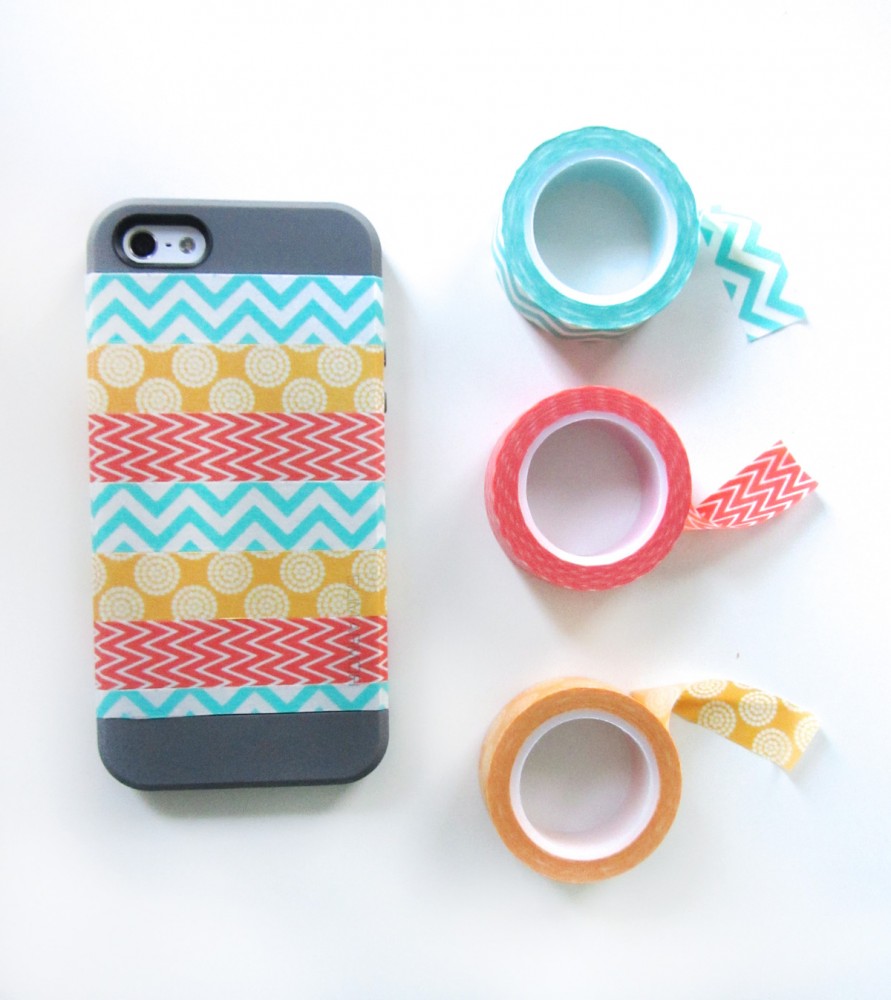
DIY Washi Phone Case

If you have an iPhone (like me) and a talent for dropping said iPhone (like me) then a good impact-proof case is a must. However, those strong cases are never cute. I need cute!

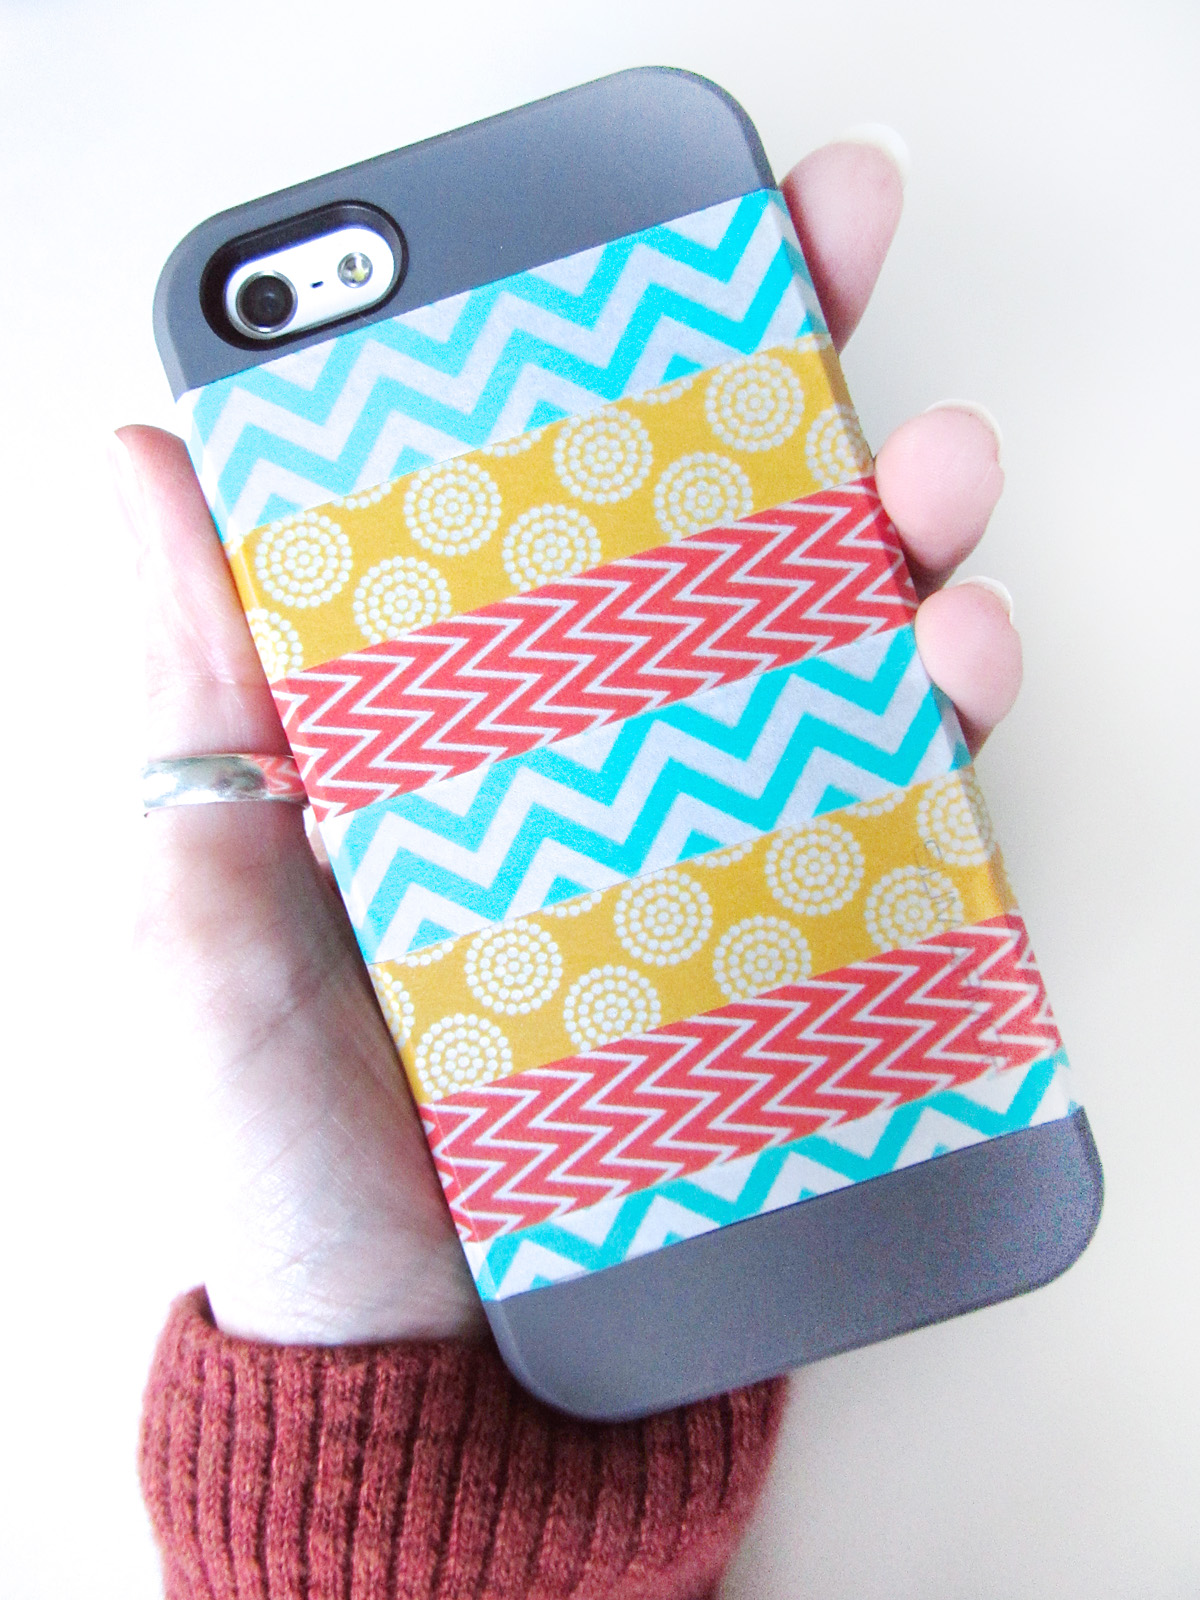
DIY Washi Tape Phone Case

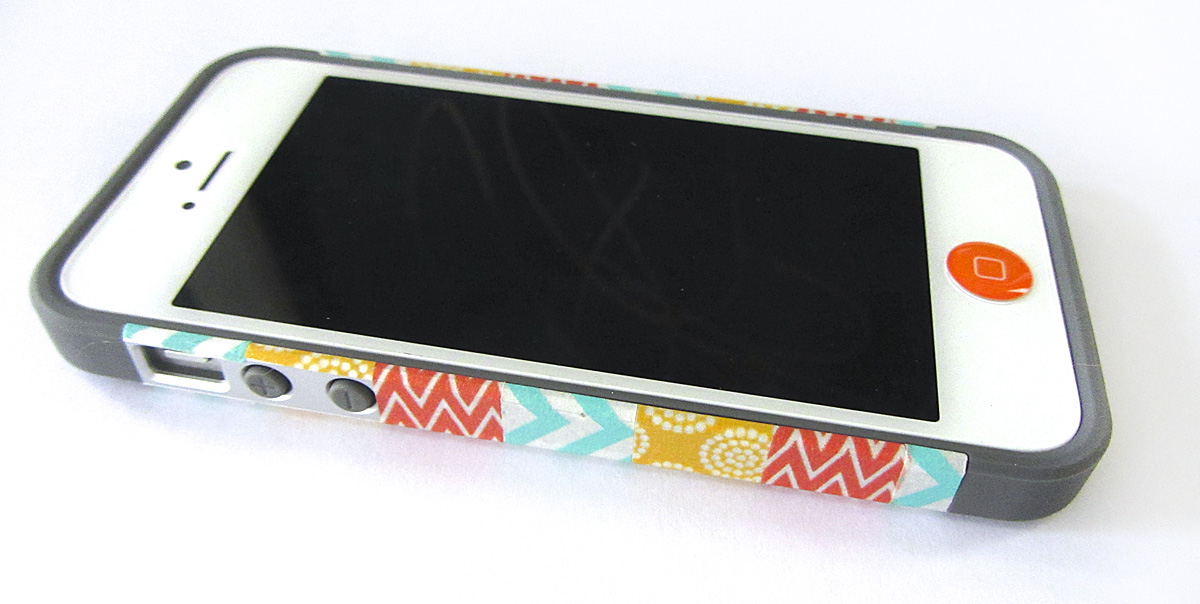
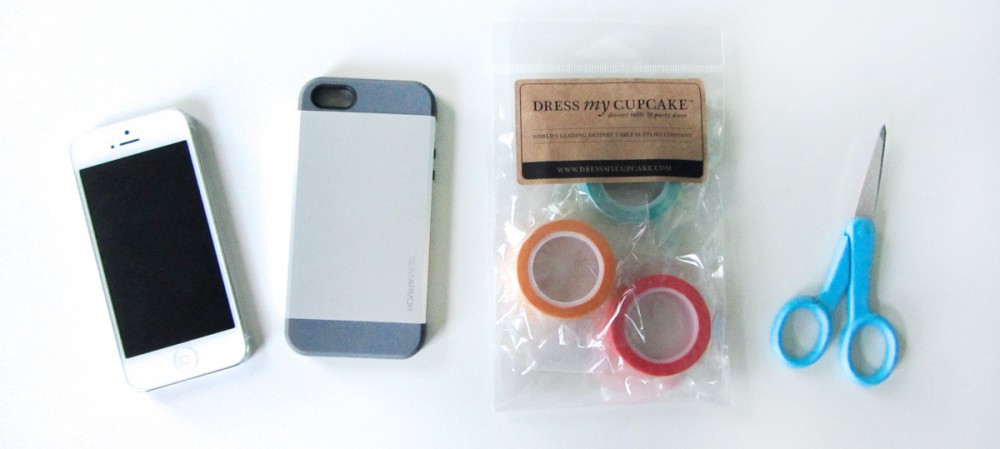
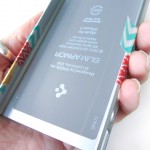
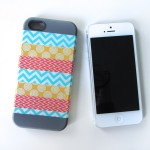
DIY Washi Tape Phone CaseI’d been using Otterbox cases for years. They come in a lot of colors, but aren’t cheap, so I’m stuck with the same look for a long time. I was having trouble with the silicone part of the case wearing out and the hard part cracking, so my husband suggested I try Spigen cases. The color options are a bit better – the case is in two pieces and you can buy extra colors separately. However, I really didn’t like that the inside color was black on all but one and I was over solid colors. I ended up buying the one option that came with a gray inner piece and a silver outer piece (Satin Silver) with the intention of making it beautiful!

DIY Washi Tape Phone Case

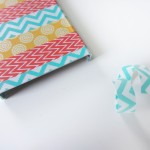
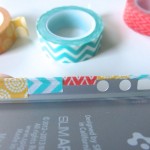
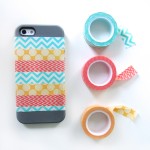
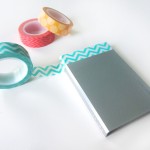
Have you used washi tape? I’m sure there aren’t many people who haven’t at this point, but if not, go get some now! It is beautiful patterning masking tape that can be used for decoration and easily removed. It was the perfect solution to my ugly but functional phone case! I’ve been decorating my new case and switching it up every few weeks. So easy!

What I Used

DIY Washi Tape Phone Case

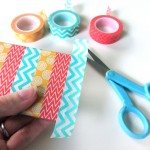
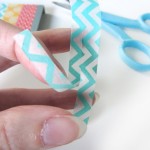
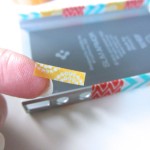
It’s as simple as cutting strips of tape and sticking them on the case! Take your phone out first so you can wrap the edges of the tape to the inside where they won’t be seen. Be creative! Sometimes I use all one pattern of tape. Sometimes I let the case color show through.

DIY Washi Tape Phone Case

Have you decorated anything unusual with washi tape?

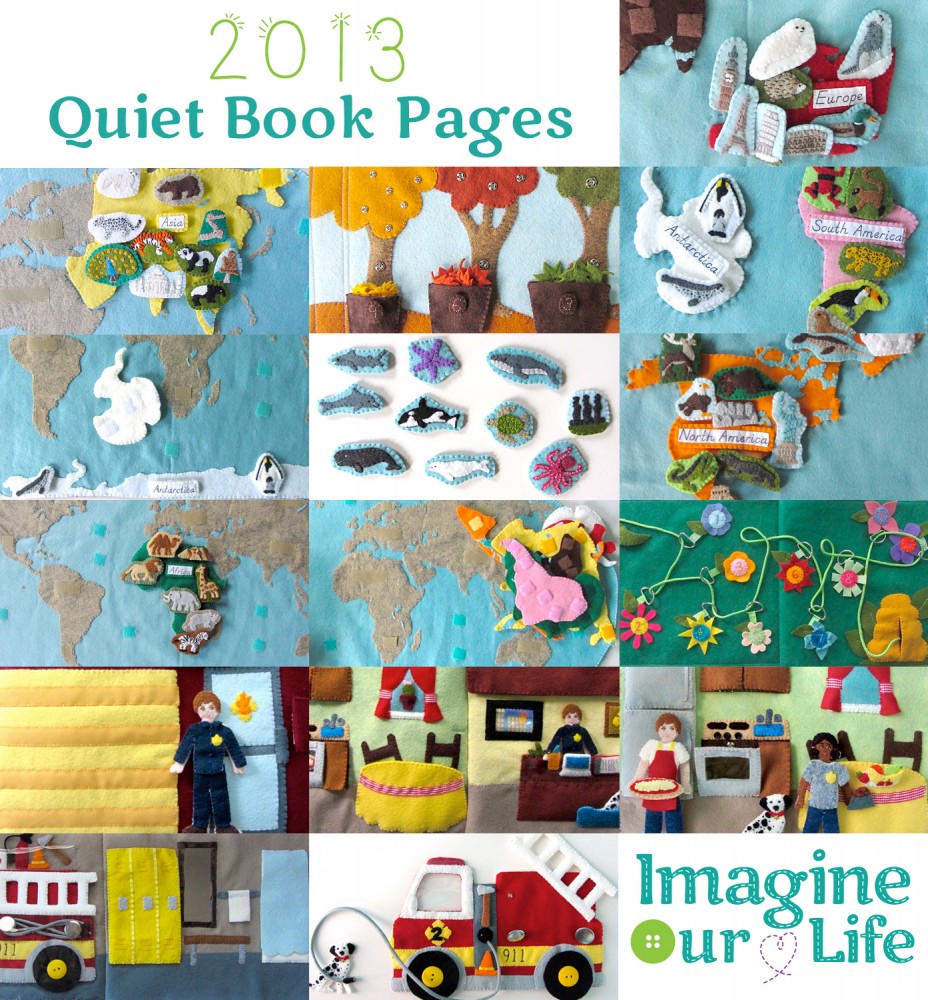
A Year of Quiet Book Pages 2013

A Year of Quiet Book Pages 2013

Happy new year!

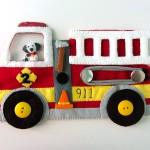
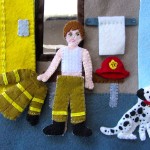
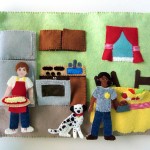
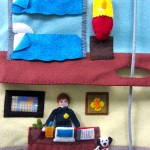
In 2013 I felt like I always had at least 2 sewing projects going at all time. With Jax turning 3 back in February, my quiet book projects grew with him. For our annual beach trip, I sewed him a large fire station quiet book. I also began a massive project to sew the whole world!

Felt Patterns on Imagine Our Life

With a new year beginning, it’s fun to look back on the pages I made and shared with you, as I did in 2012 and 2011.

Current Top 5

  1. Sock Matching Quiet Book Page – 71,096 views | 18,000+ pins
  2. Bumble Bee Lacing Maze Quiet Book Page – 16,972 views | 2,000+ pins
  3. Autumn Leaves Quiet Book – 8,794 views | 1,000+ pins
  4. Forest Quiet Book Page – 37,092 views | 1,000+ pins
  5. Circus Train Quiet Book Page – 35,987 views | 3,000+ pins

The sock matching page has been the top page for 3 years!The sock matching page has been the top page for 3 years!

All Time Top 10

  1. Sock Matching Quiet Book Page – 32,292 views | 9,000+ pins
  2. Forest Quiet Book Page – 37,092 views | 1,000+ pins
  3. Circus Train Quiet Book Page – 35,987 views | 3,000+ pins
  4. Sandcastle Quiet Book Page – 35,333 views | 7,000+ pins
  5. Let’s Cook Breakfast Quiet Book Page – 28,227 views | 4,000+ pins
  6. Mailbox & Letters Quiet Book Page – 27,230 views | 2,000+ pins
  7. Treasure Quiet Book Page – 26,466 views | 3,000+ pins
  8. Cookie Shapes & Colors Quiet Book Page – 25,461 views | 2,000+ pins
  9. Astronaut Quiet Book Page – 22,976 views | 1,000+ pins
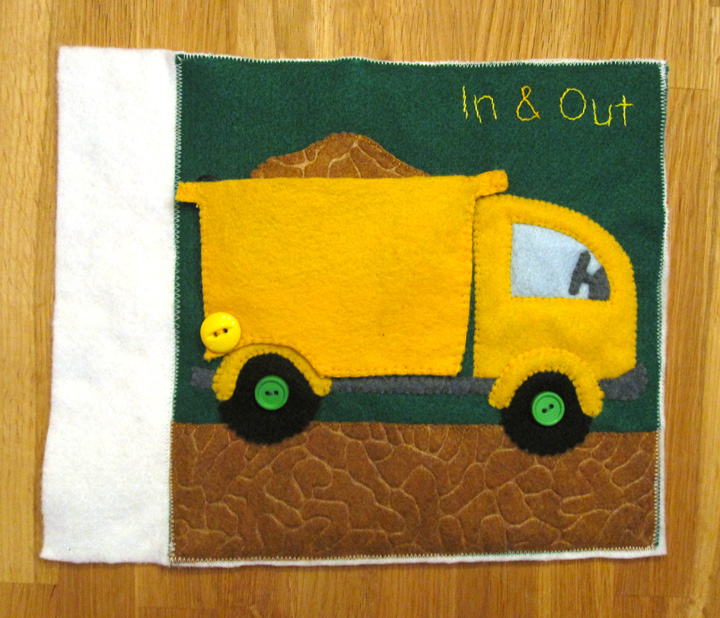
  10. Dump Truck Quiet Book Page – 22,073 views | 1,000+ pins

The dump truck made the all-time top 10 for the first time in 2013.The dump truck made the all-time top 10 for the first time in 2013.

10 Most Popular from 2013

  1. Montessori Continents Map & Quietbook – 18,854 views | 1,000+ pins
  2. Bumble Bee Lacing Maze Quiet Book Page – 16,972 views | 2,000+ pins
  3. Felt Fire Station – Fire Truck & Dalmatian – 10,259 views | 1,000+ pins
  4. Autumn Leaves Quiet Book – 8,794 views | 1,000+ pins
  5. Felt Fire Station – Cover – 7,289 views | 298 pins
  6. Animals of the Ocean for the Montessori Wall Map & Quietbook – 6,989 views | 675 pins
  7. Animals of Africa for the Montessori Wall Map & Quietbook – 6,657 views | 661 pins
  8. Felt Fire Station – Garage & Locker Room – 5,299 views | 876 pins
  9. Animals of North America for the Montessori Wall Map & Quietbook – 4,631 views | 512 pins
  10. Animals of South America for the Montessori Wall Map & Quietbook – 4,522 views | 395 pins

Animals of Europe for the Montessori Wall Map & Quietbook with PrintablesThe Montessori Wall Map & Quietbook posts got a combined 52,682 views this year!

Overall, I’ve shared 62 quiet book pattern posts with you since I started sewing them in September of 2011, including 4 multi-page books. Wow! You can check them all out here.

Click a thumbnail to visit a post:

Felt Fire Station - Fire Truck & Dalmatian  Ready to fight fires!  Felt Fire Station - Kitchen

Felt Fire Station - Office & Bedroom  Felt Fire Station - Cover  Bumble Bee Lacing Maze Quiet Book Page

Montessori Continents Map & Quietbook with 3-Part Cards  Animals of Africa for the Montessori Wall Map & Quietbook with Printables  Animals of North America for the Montessori Wall Map & Quietbook with Printables

Animals of the Ocean for the Montessori Wall Map  Animals of Antarctica for the Montessori Wall Map & Quietbook with Printables  Animals of South America for the Montessori Wall Map & Quietbook with Printables

Autumn Leaves Quiet Book & Fall Homeschool Unit  Animals of Asia for the Montessori Wall Map & Quietbook with Printables  Animals of Europe for the Montessori Wall Map & Quietbook with Printables

I’m always taking suggestions for new page ideas. Join our Facebook page, or leave a comment here!

Small Sewing Projects

Along with quiet book sewing, I also did a long of small sewing projects in 2013. My Little Ponies are a common project for me, thanks to my niece who adores them. I also do a lot of ornament sewing every Christmas.

Top 10 Sewing Projects in 2013

  1. Wee Wonderfuls – Sewing Rag Dolls – 11,512 views | 897 pins
  2. Pillow Quiet Book Cover – 5,550 views | 218 pins
  3. Felt Valentine Play Set – 5,155 views | 3,000+ pins
  4. Christmas Tree for Toddlers – 5,137 views | 179 pins
  5. DIY Rainbow Dash Plush with Goggles – 4,383 views | 324 pins
  6. DIY Sewing Labels – 3,444 views | 330 pins
  7. Make the World’s Best Robot Costume! – 2,890 views | 82 pins
  8. Mini Advent Ornaments Set One – 2,331 views | 97 pins
  9. Felt Caterpillar Coin Purse – 2,283 views | 238 pins
  10. DIY Felt Poppy Headband – 1,811 views | 199 pins

Mini Advent Ornaments Set FourOur Reader’s Choice project this holiday was the Christmas Tree Play Set!

Preschool Handbells: New-Sew Felt Musical Notes and PrintablesHonorable mention to this no-sew project: our color-coded handbell music note set!

Thank You!

A big thank you to American Felt and Craft for supplying felt for many of my creations! Their wool blend felt is just so nice to work with. And thank you Safari Ltd. for helping me make a lot of my projects more exciting and educational!

Thank You!Thank you American Felt and Craft!

Top 5 Referring Blogs in 2013:

  1. The Quiet Book Blog
  2. American Felt and Craft – The Blog
  3. Living Montessori Now
  4. Lapappadolce
  5. Proverbs 31 Woman

Let’s Be Friends!

Stephanie Segall

Want to get social? I’m the best at responding on Instagram, but you can always email if you don’t mind waiting (Sorry about that!) You can join my Facebook page or message me via Twitter. My personal site is Stvlive.com. I’m on Pinterest, and I host a large quiet book board. I also love postal mail! Jax enjoys postcards from around the world. Our mailing address is here.

Jax is growing up (he’ll be 4 in February!) but he hasn’t outgrown quiet books. But, you may have noticed that I am tending towards educational projects and larger multi-page books.

Upcoming projects will include a bit of everything: a weather page and money page that can be used in homeschooling, the last installment of the world map (Australia!) and something donut-themed (the birthday party theme Jax chose!) Have an idea for me?

Happy New Year!

Polar Family Felt Ornament Patterns – Narwhals & Penguins

Polar Family Felt Ornament Patterns – Narwhals & Penguins

Time has been flying by with lots of projects on my plate. I can’t believe it is nearly Christmas! But I finally have the last two polar family felt ornament patterns ready for you to enjoy.

Polar Family Felt Ornament Patterns – Narwhals & Penguins

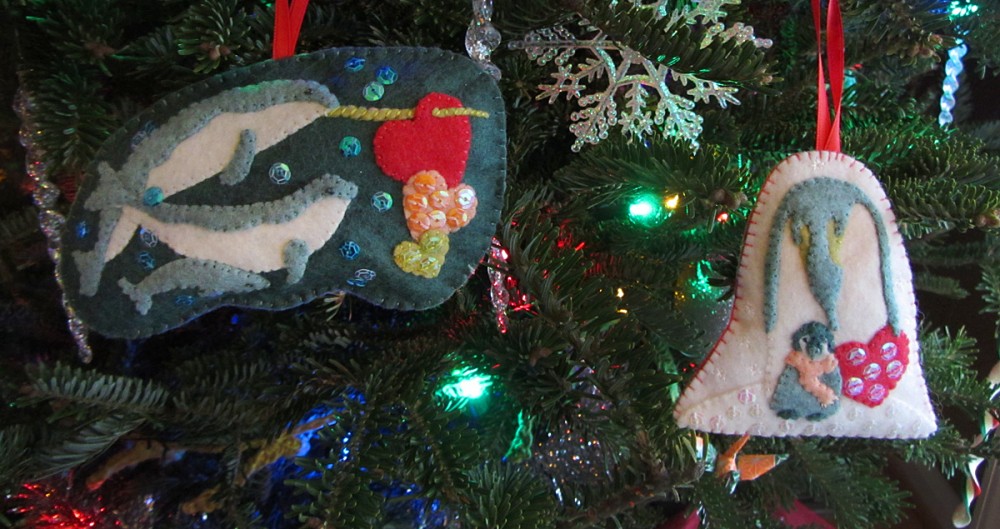
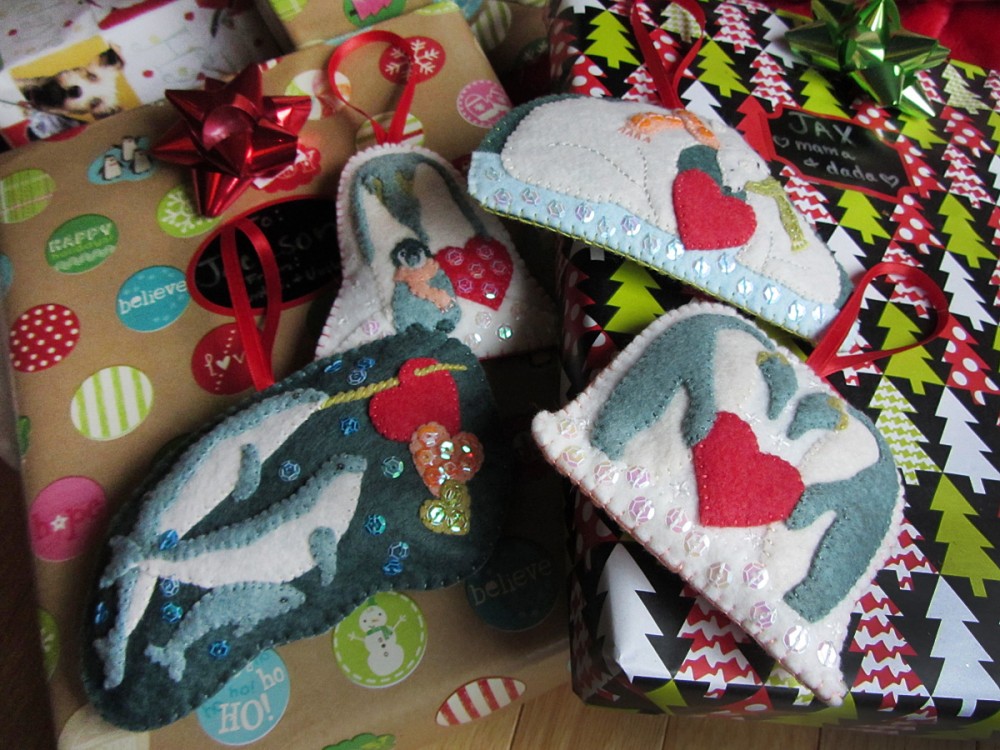
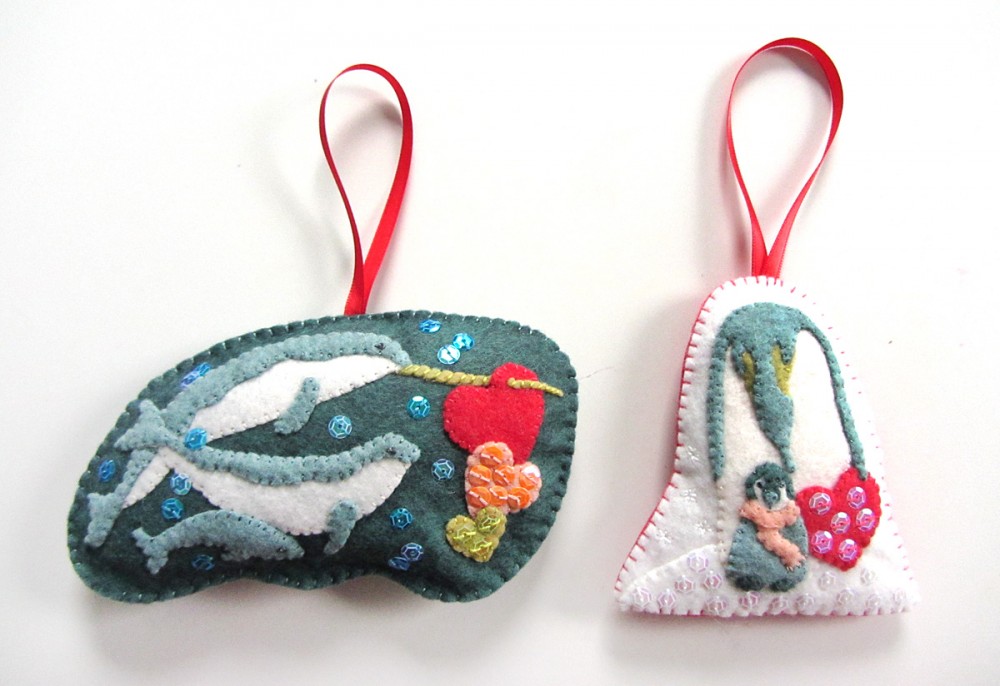
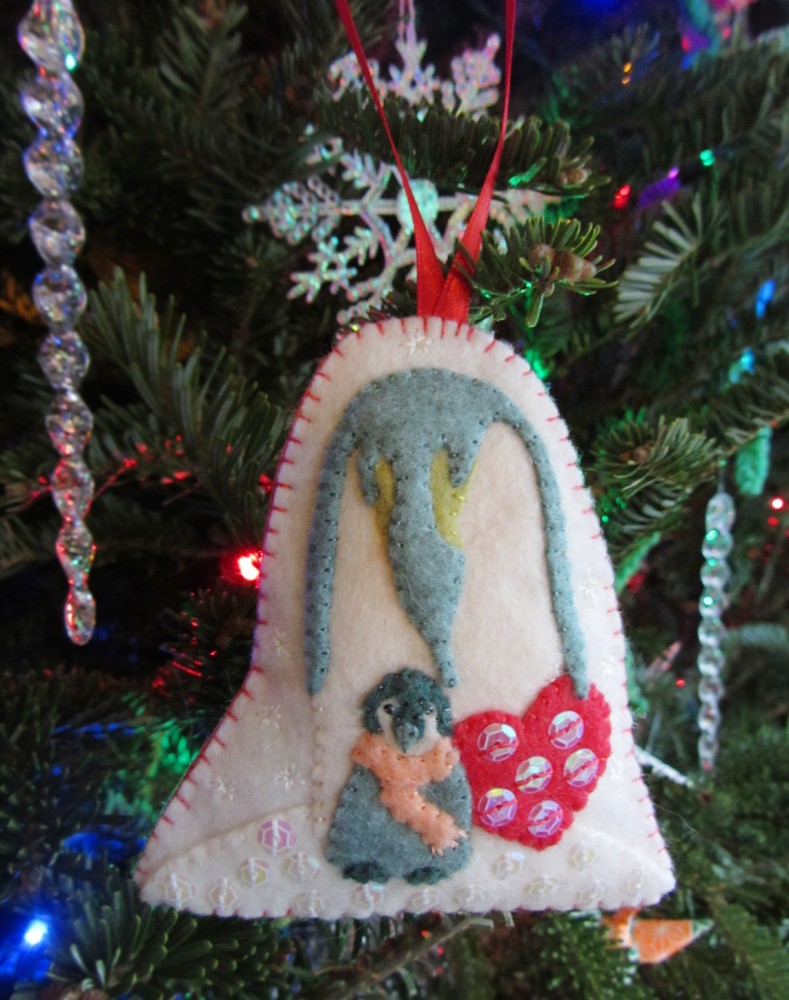
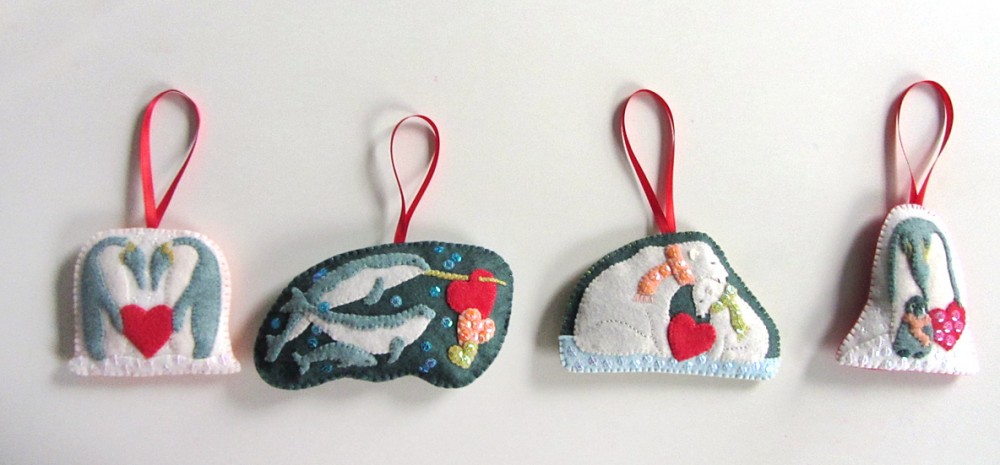
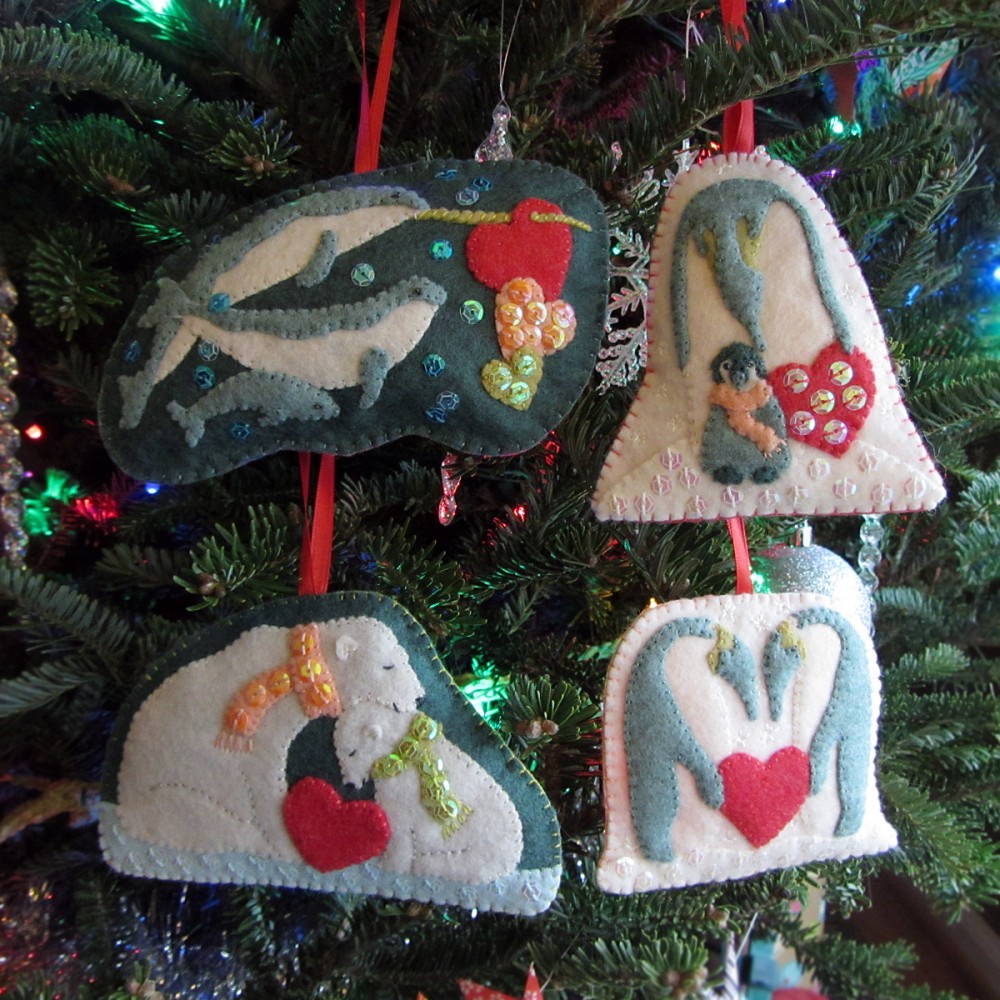
This year’s theme is Polar Families, inspired by some of the animals Jax and I have been studying in homeschool with our world continent project. There will be four designs: a penguin daddy and chick, a narwhal family, a pair of penguin mates and a polar bear mama and cub. The latter two are featured here.

Polar Family Felt Ornament Patterns – Narwhals & Penguins

What I Used

I am listing all the supplies I’ll use for the 4 ornaments, noting the ones not needed for these two.

Polar Family Felt Ornament Patterns – Narwhals & Penguins  Polar Family Felt Ornament Patterns – Narwhals & Penguins

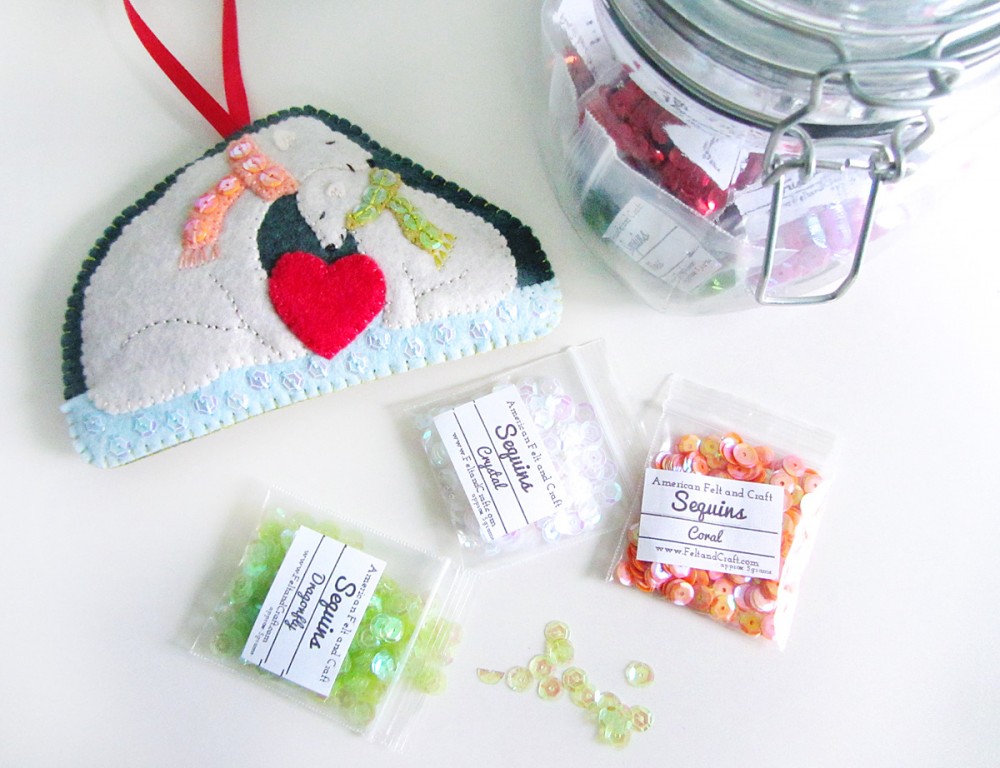
These beautiful sequins are a new offering of American Felt and Craft!

Polar Family Felt Ornament Patterns – Narwhals & Penguins

Penguin Daddy & Chick

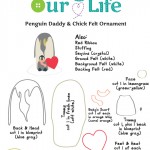
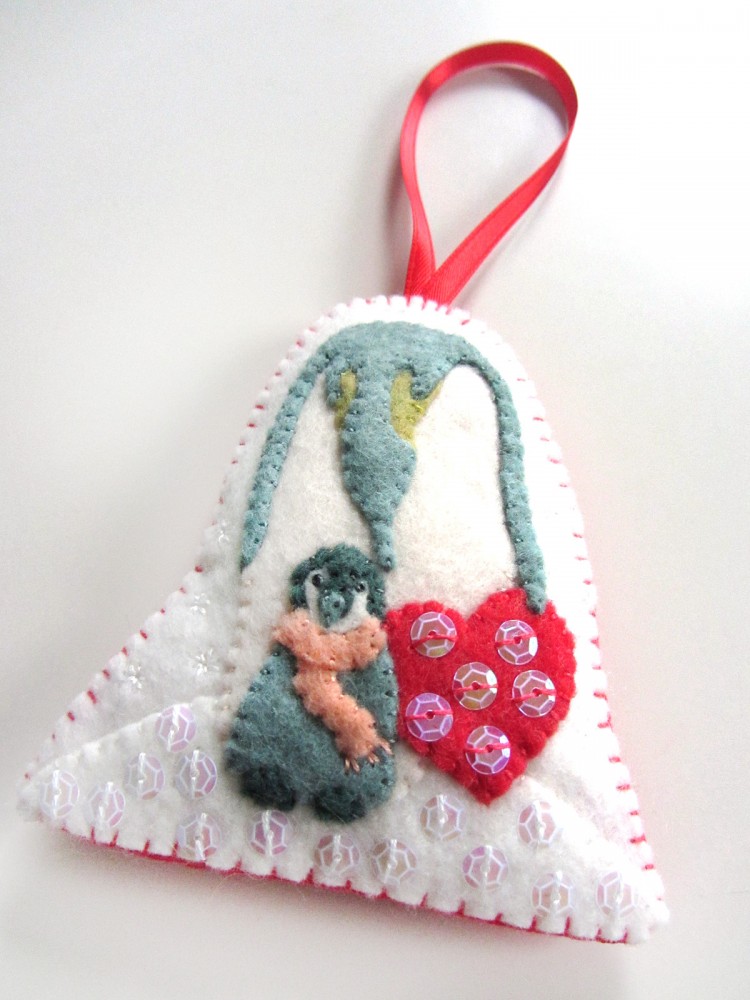
 I cut a rounded strip of white felt for the snowy ground and tacked it down across the bottom of the white background felt with felt glue. After I cut out all my pieces, I tacked them into place as well.  Then I trimmed down the background felt so there was just a small edge around the penguins.

Polar Family Felt Ornament Patterns – Narwhals & Penguins

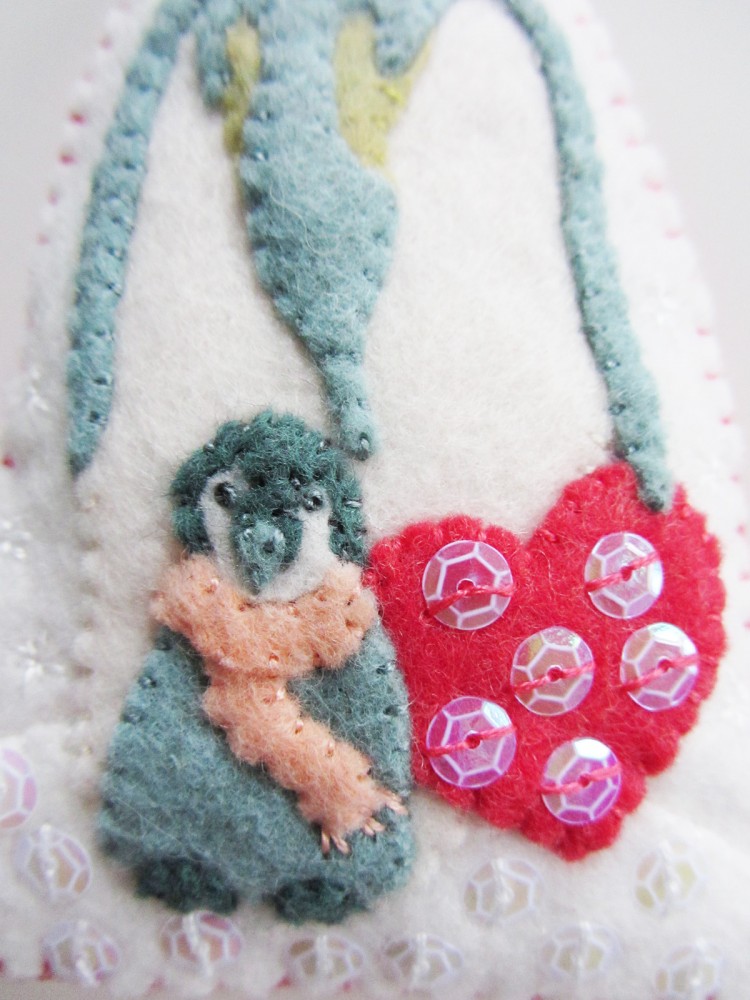
For the penguins, the heart and the top of the snowy ground, I stitched all the edges down with matching floss. (I use 2 strands.) I stitched crystal sequins randomly onto the snowy ground using 2 stitches each. I also added them to the heart. At the end of the scarf, I made upside-down V stitches as tassels. I made French knot eyes on the chick.

On the white background, I stitched snowflakes: a plus sign shape of four stitches, all stitched towards the center, then four more longer stitches on the diagonal in between.

Polar Family Felt Ornament Patterns – Narwhals & Penguins

I cut a length of red ribbon and a piece of orange whip (coral orange) felt to fit as the ornament’s backing. I stitched all the way around, adding stuffing halfway and catching the ribbon loop in the top. I used a blanket stitch.

Polar Family Felt Ornament Patterns – Narwhals & Penguins

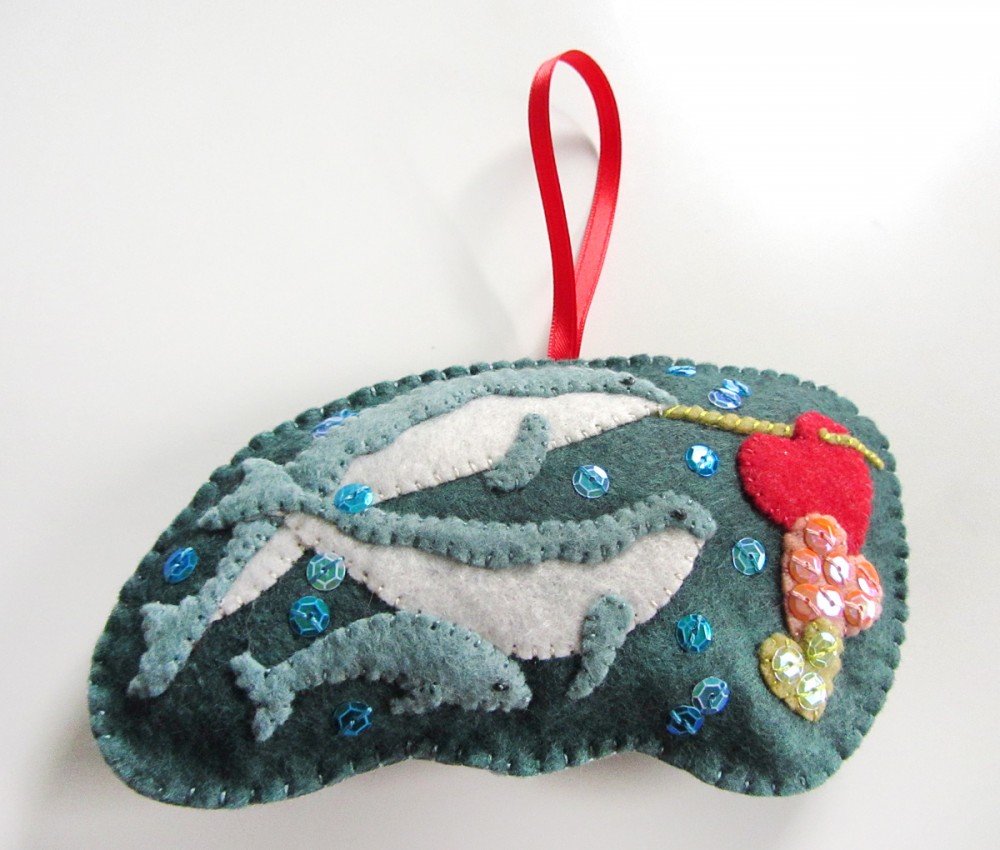
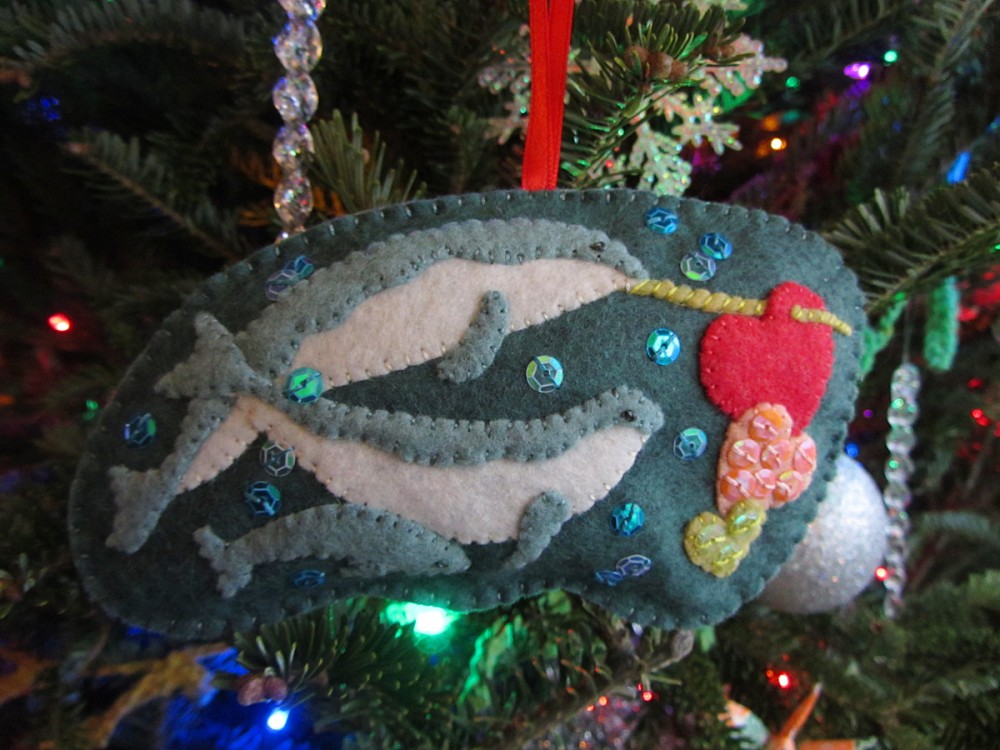
Narwhal Family

I love narwhals! They live up in the Arctic ocean, so I was happy to include them in this polar series. Narwhals are brownish grey, and they turn speckled white with age. I stuck with my color scheme, as they look blue gray under the ocean water. I had intended to use two shades of brown sequins for the adults’ speckles, but I ultimately decided to skip them. I found them distracting. [ You can see what they look like here and decide for yourself. ]

Polar Family Felt Ornament Patterns – Narwhals & Penguins

There aren’t a lot of narwhal pictures out there. I was very inspired by this drawing. Narwhals don’t typically stay in family groups, but I wanted to show all of their forms in this ornament.

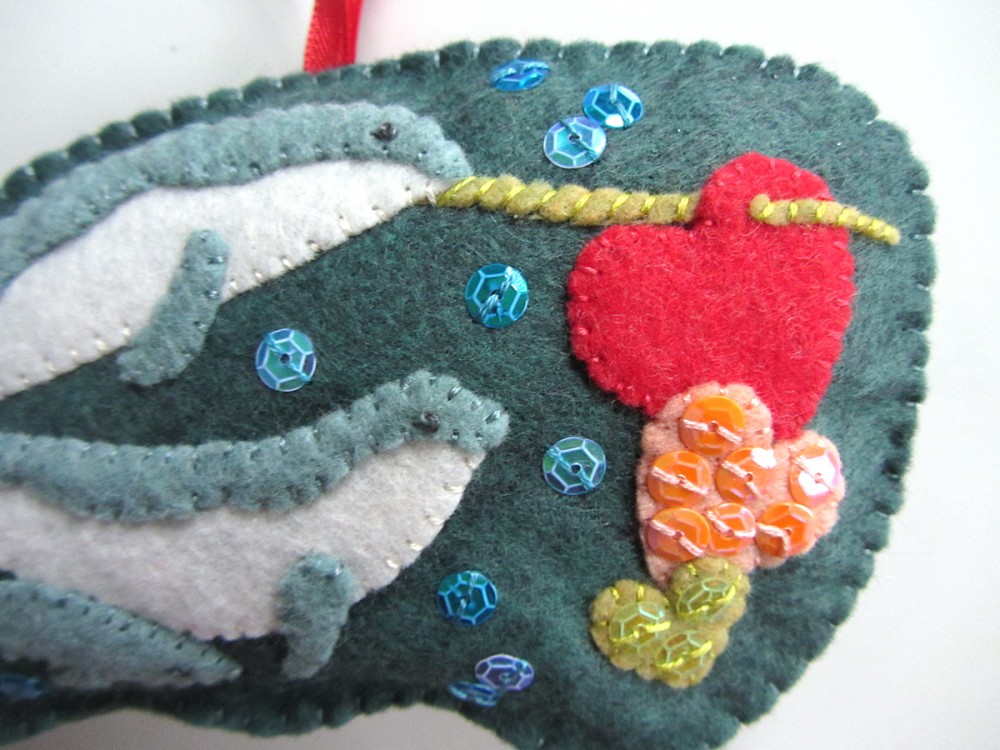
I started by tacking everything down to a dolphin teal-gray background with a light layer of felt glue, including a pointed strip I cut out of lemongrass to be the male adult’s tusk. I cut the tusk into two pieces and layered part behind the heart and part in front so that it looks like the heart is pierced. I stitched around all the edges, and added sequins to two of the hearts. The eyes are French knots with little stitches in one corner of each. The tusk was done with diagonal stitches running across it.

Polar Family Felt Ornament Patterns – Narwhals & Penguins

After sewing everything down, I cut around the outside of the ornament to trim it down, then sewed crystal and mermaid sequins on as bubbles. Add as many or as few as you’d like. I overlapped and grouped mine.

I cut a length of red ribbon and a piece of blueprint (blue-gray) felt to fit as the ornament’s backing. I stitched all the way around, adding stuffing halfway and catching the ribbon loop in the top. I used a blanket stitch.

Polar Family Felt Ornament Patterns – Narwhals & Penguins

Are you an Etsy or craft fair seller? Would you like to sell these ornaments, or any other item sewn from an Imagine Our Life pattern? Visit my Etsy shop and contact me for custom commercial licenses. All authorized sellers get featured on the website.

Polar Family Felt Ornament Patterns – Narwhals & Penguins

If you make one of these ornaments, I’d love to see it! Stop by our Facebook page, or mention me @iolstephanie on Instagram or Twitter. (If you are private on Instagram, I’ll have to request to follow you to see it.) Happy Holidays!

Mini Advent Ornaments Set Four

Mini Advent Ornaments Set Four

I can finally mark a major sewing project off my list holiday season! It was one that was chosen by my readers in our Facebook page: a felt Christmas tree play set! I hope you’ve been sewing along with me as I’ve shared the toddler-friendly tree pattern and tutorial and the first, three sets with you. But it’s not too late to join in! These mini ornaments bring a whole lot of holiday cheer and work up fast. Choose a few to stick in someone’s stocking or tie to a present as a gift tag!

Mini Advent Ornaments Set Four

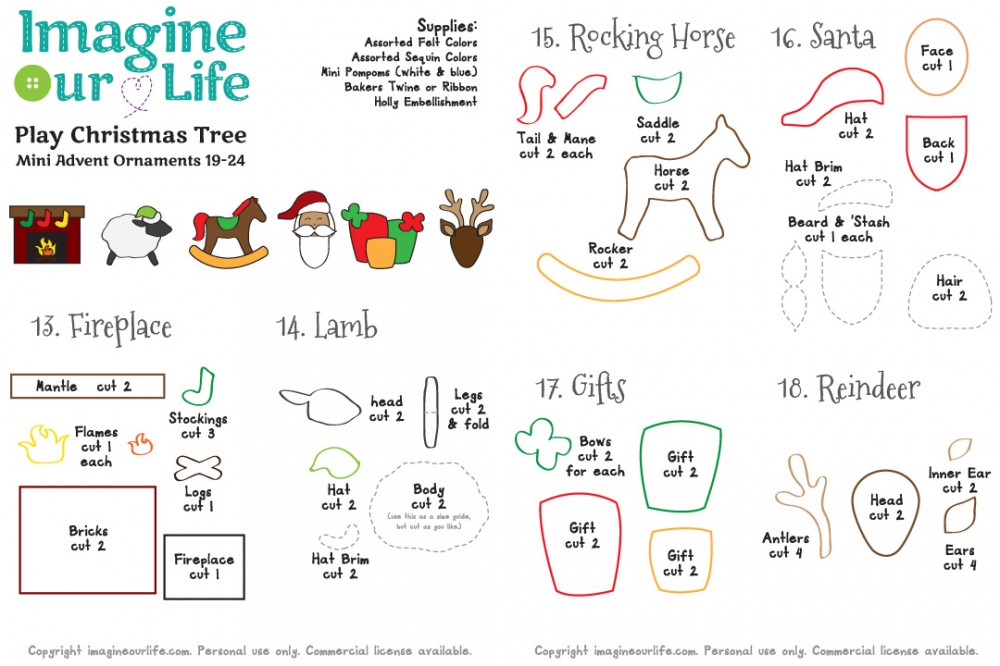
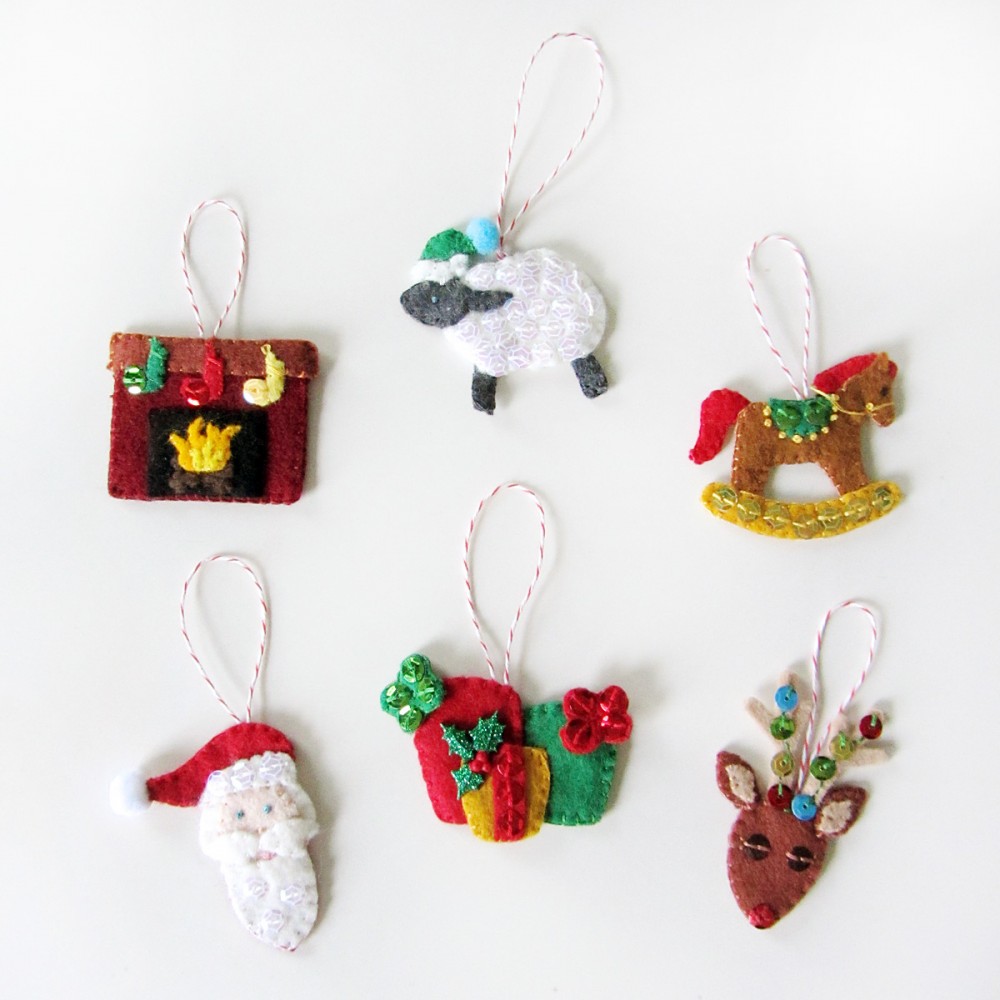
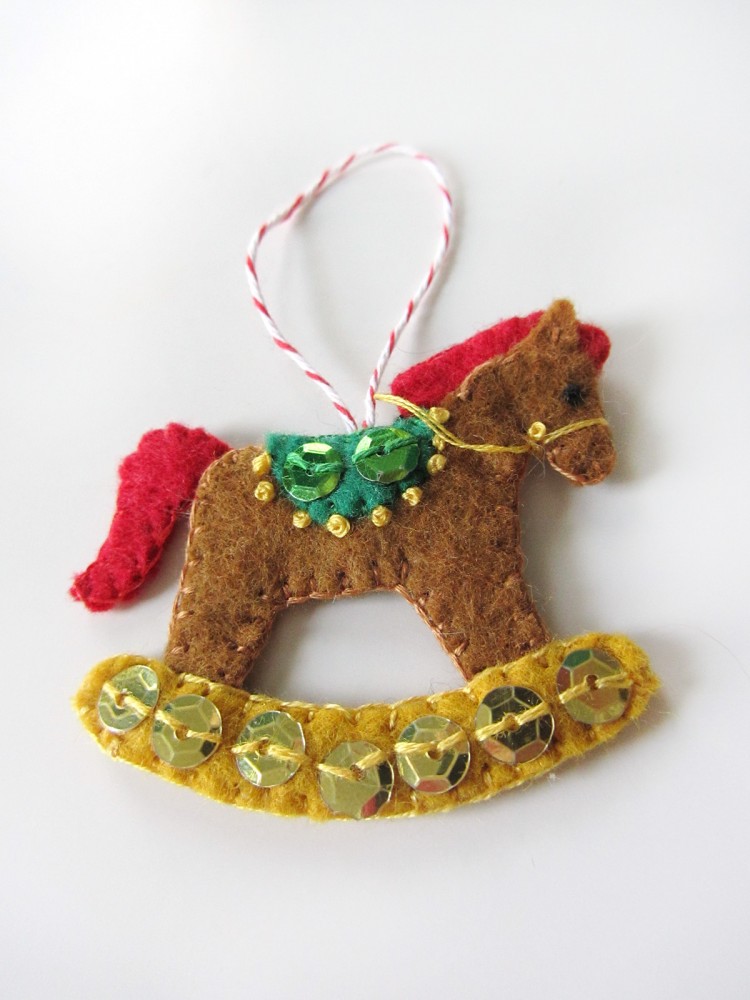
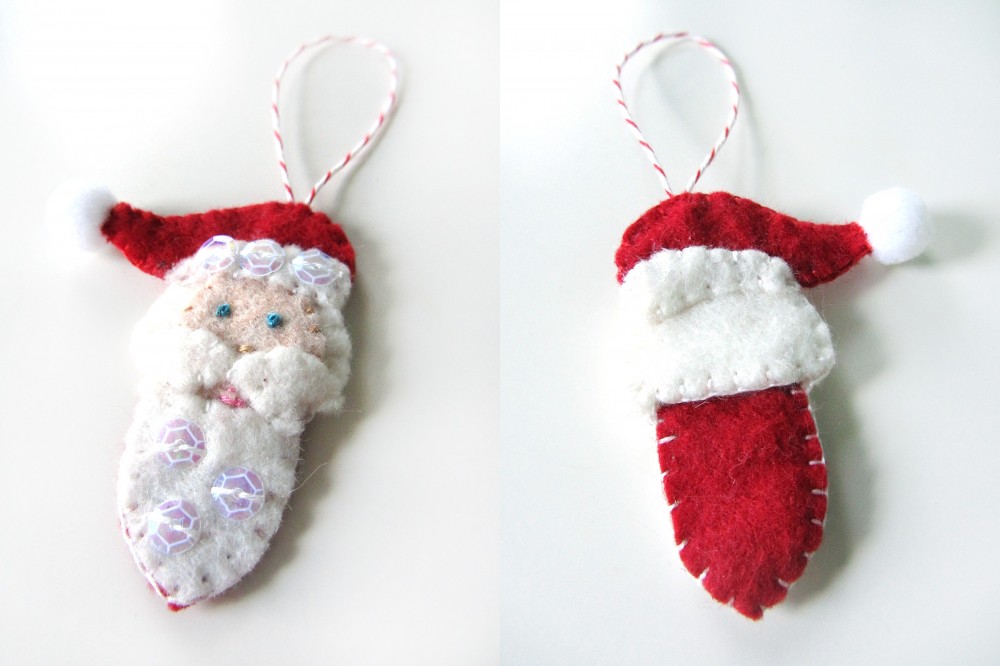
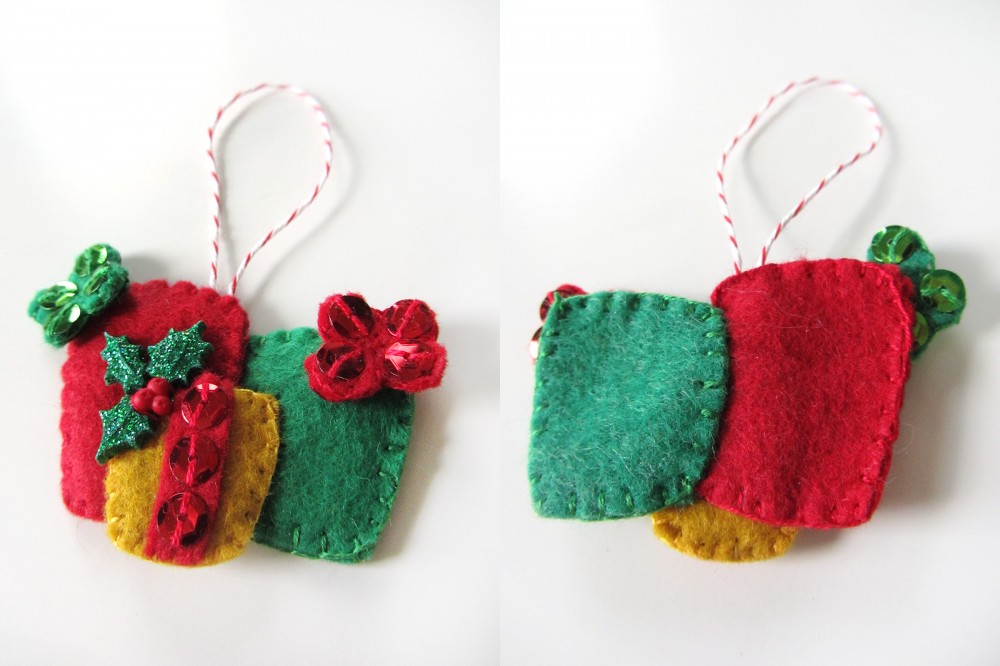
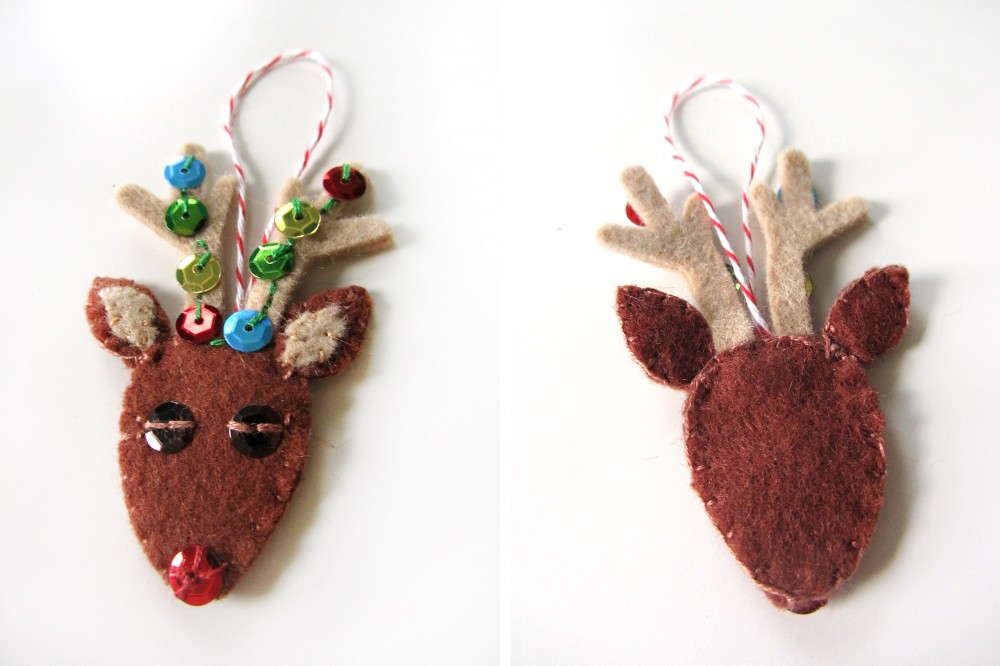
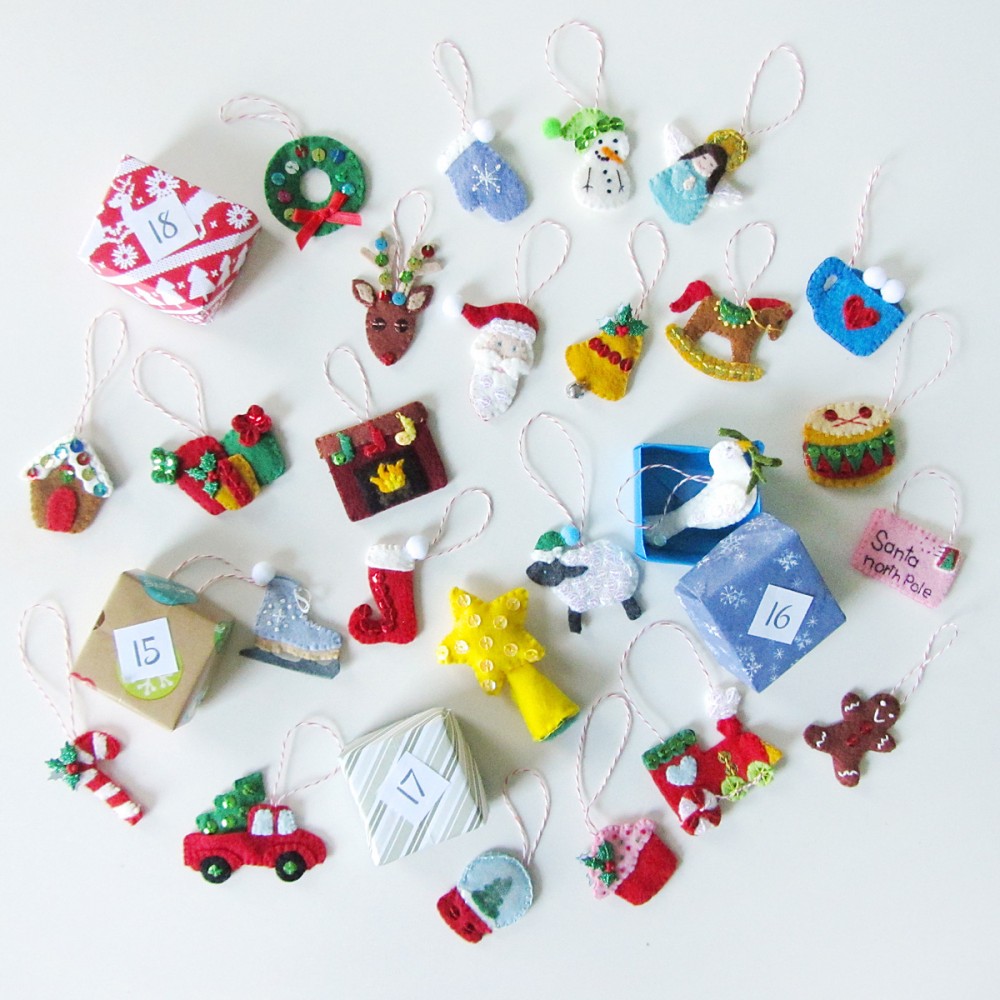
I designed 24 ornaments, and I’ve been giving Jax one to unwrap every day leading up to Christmas. I shared the ornaments in batches of 6. Ornaments 19-24 are: a fireplace, a lamb, a rocking horse, Santa, gifts and a reindeer.

To see all the posts in this series, click here.

Mini Advent Ornaments Set Four

What I Used:

Mini Advent Ornaments Set Four

For all of the ornaments: I cut pieces of baker’s twine, doubled it over and tied a knot in the ends. When stitching the tops of the ornaments together, I made sure the knot of the twine loop was inside. I also made sure to stitch through the knot to secure the loop.

Mini Advent Ornaments Set Four

19. Fireplace

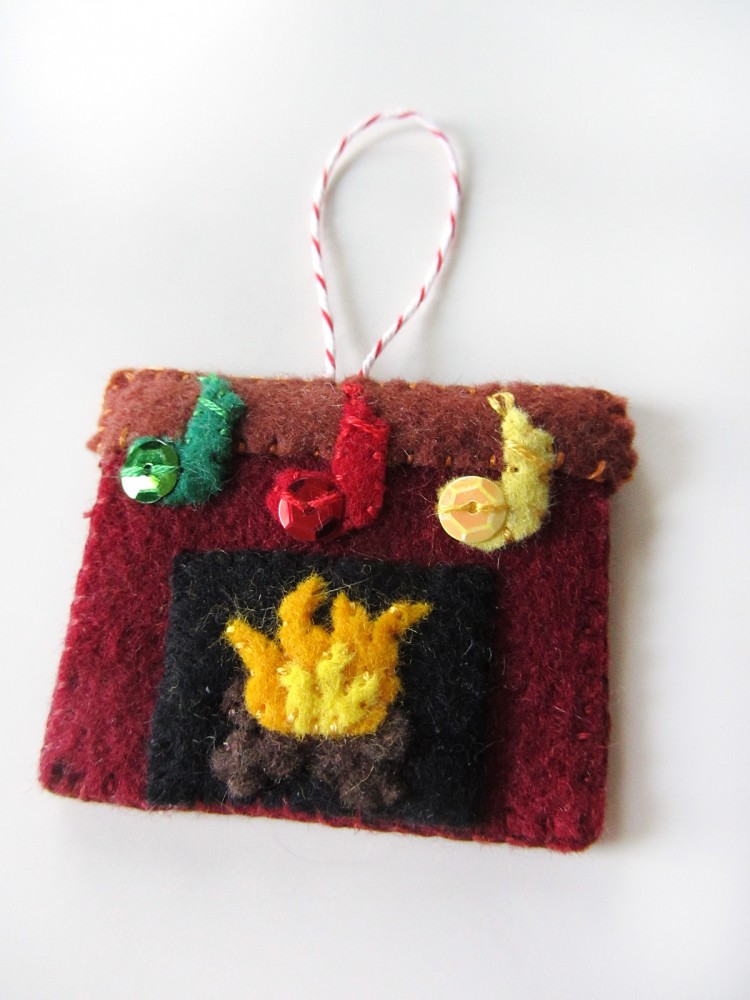
Fore the fireplace, I tacked down with glue the logs and flames to the black fireplace area, then stitched everything down. I stitched the black area to the bottom center of the front of the bricks, then stitched the front mantle on along its bottom. I glued down three stockings, then sewed them down with a sequin on the toe of each. I did a long stitch at the top of each for a cuff, and a single loop of a lazy daisy stitch at the top corner. On the back, I stitched the back mantle on along the bottom, then stitched the front and back together, catching a loop of twine at the top.

Mini Advent Ornaments Set Four

20. Lamb

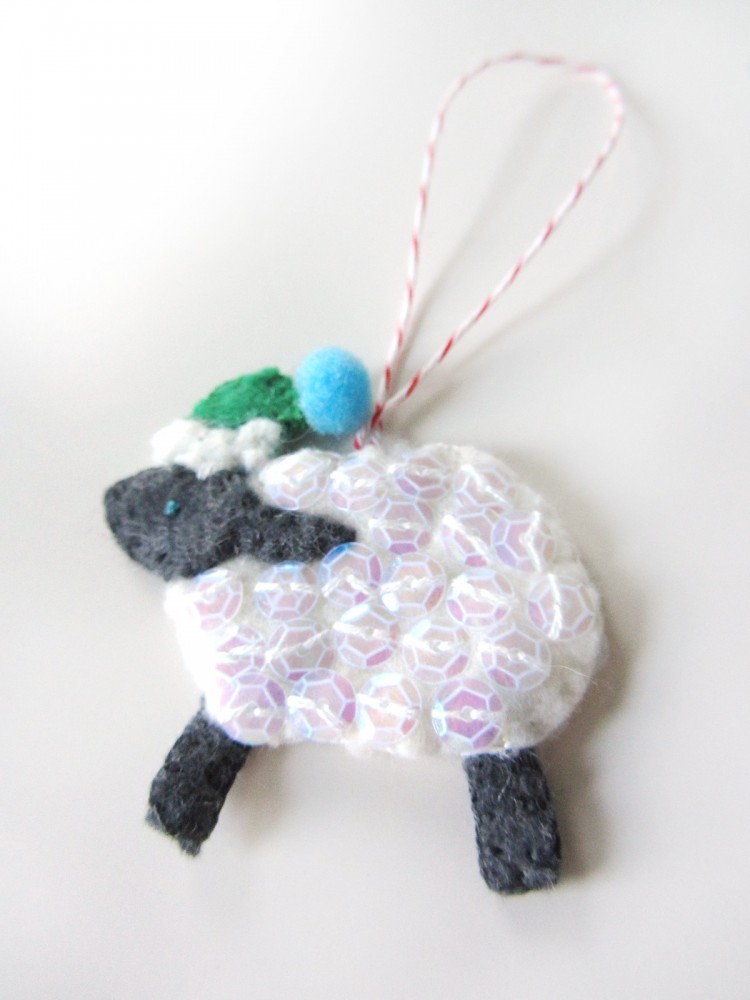
Oh, this sweet little lamb! She is quite simple, but you can believe me that all those crystal sequins are a labor of love. I started by gluing the heads onto each body piece, then sewing sequins onto the whole thing. (I provided a basic body shape in the pattern, but I found it worked best to trim the body into wooly bumps freehand.) I took the legs and folded them in half, gluing them down then stitching all around. I stitched the body of the sheep together with the twine loop at the top and the legs at the bottom. I stitched the two sides of her face together. I glued the hat brims onto the hat sides, then layered them around her head and sewed them together and onto her head.

Mini Advent Ornaments Set Four

21. Rocking Horse

I started this cute rocking horse by gluing the saddle on, then sewing it. I added two green sequins on each side, then bordered it with French knots. I gave him black French knot eyes. I sewed the two sides of the main and tail together then glued them in between the two finished sides of the horse, as they are too small to pin. I stitched all around the horse catching a twine loop at the top, skipping the ears, but making a little brown stitch in the center of each. Using gold floss, I made an anchor stitch under his chin then looped the floss around his muzzle, then made a French knot on each side. I then loosely looped the floss behind his neck and made an anchor stitch to keep it from pulling out.

Mini Advent Ornaments Set Four

22. Santa

Ho, ho, ho! I had to do Santa! I started him by gluing his beard and mustache onto his face. I stitched them down, then added some crystal sequins to his beard. I made two straight pink stitches for his mouth, a peach stitch for his nose and two blue French knot eyes. I stitched the beard to his red back piece around the outside, the stitched his face and corners of his ‘stash onto one of the hair pieces. Then I sewed the back hair piece to the front. I glued the hat brims on and stitched crystal sequins to the front one while sewing them down. I layered the two hat sides onto his head and sewed them together and onto him. I added a white pompom to the tip of his hat.

Mini Advent Ornaments Set Four

23. Gifts

These three little gifts could be made in any colors. I went with a classic Christmas palette. I stitched each of the two larger gifts separately, then stitched them together, only going through one layer of felt to hide the stitches. The corner of the red gift got the loop of twine. For the two bows, I decorated each loop with a sequin, sewed the two sides together, then stitched them on with some crossed stitches only in the center. On the gold gift, I glued down a strip of red felt as a ribbon and trimmed it to fit. I sewed a trio of sequins on to decorate it. I put the back and front together and started sewing them together with blanket stitch at the bottom, then laying it on the other two gifts and sewing through bother the gold gift and the top layer of felt of the other two while sewing the last three sides. I finished it with a plastic holly embellishment that I stitched on with red thread around the berries.

Mini Advent Ornaments Set Four

24. Reindeer

I started the reindeer by gluing the two layers of each antler together and setting them aside. I made sure to glue them edge-to-edge as I wasn’t sewing them together. I decorated the front of his face with a red sequin nose and brown sequin eyes. I glued then sewed the inner ears to the front ears, then sewed the front ears to their backs. I sewed the face pieces together with the antlers and a loop of twine at the top. I stitched the ears to the front top of the head. On the top of one antler, I made a line of back stitch running down, across and up to the top of the other. I stitched colored sequins along the way, using only one stitched in each so the dangle like holiday lights.

Mini Advent Ornaments Set Four

And now all the ornaments are complete! Which have been your favorites? It is so hard for me to choose, but I’ve really liked the tree truck, the dove and the hot cocoa cup. This project and its patterns are completely free for you to use for personal use. If you’d like to purchase a commercial license, visit my Etsy shop and contact me if you don’t see a current listing for it.

Mini Advent Ornaments Set Four

If you are making a set, I’d love to see your finished ornaments! Tag me on Instagram @iolstephanie (if you are private, I’ll have to request to follow you), mention me on Twitter @iolstephanie or post a picture on our Facebook wall. I love what I’ve seen so far! If you’d like to support my free site in other ways, visit my support page. If you’d like to get my posts the moment they go live in your email inbox, sign up here.

Mini Advent Ornaments Set Four

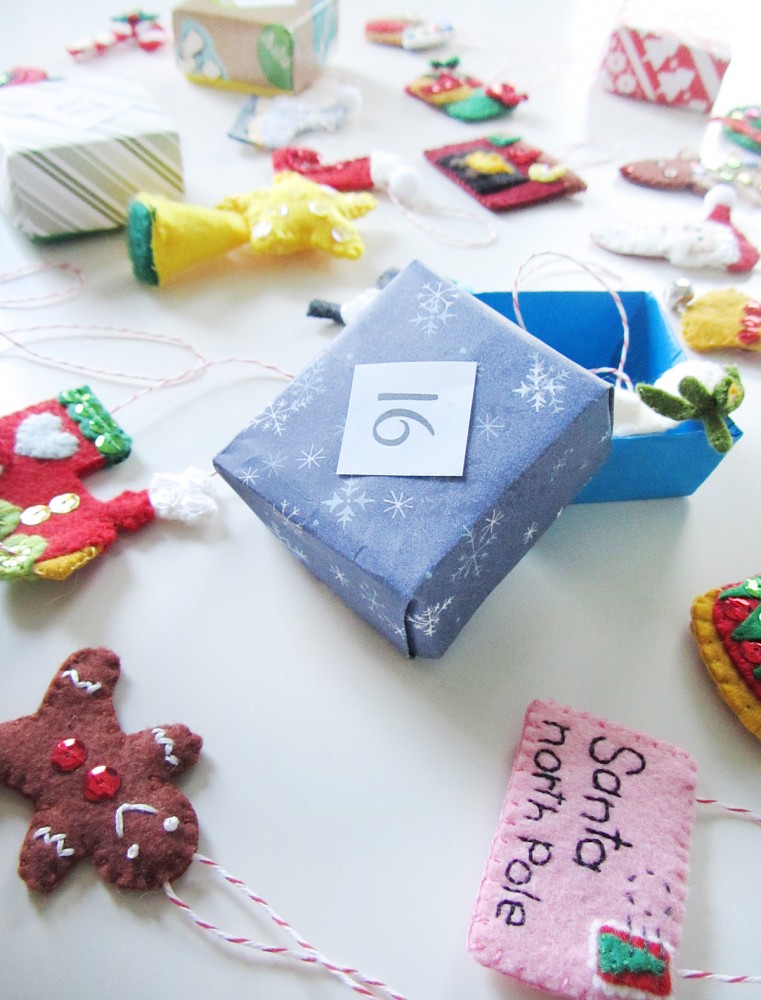
I’ve been giving Jax his ornaments in little origami boxes (mine use 6″ papers) with printed numbers on top. I have them all in in a Christmas basket and he finds the right one each night. I started out adding candy treats in there as well, but he lost interest so I stopped. He’s really gotten into opening them and asks me all day long if it is time yet.

http://greeneyed.com/2010/12/page/3/

Happy holidays!


Mini Advent Ornaments Set Three

Mini Advent Ornaments Set Three

My large sewing project this holiday season was one that was chosen by my readers in our Facebook page: a felt Christmas tree play set! I hope you’ve been sewing along with me as I’ve shared the toddler-friendly tree pattern and tutorial and the first, two sets with you. But it’s not too late to join in! These mini ornaments bring a whole lot of holiday cheer and work up fast.

Mini Advent Ornaments Set Three

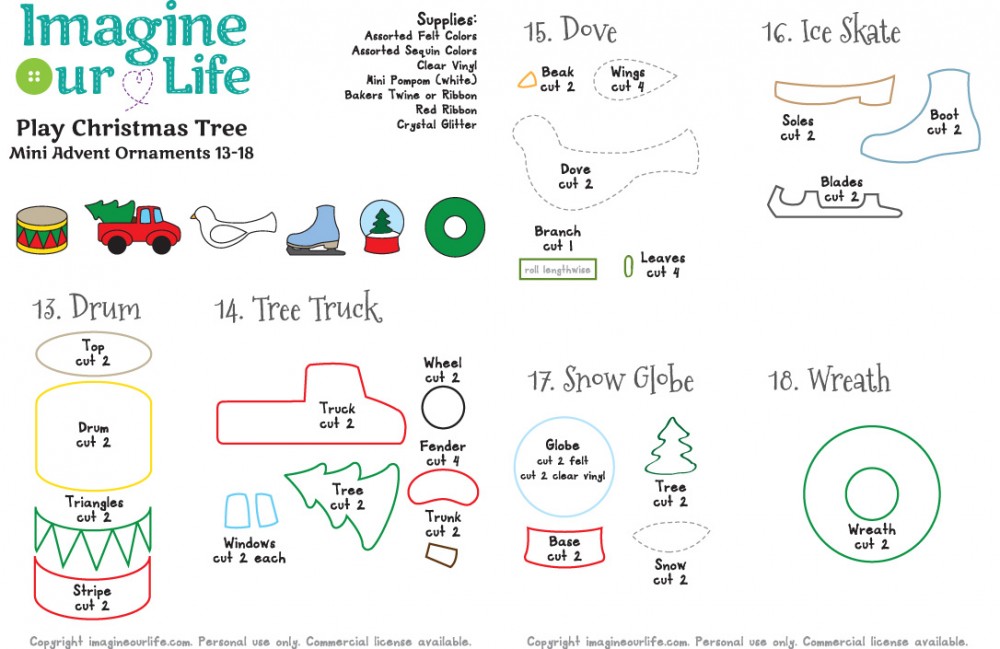
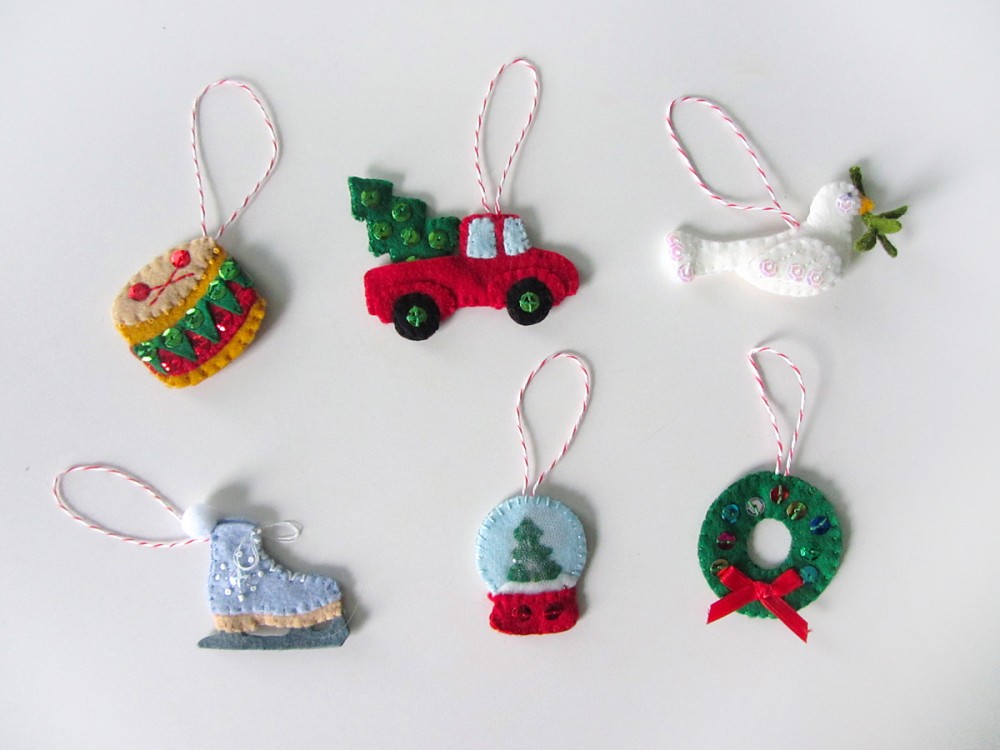
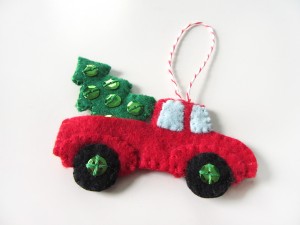
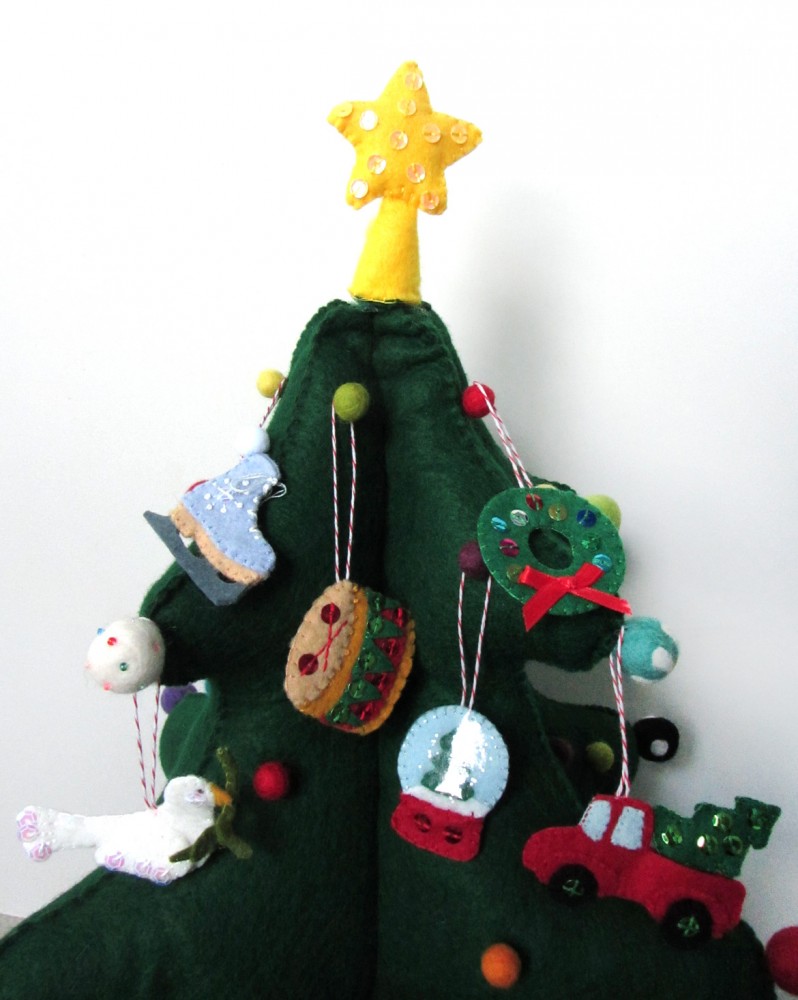
I will be designing 24 ornaments, and giving Jax one to unwrap every day leading up to Christmas. I’ll be sharing the ornaments in batches of 6. I am planning two more sets next week to finish the project. Numbers 13-18 are: a drum, a truck with a tree, a dove, an ice skate, a snow globe and a wreath.

To see all the posts in this series, click here.

Mini Advent Ornaments Set Three

What I Used:

Mini Advent Ornaments Set Three

For all of the ornaments: I cut pieces of baker’s twine, doubled it over and tied a knot in the ends. When stitching the tops of the ornaments together, I made sure the knot of the twine loop was inside. I also made sure to stitch through the knot to secure the loop.

Mini Advent Ornaments Set Three

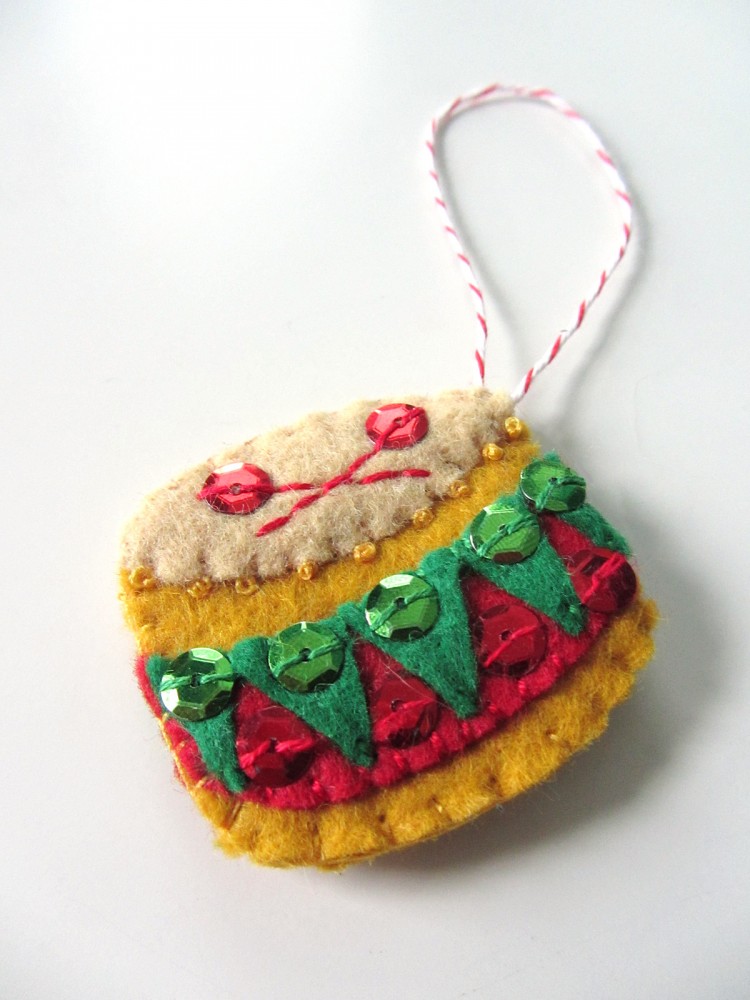
13. Drum

My husband is a drummer, so we already have a few little drums for Jax. All that aside, this little drum came out much cuter than I expected! I started by gluing down the red and green bands to each side of the drum, the stitched them down. I also added red and green sequins. I stitched the drum heads on, then made rows of gold French knots along their edges. On the front of the drum, I back stitched two drum mallets and used red sequins for the heads. I stitched around the edge of the drum, catching a loop of twine at the top corner.

Mini Advent Ornaments Set Three  Mini Advent Ornaments Set Three

14. Truck with a Tree

We haven’t gotten our Christmas tree yet, but I’m really anxious to! I was inspired by all the cars and trucks taking home their trees, so I designed this truck. It had to be red- Jackson’s favorite color!

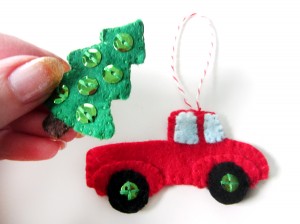
To sew the truck, decorate each side the same. Tack down the parts, then sew around the fenders and windows. Stitch green sequins into the cents of each tire. Put the two sides of the truck together, and sew each pair of tires together, going through all the layers on the upper halves. Sew the truck sides together, leaving the truck bed an open pocket and catching a loop of twine in the top of the cab.

For the little tree, I stitched green sequins onto each side. I then tacked the two sides of the truck together and stitched them around the edges. I layered them between the two tree sides, and stitched it all together. The tree can stick into the truck pocket, or come out!

Mini Advent Ornaments Set Three

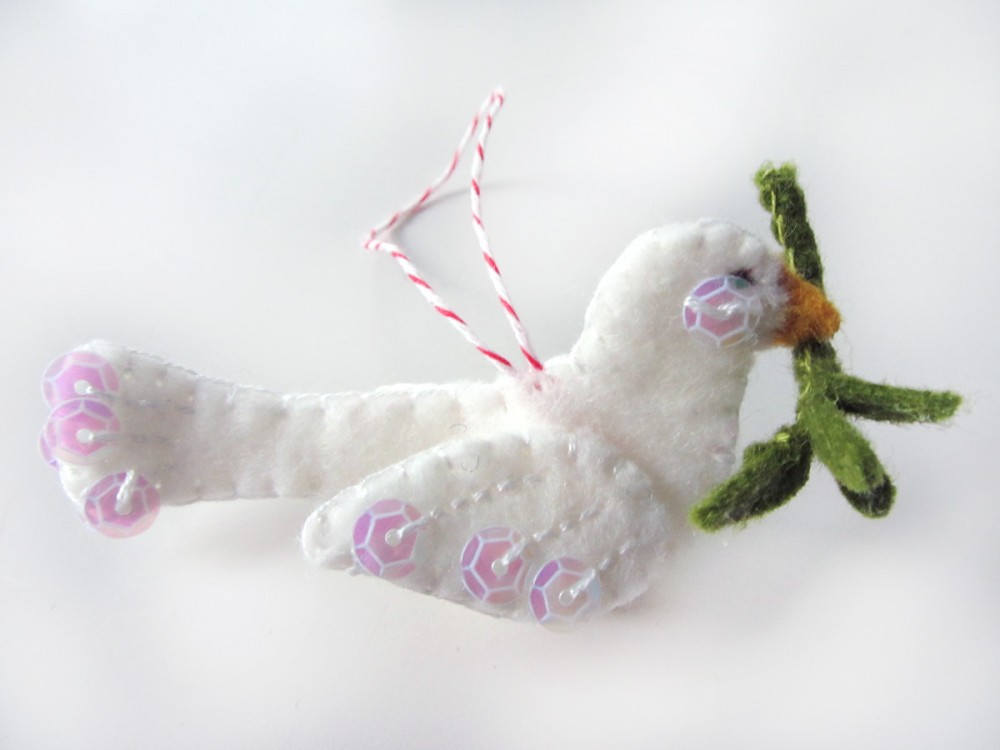
15. Dove

I am in love with this little dove! To begin, I stitched the outer piece of each wing with stripes of back stitch. At the end of each line, I stitched a crystal sequin. I left the bottoms of the sequins hanging free. I did the same rows of stitches and sequins on the tail of each body piece. I sewed each decorated wing piece to a plain one, then stitched them on along their fronts. I stitched sequin cheeks onto the dove’s face on each side, and added brown satin stitched eyes. I stitched the two sides of the dove together all the way around, catching a loop of twine in her back and the two beak pieces (sewn together) in her face.

To make the olive branch, I rolled the branch felt lengthwise and blanket stitched up its length. I then worked my way back down, stitching leaves on in a staggered pattern. I coated each leaf with felt glue and let them dry to make the sturdier. If you have a younger (or rougher) child, you may need to skip the delicate olive branch. Once the branch was dry, I stitched it to the under side of her beak.

Mini Advent Ornaments Set Three

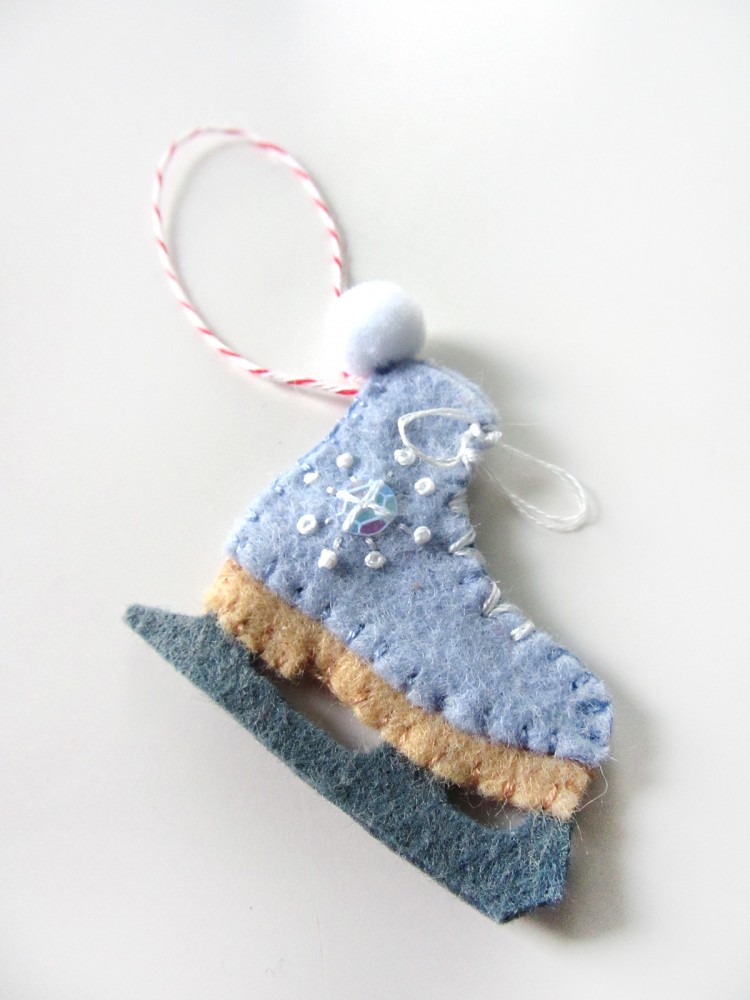
16. Ice Skate

For this little ice skate, I glued together the two sides of the gray blade using a thicker layer of glue than I’d normally use. I didn’t want stitches taking away from the crisp look of the blade, so I made sure they were thoroughly glued together. I then tacked the tan sole pieces onto either side of the blade and stitched them on along the sides and bottom. I decorated each of the sides of the boot with a crystal sequin and some stitches and French knots. Then I layered the two sides around the sole and blade and stitched them on along the sides and bottom, catching a loop of twine in the upper back corner. I left the top open, like a real skate. I used white floss to stitch zig zags along where the shoelace would be, and stitched on a looped bow. I finished it off with a mini white pompom.

Mini Advent Ornaments Set Three

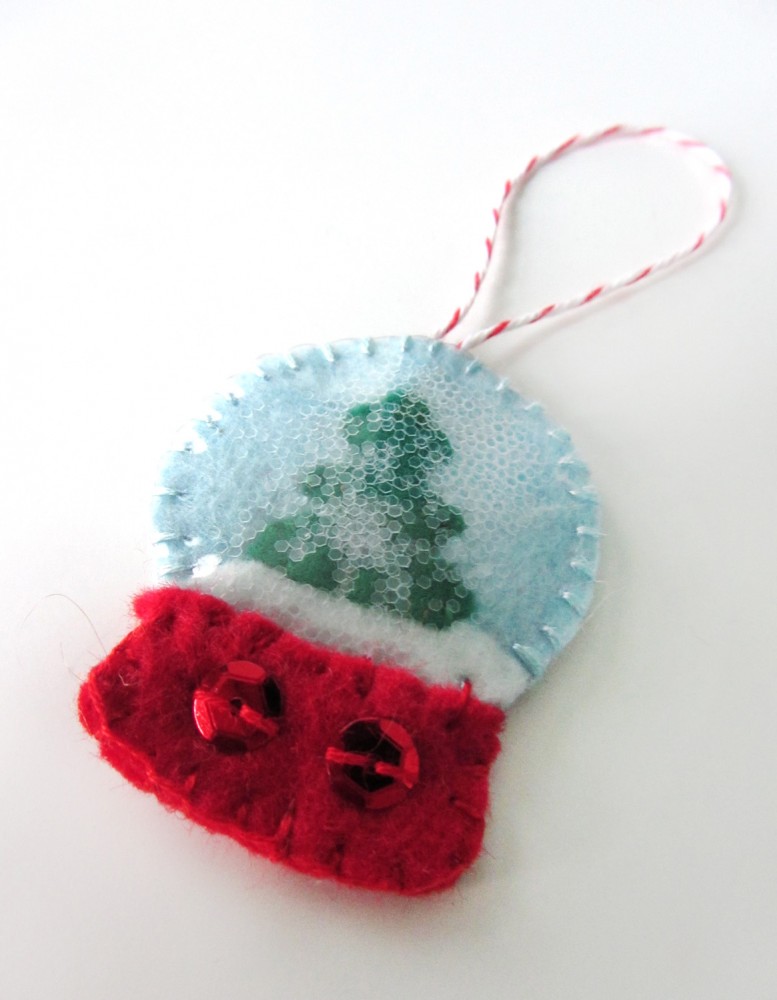
17. Snow Globe

I have to give credit to American Felt and Craft for the idea of a snow globe ornament. This is my (mini) version!

I started by prepping the two sides of the red base with some stitched on sequins. I then glued the snow and trees to each of the blue globe backgrounds and letting them dry. I stitched each of the trees down, but didn’t stitch the snow as only a bit of the edge was exposed. I thin layered the two pieces back-to-back and sandwiched them between two circles of clear vinyl. Starting at the snow line, I stitched up and around through all the layers, catching a loop of twine at the top. I used a blanket stitch and pulled it firmly. I went all the way around the blue edge and stopped at the other side of the snow line.

I turned the snow globe upside-down, and carefully poured a little crystal glitter in to each side (about a 1/4 teaspoon – whatever fits but doesn’t obscure the view too much). The glitter won’t really move around, so having see-through glitter is key. Keeping it upside down, I sewed that bottom edge closed. I then sewed on the red base.

Mini Advent Ornaments Set Three

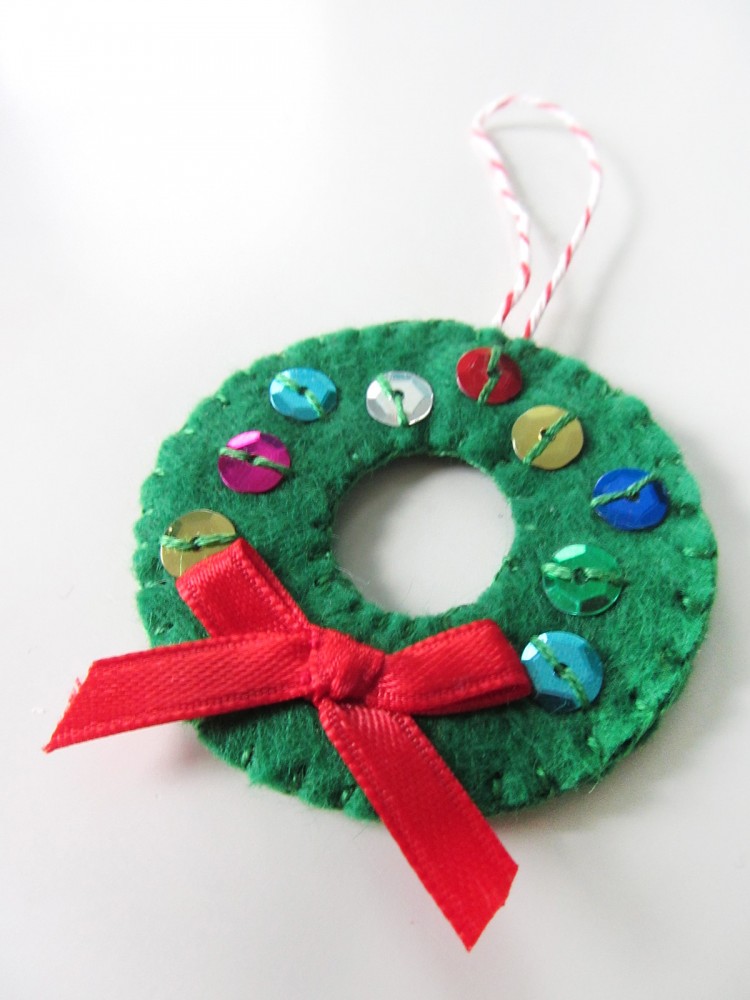
18. Wreath

The wreath is quick and easy, but very pretty. On the front, I took a little bow I’d tied in ribbon and stitched it down using tiny stitches around the knot. I then stitched colorful sequins around the ring on both sides. I stitched the fronts and backs together, making sure to catch a loop of twine at the top.

 Mini Advent Ornaments Set Three

Which one is your favorite of this set? What would you like to see next? I have to design 24, and your idea may be one! Stop by Facebook or Twitter, or comment here with your ideas. I have a couple planned that were reader suggestions!

If you are making a set, I’d love to see your finished ornaments! Tag me on Instagram @iolstephanie (if you are private, I’ll have to request to follow you), mention me on Twitter @iolstephanie or post a picture on our Facebook wall. I love what I’ve seen so far!

I have to say a quick happy birthday to my fabulous big (and only) brother! He is so wonderful, and a big reason why I’d love a sibling for Jax (the husband disagrees.) He has been a big help on all of my more technical projects and is very creative himself. Check out his puppetry!

Happy birthday big bro!! Love you! <3


Minted for the Holidays

It’s hard to believe that December is almost a week old! Have you finished your holiday cards? Me neither! Minted to the rescue!

Throughout the years I’ve gone in many directions with our holiday cards: inexpensive photo cards, handmade cards and even a holiday email. It is so rare to get real, physical mail nowadays. December becomes extra special as your mailbox fills with cards, photos and letters. So when deciding what to send out this year, I thought about what I like to receive. Photos top my list, as do the special handmade ornaments that often decorate the cards sent by my aunt. My plan is to decorate simple felt Christmas tree ornaments to send along with a photo card. (I will be sharing my template with you in an upcoming post!)

minted01

Minted Holiday Cards

I’ve used an number of online photo services and paperies over the years. Minted is an “online stationery store powered by a global community of designers.” It falls in a higher price point than I’m used to, but the quality certainly shows. Last year I splurged on high-quality ornament photo cards, and it’s hard to imagine going back to the shiny drug store style cards.

Minted’s website is beautiful, and the biggest problem (aside from price) is there are too many lovely designs to choose from!

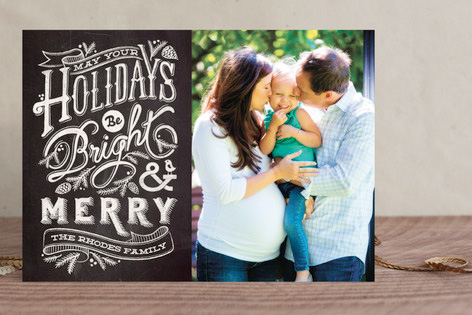
I love all things chalkboard, so this design caught my eye right away. I also like how the photo is separate from the design, so family could cut it off and frame it later.

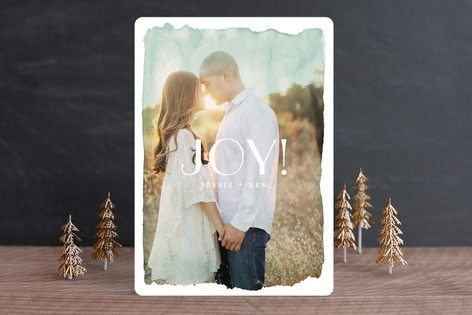
I haven’t taken our family picture yet – I need to get on that a.s.a.p.! If you have a really great photograph, why not make it the star of your card? This design adds a watercolor wash that gives a dreamy feel.

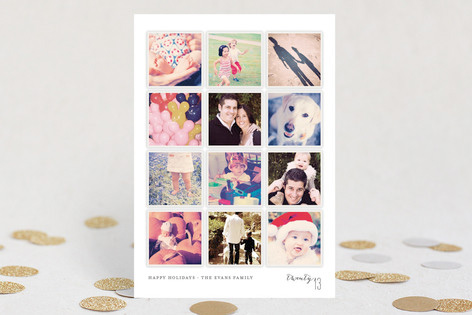
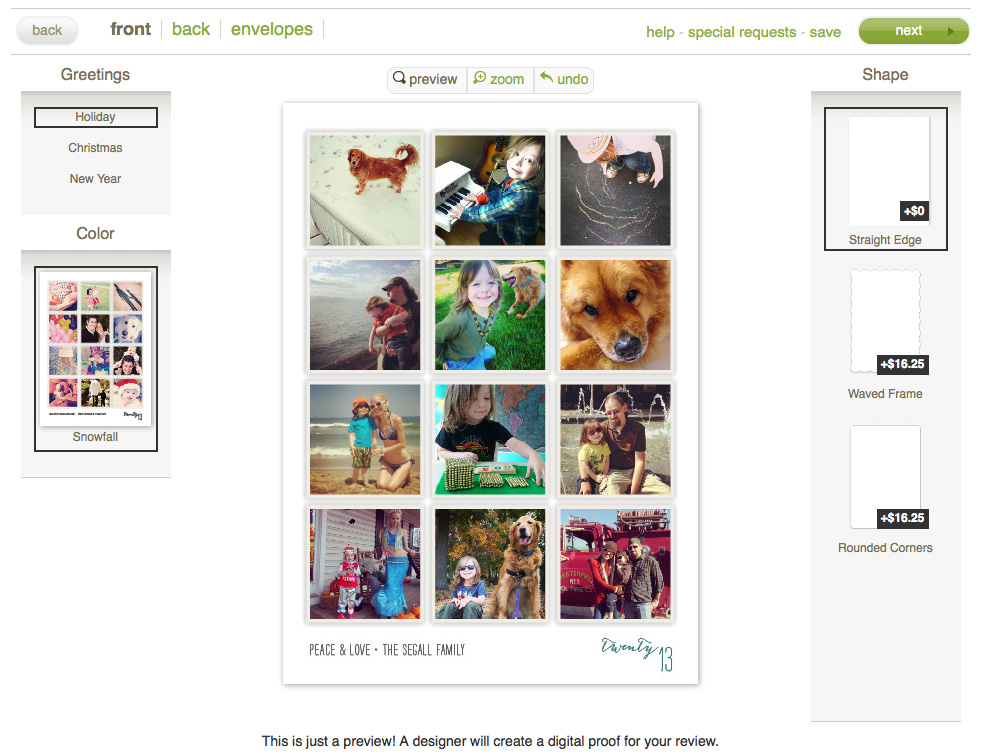
Do you love Instagram as much as I do? I’m considering featuring a look back at my year of photos. This design would be perfect for that! (Want to go all out? Try the Insta-Book!)

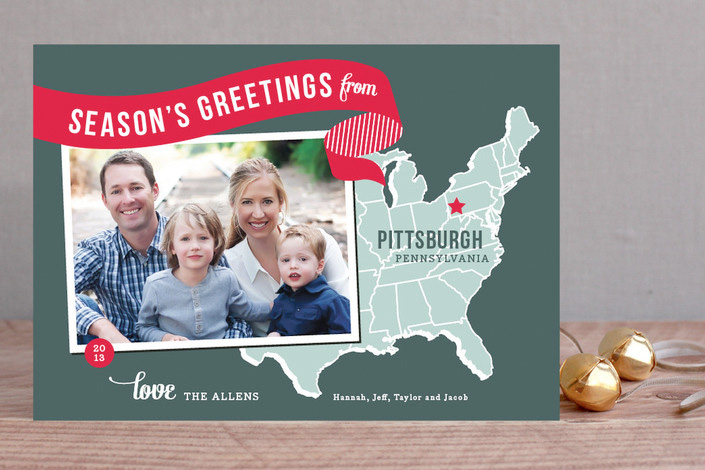
Have you recently moved? I love this design! Choose from the east coast, midwest, or west coast, then mark your hometown with a star!

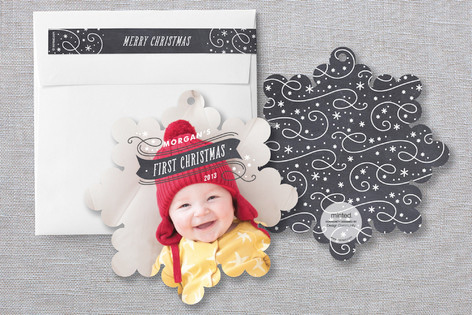
Last year I went with an ornament photo card. These are great because they can be saved and hung on the tree year after year. This snowflake is gorgeous!

All of Minted’s cards are highly customizable. Change the text color and font. Move elements around. Crop and style your photos. For added fees you can add on card backers, convert your flat card to a folded greeting, or included fancy envelopes and address labels.

ss01

Which design would you choose?

This is a sponsored post. Minted invited me to try their service in exchange for store credit. I only post my honest opinions in my reviews, and I’d love to hear yours. Want more Minted? Visit them on Facebook, Pinterest or Twitter.

Mini Advent Ornaments Set Two

Mini Advent Ornaments Set Two

My large sewing project this holiday season was one that was chosen by my readers in our Facebook page: a felt Christmas tree play set! I’ve already share the toddler-friendly tree pattern and tutorial and the first set of ornaments with you, but now it’s time to decorate even more!

Mini Advent Ornaments Set Two

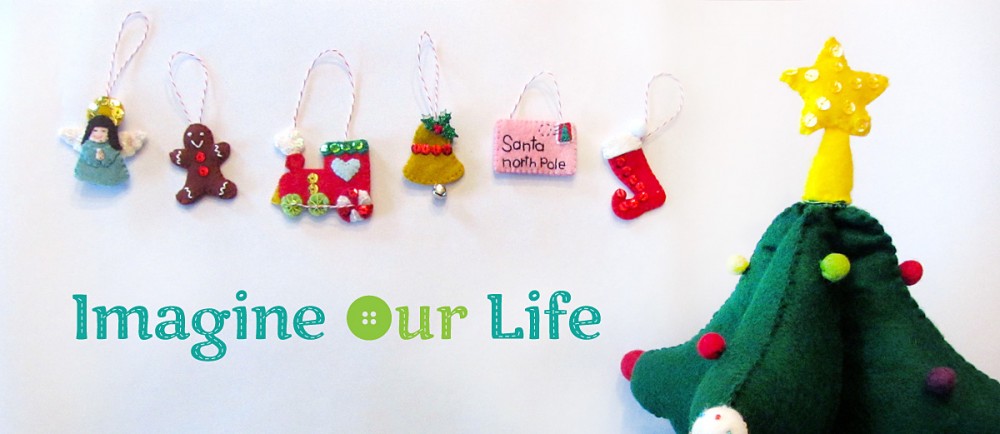
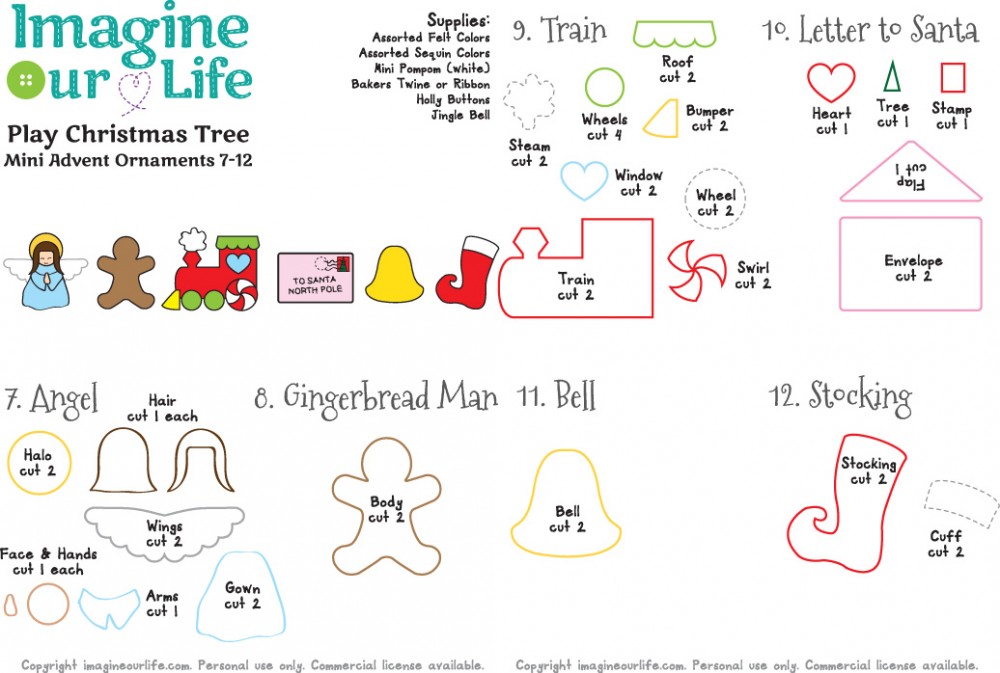
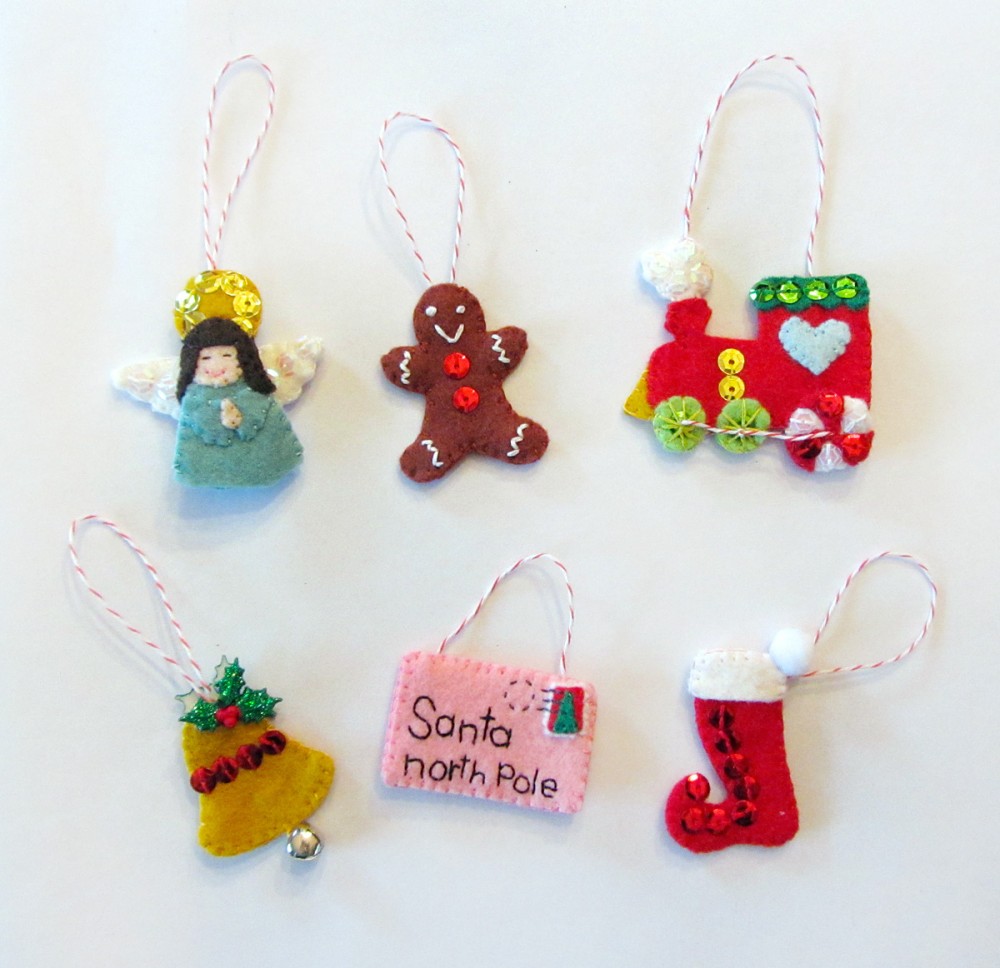
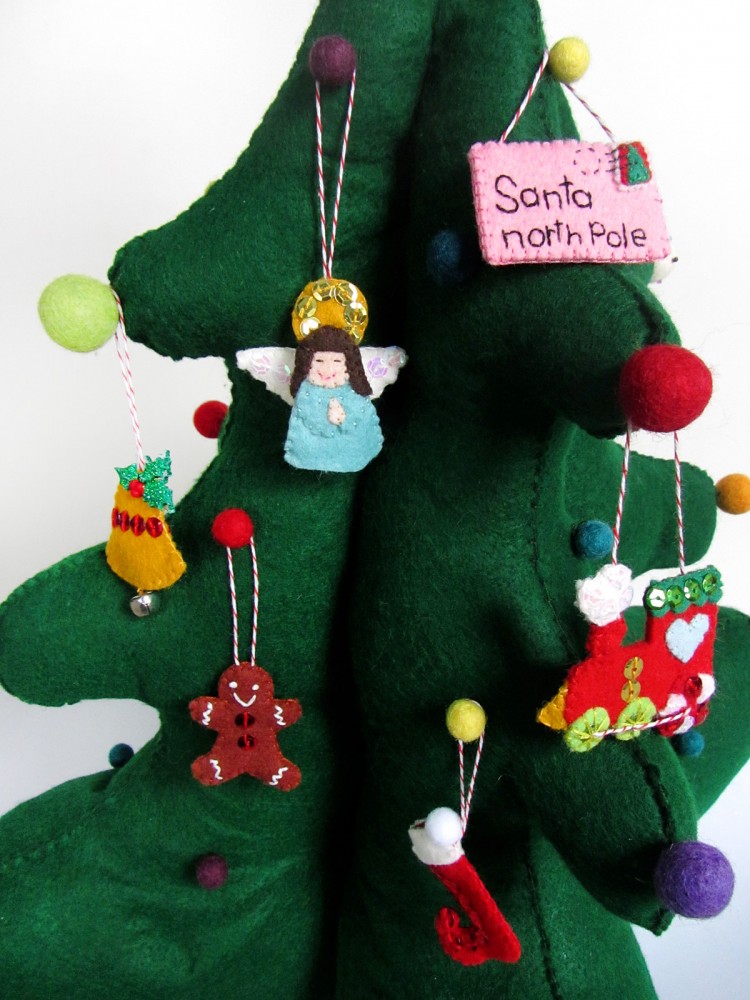
I will be designing 24 ornaments, and giving Jax one to unwrap every day leading up to Christmas. I’ll be sharing the ornaments in batches of 6. I am planning two more sets next week to finish the project. Numbers 7-12 are: an angel, a gingerbread man, a train, a letter to Santa, a bell and a stocking.

To see all the posts in this series, click here.

Mini Advent Ornaments Set Two

What I Used:

  • The Pattern
  • Felt scraps from American Felt and Craft (from my scrap bag – choose any colors you like)
  • Sequins (I used Classic Red, Moss, Gold and Crystal)
  • Felt Glue (great for holding tiny bits in place when pins are too big!)
  • Mini Pompom (I used white)
  • Baker’s Twine (I’m on year two using this cone)
  • Jingle Bell
  • Holly Embellishments (These, but try to get them at the craft store cheaper)

Mini Advent Ornaments Set Two

For all of the ornaments: I cut pieces of baker’s twine, doubled it over and tied a knot in the ends. When stitching the tops of the ornaments together, I made sure the knot of the twine loop was inside. I also made sure to stitch through the knot to secure the loop.

Mini Advent Ornaments Set Two

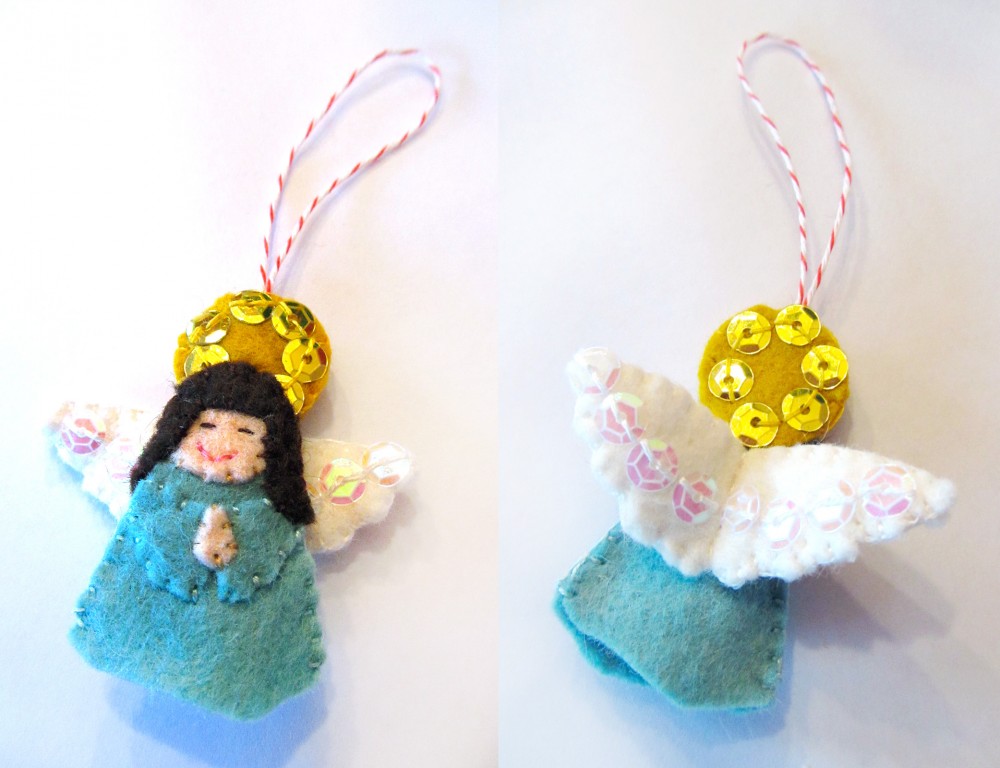
7. Angel

This little angel is so very special to me. I recently lost a loved one very suddenly. She adored angels. This one is for her.

I started by adding the sequins. On the back of the wings, I sewed a line of crystal sequins all the way across. On the front of the wings, I stitched 3 on each end. I stitched the two sides together around the outside. For the back of the halo, I stitched on a ring of 6 gold sequins. On the front of the halo, I stitched a ring of 5 (none where the head overlaps.) I put the two sides together with the back hair piece layered in place between, added a loop of twine and sewed the halo around the outside.

I then tacked down the face, arms, hands and front hair to the front gown piece. I stitched down the arms, hands and chin, then made a back stitch mouth and eyes. I tacked the halo/back hair piece to the back of the gown, then laid the wings in place. I back stitched a vertical line down the center of the wings to attach them. I stitched up the sides of the gown, and stitched the hair on, sewed the front and back together at the sides.

Mini Advent Ornaments Set Two

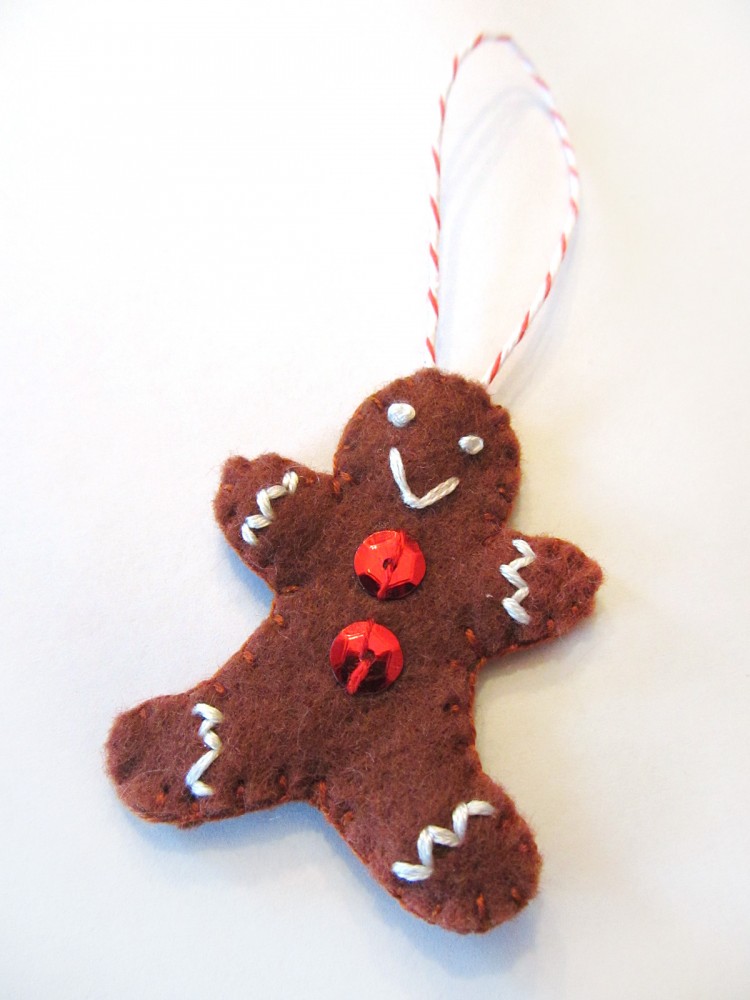
8. Gingerbread Man

The gingerbread man works up quickly! Using 4 strands of white floss (instead of my normal 2) I back stitched in a zig zag at his ankles and wrists on both sides. On the front, I gave him two red sequin buttons, a smile (made like a lazy daisy stitch) and two French knot eyes. I stitched the two sides together with a loop of twine at the top.

Mini Advent Ornaments Set Two

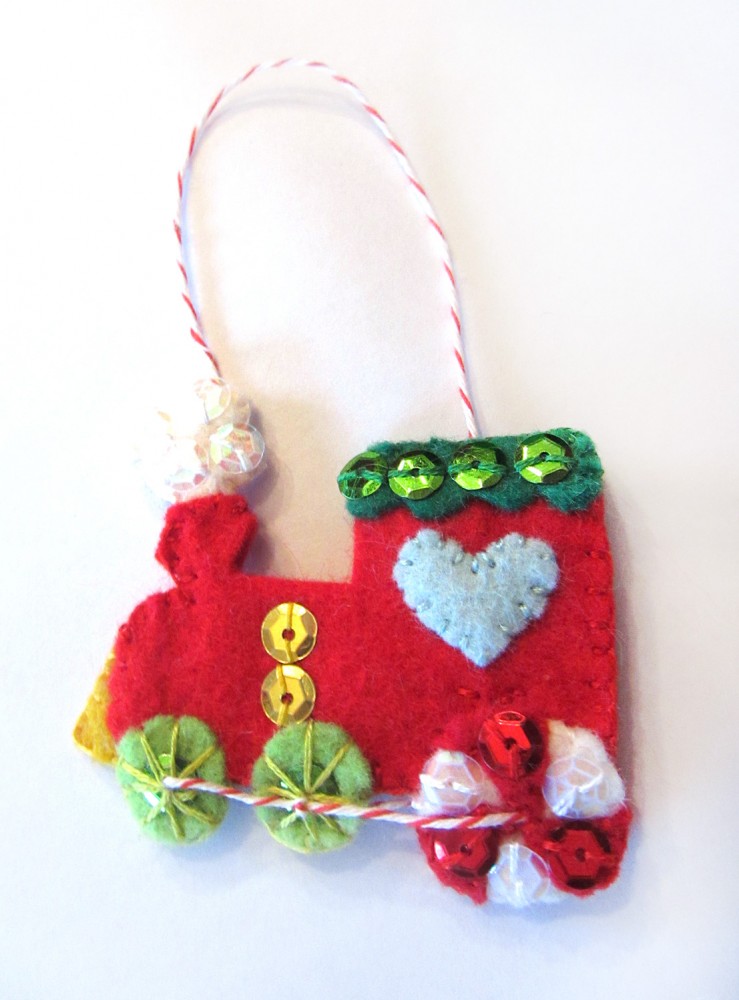
9. Train

The little red train is the same on both sides. I started by stitching crystal sequins to both sides of the steam, then sewing both sides together. I stitched the two bumper sides together. I glued the red swirls to the big white wheels then stitched them down and added red and crystal sequins. I stitched the wheels in place on the train bodies at their tops.

I used felt glue to tack down the roof pieces, windows and green wheels. I stitched the windows down and added rows of green sequins along the roof pieces. on the green wheels, I stitched a green sequin to the center of each using a starburst of long stitched to look like spokes. I decorated each train body with two gold sequins. I laid the two train sides together with the bumper and steam in place, as well as a piece of twine at the top (knotted at each end) then sewed them together around the outside.

Using a large-eyed needle, I threaded a piece of baker’s twine and knotted the end. I stuck the needle between a gap in the two sides of one of the candy wheels and came up through the center. I made a loop in the center of the middle green wheel, then went down through the center of the front green wheel. My needle came out of the center of the front green wheel on the other side, and I repeated everything in reverse. I ended it by bringing the needle out of one of the gaps in the last candy wheel, tying a knot as close as I could, cutting the twine and tucking the knot into the wheel.

Mini Advent Ornaments Set Two

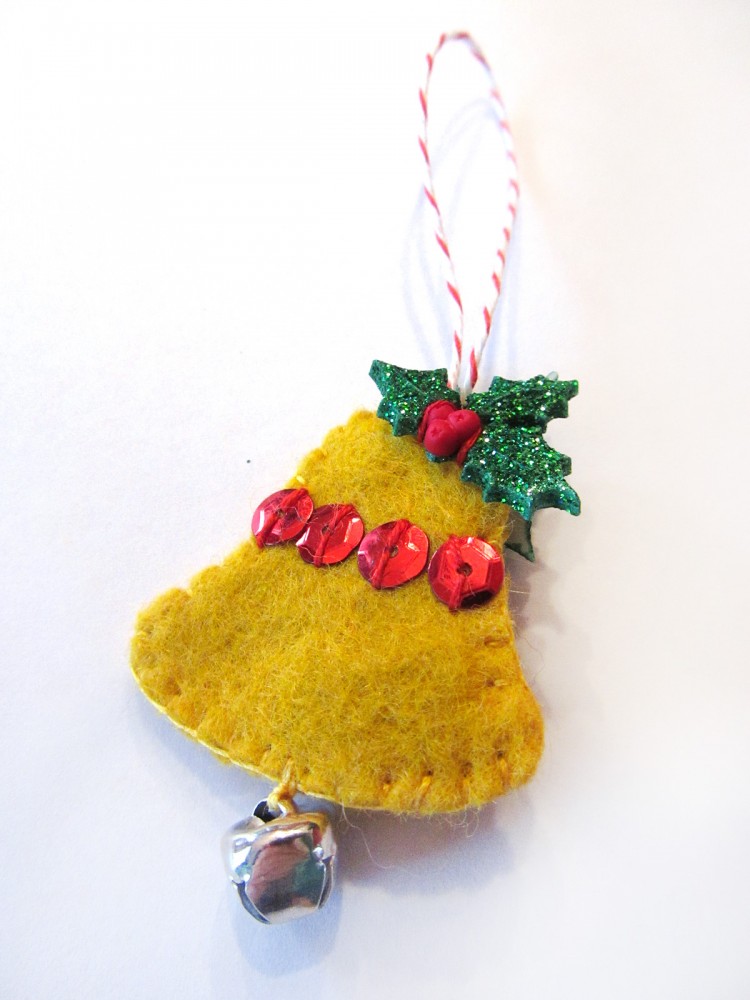
10. Bell

The little gold bell is a fun addition to the tree play set, as it really jingles! On each side, I sewed a row of red sequins. I stitched each side together with a loop of twine at the top, pausing at the bottom to sew a jingle bell in place. I stitched holly embellishments on each side using red thread around the berries.

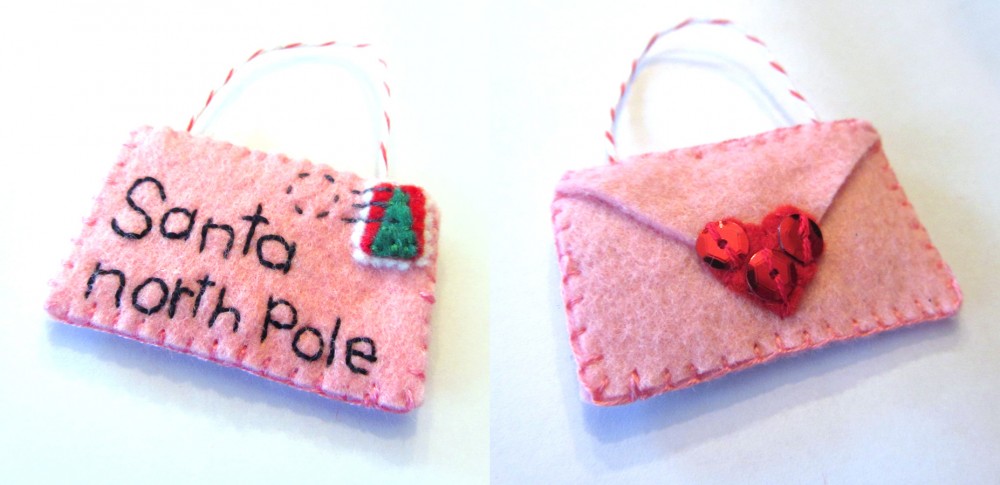
Mini Advent Ornaments Set Two11. Letter to Santa

This little letter has a long way to go! I started by freehand stitching the words “Santa north pole” using back stitch. I tried to make it look like little kid handwriting. I cut a piece of white felt a little larger than the red stamp and used my micro-tip scissors to pink the edges. (You could use pinking shears, but I thought mine were too larger for the scale of the stamp.) I glued the three pieces of the stamp together, then sewed them to the letter front all around the red rectangle. I also sewed the green tree down, but left the white pinked edge loose. Using gray floss, I stitched a dashed circle and three back stitched lines to make the postmark.

For the back of the envelope, I tacked the tip of the fold down with glue, then stitched the red heart on top. I added three red sequins. I stitched the front and back of the envelope together with a length of twine (with knots at each end) in the top.

Mini Advent Ornaments Set Two

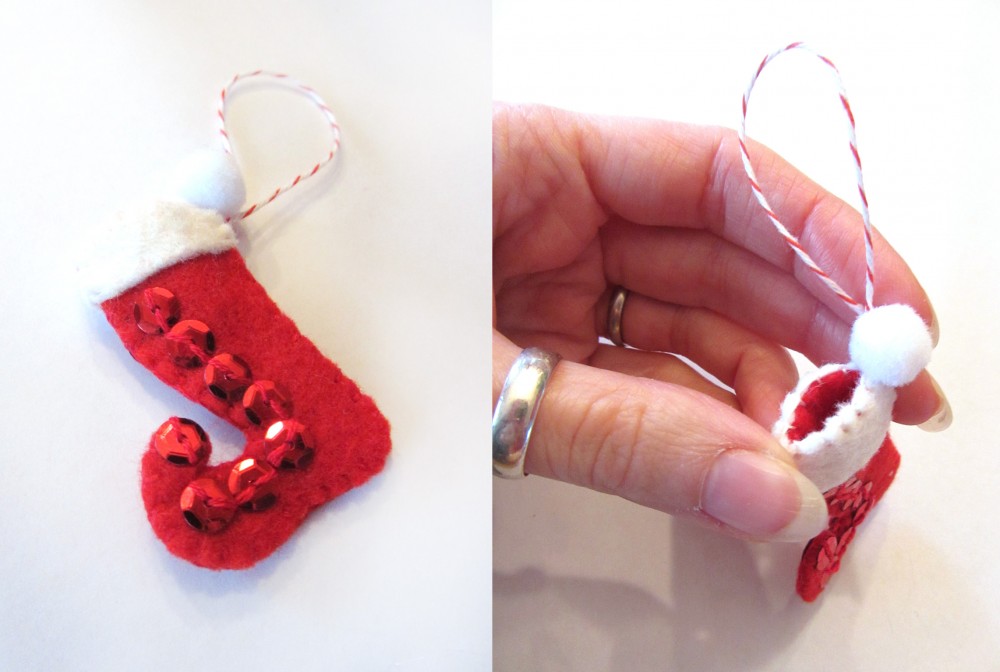
12. Stocking

The little elf stocking actually opens! I started by stitching a line of red sequins on each of the stocking sides. I then sewed the two sides together, leaving the top open. I tacked the white cuffs in place with glue, catching a loop of twine in one side, then sewed up the sides and around the top. I added a tiny white pompom to the side with the twine loop.

 Mini Advent Ornaments Set Two

Which one is your favorite of this set? What would you like to see next? I have to design 24, and your idea may be one! Stop by Facebook or Twitter, or comment here with your ideas.

If you are making a set, I’d love to see your finished ornaments! Tag me on Instagram @iolstephanie (if you are private, I’ll have to request to follow you), mention me on Twitter @iolstephanie or post a picture on our Facebook wall.

Mini Advent Ornaments Set One

Mini Advent Ornaments Set One

My large sewing project this holiday season was one that was chosen by my readers in our Facebook page: a felt Christmas tree play set! I’ve already share the toddler-friendly tree pattern and tutorial with you, but now it’s time to decorate!

Mini Advent Ornaments Set One

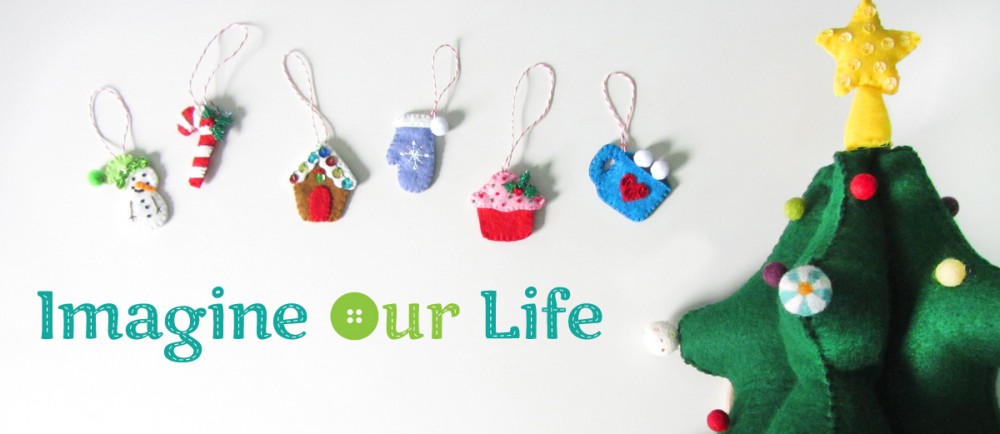
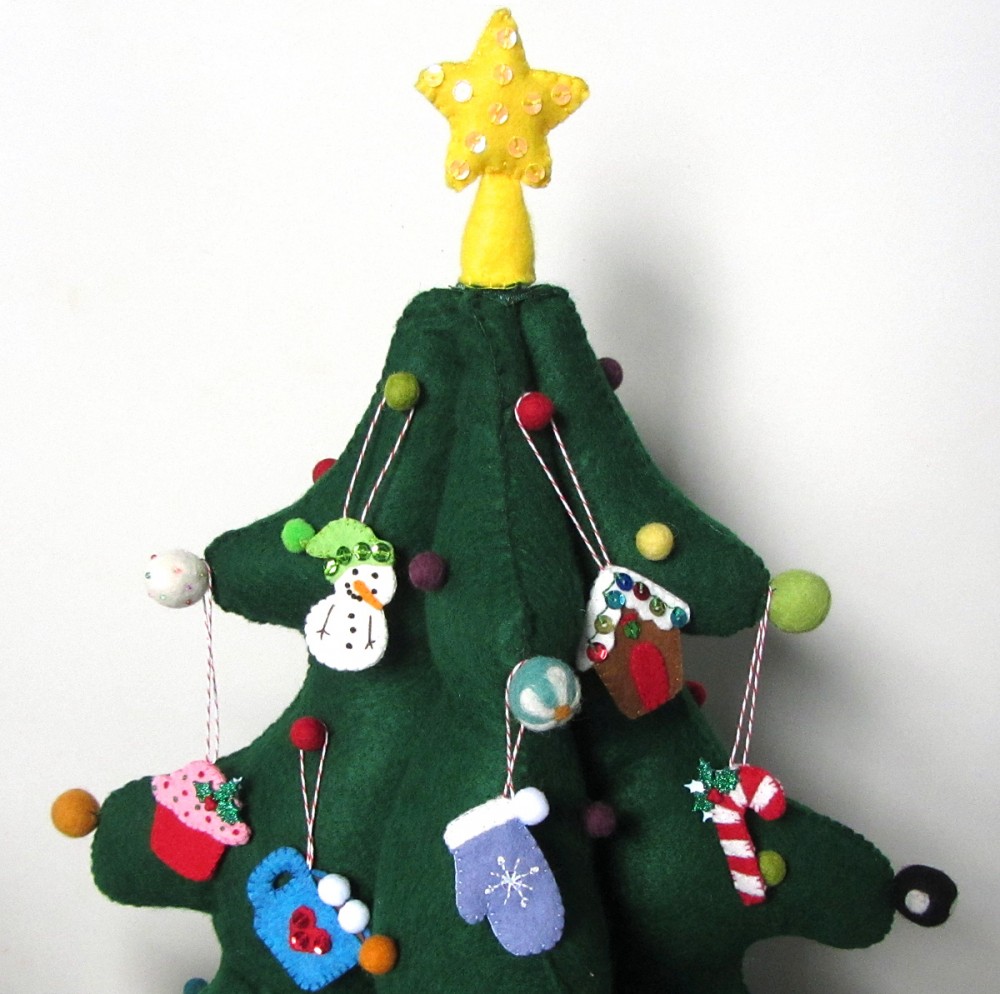
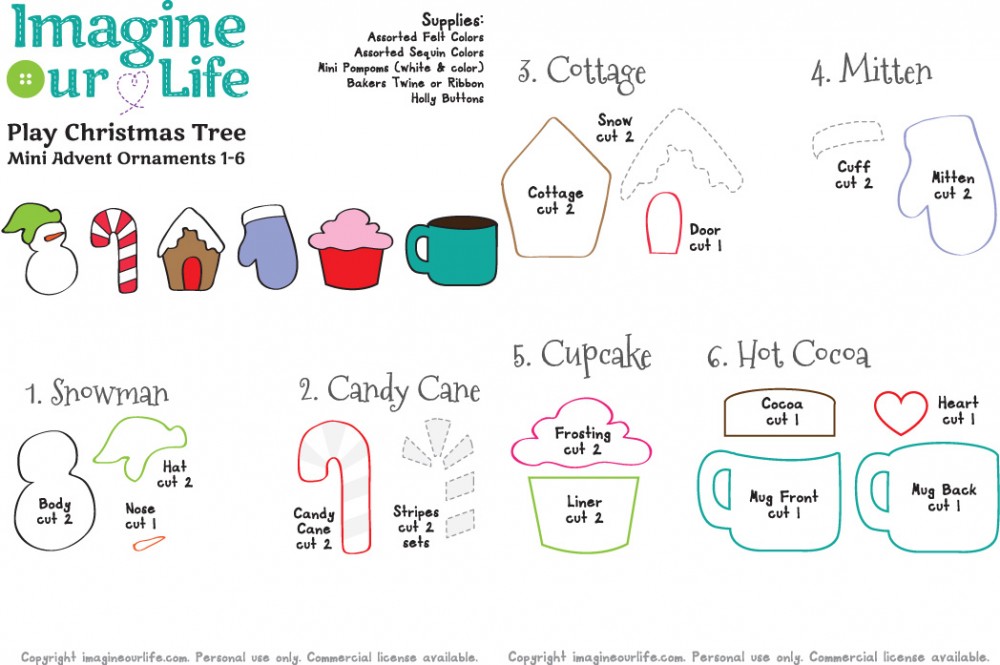
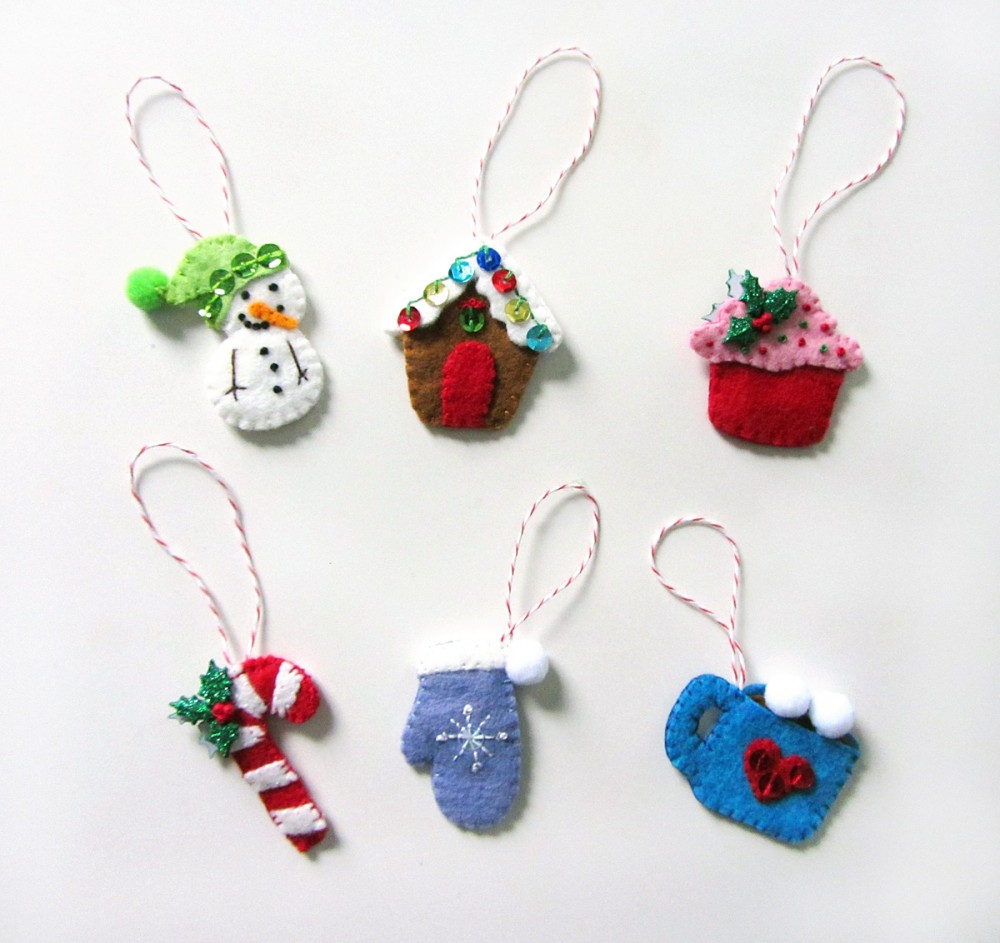
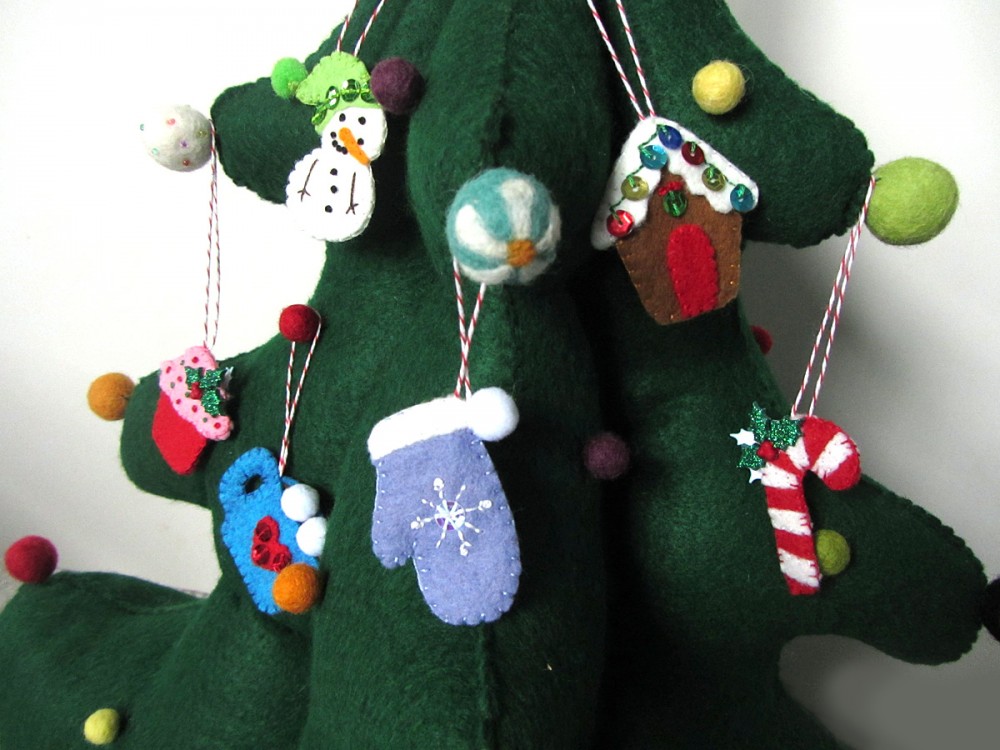
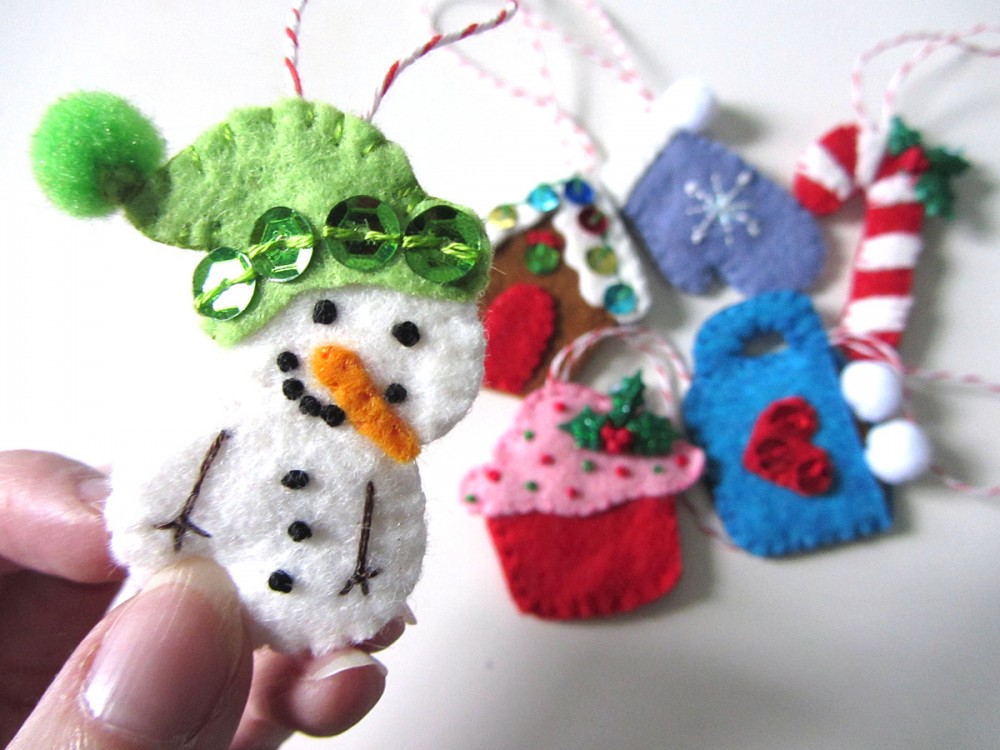
I will be designing 24 ornaments, and giving Jax one to unwrap every day leading up to Christmas. I’ll be sharing the ornaments in batches of 6. I am planning 2 sets this week and two sets next week. The first 6 are ready for you: a snowman, a candy cane, a cottage, a mitten, a cupcake and a mug of hot cocoa.

To see all the posts in this series, click here.

Mini Advent Ornaments Set One

What I Used:

  • The Pattern
  • Felt scraps from American Felt and Craft (from my scrap bag – choose any colors you like)
  • Sequins (I used Confetti and Crystal)
  • Felt Glue (great for holding tiny bits in place when pins are too big!)
  • Mini Pompoms (I needed white and a green)
  • Baker’s Twine (I’m on year two using this cone)
  • Holly Embellishments (These, but try to get them at the craft store cheaper)

Mini Advent Ornaments Set One

For all of the ornaments: I cut pieces of baker’s twine, doubled it over and tied a knot in the ends. When stitching the tops of the ornaments together, I made sure the knot of the twine loop was inside. I also made sure to stitch through the knot to secure the loop.

Mini Advent Ornaments Set One

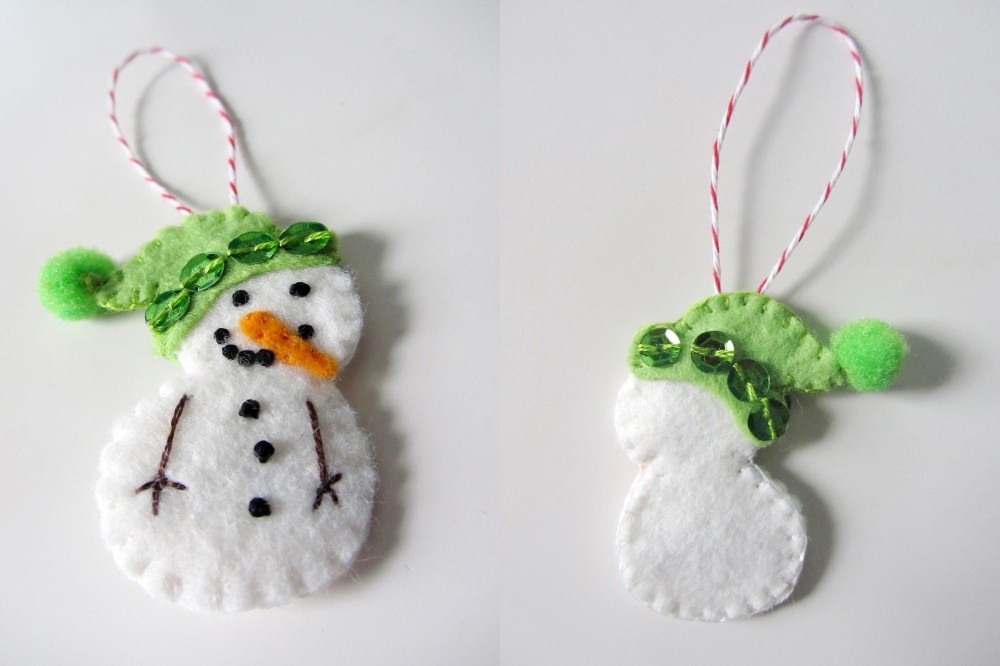
1. Snowman

This little snowman makes me smile! The way he is holding his tiny stick arms reminds me of how Jax stands and wiggles when he is really excited about something but trying not to show it. To making him, I started by embellishing the front body piece. I stitched the carrot nose on, then used French knots to make eyes, mouth and buttons. His arms are just long stitches with some little ones at the ends for fingers. I then sewed green sequins onto the brim of both sides of this hat while they were layered on their corresponding body piece. I stitched all the way around both sides of the ornament, adding the twine loop at the top. I finished him by stitching a tiny green pompom to the tip of his stocking hat.

Mini Advent Ornaments Set One

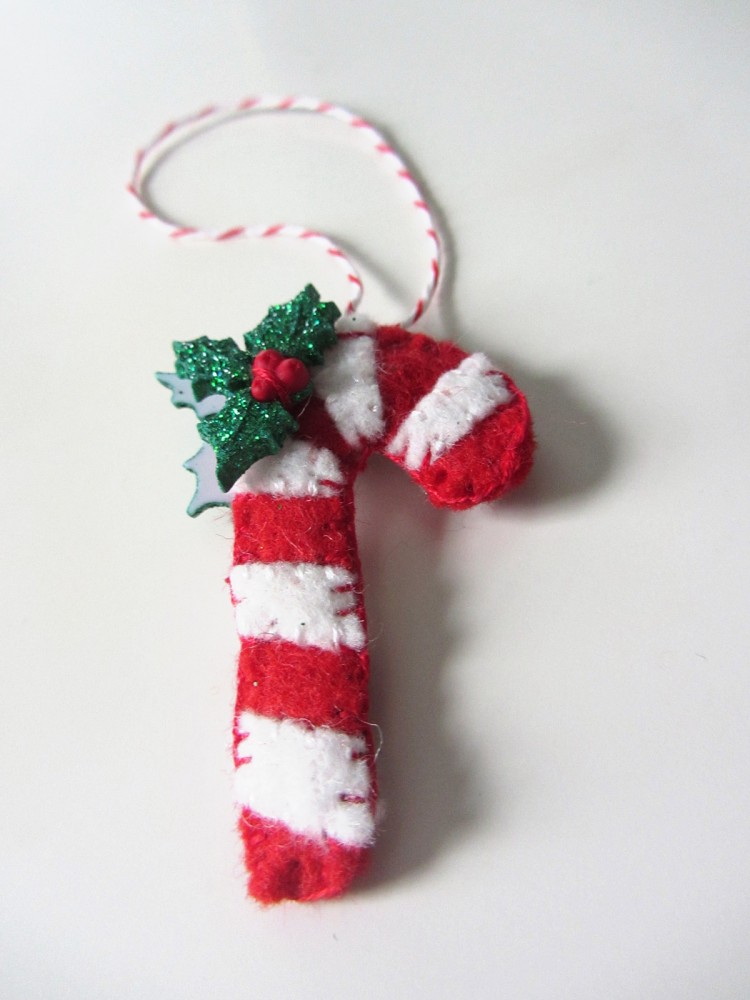
2. Candy Cane

I had to make a candy cane for Jax’s little tree! They are such a Christmas classic. To make the candy cane, I lightly glued the white stripes onto the two red canes. I stitched down the white parts, then sewed both sides together, adding a twine loop at the top. On both sides of the candy cane, I stitched on holly embellishments. These aren’t buttons, so I used red thread and attached them near the berries.

Mini Advent Ornaments Set One

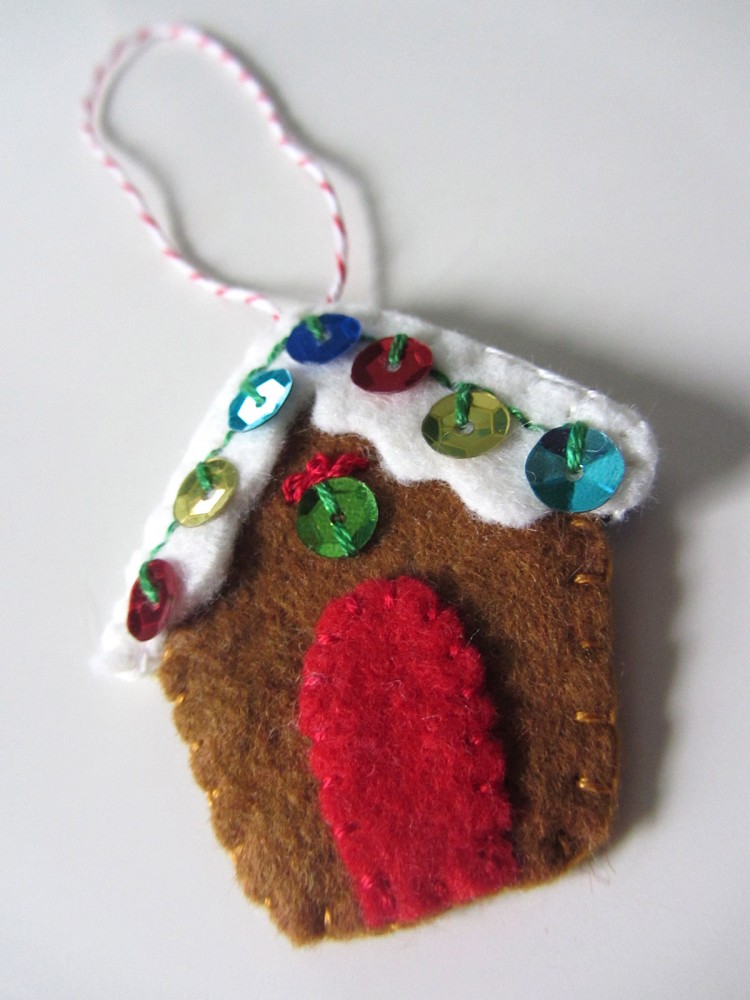
3. Cottage

The Christmas cottage is very simple but very sweet! I used sequins to make colorful strings of lights. I started by embellishing the front of the house. I stitched on the red door, then sewed a green sequin on as a wreath. Above the wreath, I stitched two loops (lazy daisy stitch) and a French Knot to made a bow. I then took the two snowy roof pieces, laid them on their corresponding house pieces and stitched the lights on each. I did this with back stitch in a swagged line, with one stitch into the top of each sequin light to allow them to dangle. I stitched around both sides of the cottage, catching the twine loop in the top.

Mini Advent Ornaments Set One

4. Mitten

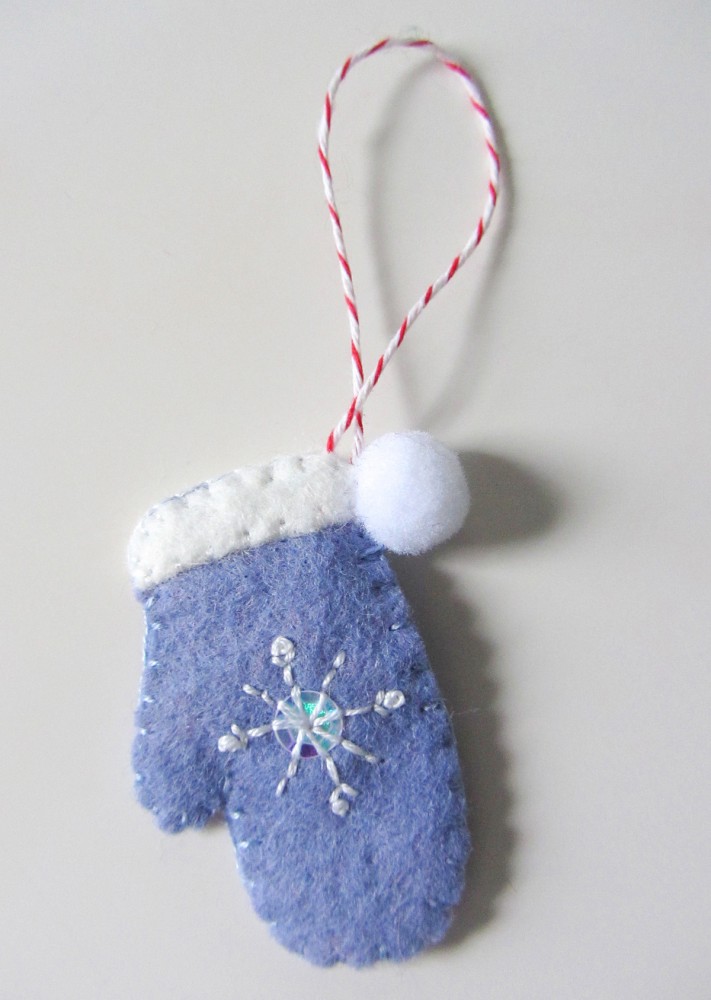
This little mitten turned out so dainty and cozy! I decorated each side with the same stitched pattern of a starburst in back stitch and a few French Knots. There is a crystal sequin at the center of each starburst. I stitched the white cuffs onto each side, then sewed the sides together with a twine loop at the top corner. I added a little white pompom to finish it.

Mini Advent Ornaments Set One

5. Cupcake

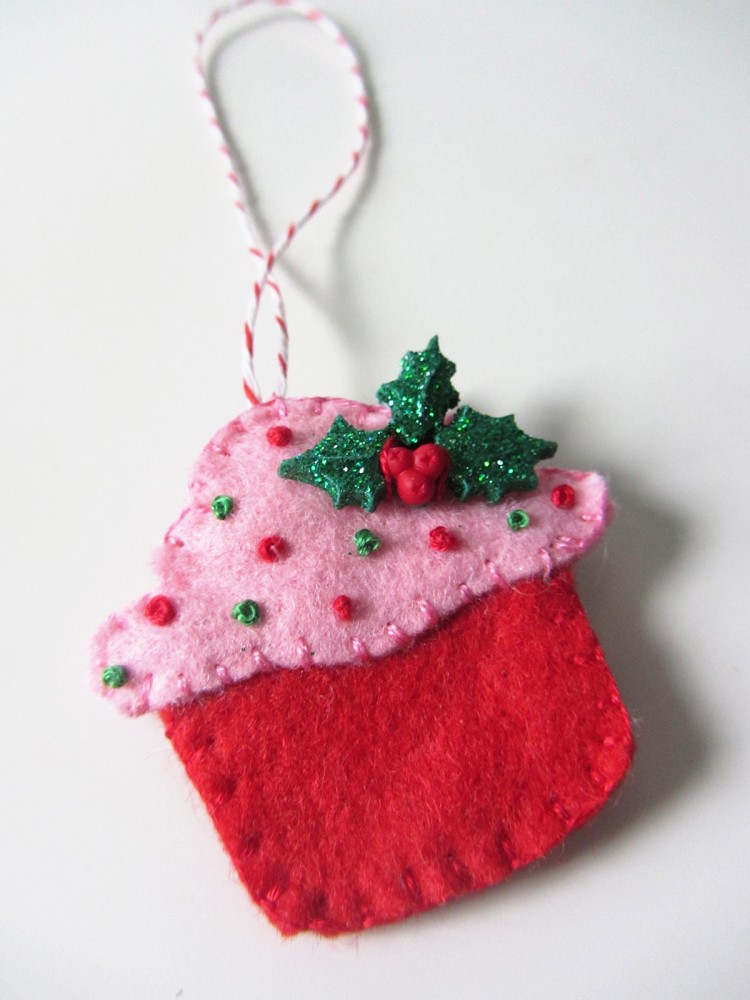
This little holiday cupcake could be decorated any way you’d like! I went with pink, as Jax loves strawberry *anything*. I stitched the frosting pieces to the liners, then embellished both sides with red and green French knots. I sewed the two sides together with a loop of twine at the top, then stitched holly embellishments onto each side.

Mini Advent Ornaments Set One

6. Hot Cocoa

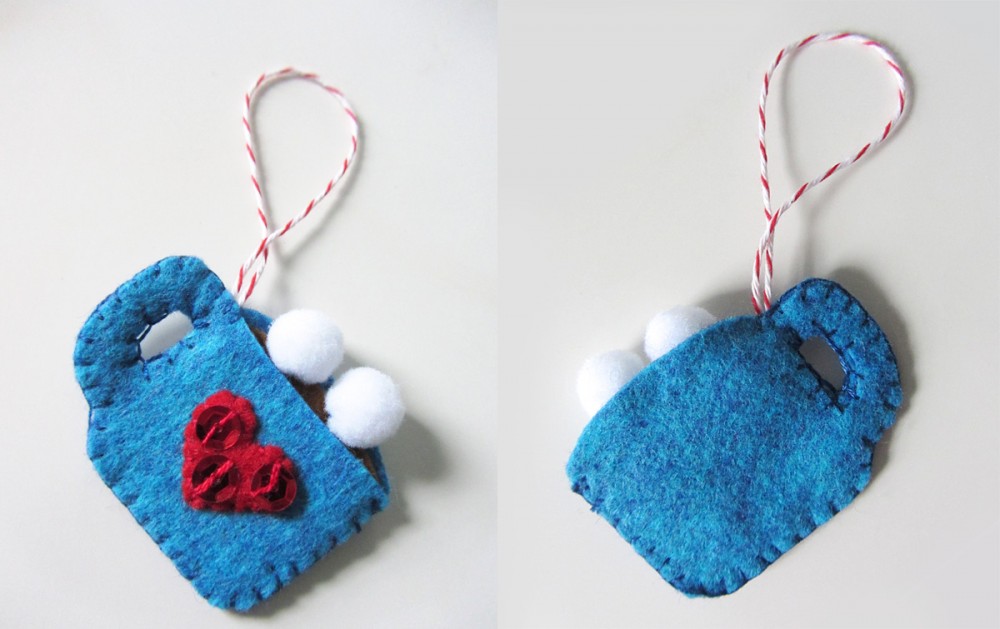
I love this little mug of hot cocoa! you might recognize it from the camping quiet book page. I did make a few changes, though. I started by sewing a red heart onto the front, then adding three red sequins. I glued the brown cocoa to the inner side of the mug back, then sewed the front and back together, I didn’t sew around the top, so I attached the twine loop at the top of the handle. No cocoa is complete without marshmallows, so mine were added via stitched-on mini pompoms.

Mini Advent Ornaments Set One

Which one is your favorite? What would you like to see next? I have to design 24, and your idea may be one! Stop by Facebook or Twitter, or comment here with your ideas. I’d love to see your finished ornaments! Tag me on Instagram @iolstephanie (if you are private, I’ll have to request to follow you.)

Mini Advent Ornaments Set One

Stay tuned for mini ornaments 7 – 12 later this week. I’ll be posting sneak peeks on Facebook and Instagram.


Animals of Europe for the Montessori Wall Map & Quietbook with Printables

Animals of Europe for the Montessori Wall Map & Quietbook with Printables

Are you ready for the next installment of the Montessori wall map? This has been the most epic sewing project ever… If you haven’t been introduced to our Montessori wall map and quiet book yet, you can read all about it here. This post is for the continent of Europe.
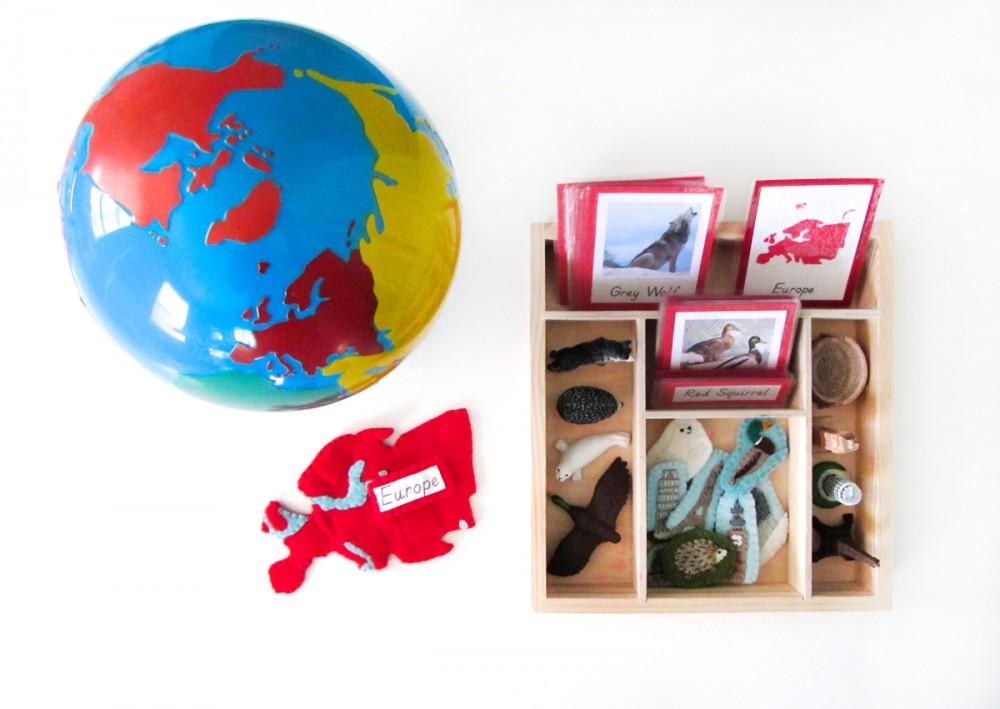
Animals of Europe for the Montessori Wall Map & Quietbook with Printables

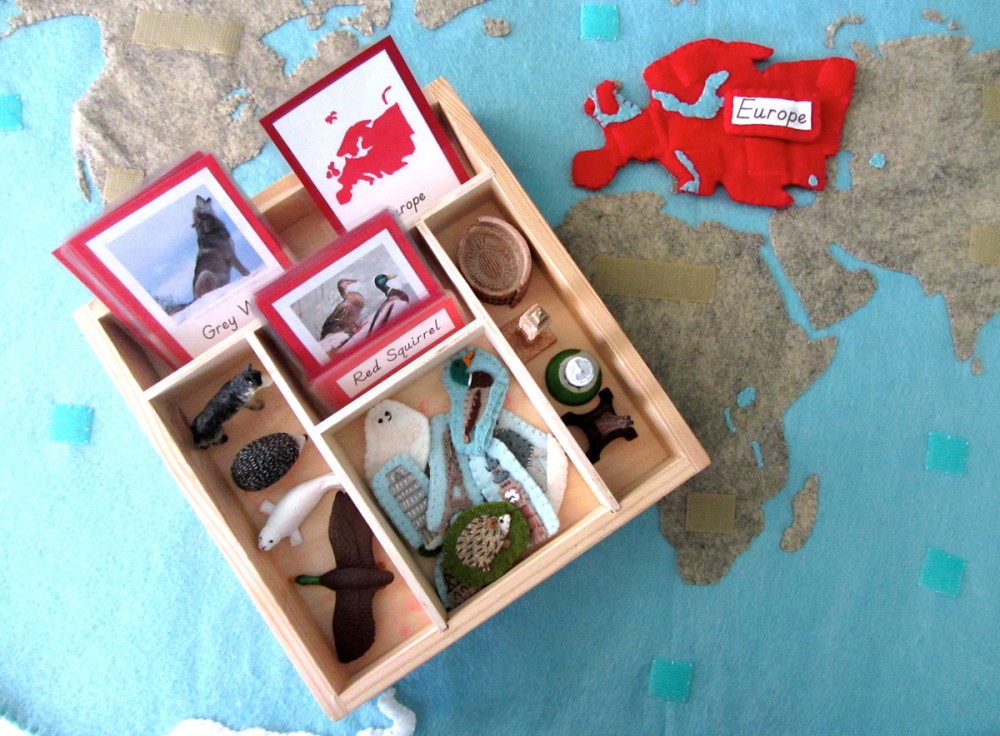
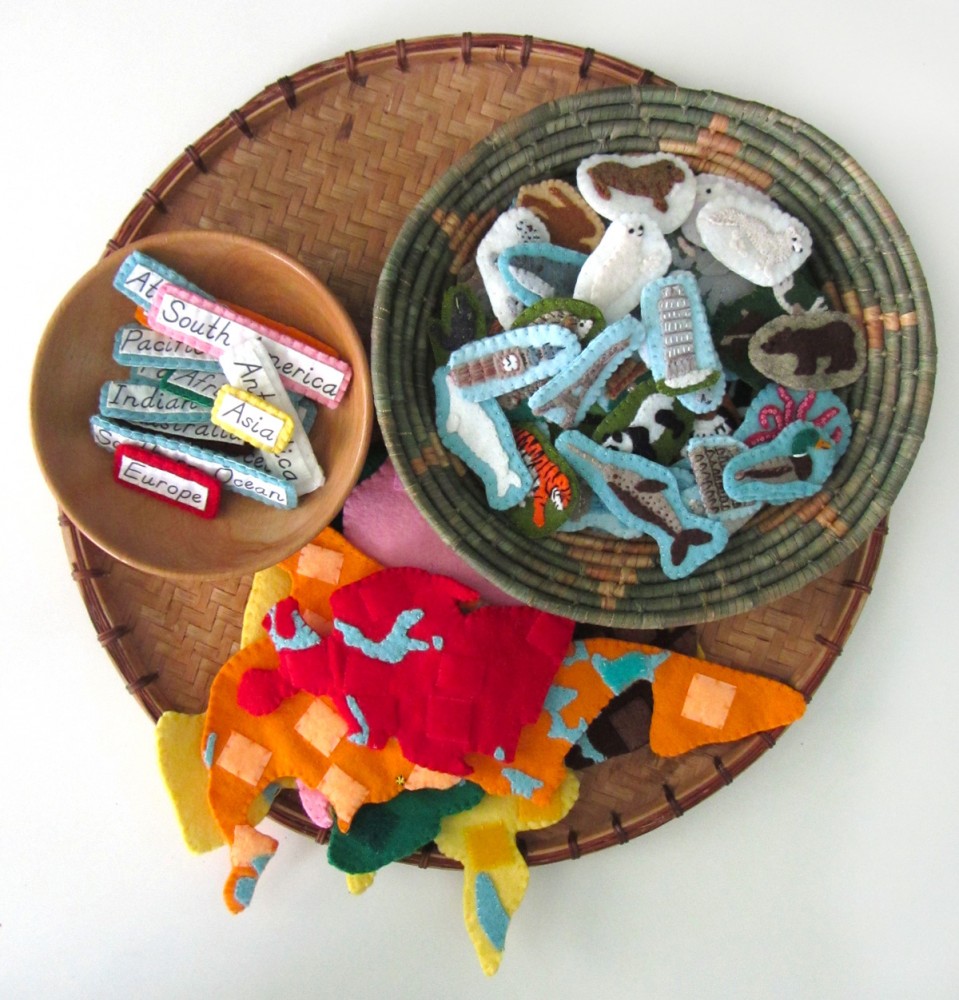
Our Europe 3-Part Card Tray

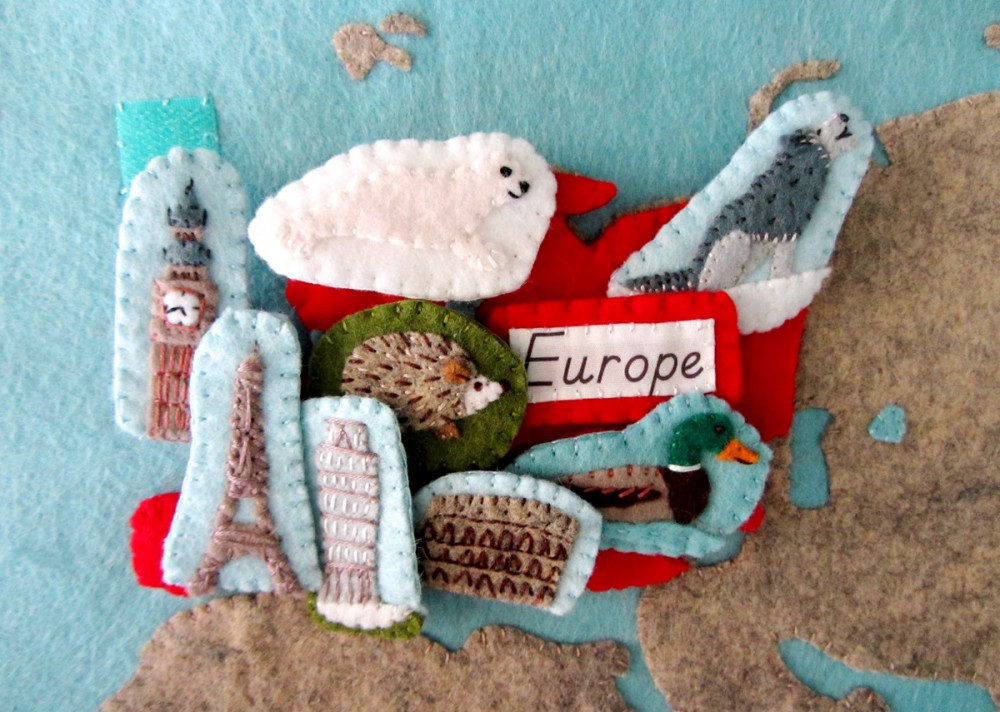
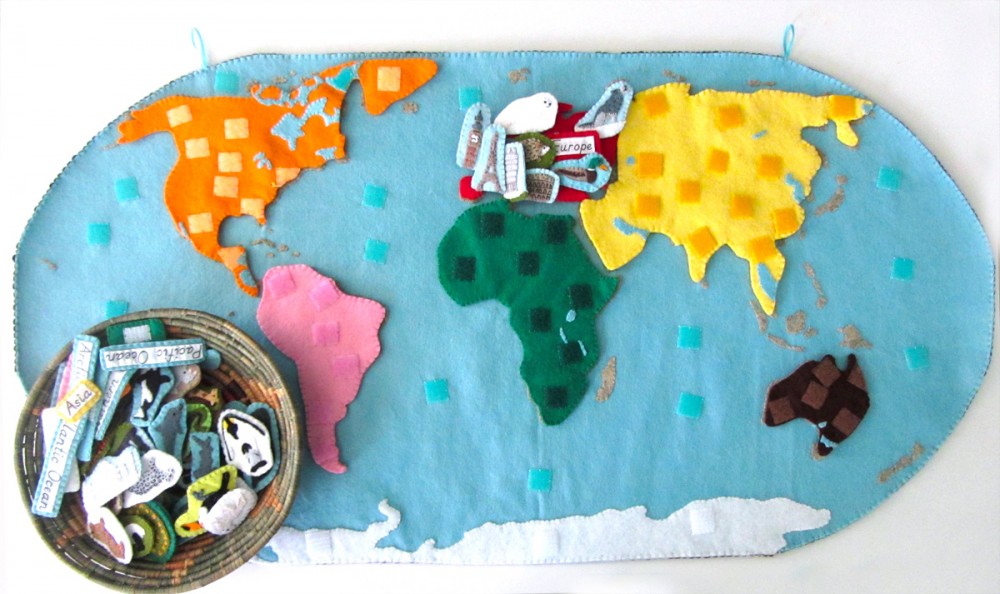
Every continent (and the oceans) will have landmarks and animals. Europe has so many amazing landmarks! I ended up choosing an even mix of animals and landmarks for this project.

Overview and Map PatternsAfricaAntarcticaAsia • Europe
North AmericaOceansSouth America

Animals of Europe for the Montessori Wall Map & Quietbook with Printables

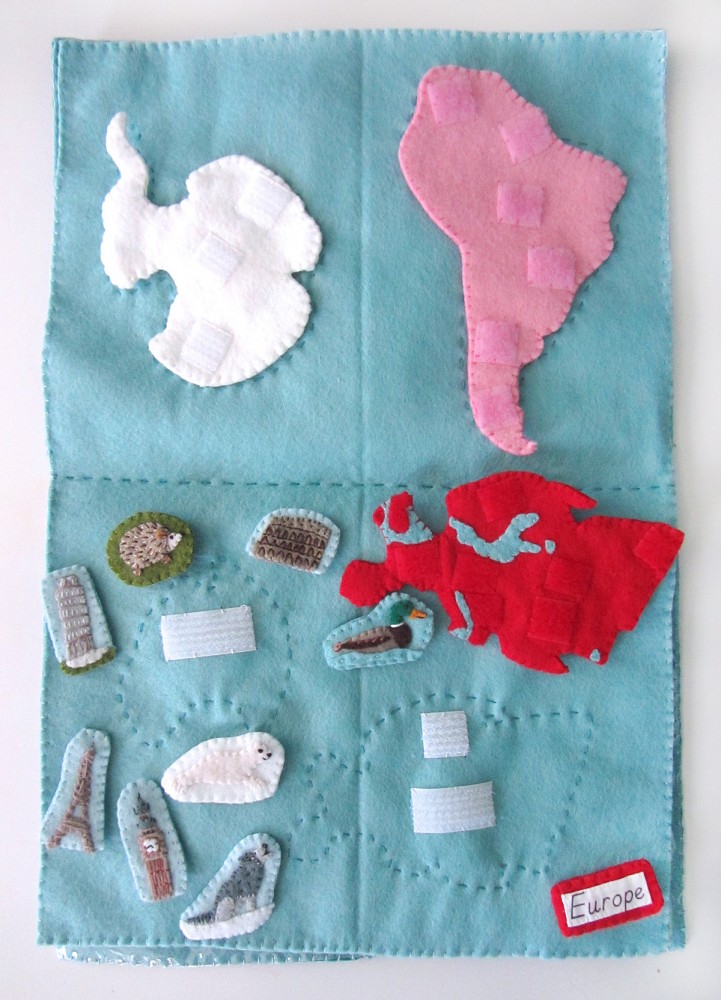
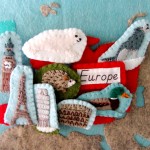
Those of you who follow along on Facebook or Instagram have been seeing what I’ve been creating for Europe. Things are definitely a tight squeeze when you put everything on the map at once. There is just so much awesome in a small area! I made: the Eiffel Tower, Big Ben, the Tower of Pisa, the Colosseum, a harp seal, a mallard, a hedgehog, and a grey wolf. My choices were influenced by which figurines were available from SafariLTD’s TOOBs.
Animals of Europe for the Montessori Wall Map & Quietbook with Printables
This project is totally free for you to use (though commercial use requires a license.) If you’d like to support my designs, one way is to make a purchase off of Jax’s Amazon wishlist. I use his list to bookmark school and craft items until I am able to get them. For more ways to contribute to this site, visit my support page.

Materials I Used

The Pattern (see the first post for the main patterns)

Felt from American Felt & Craftbig apple [red], cilantro [olive green], pastry [golden taupe], gold nugget [gold], chocolate [deep brown], fresh linen [off white], chai [taupe], doe [brown], jade [green], sparrow [light blue], ice [aqua blue], stone [heather taupe], elephant [charcoal], graywhite and black.

Hook & Loop – I used white snag-free Velcro on the backs of all these pieces and red hook & loop (loop only) on the front of the Europe puzzle piece. My red hook & loop was from here.

Felt glue to tack down the pieces before sewing, printer fabric for the continent label, embroidery floss in colors to match the felt and micro tip scissors.

Animals of Europe for the Montessori Wall Map & Quietbook with Printables

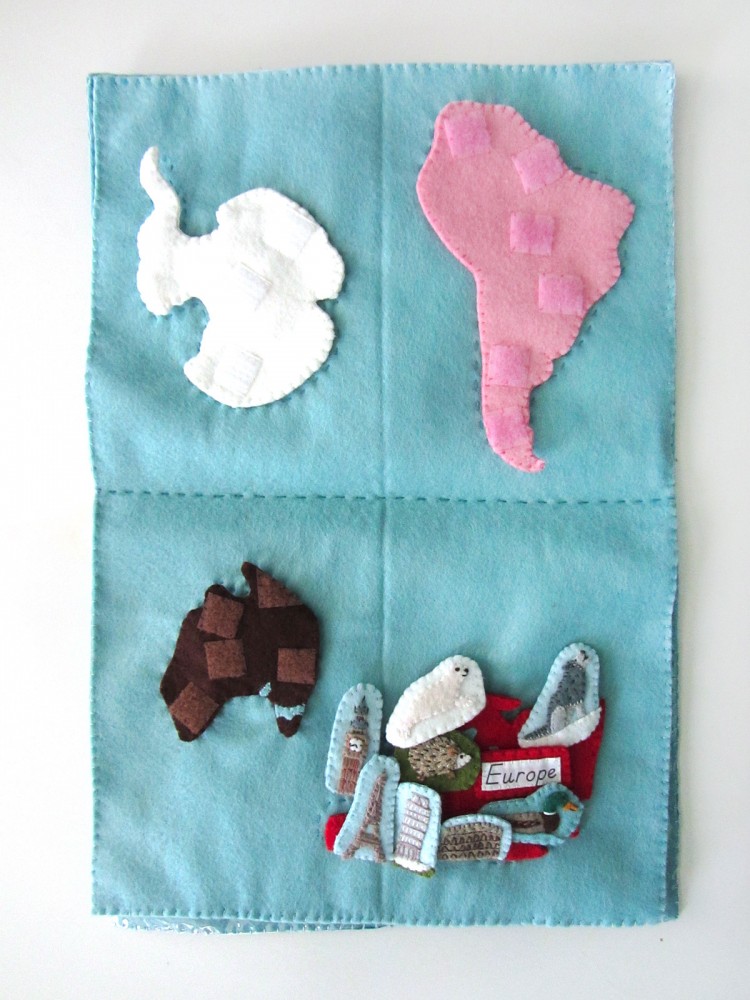
For the Europe quiet book page, I sewed a running stitch (dashed) outline around the Europe pattern piece and sewed down snag-free Velcro to line up with the Velcro on the back of the Europe piece.

Europe: (Felt used: big apple red) For the Europe continent puzzle piece, I sewed down pieces of red loop Velcro. On the back, I sewed strips of white snag-free Velcro to correspond with the Velcro in the quietbook and the wall map. I finished it by sewing the two sides together around the edge with a blanket stitch.
Animals of Europe for the Montessori Wall Map & Quietbook with Printables

Label: (Felt used: big apple red) For the continent label, I folded under the edges (just a tiny bit to hide the rough edges) and creased it with my nails. The printer fabric held the folds nicely without ironing. Then I stitched the label to some red felt and trimmed it down to be a border. I cut a matching felt rectangle for the back, sewed snag-free Velcro to it and then sewed both sides together.
Animals of Europe for the Montessori Wall Map & Quietbook with Printables

For all of the animals, I started by gluing the pieces down to a scrap of background felt with a very light amount of felt glue. I glue multiple animals at a time to give them time to dry. I sewed them down, trimmed the background and cut a matching backing piece. I sewed snag-free Velcro to the back and sewed both sides together with a blanket stitch.
Animals of Europe for the Montessori Wall Map & Quietbook with Printables

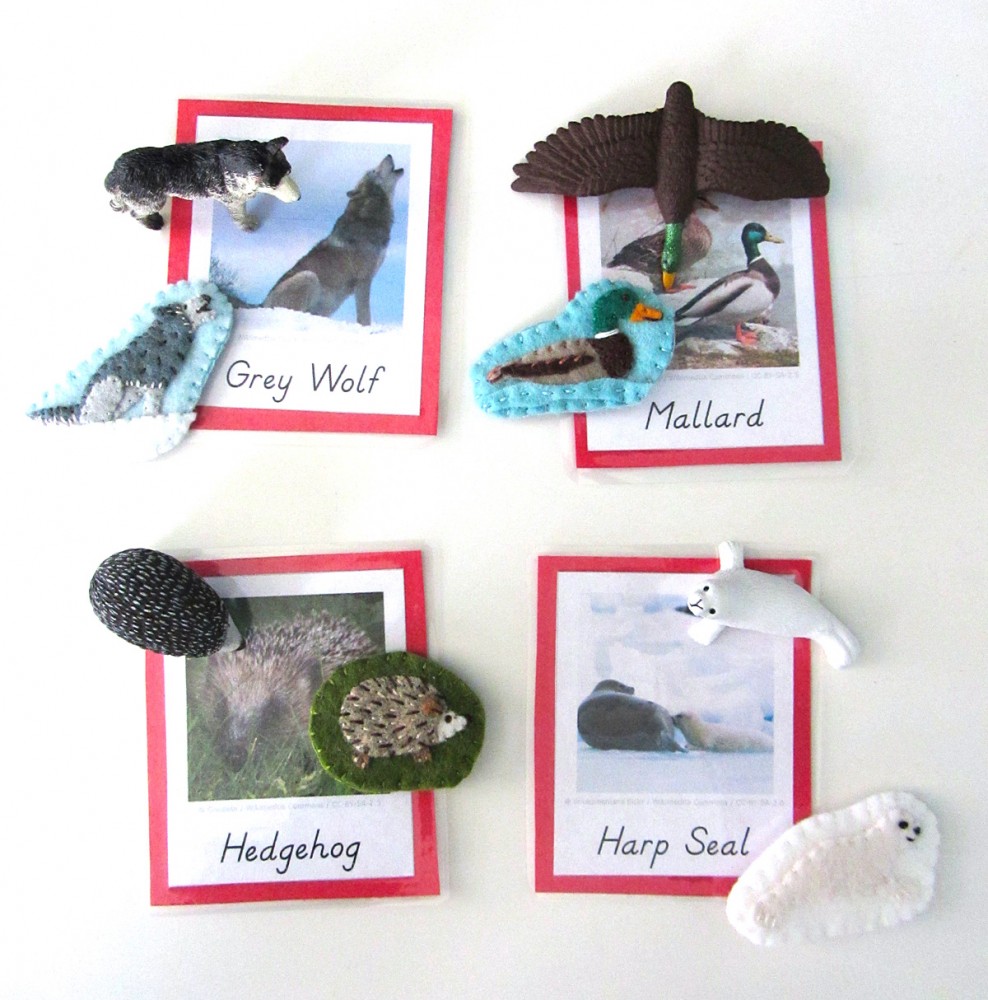
Harp Seal: (Felt used: fresh linen off-white for the baby seal, white for the background) The harp seal is super simple! I tacked down his body with glue and sewed around the edges. I made a small stitch for a mouth and satin stitched a nose. His eye is a black French knot.

Animals of Europe for the Montessori Wall Map & Quietbook with Printables

We love this animal encyclopaedia!

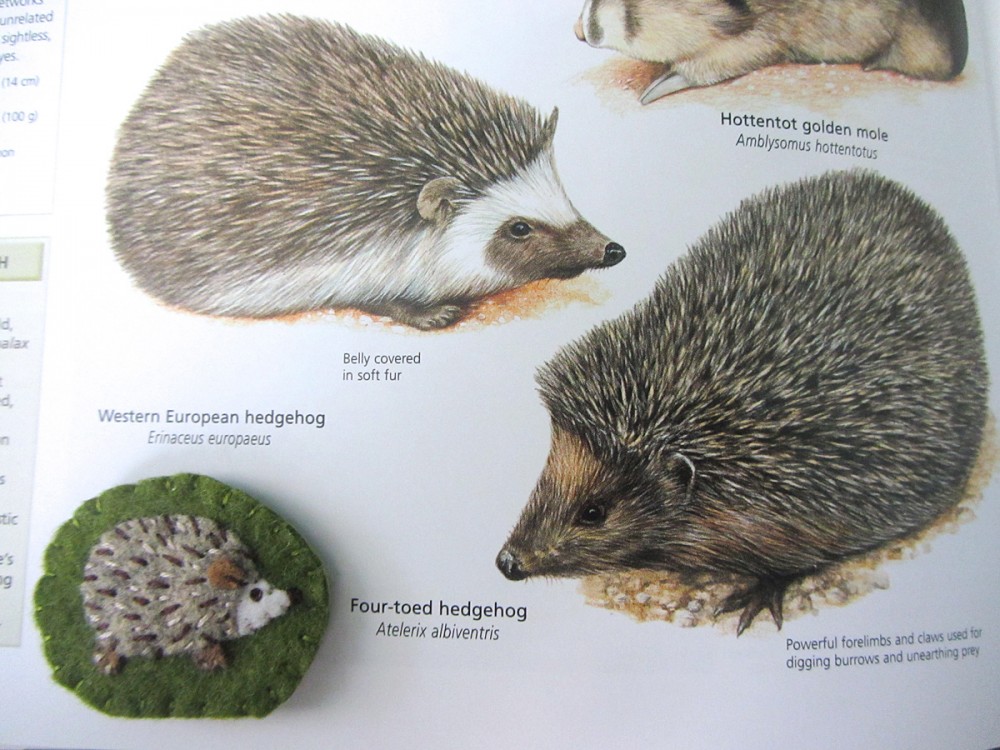
Hedgehog: (Felt used: stone heather taupe for the body, doe brown for the ear and legs, fresh linen off-white for the face and cilantro olive green for the background) I first glued down all her parts in the proper order, adding the ear last. I stitched all the way around the edges and made a stitch at the base of her ear. Using brown, I made a French knot eye and satin stitched nose. On her back, I used dark brown and cream to make stitches to show the texture of the spines.
Animals of Europe for the Montessori Wall Map & Quietbook with Printables

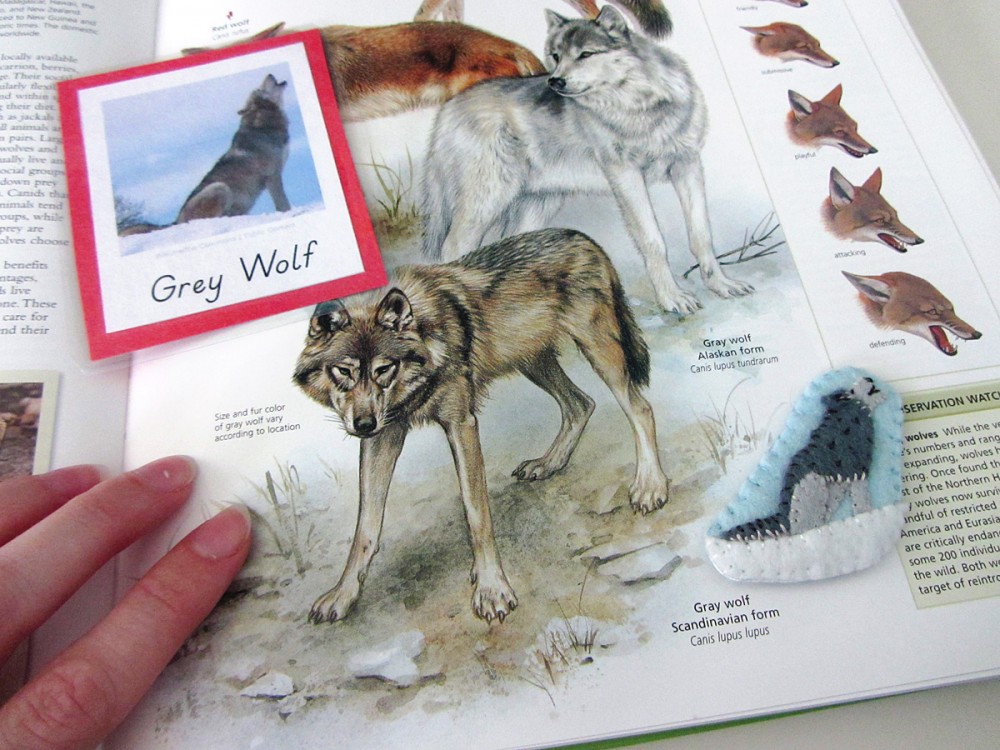
Grey Wolf: (Felt used: gray and elephant charcoal for the body and white for the snow and sparrow light blue background) I started by gluing down the front leg piece and the face (using the back/chest pieces to find the positioning. I then glued down the back/chest, followed by the hind leg and the ear. I cut a curvy piece of white and glued it down over where his feet would be to make the ground. Once it was dry, I trimmed around the wolf and stitched everything down. While stitching down the darker gray piece, I made my stitches longer and a little “sloppy” to make his fur look shaggy. Along the underside of his tail, the edge of his face and under his chest, I made light gray stitches the same way. His eye is a little stitch to make it look closed, his nose is satin stitch and his mouth is just lined with two straight stitches.
Animals of Europe for the Montessori Wall Map & Quietbook with Printables

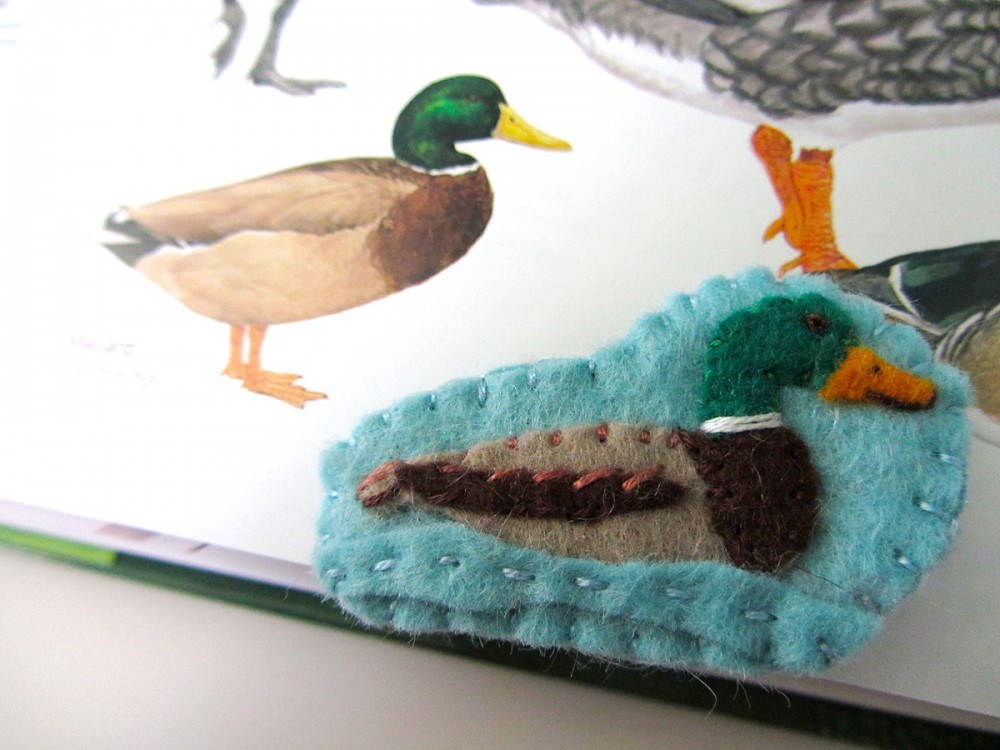
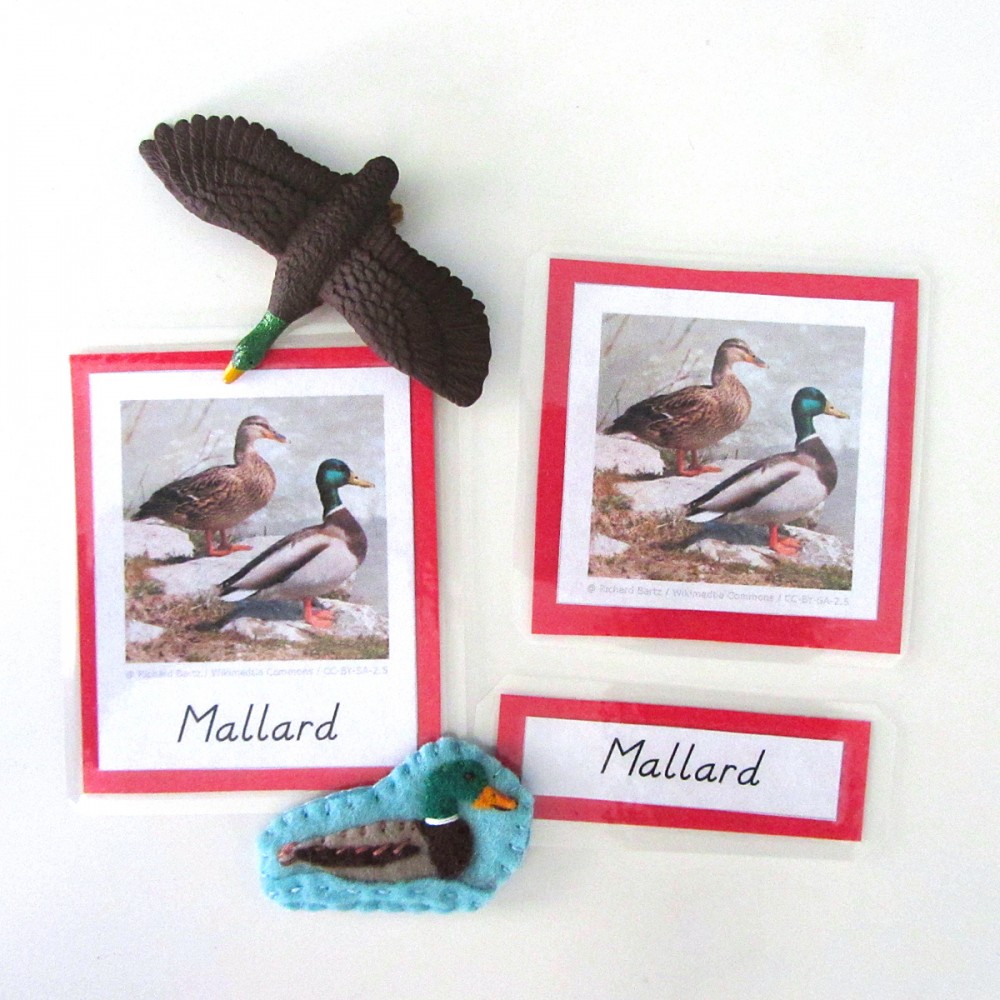
Mallard: (Felt used: gold nugget gold for the beak, jade green for the head, chai taupe for the body, chocolate deep brown for the chest and wing and ice aqua blue for the water and background) I glued down the body and head pieces, then glued the chest and wing on top. I cut a thin, wavy blue strip for water and glued it down over the bottom edge of the mallard. I stitched down all the mallard’s edges, then using dashed stitches, I stitched through the center of the water wave. At her neck, I made two long stitches in white. The eye is a French knot in brown, with a tiny stitch for a nostril and two long stitches to make the beak opening.

Sewing the Landmarks

For all the landmarks, I started by sewing the front piece. Then I cut out a backing felt to match the final shape and added some snag-free Velcro to it. I finished sewed around the whole edge, switching colors where needed. For all of the detail work, see the photos for a sample of where to stitch.
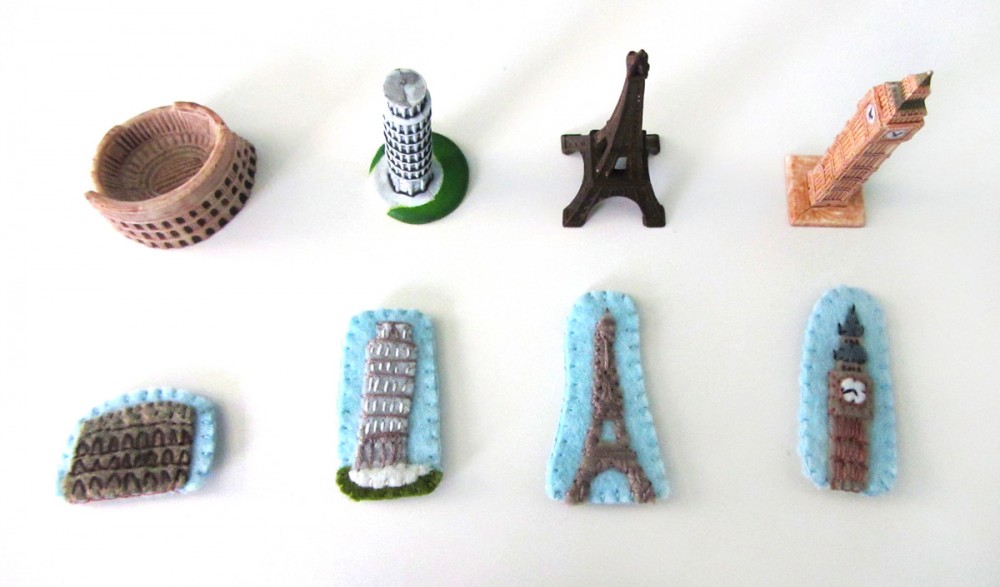
Animals of Europe for the Montessori Wall Map & Quietbook with Printables

Colosseum: (Felt used:stone heather taupe for the building and sparrow blue for the background) I glued down the building and stitched down the edges. With brown floss, I stitched 3 rows with back stitch. On the lower three levels, I stitched arches using a lazy daisy stitch that is open at the bottom. On the top level, I made tiny vertical stitches for windows.

Tower of Pisa: (Felt used: gray for the building,  white  for the ground ,cilantro olive green for the ground and sparrow blue for the background) I cut out a small green piece for the ground, then glued it down with the white ground on top. I glued the building on top. Using a medium gray floss, I made long stitches across the building to make each level. On the bottom level, I used it to make vertical stitches for columns. On the top level, I made an arch with an open lazy daisy stitch. I switched to white floss and made the rest of the columns.

Eiffel Tower: (Felt used: chai taupe for the structure and sparrow blue for the background) The Eiffel Tower is tacked down in place with glue, then I stitched around all the edges. I made criss-crossed stitches all over it similar to the beams it has. In some spots I made long horizontal or vertical stitches to make the real tower.
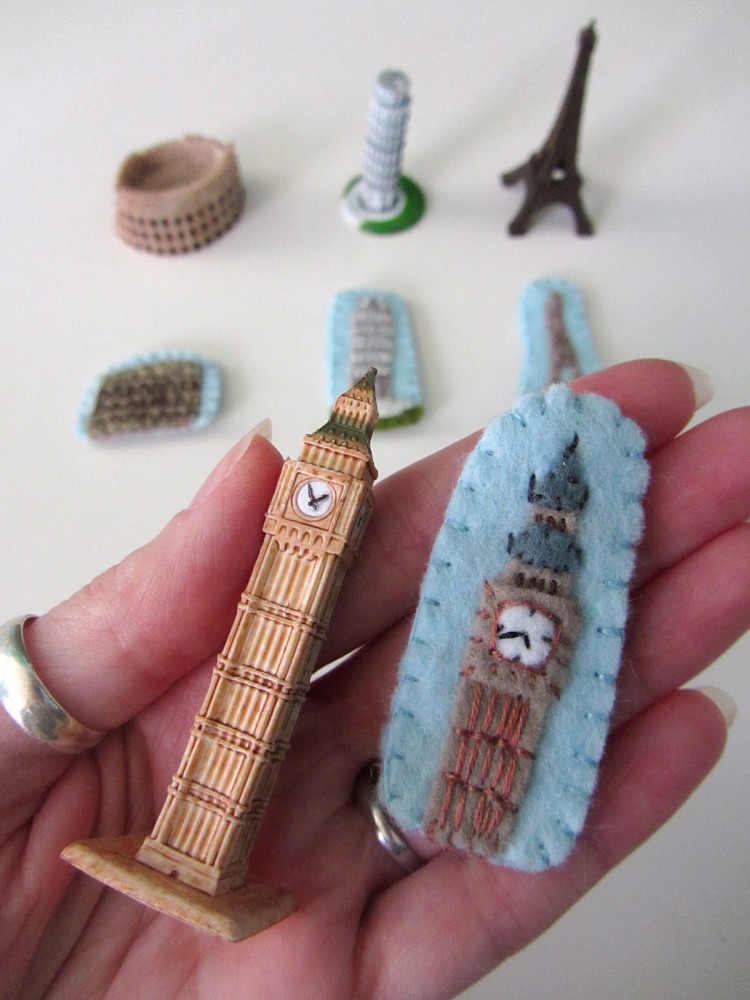
Animals of Europe for the Montessori Wall Map & Quietbook with Printables

The beautiful landmark replicas seen here were provided by SafariLTD. I am working with them to make this project the best it can be.

Eiffel Tower: (Felt used: pastry golden taupe for the building, white for the clock face, elephant charcoal for the roofs and sparrow blue for the background) For Big Ben, I glued everything in place then stitched down the roofs and the sides of the clock square piece. On the tower, I made rows of back stitching with long, vertical stitches in between. I stitched black clock hands on, then stitched a square around it in the taupe floss. Using dark brown, I made little windows above the clock. Using gray, I made the points coming off of the roofs.
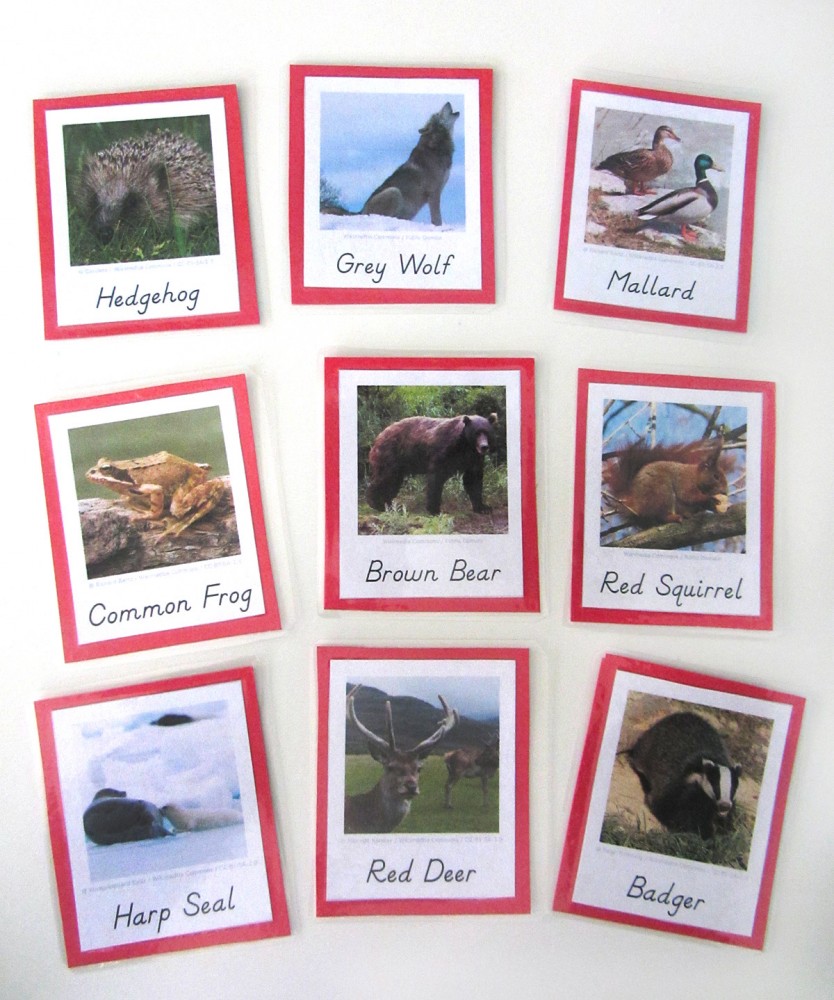
Animals of Europe for the Montessori Wall Map & Quietbook with Printables

Montessori European Animals 3-Part Cards

The series of 3-Part cards I am making for this project is something that Jax will be using for many years in homeschool. I have been focusing on the animals in these posts, but at the end of the project I will make a set featuring all the landmarks we sewed. Eventually, we will expand our collection of cards even more to include cultures, more landmarks, and so much more. Three part cards are extremely flexible learning tools.
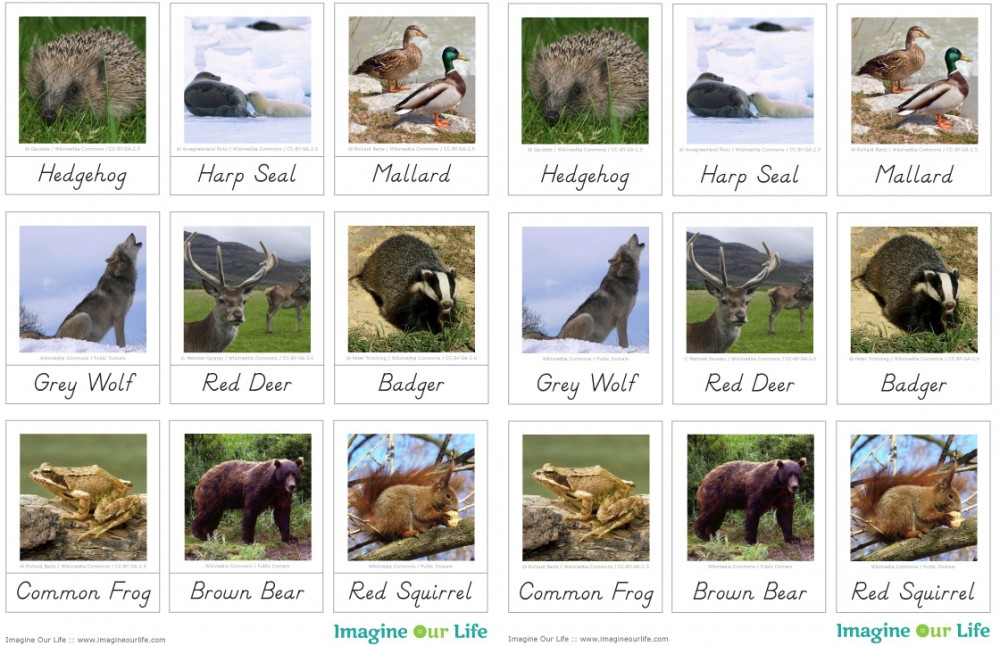
 Animals of Europe for the Montessori Wall Map & Quietbook with Printables

Click here to download my free pdf file to make your own animals of Europe cards. To make mine, I cut them out, glued them to red construction paper (to match Europe’s Montessori color) then laminated them. I use this laminator and I’ve been very happy with it. It makes everything so shiny and strong! My photos come out slightly faded from the printer (I use normal paper) but turn gorgeous after lamination. (Quick tip: Add a dab of glue stick on the back of your pieces before you place them in the lamination pouch to keep them from sliding around as you feed it through the machine.)
Animals of Europe for the Montessori Wall Map & Quietbook with Printables

Our main way of using the cards for now is to pull out our SafariLTD’s TOOB figurines and  match them to the pictures. We like to watch short videos about an animal, then study some pictures and draw our own. The TOOBs we used for these animal cards are: River TOOB (mallard), Arctic Toob (harp seal, wolf – which is actually a husky!) and Pets TOOB (hedgehog).

SafariLTD kindly provided the World Landmark TOOB and the Around the World TOOB for this continent. We are working with them to make this project the best is can be!
Animals of Europe for the Montessori Wall Map & Quietbook with Printables

I know many of you are sewing along (or plan to after the holidays!) If you are, stop by my Instagram @iolstephanie and leave a comment on one of my photos (I can’t see your photo if it you are private, but I can request to follow you temporarily if you leave a comment on mine about it) or share photos on Facebook. You can also email me. I love seeing what others make from my patterns!
Animals of Europe for the Montessori Wall Map & Quietbook with Printables

Please be sure to visit the other ideas featured on Montessori Monday. There are many great links!
Montessori Monday

Christmas Tree for Toddlers

Holiday crafting goes into full swing for me in November. I definitely have more ideas than time. I decided a good way to choose my large holiday project for to let YOU decide! Thanks to all of you wonderful Facebook fans, I hosted a vote.

Christmas Tree for Toddlers

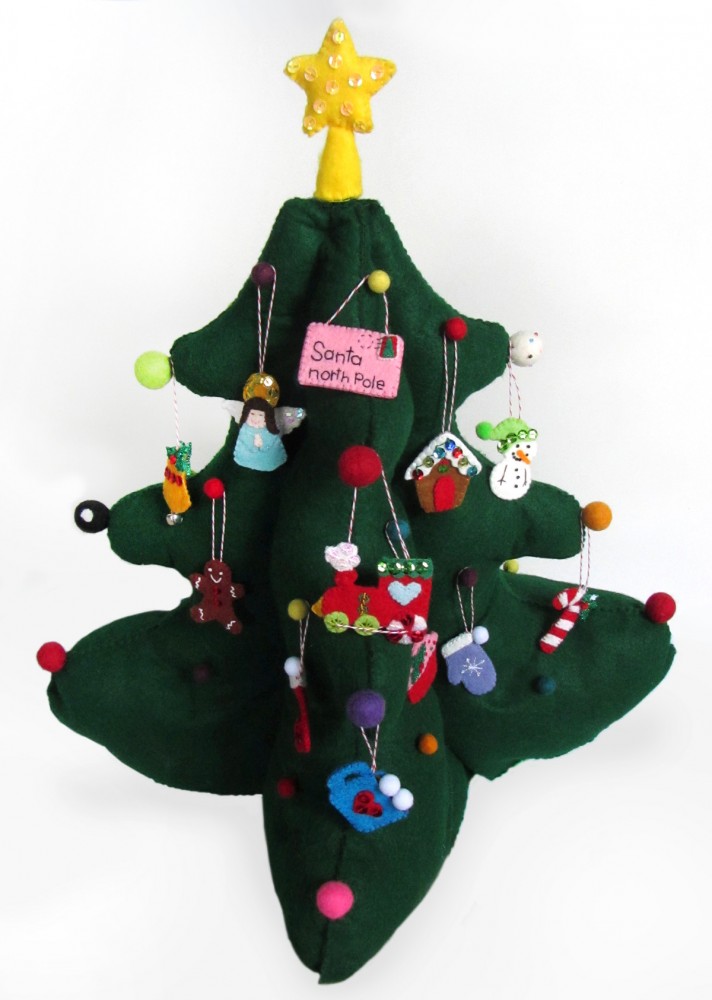
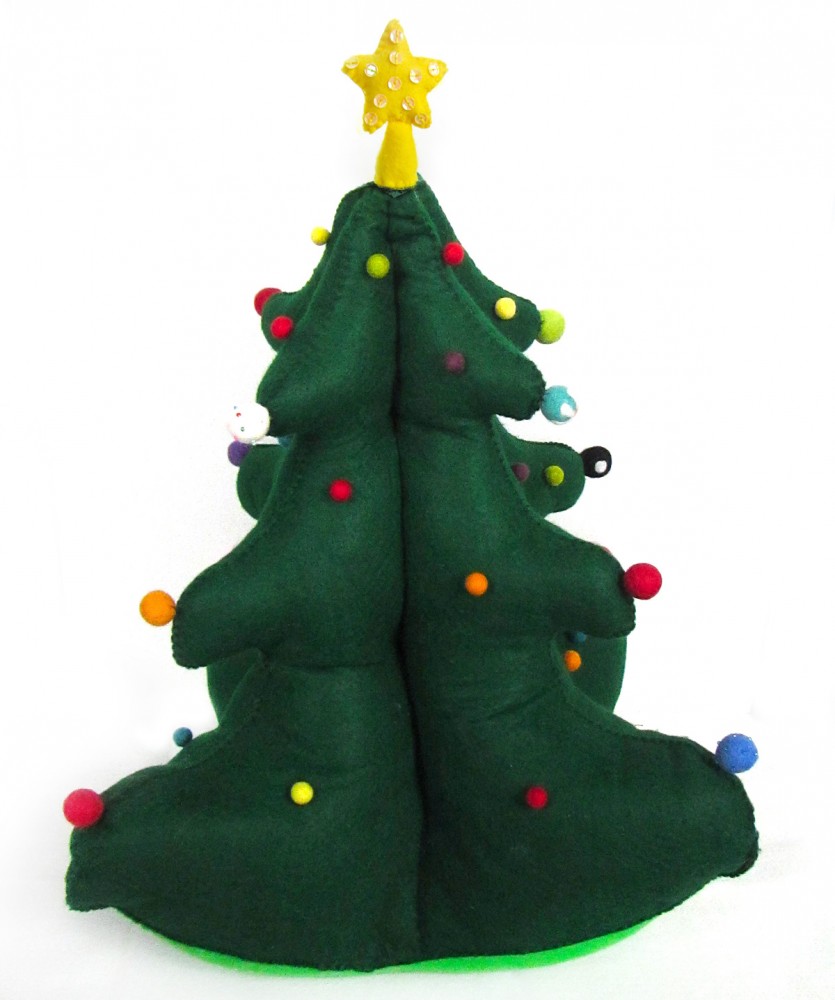
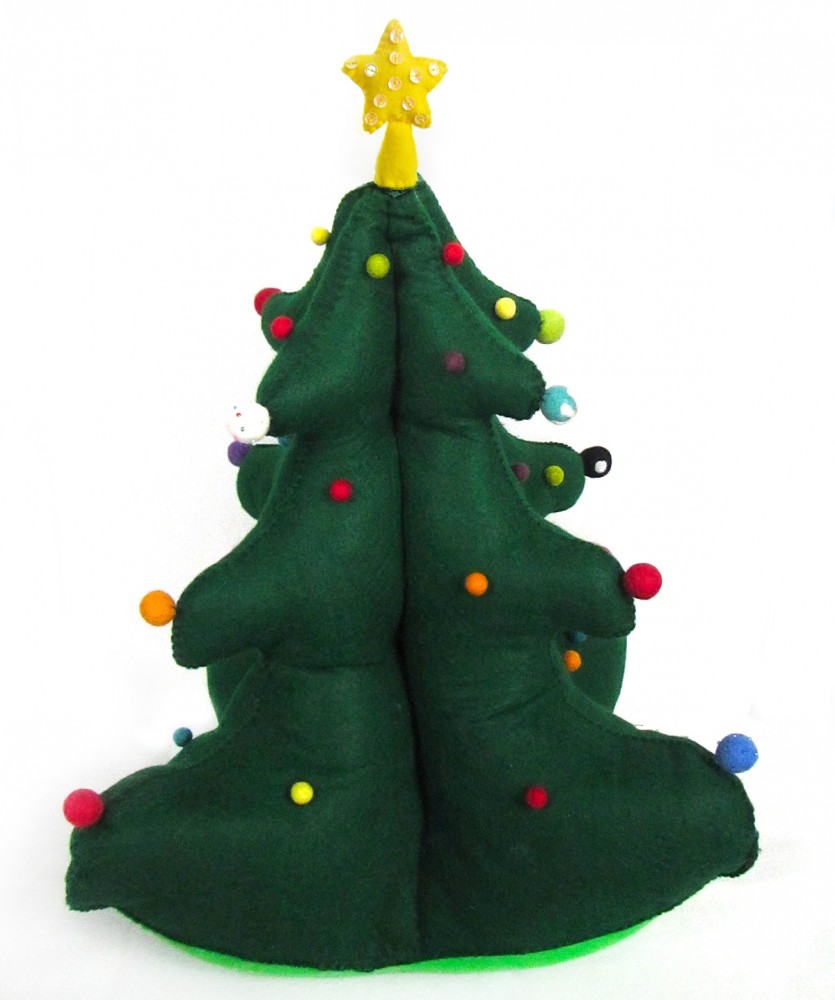
The winning project? A felt Christmas tree play set that is toddler safe. Kids love Christmas trees – who doesn’t? This project will give your little one their very own tree that they can’t break.

Christmas Tree for Toddlers

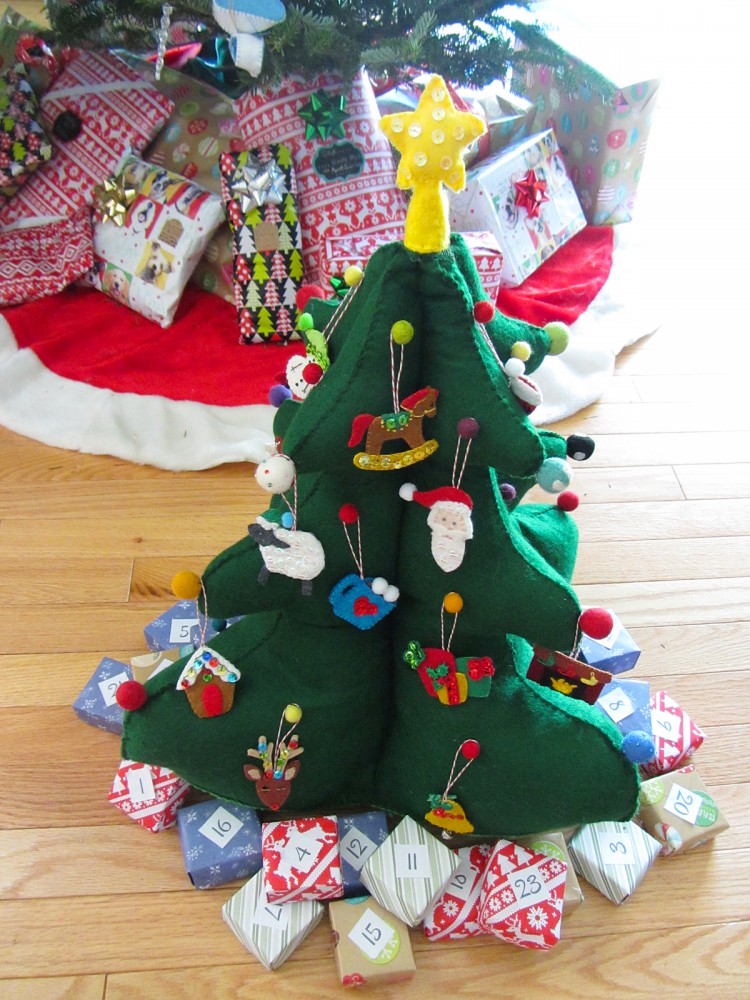
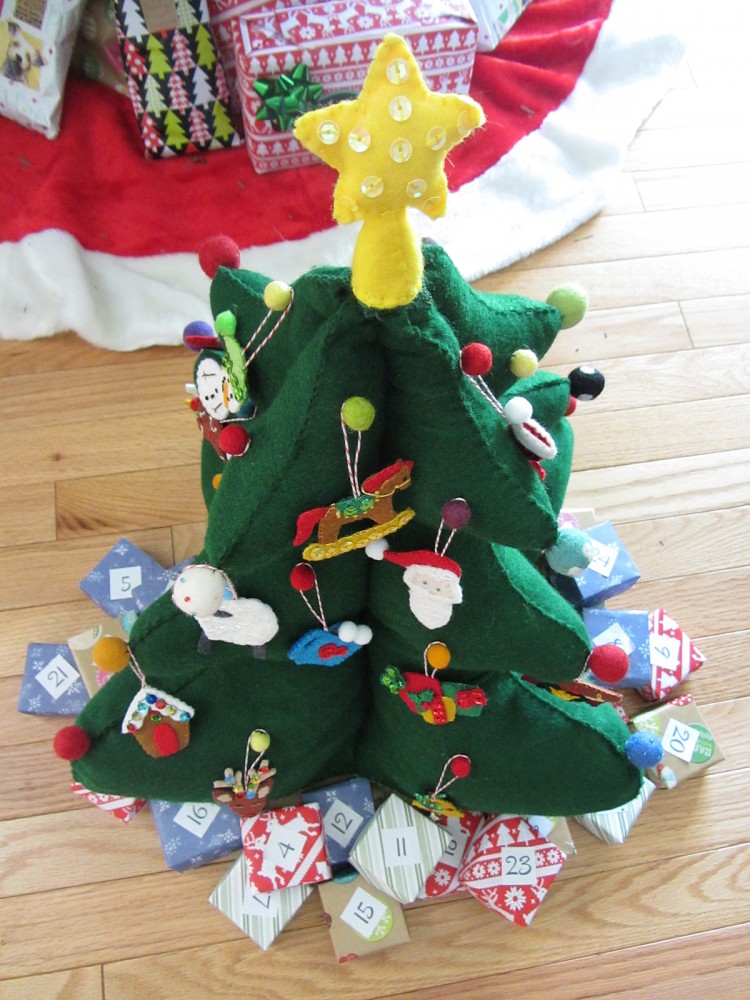
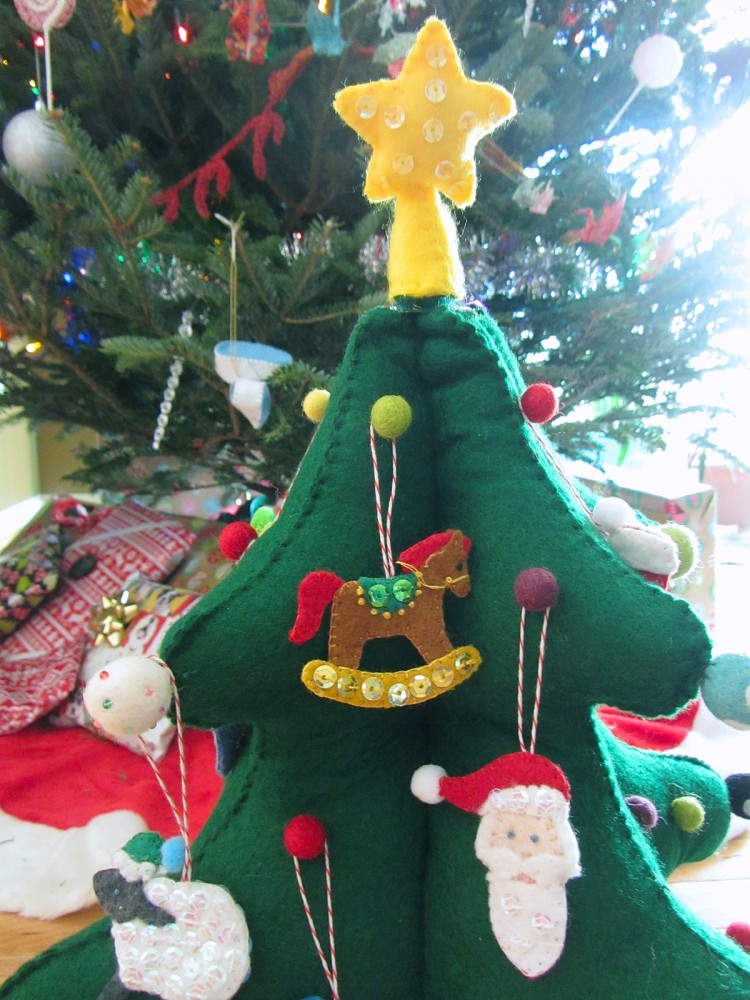
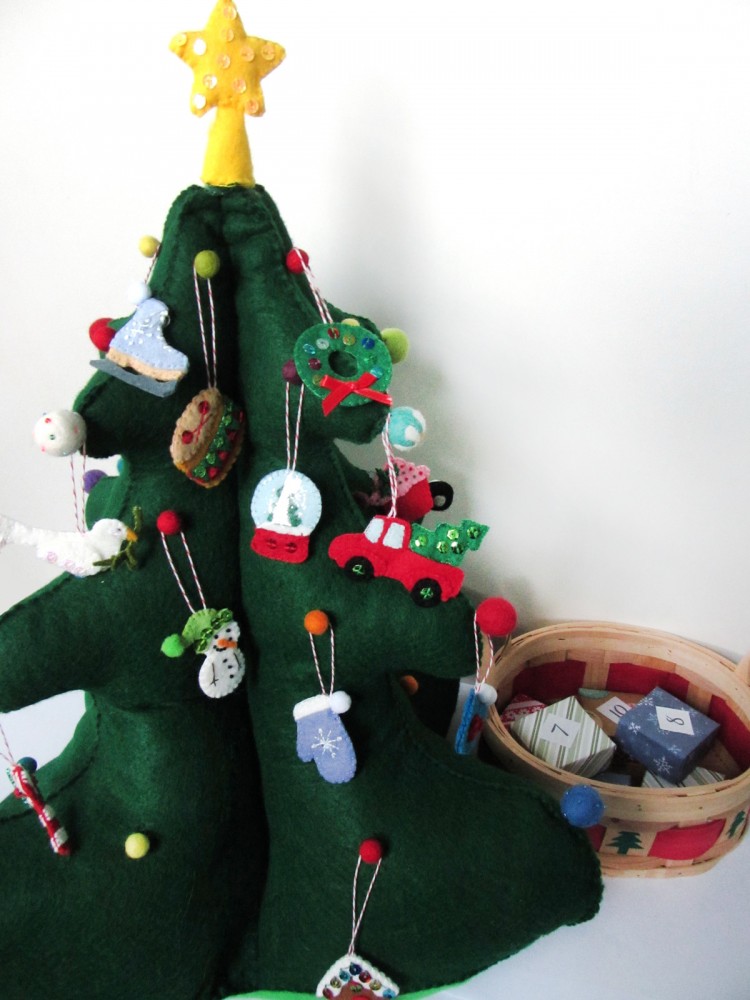
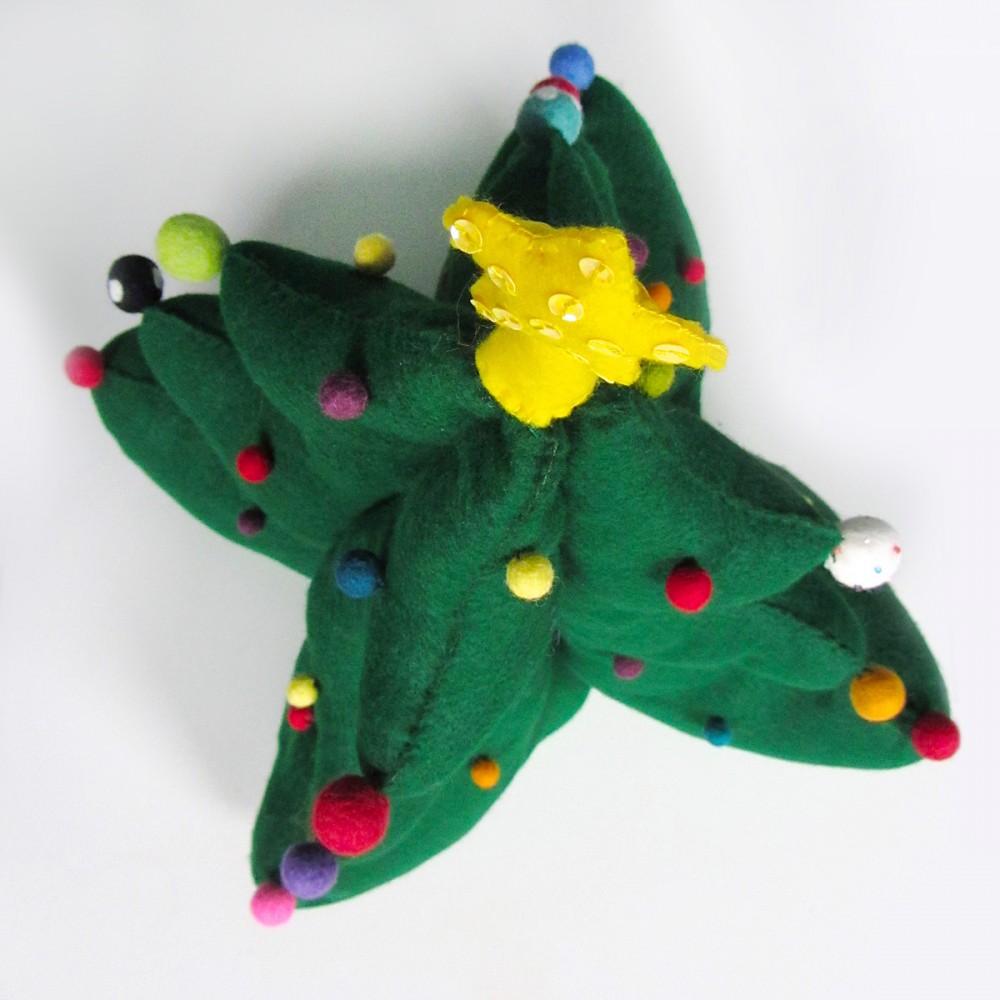
This is a 20″ high stuffed felt tree with sweet little “lights” that are really felted wool balls from my stash. The balls will do double-duty later: they will create places to hang mini ornaments! I will be posting a series of 24 mini ornaments that you can either give to your child all at once, or use in an advent calendar.

To see all the posts in this series, click here.

Christmas Tree for Toddlers

What I used:

  • The Pattern
  • 36″ x 36″ square of dark green craft felt for the sides (from the craft store for $4)
  • 20″ x 20″ square of green felt for the base
  • Yellow felt for the star
    (I recommend the same green or a red. I used what I already had!)
  • Polyfil stuffing. Lots! I used a 32 oz. of this.)
  • 20mm felted balls (an assortment of 12)
  • 10mm felted balls (an assortment of 24)
  • 1″ of green hook & loop
    (Mine is from the fabric store. There is a lighter green here.)
  • Yellow sequins

Sewing the Tree

Christmas Tree for Toddlers

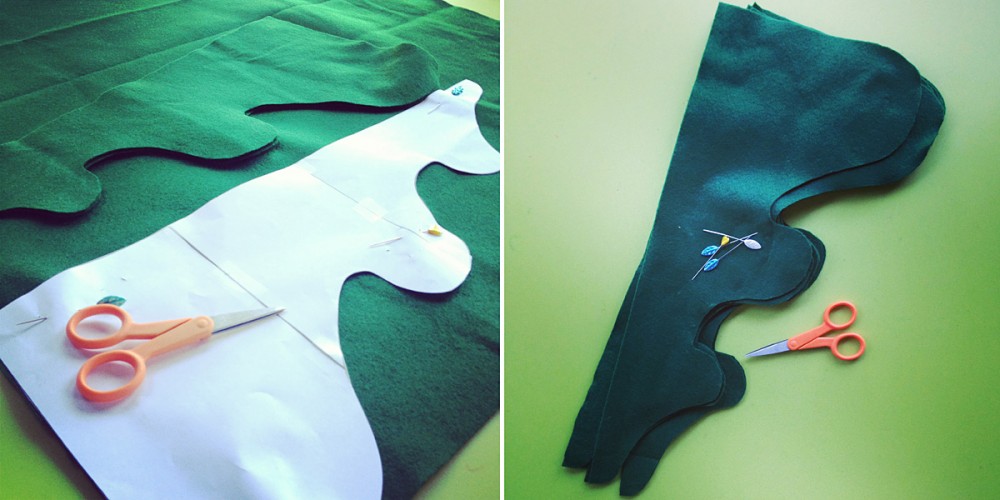
I started by cutting out the pattern and taping it together. Using my layout guide, I cut out 8 of the side pieces. I didn’t worry about cutting on the “right” side of the felt (felt is sometimes scratchier on one side.) Luckily this felt felt pretty similar on both sides. If you want to cut yours out all on one side, note that my layout has one flipped.

I hand stitched the tree using a blanket stitch. You could definitely save time and sew the straight edged on a machine with a zigzag stitch. You could possibly machine stitch all the sides, but you’d need to add seam allowance.

Christmas Tree for Toddlers

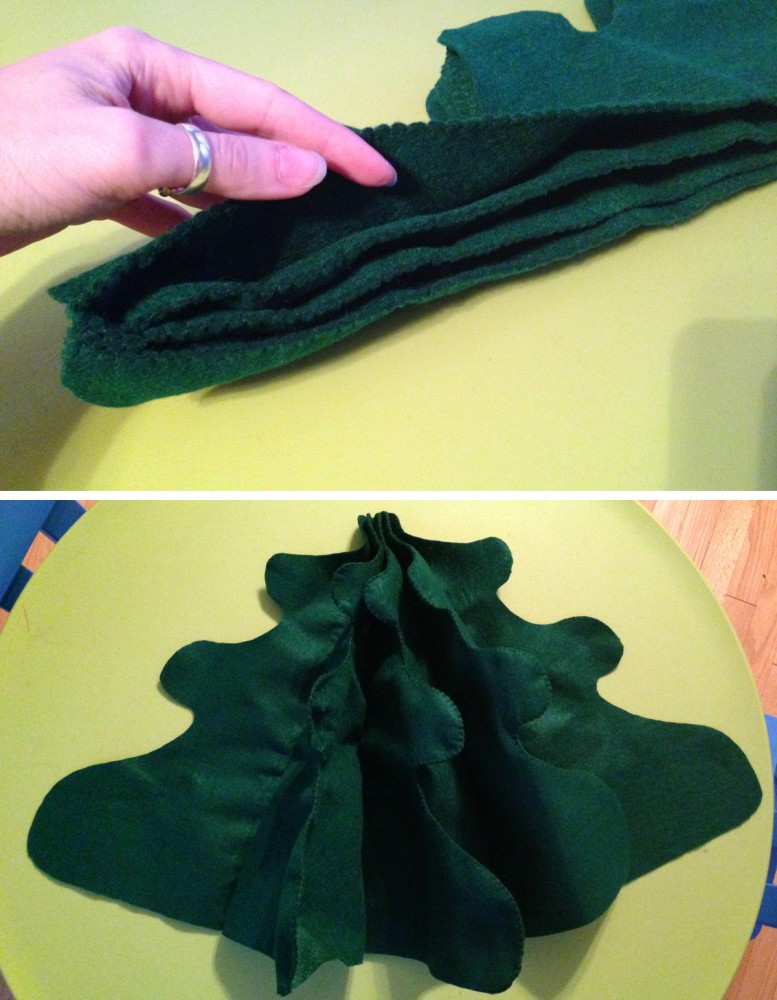
I made 4 pairs of tree sides, each with two pieces laid on top of each other, then stitched each pair together along the straight edges. I then started sewing the pairs together into an accordion shaped along the wavy edges. I then sewed the two end pieces together so the tree became tree-shaped with an open bottom. I stuffed as I sewed, just because it made handling it easier. I adjusted the stuffing later.

Christmas Tree for Toddlers

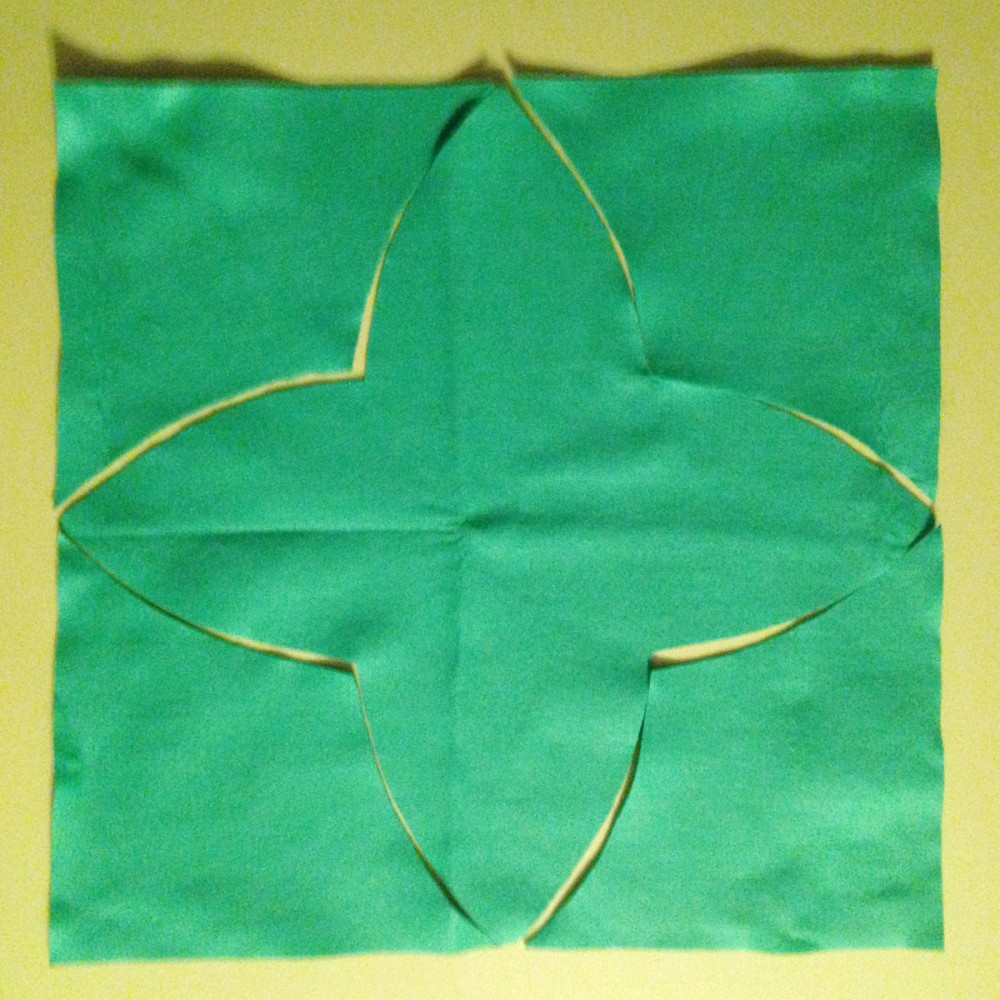
I laid out a 20″ square of felt for the base. I didn’t have any more dark green, so I used lighter green. I think it would look lovely with either more dark green, or a pretty holiday red. Using the corner template (taped together), I cut out the base shape.

Christmas Tree for Toddlers

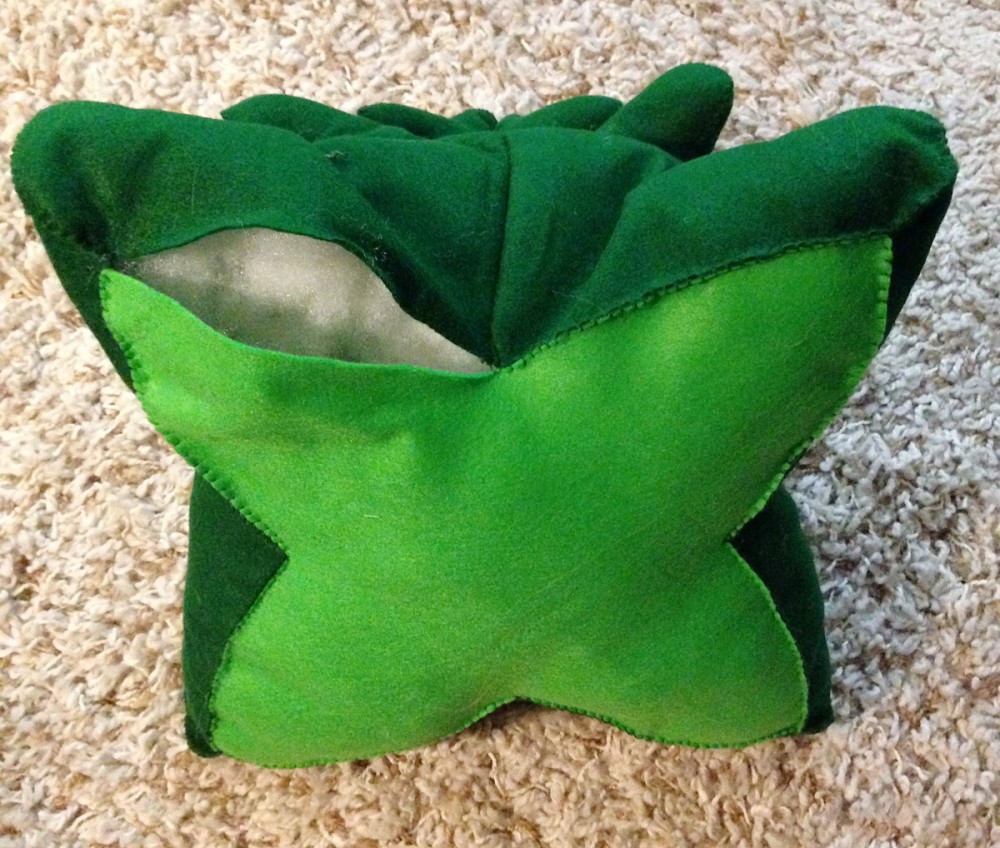
Christmas Tree for ToddlersUsing a blanket stitch, I sewed on the base, leaving half of one point open to allow me to finish stuffing it. In my photo, the lighter green helps to show how the base is attached. When the tree is finished, the base does curve down and is visible. I don’t mind the look of the two greens (and that felt was free from a friend!) but you might prefer something else.

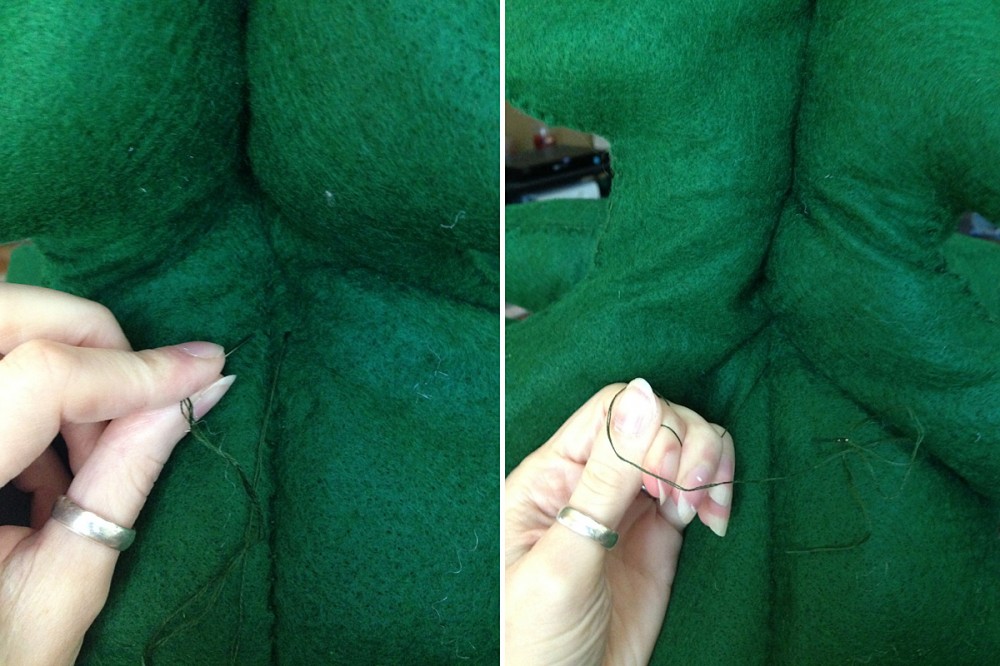
The next part is the hardest to explain, and gives you a bit of a workout. With the base sewn on (but leave that hole still!) and the tree lightly stuffed, you can see that it doesn’t have that finished tree shape. To make that, I made stitches along the straight seams that went through the center of the tree, pulling those seams in.

Christmas Tree for Toddlers

Think of the way you sew a button onto a cushion so that both sides sink in. I did that along both axis of the tree (it looks like a + from above), making stitches all the way through every 1.5″ until I was about 2/3 down from the top. You might have an easier time with a long needle and stronger thread, like in that cushion tutorial. I just used my arm strength to squish the tree as skinny as possible then pushed my longest needle through.

Christmas Tree for Toddlers

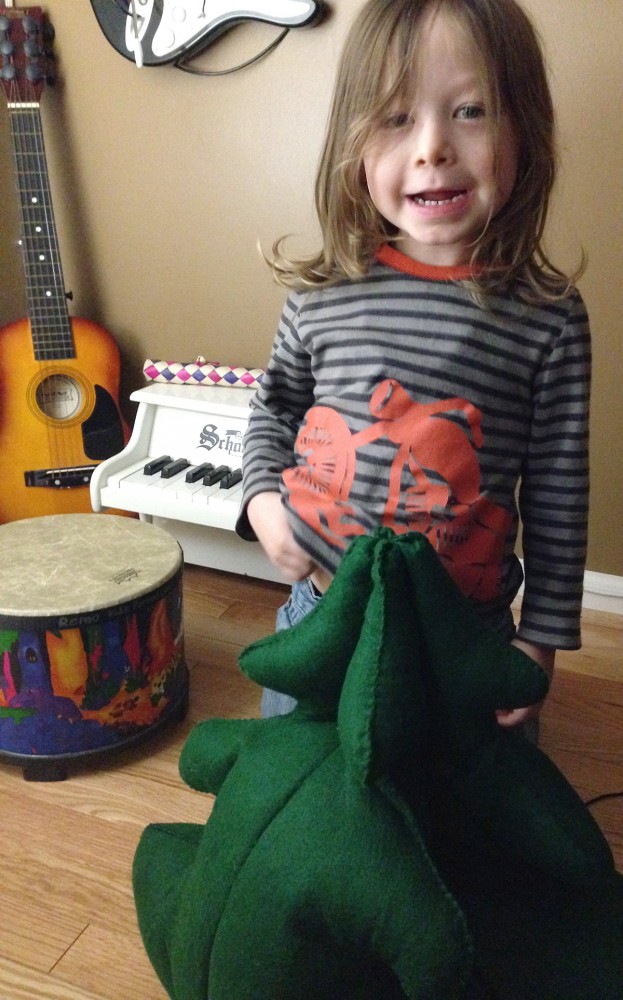
See the photo of Jax above. In it, I’d started stitching the center in, and had finished the topmost third. I did several inches at a time, pausing to perfect the stuffing. I had the stuffing the firmest at the top, softer towards the bottom. Play with it until you are happy.

Christmas Tree for Toddlers

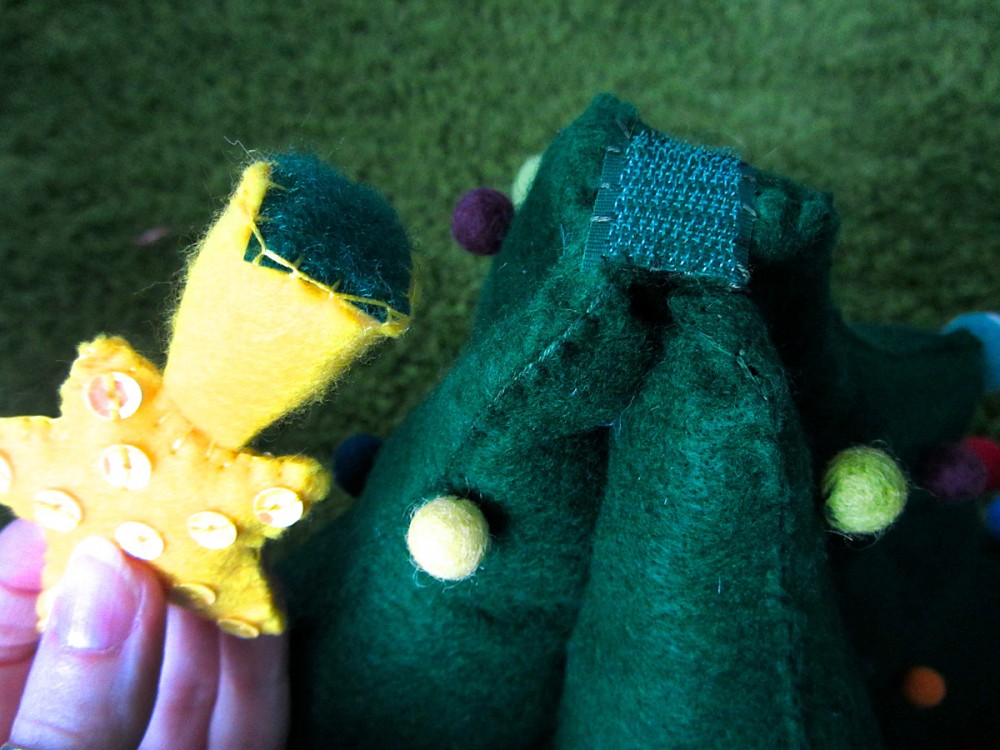
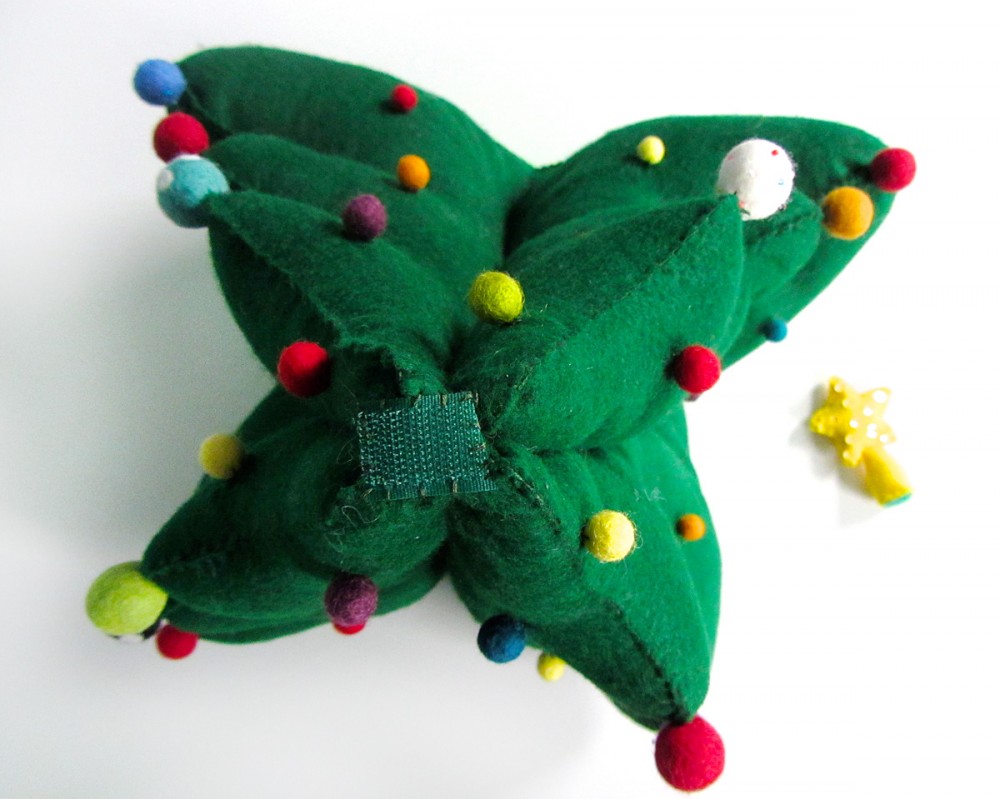
Once I’d finished shaping and stuffing the tree, I sewed the base opening closed. Then I took a small piece of green hook & loop tape and sewed it to the top of the tree. There was a tiny hole at the top that I stitched closed first. The hook & loop tape will hold the star on the tree.
Christmas Tree for Toddlers

The next step was to sew on the felt balls. I sewed one large ball onto the tip of each tree tier (12 total). I sewed 3 small balls onto each of the 8 side panels (24 total). You can do as many or as few as you’d like. Keep in mind that if you make mini ornaments, they will be hanging from these balls. I plan to do 24 mini ornaments (and will be sharing the patterns with you!)

Christmas Tree for Toddlers

Sewing the Star

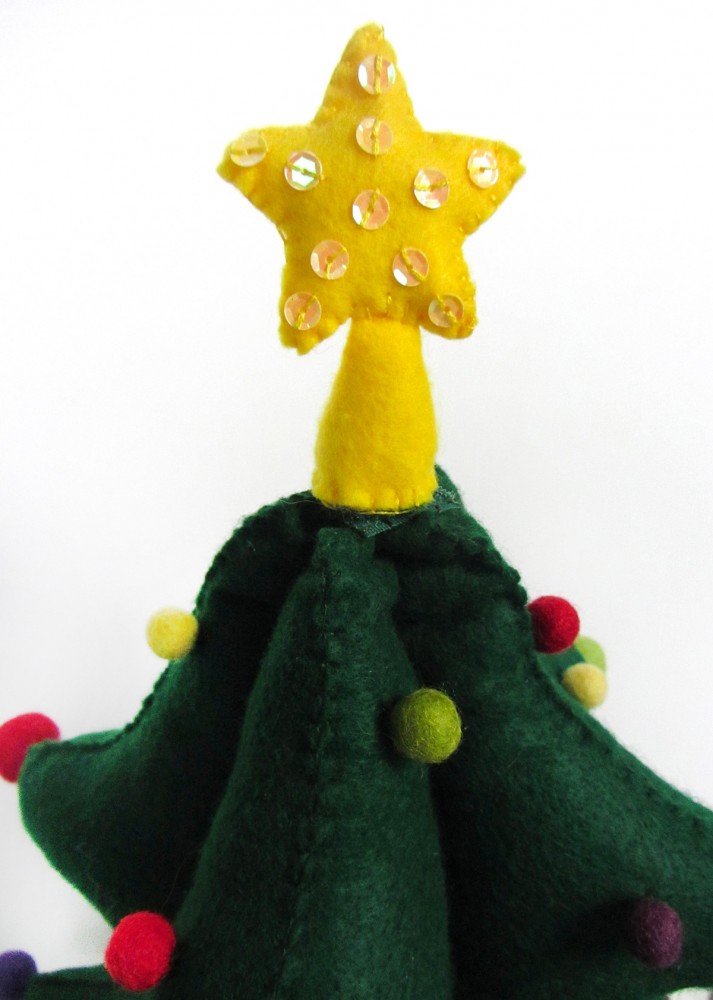
I started by taking the pie wedge piece and rolling it into a cone that would fit my circle base. I stitched down the length of the cone to hold it closed, stuffed it with polyfill, and stitched the base on, added the other half of the hook and loop tape as I went around.

Christmas Tree for Toddlers

I took the two sides of the star itself and decorated them with sequins: one in the center and 2 in each point. I then sewed them together around the edge, pausing halfway to stuff it and insert the base cone in the bottom.

Christmas Tree for Toddlers

Your little tree should be complete! Jax told me he loved it, which is the best complement ever! I know he will be very excited to unwrap a new ornament each night to hang on his own little tree. I hope you’ll sew along with me as I complete all 24 mini ornaments. I have the first 6 underway. For sneak peeks, join my Facebook page or follow me on Instagram @iolstephanie.