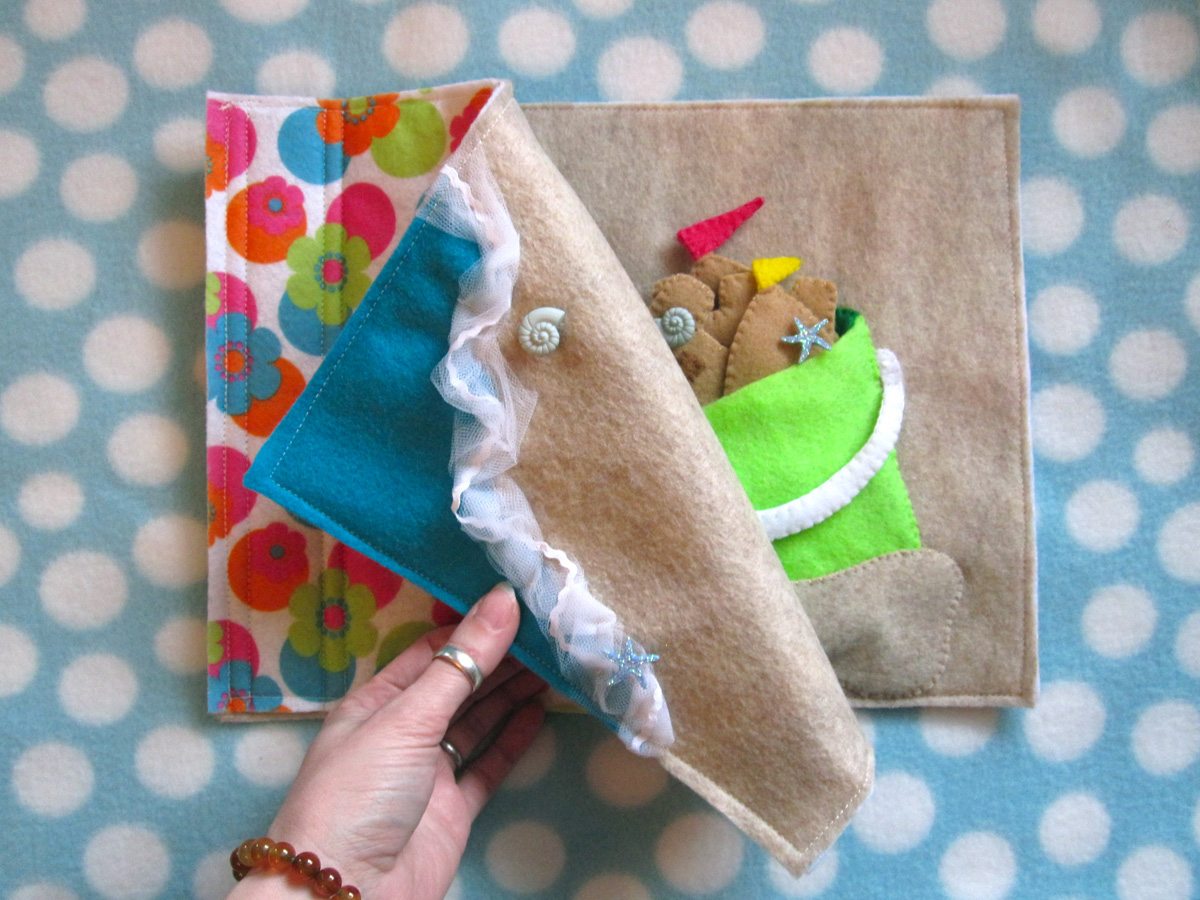
Quiet books, welcome to the 21st century!
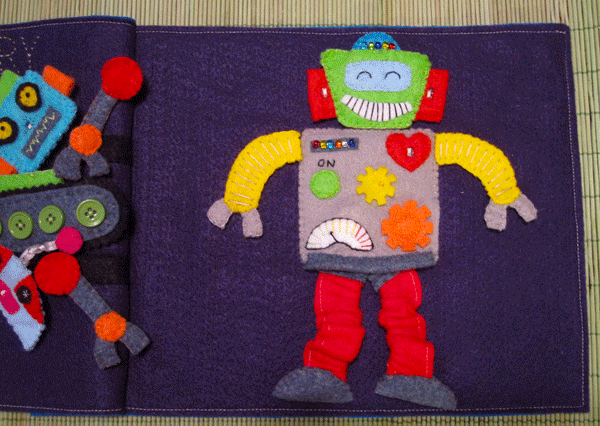
I’ve wanted to create a robot page ever since I learned what a quiet book is. I’m very glad I waited so long to really think it through, because I learned about e-sewing. E sewing is using special electronic components and conducive thread to create interactive textile projects. In simple terms? Push a button and my robot lights up!!


E-sewing is easy, but you have to make your circuits just right, or it will not work. The LilyPad system I used can be spot washed, which is all I’d recommend for a detailed quiet book. I did read somewhere that the conducive thread will eventually need to be replaced years down the road, so that is something to keep in mind. I sewed my thread to a piece of felt and not the actual page, to make it easier to pull off should I need/want to run new lines in the future. Make sure you cut your knot tails short on the back of your work so they don’t touch anything else. If threads from two different parts of your circuits touch, you will have a short and it won’t work.
This page can certainly be made without the electronic components. It is still fun to mix and match the robot parts! My tutorial assumes you are installing the LEDs.


My supply list:
- LilyPad Coin Cell Battery Holder $5
- LilyPad Button Board $1.50
- LilyPad LEDs (set of 5 – I chose red) $5
- Conducive Thread $3
- Coin Cell Battery $2
- Sew-on Snaps (I used size 1. 2 8-packs should do it)
- Felt – many colors! Feel free to change it up.
- Cardboard (I used my snap packaging.)
- Ribbon scrap
- Large seed beads
- 5 or 6 buttons
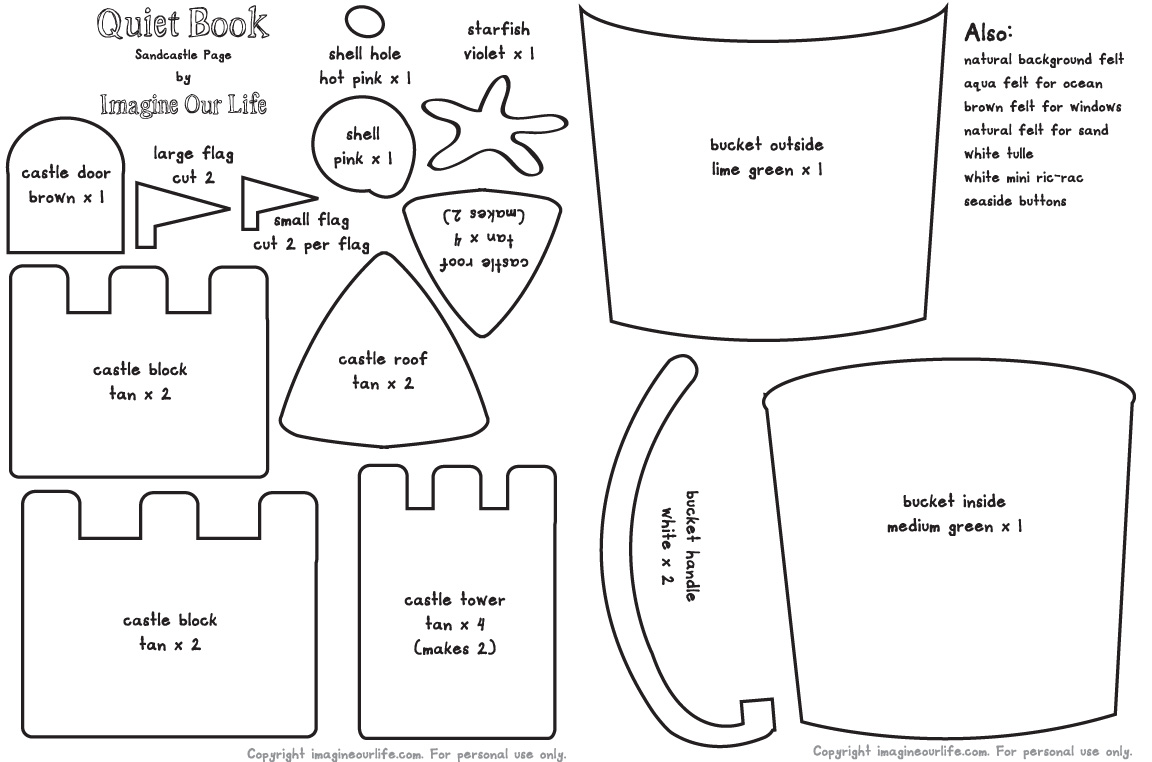
- The Pattern

The Body
Start out with your body squares. Lay out the decorations on the front piece and the battery holder, button and 1 LED on the inside piece. Lay all the parts out so the + is on the left and the – is on the right, like the photo below. The button and LED will need to line up with the front. Cut a circle out of the green button piece so the button can stick through. You’ll make a button top later. Cut a tiny rectangle out the the heart for the LED. I stitched around both holes to keep them from stretching. Sew down your front pieces. On the white meter, I stitched green, yellow and red lines, as well as a black arrow. For the gears, I stitched them down with a circle in the center of each. Sew some seed beads down along the gray rectangle. I made 2 stitches through each bead for strength. Confirm the placement of the electronics and baste them down. Baste a scrap of felt to the top as the robot’s neck and sew down some snaps.

For each of the next steps you will need to thread a large-eye needle with a length of conducive thread. I only used about 12″ – 18″ at a time. Tie a knot in the end. Make several stitches in the upper + hole of the battery holder. Use a simple running stitch (looks like a dashed line) from the battery holder + hole to the button’s + hole. Make several passes through the hole and tie off. Start a new thread and make several stitches in the button – hole. Running stitch from there to the LED + hole. Make several stitches in that hole and tie off. Start a new thread and make several passes through the LED – hole. Running stitch from there to the battery holder’s top – hole. Stitch through the hole several times and tie off. Steps 1 – 3 complete a circuit. You can put your battery in and test the LED by pressing the button.
Next we need to create half of a second circuit for the head LEDs. The additional circuit needs to be piggy-backed off the first LED. If the circuit is a diamond shape, the body LED is the bottom point, the neck snaps are the left and right points and a head LEDs will be the top point when snapped on. Start a new conducive thread and make several passes through the LED + hole. Running stitch up to the left snap. Make several stitches through all 4 holes on the snap, and make long stitches between each hole in a diamond shape. Tie it off. The idea is to get a lot of coverage with the thread on the snap. Start a new thread and make several passes through the LED – hole. Running stitch up to the right snap and sew it just like the first snap. Tie off your thread. Having the second circuit incomplete should not affect your body LED’s circuit. It should still light when you push the button.


Layer some light cardboard cut a bit smaller than your body under the inner body piece and stitch it down to the page. Since quiet books are squishy, the cardboard will make it a bit easier to press the button. Next we make a button cover. Cut a circle of cardboard that is slightly larger than the button hole in your front body piece. Cut two felt circles that are large enough to cover the cardboard and sew it in between them. Lay the button cover over the button hole and sew it down with four stitches: top, right, bottom and left. Lay your body front over the inner body and test that the button cover presses the button. The button should be sticking up through the hole, making the cover press it easily.


Sew a strip of felt along the bottom of your front body piece to finish it off. Sew the front body piece down to the page, leaving the bottom and the lower half of the right side unstitched. You need to be able to lift up the front to get to the battery for changes. I added a small snap to the corner.
Sew snaps on (with regular thread) for your arms and legs.
Robot Head 1


Sew down your two snaps to the back side of the back piece of head 1. Make sure you use the opposite snap parts as the ones you sewed to the page! (I used the “male” sides on the body parts and the “female” side on the page.) Flip the back piece over and baste your LED down with the + on the left and the – on the right. Have the LED part line up with the center of the mouth.
Thread your needle with conducive thread and sew through the + hole of the LED several times. Make a stitch or two to connect the thread to the left snap (the one on the left when you are looking at the robot’s face.) Tie it off. Start another conducive thread and sew through the – hole of the LED several times. Make a stitch or two to connect the thread to the right snap. You can now test the head by snapping it to the body and pressing the button. Both the body LED and head LED should light up.
Decorate the front head piece. Cut a small rectangular hole in the front head piece for the LED to stick through. Cut a matching hole in the mouth piece. I made red eye pieces with black felt circles. I stitched little white starburst shapes in the eyes for extra cuteness. I sewed the mouth down and stitched around the hole for strength. For the antennae, I braided some gray ribbon and sewed pink circles of felt to the top. Sew the front and back pieces together with the antennae in place.
Robot Head 2


Sew the snaps and LED onto the back piece of head 2 in the same way as head 1, but position the LED to be the nose. Decorate the front piece. Cut a hole for the nose LED and sew around it for strength. I sewed a zigzag line on the mouth piece in lime green. My eyes are yellow circles on top of black circles, with a black French knot in the center. The ears and hat pieces are folded but not sewn, so they are loops that are open on the sides. Sew the front to the back.

Robot Head 3


This head is a little trickier because it has 2 LEDs. The first LED (I did the one on the left) will be sewn to the two snaps like the previous heads. The second LED will be sewn in a circuit to the first LED. Baste the snaps down to the back of the back head piece. The ears are folded pieces of felt. Pin them in place to figure out where the holes need to be for the LEDs. I cut a scrap piece of felt to lay inside the head and do all the conducive stitching (except the stitches that are on the snaps) so the back of the head doesn’t look too messy.

Baste down the two LEDs with the + sides on the left. Thread your needle with conducive thread and make several stitches in the + hole of the LED on the left. Running stitch down the the snap on the left (when looking at the robot’s face) and stitch on the snap as before. Tie off the thread. Start another thread and make several stitches in the – hole of the same LED. Running stitch over to the right snap and sew on the snap as before. Tie off the thread. If you test the head on the body at this point, the left LED should light up. Start a new conducive thread and make several stitches in the + hole of the same LED you’ve been stitching in. Running stitch over to the + hole of the right LED and make several stitches. Tie it off. Start one more conducive thread and make several stitches in the – hole of the first (left hand) LED. Carefully running stitch over to the – hole of the right LED. You don’t want the running stitches to touch any of the others (the stitches you make in the LED holes are fine touching each other.) Make several stitches in the – hole and tie off. Testing the head now should light up both LEDs.
Decorate the head. Sew around the LED holes for strength. Fold the ear pieces down and sew the sides shut. For my mouth, I made long black stitches for teeth. For his hat, I sewed seed beads along the bottom (leave room to stick the hat in between the head pieces) and the sewed the two sides together. I used light blue for the eye piece and stitched arches for the eyes. Sew the front and back of the head together.


Other Parts
For the first set of arms, long gray pieces are layered between circles for the shoulder and wrist joints. Gray claw shapes are layered in the wrist joint.
The yellow arms have the claw shapes layered into the bottom. I made long stitches to make the arms look like tubes.
For the stretchy legs, I cut folded rectangles an inch or so longer than I wanted them to be. With a piece of elastic inside the folded felt, sew across the top, catching the elastic. Continue sewing down the side (I did all this on the machine). When you get the the bottom, stretch the elastic tight before sewing across, again catching the elastic. When you let go, the leg with scrunch up. Clip off the extra elastic. Sew scraps of gray to hide the elastic at the top. Sew the foot pieces to the bottoms.
For the tank-style tread, cut out the black tread with pinking shears. Add a row of buttons to the gray piece and sew it down. cut two scrap rectangles to sew your snaps to. Sew them together and attach it to the back of the tread so it can hang down below the body.
Spare Part Storage
On the facing page, I stitched the words “ROBOT FACTORY” by pinning the word template down and sewing right through the paper. I then ripped the paper away gently. I sewed strips of black felt down to make “shelves” and added snaps to hold all the pieces. Because you have the “female” halves of the snap on both the body and the storage shelves, you will have some orphaned “male” snap halves.
All done!
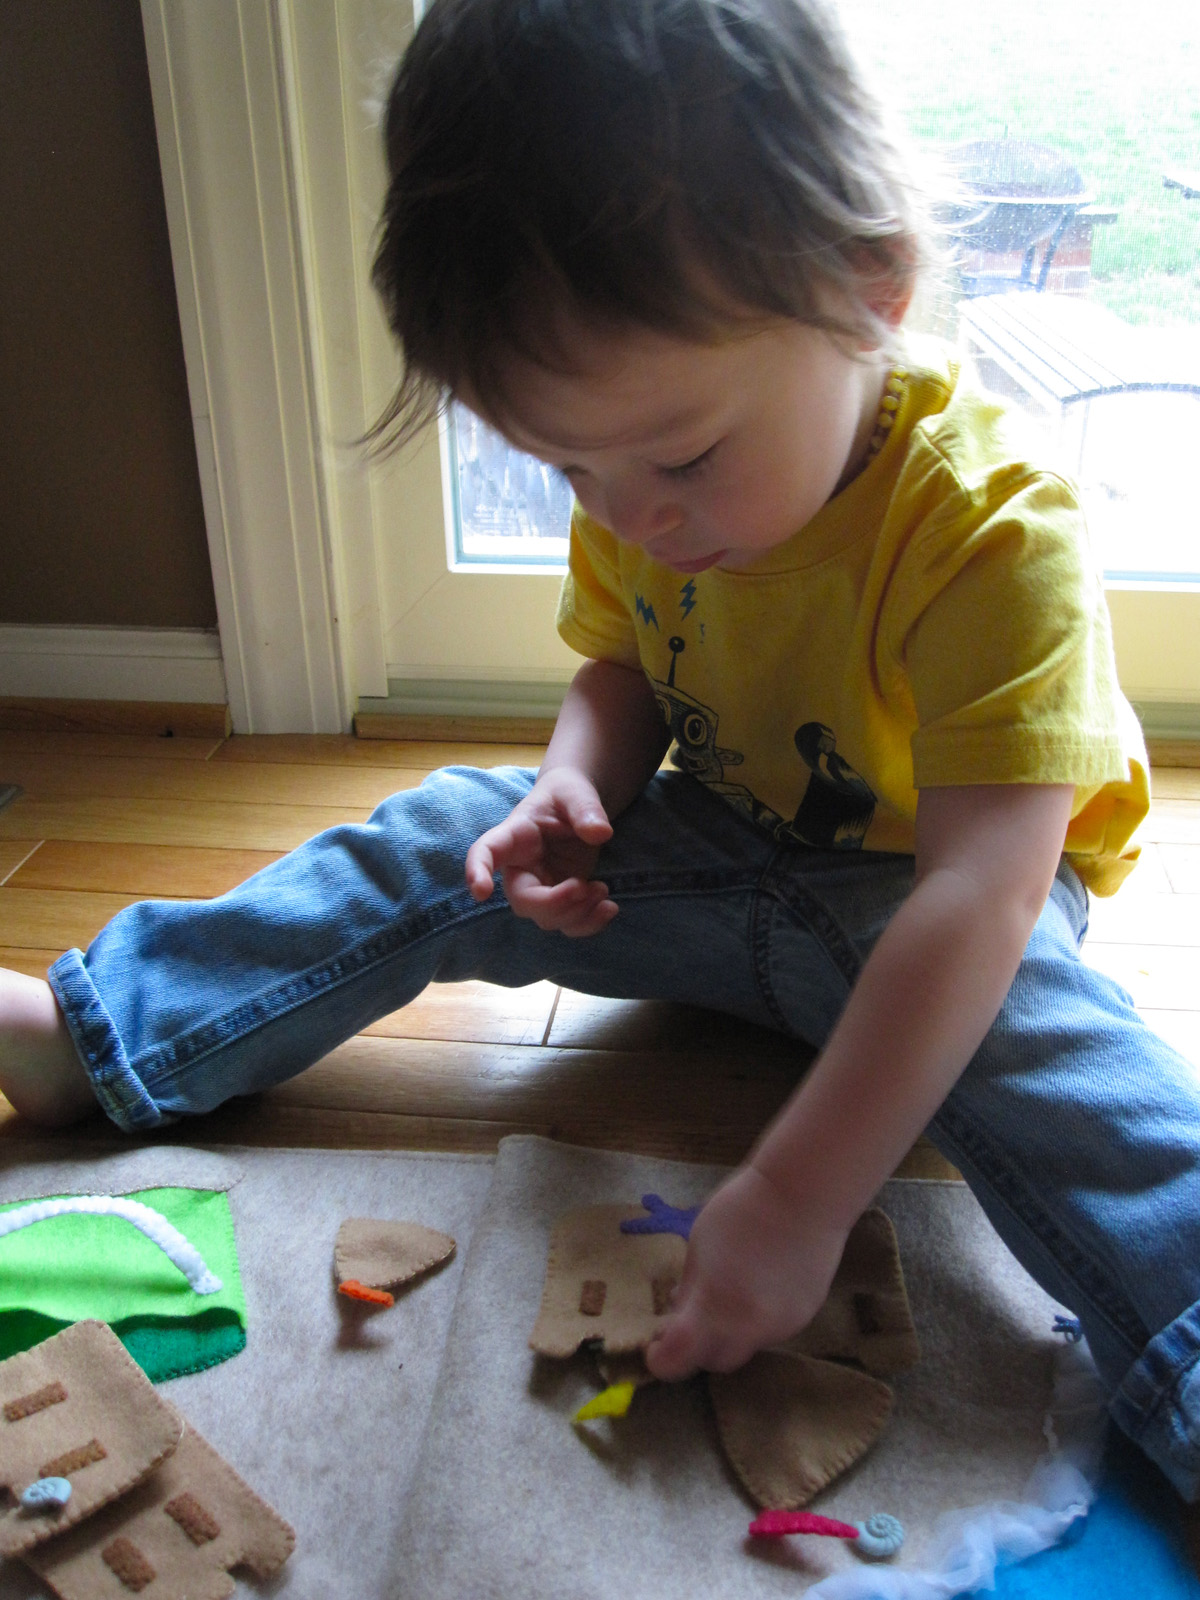
I love, love, love how this came out!! Hopefully my tutorial and diagrams make sense. This is definitely the most complicated page I’ve had to explain. It was very worth it. I haven’t let Jax play with it much because it is for our vacation, but he already loves to push the button and choose robot parts.


If you make this page, leave a comment with your link or stop by the Facebook page and post a photo. I’d love to see yours!
Are you ready to take it to the next level? Here’s my LED robot *costume* tutorial!


 I created a pattern for a sweet and simple mini (6″ square) quiet book to share with you all. I will be posting instructions in sections as I complete my sewing. Do you have a little one you’d like to give a Valentine to?


