
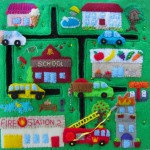
Jax enjoys the little toy fire station he received from our friend when he was little. I’ve even caught him playing with it wearing his fire fighter hat! After getting many requests for a fire fighter quiet book page, I decided to start designing.
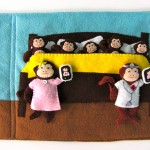
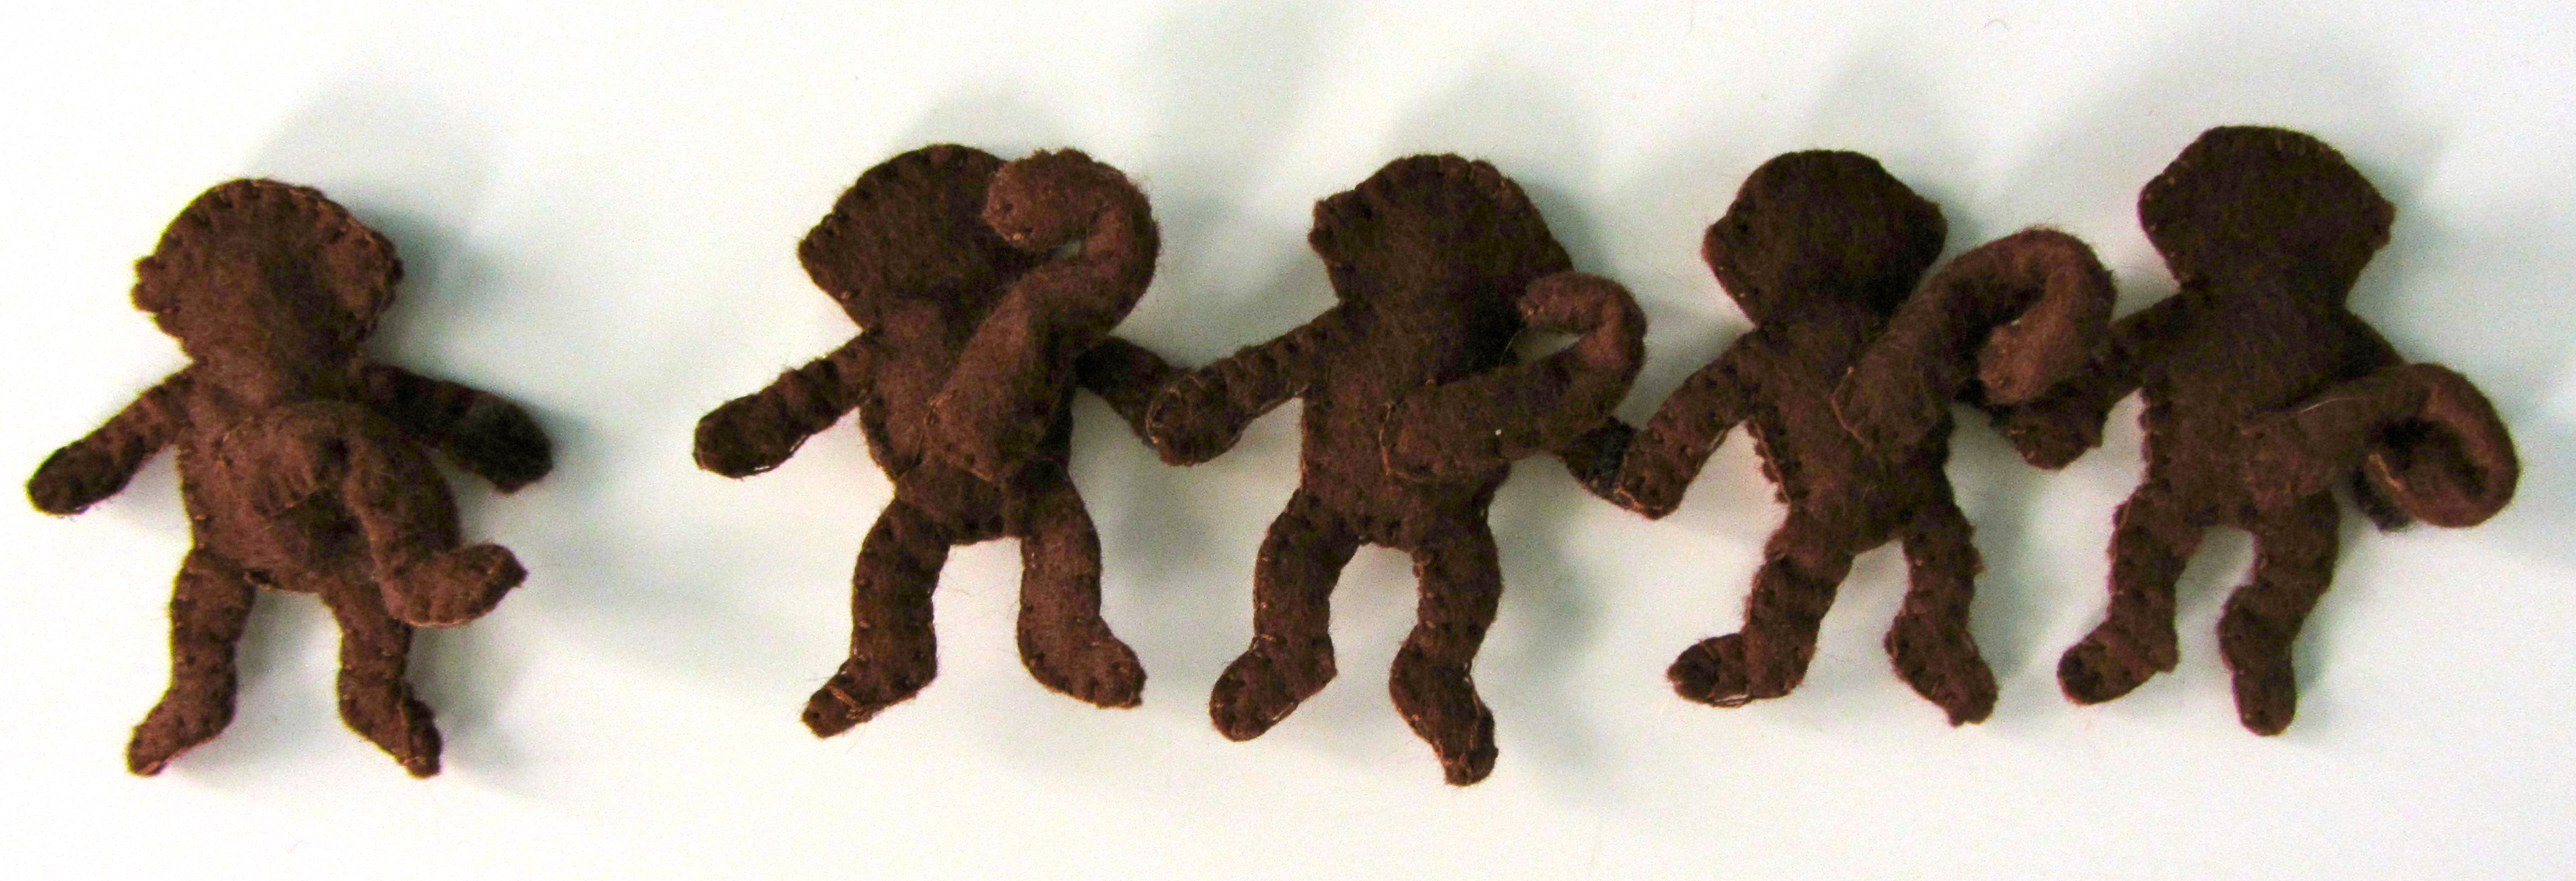
My project will be a full stand-alone quiet book, just like the dollhouse book, but using full size 9″ x 12″ sheets of felt for each page. The fire fighters will be made from the same pattern as the dollhouse dolls, so they will be interchangeable.
Because the dolls needed to set the scale of the page, the fire truck is quite large. I wanted them to be able to ride in the truck, so I couldn’t have a tiny truck. If you plan to use the fire truck pattern on a page that is the size I normally sew, you may need to shrink it a slight bit if you don’t want it sticking out. My fire station will be sewn differently, and I’ll post all about the construction when I get to that point.
This tutorial is for the first two parts of the fire station book – the fire truck and the dalmatian!
What I Used:
- The Pattern
- Felt from American Felt & Craft (in white, black, gray, elephant, banana cream pie, orange juice, big apple & doe.)
- Plastic Canvas
- Clear Vinyl
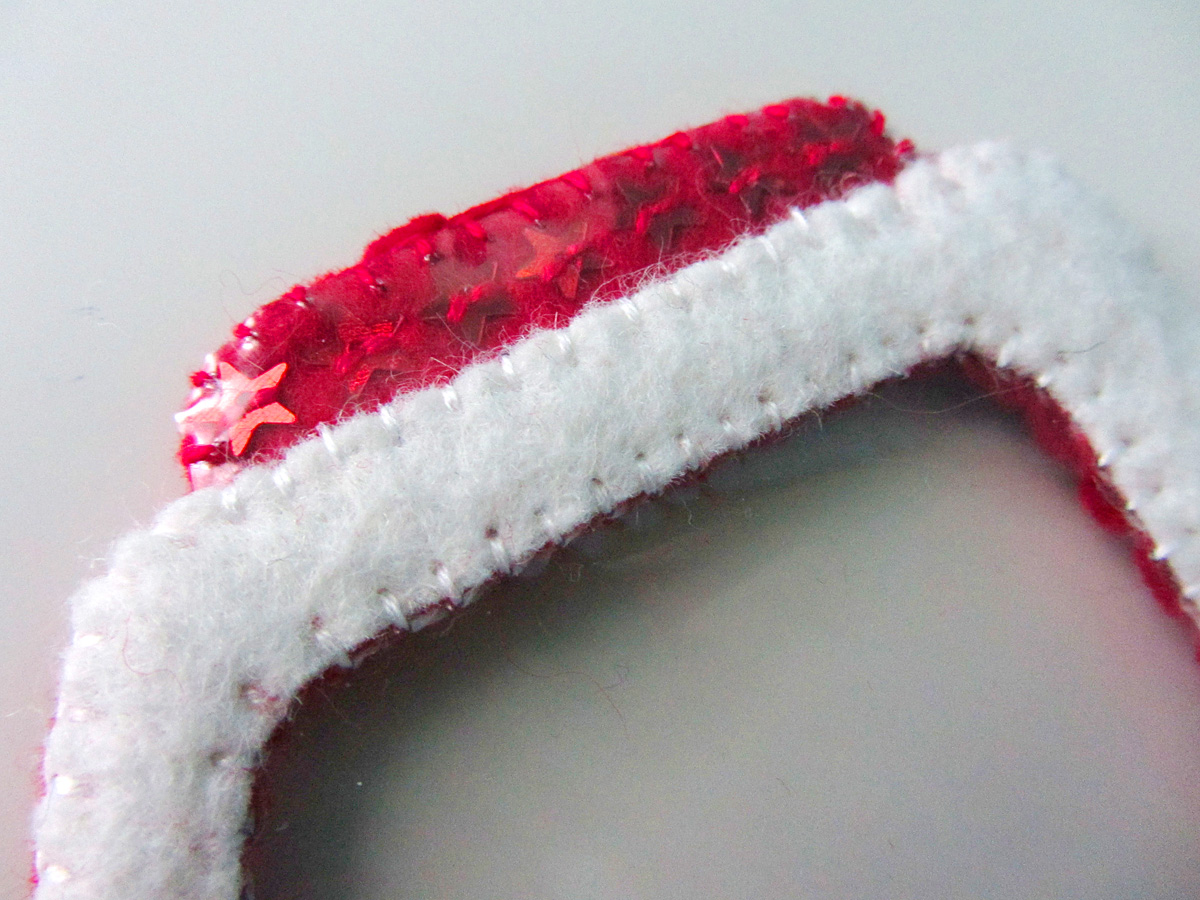
- Small Star Sequins
(7 red, 1 gold)
- Thin Yellow Ribbon Scrap
- 4 Sew-On Snaps
(I used the small ones.)
- 2 Large Yellow Buttons (1″ from this pack
)
- 2 Large Shank-Back Buttons (7/8″) (Mine are 1028 here from A.C. Moore.)
- Gray Parachute Cord
- 2 Eyelets
- Black Sew-On Velcro
(I used 1 hook coin and 1 hook square cut in half)
- Red Sew-on Velcro (I used a small piece of hook)
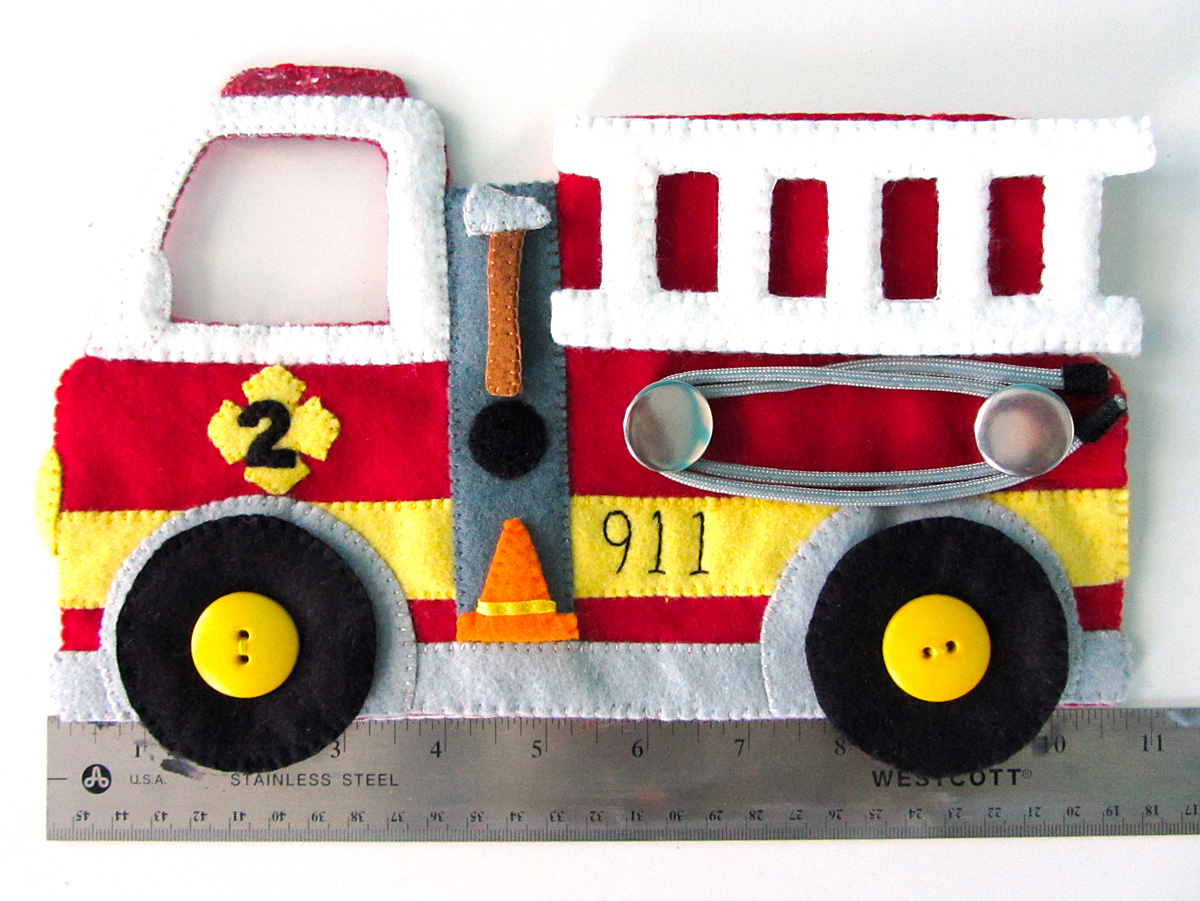
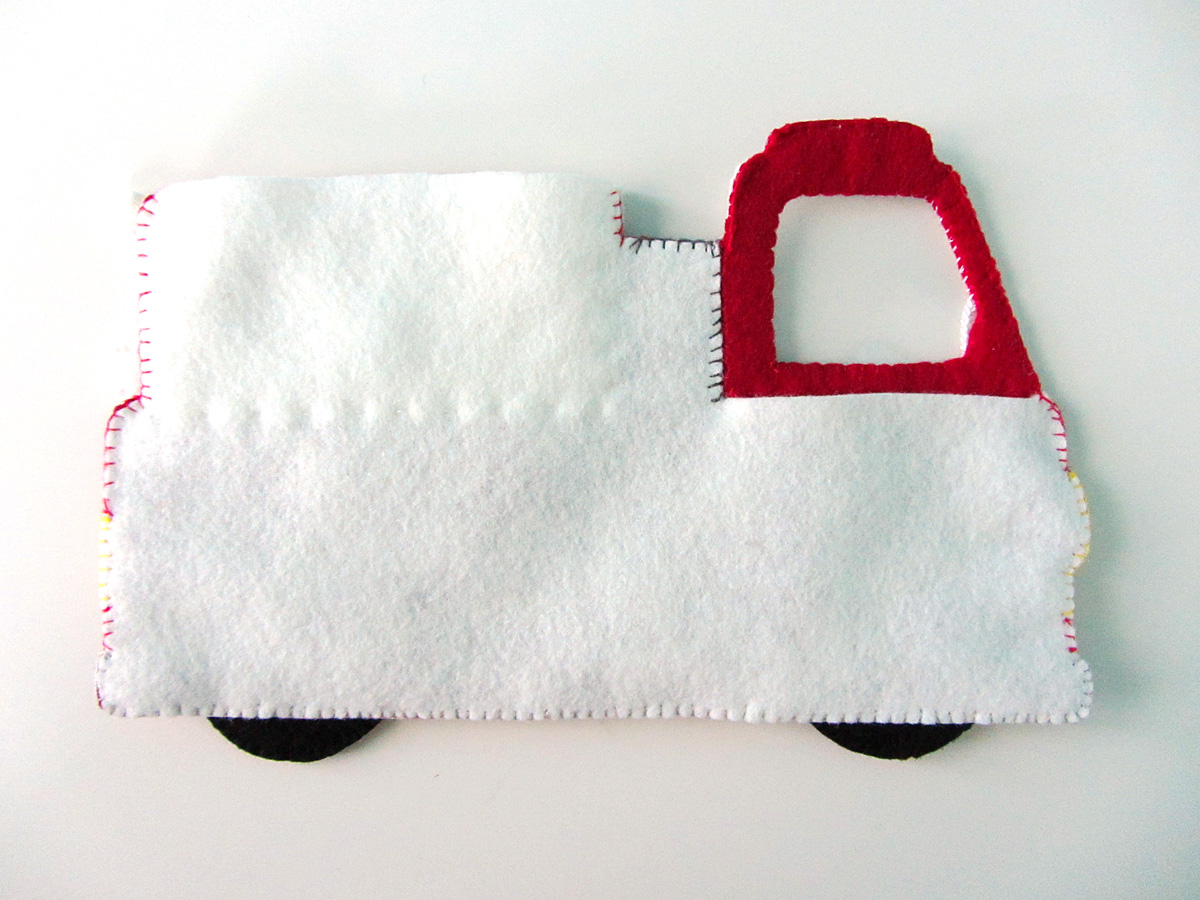
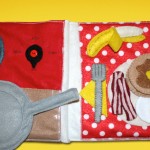
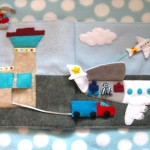
I started by stitching tiny red star sequins to the siren area on the red truck piece. Then I laid the window and siren vinyl between the red truck piece and the white cab piece before sewing them together.
 I sewed the side mirror piece over top. I sewed down the yellow stripe pieces, then sewed the dark gray tool panel crossing it. I sewed the gray running board/bumper down along the bottom (but I didn’t sew the outside edge of it down until I was sewing the white backing onto the finished truck.)
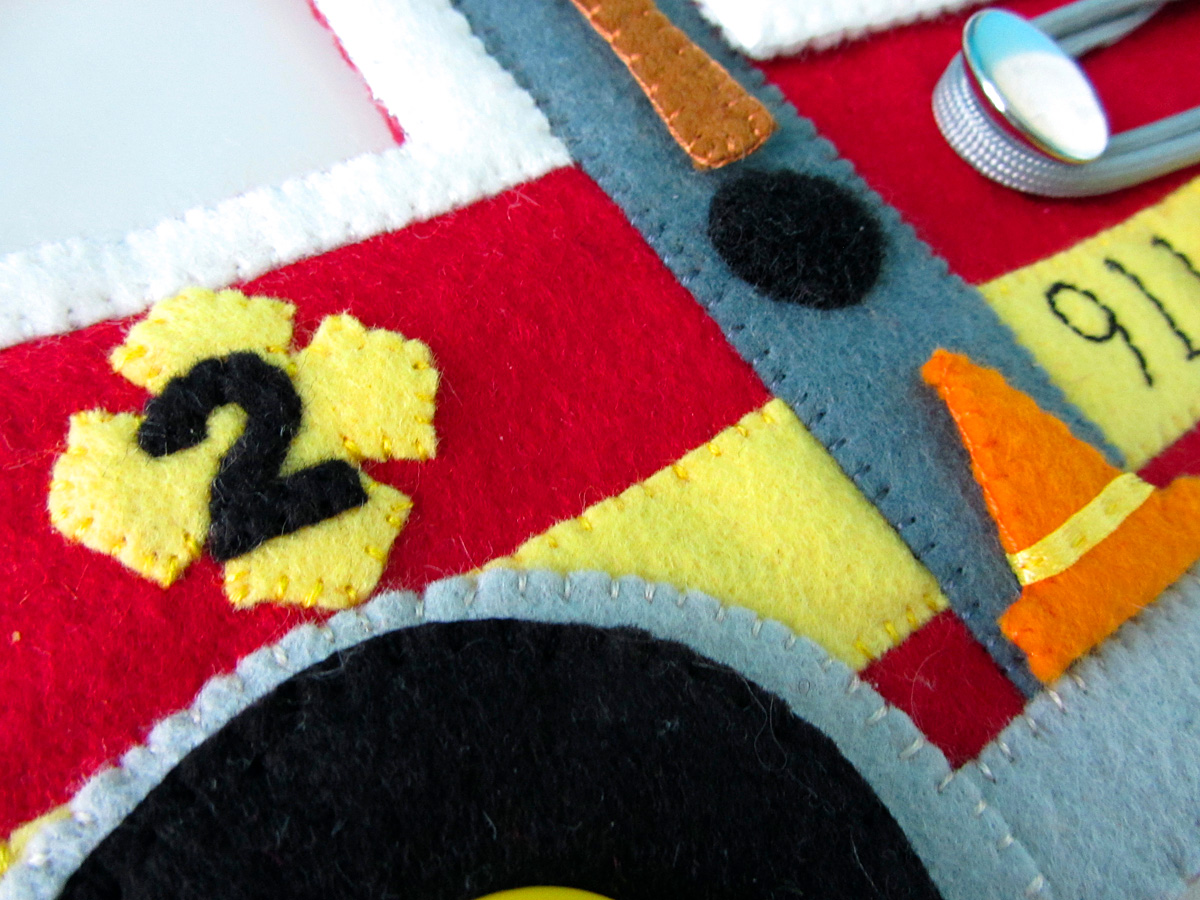
I sewed the yellow emblem onto the truck door then sewed the black 2 on top of it. Using my pattern as a guide, I stitched 911 onto the yellow stripe with a back stitch. (I actually pinned the paper to the felt and stitched right through it, following the lines. Then I carefully ripped the paper away.)
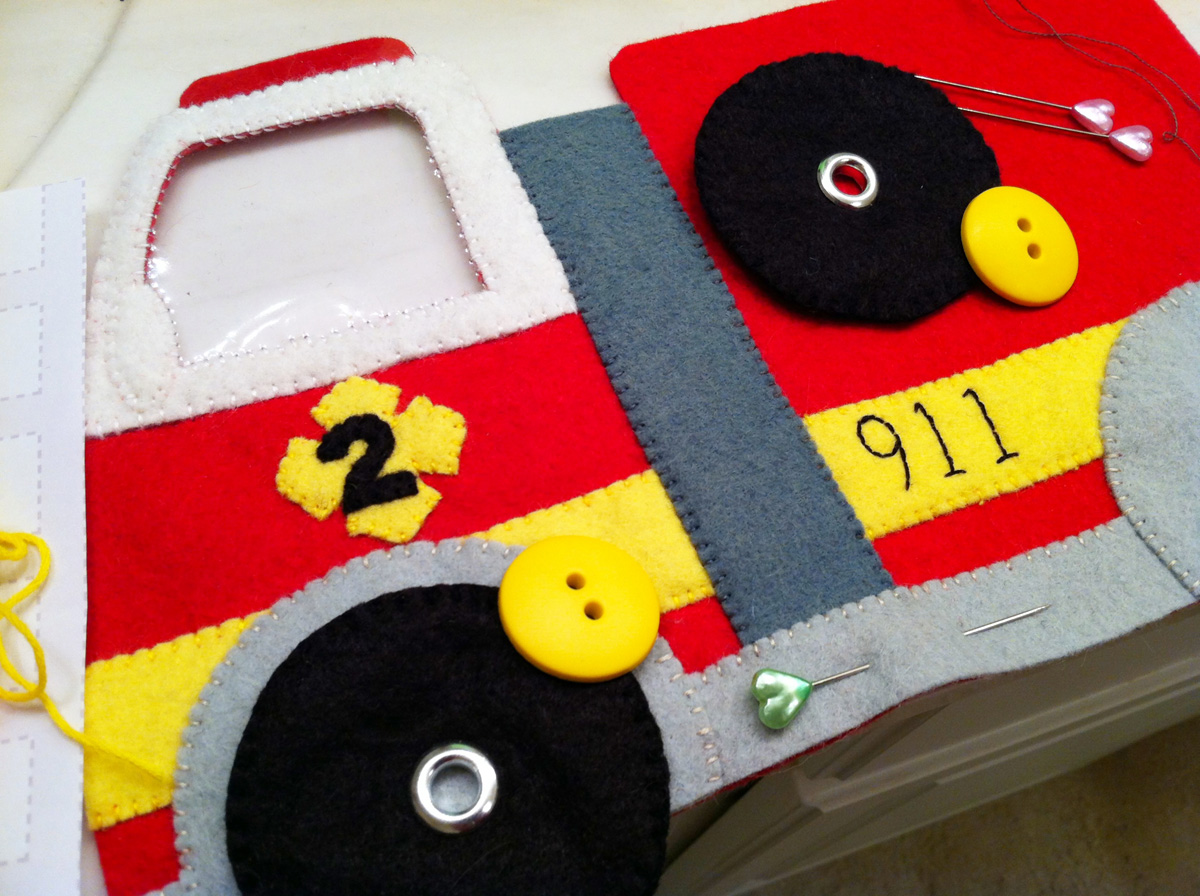
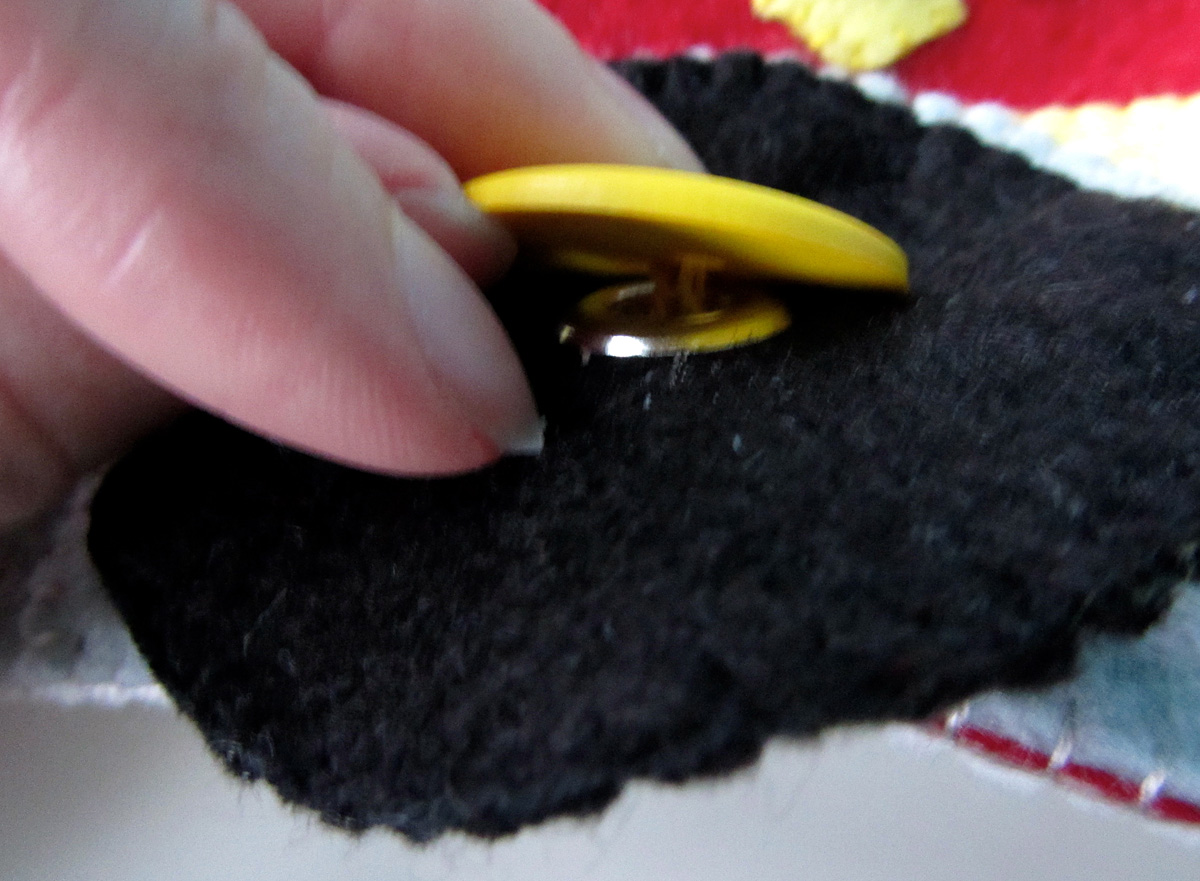
I sewed the wheel wells down where I wanted the wheels to be, the sewed two black felt circles together for each wheel. I added a large eyelet to the center of each wheel, then chose 1″ buttons as my hubcaps. I positioned the wheels where I wanted then to end up, then sewed the button to the truck through the eyelet hole. This lets the wheels spin.
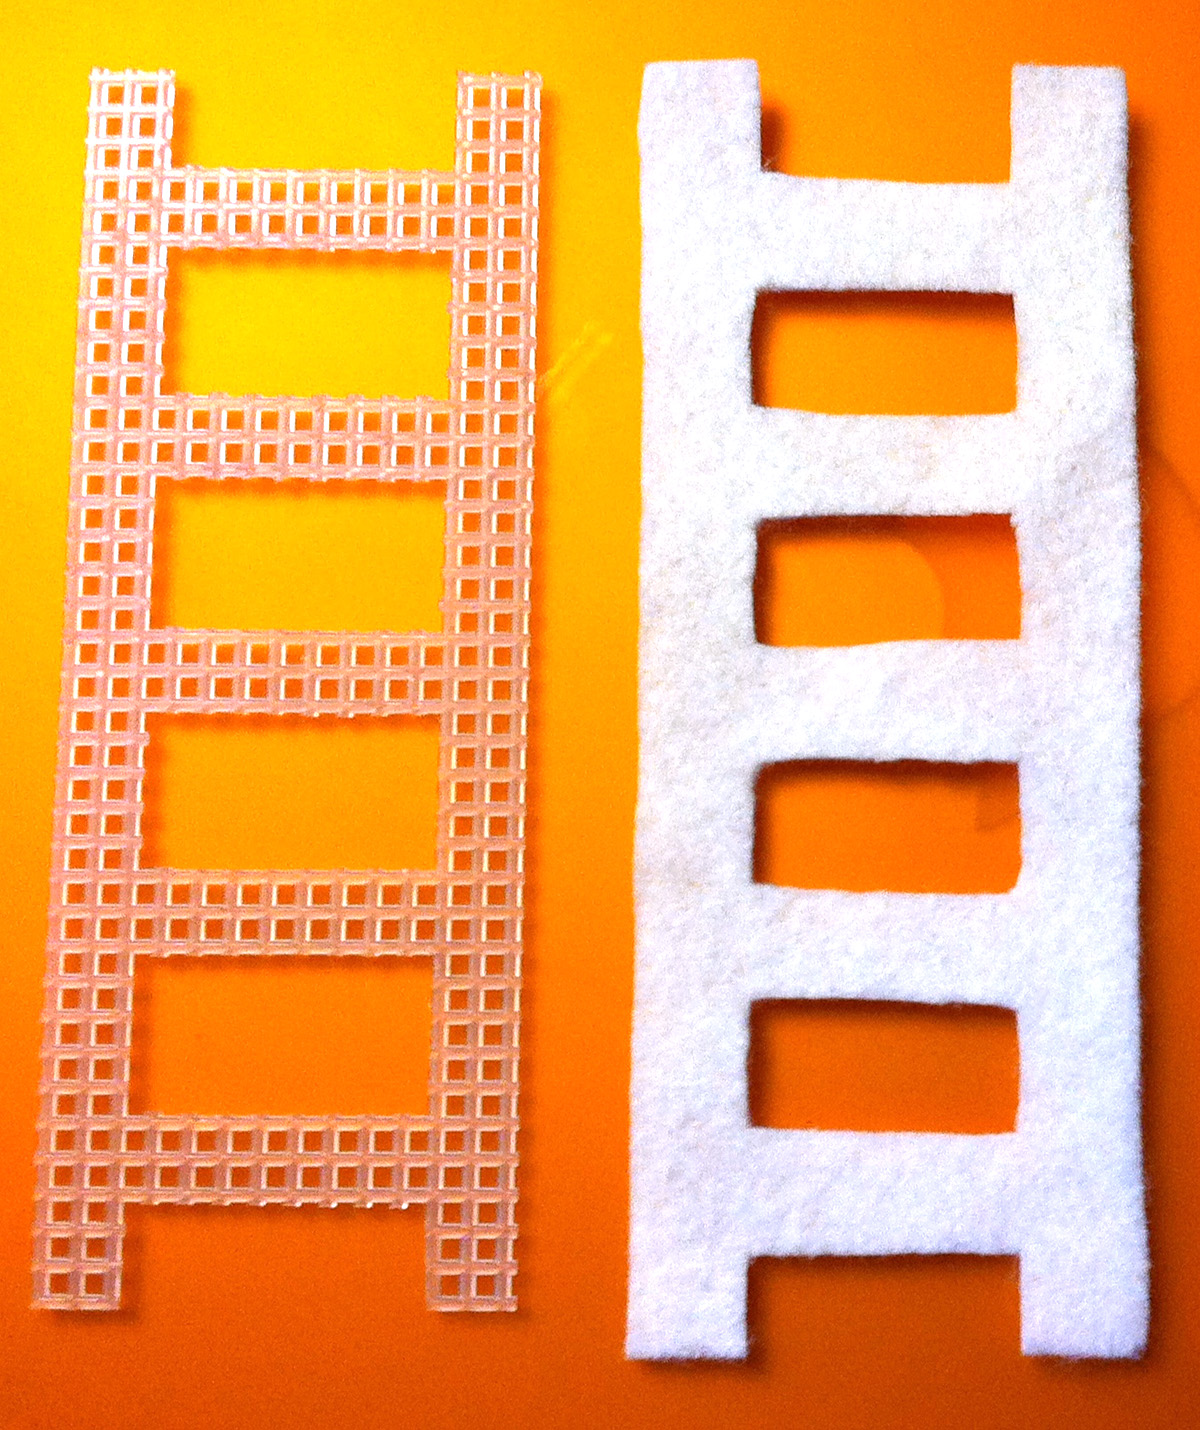
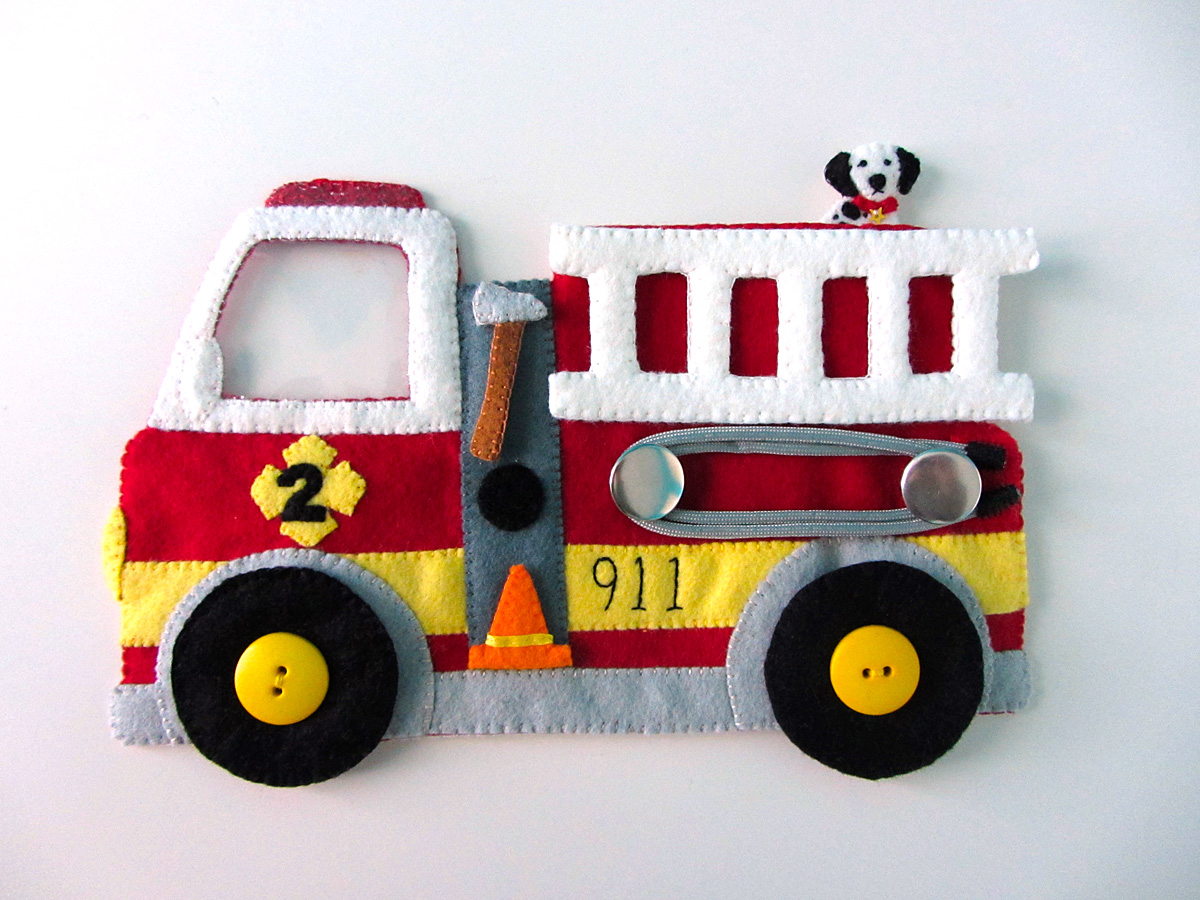
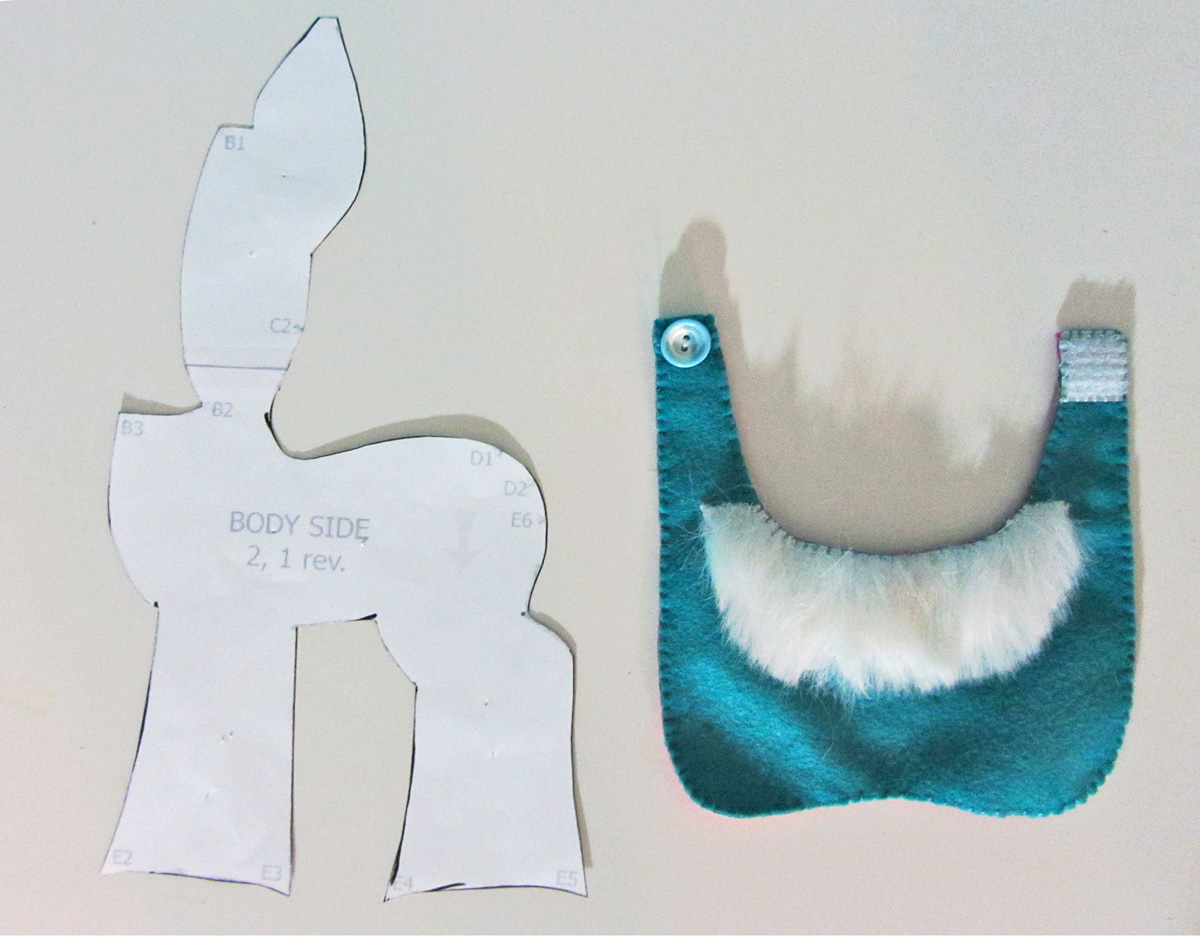
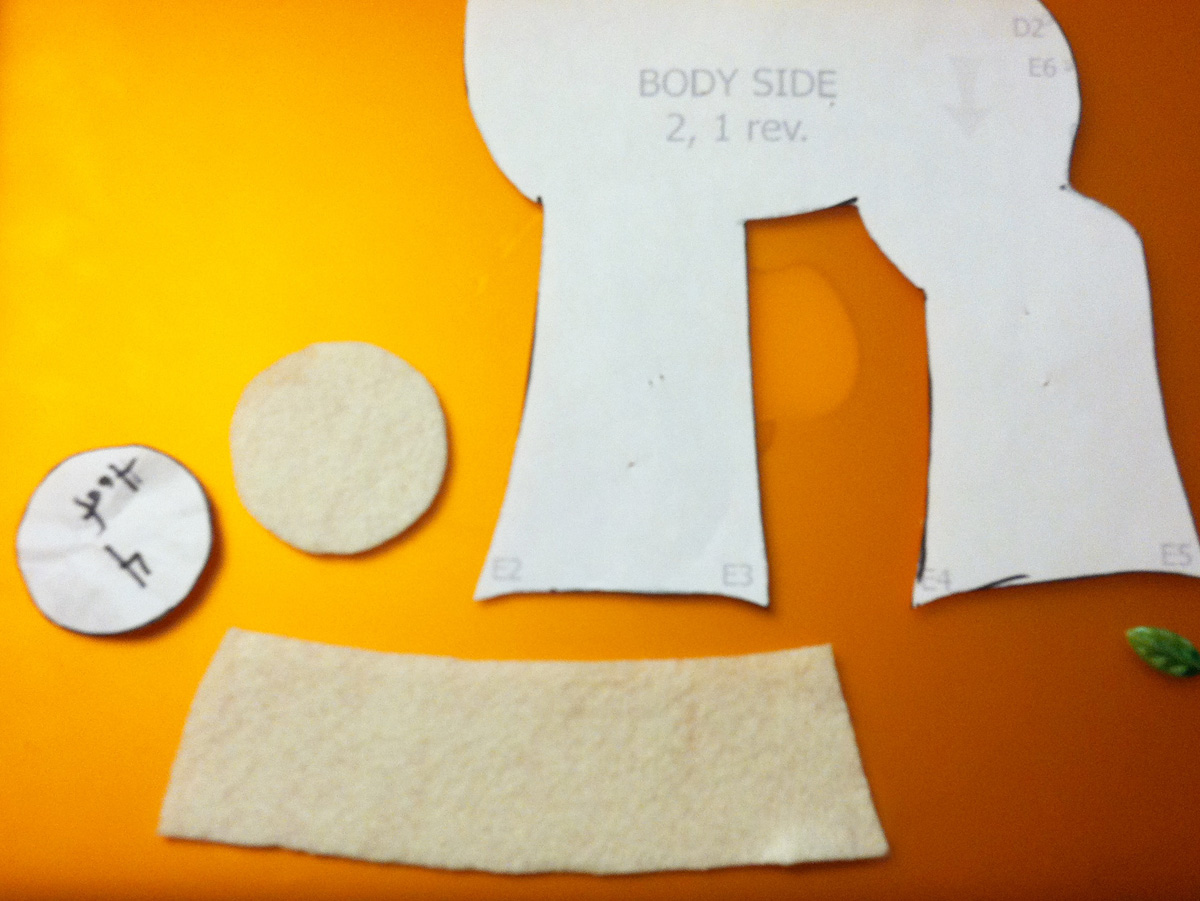
To make the ladder, I cut out plastic canvas and sewed it between two pieces of white felt. I also added snaps to the center of the top and bottom rungs to hold it on the fire truck. See the photo above to know how large to cut your plastic canvas.
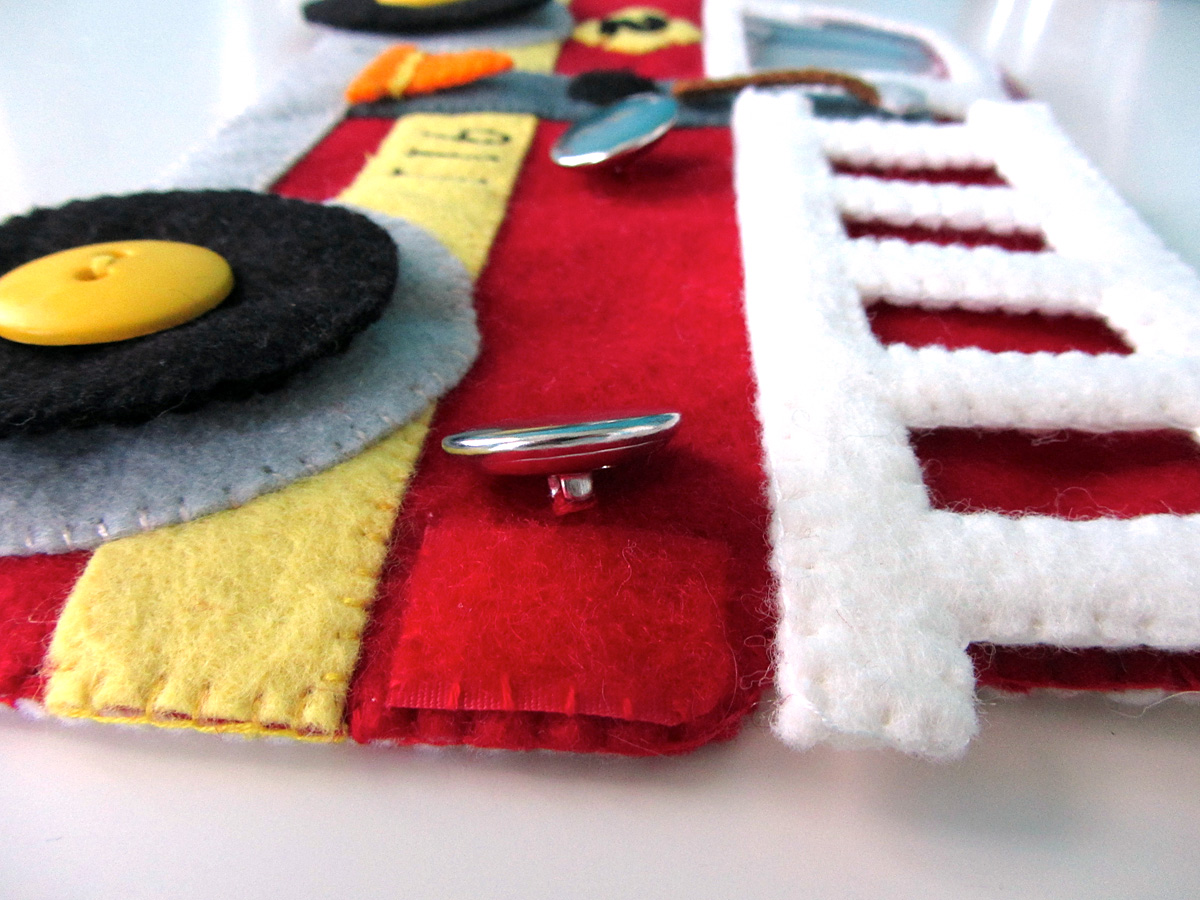
Once I had the ladder snapped to the side of the truck, I sewed on two large shank-back buttons. These are used to wrap the fire hose around when not in use. I sewed a small square of red loop (soft) Velcro beside one of the buttons so the hose can be secured.
On the center of the tool panel, I sewed down a circle of loop Velcro. This can be used to hook one end of the hose up to the truck. (There will be a fire hydrant on the fire station cover with Velcro as well.)
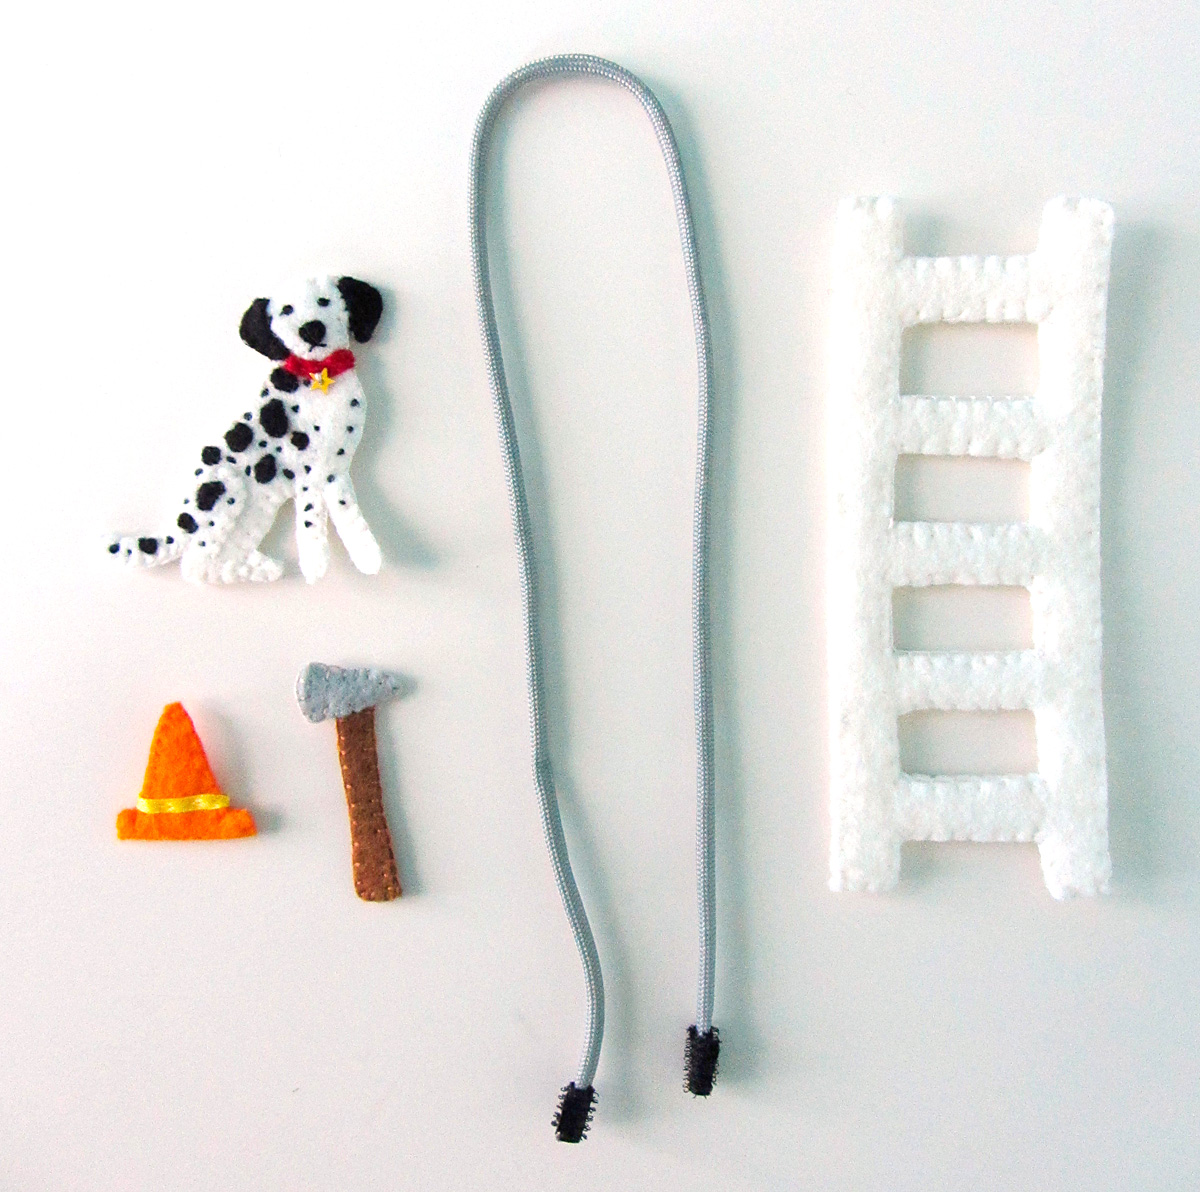
Axe: I sewed the two handle side together, then sewed a snap to the back piece of the axe blade. I sandwiched the top of the handle between the axe blade pieces and sewed them together. I positioned the axe on the tool panel and sewed the other half of the snap down to hold it in place.
Traffic Cone: I sewed a snap to the back piece of the traffic cone then sewed the two sides together. I wrapped a scrap of yellow ribbon around the base and stitched it on with a dashed running stitch. I positioned the cone on the tool panel and sewed the other half of the snap down to hold it in place.
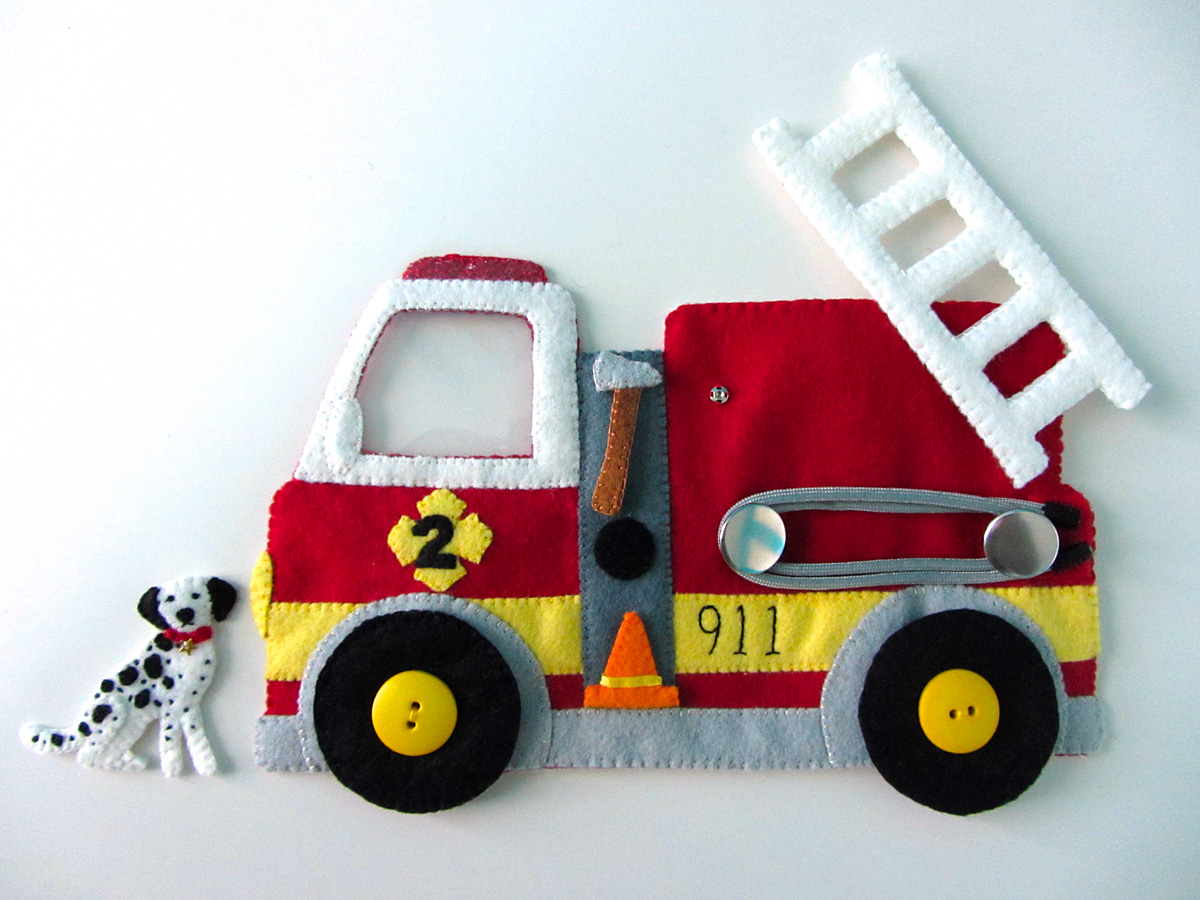
Hose: I wrapped some parachute cord around the buttons on my truck and cut it so I had enough for both ends to finish right at the red Velcro. I melted the cut ends with a flame, the stitched some hook Velcro around the ends in a tube. That isn’t easy – a sharp needle and a thimble might help.
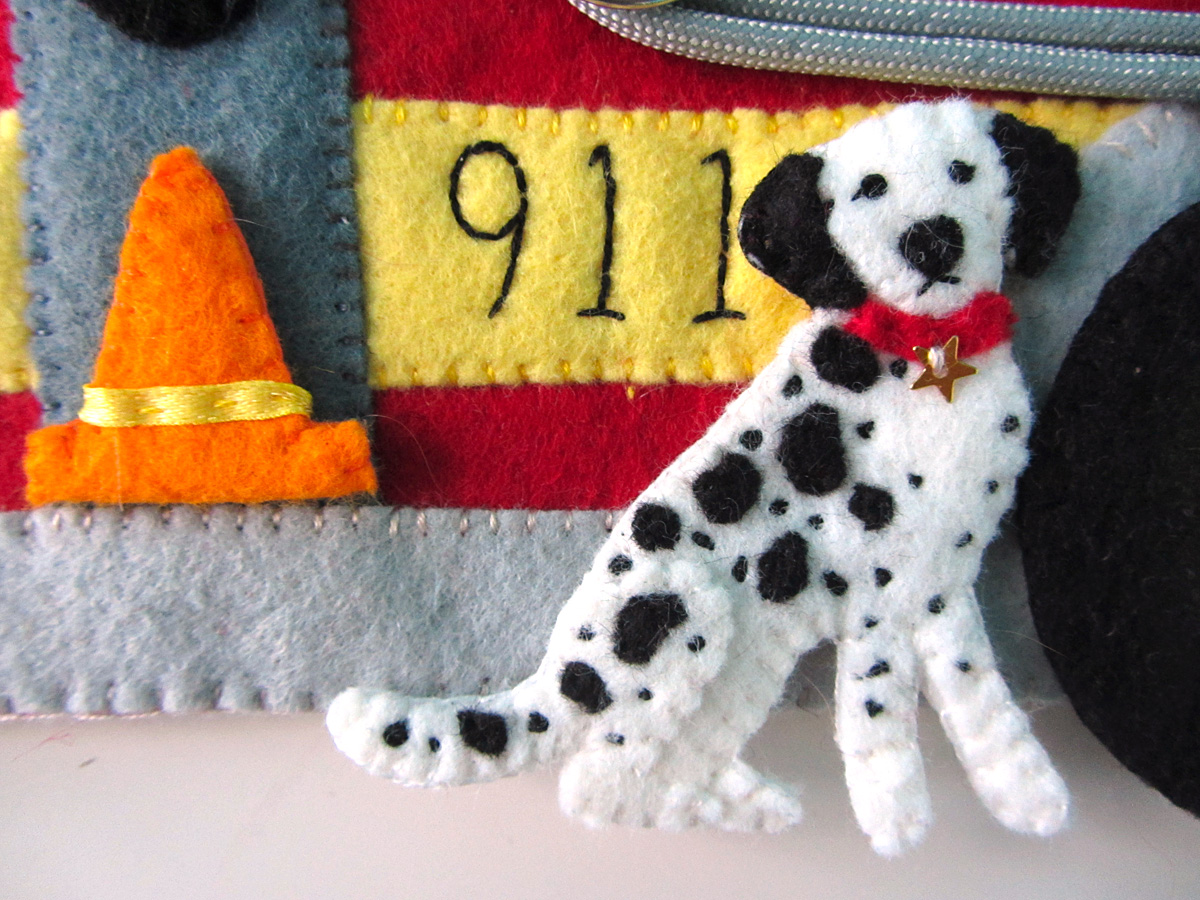
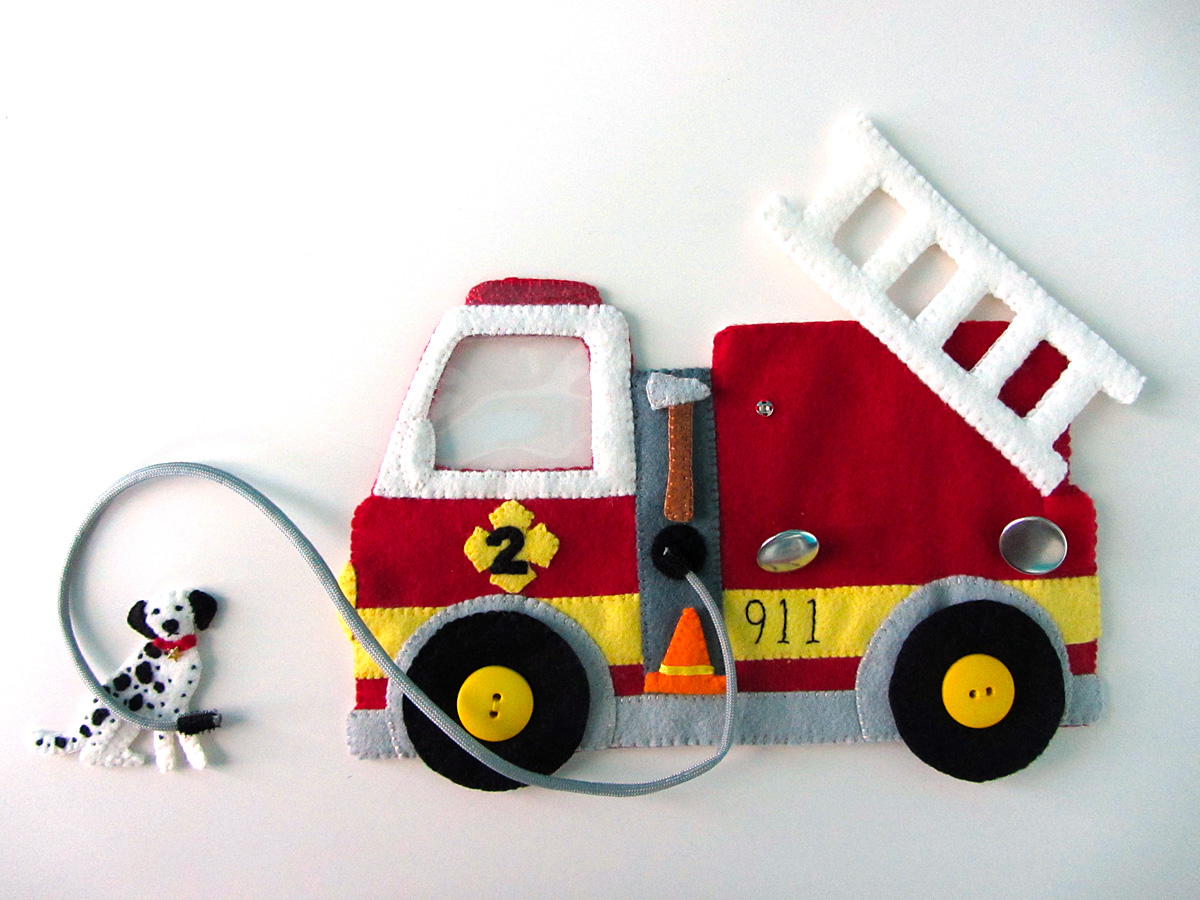
Dalmatian: I started by decorating the face piece with his ears and nose. His eyes are French knots with a stitch for eyelashes. His mouth is just two little stitches in an upside down V. I stitched the red collar onto the body front the stitched the finished face on as well.
To make the larger spots, I cut random tiny scraps of black felt and sewed them down. Wool felt works well for such tiny pieces because it fuzzes less. You’ll still need to clean black lint off the dog when you are done, though. The small spots are just groups of black stitches in random shapes. I made spots on the hind leg and sewed it down to the body front.
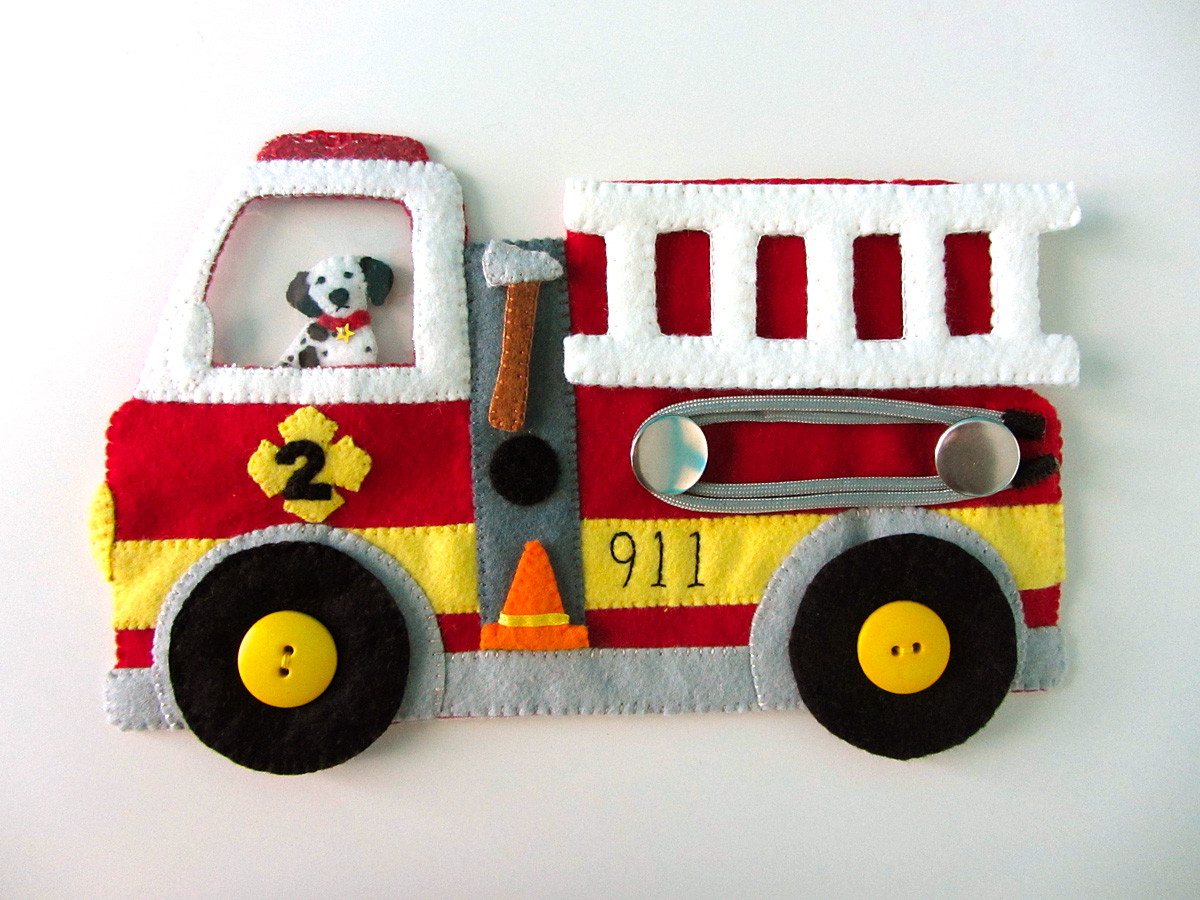
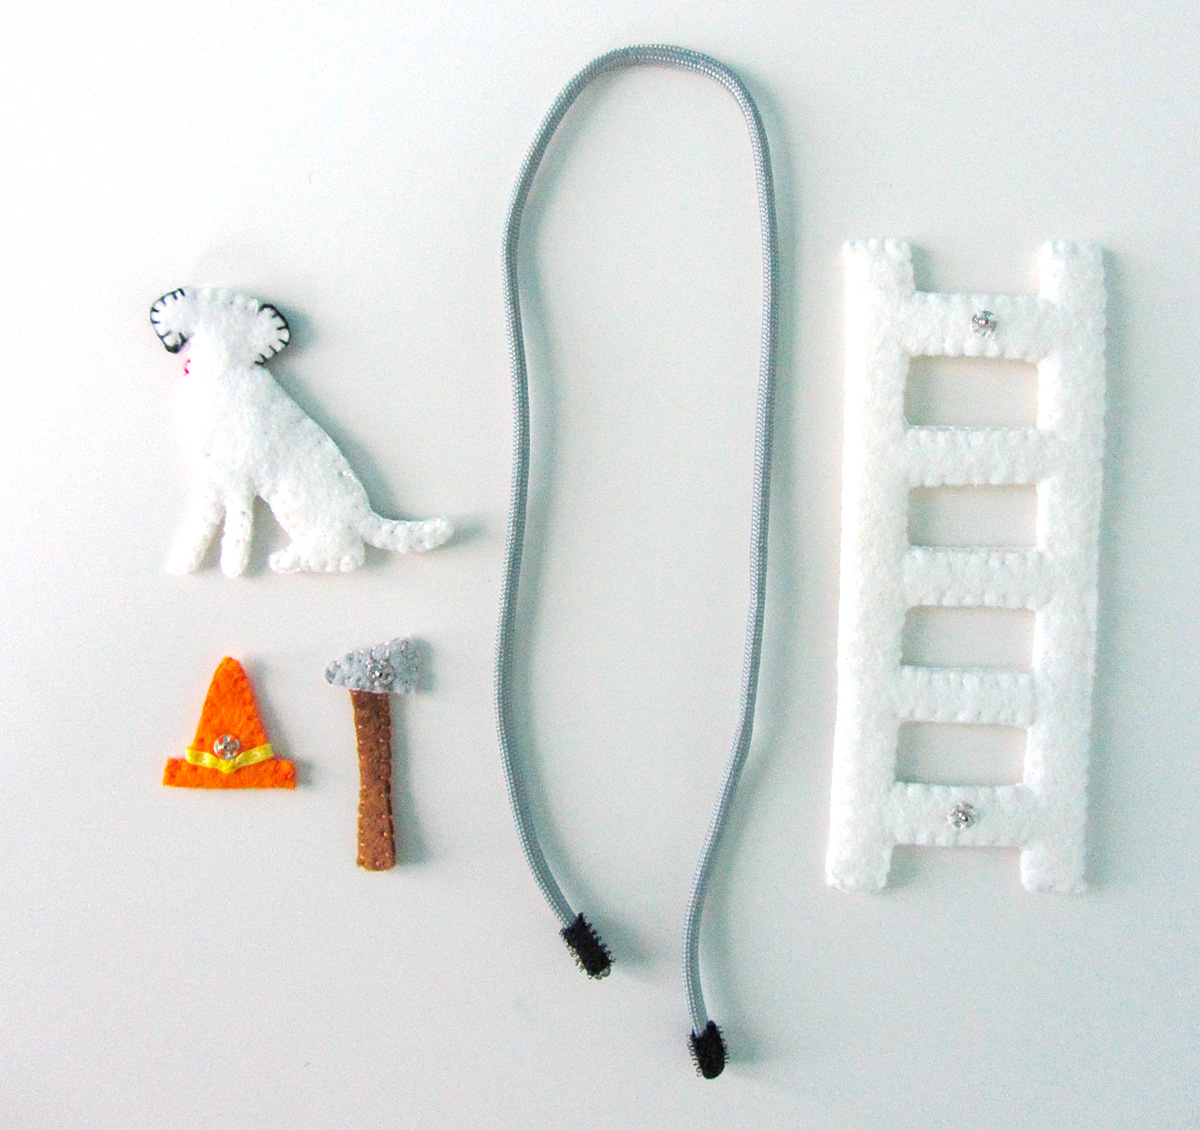
I stitched a tiny gold star sequin on the the collar as a dog tag, then sewed the front of the dog to his backing. I plan to make an extra fire hat for him in the next phase of the fire station book project, so stay tuned!
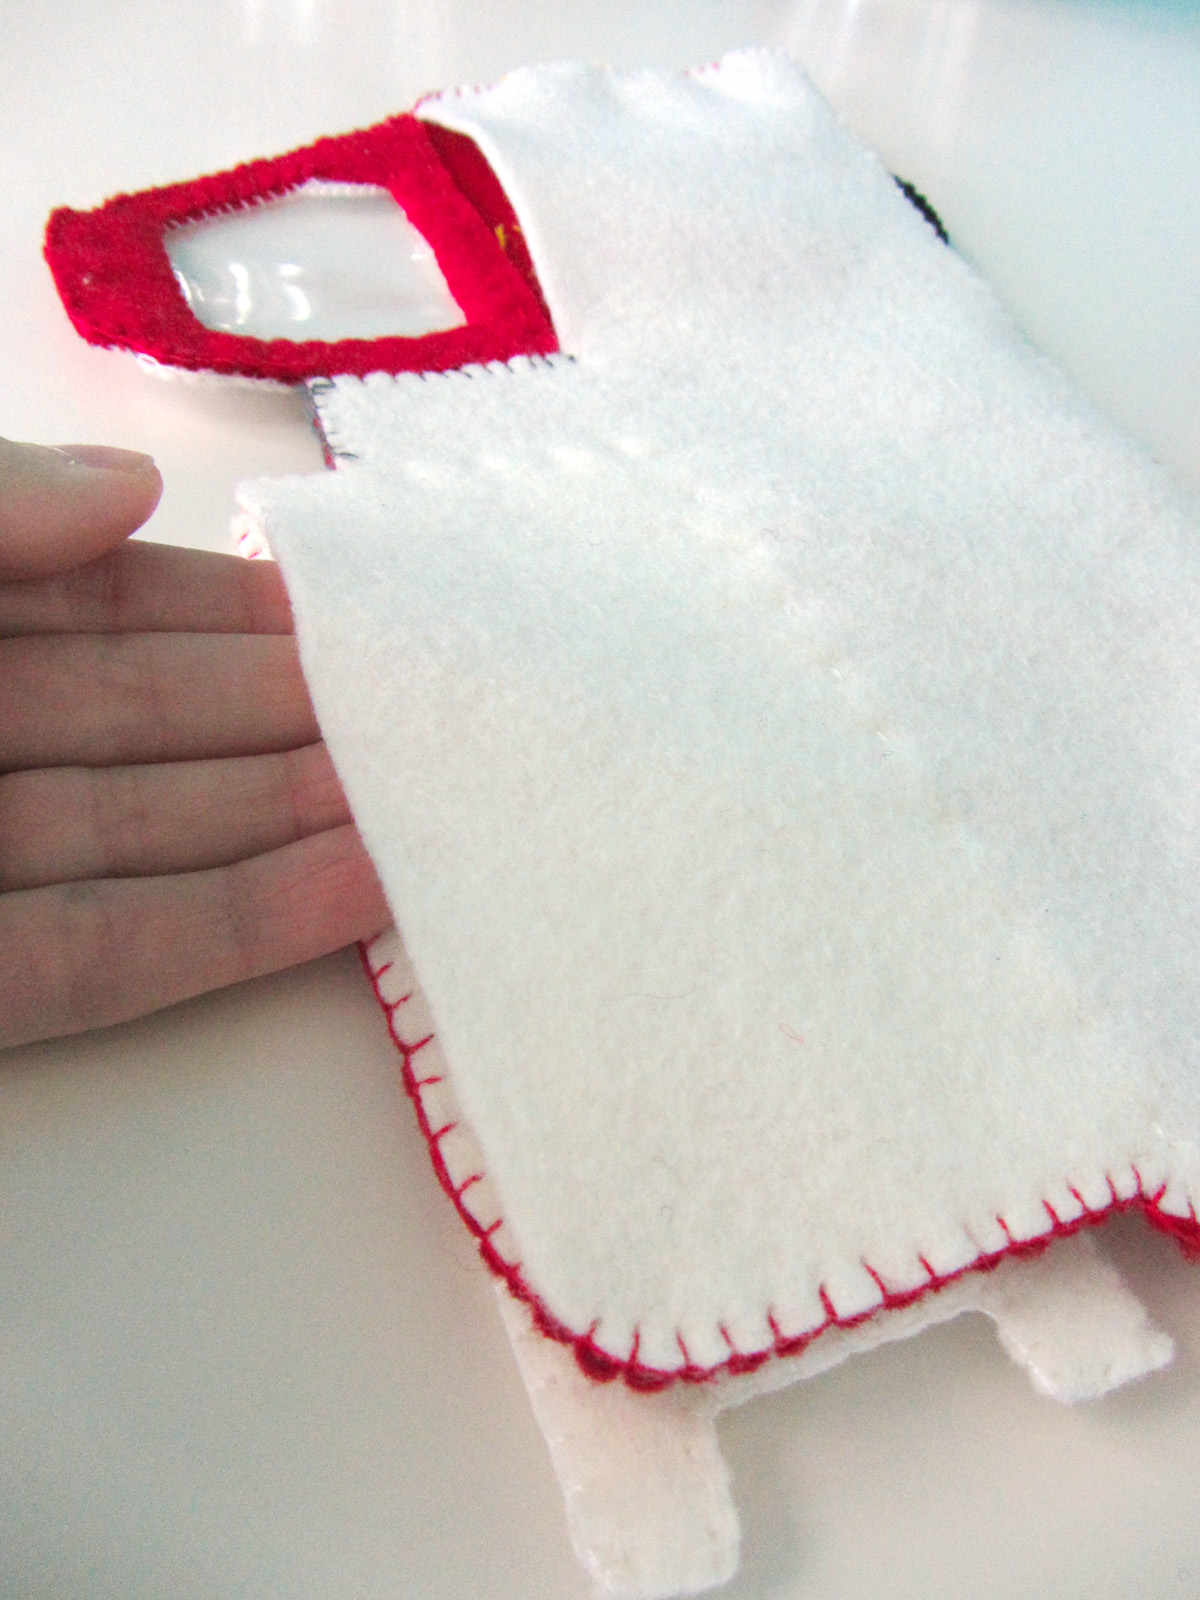
On the back of the fire truck, I sewed on the white backing piece, leaving it open at the cab and the top back to form pockets for the dog and dolls. I added a scrap of white felt to make the truck back pocket more shallow.
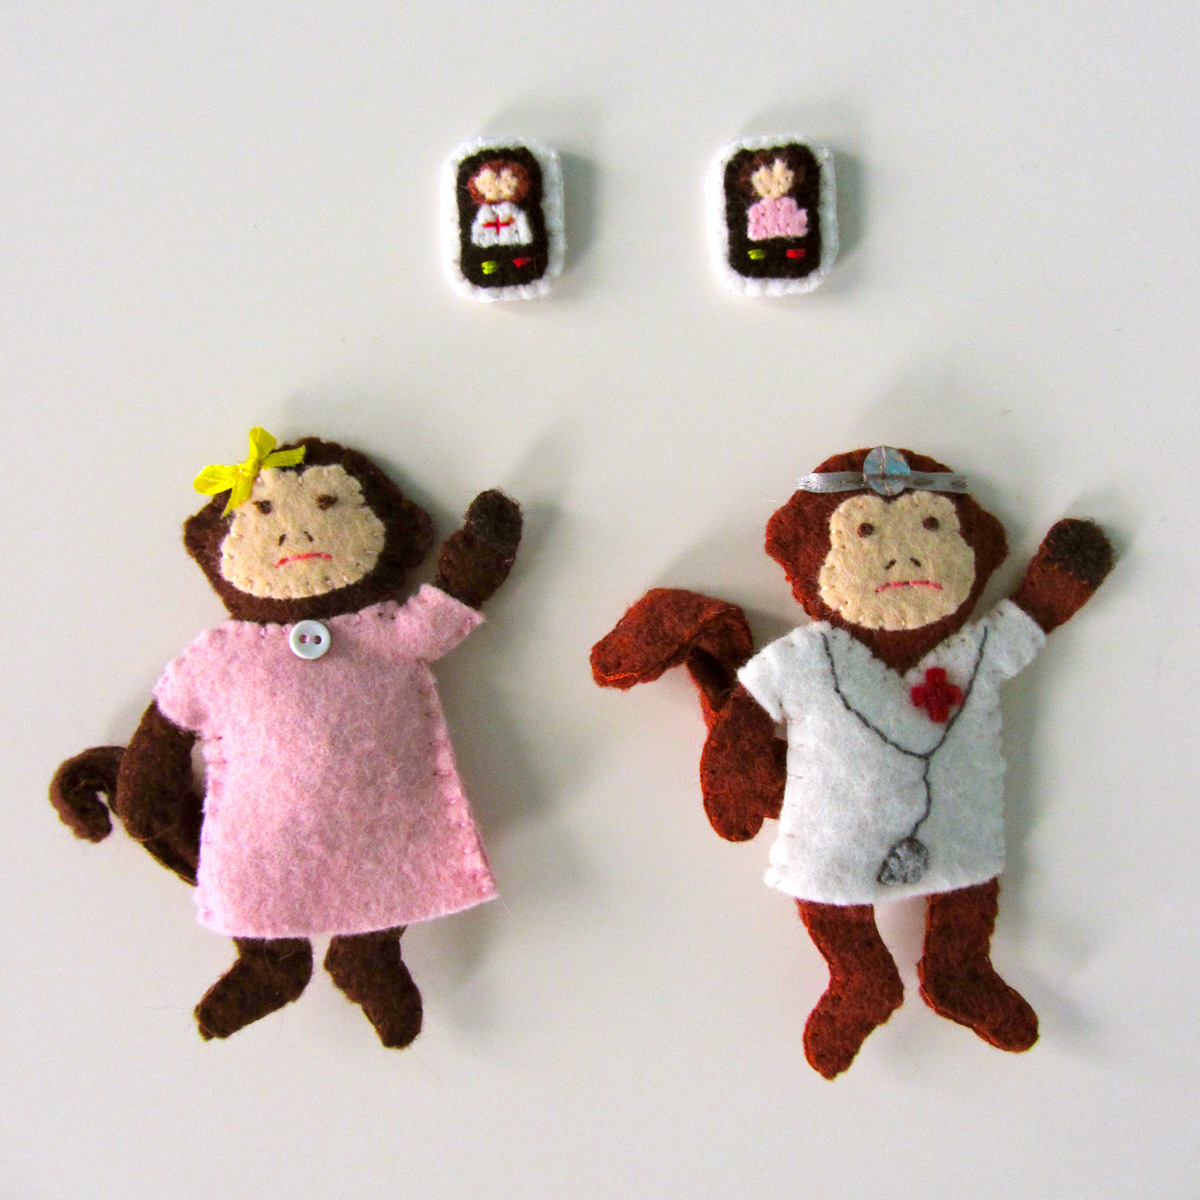
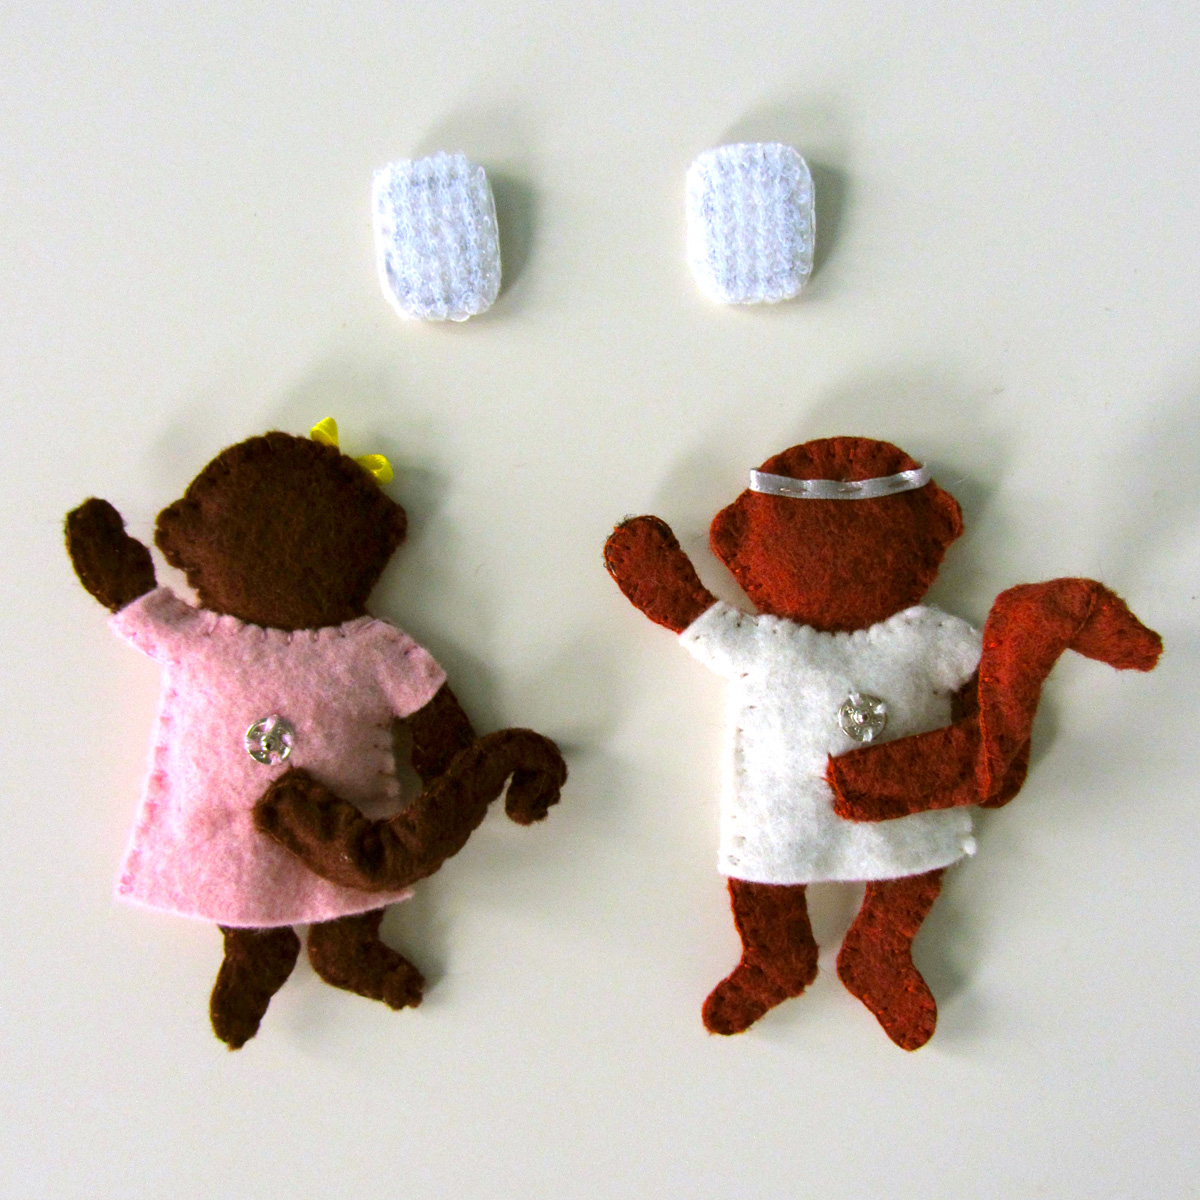
I am very pleased with how the truck (and the puppy!) turned out! I wasn’t sure what I was going to use for the hose until I found the parachute cord and got it for $1 with a coupon. I’m excited to move on to the two fire fighter dolls – one boy and one girl! They will have different clothes they can put on.
To see photo updates of this project as I work on it, follow my Instagram or join the Facebook page. I’l also taking suggestions for Valentine’s day projects now. Is there anything you’ve been wanting to make?


